Every pet parent knows the importance of regular grooming for their furry friend, but what happens when life gets in the way, and those regular nail trims fall by the wayside? Suddenly, you might find yourself staring at those alarmingly long claws, wondering how to tackle them without causing distress or injury. Overgrown dog nails are not just an aesthetic issue; they can be a source of discomfort or even pain for your pooch. In this blog, we’ll dive deep into the world of canine pedicures, offering you a step-by-step guide on how to cut overgrown dog nails without causing bleeding. Whether you’re a seasoned dog owner or a newbie, our helpful tips will ensure your furry companion stays comfortable, safe, and well-groomed. Let’s put those fears of nail trimming mishaps behind and embark on a journey to happy paws!
Why long nails are a problem
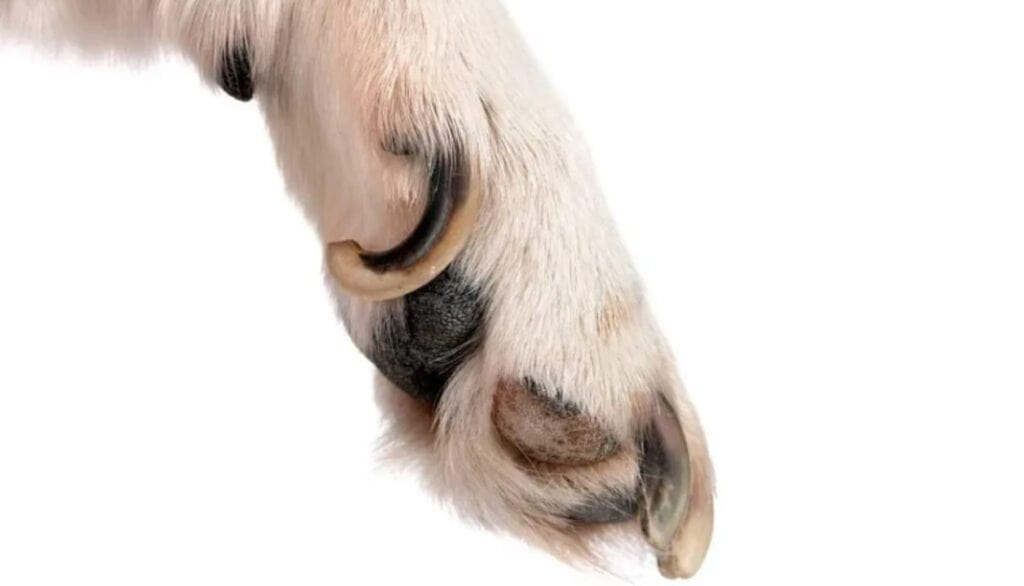
It’s easy to overlook the importance of regularly trimming your dog’s nails, especially when they’re always on the move, happily chasing after balls or going for walks. However, those seemingly harmless long nails can lead to a myriad of problems. Let’s delve into why it’s crucial to keep those claws in check:
1. Discomfort and Pain
- Altered Walking: Dogs with overgrown nails may alter their gait, leading to discomfort when walking. They’ll try to avoid the pain by changing the way they place their feet.
- Pressure on the Footpad: Long nails can push against the ground, forcing the nail back up into the nail bed, which can be extremely painful.
- Nail Bed Infections: As the nail curls, it could potentially grow into the footpad, causing infections and pain.
2. Joint and Bone Issues
- Misalignment: As the dog adjusts its gait due to long nails, it can cause the bones to be misaligned. This puts unnecessary strain on their joints, which can lead to arthritis over time.
- Increased Risk of Injuries: Dogs with long nails might get them caught in carpets, gaps, or other surfaces, leading to painful tears and even fractures.
3. Behavioral Issues
- Reduced Activity: A dog in pain might become less active and avoid playing or going for walks, which can affect their overall health and happiness.
- Aggression: Dogs might become snappy or aggressive if they associate their pain with being touched or handled.
4. Aesthetic Concerns
- Unkempt Appearance: While not a health issue, overgrown nails can make a dog appear uncared for. Proper grooming, including nail trimming, can significantly improve their overall appearance and hygiene.
In essence, while it might seem like a small task, regular nail trims play a pivotal role in ensuring the well-being and happiness of your four-legged friend. So, the next time you hear the ‘click-clack’ of nails on the floor, remember the myriad of reasons to keep them trimmed and tidy!

Step one: Make your pooch comfortable
Nail trimming can be a daunting task for many dogs, especially if they’ve had an unpleasant experience in the past or are not used to having their paws handled. Ensuring your dog is comfortable and at ease before you begin is crucial. Here are some human-friendly tips and steps to create a stress-free environment:
1. Choose the Right Time
- Post-Exercise: Trimming your dog’s nails after a long walk or play session can be ideal since they’ll be tired and more relaxed.
- Quiet Moments: Opt for a time when your home is calm and free from loud noises or distractions. This helps in keeping the anxiety levels down.
2. Create a Positive Association
- Treats: Every time you touch or handle your dog’s paws, give them a treat. This can help in associating the action with positive rewards.
- Praise: Offer lots of verbal encouragement and affection. A simple “good job” or “well done” can make a world of difference.
3. Get Them Used to the Tools
- Introduction: Let your dog sniff and investigate the nail clippers before you start. This can help in reducing any fear of the unknown.
- Sound Familiarity: If you’re using a grinder, turn it on and let them get used to the sound from a distance. Once they seem okay, bring it closer gradually.
4. Start Slow
- One Nail at a Time: If your dog is particularly nervous, consider trimming just one nail in a session and then rewarding them. This can make the experience less overwhelming.
- Short Sessions: Don’t rush. If your dog becomes anxious or scared, it’s okay to pause and continue another time. Keeping the sessions short initially can help build trust.
5. Comfortable Positioning
- Their Favorite Spot: Consider trimming their nails in a place where they usually relax, whether it’s on their bed, couch, or a specific rug.
- Hold Gently: Make sure your grip is firm enough to keep the paw steady but gentle enough not to cause discomfort. If possible, have someone they trust hold and comfort them while you trim.
By ensuring your dog feels safe and comfortable, you’ll make the nail-trimming process smoother for both you and your furry companion. Over time, with consistency and patience, your dog might even begin to look forward to these sessions – or at least, not mind them as much!
Step two: Get into nail-trimming position
Proper positioning is paramount when it comes to safely and effectively trimming your dog’s nails. Not only does it give you better control and visibility, but it also ensures that your dog remains stable and comfortable throughout the process. Here’s how to get both you and your pup into the optimal nail-trimming stance:
1. Choose the Right Surface
- Non-slip Mat: Place a rubber or non-slip mat on the floor or table where you’ll be trimming. This ensures that your dog has a good grip and feels secure.
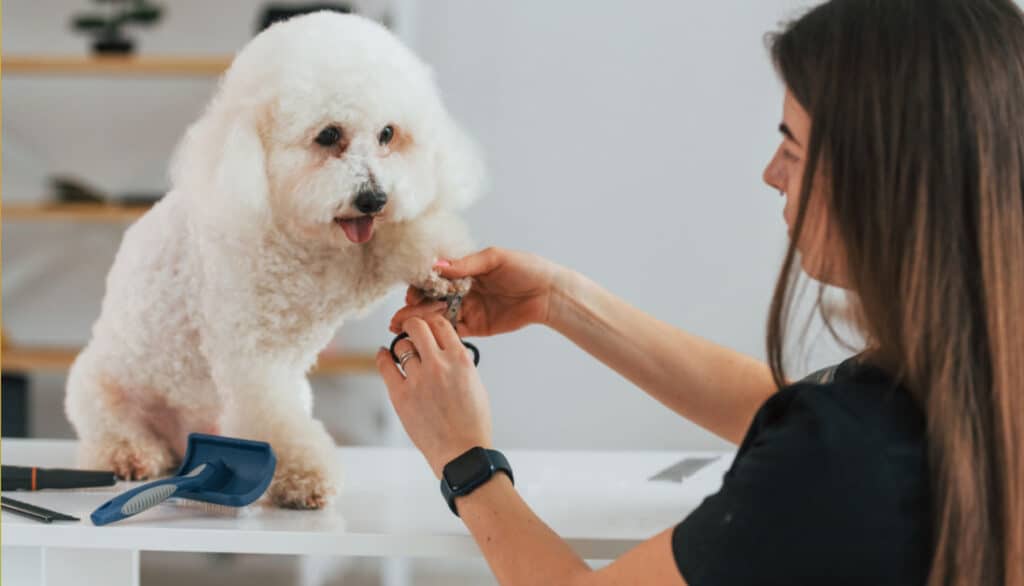
- Elevated Surface for Small Dogs: If you have a smaller breed, consider using an elevated surface like a table. This provides you with better access and reduces the need to bend over.
2. Positioning Your Dog
- Standing Position: This works best for most dogs. Hold the paw gently, and lift it in a natural position, similar to how a horse’s hoof might be held for cleaning.
- Lying Down: For dogs that are more relaxed or passive, you can have them lie on their side. This is especially helpful for getting to the nails on the underside.
3. Your Position
- By Their Side: For larger dogs or those standing, position yourself alongside them, allowing you to easily access each paw without making them feel trapped.
- Behind the Dog: For smaller breeds or dogs on an elevated surface, you might find it easier to approach from behind, gently lifting each paw as you go.
4. Use Your Body
- Steady Support: If your dog tends to squirm, you can use your body or arms to provide gentle restraint. This isn’t about applying force, but more about giving them a feeling of security.
- Body Language: Stay calm and composed. Dogs are adept at picking up our energies. If you’re anxious, they’ll likely sense it. Deep breaths and relaxed posture can make a difference.
5. Holding the Paw
- Thumb on Pad, Fingers on Top: This grip gives you better control. Pressing slightly on the pads will cause the nails to extend, making them easier to trim.
- Gentle Yet Firm: Hold the paw in a manner that’s secure but not too tight. Remember, it should be a comforting touch.
Ensuring you and your dog are in the right position not only makes the nail-trimming process easier but also more efficient. With the right stance, you’ll be well on your way to giving your pup a safe and pleasant pedicure experience!
Step three: Locate the quick
One of the main reasons many pet owners hesitate to trim their dog’s nails is the fear of cutting into the ‘quick.’ The quick is a sensitive part of the nail that contains nerves and blood vessels. Cutting into it can cause pain and bleeding. Being able to identify and avoid the quick is crucial. Let’s explore how you can do just that:
1. Understanding the Nail Structure
- The Quick: This is the pinkish area within the nail where the blood vessels and nerves are located. It’s easier to spot in dogs with lighter-colored nails.
- The Keratin: This is the hard, outer part of the nail that doesn’t have any nerves or blood vessels.
2. Light-Colored Nails
- Spotting the Quick: In light-colored nails, the quick is the pink section. The rest of the nail that’s opaque or white is safe to trim.
- Guidance: Aim to cut a little distance away from where the pink starts, giving yourself a buffer to avoid accidents.
3. Dark-Colored Nails
- Use a Flashlight: Holding a flashlight behind the nail can help illuminate it and make the quick more visible.
- Look for the Pulp: As you trim the nail, you’ll notice a homogeneous gray/white region first. As you get closer to the quick, you’ll start to see a darker, circular area in the center known as the ‘pulp’. Stop trimming once you spot this.
4. Cut in Stages
- Small Bits: Instead of taking off large portions of the nail at once, trim tiny bits at a time. This method is especially useful for dark nails where the quick is harder to spot.
- Frequent Checks: As you trim gradually, keep checking the nail’s cross-section for signs of approaching the quick.
5. When in Doubt, Be Cautious
- Safety First: If you’re unsure about the location of the quick, it’s better to trim less than to risk cutting too deep.
- Ask for Help: If you’re consistently struggling to locate the quick, especially in dark-nailed dogs, consider seeking help from a vet or professional groomer the first few times. They can provide guidance and demonstrate the right technique.
By accurately locating the quick, you’ll not only ensure a pain-free nail-trimming experience for your pooch but also gain confidence in the process. With practice, it becomes easier to determine how much nail you can safely trim. Remember, it’s always better to be conservative and trim less rather than risking cutting into the quick.
Step four: Trim or grind the nail quickly, safely, and confidently
After successfully locating the quick, the actual act of trimming or grinding the nail comes into play. This step, while straightforward, requires precision and confidence. Here’s how to ensure a safe and efficient trimming or grinding experience for your canine companion:
1. Choose the Right Tool
- Guillotine Clippers: These work by inserting the nail into a hole and slicing it off. They are often better suited for smaller dogs with thinner nails.
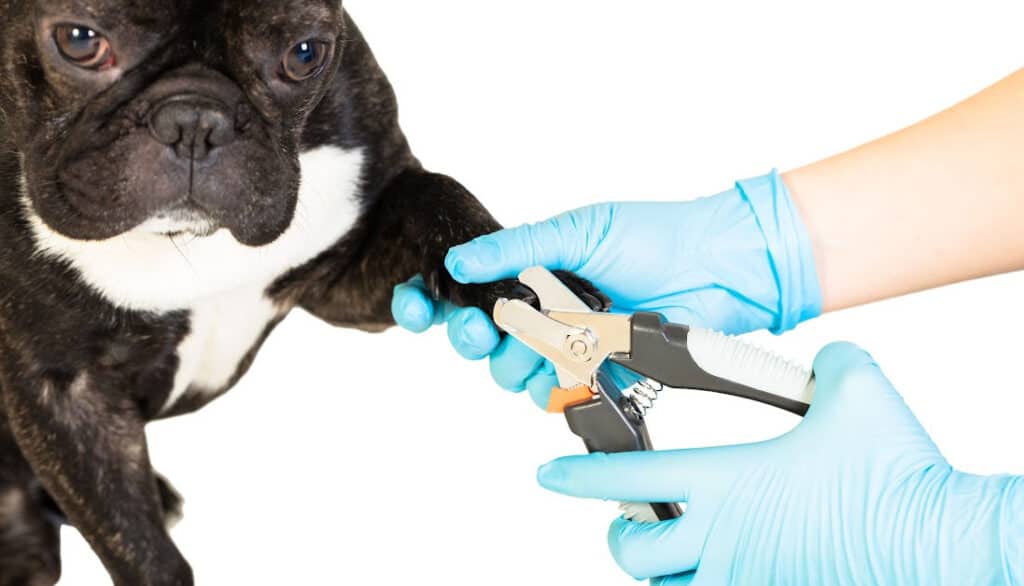
- <strong>Scissor Clippers: These are strong and work like regular scissors but are curved at the tips to contour around the nail. They are ideal for larger dogs or dogs with thicker nails.
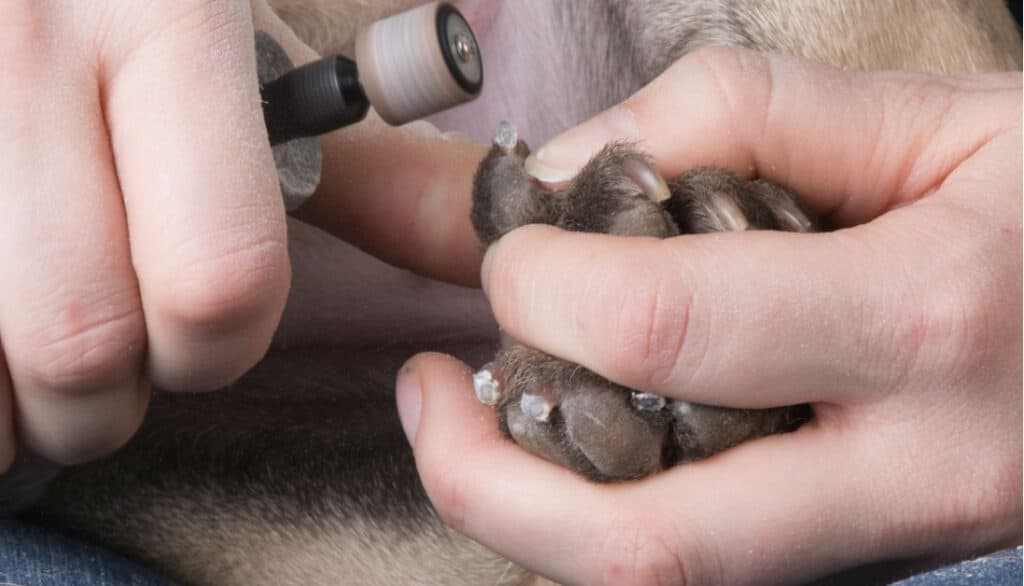
- Nail Grinders: These electronic tools grind down the nail instead of cutting it. They’re an excellent option for dogs scared of the clipper’s snapping sound, or for smoothing out rough edges after clipping.
2. Holding the Tool Correctly
- Steady Hand: Ensure your hand is steady. Hold the clipper or grinder in a way that feels comfortable and gives you maximum control.
- Angle Matters: Position the clipper at a 45-degree angle to the nail, ensuring you’re cutting from top to bottom, not side to side.
3. The Trimming Process
- Quick, Decisive Cuts: Once you’ve positioned the clipper correctly and are sure of where the quick is, make a swift, decisive cut. Hesitation or slow cuts might splinter the nail or cause discomfort.
- Small Sections: Especially if you’re unsure or if the dog has dark nails, trim the nail in small sections, gradually moving closer to the quick but always ensuring a safe distance.
4. Grinding with Care
- Short Bursts: If using a grinder, use short bursts to prevent the nail from getting too hot, which can cause discomfort.
- Smooth Motion: Move the grinder in a smooth motion around the edge of the nail to create a rounded finish.
- Stay Alert: Pay close attention to your dog’s reactions when grinding. If they pull away or seem uncomfortable, it may be getting too hot or close to the quick.
5. Post-Trimming Care
- Smooth Rough Edges: If you used clippers, you could smooth out any rough edges with a nail file or the grinder to prevent snags.
- Reward and Praise: After each nail, offer a treat or verbal praise to make the experience positive. This will make future trimmings easier.
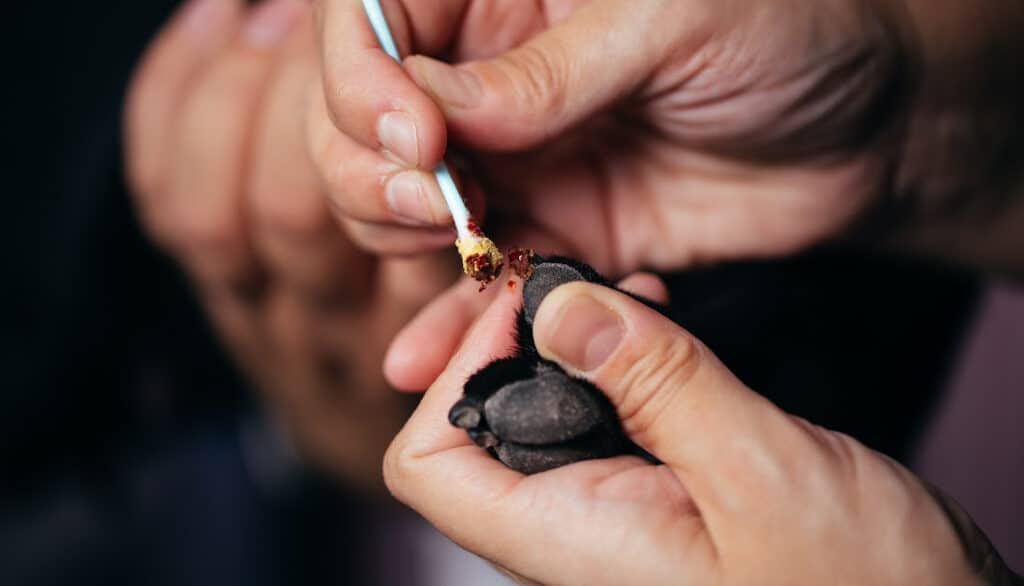
- Check for Bleeding: In case you accidentally nick the quick, don’t panic. Use a styptic powder or cornstarch to stop the bleeding. If bleeding continues or seems excessive, contact your vet.
Trimming or grinding your dog’s nails can be a smooth process when approached with knowledge and confidence. Over time, with consistent practice and positive reinforcement, both you and your furry friend will become more at ease with the routine, ensuring well-maintained paws and a happy pup!
Step five: Take your time, and repeat regularly
While it’s crucial to be quick and decisive during the actual trimming, the overall process shouldn’t be rushed. Regular maintenance is key, so it’s better to be gentle and methodical, establishing a routine that both you and your dog grow accustomed to. Here’s how to approach nail care with patience and consistency:
1. Don’t Force It
- Recognize Limits: If your dog is especially anxious or fidgety, it might be best to trim just one or two nails in a session, then gradually increase as they become more comfortable.
- Comfort Breaks: Allow your dog to have little breaks in between, especially if it’s their first time or if they’re showing signs of stress.
2. Set a Routine
- Consistent Schedule: Depending on your dog’s activity level and where they spend most of their time, you’ll need to establish a trimming routine. For many dogs, every 3-4 weeks is adequate, but more active dogs or those who walk primarily on soft surfaces might need more frequent trims.
- Regular Checks: Even if you’re not trimming, inspect your dog’s nails every week. This helps you recognize when they’re due for a trim and familiarizes your dog with having their paws handled.
3. Create a Calm Environment
- Quiet Spot: Choose a location away from household distractions or loud noises. This will help keep your dog relaxed and make the process smoother.
- Comfort Items: Familiar items like their favorite toy or blanket can be placed nearby to offer additional comfort.
4. Positive Reinforcement
- Treats and Rewards: Keep treats at hand and reward your dog after each nail, especially when starting. This positive reinforcement will make them associate nail trimming with good things.
- Praise Generously: Your voice can be a soothing tool. Praise and talk to your dog in a calm, reassuring manner throughout.
5. Be Consistent
- Stick to the Routine: Even if you’re only trimming a little bit off each time, regular maintenance can prevent the quick from growing too long, making future trims easier.
- Re-evaluate and Adjust: As your dog ages or their lifestyle changes, their nail growth might change too. Stay observant and adjust your trimming routine as needed.
In the world of dog nail care, patience truly is a virtue. By taking your time and repeating the process regularly, you’ll ensure your dog’s paws remain healthy and comfortable. Over time, with positive experiences and a consistent routine, nail trimming will become just another bonding activity that you and your pet can navigate with ease.
What to do if you cut the quick
Even with the utmost care and precision, accidents can happen, and the quick may get nicked during a nail-trimming session. If this occurs, it’s essential to remain calm and act promptly. Here’s a guide on what to do if you accidentally cut into the quick:
1. Stay Calm
- Your Reaction Matters: Dogs pick up on our energy. If you panic, your dog may become more anxious or scared. Take a deep breath and reassure your dog with a calm voice.
- It’s a Common Mistake: Remember, even professionals occasionally nick the quick. It’s painful for a moment, much like when humans cut their nails too short, but it’s not a grave injury.
2. Stop the Bleeding
- Styptic Powder: This is a must-have in your dog grooming kit. When applied to the bleeding nail, it helps clot the blood and stop the bleeding quickly.
- Cornstarch or Flour: If you don’t have styptic powder on hand, you can dip the nail into a small pile of cornstarch or flour, pressing it onto the nail. This can help form a barrier and promote clotting.
- Hold Gently: Using a clean cloth or tissue, apply gentle pressure to the nail for a few minutes until the bleeding slows down or stops.
3. Reassure Your Dog
- Comfort and Soothe: After the incident, spend a few minutes comforting your dog. Offer their favorite treat or toy, pet them, and speak softly to help them relax.
- Evaluate Continuing: Depending on your dog’s stress level, you may choose to continue trimming the other nails or decide to take a break and try again later.
4. Prevent Infection
- Clean the Area: Once the bleeding has stopped, gently clean the nail with warm water and mild soap.
- Monitor for Signs of Infection: Over the next few days, keep an eye on the affected nail. If you notice swelling, redness, discharge, or if your dog is excessively licking the area, contact your vet.
5. Learn and Adjust
- Review Technique: Reflect on what might have gone wrong. Were you unsure of where the quick was, or did you make too bold of a cut? Adjusting your technique can help prevent future mishaps.
- Seek Guidance: If you’re unsure about your technique or continue to cut the quick, consider seeking guidance. Watching a professional groomer or asking your vet for tips can be incredibly beneficial.
Accidentally cutting the quick can be distressing for both the dog and the owner. However, with the right approach and aftercare, it’s a manageable situation. Always prioritize your dog’s well-being, comfort, and safety. With experience and patience, your nail-trimming sessions will become smoother, building trust between you and your canine companion.
More grooming tips
Proper grooming is about more than just keeping your dog looking neat and tidy; it’s an essential part of their overall health and well-being. Beyond nail trimming, here are some comprehensive grooming tips to ensure your canine companion always feels their best:
1. Brushing Fur
- Choose the Right Brush: Depending on your dog’s coat type – short, long, curly, or straight – you’ll need a specific brush type. For instance, bristle brushes are great for short-haired breeds, while slicker brushes work well for detangling long-haired breeds.
- Regular Sessions: Brushing not only removes tangles but also distributes natural oils, promoting a shiny and healthy coat. Depending on your dog’s coat, you might need to brush them daily or a few times a week.
2. Bathing
- Not Too Often: Dogs have natural oils in their fur that keep their skin moisturized. Bathing them too frequently can strip these oils. Typically, dogs need baths every month or so, but it depends on their activity level and breed.
- Use Dog-Specific Shampoo: Human shampoos can be too harsh for a dog’s skin. Always use a dog-appropriate shampoo to maintain the pH balance of their skin.
3. Ear Care
- Regular Checks: Look into your dog’s ears for signs of redness, irritation, or any unusual discharge. This can indicate infections or the presence of ear mites.
- Gentle Cleaning: Use a vet-approved ear cleaner and a soft cotton ball. Avoid inserting anything into the ear canal; clean only the outer ear.
4. Dental Care
- Brush Those Teeth: Just like humans, dogs can suffer from dental problems. Use a dog-specific toothbrush and toothpaste to brush their teeth a few times a week.
- Chew Toys: Dental chew toys can help reduce tartar and keep your dog’s teeth healthy.
5. Paw and Pad Care
- Inspect Regularly: Check your dog’s paws for any foreign objects, cuts, or injuries, especially after outdoor activities.
- Moisturize: Some dogs have dry or cracked paw pads. Use a dog-specific moisturizer or balm to keep them soft and supple.
6. Maintaining a Healthy Diet
- Good Skin and Coat: A dog’s diet directly affects their skin and coat health. Ensure they’re getting a balanced diet with the necessary nutrients. Omega fatty acids, in particular, can help promote a glossy coat.
7. Seasonal Grooming
- Winter Care: In cold climates, consider dog booties to protect their paws from snow, ice, and de-icing chemicals.
- Summer Care: During hot months, consider giving your dog a trim, especially if they have a thick coat. But never shave them completely, as their coat also protects them from sunburn.
Grooming is a continuous process that offers a fantastic opportunity to bond with your pet. It also allows you to check for signs of health issues, like skin problems or lumps. Remember to always use positive reinforcement and patience, ensuring your dog associates grooming sessions with positive experiences. Over time, with a consistent routine and your loving touch, grooming will be a breeze for both of you!
Conclusion
Grooming is more than just a cosmetic routine; it’s an intimate dance of trust between you and your beloved canine. From the gentle swipe of a brush to the precision of a nail clipper, every gesture reinforces the bond you share. Through regular grooming sessions, not only do we ensure the health and well-being of our dogs, but we also create countless moments of connection, understanding, and mutual respect.
As we’ve journeyed through the intricacies of trimming overgrown nails to embracing a comprehensive grooming regime, one thing remains evident: our dogs depend on us for their care. With patience, education, and love, we can rise to the occasion, ensuring our furry friends always feel their best.
As pet owners, our role is multifaceted. We are caregivers, friends, and guides in their world. Embracing the art and science of grooming is just another testament to our commitment to their happiness. So, as you venture into your next grooming session, remember – it’s not just about aesthetics, it’s a celebration of the special bond you both share. Here’s to happy, healthy pups and the hands that lovingly care for them! 🐾🖤
Frequently Asked Questions (FAQs)
While the exact frequency can vary based on your dog’s activity level and where they spend most of their time, a general rule of thumb is every 3-4 weeks. However, it’s essential to inspect your dog’s nails regularly and trim them whenever they start touching the ground when your dog stands.
It’s not uncommon for dogs to be anxious about nail trimming. Begin with short sessions and gradually increase their duration. Using treats, positive reinforcement, and ensuring a calm environment can help reduce their anxiety. If your dog remains extremely fearful, consulting with a professional groomer or veterinarian may be beneficial.
It’s best to use tools specifically designed for dogs. Dog nail clippers come in scissor-like or guillotine styles, and there are also grinders available for a smoother finish. These tools are designed to accommodate a dog’s nail size and shape, ensuring a safer and more effective trim.
Dogs with darker nails can make locating the quick challenging. In such cases, it’s advisable to make tiny trims at a time, looking for a dark dot in the center of the nail. This dot is the start of the quick. Alternatively, using a flashlight against the nail can sometimes help visualize the quick better.
Brushing your dog’s coat is paramount. It helps distribute natural oils, prevents matting, and reduces shedding. Depending on your dog’s coat type, you might need to brush them daily or a few times a week. Regularly checking ears, brushing teeth, and inspecting paws are also crucial for their overall health.