Category: Dog Grooming

  • Can You Use Human Clippers On Dogs? Which Ones Are Best?

    Can You Use Human Clippers On Dogs? Which Ones Are Best?

    When your dog’s coat starts looking shaggy, it might be tempting to grab your own set of hair clippers and give grooming a try. After all, clippers are clippers—right? Not quite. While human clippers and dog clippers may look similar, they’re designed very differently, and using the wrong tool could lead to an uneven cut, damaged blades, or even injury to your pup’s sensitive skin. In this article, we’ll explore the key differences between human and dog clippers, why it matters, and what you should consider before grooming your dog at home.

    Using human clippers on dogs

    Potential risks and benefits of using human clippers on dogs

    When it comes to grooming our furry friends, many dog owners ask the question if human clippers are suitable for their pets. While it may seem convenient to use what we already have at home, there are potential risks and benefits of using human clippers on dogs that need to be considered.

    Benefits:

    • Cost Savings: Using human clippers can save money as they’re often already in most homes.
    • Availability: They’re easily accessible and can be found in most households.

    Risks:

    • Skin Irritation: Human clippers may cause discomfort or skin irritation as they’re not designed for pet fur.
    • Inefficiency: They may not be as effective at cutting through thick, dense dog hair.

    Possible Alternatives:

    • Pet-specific Clippers: These are designed specifically for pet fur, ensuring safety and efficiency.
    • Professional Grooming Services: Consider taking your pet to a professional groomer for a safe and thorough grooming experience.

    Be cautious when using any tool that was not designed specifically for dogs, as it could result in unwanted injuries or discomfort. It is important that you research extensively before making decisions when it comes to your animal’s safety.

    Factors to consider when choosing a clipper for dogs

    When it comes to grooming your furry friend, having the right clipper makes all the difference. Here are some important factors to consider when selecting dog clippers.

    1. Blade Size: Choose a blade size that is appropriate for your dog’s coat length and texture.
    2. Speed: Clippers with multiple speed settings allow you to adjust the speed based on your dog’s individual needs.
    3. Noise Level: Some dogs may become anxious or frightened by loud noises, so choose a clipper with a low noise level if this is a concern.
    4. Ergonomics: Comfortable grip and lightweight design can minimize hand fatigue and ensure better control.

    It is also important to consider other features like corded versus cordless, battery life, and ease of cleaning. Taking the time to research and choose the right clipper will make grooming sessions more comfortable for both you and your furry friend.
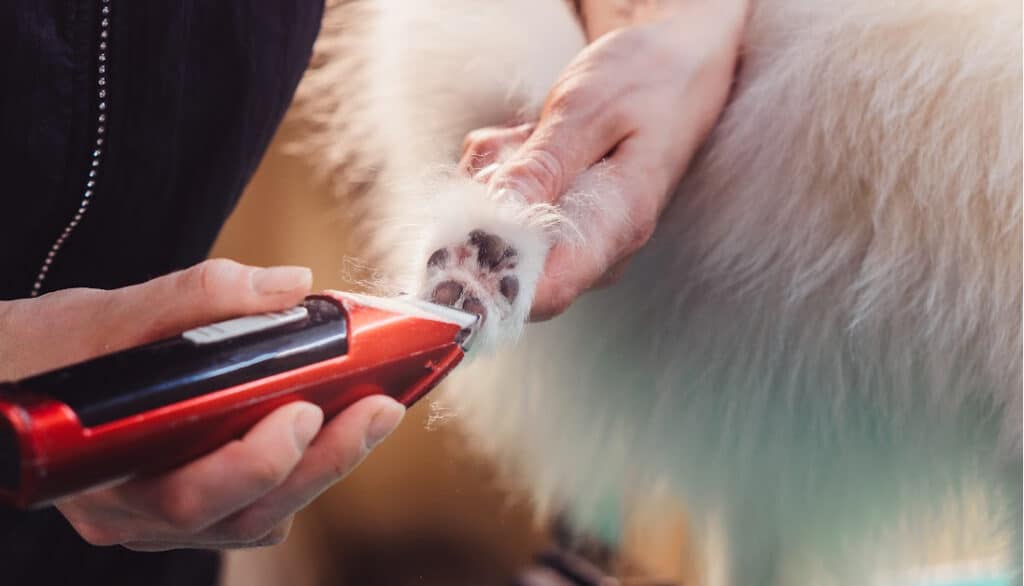
    Best Clippers for Grooming Dogs

    To find the perfect clippers for grooming your furry friend, explore the Best Clippers for Grooming Dogs section with an overview of different types, features to look for, and the top five best clippers for dogs in the market. Discover which clipper type offers the ideal features for your dog grooming needs.

    Overview of different types of clippers available for dogs

    Different types of dog clippers available in the market have unique features that cater to various coats, sizes and needs of pets.

    TypeDescriptionUsage
    Corded ClippersNeed electricity to operate with a powerful motor, generates high-speeds, and provides high precision.Suitable for long hair breeds or dogs with thick and tangled coats.
    Cordless ClippersBattery powered make less noise and vibration than corded ones which help not to scare dogs while making grooming sessions convenient. They are portable, easy to handle.Suitable for all breed’s shorter haircuts depending on their battery timings.
    Silent ClippersIdeal for noise-sensitive pets or those prone to anxiety that cannot bear loud sounds while getting groomed. The lower vibrations keep them calm during grooming sessions.Suits smaller dogs as it doesn’t have too much power but designed solely for trimming ears, legs, muzzle areas.

    While selecting a perfect clipper that works efficiently is an essential factor- Knowing the types of clippers will allow you to pick the best one that suits your furry friend’s grooming requirements -the length of their coat, texture and breed.

    It is worth considering the blades’ sharpness as this has a significant effect on a clipper’s performance and lifespan. Proper cleaning & lubricating clippers after every usage increase durability.

    Overall, for complete pet grooming success, having the right clipper and accessories will make a lot of difference in the quality and quantity of your pet’s coat trimming experience.
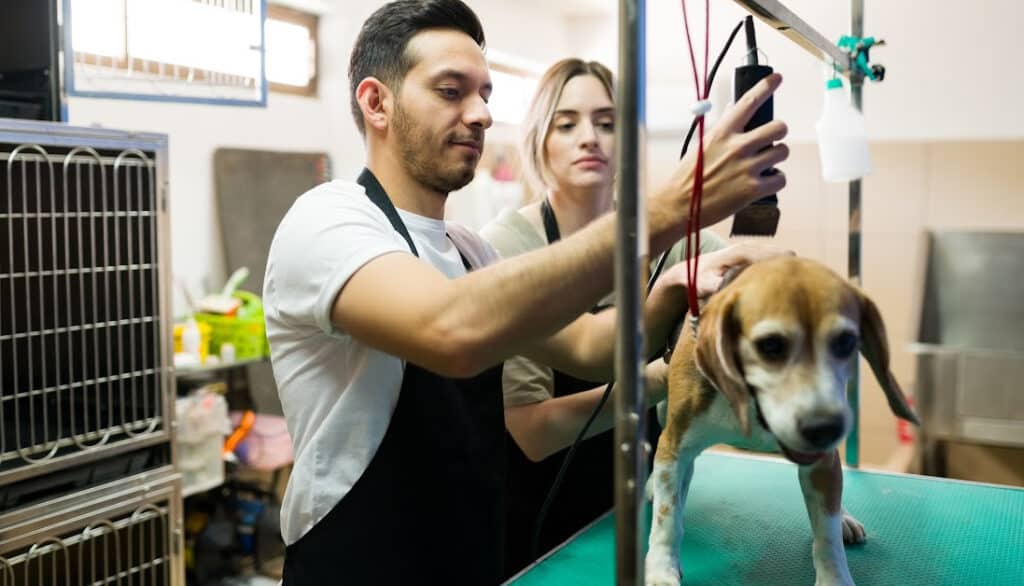
    Features to look for in a dog clipper

    To select the perfect dog clipper for grooming, it is crucial to consider different features. Here are the essential features to look for when choosing a dog clipper:

    • Blade Quality
    • Power source and Type of motor
    • Noise level
    • Corded vs Cordless
    • Weight and Ergonomics of Clipper
    • Versatility of Blades and Comb attachments

    The blade quality is a top priority as it determines how effectively the fur will be trimmed. The power source and motors affect the overall performance of the clipper; hence they need to be considered. Furthermore, noise level can impact pet’s attitude towards grooming sessions, making corded vs cordless operation an essential consideration. Moreover, weight and ergonomic design have an impact on your comfort during the grooming process. Lastly, versatility in blades size options and comb attachments allows you to groom your dog’s fur precisely.

    It is crucial to note that there are many other technical features that may differ between clippers depending on personal preferences or breed-specific requirements; thus consulting with a professional would be wise before making a final decision.

    Top 5 Best Clippers for Grooming Dogs

    When it comes to grooming our furry friends, finding the best clippers is crucial for a successful and stress-free session. Here’s a rundown of top-performing dog clippers that can make your life easier.

    Clipper BrandFeaturesPrice Range
    Andis Pro-Animal ClipperCool-running motor, detachable blades, 5-speed settings$150-$200
    Oster A5 Turbo 2-Speed ClipperPowerful, great for heavily matted dogs & thick coats, 2-speed settings$120-$160
    Shernbao Professional Animal Grooming ClipperLightweight, quiet and cordless operation, adjustable blade sizes, good for sensitive dogs$130-$170
    Wahl Bravura Lithium Ion Pet Clipper KitCordless operation with low vibration and noise, 5-in-1 blade system for versatile grooming$150-$190
    Andis Excel Pro-Animal 5-Speed Detachable Blade ClipperSpecially designed for heavy use, easy-to-change blade system with 5 speed settings$220-$260

    All of these clippers have unique features that make them stand out from one another. While some are corded, others are cordless. Some come with adjustable blade sizes while some offer multi-speed options. It all depends on your dog’s needs and your preferences.

    It’s important to note that while expensive clippers may seem like the best option, they may not necessarily be the right fit for your dog. Consider your dog’s coat type, grooming needs and temperament before making a final decision. With the right tools and approach, grooming can become an enjoyable bonding experience for you and your furry companion.
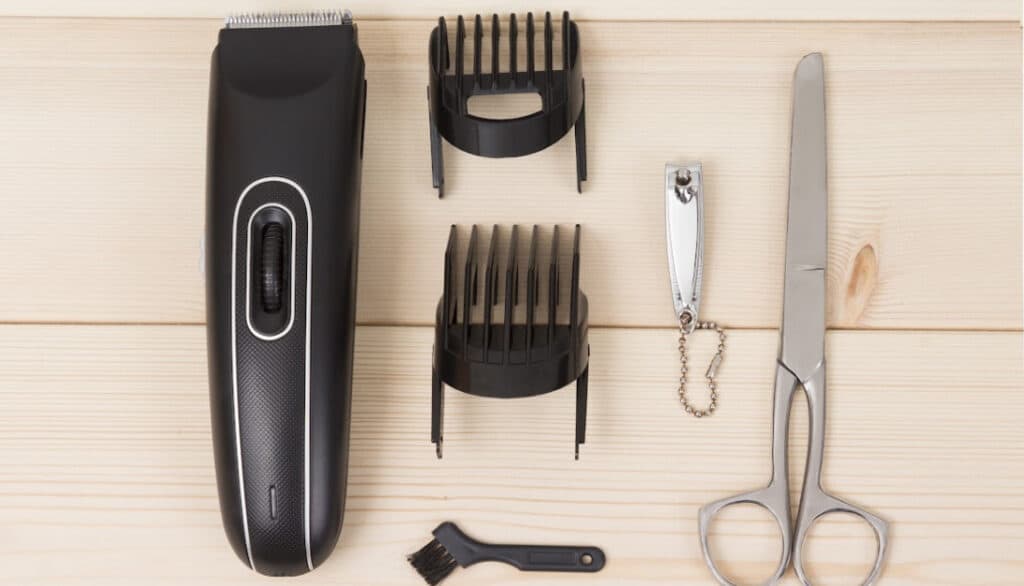
    Dog Clipper Maintenance

    To maintain your dog clippers, with importance as the key factor, follow the steps to clean and maintain them. Avoid common mistakes when cleaning. In this section, we will introduce the importance of maintaining your dog clippers and how to keep them clean in order to maintain their longevity. Also, we will brief you on the common mistakes you should avoid while cleaning your dog clippers.

    Importance of maintaining dog clippers

    Maintaining dog clippers is integral to keeping them in optimal condition. Dog clipper maintenance helps to ensure safe and effective grooming while prolonging the device’s lifespan. Neglecting maintenance could result in poor performance, compromised pet safety, and increased repair costs.

    Why is Dog Clipper Maintenance Important?

    • Regular maintenance of your dog clipper ensures that the blade remains sharp, reducing the risk of nicks or cuts.
    • Routine cleaning and oiling reduces friction between parts, ensuring a smoother operation with less heat buildup.
    • Replacing worn-out parts, such as blades or motors, and fixing defects before they worsen can save you money in the long run.

    Proper maintenance ensures that your dog clipper is always ready for use when you need it. Skipping routine care could lead to a malfunction mid-grooming session, causing distress to both you and your pet.

    Maintaining Your Dog Clipper: Best Practices

    To keep your dog clipper in good shape, take time to clean it after every use. Use specialized tools to remove hair from under the blade guard, then wipe off any remaining debris using a soft cloth. Apply a drop of oil onto the blade pivot point before storing it away using a protective cover.

    Keeping your dog clipper well-maintained is key for optimal function while maximizing its lifespan. By performing regular maintenance like cleaning and oiling after every use and replacements as needed, you’ll ensure that your furry friend receives safe yet efficient grooming sessions every time.
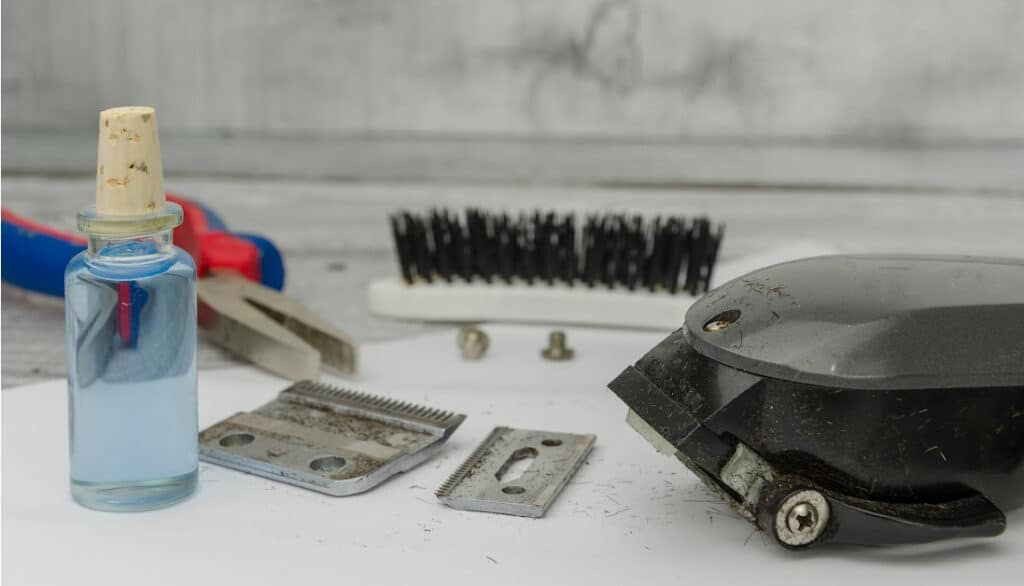
    Steps to clean and maintain dog clippers

    Proper maintenance of dog clippers is mandatory to ensure that your pet’s grooming is done impeccably. It is essential to keep the clippers clean and well-maintained to avoid infections and injuries. Let’s understand the necessary steps to undertake for cleaning and maintaining dog clippers.

    1. Preparation: Before starting cleaning, always unplug the clipper and ensure that it has cooled down.
    2. Cleaning Blades: Remove the blades and clean any hair or debris attached to them using a small brush. Ensure that you do not lose any screws while taking off the blades. Then, soak the blades in a professional oil solution overnight to remove any rust or bacteria.
    3. Nose Hair Trimmer Removal – If your clipper has a nose hair trimmer attached, remove it carefully. Wipe it down with a soft damp cloth before reattaching it.
    4. Cleaning Clipper Body: Use a dry cloth to wipe away any loose hair on the clipper body, including areas around vents or holes as they may affect airflow. Then use an approved clipper cleaning spray to rinse and sterilize all surfaces of the clipper.

    To prevent damage to fur and skin when clipping your pet, maintain blade sharpness by sharpening them every few months with a professional sharpening machine. Always replace damaged parts with authentic ones offered by authorized dealerships or manufacturers who assure quality products.

    Regularly scheduled cleanings will enhance their longevity lifespan and guarantee excellent performance for future grooming sessions. Keep this guide handy, clean your clippers various times standardly during its life cycle, increased during dusty periods(approximately twice per week), followed by lubrication services(using proper oils).

    Common mistakes to avoid when cleaning dog clippers

    Cleaning your dog clippers is important and should be done regularly to maintain their effectiveness. However, there are certain misconceptions that need to be avoided in the process of cleaning these tools to keep them in optimal condition.

    To help you steer clear of these mistakes, here’s a four-step guide on the right way to clean your dog clippers:

    1. First and foremost, start by turning off and unplugging the clippers. This ensures your safety and prevents any damage.
    2. Remove the blades from the clipper – use a screwdriver or other appropriate tool for this – and brush off any excess hair or debris with a small brush or toothbrush.
    3. Cleanse each piece thoroughly using blade wash, cleaning solution or warm soapy water. Dry all pieces completely before reassembling everything back together.
    4. Finally, it’s important to lubricate your blades after cleaning- this helps prevent rusting and keeps them working at their peak performance levels

    It’s best not to soak your clippers in water as this can cause internal damage. Rubbing alcohol is also discouraged as it dries out the blade teeth. Instead make use of an adequate cleaning solution.

    A key example of a semantic variation would be ‘Important Dog Clipper Cleaning Tips’. By understanding common trends associated with clipper maintenance, one can avoid several misgivings regarding vibration which leads to broken parts as well as loss tolerance during cutting procedures. By following strict outlined steps of switching off appliances, brushing excess hair, etc., maintenance efforts become easier & promote better efficiency with pet grooming processes involved.
    Professional Grooming Vs DIY Grooming

    To make an informed decision between professional and DIY grooming, consider the pros and cons of each option, along with key factors that may influence your choice. Professional dog grooming has its benefits, but it can also be expensive and inconvenient. On the other hand, DIY grooming can save you money, but requires more time and effort on your part. In this section, we’ll explore the advantages and disadvantages of both approaches, along with important considerations to help you choose the best one for you and your furry best friend.

    Pros and cons of professional dog grooming

    Professional grooming for dogs: What are the benefits and drawbacks?

    Grooming plays a vital role in maintaining a dog’s health and hygiene. While many pet parents prefer to groom their furry friends at home, some prefer professional services. Professional grooming has both advantages and disadvantages.

    Pros of professional dog grooming:

    Pros of Professional Dog Grooming
    1Hygiene Maintenance: Professionals have the tools and skills necessary to clean dogs’ ears, teeth, and coat effectively, leading to better overall hygiene.
    2Nail Trimming: Trimming a dog’s nails can be challenging for many owners. Professional groomers know how to do this without causing any discomfort or harm.
    3Proper Grooming Equipment: They have access to high-quality grooming equipment, which makes the grooming process more efficient and effective.
    4Coat Care: Regular professional grooming can help keep the dog’s coat in good condition, reducing shedding and potential skin issues.
    5Parasite Detection: Professionals can spot early signs of fleas, ticks, or other skin infections and guide owners to appropriate treatments.
    6Expert Handling: Groomers have the expertise to handle dogs of all breeds and temperaments, ensuring a stress-free experience for the dog.
    7Aesthetics: Professional groomers can make your dog look its best, which is especially important if your dog participates in shows.
    8Early Detection of Health Issues: Groomers may notice abnormalities such as lumps, rashes, or skin discoloration, which could be signs of underlying health problems.
    9Saves Time and Effort: For busy pet owners, having a professional take care of grooming can save a lot of time and effort.
    10Reduced Risk of Injury: Professionals have been trained to groom without causing cuts or irritation to the skin, reducing the risk of injury during grooming.

    Cons of professional dog grooming:

    Cons of Professional Dog Grooming
    1Cost: Professional grooming services can be expensive, especially for large breeds or dogs with specific grooming needs.
    2Stress for the Dog: Some dogs might find the grooming process stressful, especially when handled by strangers in a new environment.
    3Risk of Injury: Although rare, there’s a small risk of injury if the groomer isn’t careful or the dog becomes agitated.
    4Inconvenience: Scheduling and transportation to grooming appointments can be inconvenient.
    5Possible Exposure to Diseases: If the grooming salon doesn’t maintain strict hygiene standards, there’s a risk of dogs catching diseases from other pets.
    6Incorrect Styling: Not all groomers are skilled in styling all breeds. Incorrect grooming can lead to discomfort or even health issues for some dogs.

    If you opt for professional dog grooming, it’s worth considering if the benefits outweigh any potential drawbacks before making your decision. While there are certainly advantages like the convenience of dropping off your pup for a full grooming session that includes pampering and snuggles for a few hours to style while you get some errands done it’s important to note the time and costs in addition to any potential effects on the bond between you and your pet.
    DIY Dog Grooming – Weighing the Pros and Cons

    Grooming your furry friend at home may seem like a good idea, but is it worth it? Let’s take a look at the pros and cons of DIY dog grooming.

    • Pros:
      • Saves money
      • Bonding experience
      • Familiarity with your pet’s body and behavior
      • Avoids stress caused by unfamiliar surroundings and people
    • Cons:
      • Possible injury due to lack of experience or tools
      • Might not achieve desired results in terms of appearance and hygiene level
      • Missed health issues or underlying problems
      • Takes up time and effort for cleaning up after the grooming session

    It is important to remember that certain breeds require special grooming needs, which may be out of your reach to meet. All in all, weighing the pros and cons of DIY dog grooming can help you determine whether it’s worth trying or leaving for a professional groomer.

    Factors to consider when choosing between professional and DIY dog grooming

    When deciding between grooming your dog at home or seeking professional services, various factors need to be taken into account. Carefully reviewing each aspect before choosing can save time and expenses.

    • Cost: While DIY grooming may seem less expensive, purchasing quality equipment can become a significant expense over time. Professional grooming services often provide necessary gear and are usually cost-effective in the long run.
    • Expertise: Professional groomers have training and experience that allows them to handle dogs of different breeds and temperaments. On the other hand, an owner may not have adequate knowledge or tools to cater to their dog’s specific needs.
    • Convenience: Time constraints may lead one to prefer either of the options. While home grooming can fit into a busy schedule, professional grooming often offers flexible schedules that suit pet owners’ needs.

    It is crucial to consider all aspects carefully before making a decision as no one method suits every dog’s needs. Keep in mind the breed, age, health condition of your pet, your availability, and budget when deciding which option suits both you and your four-legged friend best.
    Tips for Grooming Dogs at Home

    To achieve professional level grooming for your dog at home, follow these tips for grooming dogs at home with the focus on pre-grooming preparation, techniques to help your furry friend relax during the grooming process, and tips for ensuring excellent results. Prepare your dog for grooming, relax them during the process, and get salon-level results at home with these techniques.

    Importance of pre-grooming preparation

    Grooming your dog at home can be an enjoyable and rewarding experience for both you and your pet, but it requires pre-grooming preparation. Proper pre-grooming preparation ensures that you have all of the tools and equipment you need, and it also makes the grooming process more efficient. It is essential to prepare before starting any grooming activity with your furry friend.

    • Preparing yourself mentally and physically for the activity
    • Gathering all necessary grooming tools
    • Creating a safe environment for your doggy
    • Maintaining an organized grooming area to avoid any confusion or interruptions during the grooming session.

    It is crucial to take extra care when preparing for dog grooming because a lack of enough attention could pose risks such as injury from sharp dog grooming scissors or clippers that may cause cuts, scratches or nicks on their skin. Prioritize creating a comfortable environment that your dog will be relaxed in during the grooming activity. It’s best to consider investing in soft towels, a non-slip bathing mat, quality shampoo and conditioner to keep him calm while you are carrying out this duty. Remember to avoid stressful events such as using loud music or forcing water down their throat.

    Incorporate these tips into your pre-grooming routine to ensure when it’s time to groom Fido, he is relaxed enjoying the experience while keeping him looking stylish and hygienic without risking causing pains due to lack of adequate preparation.

    Techniques to make grooming less stressful for dogs

    To ensure that your dog undergoes grooming procedures without any stress, it is essential to use specific techniques. These techniques will help put your dog at ease and enable you to groom your furry friend effectively.

    • Introduce Grooming Techniques Gradually: It is critical to introduce your dog to grooming gradually. Try isolating one part of their body and begin by grooming that area before moving on to the others.
    • Reward Them for Good Behavior: Positive reinforcement goes a long way in making grooming less stressful for dogs. Reward them with treats when they behave well during their grooming sessions.
    • Use Safe and Effective Products: Ensure you choose products that are suitable for your dog’s age, breed, and skin type. Also, opt for high-quality tools that are comfortable and safe for your pooch.
    • Make Grooming Sessions Shorter: Lengthy grooming sessions can be stressful for dogs; keep them short but frequent. Establish a regular routine so that the more often you groom your pet, the more relaxed they’ll become.

    One of the most common mistakes pet owners make while grooming their dogs is using aggressive methods such as yelling or hitting when things don’t go smoothly. These techniques may have negative psychological effects on dogs, damaging trust and ultimately causing more stress in future grooming sessions.

    By following these tips, dog owners can reduce their pets’ stress levels during the grooming process, creating a bond between pet and owner while maintaining optimal coat health.

    Tips for achieving good results when grooming dogs at home

    Grooming a dog at home can be challenging without adequate knowledge and skills. Here are six tips to achieve excellent results when grooming your furry friend:

    • Choose the right grooming tools for your dog’s coat type.
    • Bathe your dog with quality shampoo and conditioner, ensuring the water is at an appropriate temperature.
    • Trim your dog’s nails regularly to avoid overgrowth and discomfort.
    • Clean your dog’s ears and teeth often to prevent infections and dental problems.
    • Brush your dog’s coat frequently to remove dirt, tangles, and mats.
    • Be gentle with your dog throughout the grooming process to avoid injuries or stress.

    Aside from these tips, make sure to seek professional help if you encounter any difficulty in grooming or notice any unusual symptoms on your pet. Consistency and patience are also crucial factors that contribute to achieving good results in home grooming.
    human clippers on dogs

    Conclusion

    When using human clippers on dogs, it is important to keep in mind the best practices for clipping to avoid causing injury. Utilizing clippers designed specifically for dogs can be a safer option, but if using human clippers, be sure to take precautions such as keeping the blades sharp and properly lubricated. Avoiding sensitive areas and taking frequent breaks can also help prevent accidents.

    Additionally, it’s important not to rush through the clipping process as this could lead to mistakes or overlooking areas that require attention. Taking time to carefully clip your dog can result in a better grooming job overall.

    Lastly, understanding your dog’s specific coat type and needs can help determine the most appropriate clipping technique. Whether your dog has short or long hair, a regular grooming routine that includes dematting and bathing can make the clipping process easier and more effective.

    Ultimately, prioritizing safety, taking your time, and understanding your dog’s unique needs are key factors in successful at-home grooming with human clippers.

    Frequently Asked Questions

    1. Can you use human clippers on dogs?

    Yes, you can use human clippers on dogs. However, the type of clipper you use will depend on the type of coat your dog has and the grooming job that needs to be done.

    2. What is the best type of clipper to use on dogs?

    The best type of clipper to use on dogs depends on their coat. For thick or double-coated breeds, a heavy-duty clipper with a powerful motor is best. For shorter or finer coats, a lightweight clipper with a smaller motor will work well.

    3. Can I use my beard trimmer on my dog?

    No, it is not recommended to use a beard trimmer on your dog. Human beard trimmers are not designed for the thick and coarse hair of dogs and can cause discomfort and potential harm to your pet.

    4. How do I choose the right clipper blade for my dog’s coat?

    You should choose a clipper blade based on the length and thickness of your dog’s coat. The lower the blade number, the shorter the cut. Shorter coats, use blades 10 or 15. For medium-length coats, use blades 4, 5, or 7. For longer coats, use blades 3, 3 ¾, or 5F.

    5. Should I use clippers on my dog’s sensitive areas?

    It is not recommended to use clippers on your dog’s sensitive areas such as their genitals or face. These areas require special attention and may require scissors or hand trimming.

    6. How do I maintain my dog clippers?

    To maintain your dog clippers, you should clean the blades after each use and oil them to prevent rusting. You should also regularly check the blades for dullness and have them sharpened or replaced when necessary.

  • Can You Use Baby Wipes On Dogs? Is It Safe?

    Can You Use Baby Wipes On Dogs? Is It Safe?

    Medically Reviewed by: Dr. Candy Akers, DVM

    Have you ever found yourself in a situation where your dog gets dirty after a walk or playtime but you don’t have access to a bath? Or maybe your pup stepped in something gross and you just want to clean their paws? You might be tempted to reach for some baby wipes, but can you use baby wipes on dogs? In this article, we’re going to answer the question of whether or not baby wipes are safe for dogs.

    We’ll also provide some context for why someone might want to use them on their pup. Dogs love getting dirty, but sometimes it’s just not practical or healthy for them to be covered in mud or other substances.

    That’s where baby wipes come in handy. They can be used as a quick and easy way of cleaning up your pet without having to give them a full bath. But before you start wiping down your dog with any old baby wipe, it’s important to understand that not all wipes are created equal. In this blog, we will discuss the chemicals to watch for and the ingredients that can actually be beneficial.

    using baby wipes on dogs

    What are baby wipes?

    If you have a baby or know someone who has one, you’re probably familiar with baby wipes. These moist towelettes are specifically designed for cleaning a baby’s delicate skin during diaper changes.

    But did you know that they can also be used to clean your furry friend’s paws and fur? Baby wipes come in various sizes and can be purchased in bulk or individually wrapped.

    They are made of soft, gentle materials that won’t irritate your baby’s skin. Some brands advertise as being “unscented,” while others offer various scents, like lavender or chamomile.

    What are they typically used for?

    As mentioned, the primary use of baby wipes is for cleaning babies during diaper changes. However, they can also be used for wiping away spit-up, food messes, and other general messes that come with having a little one.

    But what about dogs? Can they be used on them too?

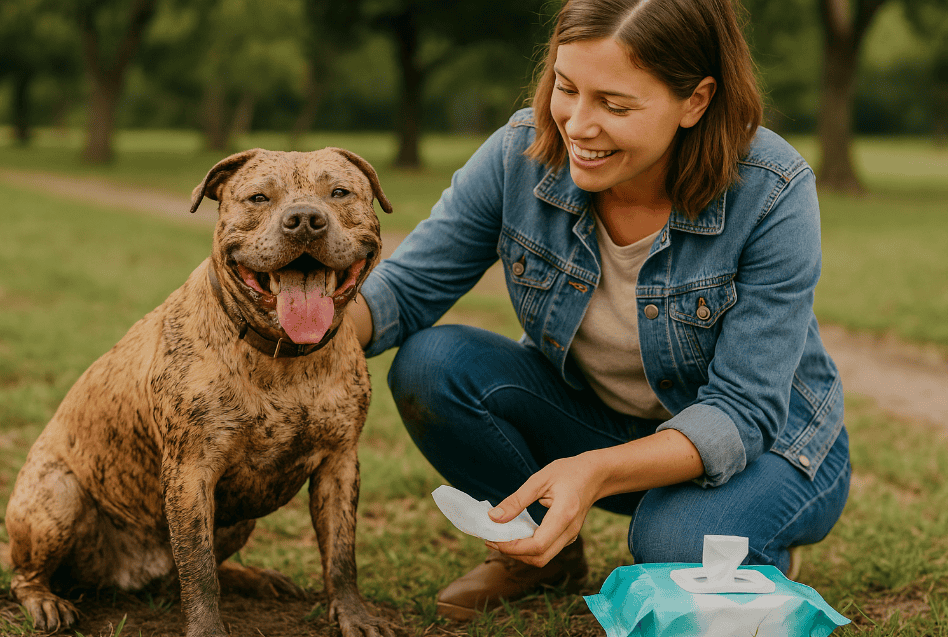
    The answer is yes! Baby wipes offer an easy and convenient way to clean up your dog after a walk or playtime in the park.

    Common ingredients found in baby wipes

    Different brands have unique ingredients in their baby wipes. However, common ones exist. Water is primary, making up most of the wipe. Baby wipes also have mild cleansers. These include surfactants and emulsifiers. They break down dirt on the skin.

    Many wipes contain moisturizers like glycerin or petrolatum. They hydrate the skin. Other ingredients are preservatives, fragrances, and pH adjusters. Preservatives stop bacteria growth. Fragrances add scent. pH adjusters balance acidity levels.

    The difference between regular and pet-specific wipes

    While baby wipes can be used on dogs, there are some differences between regular baby wipes and pet-specific ones. Pet-specific wipes are specially designed for dogs and contain ingredients that cater to their needs.

    For example, pet wipes may contain ingredients like aloe vera or oatmeal to soothe irritated skin. Some may even have antibacterial properties to prevent infections. Additionally, pet-specific wipes are often larger than baby wipes, making them better suited for cleaning larger dogs.

    If you must clean your dog and lack pet-specific wipes, use a baby wipe. However, pick an unscented one. Ensure it’s free of harsh chemicals. These could irritate your dog’s skin

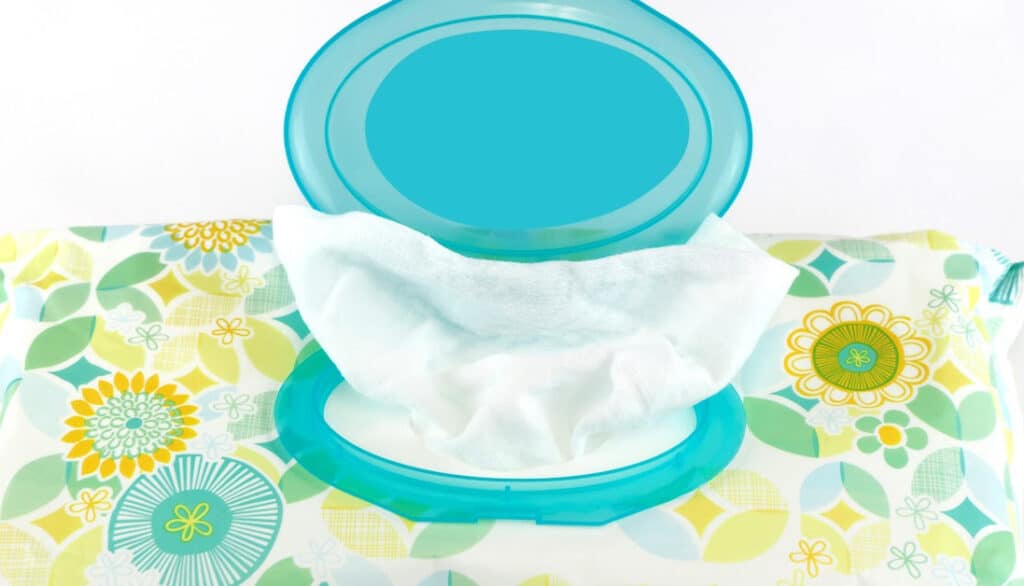
    out of focus picture of a package of baby wipes

    Can You Use Baby Wipes on Dogs?

    As a dog owner, you may be wondering if it’s safe to use baby wipes on your furry friend. The answer is yes, but with some important considerations.

    Not all types of baby wipes are created equal, and some can even be harmful to your dog’s skin. In this section, we’ll explore the ins and outs of using baby wipes on dogs and how to choose a safe brand.

    Not All Baby Wipes Are Safe for Dogs

    While many baby wipes are gentle enough for human babies, they may not be suitable for use on dogs. Some brands contain harsh chemicals or fragrances that can cause skin irritation or allergic reactions in dogs. Before using any type of wipe on your dog, it’s important to read the label carefully and make sure it’s safe for pets.

    Pet-Specific Wipes May Be a Better Option

    If you want to play it safe when cleaning your dog with wipes, consider purchasing pet-specific wipes. These are specially formulated for use on dogs (and sometimes cats), meaning they’re less likely to contain ingredients that could harm your pet. Pet-specific wipes also tend to be larger and more durable than standard baby wipes, making them easier to use on bigger dogs or messier situations.

    Choosing a Safe Brand of Baby Wipe

    If you decide to go with standard baby wipes instead of pet-specific ones, there are still ways to ensure the safety of your furry friend. Look for fragrance-free or hypoallergenic options that are gentle enough for sensitive skin. Avoid products that contain alcohol or other harsh chemicals known to cause irritation.

    It’s also a good idea to check the packaging for information about whether the manufacturer recommends using the product on pets. Some brands may explicitly state that their wipes are not intended for animal use.

    How to Use Baby Wipes on Your Dog Safely

    Using baby wipes on your dog can be a great way to quickly clean up messes or freshen up their coat between baths. However, it’s important to do so safely, to avoid causing irritation or other health problems. Start by choosing a wipe that’s safe for your dog and free of any potential allergens or irritants.

    Then, gently wipe down your dog’s fur, paying special attention to any areas that are particularly dirty or smelly. Avoid using wipes on open wounds or irritated skin, as this can further aggravate the problem.

    Also, don’t use too many wipes at once – one or two should suffice for most situations. Always dispose of used wipes in the trash rather than flushing them down the toilet.

    The Bottom Line: Baby Wipes Can Be Safe for Dogs When Used Properly

    Yes – you can use baby wipes on dogs! Just make sure to choose a safe brand and be careful when using them on your furry friend. By following these guidelines and taking care not to overuse wipes, you can help keep your pup clean and comfortable between baths.

    baby wipes for dogs

    When Should You Use Baby Wipes on Your Dog?

    As mentioned earlier, using baby wipes on dogs can be a convenient way to clean them up after a messy outdoor excursion. However, it’s important to know when and how often to use the wipes to avoid any adverse effects. One example of a situation where using a baby wipe on your dog is beneficial is after a muddy walk.

    If your dog enjoys exploring muddy puddles or rolling around in dirt, their fur can quickly become caked with mud and dirt. Instead of giving them a full bath every time this happens, using a baby wipe can help get rid of the excess dirt and prevent it from being tracked into your home.

    Another situation where baby wipes may come in handy is after playing in the park or going for a swim. Dogs are known for getting into all sorts of odorous messes, whether it be running through goose poop or rolling around in decomposing plant matter.

    Again, instead of resorting to a full bath every time this happens, wiping down your dog with baby wipes can help keep them clean and smelling fresh. However, it’s important not to overdo it with the wipes.

    Using too many wipes on your dog can strip their skin of natural oils and cause irritation. Only use as many as necessary for each cleaning session, and don’t make it an everyday routine unless absolutely necessary.

    How Often Should You Use Baby Wipes on Your Dog?

    It’s generally recommended that you limit the use of baby wipes on dogs to once or twice per week at most. Using them more frequently than that could lead to dry skin and other irritations. If you find that your dog frequently gets dirty or smelly during the week, consider using other methods besides baby wipes such as dry shampoo or giving them more regular baths.

    Choosing Safe Brands

    When choosing which brand of baby wipes to use on your dog, it’s important to read the ingredients list carefully. Look for wipes that are free from alcohol, fragrances, and other harsh chemicals that can irritate your dog’s skin.

    Additionally, you can look for pet-specific wipes that are designed with dogs in mind. These wipes will typically have a more neutral pH balance and be gentler on your dog’s skin than regular baby wipes.

    How to Use Baby Wipes Safely

    When using baby wipes on your dog, make sure to avoid sensitive areas such as their face or genitals. Instead, focus on wiping down their fur and paws, being careful not to apply too much pressure or rub too vigorously.

    Before using the wipe, it can also be helpful to test a small area of your dog’s skin first to make sure they don’t have any adverse reactions. If you notice any redness or irritation after using the wipe, discontinue use immediately.

    Baby wipes can be a useful tool for cleaning up after your furry friend without resorting to a full bath every time they get dirty. However, it’s important to use them in moderation and choose safe brands with gentle ingredients.

    Remember not to overdo it with the use of wipes and only use as many as necessary during each cleaning session. With proper precautions and care taken while using them safely on your dog’s body parts like paws etc., you can ensure that both you and your dog are happy with the results!

    How to use baby wipes on your dog

    Choosing the Right Baby Wipes

    Not all baby wipes are created equal, so it’s important to choose the right ones for your furry friend. Look for unscented, hypoallergenic wipes that are free of any harmful chemicals like alcohol or fragrances. It’s also a good idea to opt for wipes that are specifically designed for pets as they often come with added benefits like conditioning agents and natural essential oils.

    Preparing Your Dog

    Before using the baby wipe, make sure your dog is calm and relaxed. If they’re not used to being wiped down, it may be helpful to give them a treat or a toy to distract them. Use a leash or have someone hold onto your dog’s collar if they tend to move around a lot.

    Wiping Down Your Dog

    Start by wiping down your dog’s paws and work your way up their legs. Be gentle and avoid applying too much pressure as you don’t want to cause any discomfort or irritation. Pay extra attention to areas that tend to get dirty like their paws, belly, and underside.

    If you’re using pet-specific wipes with added ingredients like essential oils or moisturizers, make sure you follow the instructions on the package carefully. Some wipes may need to be rinsed off after use while others can be left on.

    Cleaning Sensitive Areas

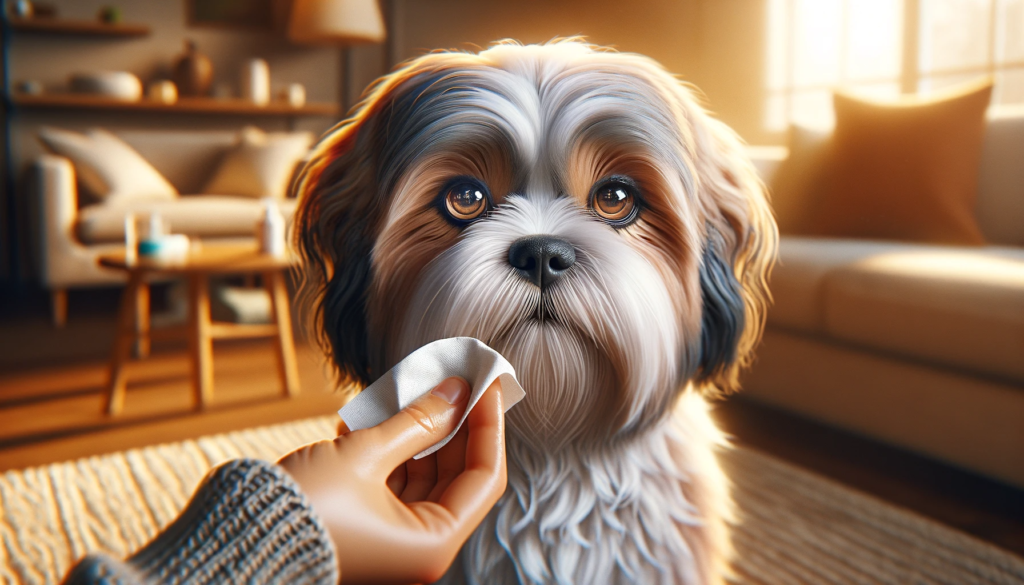
    When wiping sensitive areas like around their eyes or ears, use caution and avoid getting too close. You may also want to switch out the wipe frequently if it becomes too soiled as bacteria can spread easily in these areas.

    Drying Off Your Dog

    After you’ve finished wiping down your dog, use a towel to dry them off thoroughly. Make sure they’re completely dry before letting them outside as wet fur can lead to skin irritation or infection.

    colorful package of baby wipes

    Conclusion

    Using baby wipes on your dog can be a great way to keep them clean and fresh in between baths, but it’s important to do so safely and responsibly. As always, if you have any concerns about your pet’s health or wellbeing, don’t hesitate to consult with your veterinarian.

  • Can You Use Head and Shoulders On Dogs? Does It Work?

    Can You Use Head and Shoulders On Dogs? Does It Work?

    Medically Reviewed by: Dr. Candy Akers, DVM

    Head & Shoulders shampoo is widely used by humans around the world for treating dandruff-induced itchy scalp conditions while keeping hair healthy-looking throughout all seasons. The question arises head & shoulders shampoo can be used to wash dogs too? After all both human beings and dogs have hair or fur! The short answer is, in moderation.

    The use of human shampoos on pets isn’t always safe. They may cause allergies or toxicity. Dandruff is common in both humans and animals. This leads some people to think Head & Shoulders can be safe for dogs. It’s designed to combat dandruff. But is it effective for dogs too? The answer isn’t clear.

    On the other hand, others argue that dogs have different skin pH balance from humans and their skin is more sensitive. Using human shampoos can lead to dryness and other potential complications that could exacerbate skin problems.

    head and shoulders used on dogs

    The Importance of Properly Caring for Your Dog’s Skin & Coat

    Regardless of whether or not you choose to use head & shoulders shampoo on your dog, it’s crucial to understand the importance of proper skin and coat care for your furry friend. Regular grooming routine keeps your dog’s coat clean, healthy-looking and shiny.

    It helps remove dirt, dead hair, and debris while spreading natural oils evenly throughout the coat. Moreover, proper grooming can prevent certain skin conditions such as hotspots (acute moist dermatitis), matted fur or flea infestations that could lead to an uncomfortable experience for your furry friend.

    Taking care of a dog’s skin and coat is essential just as much as any other aspect in pet care. We will delve deeper into the topic of using Head & Shoulders shampoo on dogs in the next section.

    bottle of head & shoulders shampoo on a splashing water background

    What Is Head and Shoulders

    As mentioned earlier, Head and Shoulders is a medicated shampoo created for humans. The active ingredient in the formula is pyrithione zinc which helps to control the growth of malassezia furfur – a fungus known to cause dandruff in humans. It also contains other ingredients such as water, sodium laureth sulfate (SLS), fragrance, sodium lauryl sulfate (SLES), citric acid, etc.

    Is It Safe to Use Head and Shoulders on Dogs?

    “Yes” and “no” are both answers to this. Some vets endorse careful, limited use of Head and Shoulders. Others caution against it. The hesitation is due to the shampoo’s strong chemicals, which can harm if misused or overused.

    SLS/SLES are key ingredients. They’re strong cleansers, capable of removing dirt and oil. However, they can strip away protective skin oils, causing dryness or irritation. The shampoo’s pH is another issue. It’s between 4-5, while pet shampoos are 6-7, more suitable for dogs.

    This shampoo’s acidity may harm a dog’s skin acid mantle layer. This raises infection risks. Dogs often lick themselves too, and could ingest shampoo residue. This may cause symptoms like vomiting, diarrhea, or stomach discomfort.

    Before using Head and Shoulders on your dog, it’s best to consult with a veterinarian first. They can assess if it is appropriate for your dog and provide advice on how to use it safely.

    tan and white scruffy dog in a tub outside getting bathed

    The Benefits of Using Head and Shoulders on Dogs

    How it can help with certain skin conditions

    Head and Shoulders is commonly known for its ability to effectively treat dandruff and other scalp conditions in humans. However, it can also be beneficial for dogs suffering from similar skin issues. Dandruff or flaky skin on dogs is usually caused by dryness, irritation, or fungal infections.

    Head and Shoulders has active ingredients like pyrithione zinc. This fights yeast, bacteria, and fungi that irritate dog’s skin. Using this shampoo can ease symptoms of uncomfortable hot spots in dogs.

    A hot spot is a moist, inflamed wound. It results from constant chewing or licking a body spot. Head and Shoulders’ anti-fungal properties can treat these spots. It eliminates bacteria and fungi. The moisturizing properties also soothe the area.

    How it can improve the appearance of a dog’s coat

    In addition to treating specific skin conditions, using head & shoulders on your dog regularly can also help improve their overall appearance. The shampoo contains moisturizing agents like glycerin that hydrate dry hair follicles making them appear shinier with time.

    If your furry friend has dull fur or sheds excessively then using head & shoulders may help restore luster to their coat while reducing shedding at the same time; two benefits that every pet owner will appreciate. Another important consideration when using head & shoulders on dogs is that they come in various formulas designed specifically for different hair types so you get an even better performance boost when you choose a product suited to your dog’s specific coat type.

    Head & Shoulders shampoo has been shown to be helpful in treating several skin conditions in dogs and can also improve the look and feel of their coat. However, it is important to use the shampoo with caution and in moderation because overuse or misuse can cause adverse reactions such as dryness or irritations.

    The Risks of Using Head and Shoulders on Dogs

    Possible Allergic Reactions

    Just like humans, dogs can have an allergic reaction to certain ingredients in shampoo. Head and Shoulders contains many different chemicals, including zinc pyrithione, which is used to treat dandruff in humans. However, this chemical can cause skin irritation and allergic reactions in dogs.

    Symptoms of an allergic reaction include itching, redness, swelling, and even hives. If you notice any of these symptoms after using Head and Shoulders on your dog, stop using it immediately and consult your veterinarian.

    Overuse Leading to Dry Skin

    Using too much shampoo or using it too frequently can also lead to dry skin in dogs. Head and Shoulders is designed for human scalps, which are different from dog skin.

    Dogs have a thinner dermis layer than humans do, so their skin is more sensitive to harsh chemicals found in shampoo. Overuse of Head and Shoulders can strip away the natural oils that keep your dog’s coat healthy and moisturized.

    This can lead to dryness and flakiness of the skin as well as dull looking fur. To avoid overusing Head and Shoulders on your dog’s coat try limiting use to once a month or less frequent if they don’t have any specific conditions such as dandruff that require more frequent application.

    shelves of all-natural shampoos and shower gels

    All-Natural Alternatives

    If you’re concerned about the risks associated with using Head & Shoulders on your furry friend’s coat but still want an effective treatment option for common skin irritations like dandruff or itchiness there are many all-natural alternatives available! Aloe vera gel has been shown to be effective in treating various kinds of skin issues including itchiness caused by allergies or insect bites.

    You could also opt for oatmeal shampoo, which has been shown to be very effective at treating dry and itchy skin in dogs. Additionally, olive oil can help moisturize your dog’s coat and soothe any itchiness or dryness.

    Consult with Your Veterinarian

    Ultimately, it’s best to consult with your vet before using any kind of shampoo on your dog’s coat to ensure they don’t have any underlying conditions that require specialized treatment. They may recommend a specific product or brand based on your dog’s needs or recommend alternative natural remedies that are safer for use on dogs. While Head & Shoulders might seem like an easy solution for treating dandruff in dogs, it does come with some potential risks such as allergic reactions and overuse leading to dry skin.

    There are many all-natural alternatives available as well as specialized products designed specifically for use on pets that can be just as effective without the added risks. Consult with your veterinarian before trying any new products on your pet’s coat!

    bottle of apple cider vinegar with q-tips and cotton pads

    Alternatives to Head and Shoulders for Dogs

    Natural remedies for common skin conditions

    While Head and Shoulders may be effective for some dogs, it’s not always the best solution. Some dogs may have sensitive skin or allergies that could react negatively to certain ingredients in commercial shampoos. In these cases, natural remedies are a great alternative.

    One popular natural remedy is oatmeal. Oatmeal contains anti-inflammatory properties that can soothe irritated and itchy skin.

    To use oatmeal for your dog’s bath, grind up plain oatmeal in a blender or food processor until it becomes a fine powder. Then mix the powder with water until it forms a paste-like consistency.

    Apply the paste to your dog’s coat and let sit for at least 10 minutes before rinsing off. Another natural remedy is apple cider vinegar.

    Apple cider vinegar has antimicrobial properties that can help fight bacteria and yeast on your dog’s skin. Mix equal parts apple cider vinegar and water in a spray bottle, then spray onto your dog’s coat after their bath.

    tan and white dog in tub with dog shampoo

    Dog-Specific Shampoos

    Dog-specific shampoos are designed specifically for a dog’s delicate skin and coat needs. These shampoos are pH-balanced, meaning they won’t strip away essential oils from your dog’s coat or cause dryness like some human shampoos can.

    When choosing a dog shampoo, look for ones that contain natural ingredients like chamomile or lavender oil which have calming properties that can help soothe irritated skin. Also consider whether you want to buy an all-purpose shampoo or one tailored to specific needs such as flea prevention or medicated formulas for certain conditions.

    Some popular brands of dog shampoo include Earthbath, Burt’s Bees, and Isle of Dogs. If you’re looking for an alternative to Head and Shoulders for your dog, natural remedies and dog-specific shampoos are both excellent options.

    These products can leave your dog’s skin and coat feeling healthy and refreshed without the risk of harsh chemicals or allergic reactions. Be sure to do your research to find the best product for your furry friend’s specific needs.

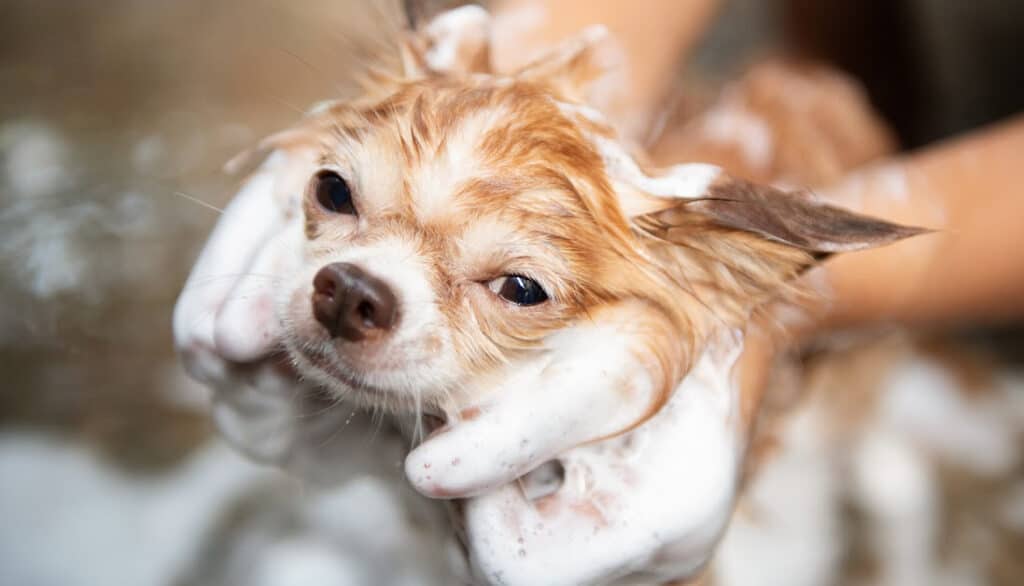
    yorkshire terrier getting a bath

    How to Safely Use Head and Shoulders on Dogs

    Now that we have discussed the benefits and risks of using Head and Shoulders on dogs, let’s talk about how to use it safely. It is important to follow some guidelines to ensure that your furry friend stays healthy and happy.

    Proper Dilution Ratios

    The first thing you need to know when using Head and Shoulders on your dog is how much to dilute it. It is essential always to dilute the shampoo before applying it to your dog’s skin.

    The appropriate ratio depends on the type of shampoo you are using, so make sure you read the label carefully. A general rule of thumb is a 1:1 ratio for mild cases or up to 1:5 for more severe conditions.

    In any case, do not use concentrated formulas as they can harm your pet’s skin. If you are unsure about what ratio is best for your dog, consult with a veterinarian or a professional groomer before using any new shampoo products.

    Frequency of Use

    The frequency in which you bathe your dog with Head and Shoulders also plays an important role in keeping them healthy. While it may be tempting always to keep them clean, over-bathing can dry out their skin leading to further problems such as itchiness or flaking. We recommend bathing your dog no more than once every three weeks with Head and Shoulders unless explicitly directed otherwise by a vet. However, if the dog has a specific condition that requires frequent baths with medicated shampoos containing pyrithione zinc as an active ingredient (the main component of Head & Shoulders), then bathing once weekly may be okay.

    In any case, pay attention to how your dog reacts to the shampoo and adjust accordingly. If you notice any unusual symptoms such as rashes, redness, or excessive scratching, discontinue use immediately and contact a veterinarian.

    Remember that Head and Shoulders is not a substitute for regular grooming practices such as brushing your pet’s coat daily or cleaning their ears regularly. These practices are essential to keep your pup healthy and happy.

    Conclusion

    Using Head and Shoulders on dogs can be beneficial but also carries some risks, so it’s important to weigh the pros and cons carefully. If you do decide to try Head and Shoulders on your pet, make sure you take all necessary safety precautions such as properly diluting the shampoo prior to use.

    Alternatively, consider trying some natural remedies or dog-specific shampoos that can provide similar benefits without the potential risks. Ultimately, what’s most important is taking good care of your dog’s skin and coat to keep them healthy, happy, and comfortable for years to come!

  • Can You Use Human Conditioner On Dogs? Find Out Here!

    Can You Use Human Conditioner On Dogs? Find Out Here!

    Medically Reviewed by: Dr. Candy Akers, DVM

    As a pet owner, you likely want your furry friend to look and feel their best. That’s why regular grooming is an essential part of pet care. You may have wondered “can you use human conditioner on dogs?”. The short answer is no.

    Grooming helps to keep your pet’s coat clean, healthy and free of tangles or mats. Additionally, it can help prevent skin problems and infections by removing dead skin cells and distributing the natural oils throughout the fur. Grooming is also important for maintaining good hygiene. Regular baths can help remove dirt, debris, and odors from your pet’s coat, preventing them from becoming smelly or uncomfortable.

    In addition to bathing, grooming may also include nail trimming, ear cleaning, teeth brushing and anal gland expression. Overall, proper grooming can contribute to a happier and healthier life for your furry friend.

    human conditioner on dogs

    Introducing Human Conditioner for Dogs

    Many of us use conditioner in our daily hair care routine to keep our locks soft and smooth. However, as a pet owner you may wonder if it’s safe to use human conditioner on your dog’s coat as well. While dogs have similar hair structures as humans do; they have different pH levels in their skin.

    Human shampoos and conditioners are designed with a pH level that works well for us but might not be ideal for dogs. If you use human conditioner on your dog’s coat regularly there could be negative side effects like dryness or sensitivity due to changes in the pH balance of their skin.

    That being said, there are some instances where using human conditioner on dogs might be okay if done properly with appropriate products under professional guidance; however this should not become a substitute for specialized dog products specifically formulated with safe ingredients that work best with dogs’ skins. Next up we will explore in detail some reasons why using human conditioners on dogs may not always be the safest choice along with possible side effects.

    Can You Use Human Conditioner on Dogs?

    You may have wondered if you can use your own conditioner on your furry friend to make their coat silky and smooth. Unfortunately, it’s not always a good idea. There are a few key differences between human hair and dog hair that make human conditioners unsuitable for dogs.

    Differences Between Human and Dog Hair

    First of all, dog hair is more prone to getting matted or tangled than human hair. This means that it needs to be brushed regularly to prevent mats from forming, especially in longhaired breeds.

    In addition, dog skin is much more sensitive than human skin. Using the wrong products can irritate their skin and cause discomfort.

    Dog hair is also much coarser and thicker than human hair. Dogs have two types of coat: undercoat and topcoat.

    The undercoat is soft, fluffy fur that keeps them warm in cold weather, while the topcoat is longer and stiffer. Some breeds only have an undercoat or a topcoat, while others have both.

    Why Using Human Conditioner on Dogs May Not Be Ideal

    Because of the differences between human and dog hair, using human conditioner on dogs may not be ideal. For one thing, most shampoos and conditioners designed for humans contain harsh chemicals that can strip the natural oils from your dog’s coat and leave it dry and brittle.

    In addition to stripping natural oils from your pet’s coat, using your own personal products could cause severe irritation or allergic reactions for some pooches! It’s crucial to remember that animals’ bodies process things differently than ours do.

    picture of dog being professionally bathed

    Potential Risks and Side Effects of Using Human Conditioners on Dogs

    Using conditioner meant for humans could lead to severe consequences such as extreme itchiness, flaky skin or even infections! If any type of swelling or skin irritation starts, make sure to contact your vet immediately. Another risk is that some human conditioners contain ingredients that are toxic to dogs.

    Certain essential oils, such as tea tree oil, can be harmful or even deadly if ingested. Human hair products are designed to work on our hair type and not meant to be consumed by pets.

    The Bottom Line: Use Dog-Specific Conditioner

    Instead of taking a risk with your furry friend’s well-being, it’s better to stick with a conditioner specially formulated for dogs. Dog-specific conditioners are made with ingredients that are safe and effective for their unique needs. They help keep their coat healthy and shiny without causing any harm.

    When choosing a dog conditioner, make sure you read the label carefully and choose one that matches your dog’s coat type and needs. For example, if you have a longhaired breed, look for a conditioner designed specifically for long coats that can help address the issue of mats.

    While using human conditioner may seem like an easy solution to keep your dog’s fur looking good, it could actually end up being more harm than good! When it comes down to grooming your beloved pet always opt for products specially formulated for them – after all you want them happy and healthy in the long run!

    dog being professionally bathed in a tub

    Alternatives to Human Conditioners for Dogs

    If you’ve decided that using human conditioner on your furry friend isn’t the best option, don’t worry! There are plenty of dog-specific conditioners on the market that are safe and effective.

    Here are some of our top picks:

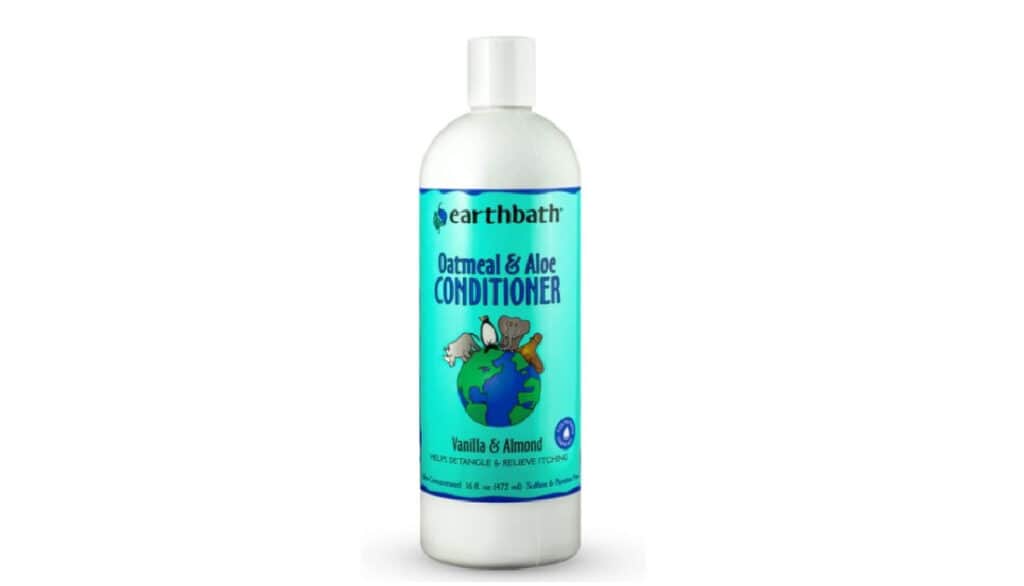
    1. Earthbath Oatmeal and Aloe Dog Conditioner

    This conditioner is made with all-natural ingredients, including oatmeal and aloe vera which help soothe and moisturize your dog’s skin. It’s also pH-balanced for dogs, so it won’t cause any irritation or dryness.

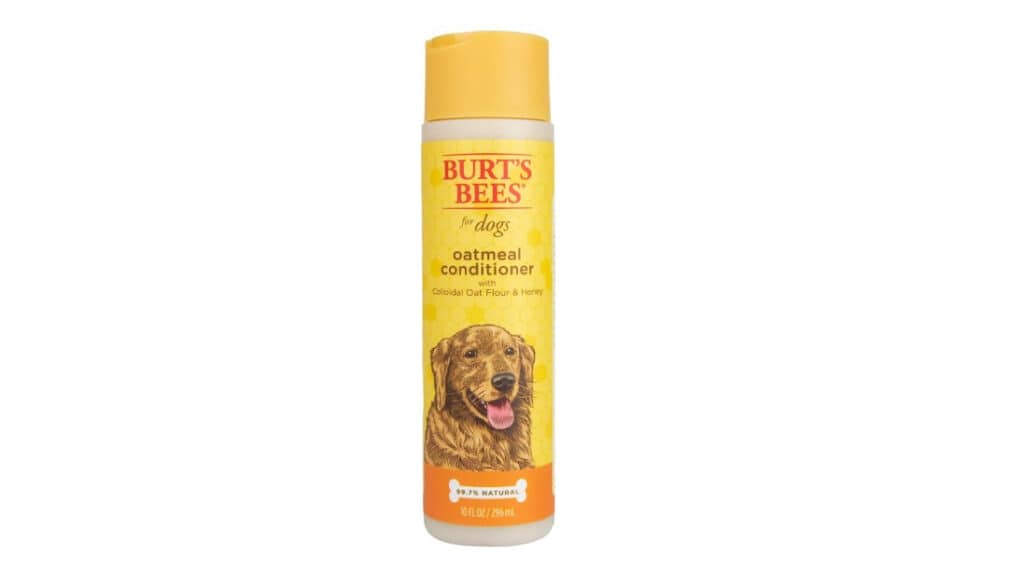
    2. Burt’s Bees for Dogs Oatmeal Conditioner

    Burt’s Bees is a trusted brand among pet owners, and their oatmeal conditioner is no exception. It’s made with colloidal oat flour which helps soothe dry, itchy skin, and honey which adds extra moisture.

    3. Isle of Dogs Silky Coating Conditioner

    This conditioner is specifically designed for dogs with long coats who need extra detangling power. It contains jojoba oil which helps smooth out tangles and adds shine to your dog’s coat.

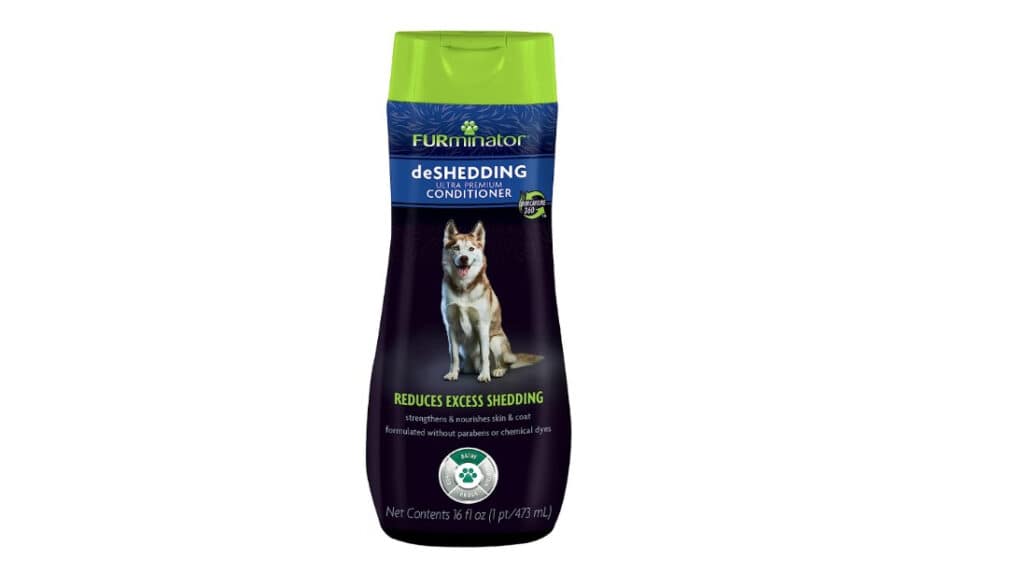
    4. Furminator deShedding Ultra Premium Dog Conditioner

    If your dog sheds a lot, this conditioner might be right up your alley! It’s designed to reduce shedding by removing loose undercoat hair without damaging the topcoat. It also contains omega-3 fatty acids which help promote healthy skin.

    The Benefits of Using Dog-Specific Conditioners

    There are several benefits to using conditioners that are specifically formulated for dogs:

    Better pH Balance:

    Dog skin has a different pH level than human skin, so using human conditioner can throw off your dog’s natural balance. Dog-specific conditioners are formulated to match your dog’s pH level, which helps prevent irritation and dryness.

    Safer Ingredients:

    Human conditioners often contain ingredients that can be harmful to dogs, such as sulfates and parabens. Dog-specific conditioners are made with safe ingredients that are gentle on your pup’s skin and coat.

    Improves Coat Health:

    Using a conditioner designed for dogs can help improve the overall health of their coat. These products often contain ingredients like omega-3 fatty acids and vitamins that promote healthy hair growth and reduce shedding.

    Easier Grooming:

    Dog-specific conditioners often have detangling properties that make brushing and grooming easier. This is especially helpful if you have a breed with long hair or if your dog is prone to matting.

    Long-Term Cost Savings:

    While dog-specific conditioners may seem more expensive than human ones at first glance, they actually provide long-term cost savings. Because they’re formulated specifically for dogs, you’ll use less product over time and won’t need to purchase additional grooming products like detanglers or anti-shedding sprays. While it may seem convenient to use human conditioner on your furry friend, it’s best to stick with products designed specifically for dogs.

    Not only will these conditioners help keep your pet’s skin and coat healthy, but they’ll also make grooming easier in the long run. So next time you’re shopping for grooming supplies, make sure to check out the dog-specific options!

    human conditioner on dogs

    How to choose the right conditioner for your dog

    Determine Your Dog’s Coat Type and Needs

    The first step in choosing the right conditioner for your dog is to determine its coat type. Just like humans, dogs have different hair types, and each requires specific care.

    Some breeds have long, thick coats that need more frequent brushing and conditioning than short-haired breeds. You should also consider any specific needs your dog may have.

    For example, if your dog has dry skin or allergies, you’ll want to look for a conditioner that’s gentle and moisturizing. If your pet spends a lot of time outdoors or is prone to getting dirty quickly, you may want to opt for a tougher conditioning formula.

    Tips for Selecting a Suitable Conditioner

    Once you’ve determined your dog’s coat type and needs, it’s time to select an appropriate moisturizer. Here are some tips to help you make the right choice:

    • Look for conditioners specially formulated for dogs: While it may be tempting to use human conditioners on pets because they’re readily available at home, most contain chemicals that aren’t safe for canines.
    • Choose natural ingredients: Avoid conditioners with harsh chemicals or synthetic fragrances that can irritate skin and cause discomfort.
    • Read reviews: A great way to learn about many products available in the market is by reading online reviews from other pet owners who have used them before.
    • Talk with your veterinarian: Your vet will typically know which products are safe and effective based on factors like breed, age, overall health status/issues of the pet.
    • Consider cost-effectiveness: While investing in good quality conditioners pays off in the long run because they nourish pets’ hair as well as skin making them strong and shiny; there are plenty of affordable options on the market so don’t shy away if you are on a tight budget.

    Ultimately, the key to choosing the right conditioner for your dog is to consider their unique needs and preferences. With a little bit of research and trial-and-error, you’ll find a product that works great for your furry friend, keeping their coat healthy and shiny.

    Conclusion

    While it may be tempting to simply use your own conditioner on your furry friend, it’s important to understand the differences between human and dog hair and the potential risks involved. Human hair is very different from dog hair, and using a product not specifically designed for a dog’s coat can cause irritation or even harm. That being said, there are many safe and effective conditioners specifically formulated for dogs.

    These products are designed with their unique coat types in mind and can provide great benefits when used properly. When choosing a conditioner for your pup, it’s important to consider their coat type and any specific needs they may have.

    Some dogs may require a moisturizing conditioner to combat dry skin, while others may need one that helps detangle their fur. It’s also important to choose products that are safe for animals.

    Look for conditioners that are made with natural ingredients and avoid those with harsh chemicals or fragrances that could irritate your pet’s skin. Remember, just because something is safe for humans doesn’t mean it’s safe for dogs!

    Take the time to research and choose products that are appropriate for your furry friend. At the end of the day, keeping our pets healthy and happy is our top priority.

    By using safe and effective products specifically formulated for dogs, we can ensure they get the care they need without putting them at risk. So next time you’re considering using human conditioner on your pup, think twice – there are plenty of better options out there!

  • Do Long Nails Hurt Dogs? Facts About Toe Nail Pain & Nail Length

    Do Long Nails Hurt Dogs? Facts About Toe Nail Pain & Nail Length

    *This page may include affiliate links, which means that if you make a purchase through one of the product links, we may receive a small commission. For full affiliate disclosure please see our disclaimer page.

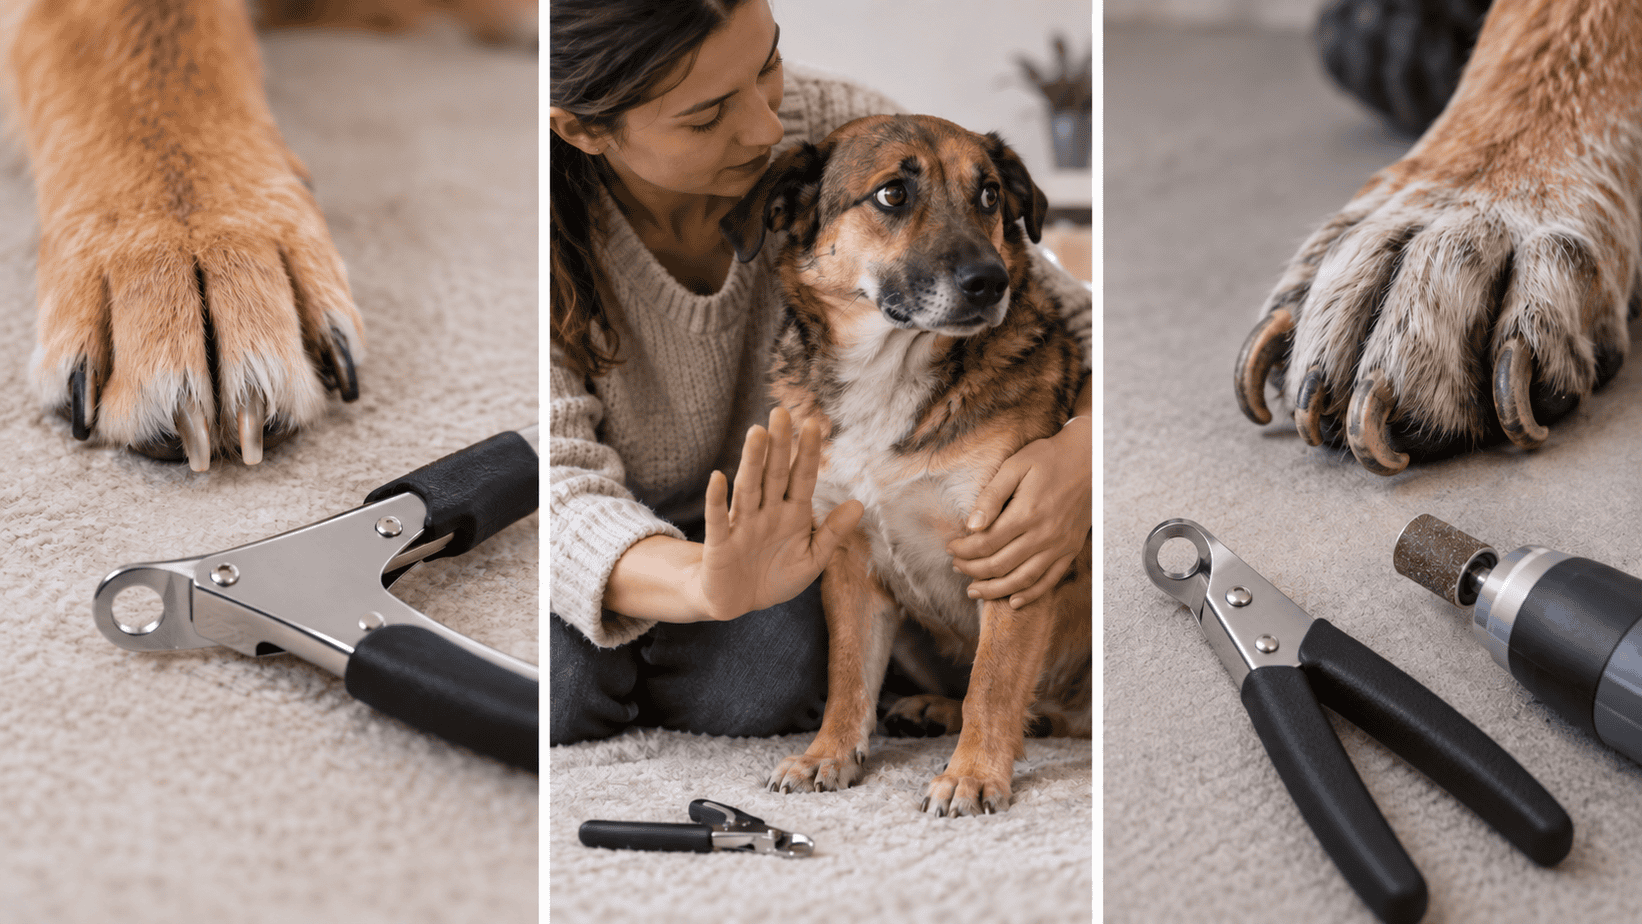
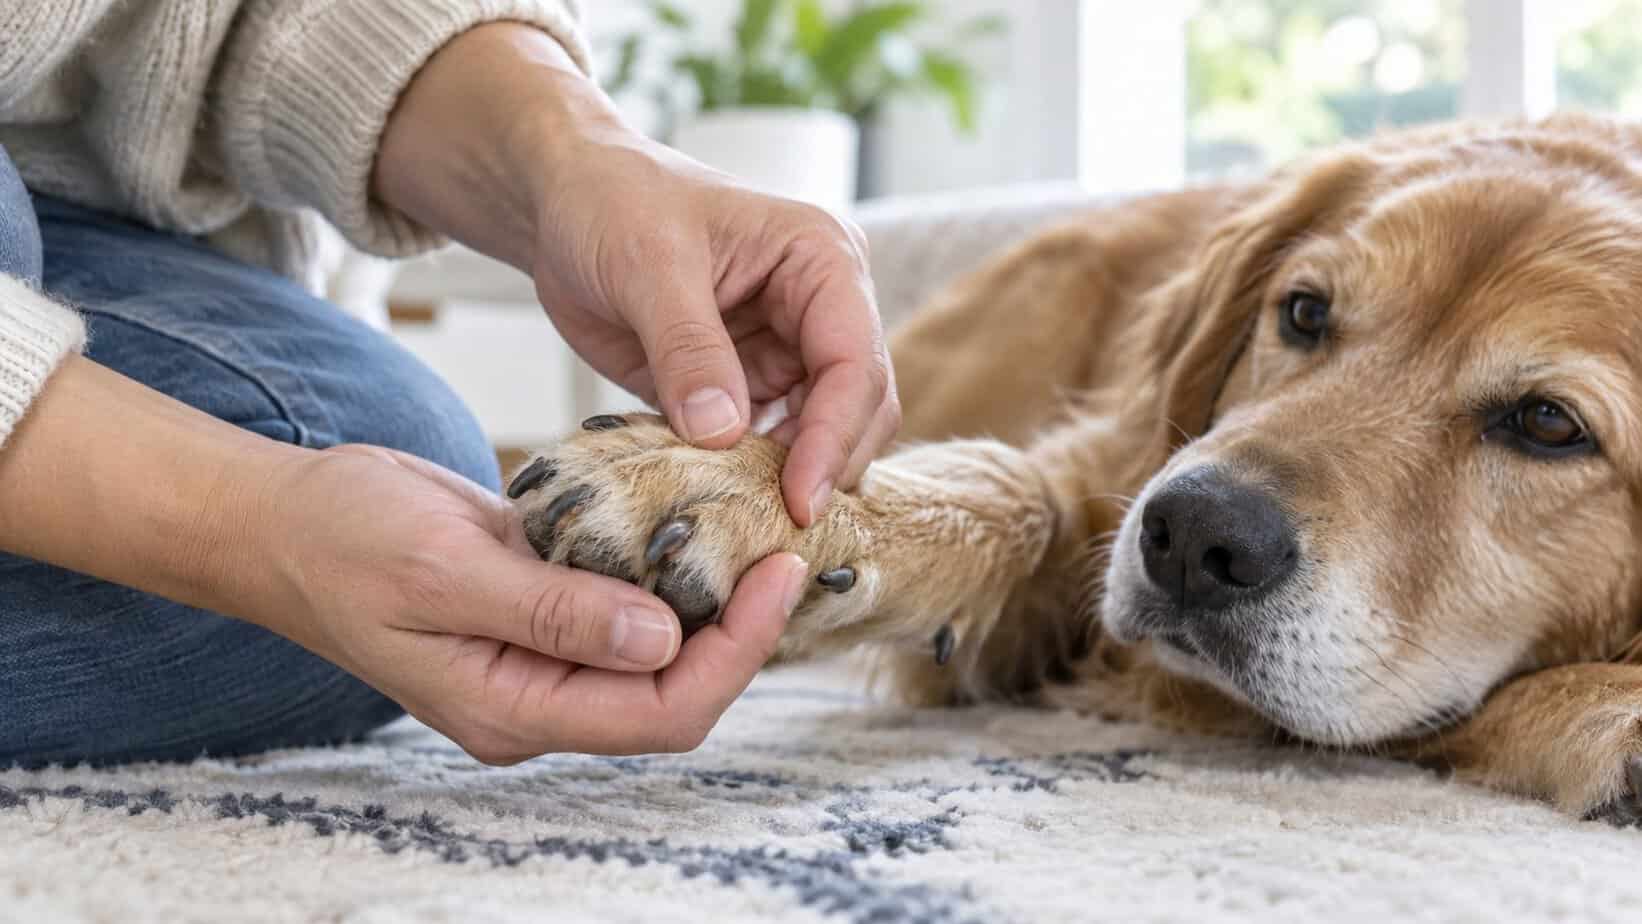
    When we think of pampering our dogs, a luxurious bath or a playful day at the park often comes to mind. But did you know that one of the most crucial aspects of ensuring their comfort might be lying at the tips of their paws? Yes, I’m talking about their nails. Many of us might overlook this small detail, assuming it’s just a grooming necessity. But in reality, it’s much more than that. Long nails can cause discomfort, change the way our beloved canines walk, and even lead to more serious health concerns. As a dog lover, I’ve often found myself pondering, “Do long dog nails hurt? How long is too long?”

    If you’ve been asking yourself the same questions, you’re in the right place. Dive into this article with me, and let’s unravel the facts about dog toe nail pain and nail length, ensuring our furry friends trot happily and pain-free!

    do long nails hurt dogs

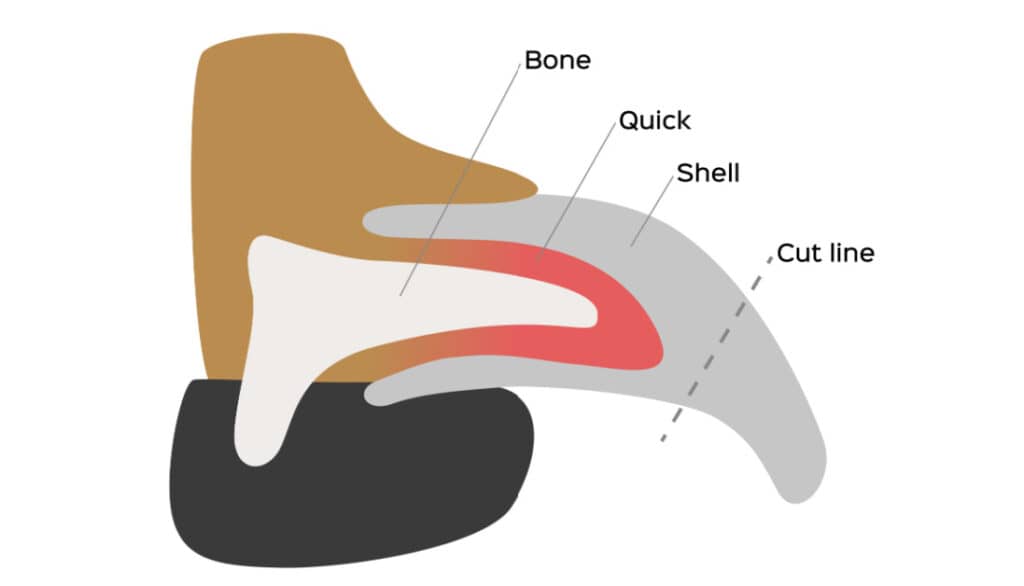
    The Anatomy of a Dog’s Nail

    Have you ever curiously observed your dog’s nails and wondered what they’re made of or why they even exist? Just like human nails have a purpose beyond being canvases for colorful nail polish, a dog’s nails serve more functions than simply tapping away on your hardwood floor. Let’s embark on a little exploration of the intricacies of our canine friend’s nails.

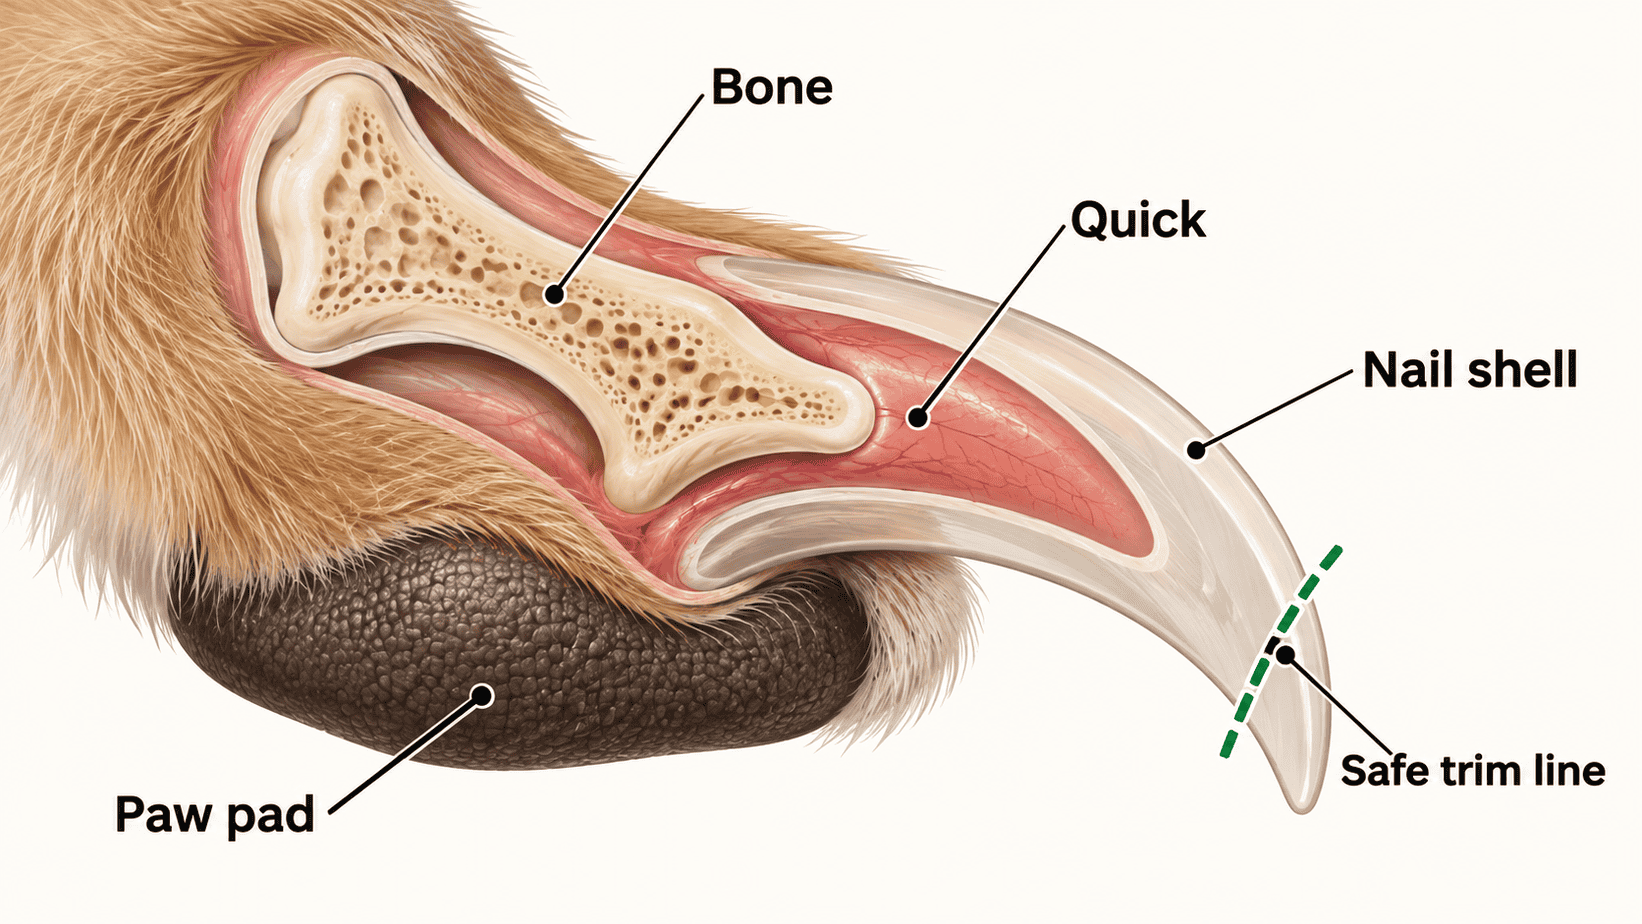
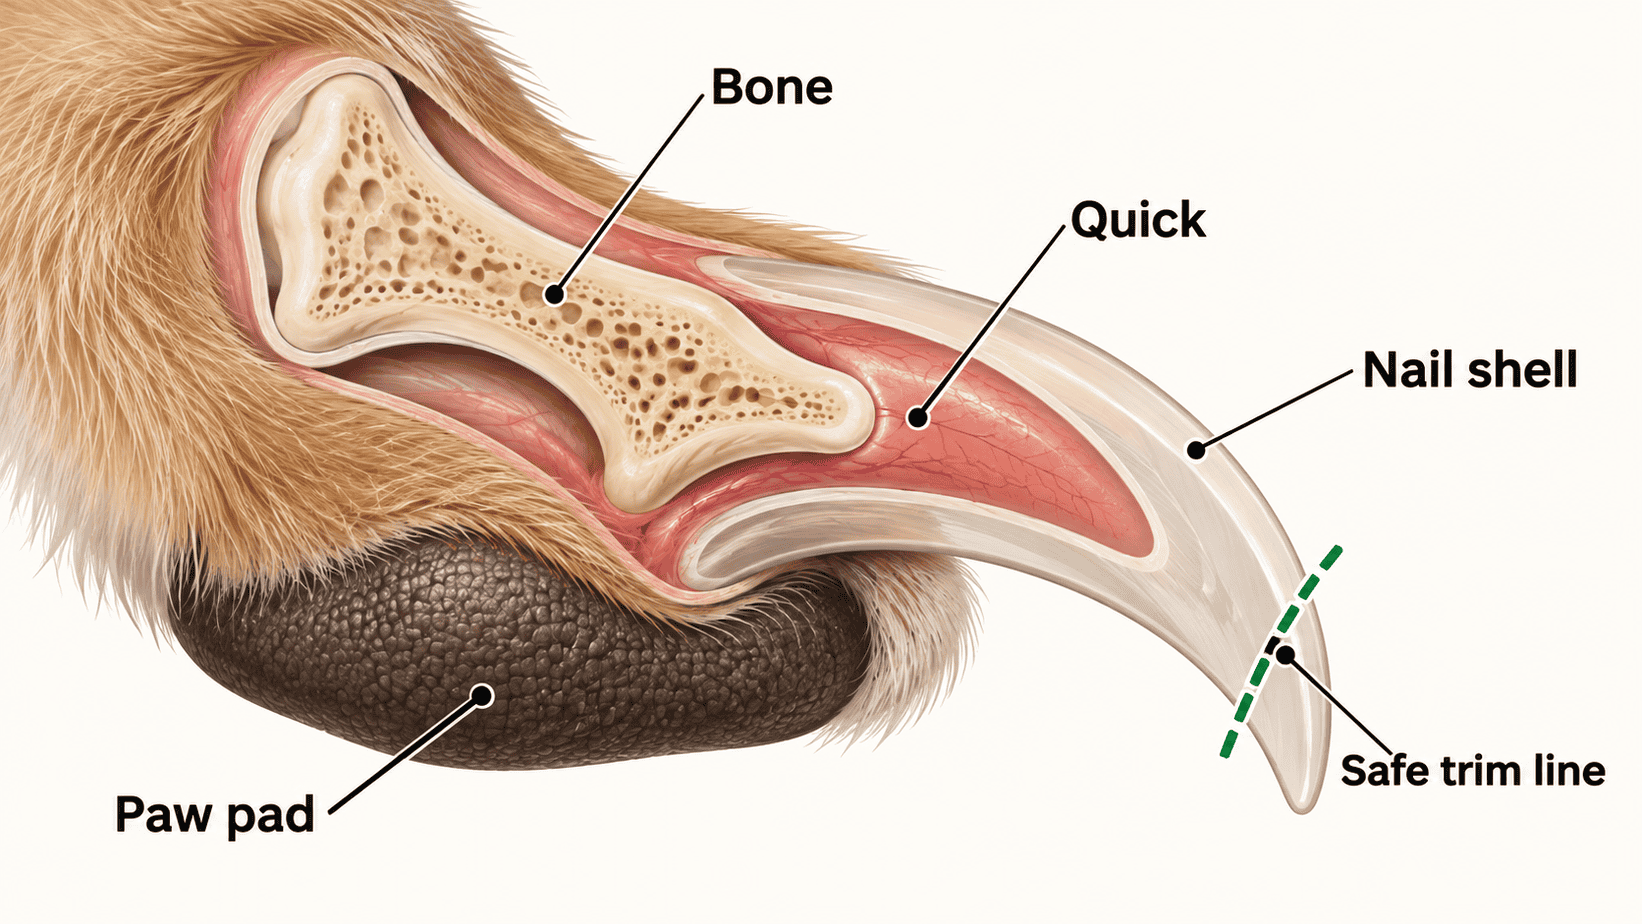
    1. Structure and Layers: Much like our own nails, a dog’s nail isn’t just a single piece of hard substance. Instead, it consists of layers, mainly:

    • Keratin: This is the hard, protective outer layer that you see and hear clicking on the floor. It’s a protein that gives the nail its firmness.
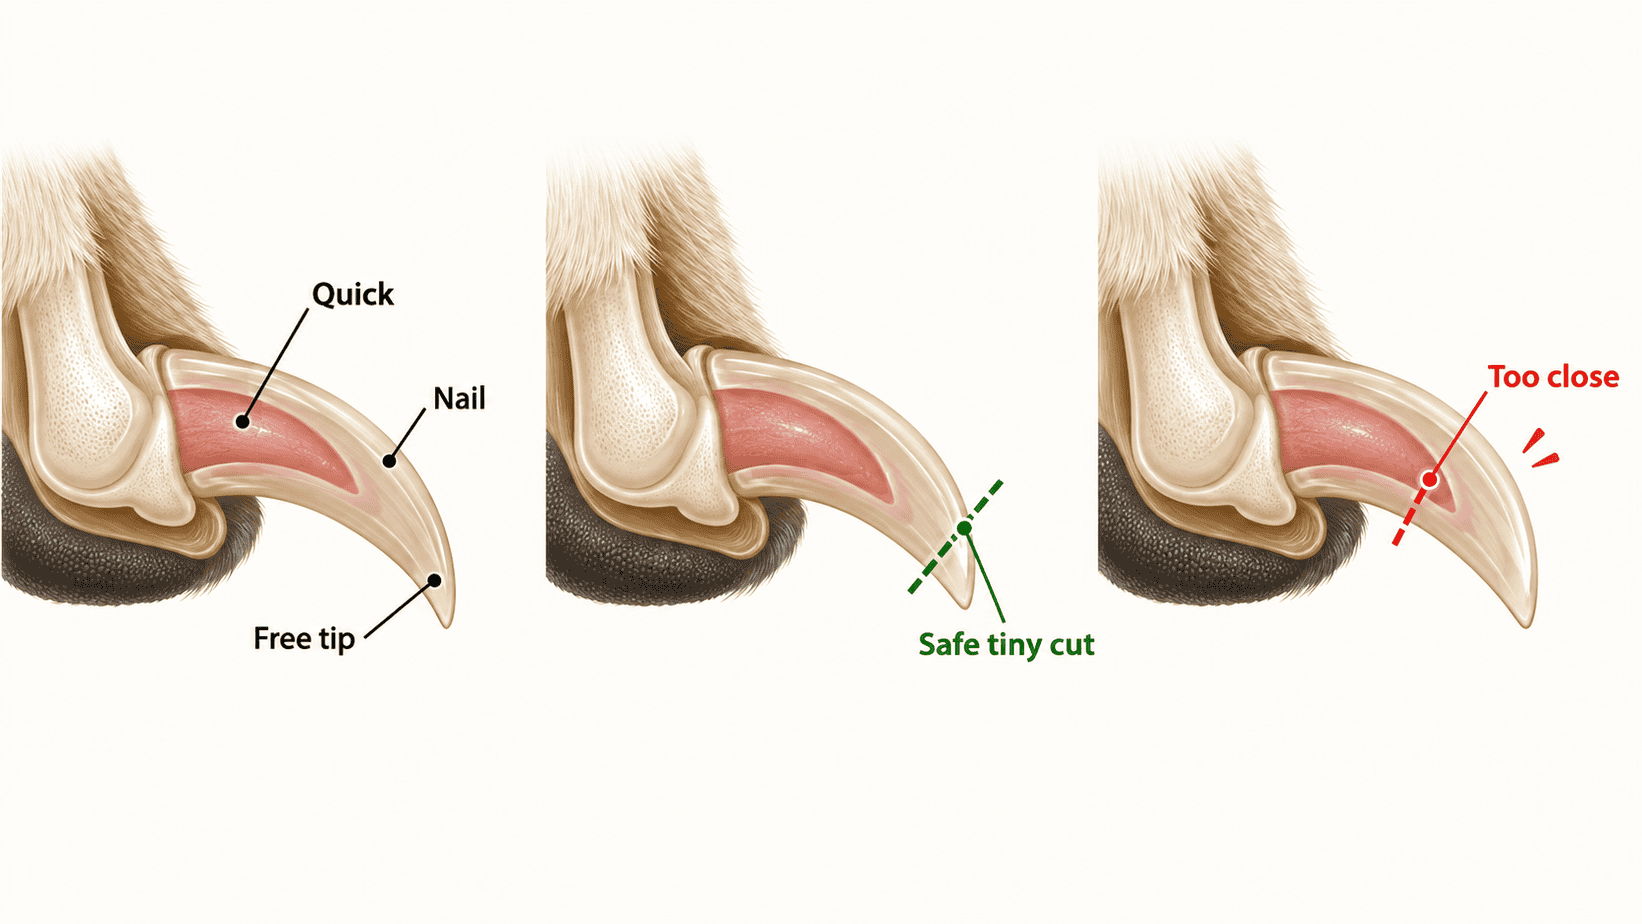
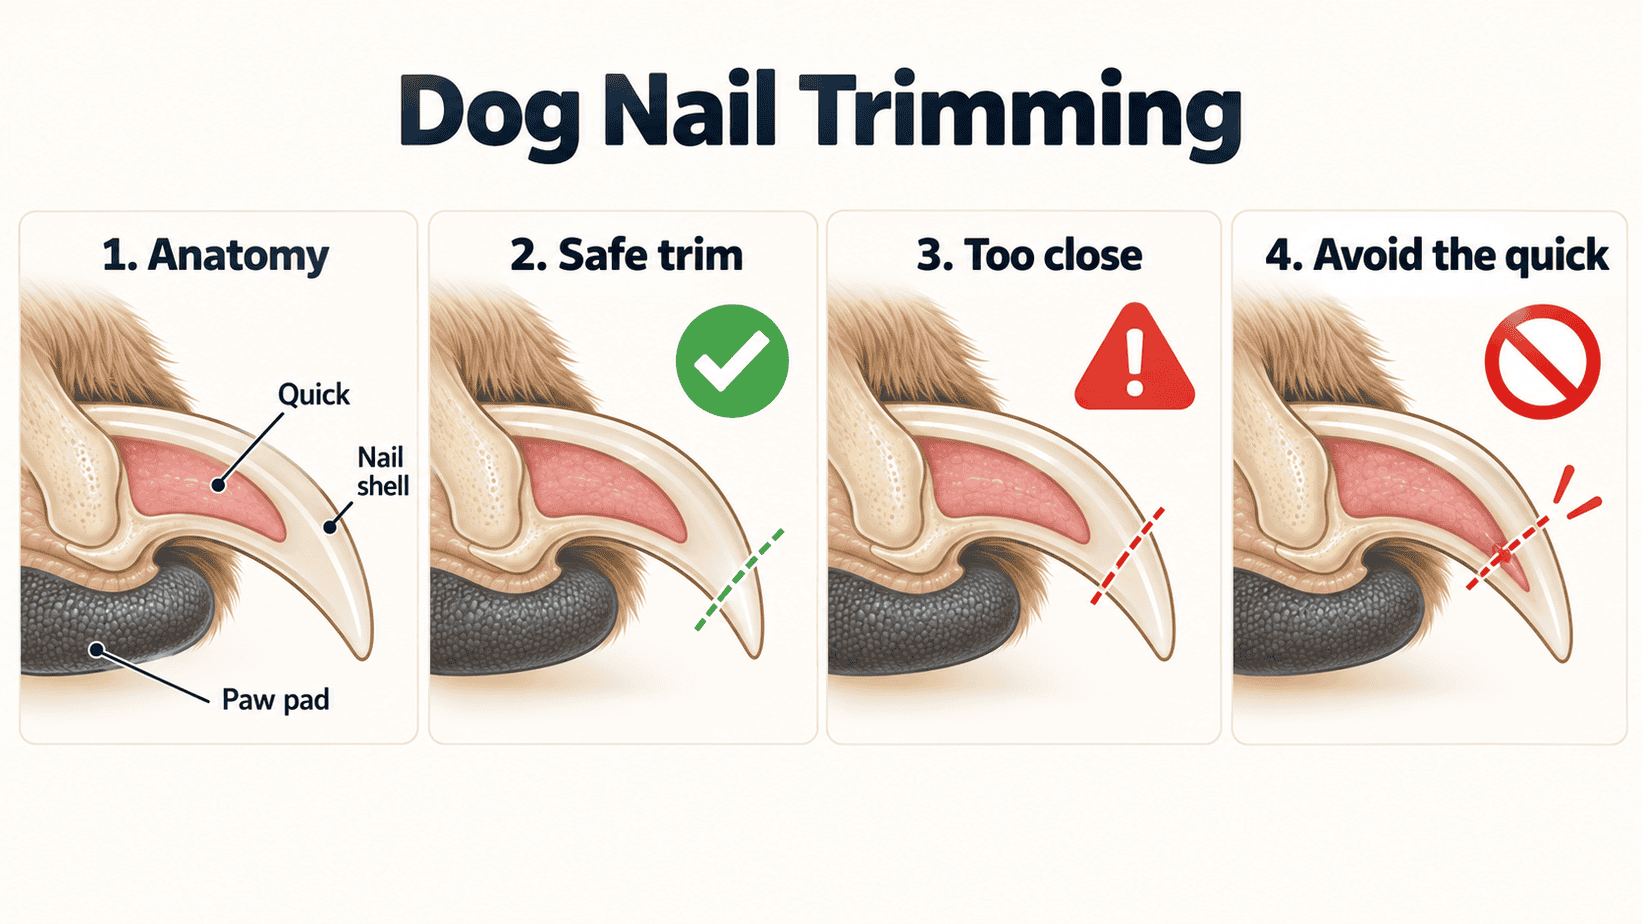
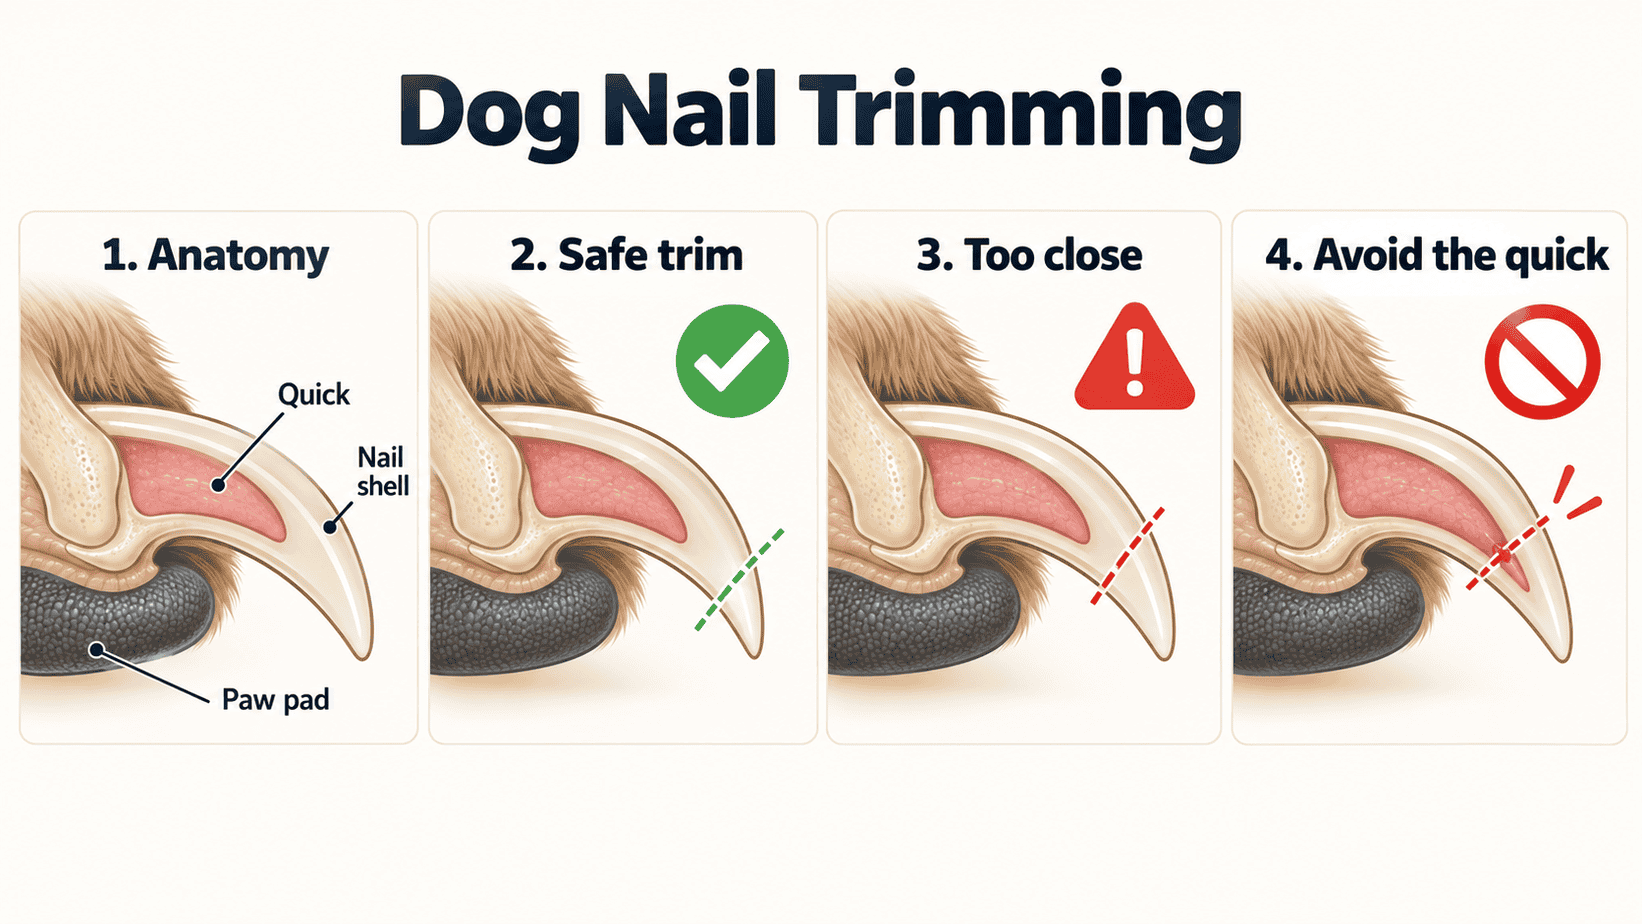
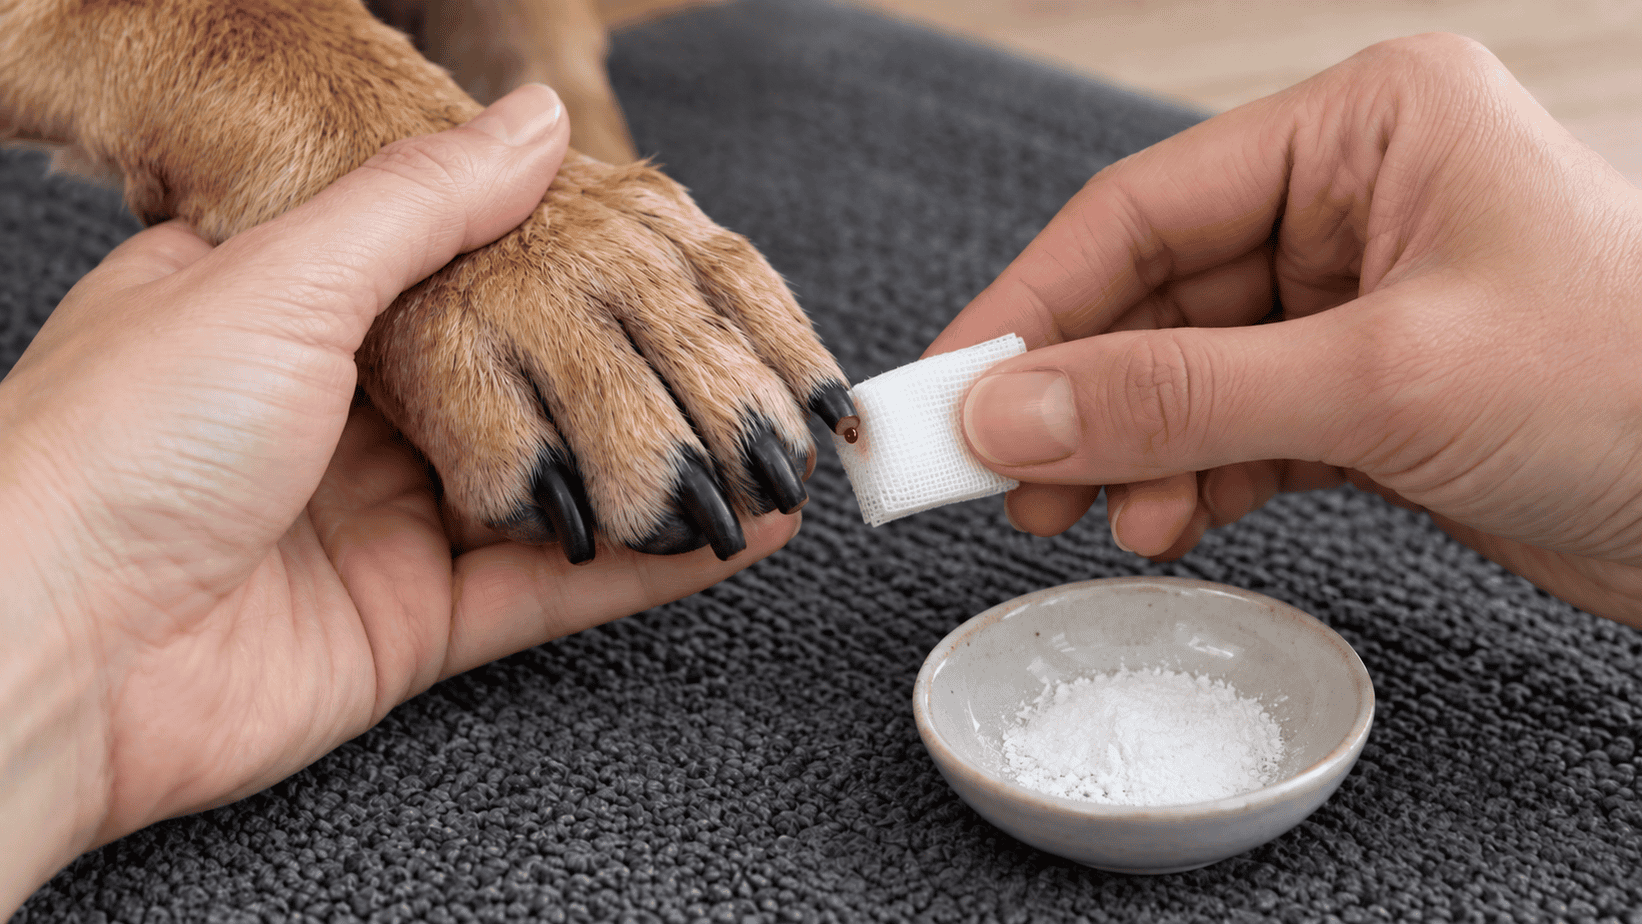
    • The Quick: Beneath that hard exterior lies the quick. If you’ve ever spotted a dark or pinkish section inside a semi-translucent nail, that’s it! It’s sensitive, filled with blood vessels and nerves. A nick to the quick can be painful for the dog and can bleed quite a bit.

    2. Nail Growth: Just like human hair or nails, dog nails are continuously growing. Factors like genetics, diet, and activity level can influence the growth rate. That’s why some dogs may need more frequent nail trims than others.

    3. Purpose and Function: A dog’s nails are more than just adornments. They aid in gripping surfaces when they run, help them dig, and even serve as a tool for certain tasks, like holding onto a chew toy!

    It’s fascinating, isn’t it? Just by understanding the anatomy of our dog’s nails, we can better appreciate the importance of keeping them in tip-top shape. So, next time you see your dog tapping away on your tiles, remember there’s a whole world of anatomy and function in those tiny nail tips.

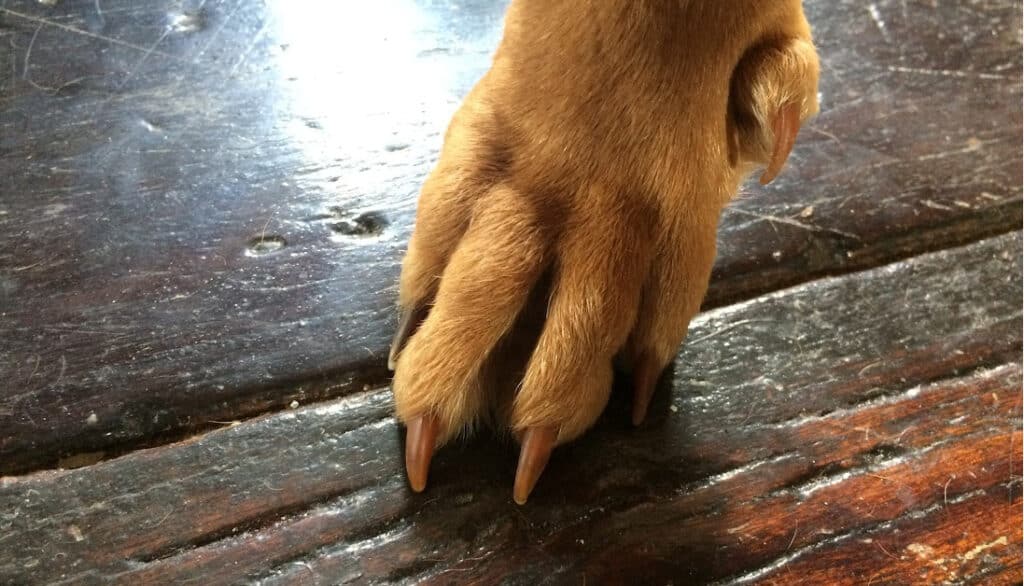
    anatomy of a dog toenail

    Why Long Nails Can Be Harmful

    Every dog owner recognizes the rhythmic “click, click, click” of canine nails on a hard surface. While it might be a melody of daily life for some, it might also be a sign that your dog’s nails need a little attention. Let’s explore why keeping those nails in check is more than just a beauty regimen.

    Altered Gait

    Imagine if you had to wear tight shoes or ones with an uneven sole constantly. It sounds uncomfortable, doesn’t it? For dogs, elongated nails can mean walking on the backs of their footpads, which can throw off their entire body alignment. Over time, this unnatural posture can lead to joint strain and potentially contribute to arthritis.

    The Risk of Injury & Pain

    Longer nails have a knack for finding trouble. They are more susceptible to splitting, breaking, or getting ensnared in carpets and crevices. And when they do get damaged? It’s not a mere annoyance; it can be genuinely agonizing. Plus, a torn nail can bleed and, if not treated appropriately, become infected.

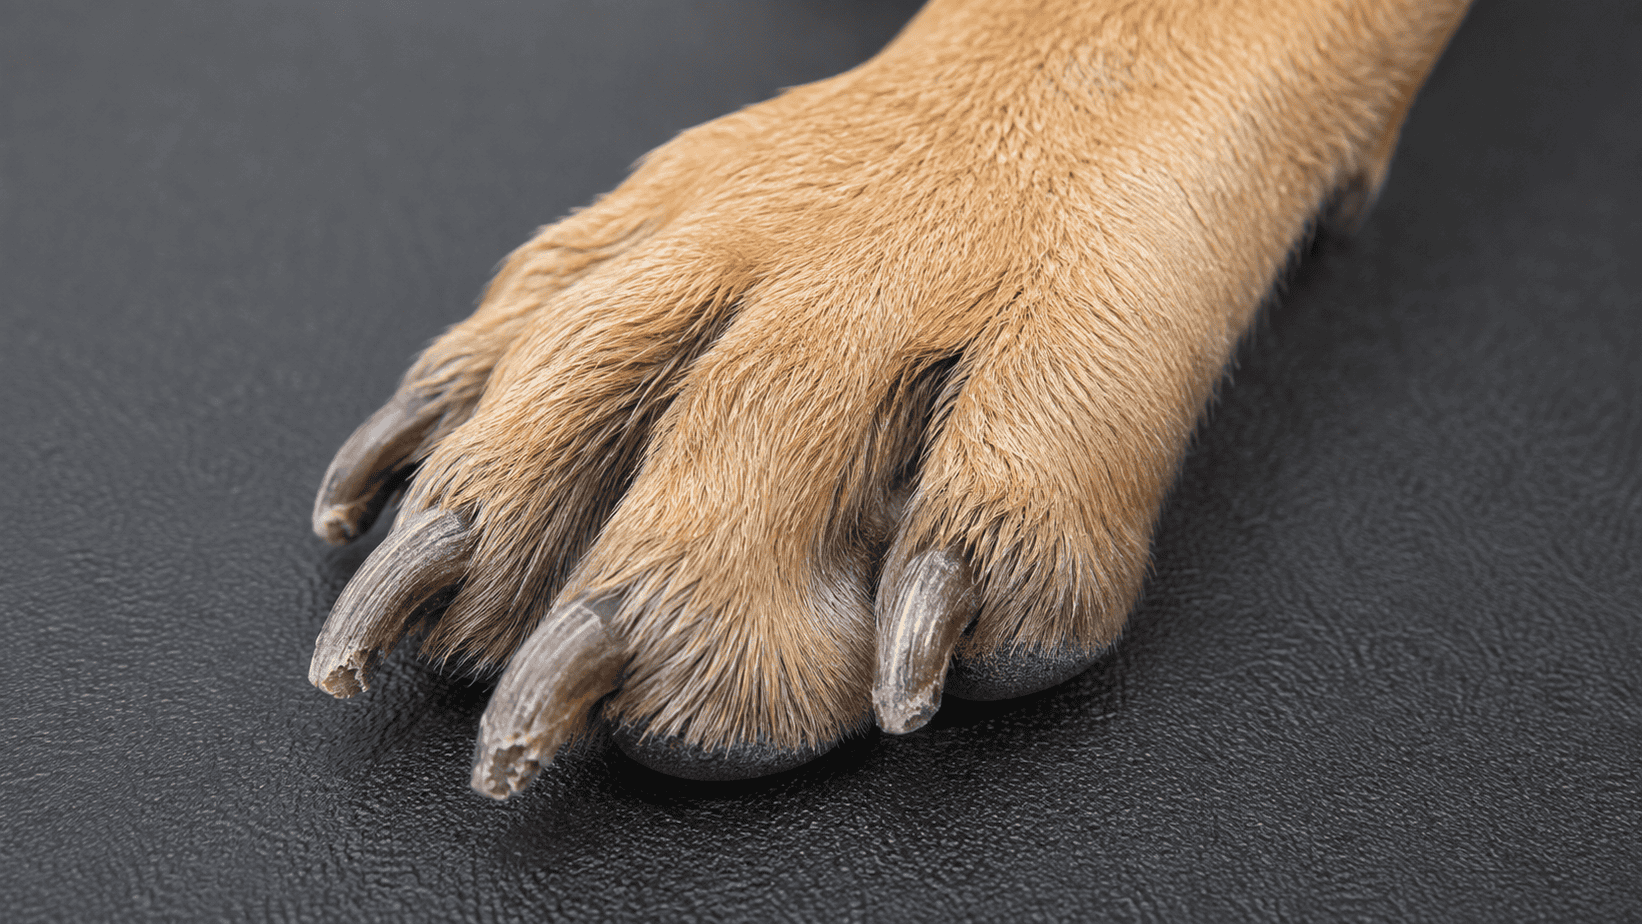
    injured dog toenail

    Joint & Bone Stress

    The fallout from an altered posture doesn’t stop at the feet. With prolonged nail lengths forcing dogs to walk abnormally, there’s added stress on their joints and bones. This strain can be especially concerning for senior dogs or breeds that are naturally predisposed to joint issues.

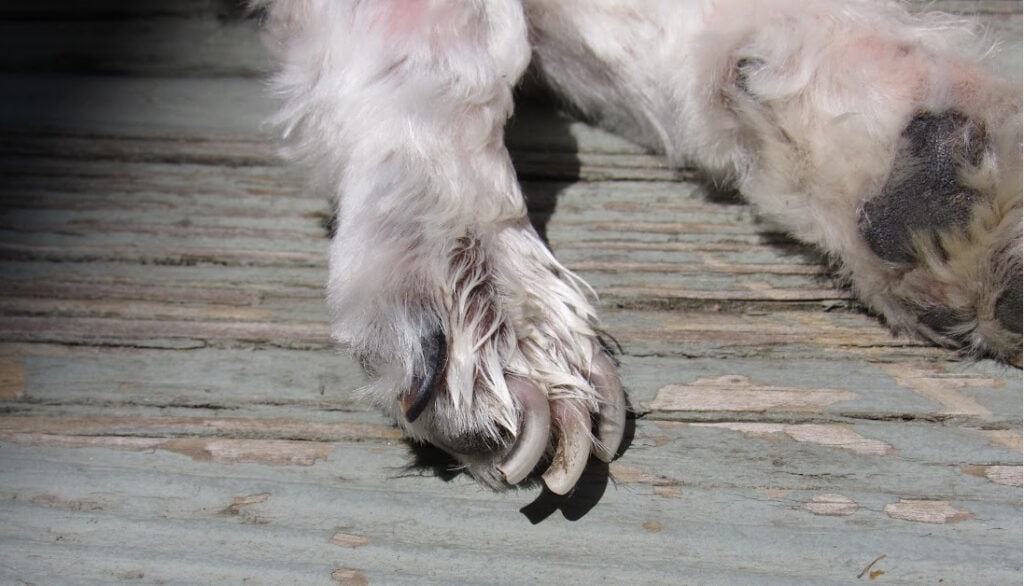
    The Threat of Nails Curving Into Paw Pads

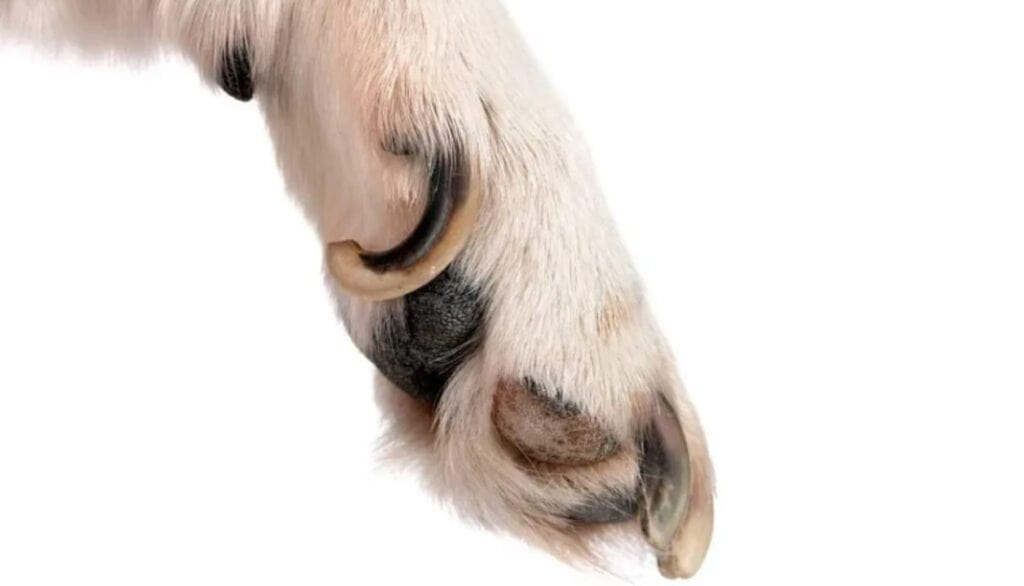
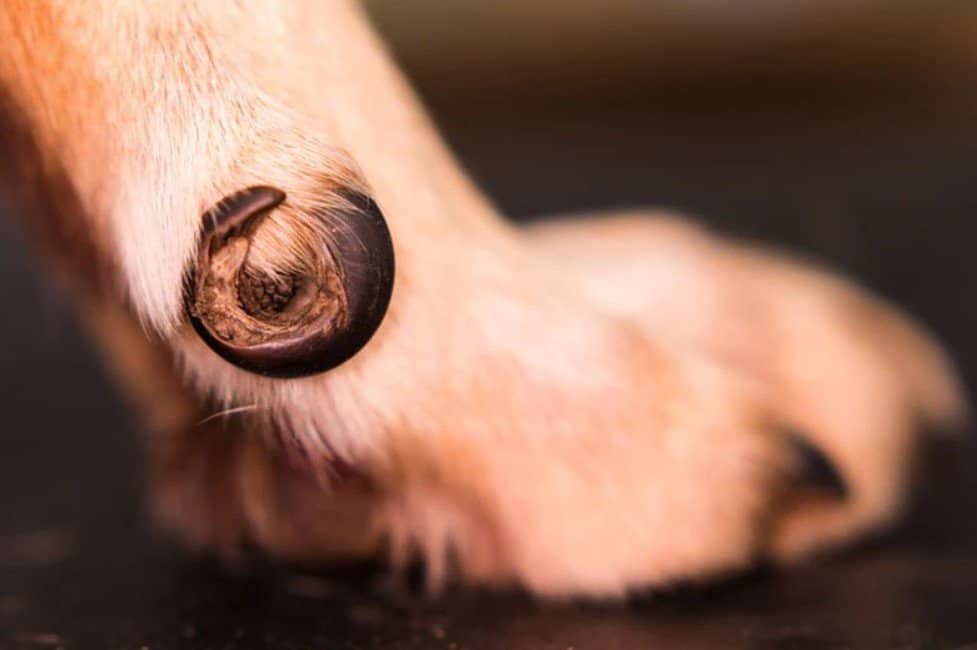
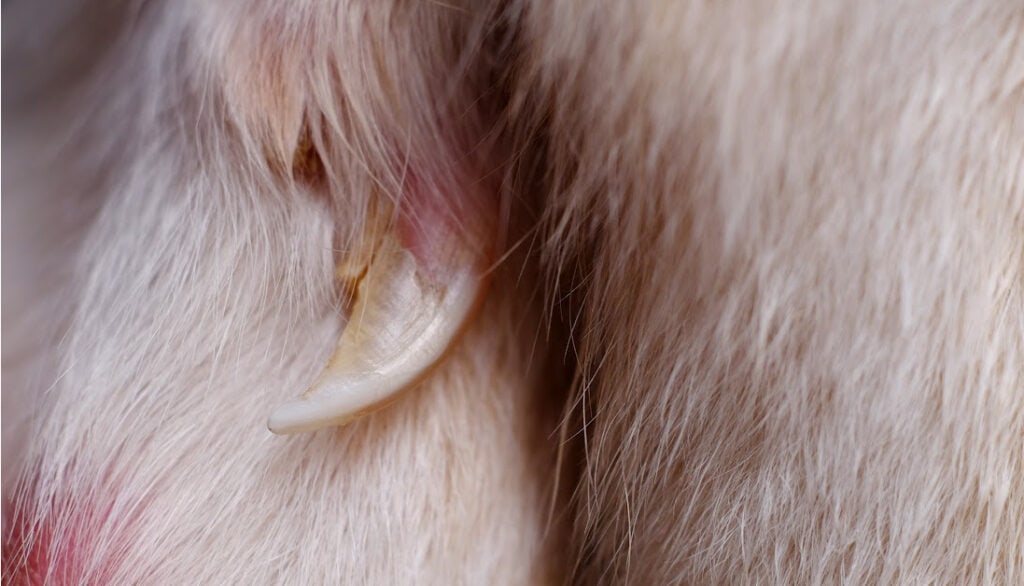
    One of the more cringe-worthy consequences of neglecting nail length is the possibility of nails, particularly the dewclaws, curving and growing into the paw pads. Not only is this painfully distressing, but it also poses a risk of infections and additional complications.

    In essence, while long nails might seem like a superficial issue, they carry genuine health implications for our furry friends. Recognizing the importance of regular nail trims can make all the difference in ensuring our dogs prance about comfortably and healthily.

    ingrown dog toenail

    Signs Your Dog Might Be Experiencing Pain from Long Nails

    Every dog expresses discomfort differently, but there are common signs that can indicate your pup might be in pain due to their long nails. Here’s what to keep an eye out for:

    Limping or Favoring a Paw

    If your dog suddenly starts limping or avoids putting weight on one of their paws, it could be because a long nail is causing discomfort. It’s even more suspicious if there’s no apparent injury or foreign object in their paw.

    Reluctance to Walk or Play

    Dogs typically have a zest for life, and if you notice a sudden decline in their enthusiasm for walks or play, their nails might be the culprits. Experiencing pain every step of the way can quickly dampen their spirits.

    Clicking Sound on Hard Surfaces

    While this might not indicate pain per se, a consistent clicking sound when your dog walks on hard surfaces like tiles or hardwood often means their nails are too long. It’s a clear cue for a nail check!

    dog chewing on long toenails

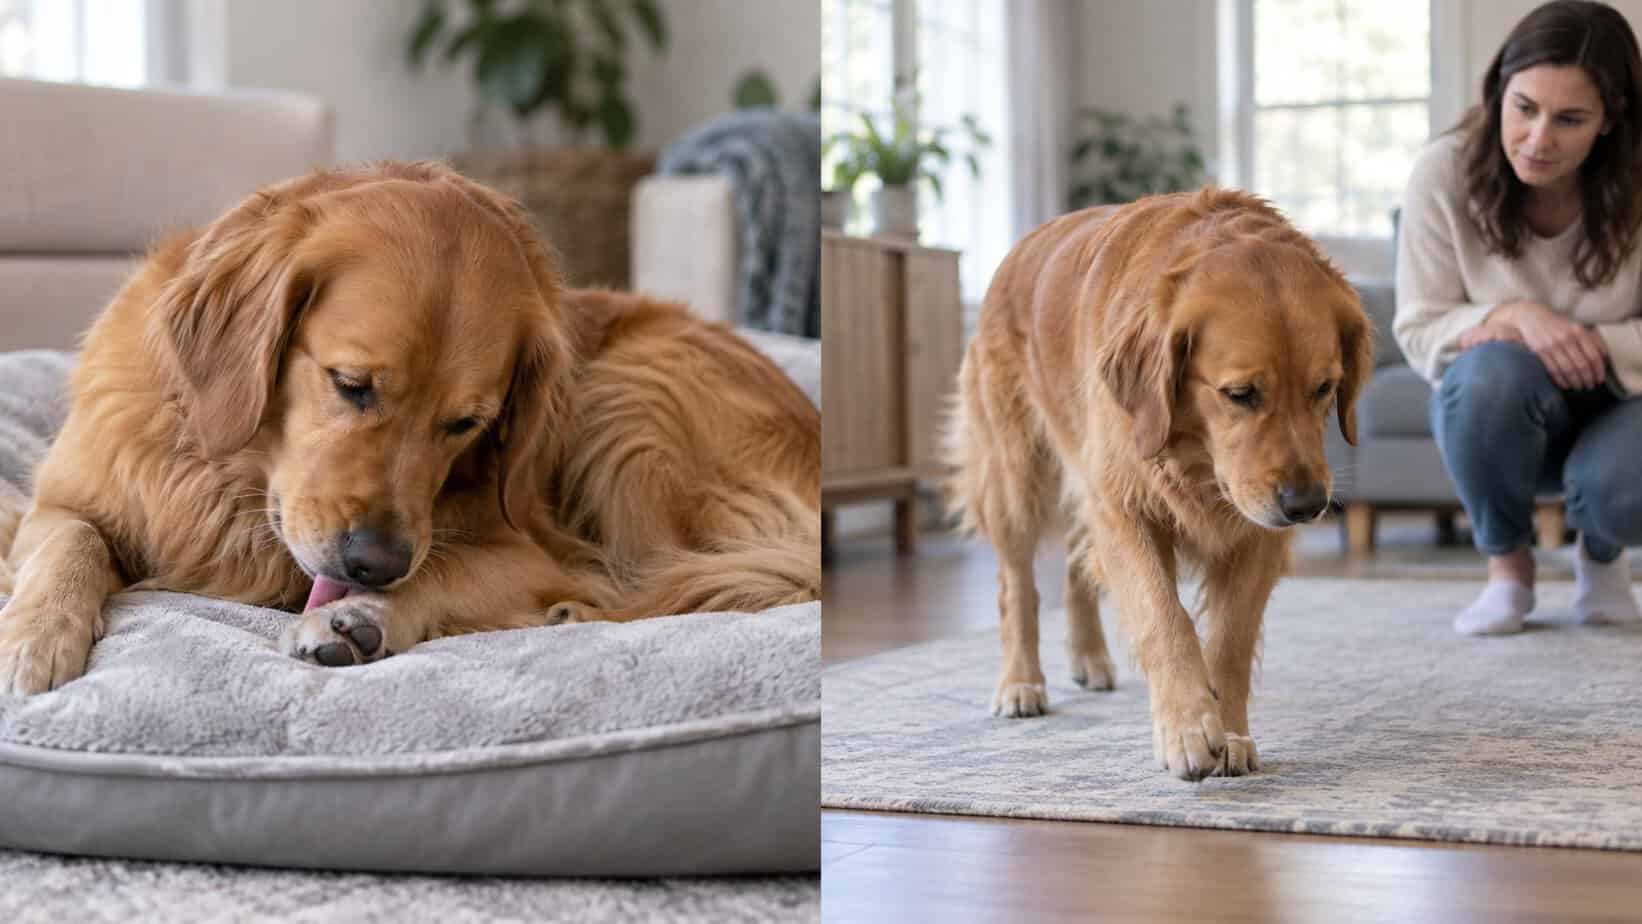
    Overlicking or Biting at Their Paws

    Dogs will often try to soothe discomfort by licking or biting the affected area. If your pet is incessantly attending to their paws, it could be a sign that long nails are causing irritation or pain.

    Visible Curvature or Twist in the Nails

    If you can see that one or more of your dog’s nails are curving sideways or starting to twist, it’s a clear sign they’ve grown too long. Such deformities can press into the paw pads, leading to pain and potential infections.

    While some of these signs can stem from other issues, it’s essential to regularly check and maintain your dog’s nails. Not only will you prevent potential pain and complications, but you’ll also ensure your furry friend is comfortable and happy trotting beside you.

    The Proper Length for Dog Nails

    Keeping our dogs comfortable and injury-free often comes down to understanding and maintaining the right nail length. But what is the “proper” length, and how can we determine it? Let’s delve into some guidelines and tips.

    No Contact with the Ground

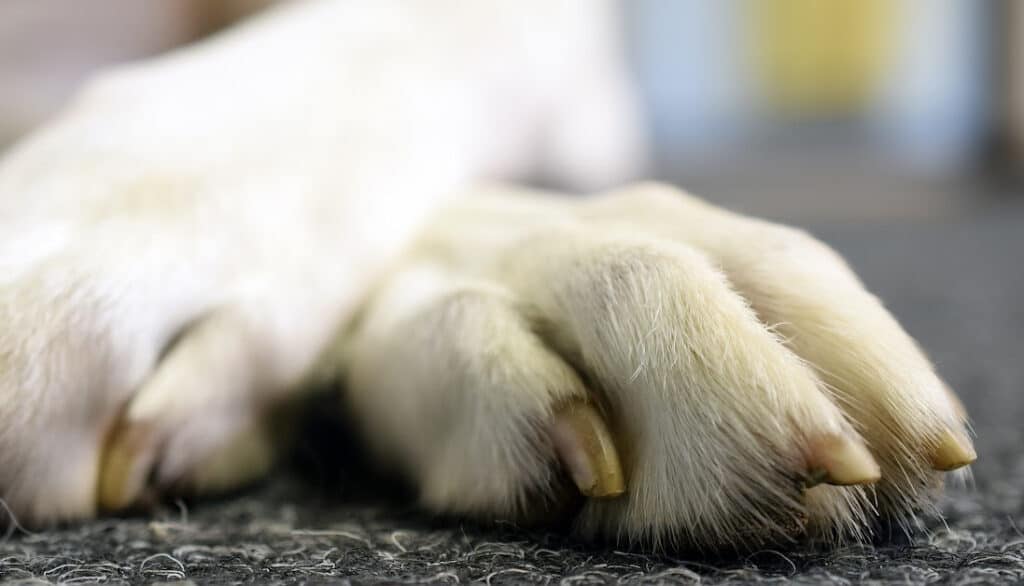
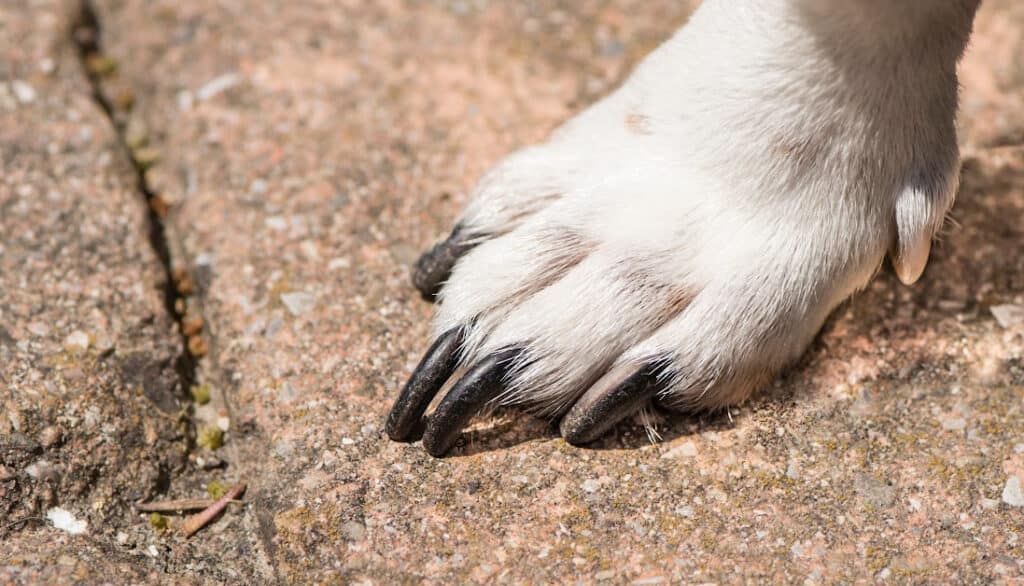
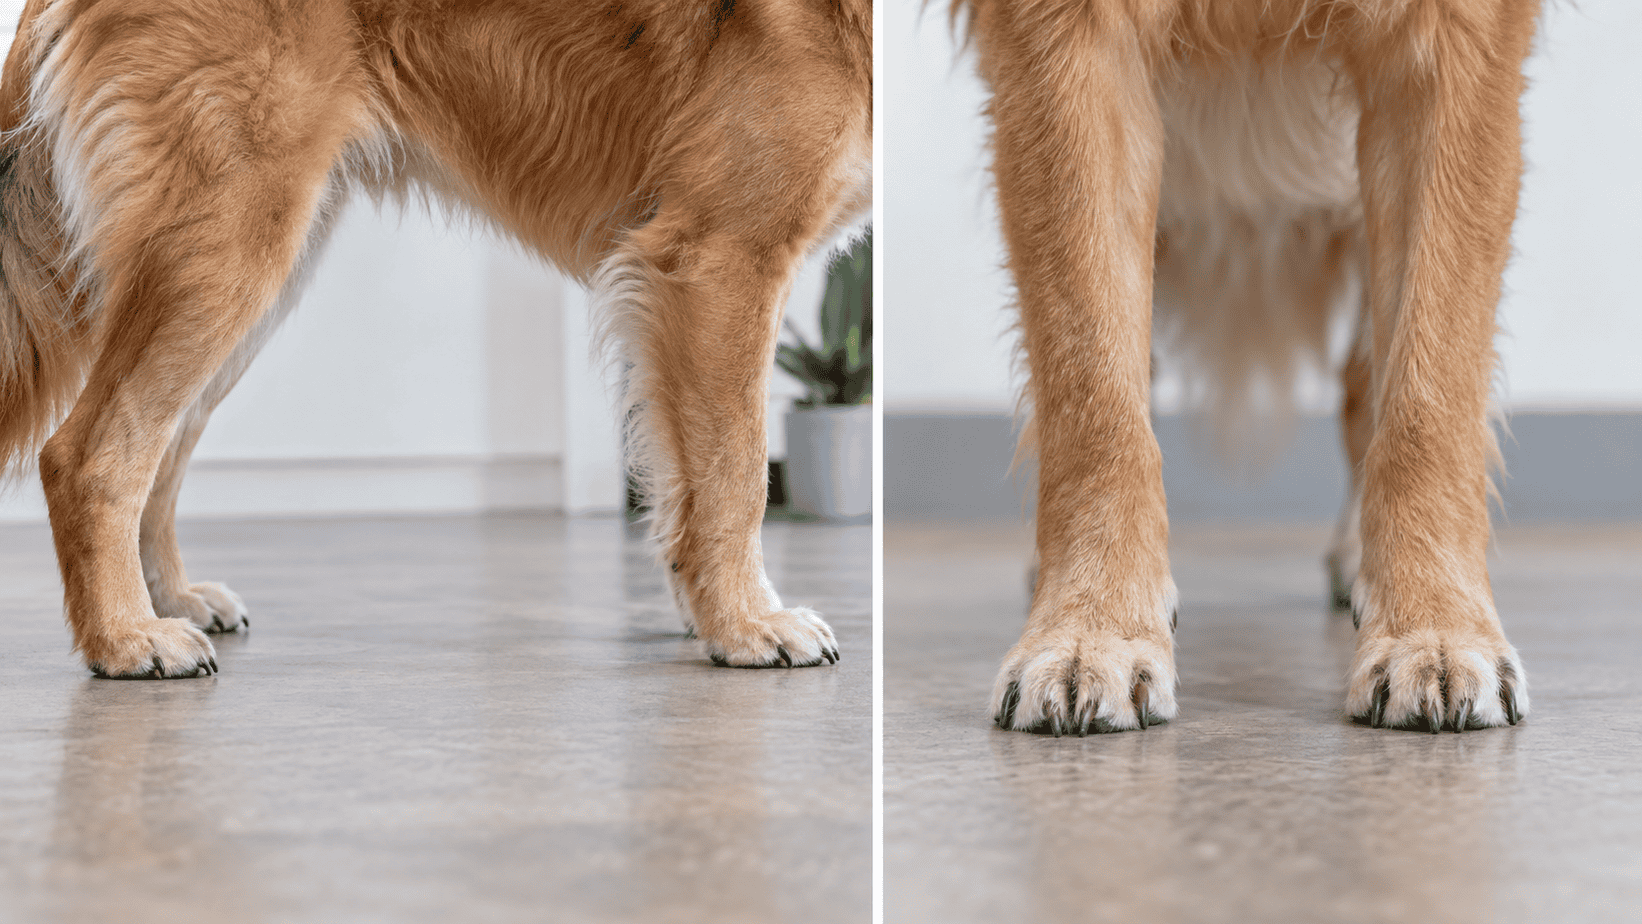
    A straightforward rule of thumb (or should we say “paw”?) is that when your dog stands on a flat surface, their nails shouldn’t touch the ground. If you hear a clicking sound when they walk on hard surfaces, it’s a sign the nails are too long.

    Look for a Natural Curve

    While each dog’s nails are different, a naturally occurring curve without any extreme twists or bends is a good indicator of healthy nail length. When nails get too long, they often start to curl, which can lead to potential pain and injury.

    Different Breeds, Different Needs

    It’s worth noting that different breeds and even individual dogs might have varying nail growth rates and structures. Breeds with more robust paws might naturally have slightly longer nails that don’t cause discomfort, while smaller breeds may require more frequent trims.

    Consistent Trimming is Key

    Instead of aiming for a specific length, a more practical approach is to engage in regular nail trims. Keeping the nails at a consistent, comfortable length reduces the risk of overcutting or causing pain.

    When in Doubt, Consult a Professional

    If you’re ever unsure about the correct nail length or feel uncomfortable trimming your dog’s nails, it’s always best to consult a professional groomer or veterinarian. They can offer guidance tailored to your specific dog and ensure that the nails are kept at a healthy length.

    Remember, the ultimate goal is to ensure our dogs are comfortable and free from any potential nail-related discomfort. Regular checks and maintenance, combined with understanding the right nail length for your specific pup, will go a long way in ensuring their paws stay in tip-top shape!

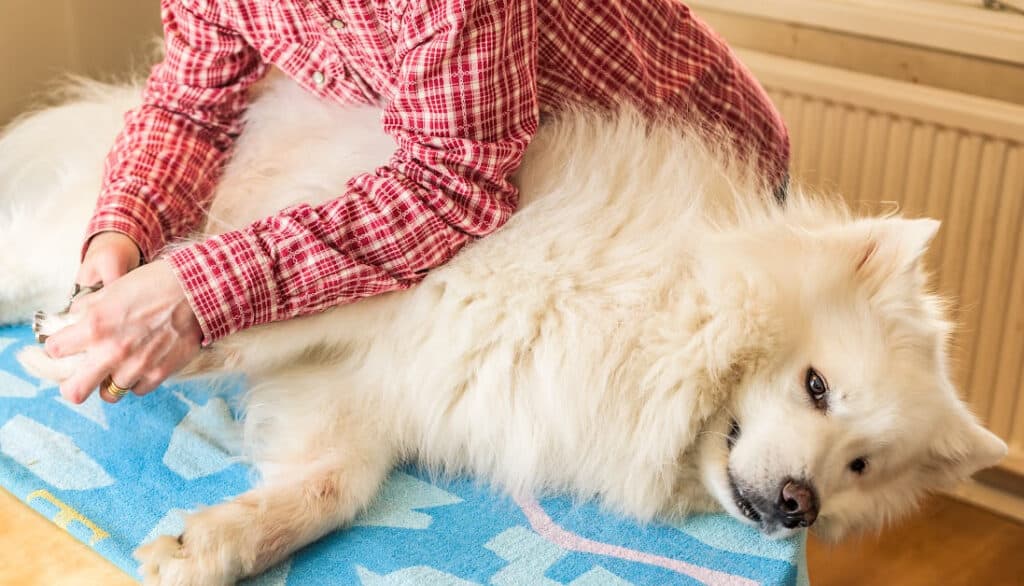
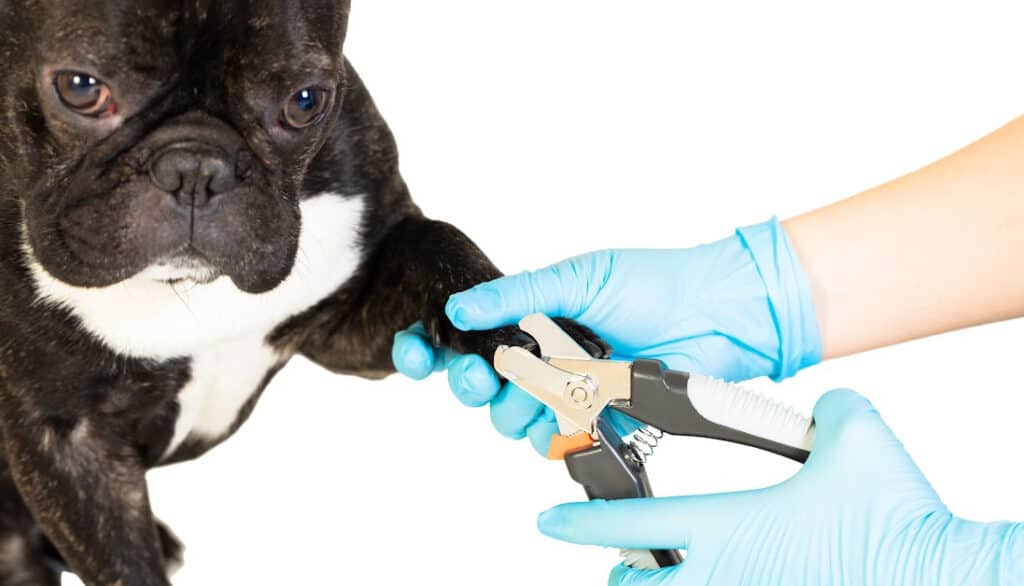
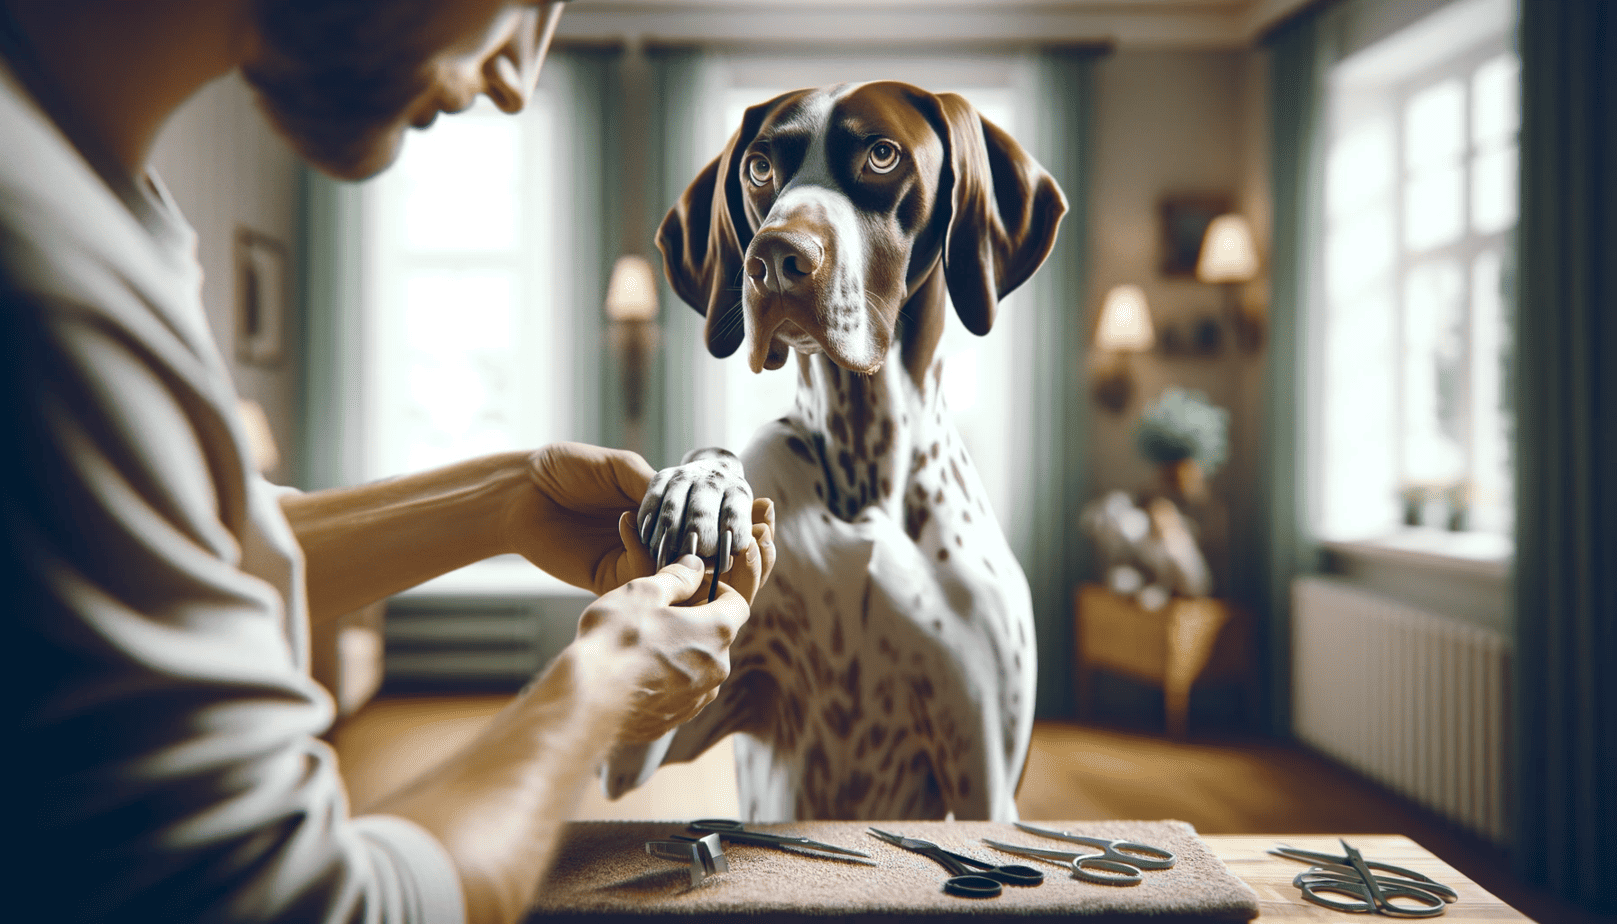
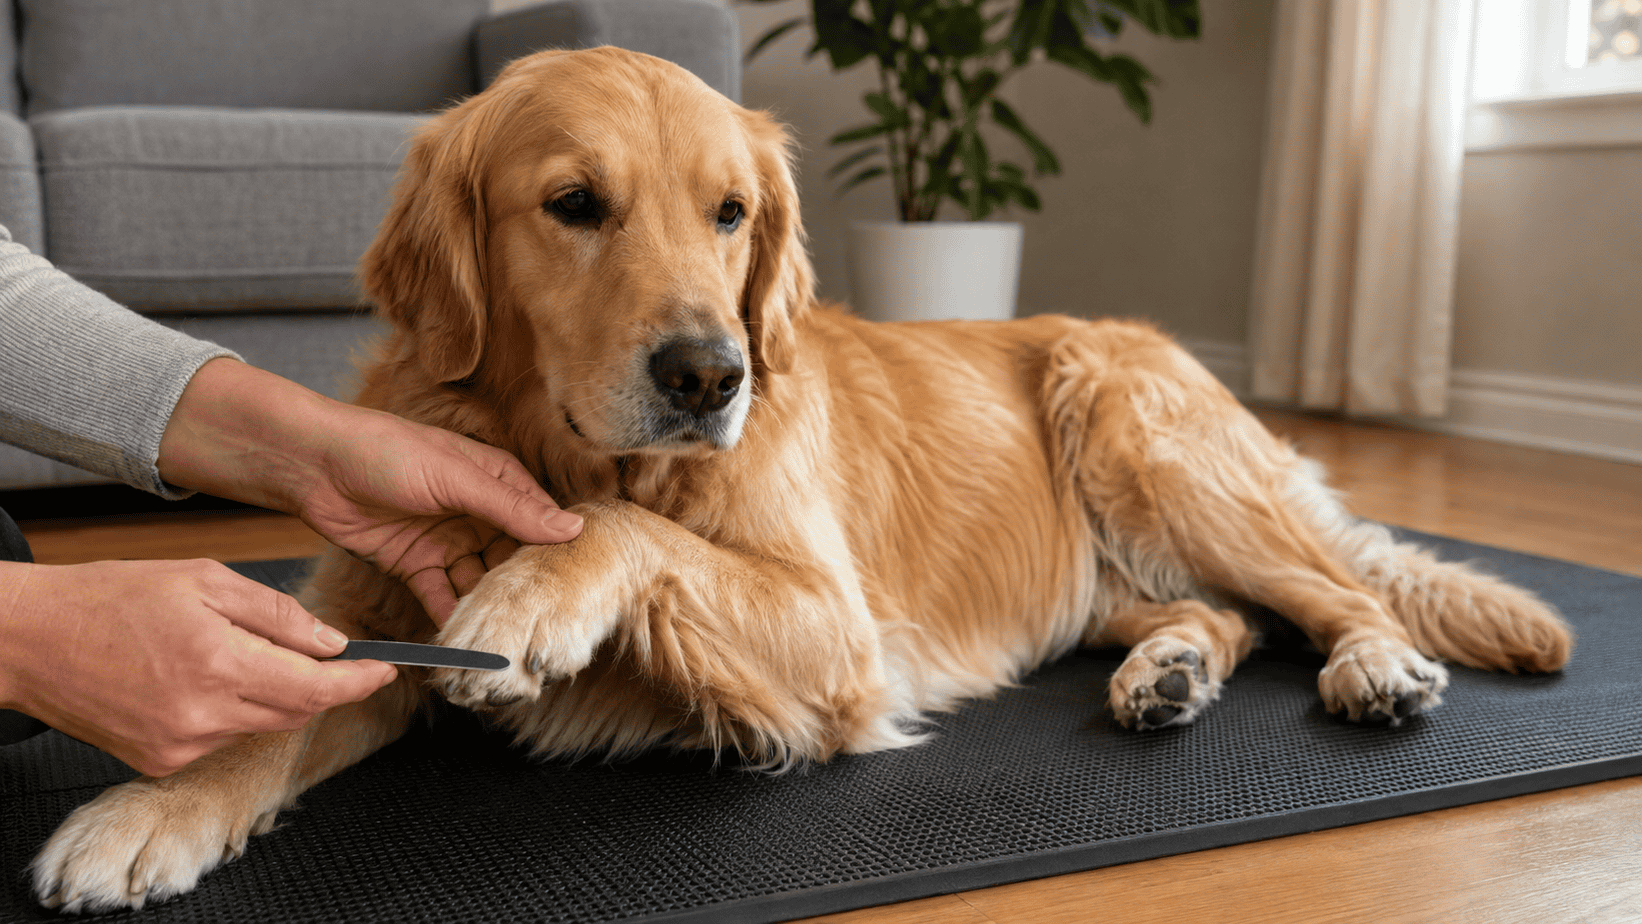
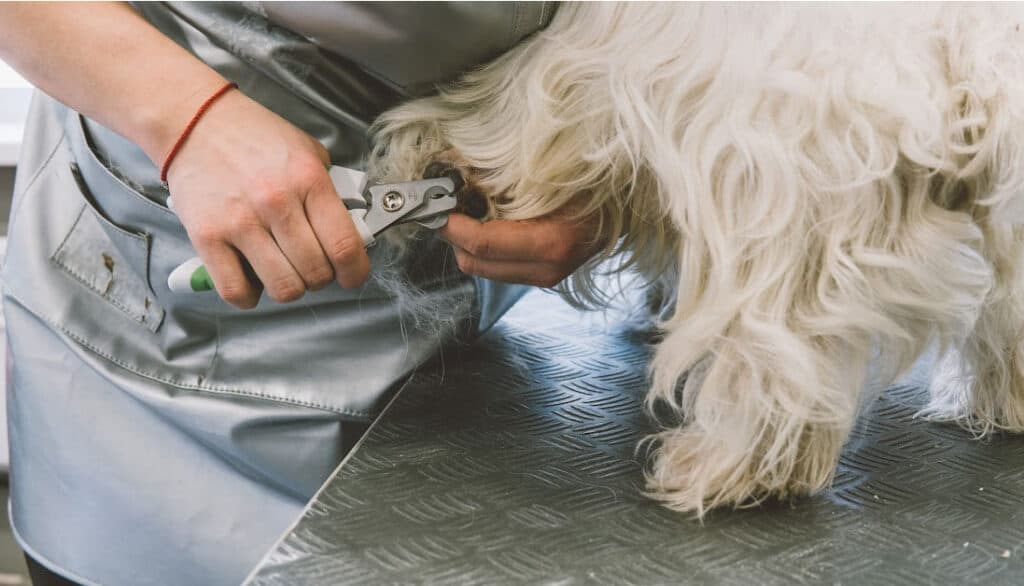
    clipping dog nails

    Tips for Maintaining Your Dog’s Nail Health

    Maintaining healthy nails for your dog doesn’t just end with knowing the proper length. It’s an ongoing commitment that requires attention to detail, regular care, and sometimes a bit of patience. Here are some essential tips to help you ensure your canine companion’s nails remain in optimal condition:

    Start Young

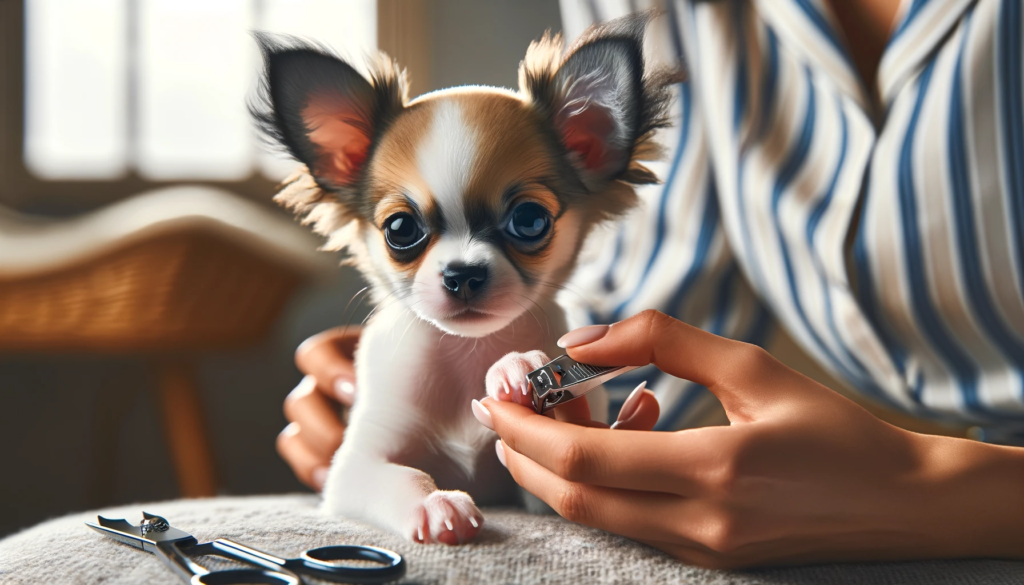
    If you have a puppy or a younger dog, it’s the best time to introduce them to nail trims. The earlier they become accustomed to the routine, the less stressful it will be for both of you as they grow.

    Regular Trimming is Essential

    Don’t wait for the nails to become visibly long. Set a regular schedule for nail trims, be it every couple of weeks or once a month, depending on your dog’s nail growth rate.

    Invest in Quality Tools

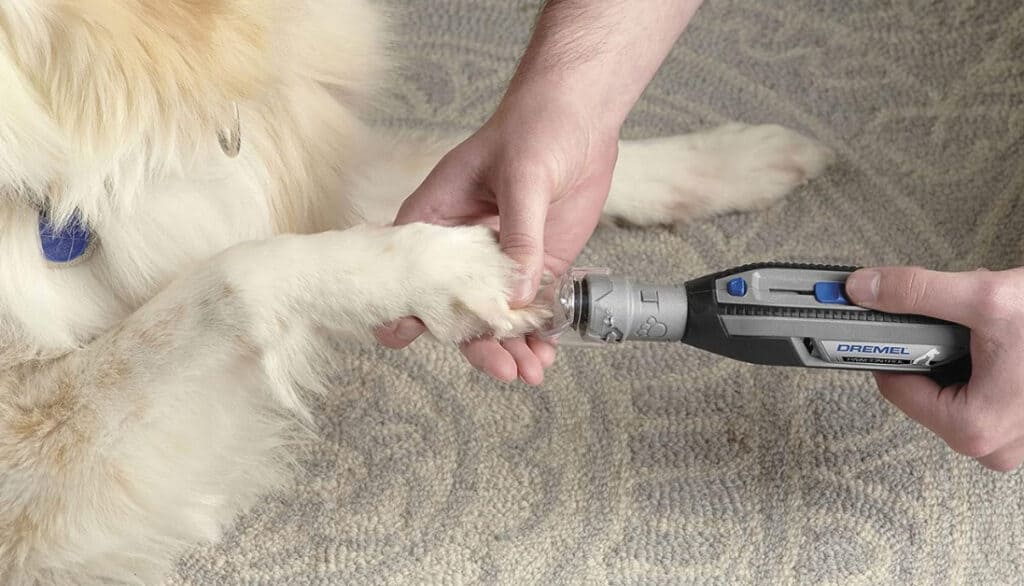
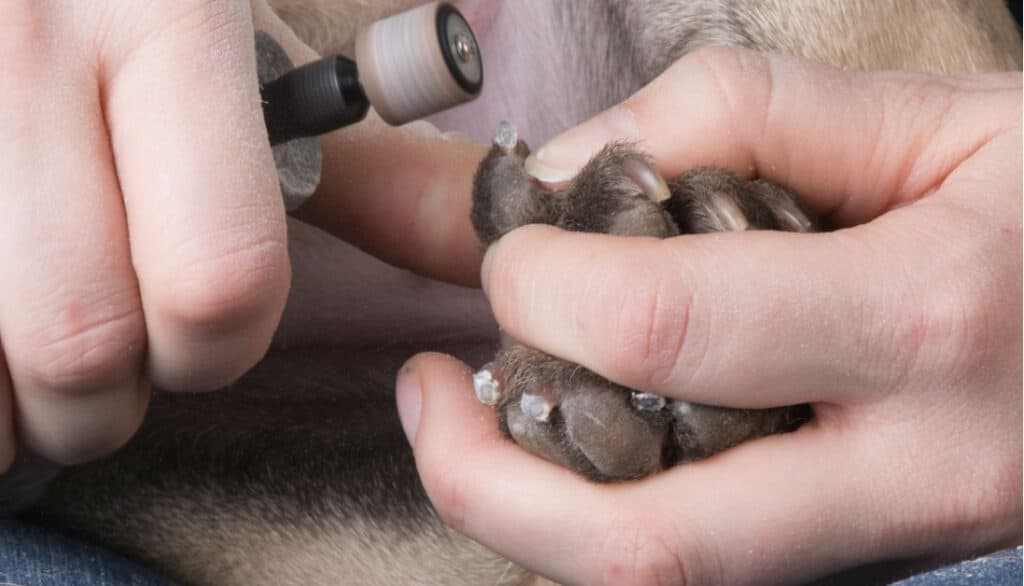
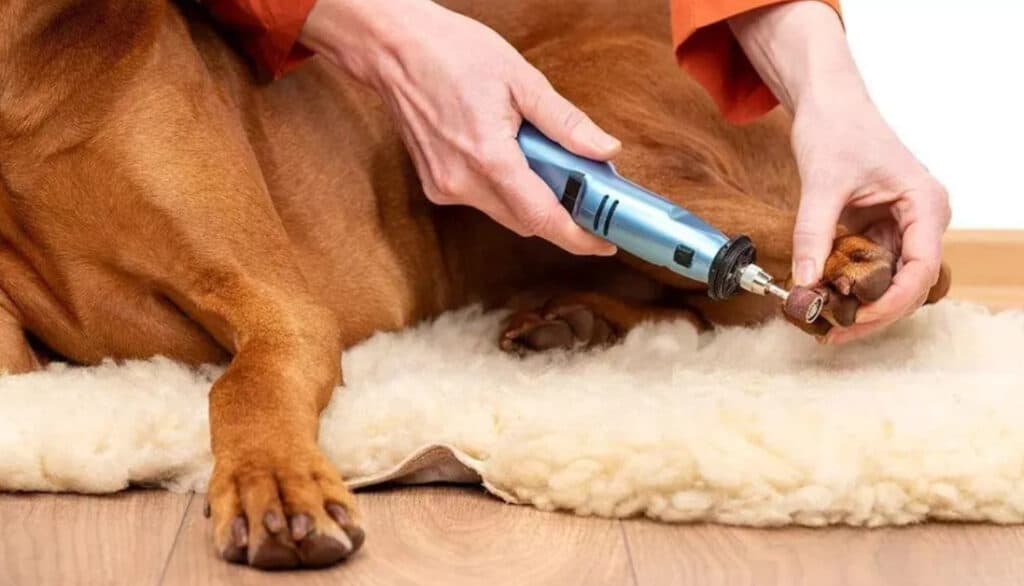
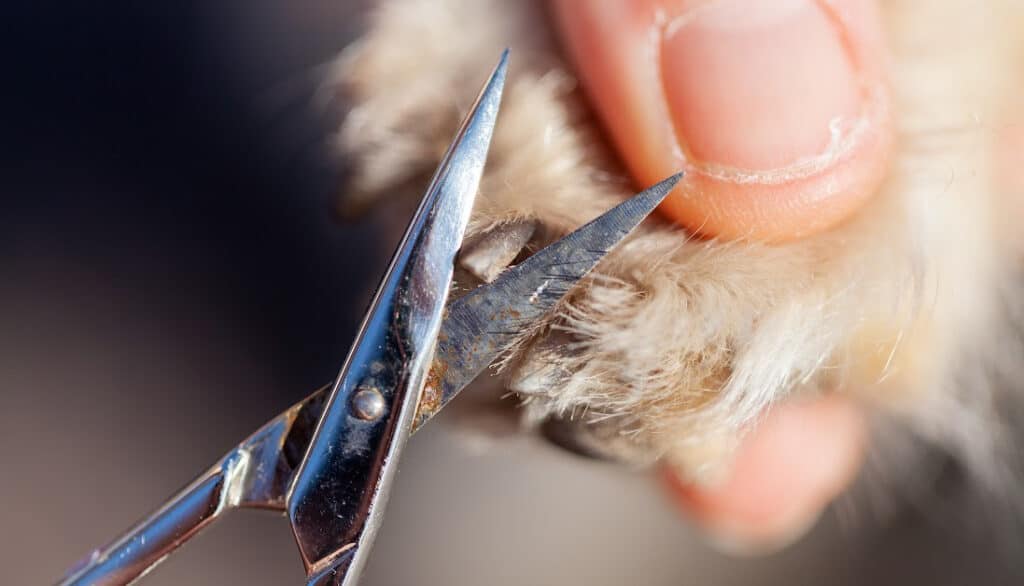
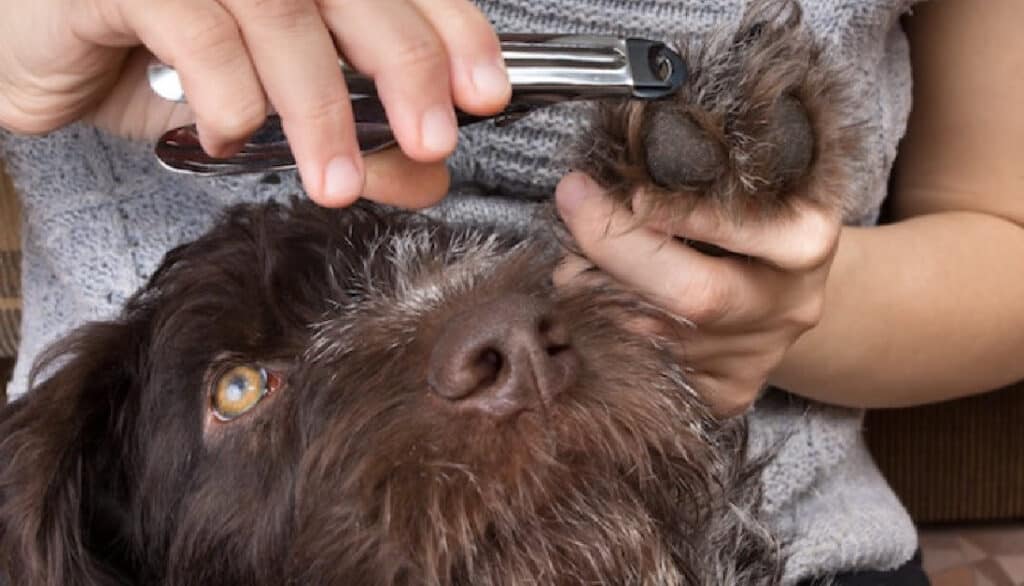
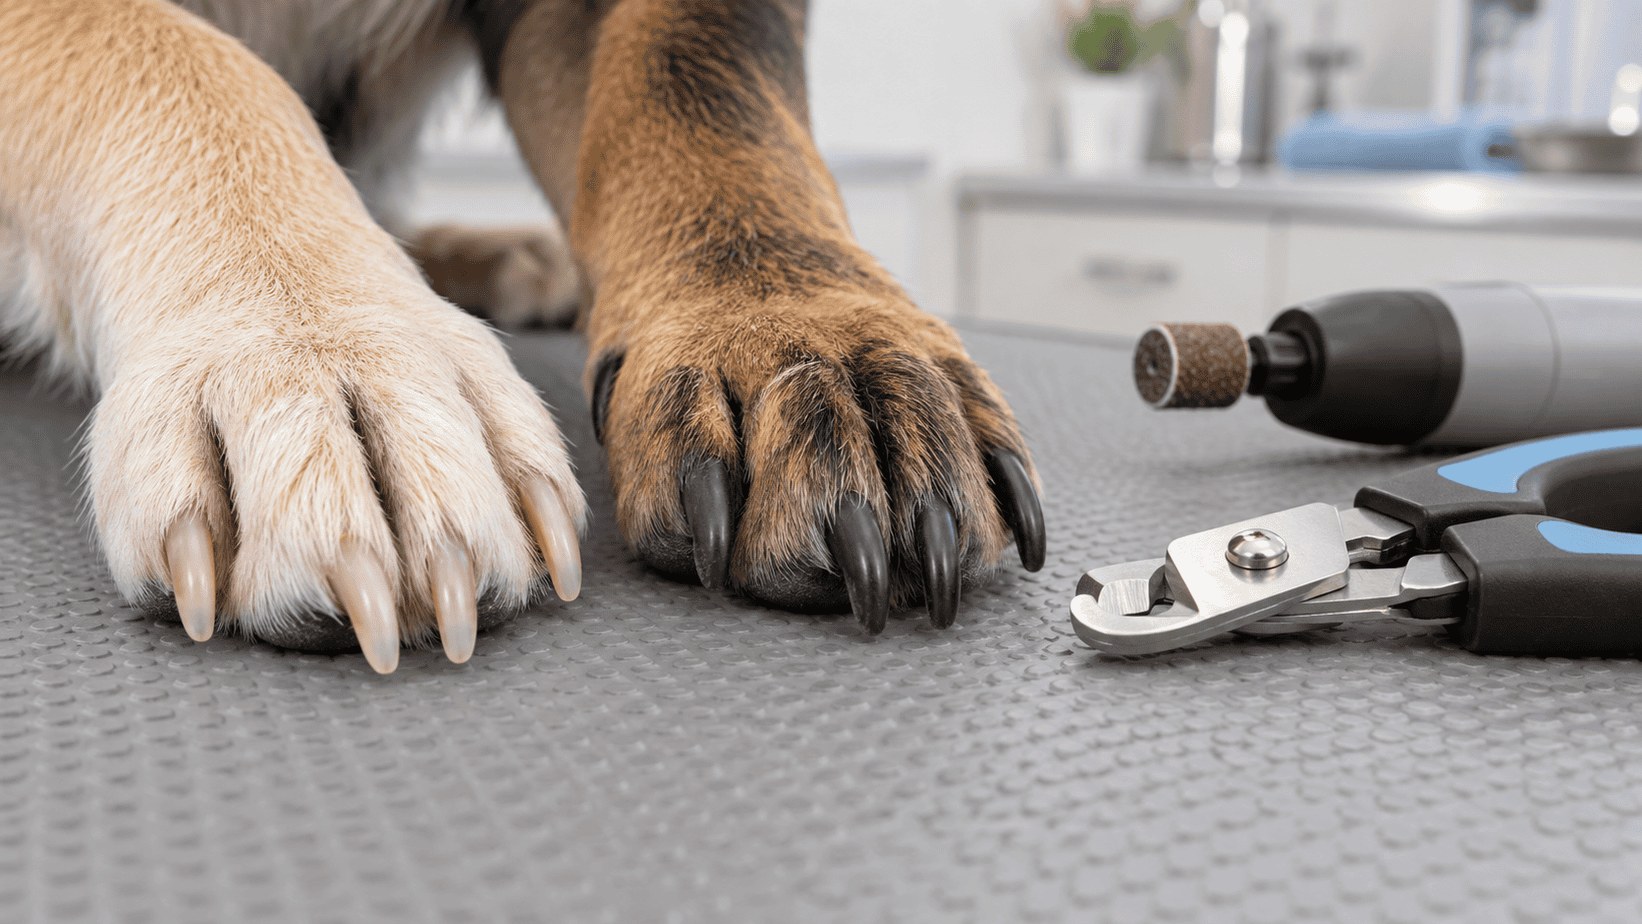
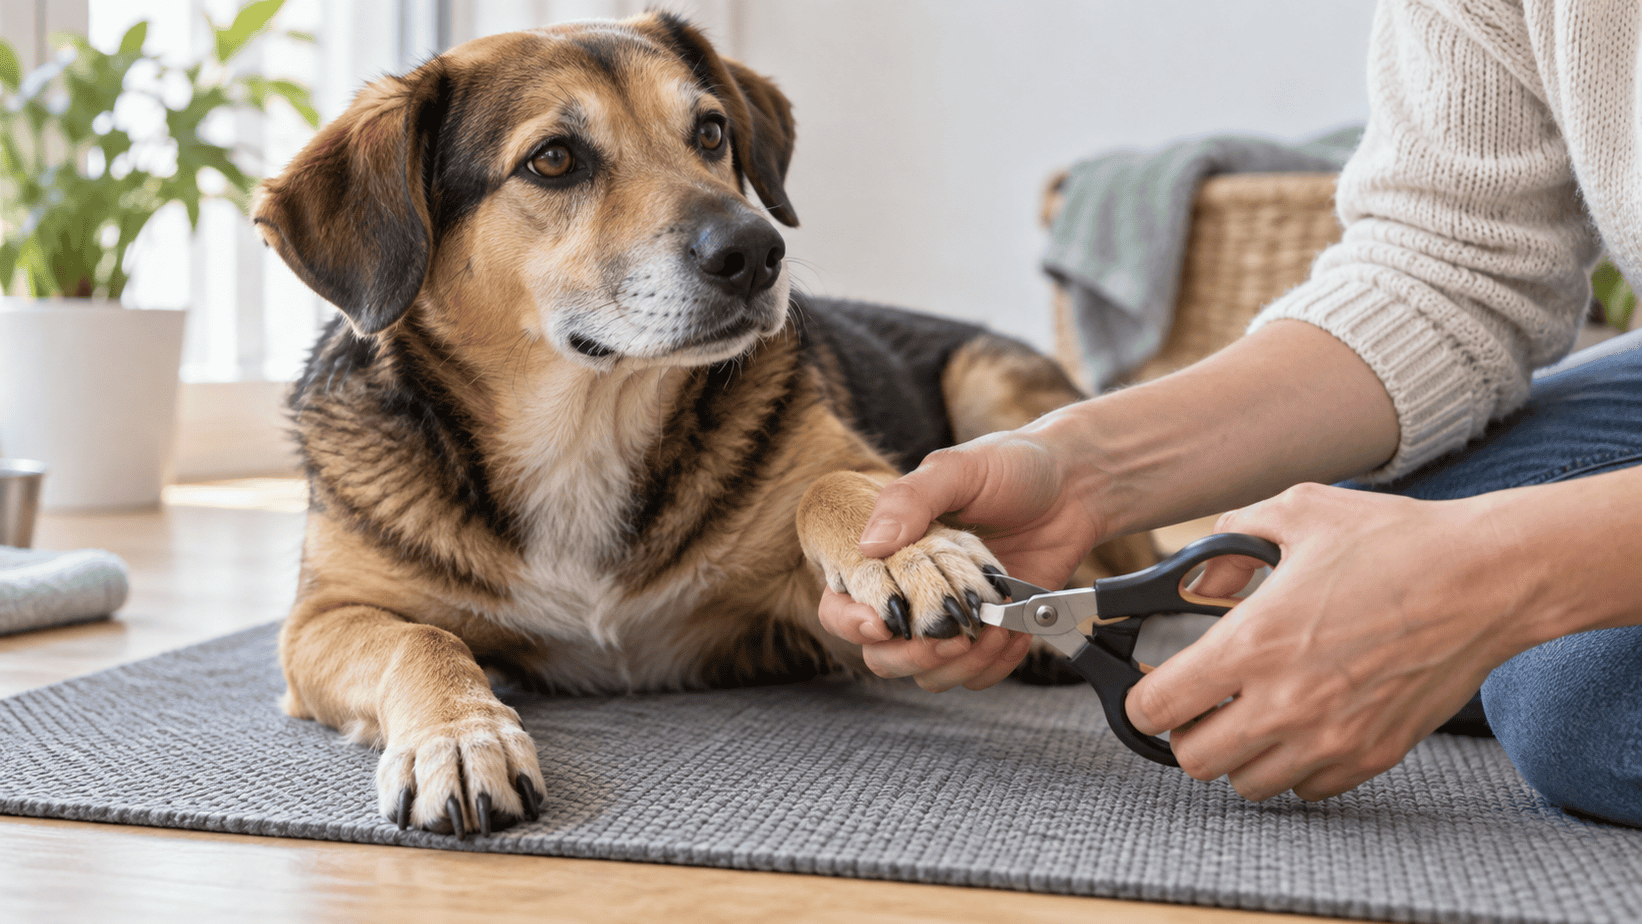
    Using the right tools can make a huge difference. Ensure you have a pair of sharp, quality nail clippers or grinders specifically designed for dogs. Dull tools can cause splits or cracks, leading to discomfort.

    Mind the Quick

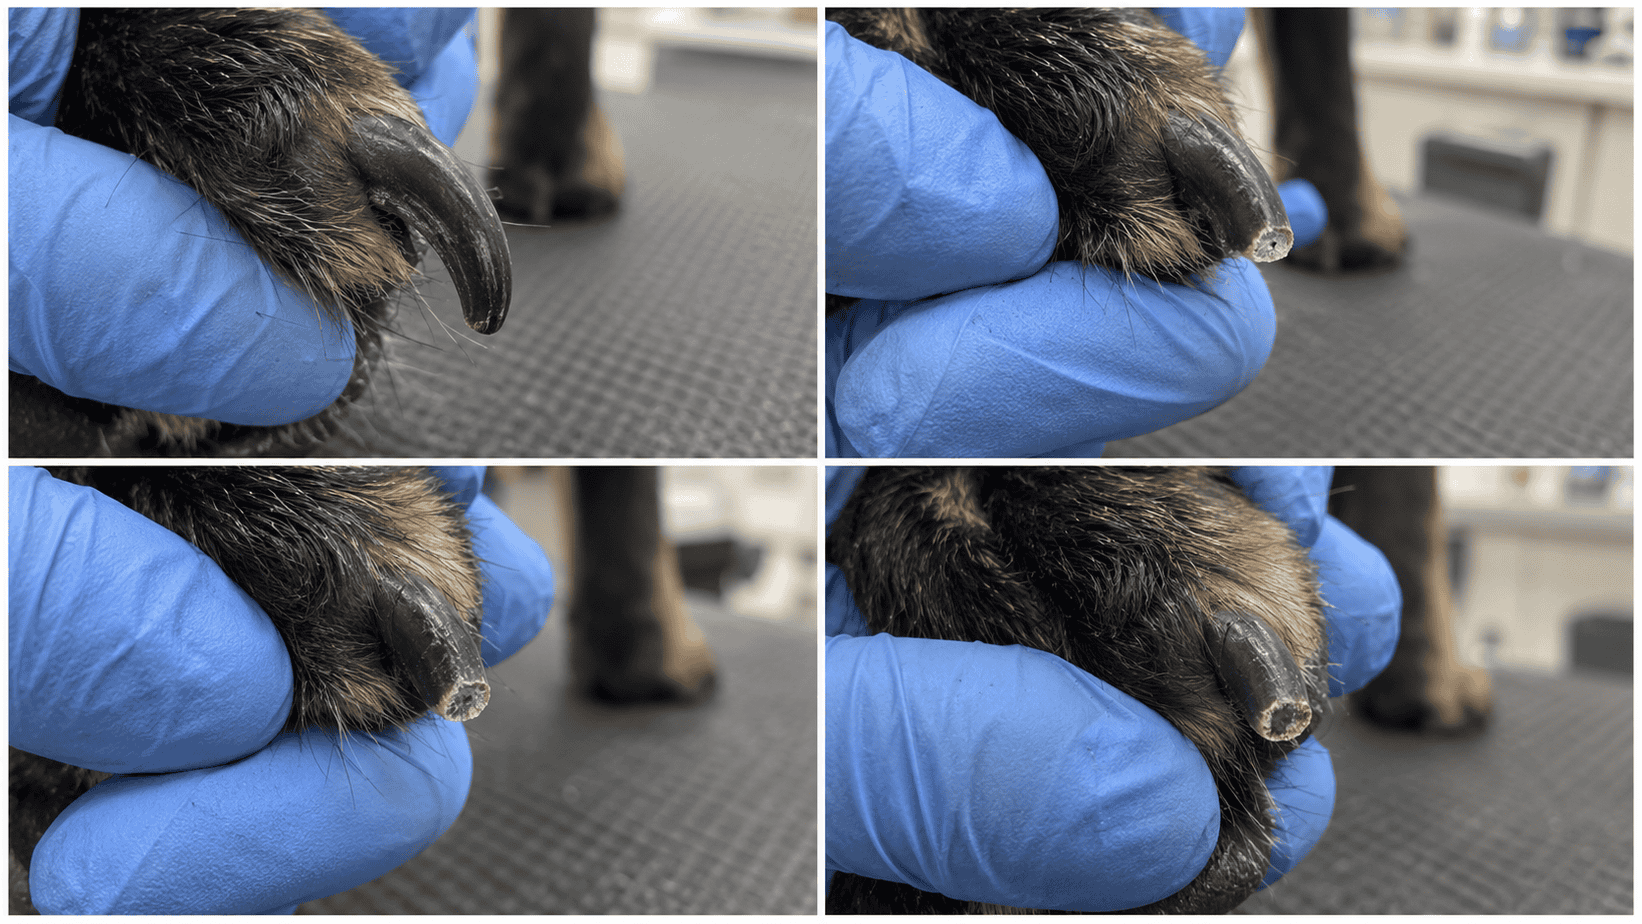
    Be cautious not to cut into the quick. If your dog has translucent nails, you can usually spot the quick as a pinkish section. For dogs with darker nails, trim a little bit at a time and look for a small white dot in the center, indicating you’re getting close to the quick.

    Stay Calm and Offer Treats

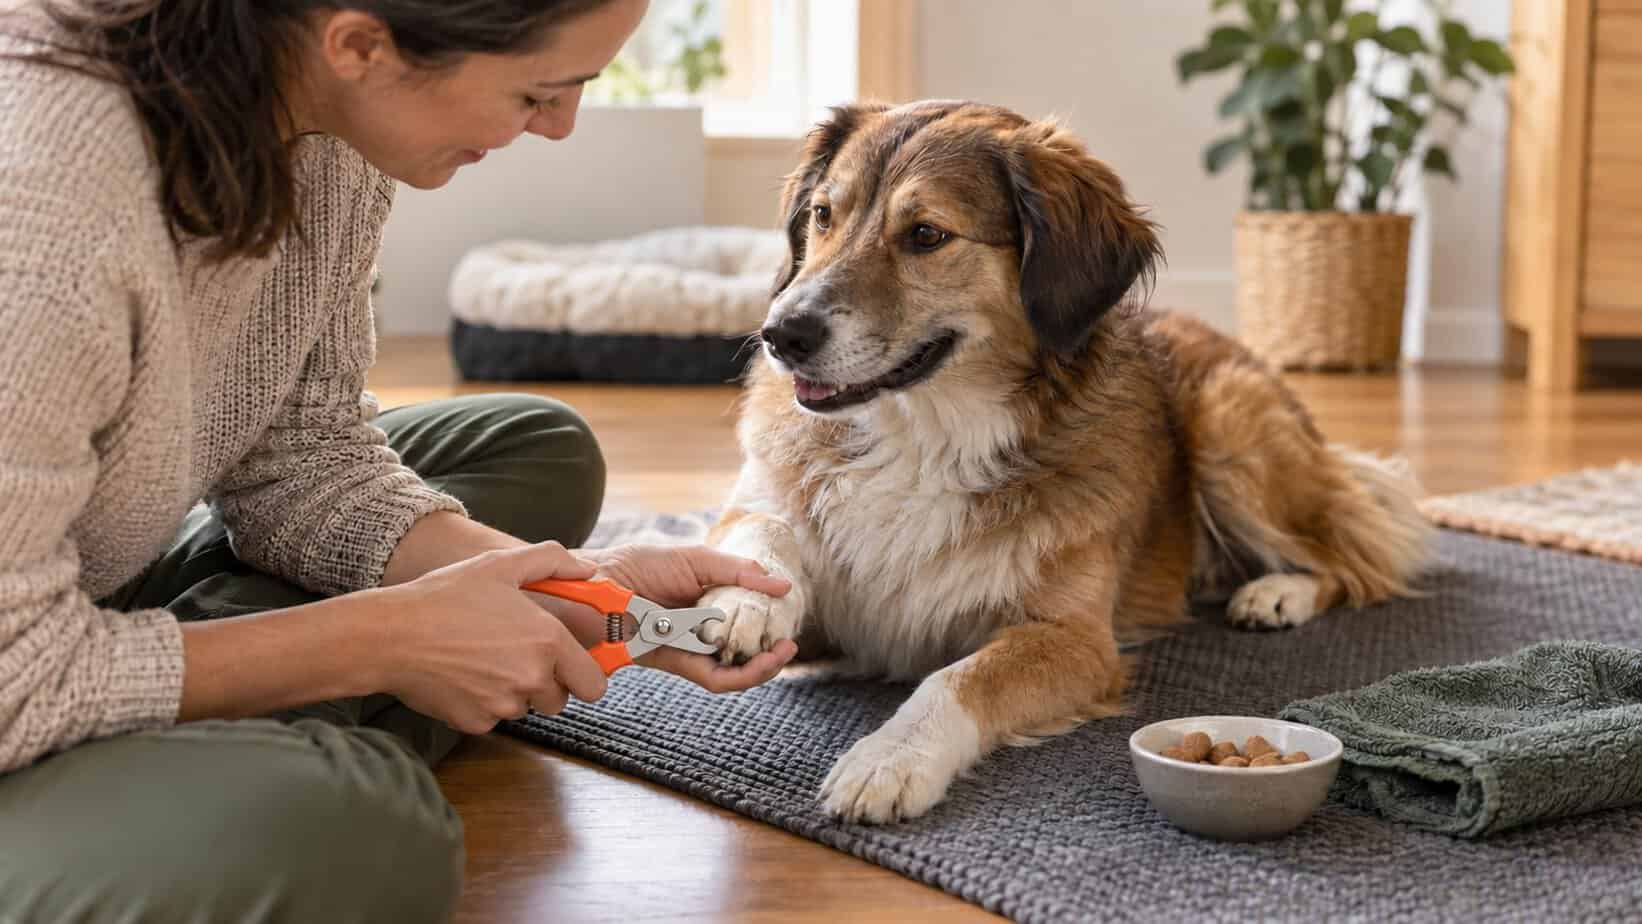
    Your demeanor can influence your dog’s behavior. Stay calm and positive during nail trims, rewarding them with treats and praises afterward. This positive reinforcement can make future trims much more manageable.

    Consider Natural Abrasion

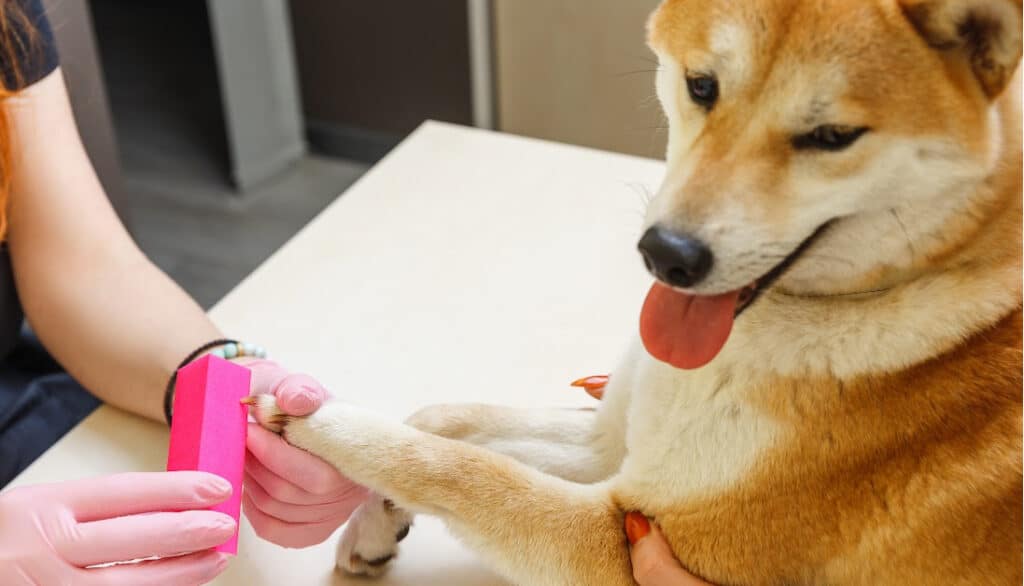
    Taking your dog for walks on concrete or pavement can naturally help wear down their nails. However, it shouldn’t replace regular trims, but rather complement the process.

    Check the Dewclaws

    Don’t forget about the dewclaws! These “thumb” nails don’t always wear down naturally and can grow into the paw if left unchecked.

    Seek Professional Help When Needed

    If you’re uncomfortable or uncertain about trimming your dog’s nails, seek out the expertise of a professional groomer or veterinarian. They can also provide insights and tips tailored to your dog’s specific needs.

    Nail care is an integral part of overall dog health and well-being. By dedicating time and care to your dog’s nails, you not only prevent potential discomfort and injury but also contribute to their overall happiness and longevity.

    Special Considerations for Aging Dogs or Dogs with Health Issues

    As our loyal companions age or face health challenges, their nail care needs can evolve. Aging dogs and those with specific health issues often require special attention to ensure their nails, paws, and overall well-being are maintained. Here’s what you need to know:

    Joint Pain and Arthritis

    Older dogs often struggle with joint pain or arthritis, making the consequences of long nails even more pronounced. Improper posture due to long nails can exacerbate joint discomfort, making regular trims even more crucial.

    Reduced Activity Levels

    Aging dogs or those with health issues might not be as active as they once were. Reduced activity means less natural wear on their nails, potentially leading to quicker nail growth and a greater need for frequent trims.

    Brittle Nails

    Just like in humans, an older dog’s nails can become more brittle, leading to splits and breaks. Using sharp, quality tools and being gentle during trimming can help mitigate the risk of damage.

    Altered Sensitivity

    Health issues can sometimes affect a dog’s sensitivity. They may become more sensitive to touch due to conditions like diabetes, making nail trims potentially more stressful. Always be gentle and observant, adjusting your approach based on their reactions.

    Medications and Nail Growth

    Some medications can influence nail growth rates or nail quality. If your dog is on medication, regularly check their nails and adjust your trimming routine as needed.

    Vision and Hearing Impairments

    Dogs with reduced vision or hearing might be more startled during nail trims. Approach them gently, ensuring they’re aware of your presence. Keeping the environment calm and predictable can be beneficial.

    Seek Veterinary Advice

    If your dog has health issues or is aging, it’s essential to stay in close communication with your vet. They can offer tailored advice, suggesting the best nail care routine or any special considerations for your specific dog.

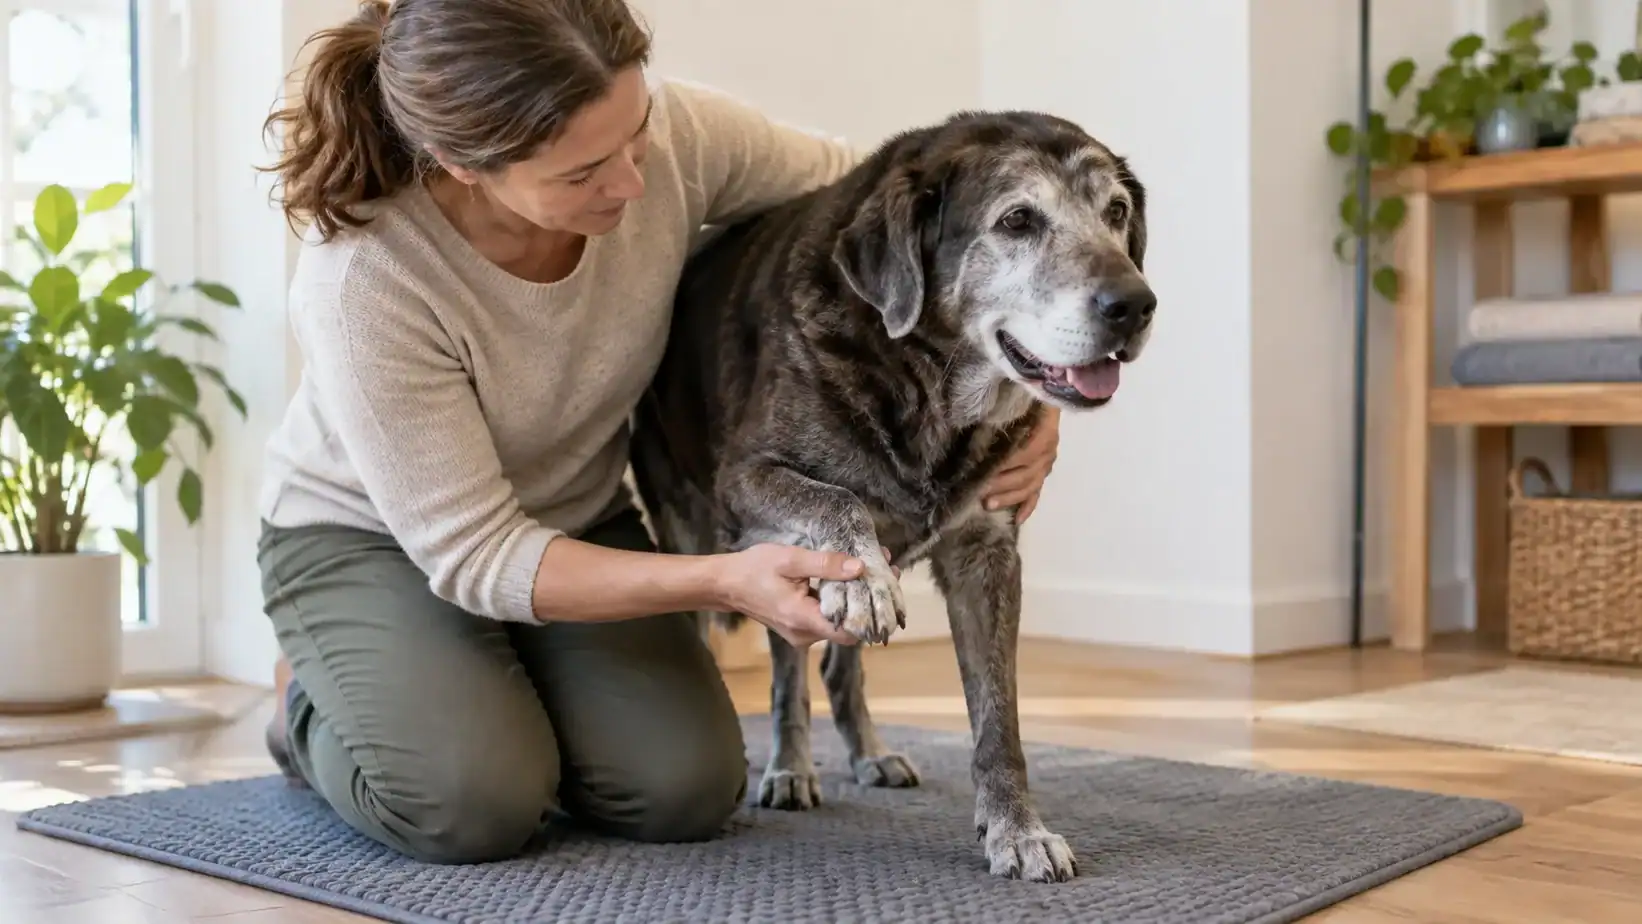
    In essence, as our dogs age or face health challenges, their nail care needs don’t diminish—they often become more critical. Understanding and adapting to these special considerations can ensure your furry friend remains comfortable and healthy in their golden years or as they navigate health challenges.

    senior dog nail trims

    Conclusion

    Caring for our furry companions extends beyond playtimes, cuddles, and nutritious meals. The seemingly small task of maintaining their nails holds a significant place in their overall well-being. As we’ve explored, nail health impacts everything from posture and mobility to comfort and injury prevention.

    For first-time dog owners, the intricacies of nail care might seem daunting. Yet, with patience, education, and a bit of practice, it becomes just another way we show our pets love and care. Whether you’re handling nail trims at home or trusting a professional, the goal remains the same: ensuring our dogs lead a life free of nail-induced discomfort.

    In the journey of pet ownership, it’s often the small gestures – a treat after a nail trim, a gentle pet during a grooming session, or a vigilant check for signs of discomfort – that solidify the bond between human and pet. Here’s to countless days of hearing the joyful, pain-free patter of dog paws, as we navigate the path of canine care together.

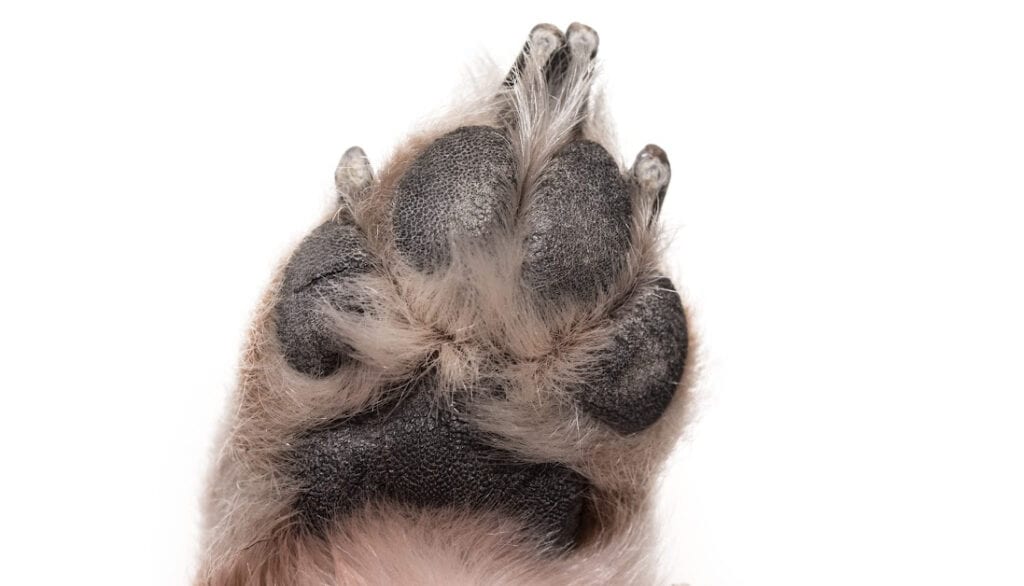
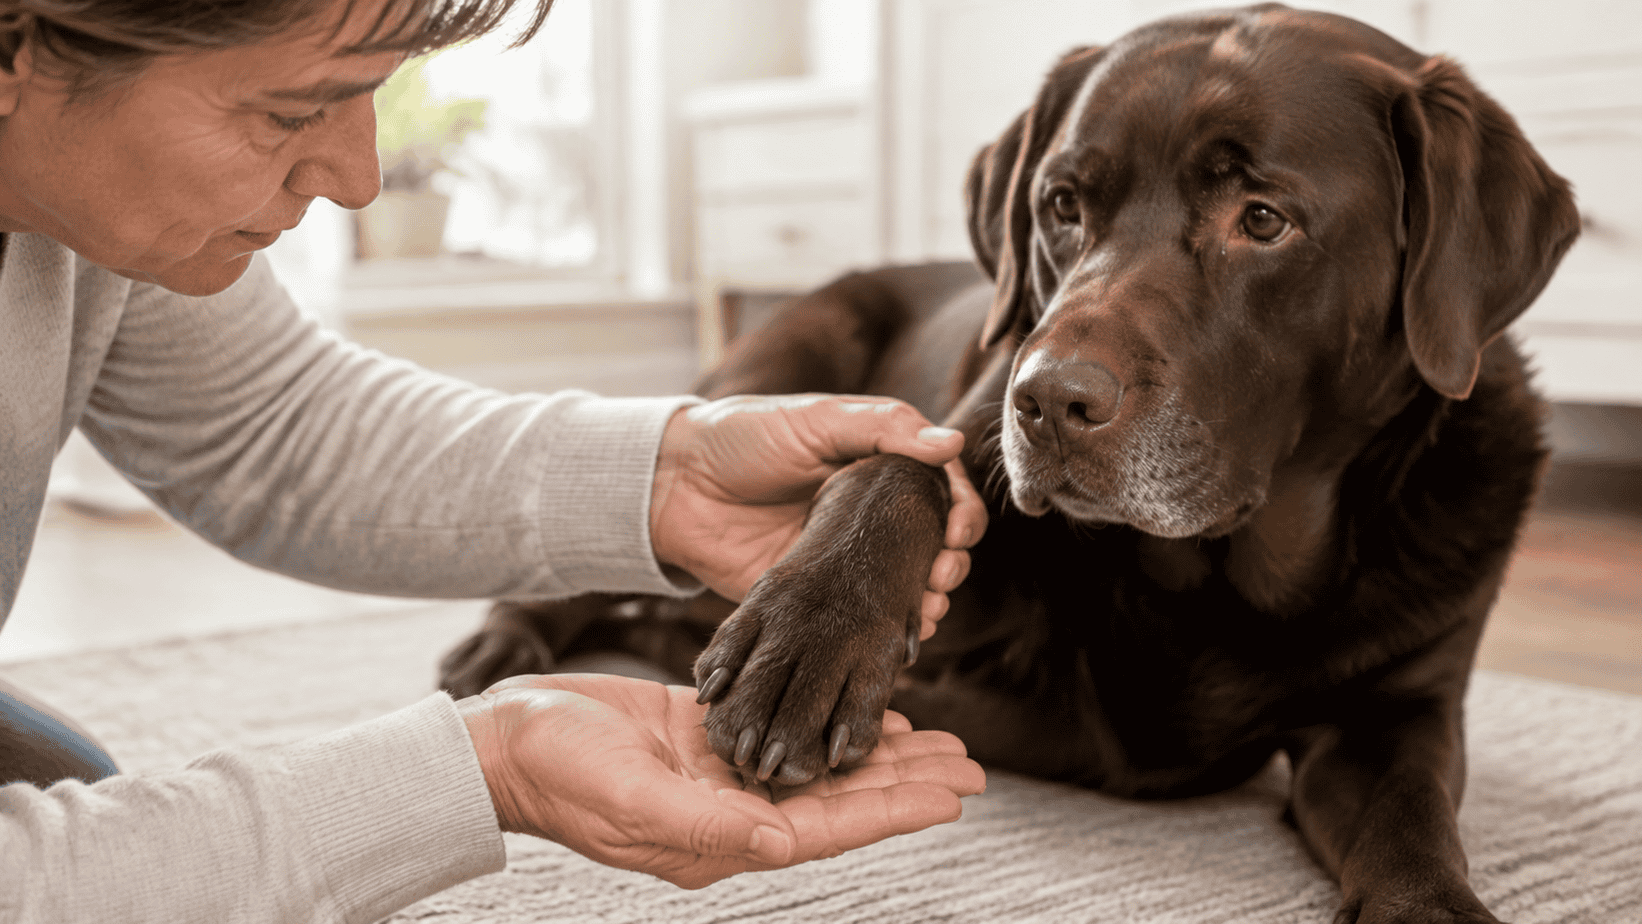
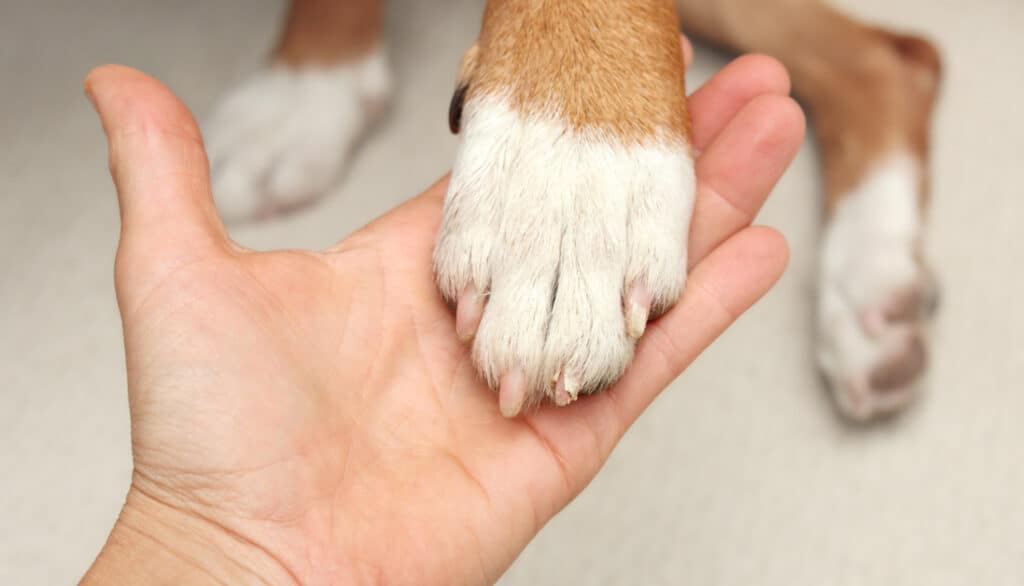
    holding dog paw

    Frequently Asked Questions

    1. How often should I trim my dog’s nails?

    Answer: The frequency of nail trims varies depending on your dog’s activity level, breed, age, and the surface they regularly walk on. Generally, a good rule is to trim or check their nails every 2-4 weeks. However, always pay attention to signs of overgrowth or discomfort in between scheduled trims.

    2. What if I accidentally cut the quick of my dog’s nail?

    Answer: If you accidentally cut the quick, don’t panic. It might bleed and be a bit painful for your dog. Apply styptic powder or a styptic pencil, if available, to stop the bleeding. If you don’t have these on hand, applying gentle pressure with a clean cloth can also help. Make sure to soothe and comfort your dog, and keep an eye out for any signs of infection.

    3. My dog is terrified of nail trims. What can I do?

    Answer: It’s not uncommon for dogs to fear nail trims. Start by creating a calm environment. Introduce the nail clippers gradually, rewarding your dog for calm behavior. You might need to do this over multiple sessions. Also, consider consulting a professional groomer or vet who can use specialized techniques or even mild sedation if absolutely necessary.

    4. Can I use human nail clippers for my dog?

    Answer: While it’s technically possible, it’s not advisable. Dog nails are much thicker and tougher than human nails. Using dog-specific nail clippers or grinders ensures a clean, safe cut that’s suitable for the shape and size of your dog’s nails.

    5. Why do my dog’s nails grow so fast compared to other dogs?

    Answer: Nail growth can be influenced by various factors, including breed, age, diet, health, genetics, and activity level. If you notice a sudden change in nail growth rate or have concerns, it’s always a good idea to consult with a veterinarian to rule out any underlying health issues.

  • How Fast Do Dog Nails Grow – Nail Length Growing Guide

    How Fast Do Dog Nails Grow – Nail Length Growing Guide

    *This page may include affiliate links, which means that if you make a purchase through one of the product links, we may receive a small commission. For full affiliate disclosure please see our disclaimer page.

    Hello, dear readers and fellow canine enthusiasts! When it comes to our furry companions, we often consider their nutrition, exercise, and overall health. Yet, one aspect that tends to fly under the radar is the growth of their nails. “How fast do dog nails grow?” is a question that many dog owners ponder, especially when it feels like they’ve just trimmed those claws, only to find them tapping on the floor again shortly after. Nail care is more than just an aesthetic concern; it’s about comfort and health. With this guide, “How Fast Do Dog Nails Grow- Nail Length Growing Guide,” we aim to provide you with a comprehensive understanding of your dog’s nail growth rate, factors that influence it, and tips to maintain them properly. Journey with us as we delve into the intricacies of your pooch’s paws and ensure they’re always in tip-top shape!

    how fast do dog nails grow

    How Fast Do Dog Nails Grow?

    The speed at which dog nails grow can vary based on the breed, age, activity level, and other factors. Here’s a general breakdown:

    FactorDescription
    AgePuppies: Faster growth
    Adult Dogs: Slower, steady growth
    Breed VariationsSmall Breeds: Faster nail growth
    Medium Breeds: Moderate nail growth
    Large Breeds: Slower growth, but thicker nails
    Activity LevelActive Dogs: Nails wear down, seeming slower growth
    Less Active Dogs: Prominent nail growth
    Health & NutritionWell-fed: Steady and healthy nail growth
    Malnourished: Slower or brittle nail growth
    Environmental FactorsHard Surfaces: Natural nail filing during walks
    Soft Surfaces: Less wear, leading to noticeable growth

    Tips for Healthy Dog Nails:

    1. Regularly check your dog’s nails, ideally every 1-2 weeks.
    2. Use the right tools for nail trimming to ensure a smooth cut.
    3. Pay attention to the quick of the nail to avoid injuries.
    4. If unsure about nail trimming, consult with a veterinarian or professional groomer.

    What Happens If You Don’t Cut Dogs Nails?

    1. Overgrowth and Discomfort

    When a dog’s nails become too long, they can cause discomfort or even pain. As the nails grow, they can force the toes to spread apart unnaturally or cause the nails to twist to the side, leading to discomfort when walking.

    2. Injury and Breaks

    Long nails are more susceptible to splitting, cracking, or breaking. If a nail breaks, it can be very painful for the dog and may even bleed. In severe cases, broken nails can lead to infections if not treated promptly.

    3. Altered Gait and Posture

    A dog’s posture and gait can be negatively affected by long nails. When nails touch the ground as the dog walks, it exerts pressure back into the nail bed, creating pain or discomfort. Over time, this can lead to a change in how the dog walks, potentially causing joint strain or other orthopedic issues.

    dog chewing on long toenails

    4. Reduced Traction

    Long nails can reduce a dog’s ability to grip surfaces, particularly on tile or hardwood floors. This can increase the risk of slipping, which could lead to injuries.

    5. Ingrown Nails

    Just like humans, dogs can also suffer from ingrown nails. This happens when the nail grows back into the paw pad. Ingrown nails are painful, can become infected, and often require veterinary intervention.

    6. Reduced Socialization

    If a dog associates its long, painful nails with certain activities like walking or playing, it might become hesitant or resistant to participate. This can lead to reduced socialization and activity, affecting their overall well-being and mental health.

    Regular nail trims are essential for maintaining your dog’s health and comfort. Not only does it prevent potential physical complications, but it also ensures your furry friend remains active and happy. Always keep an eye on the length of your dog’s nails and trim them regularly, either at home or with the help of a professional groomer.

    how fast do dog nails grow

    Tips for Shortening Nails

    Ensuring that your dog’s nails are kept at a healthy length is crucial for their overall well-being. Here are some effective tips to help you maintain or reduce their nail length:

    1. Regular Trimming

    The simplest and most direct way to keep nails short is by trimming them regularly. Depending on how fast your dog’s nails grow, you might need to do this every two to four weeks.

    2. Use the Right Tools

    Invest in a good quality pair of dog nail clippers. There are different types, such as guillotine-style or scissor-style clippers. Some dog owners also prefer using a rotary tool or nail grinder, which files down the nails.

    3. Start Young

    If you have a puppy, start the nail trimming routine early. Puppies who get used to having their feet handled and nails trimmed at a young age are usually more accepting of the process as adults.

    4. Gradual Reduction for Overgrown Nails

    If nails are extremely overgrown, don’t try to cut them short all at once. Instead, trim a little bit off at a time over several weeks to allow the quick (the sensitive part of the nail) to recede naturally.

    5. Positive Reinforcement

    Reward your dog with treats and praise during and after nail trimming. This can help make the experience more positive for them, making future trims easier.

    6. Familiarize Yourself with the Quick

    The “quick” is the blood vessel that runs through the nail. Cutting into it can cause pain and bleeding. In light-colored nails, the quick is the pinkish section. For dogs with dark nails, it’s harder to see, so only trim a small amount at a time or use a flashlight behind the nail to help locate it.

    7. Frequent Walks on Pavement

    Walking your dog regularly on pavement or concrete can help naturally file down their nails. However, be cautious during hot weather, as hot surfaces can burn a dog’s paw pads.

    8. Consult with Professionals

    If you’re unsure about trimming your dog’s nails yourself, consider taking your pet to a professional groomer or veterinarian. They can give you a demonstration or provide tips tailored to your specific dog.

    9. Stay Calm and Confident

    Dogs often pick up on our emotions. If you’re nervous about cutting their nails, they’ll likely become anxious too. Taking a calm and confident approach will make the process smoother for both of you.

    how to trim dog nails

    When to Trim Your Dog’s Nails

    Knowing when to trim your dog’s nails is crucial for their comfort, health, and overall well-being. Let’s delve into the various indicators and best practices associated with nail trimming.

    1. Clicking Sounds on Hard Surfaces

    One of the most common signs that it’s time to trim your dog’s nails is when you hear them clicking or tapping as they walk on tile, hardwood, or other hard surfaces.

    2. Observation

    • Curvature: If the nails start to curve downwards or sideways, it’s an indication that they’re getting too long.
    • Touching the Ground: When your dog is standing still, their nails shouldn’t touch the ground. If they do, it’s time for a trim.

    3. Discomfort or Altered Gait

    If your dog starts to walk differently, limps, or seems to be in discomfort when walking, long nails might be the cause.

    4. Regular Check-ups

    Even if none of the above signs are evident, it’s a good practice to check your dog’s nails:

    • Puppies: Every week, as they tend to grow quickly.
    • Adult Dogs: Every 2-4 weeks.

    5. Post-Activity Check

    After activities like playing in the mud or swimming, nails can become softer and more vulnerable to breaking. It’s a good idea to inspect and, if necessary, trim them post such activities.

    6. Check the Dewclaws

    The dewclaws, or the nails higher up on the paw, don’t always touch the ground and therefore don’t wear down naturally. Regularly check these, as they can grow in a circular pattern back into the paw if left unattended.

    7. After Bath Time

    Nails are softer after a bath, making it a good time to trim them. If you integrate nail trimming into the post-bath routine, it can become a regular habit.

    8. Based on Previous Growth Rate

    Every dog is unique. Some dogs may need nail trims every two weeks, while others might go a month or more. By observing and understanding your dog’s nail growth rate, you can set a more personalized trimming schedule.

    Regular nail maintenance is vital for a dog’s health and comfort. By staying observant and integrating nail checks into routine care, you can ensure that your furry friend’s paws remain in tip-top shape.

    dog toenail infection

    What Causes Toenail Breakage in Dogs?

    Toenail breakage in dogs can be distressing for both the pet and the owner. Understanding the root causes can help in preventing such incidents and ensuring your dog remains pain-free and happy. Here are the most common causes:

    1. Overgrown Nails

    Long nails are more prone to snagging and getting caught on surfaces like carpets, gaps in wooden floors, or between deck planks. This can lead to sudden breaks or cracks.

    2. Trauma

    Running, playing, or roughhousing can sometimes lead to toenail injuries, especially if the dog stops suddenly or collides with an object. Jumping off elevated surfaces or getting a nail caught while moving can also result in trauma.

    3. Brittle Nails

    Some dogs naturally have brittle nails, or they may develop them due to medical conditions, age, or nutritional deficiencies. Brittle nails are more likely to split, crack, or break.

    4. Infections or Fungal Diseases

    Infections, especially fungal ones, can weaken the nail structure. A weak nail is more susceptible to breakage.

    5. Tumors or Growths

    In rare cases, tumors or growths on the nail bed or in the nail matrix can cause deformities and weaknesses, making breakages more likely.

    6. Allergies

    Dogs with allergies may excessively lick or chew their paws, weakening the nails over time and making them prone to breakages.

    7. Poor Nutrition

    A diet deficient in essential nutrients can lead to weaker nails. Proper nutrition, including specific vitamins and minerals, is vital for strong and healthy nails.

    8. Frequent Exposure to Water

    Dogs that spend a lot of time swimming or in wet environments might experience softer nails, which can be more prone to tearing or breaking.

    9. Genetic Predisposition

    Some dog breeds or individual dogs may be genetically predisposed to have weaker or more brittle nails, leading to more frequent breaks.

    Toenail breakage in dogs can result from a combination of environmental, genetic, and health factors. It’s essential to keep an eye on the condition of your dog’s nails and provide the necessary care, nutrition, and preventive measures to minimize the risk of breakage. If you notice frequent breakages or any signs of infection, it’s wise to consult a veterinarian.

    Conclusion

    Our dogs rely on us for more than just food and love; they need us to ensure their overall well-being, and a significant part of that is nail care. While seemingly a small detail in the grand scheme of pet ownership, the health and length of a dog’s nails can greatly impact their comfort, mobility, and overall quality of life. By understanding the intricacies of nail growth, the repercussions of neglect, and the potential causes of nail issues, you’re better equipped to provide the best care possible for your furry friend. Regular nail maintenance might require a bit of time and patience, but the rewards—a happy, healthy, and sprightly companion—are well worth the effort. After all, every small act of care we show contributes to a lifetime of happiness for our loyal pals. So, grab those clippers, offer a comforting pat, and take a step toward ensuring your dog’s paws are always in top-notch condition!

    Frequently Asked Questions

    1. How often should I trim my dog’s nails?

    The frequency varies depending on the breed, age, activity level, and individual growth rate of the dog. However, a general guideline is every 2-4 weeks for adult dogs and weekly for puppies.

    2. What should I do if I accidentally cut into the quick?

    If you accidentally cut into the quick, don’t panic. It will bleed and may be painful for the dog. Apply styptic powder or cornstarch to the bleeding nail to help stop the bleeding. Comfort your dog and ensure they’re calm before proceeding or deciding to continue another day.

    3. Can long walks or runs replace the need for nail trims?

    While walking or running on hard surfaces can naturally file down a dog’s nails, it may not be sufficient for all nails, especially the dewclaws. Regular checks and trims are still necessary to ensure all nails are at a healthy length.

    4. My dog is terrified of nail trims. What can I do?

    Start with positive reinforcement, rewarding your dog for calm behavior during nail checks. You can also desensitize them by handling their paws regularly without trimming. If anxiety persists, consider seeking the help of a professional groomer or veterinarian, or try anti-anxiety aids and tools.

    5. Are there any dog breeds particularly prone to nail problems?

    While all dogs can experience nail issues, some breeds with certain genetic predispositions, like the Dachshund, might have more nail-related problems. It’s essential to be aware of your breed’s specific health concerns and monitor their nails closely.

  • When To Stop Grinding Dog Nails- What To Look For To Avoid Quick

    When To Stop Grinding Dog Nails- What To Look For To Avoid Quick

    *This page may include affiliate links, which means that if you make a purchase through one of the product links, we may receive a small commission. For full affiliate disclosure please see our disclaimer page.

    As a loving pet owner, ensuring the well-being and comfort of your furry friend is always a top priority. One essential but often overlooked aspect of dog care is nail maintenance. You might be wondering, “How much is too much when it comes to grinding my dog’s nails?” or “How can I ensure I don’t hurt my pet in the process?” You’re not alone in these concerns. This blog aims to shed light on the often murky waters of dog nail care, specifically addressing the pivotal question: When to stop grinding dog nails? Dive in as we unpack the signs to watch out for and provide handy tips to avoid the quick – ensuring a safe and painless grooming experience for your four-legged companion.

    when to stop grinding dog nails

    How to Avoid Failures While Cutting Your Dog’s Nails

    Ensuring your dog’s nails are well-maintained is more than just aesthetics; it’s about health, comfort, and safety. However, it can be an intimidating process for both owners and their pets. Let’s explore methods to make this process smoother and more efficient, minimizing any potential mishaps.

    Cut Your Dog’s Nails Regularly

    • Regular maintenance reduces the chances of the nails growing too long.
    • Shorter intervals between trims mean less stress for your dog as they become familiar with the routine.
    • It prevents nails from becoming overly curved, which can lead to painful ingrown nails.

    Use an Electric Pet Nail Grinder

    • Nail grinders minimize the risk of cutting into the quick.
    • They give a smoother finish compared to traditional clippers.
    • Grinders are especially beneficial for dogs with thicker nails that are difficult to cut.

    Choose the Right Moment for Cutting Your Dog’s Nails

    • Opt for a time when your dog is calm, perhaps after exercise or a meal.
    • Avoid nail trimming when your dog is overly excited or anxious.
    • Create a calm environment, free from loud noises or other distractions.

    Ease your Pet into Paw Handling

    • Regularly touch and massage your dog’s paws, so they become accustomed to handling.
    • Reward your dog with treats or praise when they allow you to handle their paws.
    • Gradually introduce nail cutting tools without actually using them, so your dog gets familiar with them.

    Introduce the Electric Pet Nail Grinder

    • Start by simply letting your dog sniff and explore the grinder.
    • Turn on the grinder away from your dog initially, so they get used to the sound.
    • Reward your pet with treats and praise for calm behavior around the grinder.

    Have Some Styptic Powder to Hand

    • Accidents happen. Styptic powder quickly stops bleeding if you accidentally cut into the quick.
    • Always keep it nearby during nail trimming sessions.
    • If you don’t have styptic powder, cornstarch can also be effective in a pinch.

    Hold the Paw Firmly When Cutting Your Dog’s Nails

    • A firm grip ensures stability and prevents sudden movements.
    • However, be gentle. Too much pressure can make your dog uncomfortable.
    • Holding the paw up, rather than out to the side, can often give you a better angle for trimming.

    Hold the Tool at a 45-Degree Angle

    • Holding at this angle helps avoid cutting into the quick.
    • It offers a cleaner cut or grind.
    • Regularly check the nail’s progress, ensuring you don’t trim too much at once.

    Praise and Reward After Each Session

    • Always end each nail-trimming session on a positive note.
    • Offer treats, verbal praises, or playtime as a reward for their patience and good behavior.
    • This positive reinforcement encourages better cooperation in subsequent sessions.

    Stay Calm and Patient

    • Your dog can sense your emotions. If you’re anxious or stressed, your dog will pick up on that, making them nervous as well.
    • Take deep breaths if you feel overwhelmed. Remember, you can always take a break and return to the task later.
    • If you’re uncertain, consider observing a professional groomer or veterinarian the first few times. This hands-on learning can help boost your confidence.

    Educate Yourself

    • Continuously educate yourself about your specific dog breed. Some breeds have unique nail considerations.
    • Watch videos, attend workshops, or consult with your vet regularly for nail-trimming tips.
    • The more you know, the better equipped you’ll be to handle unexpected situations.

    Regularly Check the Tools

    • Ensure that your tools, be it clippers or grinders, are sharp and in good working condition.
    • Dull tools can split or crack the nail, causing pain and discomfort.
    • Clean your tools after each session to maintain hygiene and prolong their life.

    Seek Professional Help When Needed

    • If you ever feel uncertain or uncomfortable cutting your dog’s nails, there’s no shame in seeking professional help.
    • Professional groomers and vets have experience with various breeds and nail types.
    • Occasionally having your dog’s nails trimmed by a professional can also provide you with a benchmark for future at-home trims.

    By following these guidelines and remaining patient, nail trimming can become a stress-free routine for both you and your pet. Remember, it’s always okay to take breaks and return to the task if your dog becomes overly anxious. Safety and comfort are paramount.

    stop grinding dog nails

    How Do You Know When to Stop Grinding Your Dog’s Nails?

    Grinding your dog’s nails is an effective alternative to traditional clipping, offering precision and minimizing risks. However, it’s essential to know when to stop to ensure your dog’s safety and comfort. Let’s delve into the indicators and tips that signal it’s time to halt the grinding process.

    Watch for the White Ring

    • As you grind closer to the quick, a small white ring or dot will start to appear in the center of the nail.
    • This white ring indicates that you are approaching the quick and should stop soon.
    • For dogs with darker nails, this can be more challenging to spot, so proceed with caution.

    Check the Nail Temperature

    • Continuous grinding can generate heat, causing discomfort to your dog.
    • If the nail feels warm to the touch, it’s a good idea to give it a break before continuing.
    • Your dog might also pull their paw away or show signs of discomfort due to the heat.

    Observe Your Dog’s Behavior

    • Dogs will often give signs when they’re uncomfortable. They might try to pull their paw away, whine, or show signs of distress.
    • If your dog starts to show discomfort or anxiety, it might be time to pause or stop the grinding process.

    Feel the Nail Thickness

    • As you grind, periodically feel the nail’s thickness between your fingers.
    • When the nail feels considerably thinner and more pliable, you are likely nearing the quick.

    Stay within Safe Lengths

    • Always maintain a conservative length when grinding your dog’s nails.
    • It’s safer to err on the side of slightly longer nails than to risk injuring the quick.
    dog nail anatomy

    Consistent Check-ins

    • Regularly check the progress of the nail as you grind.
    • Pause every few seconds, especially as you get closer to the desired length, to ensure you don’t overdo it.

    Use a Flashlight for Dark Nails

    • For dogs with black or dark-colored nails, shining a flashlight from underneath the nail can help in identifying the quick.
    • The quick will appear as a darker shadow within the nail, signaling that you’re nearing your stop point.

    Consult with a Professional

    • If you’re ever uncertain about how much to grind, consider a consultation with a professional groomer.
    • They can provide guidance on safe lengths for your dog’s specific breed and nail type.

    In essence, understanding when to stop grinding your dog’s nails revolves around observation, gentle touch, and a good sense of your pet’s comfort. With practice and patience, you’ll become more adept at recognizing these signs, ensuring a safe and stress-free experience for both you and your furry friend.

    How Often Should You Grind Dog’s Nails?

    Regular nail maintenance is vital for your dog’s health and comfort. While the frequency of grinding can vary based on several factors, establishing a consistent routine is essential. Here’s a comprehensive guide on determining how often you should grind your dog’s nails.

    Activity Level and Lifestyle

    • Active Dogs: Dogs that are frequently active, especially on hard surfaces like concrete, naturally wear down their nails. These dogs might need less frequent nail grinding.
    • Indoor Dogs: Dogs that spend most of their time indoors on soft surfaces like carpets won’t wear their nails down naturally. They typically require more regular nail grinding.

    Nail Growth Rate

    • Every dog is unique. Some dogs have nails that grow faster than others. Regularly check the nail length to determine the appropriate grinding frequency.

    Age of the Dog

    • Puppies: Puppy nails grow very quickly. You might find that younger dogs require more frequent nail grinding.
    • Senior Dogs: Older dogs might be less active, leading to less natural wear of their nails. Regular checks and possibly more frequent grinding sessions might be needed.

    Type of Nail

    • Hard Nails: Breeds with harder nails might not wear them down as quickly through regular activity. Such breeds often benefit from more frequent grinding.
    • Soft Nails: Soft nails tend to wear down or break naturally but still require consistent check-ups to ensure they’re at a comfortable length.

    General Guidelines

    • Weekly to Bi-weekly: For most dogs, checking the nails weekly and grinding every two weeks is a good starting point.
    • Monthly: For dogs that naturally wear down their nails or have slower nail growth, a monthly check and grind might suffice.

    Visual and Audible Checks

    • If you hear your dog’s nails clicking on the floor when they walk, it’s usually a sign that their nails are too long and need grinding.
    • Visually inspect the nails. If they seem overly curved or long, it’s time for a grind.

    Safety First

    • It’s always better to grind a little bit more often than to wait too long and risk the quick growing out with the nail. Longer nails can also cause discomfort or lead to other issues like ingrown nails or impaired walking.

    Post Grinding Check

    • After grinding, if you notice your dog’s nails still touch the ground when they’re standing, you’ll know to adjust your routine accordingly.

    While there are general guidelines, the exact frequency of nail grinding depends largely on your dog’s individual needs. It’s essential to strike a balance between their natural lifestyle and the need for regular grooming. By staying attentive to your dog’s nails and adjusting based on their specific conditions, you’ll ensure their paws stay healthy and comfortable.

    dremel dog nails

    Does Grinding Dogs Nails Hurt Them?

    It’s a common concern among pet owners: Will grinding my dog’s nails cause them pain? In essence, when done correctly, grinding your dog’s nails is a safe and effective method of nail maintenance that should not cause any pain. However, there are nuances to consider. Let’s explore the matter in-depth.

    The Advantages of Grinding

    • Smooth Finish: Grinding provides a smoother finish to the nail compared to clipping. This reduces the chance of nails snagging on surfaces or splitting.
    • Precision: Grinders offer more control, which allows for a gradual reduction of the nail’s length, minimizing the risk of cutting into the quick.
    • Less Pressure: Unlike clippers that exert sudden pressure, grinders gently wear down the nail, which can be more comfortable for some dogs.

    Potential Sources of Discomfort

    • Heat: Continuous grinding can create friction, which produces heat. If the nail gets too hot, it can be uncomfortable for the dog.
    • Vibration: Some dogs might be sensitive to the vibration caused by the grinder. This sensation can feel odd but typically doesn’t cause pain.
    • Noise: The sound of the grinder can be unsettling for some dogs, leading to anxiety. While this isn’t physical pain, mental distress is worth noting.
    dog nail quick

    The Quick

    The quick is a sensitive part of the nail containing nerves and blood vessels.

    • Grinding Too Deep: Just like cutting, if you grind into the quick, it will cause pain and bleeding. However, the gradual nature of grinding often gives you more reaction time to stop before reaching the quick.
    • Recognizing the Quick: As you approach the quick, a small white or grayish ring or dot will often appear in the center of the nail. It’s a signal to stop grinding.

    Ensuring a Painless Experience

    • Regular Maintenance: Regular nail grinding ensures the quick doesn’t extend too much, making the process easier and reducing chances of injury.
    • Training and Familiarity: Gradually introducing your dog to the grinder, its noise, and sensation can make the experience less stressful.
    • Short Sessions: Instead of grinding each nail down in one go, it might be less stressful to do a little bit on each nail and then cycle through them again. This method can also help avoid generating too much heat on a single nail.
    • Equipment Quality: A good quality grinder with multiple speed options allows for better control and can be gentler on the dog’s nails.

    Professional Consultation

    If you’re uncertain or your dog seems particularly averse to the grinding process, it might be a good idea to consult a professional groomer or vet. They can provide guidance, tips, and even demonstrations.

    When done correctly and with the dog’s comfort in mind, grinding your dog’s nails should not cause them pain. Like any grooming process, it requires patience, understanding, and a bit of practice to ensure a positive experience for both you and your pet.

    What Shape Should Dog Nails Be to Grind?

    Grinding is an effective method for maintaining a dog’s nails, but it’s crucial to know the ideal shape and length to aim for during the process. The shape of a dog’s nails can significantly impact their comfort and overall paw health. Let’s delve into the desired nail shape and how to achieve it through grinding.

    Natural Curve

    • Dog nails naturally have a curve, and it’s essential to respect this natural shape when grinding.
    • Over-grinding or flattening the curve can lead to discomfort and may cause the nail to grow unnaturally.

    Avoiding Overextension

    • Nails that are too long can cause discomfort when walking, leading to posture issues and potential injuries.
    • Ideally, when your dog is standing on a flat surface, their nails shouldn’t touch the ground. If they do, it’s an indication they might be too long.

    Rounded Tips

    • One of the benefits of grinding versus clipping is the ability to achieve a smooth, rounded finish at the tip.
    • Rounded tips prevent nails from snagging on carpets, clothes, or other surfaces and reduce the risk of accidental scratches.

    Maintain a Gradual Taper

    • When grinding, work the nail to create a gentle taper from the base to the tip.
    • A gradual taper respects the nail’s natural shape and ensures the strength and integrity of the nail.

    Avoiding the Quick

    • The quick, a sensitive vein inside the nail, dictates how short you can safely grind the nail.
    • Aim to grind the nail close to, but not touching, the quick. For clear nails, the quick is visible as a pinkish area. For darker nails, watch for a small white ring or dot which indicates you’re approaching the quick.
    dog nail trim diagram

    Checking from Different Angles

    • Periodically, pause and inspect the nail from various angles. This approach ensures even grinding and helps you achieve a consistent shape across all nails.

    Flat Base with a Curved Top

    • Think of the ideal nail shape as a semi-circle. The base (where it connects to the paw) should be relatively flat, while the upper part maintains a natural curve.

    Feedback from Your Dog

    • Dogs often indicate when something doesn’t feel right. If your dog starts to pull away or shows signs of discomfort, it may be an indication that you need to adjust the shape or check your grinding technique.

    Regular Checks and Maintenance

    • Frequent checks will help you identify when it’s time to grind again. Regular maintenance ensures that the nails remain in the ideal shape, making each grinding session simpler and faster.

    In summary, the goal when grinding your dog’s nails is to emulate and maintain their natural shape, ensuring comfort, and avoiding any potential health issues. With patience and practice, you can master the technique, ensuring that your dog’s nails are in the best possible shape for their health and well-being.

    dog toenail grinding

    Conclusion

    Taking care of your furry friend extends beyond just feeding and regular walks. The often overlooked practice of nail maintenance plays a pivotal role in their comfort and overall health. While the process of grinding might initially seem daunting, with the right knowledge, tools, and a gentle approach, it becomes a straightforward task. By understanding the nuances—like when to stop grinding, how often to do it, what shape to aim for, and ensuring it’s a pain-free experience—you’re not just trimming nails; you’re paving the way for a happier, healthier pet.

    Every moment spent in this endeavor also serves to strengthen the bond between you and your canine companion. They learn to trust you even more, recognizing the care and love behind each action. So, as you embark on this journey of regular nail care, remember that with each grind, you’re not just shaping a nail, but also fostering trust and ensuring your pet’s pawsitive well-being. Happy grinding!

    Frequently Asked Questions (FAQs)

    Q: Can I switch between clipping and grinding for my dog’s nails, or should I stick to one method?

    A: Yes, you can switch between methods depending on your comfort level and your dog’s tolerance. Some dog owners clip the nails first to achieve the desired length and then use a grinder to smooth out the edges. It’s essential to ensure your dog is comfortable with both processes and to be especially cautious not to cut or grind too close to the quick.

    Q: How long will it take for my dog to get used to the grinding process?

    A: Each dog is different. Some might become accustomed after a few sessions, while others may take longer. It’s crucial to introduce the grinder gradually, letting your dog get used to its sound and vibration. Starting with short sessions and providing treats and praise can help make the experience more positive.

    Q: What should I do if I accidentally grind into the quick and my dog’s nail starts bleeding?

    A: First, remain calm. While it can be distressing, accidents happen. Have styptic powder or a styptic pencil on hand; these can help stop the bleeding when applied to the nail. If you don’t have these, you can also use cornstarch or flour in a pinch. If the bleeding continues for an extended period or seems excessive, contact your veterinarian.

    Q: How do I choose the best grinder for my dog’s nails?

    A: Look for grinders that have multiple speed settings, which allow for better control. It’s also beneficial to choose a grinder with a safety guard to reduce the chances of grinding too deeply. Reading reviews and consulting with your veterinarian or a professional groomer can provide additional recommendations tailored to your dog’s specific needs.

    Q: My dog is extremely anxious about nail grinding, even after multiple tries. What should I do?

    A: In cases of extreme anxiety, it’s essential to prioritize your dog’s well-being. You can try alternative methods like clipping or consult a professional groomer who may have techniques and tools to make the process more comfortable. It might also be helpful to consult with your vet about possible calming treatments or techniques that can make nail grooming more manageable.

  • How To Calm Dog To Cut Nails- 5 Safe Ways To Relax Before Home Nail Trim

    How To Calm Dog To Cut Nails- 5 Safe Ways To Relax Before Home Nail Trim

    *This page may include affiliate links, which means that if you make a purchase through one of the product links, we may receive a small commission. For full affiliate disclosure please see our disclaimer page.

    If you’re like me, you know that nail-trimming day can sometimes feel like an Olympic event. Whether it’s the nervous dance we do around our furry friend, the hopeful bribery with their favorite treats, or that deep sigh of relief once it’s all over—many of us have been there. Nail trims are essential for our pups, but for some reason, many of our four-legged companions seem to view the humble nail clipper as their arch-nemesis. But what if I told you that nail trimming doesn’t have to be a dramatic episode? Yep, it’s true! Over the years, I’ve gathered some tried-and-true techniques to transform this daunting task into a stress-free experience, both for you and your dog. In this blog, we’ll explore five safe and effective ways to calm your dog to cut nails, ensuring that the process is as smooth and comfortable as possible. Grab your doggo, a cozy spot, and let’s get started!

    calm dog to cut nails

    1. Understanding Your Dog’s Fear

    Before we jump into tactics and strategies, let’s take a moment to understand our pups a bit better. Understanding why our dogs may be afraid can make all the difference in addressing their fears compassionately.

    Why Some Dogs Are Afraid of Nail Trims

    • Past Traumas: Just like humans, dogs can develop fears based on past experiences. If they’ve had a painful nail trim before (like cutting into the quick), they might associate the clippers with pain.
    • The Sensation: Dogs have heightened senses. The pressure of nail cutting, even when painless, is an unfamiliar sensation for them.
    • Sound and Vibration: The sound of the clippers or the slight vibration it might cause can be startling or unnerving for some dogs.
    • Natural Instinct: It’s worth noting that in the wild, showing vulnerability can be risky. Allowing their paws to be held exposes them to a vulnerable position.

    Recognizing the Signs of Stress in Your Dog

    Understanding when your dog is stressed is vital to ensure their comfort. Here are some signs:

    • Vocalizations: Whining, whimpering, or growling can be indicators of distress.
    • Body Language: Tucked tail, pinned ears, and dilated pupils are all signs your dog is feeling uneasy.
    • Avoidance Behavior: If they’re hiding, trying to pull their paw away, or constantly looking away from you and the clippers, they’re probably anxious.
    • Excessive Grooming: Some dogs might lick their paws or lips excessively when they’re nervous.

    It’s essential to remember that every dog is an individual. What terrifies one might not faze another, and vice versa. By truly understanding our canine companion’s fears and signals, we can approach nail trimming with empathy and kindness, ensuring a positive experience for both. After all, as they say, knowledge is power – or in this case, the power to give a gentle, stress-free trim!

    how to calm dog for nail trim

    2. Preparing the Environment

    Alright, now that we’ve dipped our toes into the world of canine emotions, let’s set the stage! The environment in which you trim your dog’s nails plays a huge role in how the experience unfolds. Think of it as setting the mood for a relaxing spa day instead of a trip to the dentist.

    The Role of a Familiar and Quiet Space

    • Comfort Zone: Always choose a spot where your dog feels at ease. This might be their favorite lounging area or where they often play. Familiarity breeds comfort!
    • Avoid Distractions: Reduce sudden loud noises or other potential distractions. Perhaps wait until the mail has been delivered so the doorbell doesn’t ring, or do it at a time when the neighborhood kids aren’t playing loudly outside.

    The Importance of the Right Tools

    • Quality Clippers: Invest in a pair of quality dog nail clippers that are sharp and the right size for your dog. Dull clippers can cause splitting or crushing of the nail, which is uncomfortable.
    • Safety First: Consider clippers with safety guards to avoid over-trimming. And always have styptic powder on hand just in case you nick the quick.
    • Alternative Tools: For dogs especially nervous about clippers, consider using a nail grinder. They’re quieter and reduce the chances of cutting the quick. Just ensure you introduce the grinder slowly, so the vibration doesn’t startle them.

    How Ambient Music or White Noise Can Help

    • Soothing Sounds: Just as some of us humans enjoy calming music during a massage, dogs can also benefit. Consider playing some soft instrumental music or nature sounds to create a serene atmosphere.
    • Drown Out the Scary Noises: White noise machines or even a fan can help mask any unexpected noises that might occur during the session, ensuring your dog isn’t suddenly jolted by a car honk or other startling sounds.

    Setting up the perfect environment is akin to laying the foundation for a house. With the right surroundings and tools, you’re paving the way for a relaxed and efficient nail-trimming experience. After all, our pups deserve nothing but the best!

    comfortable dog for nail trim

    3. Desensitization and Positive Reinforcement

    Hey, dog lovers! As we embark on this topic, let’s acknowledge something: change can be hard, especially when it involves confronting our fears. But with patience, consistency, and a sprinkle of positivity, we can help our furry friends adjust. Here’s how to use desensitization and positive reinforcement to make nail trims a walk in the park… or at least less of a hurdle.

    Introduction to Desensitization and Its Importance

    • Baby Steps: Desensitization is all about introducing our dogs to nail trimming slowly and in controlled increments. Instead of jumping straight into a full-blown nail trim, we break the process down into baby steps.
    • Building Trust: This approach not only helps in reducing fear but also builds trust. When our dogs understand that the clipper or grinder isn’t out to get them, they’re more likely to cooperate.

    Step-by-Step Guide to Desensitization

    1. Clipper Introduction: Before you even think of trimming, let your dog inspect the nail clipper or grinder. Place it near their toys or feeding area for a few days. Curiosity might just get the better of them!
    2. Mock Trimming Sessions: Hold your dog’s paw gently and mimic the motion of trimming without actually doing it. This helps them get used to the sensation.
    3. Short Sessions: Once they seem more comfortable, try trimming just one nail and then giving them a break. Slowly increase the number of nails you trim in one sitting over time.
    4. Consistent Practice: Regular, short sessions are better than rare, long ones. It keeps the routine familiar and less daunting.

    The Magic of Positive Reinforcement

    • treats Galore: After every positive interaction with the nail trimmer or a successful trim, reward your dog with their favorite treat. It builds a positive association.
    • Verbal Praise: Don’t underestimate the power of a cheerful “Good job!” or “Well done!”. Dogs pick up on our enthusiasm and love being praised.
    • Playtime: Maybe after a nail trimming session, engage in a short play session. It serves as both a distraction and a reward.

    Remember, desensitization and positive reinforcement is a journey, not a destination. There might be setbacks, but with persistence, understanding, and lots of love, nail trimming can become a stress-free, or dare we say, enjoyable activity for you and your pup!

    dog getting treat after nail trim

    4. Physical Relaxation Techniques

    Hello to all the pet enthusiasts out there! Now that we’ve journeyed through understanding, preparation, and gentle desensitization, let’s dive into some hands-on (or paws-on) techniques. These physical relaxation strategies are like giving your dog a mini spa session. The idea is to combine the comforts of a massage with the necessity of a nail trim. Let’s pamper those paws!

    Gentle Massage Techniques for Relaxation

    • Paw Massages: Start by gently massaging the pads of their feet. The soft circular motions can help to soothe any tension they might be holding in their paws.
    • Full Body Massage: Gradually expand your touch, moving up their legs, along their spine, and to their neck. Paying attention to areas your dog particularly enjoys can be a game-changer.

    Pressure Points Known to Help Dogs Calm Down

    • Base of the Ear: Gently rubbing the base of your dog’s ears can have a calming effect. It’s a sensitive spot many dogs love being petted or massaged.
    • Chest Rub: Many dogs find gentle strokes or circular massages on the chest soothing. It’s a great way to bond and promote relaxation.

    The Role of Calming Wraps or Anxiety Vests

    • Swaddling Comfort: Just as swaddling can soothe a baby, a calming wrap provides gentle, constant pressure that can help calm a nervous dog. It’s especially handy for pups who have a heightened fear of nail trims.
    • How They Work: These vests or wraps apply gentle pressure to the dog’s body, which can produce a calming effect. It’s similar to the concept of weighted blankets for humans.

    Integrating these relaxation techniques isn’t just about nail trims. It’s about enhancing the bond between you and your dog, understanding their body language, and providing comfort. Every massage, every gentle rub is a reminder that you’re there for them, through the fun times and the nail trims. So, next time, before you pick up those clippers, take a moment to indulge in some relaxation techniques. It could turn your dog’s nail-trimming session from a chore to a cherished moment.

    woman petting dog on couch

    PRO TIP: Calming Essential Oils

    Alright, before we continue, here’s a little golden nugget of advice for those looking to go the extra mile in ensuring a tranquil atmosphere for their dogs.

    Harnessing the Power of Essential Oils: Certain essential oils are known for their calming properties. When used correctly and safely, they can provide an added layer of relaxation for your furry friend.

    1. Lavender: This oil is renowned for its soothing properties, not just for humans but for dogs as well. A whiff of lavender can help reduce anxiety and stress.
    2. Chamomile: Known for its natural calming effects, chamomile can aid in soothing an upset or nervous dog.
    3. Frankincense: This ancient essential oil can provide a sense of tranquility and peace for both dogs and humans.

    How to Use:

    • Diffuse with Care: Use a diffuser in the room, starting with a low concentration. Ensure it’s not too strong, as dogs have a much more sensitive sense of smell than humans.
    • DIY Calming Sprays: You can make a diluted spray using a few drops of essential oil in water. Spritz it in the room or on your dog’s bed. Avoid direct contact with the skin or spraying it on their face.
    • Consult with a Vet: Before using any essential oils, always consult with your veterinarian, especially if your dog has a medical condition or is pregnant.

    Caution! While many essential oils can be beneficial, some can be toxic to dogs. Always ensure you’re using dog-safe oils and avoid oils like tea tree, cinnamon, citrus, and pennyroyal, among others.

    Essential oils can be a beautiful addition to your relaxation toolkit, providing a serene backdrop for those nail-trimming days. Remember, the key is moderation and always prioritizing your pup’s comfort and safety.

    essential oils for dogs

    5. Natural Calmatives and Supplements

    While setting the mood and mastering the technique are pivotal, sometimes our fur-babies need an extra nudge towards relaxation. Nature offers a variety of gentle helpers that can promote calmness in our pets. So, let’s explore the world of natural calmatives and supplements that can make nail trimming a zen-like experience for your dog.

    Herbal Remedies Known to Calm Dogs

    • Valerian Root: Often used as a sleep aid for humans, this herb can also help reduce anxiety in dogs. It’s nature’s answer to creating a relaxed state of mind.
    • Chamomile: We mentioned it as an essential oil, but chamomile in its natural form or as a tea can also be a mild relaxant for dogs when ingested.
    • Passionflower: Historically used to treat restlessness and agitation, passionflower can provide a calming effect without causing drowsiness.

    Natural Supplements to Consider

    • L-Theanine: An amino acid found in green tea, L-Theanine can promote relaxation and reduce irritability without sedation.
    • Hemp Oil or CBD for Dogs: Gaining popularity for its wide range of health benefits, CBD (when derived from hemp and containing 0.3% THC or less) can be a great way to alleviate anxiety in dogs. Always opt for high-quality, pet-specific products.

    Calming Treats and Chews

    • Pre-Made Options: Several companies offer calming chews or treats infused with a mix of the above ingredients, making it easy to administer before nail trims.
    • Homemade Treats: If you’re the DIY type, consider making treats infused with dog-safe calming herbs. Not only do you control the ingredients, but the act of giving a homemade treat can also reinforce your bond.

    When to Administer

    For most calmatives and supplements, timing is crucial. Administering them 30 minutes to an hour before nail trimming allows them to take effect just when you need them most.

    A Friendly Reminder: Always consult your veterinarian before introducing any new supplements or herbs into your dog’s routine. Every dog is unique, and what works for one might not be suitable for another. Plus, it’s essential to ensure there are no interactions with any existing medications or health conditions.

    Natural calmatives and supplements are a testament to nature’s brilliance. With their aid, nail trimming can evolve from a dreaded task to a peaceful ritual, drawing you and your canine companion even closer. Mother Nature’s got your back, and so do we!

    hold dog paw

    Conclusion

    Whew! We’ve traversed quite the journey together, haven’t we? From understanding our dog’s fears to immersing ourselves in the holistic world of natural calmatives. But here’s the crux of it all: nail trimming isn’t merely about grooming—it’s a chance to bond, to communicate, and to showcase our unwavering love and care.

    By now, we hope you’re equipped with a toolbox brimming with strategies and tips to make nail trims a more serene experience for both you and your furry friend. Remember, patience is key. Some dogs might take longer to adjust than others, but with consistent effort, understanding, and a lot of heart, even the most nail-trim-averse pup can come around.

    Your dog is more than just a pet; they’re family. Every moment, be it playtime or a simple grooming session, is an opportunity to deepen that connection. So the next time you approach those clippers, do it with confidence, armed with knowledge and the comforting thought that you’re doing the best for your canine companion.

    Here’s to more wagging tails, contented woofs, and hassle-free nail trims. Until next time, keep pampering those paws and cherish every moment with your four-legged friend!

    Frequently Asked Questions (FAQs)

    1. How often should I trim my dog’s nails?

    Answer: The frequency of nail trims varies depending on your dog’s activity level and where they spend most of their time. Dogs that walk on hard surfaces may naturally wear down their nails and need less frequent trims. However, on average, most dogs will benefit from a nail trim every 3-4 weeks. Always check your dog’s nails regularly and trim when necessary to prevent overgrowth.

    2. What should I do if I accidentally cut the ‘quick’ of my dog’s nail?

    Answer: It happens to the best of us! If you accidentally cut the quick, causing it to bleed, remain calm. Apply styptic powder or cornstarch to the bleeding nail to help clot it. Gently press it against the nail for a few seconds. If bleeding continues or if your dog appears in pain, consult your veterinarian.

    3. Are there specific essential oils I should avoid for dogs?

    Answer: Yes, while some essential oils can be beneficial, others can be toxic to dogs. Some oils to avoid include tea tree, cinnamon, citrus, pennyroyal, and many more. Always research and consult with your vet before introducing any new oil to your dog’s environment.

    4. Can I use human nail clippers on my dog?

    Answer: It’s recommended to use dog-specific nail clippers. Human nail clippers might not be strong enough to cut through a dog’s nail, especially for larger breeds, and could cause splitting or uneven cuts. There are various types of dog nail clippers available, including scissor-type and guillotine-type, to suit different needs.

    5. My dog is extremely fearful, and even with these methods, nail trimming is a struggle. What should I do?

    Answer: If your dog is excessively fearful, it might be beneficial to consult with a professional dog trainer or behaviorist. They can provide specialized techniques tailored to your dog’s needs. In extreme cases, consider seeking the assistance of your vet or a professional groomer who can provide a safe and stress-free experience for your pet.

  • How To Use Guillotine Dog Nail Clippers: A Safe Trimming Guide

    How To Use Guillotine Dog Nail Clippers: A Safe Trimming Guide

    *This page may include affiliate links, which means that if you make a purchase through one of the product links, we may receive a small commission. For full affiliate disclosure please see our disclaimer page.

    Trimming your dog’s nails is more than just a cosmetic chore; it’s a vital aspect of their overall health and well-being. But, if you’ve ever been intimidated by the thought of accidentally cutting into the quick or simply navigating the myriad of tools available, you’re not alone. Enter the guillotine dog nail clippers—a popular, efficient, and user-friendly choice for many pet owners. This comprehensive guide will shed light on how to use guillotine dog nail clippers safely, ensuring a stress-free and comfortable experience for both you and your furry friend. Dive in as we demystify the process, step by step, so you can clip with confidence!

    how to use guillotine nail clippers

    How to tell if your dog’s nails need clipping 

    Dogs might not pop into your salon chair and ask for a pedicure, but their nails can tell you a lot about their grooming needs. Overgrown nails can lead to a variety of health problems for your pooch, so it’s essential to recognize the signs. Here are some clear indicators that it’s time to grab those clippers:

    1. Click-Clack Sound

    Every time your dog walks on a hard floor, and you hear a distinctive clicking noise, that’s a telltale sign. Healthy dog nails shouldn’t make contact with the ground in such a manner.

    2. Sideways Growth

    Inspect the nails. If they are growing in a curved manner, almost sideways, then they are probably too long. In extreme cases, they can even grow back into the paw pad, which is painful.

    3. Trouble Walking

    Watch your dog’s gait. If they seem to be walking more gingerly or are limping, overgrown nails might be the culprit. Long nails can alter the way a dog positions its foot and moves.

    4. Visible Quick

    For dogs with clear nails, you can see the “quick,” which is a darker, inner part of the nail containing blood vessels and nerves. If there’s only a tiny bit of clear nail beyond the quick, it’s time for a trim.

    5. Scratching You More Than Usual

    If your usually gentle pet suddenly starts scratching you with their paws and it feels sharper than usual, their nails might have grown longer than is comfortable for them (or you!).

    6. Nails Catching on Fabrics

    Whether it’s your carpet, the couch, or your favorite sweater, if your dog’s nails are getting caught frequently, it’s a signal they need a trim.

    7. Discomfort or Pain

    If your dog starts licking their paws excessively or seems sensitive when you touch their feet, long or damaged nails might be causing discomfort.

    Tips for Regular Maintenance

    To avoid reaching the stage where your dog’s nails become noticeably overgrown, consider:

    • Setting a Schedule: Depending on your dog’s activities and the surfaces they walk on, you might need to trim their nails every few weeks or once a month.
    • Regular Inspections: Make a habit of checking their nails during regular grooming or bath time.

    Remember, regular nail trims not only keep your dog comfortable but also prevent potential health issues. So, keep those clippers close and ensure your furry friend’s paws are always in tip-top shape!

    dog getting nails trimmed

    Are guillotine dog nail clippers better than bypass types? What’s the difference? 

    Choosing the right type of dog nail clippers can feel overwhelming, especially when faced with various options, each boasting its unique features. Two of the most popular styles are the guillotine and bypass types. Let’s break down their differences and determine which might be better suited for your dog’s grooming needs.

    Guillotine Dog Nail Clippers:

    1. Mechanism: These clippers work just like a guillotine. Once the nail is placed through a small hole, a blade slides across to trim the nail.
    2. Best For: Typically recommended for smaller dogs due to the size and the amount of force they exert. They might not be as effective for larger dogs with thicker nails.
    3. Advantages:
      • Quick and easy to use for small nails.
      • Often results in a cleaner cut for smaller breeds.
      • Less force is required to clip the nail, which can be easier on the hands.
    4. Disadvantages:
      • Blade needs to be changed regularly to ensure a clean cut.
      • Not suitable for thicker nails, as they can crush rather than clip.

    Bypass Dog Nail Clippers (Scissor Type):

    1. Mechanism: They look and work similarly to scissors, where two blades bypass each other to create the cut.
    2. Best For: Suitable for dogs of all sizes, from small breeds to larger ones with thicker nails.
    3. Advantages:
      • Strong and durable, ideal for thicker nails.
      • Typically last longer without needing blade replacements.
      • Offer more control, which can be beneficial for dogs that fidget.
    4. Disadvantages:
      • They can crush the nail if not sharp.
      • Might be more intimidating to some dogs due to their size and appearance.

    So, Which Is Better?

    The decision between guillotine and bypass clippers boils down to personal preference and your dog’s size and nail thickness. If you have a smaller dog with delicate nails, guillotine clippers might be your best bet. On the other hand, if you’re dealing with a larger breed or one with sturdy nails, bypass clippers offer the strength and control you might need.

    Regardless of your choice, always ensure your clippers are sharp, clean, and in good condition. A dull blade can cause splintering or crushing of the nail, which is uncomfortable for your pup.

    In addition to the type of clipper, your comfort and confidence in using the tool are crucial. If you’re unsure, consider consulting with a professional groomer or vet for advice tailored to your dog’s specific needs.

    guillotine dog nail clippers

    How to Clip Your Dog’s Nails With Guillotine Clipper

    Trimming your dog’s nails might sound daunting, especially if you’ve never done it before. Using a guillotine clipper can simplify the process when done correctly. Here’s a step-by-step guide to help you navigate this essential grooming routine:

    Step 1. Get Your Dog Used To The Guillotine Clipper

    Before you even think about trimming, it’s essential to make your dog familiar with the clipper. This will help reduce any anxiety or fear.

    • Desensitize: Let your dog inspect and sniff the clipper for a few days before the actual trimming.
    • Touch Their Paws: Regularly handle your dog’s paws, pressing gently on each toe, so they become accustomed to the sensation.
    • Mimic the Trimming Motion: With the clipper’s blade retracted, mimic the trimming motion on their nails without actually cutting, so they get used to the feel of the tool.

    Step 2. Clip Away!

    Once your dog is comfortable, it’s time to start the trimming process:

    • Find a Comfortable Spot: Opt for a well-lit area. If your dog is small, you can place them on a table or your lap. For larger breeds, the floor works best.
    • Hold the Paw Firmly: Gently but firmly grasp your dog’s paw. Press lightly on the pad to extend the nail.
    • Position the Clipper: Insert the nail into the hole of the guillotine clipper, ensuring you’re not too close to the quick. If your dog has clear nails, the quick will appear as a pinkish area inside the nail.
    • Clip: Once positioned correctly, squeeze the clipper’s handles together to cut the nail. Make sure to cut perpendicular to the nail.
    dog nail trim diagram

    Step 3. Load On the Praise!

    Positive reinforcement goes a long way. After each nail or even a successful trimming session:

    • Verbal Praise: Cheerfully tell your dog how good they are.
    • Treats: Offer a small treat or their favorite toy as a reward.
    • Petting: A good cuddle or petting session can help reassure your dog.

    Step 4. File Down Nail Edges

    After trimming, nails can have sharp edges. To prevent scratching and ensure a smooth finish:

    • Use a nail file or grinder to smooth out the tips.
    • Be gentle and ensure you don’t file too close to the quick.

    Oh No, I Cut My Dog’s Quick!

    Accidents happen. If you cut into the quick:

    • Stay Calm: Your dog will pick up on your anxiety, so try to remain calm.
    • Staunch the Bleeding: Use styptic powder or a styptic pencil to stop the bleeding. If you don’t have these on hand, cornstarch can work in a pinch.
    • Comfort Your Dog: They might be in pain or shock. Offer comfort and maybe a treat to distract them.
    • Check for Infection: Over the next few days, keep an eye on the nail to ensure there’s no sign of infection.

    Remember, practice makes perfect. The more you trim your dog’s nails, the more confident and efficient you’ll become. If ever in doubt, consult with a professional groomer or veterinarian for guidance.

    freshly trimmed dog nails

    How to hold dog nail clippers 

    Holding dog nail clippers correctly ensures both precision and safety. The right grip will give you control, reduce the risk of injury, and make the process smoother for both you and your dog. Here’s a guide on how to achieve the optimal grip based on the type of nail clipper you’re using:

    Guillotine Clippers:

    1. Thumb Placement: Your thumb should go into the single, large loop of the clipper. This loop is where the squeezing action will come from.
    2. Finger Placement: Your remaining fingers should wrap around the body of the clipper, stabilizing it. Your index finger can rest near the top, guiding the motion.
    3. Orientation: Ensure that the hole (where you insert the nail) faces you, so you can see exactly where you’re cutting. This helps in avoiding the quick.

    Bypass (Scissor-type) Clippers:

    1. Thumb and Finger Loops: Bypass clippers come with two loops. Place your thumb in one and your fingers (usually index and middle) in the other.
    2. Solid Grip: Your remaining fingers should wrap around the handles for additional support and control.
    3. Orientation: While cutting, make sure the clipper’s blades are perpendicular to the nail to prevent splitting.

    General Tips for Both Types:

    1. Relaxed Grip: While you want control, avoid gripping too tightly as this might cause your hand to shake or tire quickly.
    2. Stabilize the Dog’s Paw: Use your free hand to hold the dog’s paw gently but firmly. This gives you better control and helps in keeping the nail steady.
    3. Wrist Movement: Focus on moving from the wrist rather than the whole arm. This provides better precision and control.
    4. Short and Quick Clips: Especially if you’re new to this or if your dog is anxious, make short and quick clips. This minimizes any discomfort for the dog and reduces the risk of cutting into the quick.

    Properly holding the nail clippers can make a significant difference in the nail-trimming experience. The more confident and controlled you are, the more at ease your dog will be. Remember, if you’re ever unsure, there’s no harm in seeking a demonstration or advice from a professional groomer or vet.

    What is the guard for on dog nail clippers? 

    Ah, the trusty guard on dog nail clippers—often overlooked but undeniably handy for those venturing into the world of dog pedicures. If you’ve ever wondered about that little metal piece protruding from your clipper and its role in your dog’s grooming routine, you’re not alone. Let’s dive into its purpose and how it can make nail trimming a tad bit easier for you and your furry friend.

    Purpose of the Guard:

    1. Safety Feature: The primary function of the guard is to prevent over-trimming. It acts as a barrier, ensuring you don’t cut too much of the nail off in one go. This is especially useful for those less experienced in dog nail trimming, as it reduces the risk of accidentally cutting into the quick.
    2. Consistent Length: The guard helps in achieving a uniform length across all nails. This consistency not only looks neat but also ensures your dog’s paws remain balanced and comfortable when walking.
    3. Reducing Anxiety: For pet parents who are a little nervous about the trimming process, the guard offers an extra layer of reassurance. Knowing there’s a mechanism in place to prevent cutting too deeply can provide a confidence boost.

    Using the Guard Effectively:

    1. Adjust If Possible: Some advanced nail clippers come with adjustable guards. Depending on your dog’s nail size and your comfort level, you can set the guard to allow more or less of the nail through for clipping.
    2. Ensure Visibility: While the guard is helpful, you still want to see what you’re doing. Make sure it doesn’t obstruct your view of the nail, especially the quick.
    3. Remember, It’s a Guide: While the guard is a useful tool, it’s essential to remember that it’s just a guide. Always pay attention to the nail’s anatomy, especially if your dog has darker nails where the quick isn’t easily visible.

    While the guard on dog nail clippers might seem like a minor feature, it plays a significant role in ensuring a safe and stress-free trimming experience. However, as with all tools, it’s crucial to use it correctly and in conjunction with your judgment. If ever in doubt, a quick chat with a seasoned groomer or vet can offer insights tailored to your pup’s specific needs. Happy trimming!

    dog nail clipper gaurd

    How to sharpen guillotine dog nail clippers 

    Sharp guillotine dog nail clippers are essential for a quick, clean cut. Dull clippers can crush or splinter a dog’s nails, causing discomfort or even injury. If you’ve noticed that your clippers aren’t cutting as smoothly as they once did, it might be time to sharpen them. Here’s a step-by-step guide on how to bring that sharp edge back to your guillotine dog nail clippers:

    1. Disassemble the Clippers:

    Before sharpening, it’s crucial to disassemble the clippers for safety and to get a good angle on the blade.

    • Remove the Blade: Most guillotine clippers have a small retaining ring or screw that holds the blade in place. Using a screwdriver or pliers, carefully remove this to detach the blade.

    2. Clean the Blade:

    Once you have the blade removed:

    • Wipe away any nail fragments or dirt using a cloth.
    • Clean the blade with soapy water, rinse, and dry thoroughly. This removes any accumulated grime and allows for more effective sharpening.

    3. Sharpening with a File:

    • Choose the Right File: A diamond taper file or a ceramic rod is ideal for this purpose due to their fine grit and precision.
    • Angle & Motion: Hold the blade at an angle (usually around 45 degrees) to the file. Using smooth, consistent strokes, slide the blade down the file from the base to the tip.
    • Check Your Progress: After several strokes, check the blade’s sharpness by feeling it with your fingers (move your fingers from the base to the tip to avoid cutting yourself).

    4. Reassemble the Clippers:

    Once satisfied with the sharpness:

    • Place the blade back into its slot on the clippers.
    • Reattach the retaining ring or screw to secure the blade in place.

    5. Test the Clippers:

    Before using them on your dog, test the clippers on a small, thin stick or a piece of paper. This ensures the blade is sharp and reattached correctly.

    6. Maintenance and Safety:

    • Regular Checks: Regularly inspect your clippers for signs of dullness or damage. Keeping them sharp will ensure they work efficiently and safely.
    • Replacement: Sometimes, blades are past their prime or too damaged. In such cases, it’s more effective to replace the blade or the entire clipper.
    • Store Properly: After use, clean and store your clippers in a dry place to prevent rusting or damage.

    Sharpening guillotine dog nail clippers might require a bit of patience, but it’s a skill worth mastering. Not only does it save money in the long run, but it also ensures your dog’s nail trimming experience is as smooth and stress-free as possible. If you’re ever uncertain about the sharpness or assembly, don’t hesitate to seek advice from a professional groomer or pet supply store.

    trimming dog nails with guillotine clippers

    Guillotine vs. Others

    When trimming your dog’s nails, the right tool is pivotal for both safety and ease. The market offers a variety of dog nail clippers, but most fall into a few primary categories. Here’s a detailed comparison between guillotine clippers and other prominent types, using tables for a clearer breakdown of their pros and cons.

    1. Guillotine Clippers:

    • How They Work: Guillotine clippers have a hole where the dog’s nail is inserted. A blade slides across this hole to trim the nail when the handles are squeezed.
    ProsCons
    Ideal for small to medium-sized dogs with relatively thin nails.Can crush or splinter the nail if not sharp.
    Straightforward cutting action can be less intimidating for some users.Not suitable for very thick or large nails.
    guillotine style nail clippers

    2. Scissor (Bypass) Clippers:

    • How They Work: Resembling scissors, they’re tailored for dog nails. Some models feature a curved blade to fit the nail’s shape.
    ProsCons
    Perfect for thicker nails or larger dogs.Might be excessive for tiny dogs or puppies.
    Offers more control over the cutting angle.Their size can be more intimidating for some users.
    bypass clippers

    3. Grinder Tools (Rotary):

    • How They Work: These electronic tools grind down the nail using a rotating component.
    ProsCons
    Suitable for dogs with very thick nails.The noise and vibration can unsettle some dogs.
    Lowers the risk of cutting into the quick.Requires more time than straightforward clipping.
    Produces a smooth nail edge, reducing scratchiness.Needs regular battery replacements or recharging.
    grinder style nail clippers

    Which One is Best?

    Choosing the right tool depends on the dog’s characteristics and the owner’s comfort level. Factors to consider include:

    • Dog’s Size and Nail Thickness: A Chihuahua’s needs differ vastly from those of a Saint Bernard.
    • User’s Comfort: Some may find the guillotine’s squeezing action simpler, whereas others might favor the scissor clippers’ familiar mechanism.
    • Dog’s Temperament: A skittish dog might not bear the sound or vibration of a grinder, but a calmer one might have no issues.

    Ultimately, regardless of your choice, ensure you use the tool correctly and maintain it well. If uncertain, consult a professional groomer or veterinarian.

    Conclusion

    Trimming your dog’s nails is more than just a grooming ritual; it’s an essential act of care that ensures their comfort, health, and overall well-being. With the myriad of options available in the market, choosing the right tool might feel overwhelming, but remember, the perfect clipper is the one that aligns with both your dog’s needs and your comfort.

    Whether you’re a fan of the swift precision of the guillotine, the robust control of the scissor clippers, or the gentle touch of the rotary grinder, the key lies in regular maintenance, patience, and gentle handling. After all, this isn’t just about aesthetics or routine—it’s a bonding moment, a time when you reassure your dog that you’re looking out for them.

    Remember, the journey to a perfect trim isn’t just about the tool but also the hand that wields it. Stay informed, practice often, and always prioritize your dog’s comfort. And when in doubt? Seek expert advice. Your furry friend’s trust and wagging tail will be the best indicators that you’ve made the right choice.

    Frequently Asked Questions (FAQs)

    What if my dog is afraid of nail clippers?

    It’s common for dogs to be wary of unfamiliar objects. Start by introducing the clipper slowly. Let them sniff and get acquainted without actually trimming. Positive reinforcement with treats and praise can also help. Over time and with consistent exposure, most dogs will become accustomed to the tool.

    How often should I trim my dog’s nails?

    The frequency depends on your dog’s lifestyle and the rate at which their nails grow. Generally, most dogs need their nails trimmed every 3-4 weeks. If you hear their nails clicking on hard surfaces, it’s a sign they’re due for a trim.

    What should I do if I accidentally cut the quick?

    First, don’t panic. While it might bleed and cause your dog some discomfort, it’s not life-threatening. Apply styptic powder or cornstarch to the bleeding nail to help it clot faster. Give your dog some comfort and be sure to be extra cautious next time.

    Is it better to clip or grind dog nails?

    Both methods have their advantages. Clipping is quick and efficient, while grinding can give a smoother finish and may be better for dogs with thick nails. The best method often comes down to the dog’s temperament and the owner’s comfort level.

    Can I use human nail clippers on my dog?

    While it’s technically possible for very small breeds or puppies, human nail clippers aren’t designed for the thickness and shape of dog nails. It’s always best to use tools specifically designed for dogs to ensure safety and effectiveness.

  • How To Trim A Dog’s Dew Claw- Easy Step By Step

    How To Trim A Dog’s Dew Claw- Easy Step By Step

    As a devoted dog parent, I know the challenges we often face when it comes to grooming our furry friends. One frequently overlooked aspect of canine care is the dew claw— that little ‘thumb’ nail on the side of their leg. Left unattended, it can grow into the skin, leading to pain and potential infection. If you’ve been wondering about the best approach to handle this delicate task, you’re in the right place. Welcome to my comprehensive guide on “How To Trim A Dog’s Dew Claw – Easy Step By Step.” Whether you’re a newbie to dog grooming or just looking for some refreshers, this blog will ensure that you can confidently and safely keep those dew claws in check. Let’s make grooming a stress-free experience for both you and your pup!

    how to trim dewclaws

    6 Tips for Trimming Your Dog’s Dew Claw

    Grooming your dog involves more than just baths and brush-outs. One often overlooked yet essential area of canine care is the dew claw—a tiny ‘thumb’ nail that requires just as much attention as the rest. While it might seem intimidating to trim this delicate part, with the right guidance, it’s a breeze! Here are six expert tips to ensure a safe and stress-free dew claw trimming experience for both you and your furry companion.

    Dew Claws Can Become Ingrown

    Understanding the anatomy of your dog’s dew claw is essential. Unlike other nails, dew claws don’t touch the ground, so they don’t naturally wear down. If neglected, they can grow in a circular manner back into the dog’s skin, causing discomfort or even infections. Regular check-ups are essential to prevent them from becoming ingrown.

    Dew Claws May Be Sore

    Always approach dew claw trimming with a gentle touch. Some dogs have dew claws that are loosely attached, while others are firmly attached to the leg. Because of this variability, they can sometimes be more sensitive than other nails. Ensure your dog is relaxed and comfortable, and always pay attention to their reactions while trimming.

    Use a Flashlight to See the Quick

    One of the main challenges of trimming a dog’s nails is avoiding the ‘quick,’ which is the blood vessel running through the nail. Accidentally cutting this can cause bleeding. Using a flashlight (or even your phone’s flashlight) behind the dew claw can help illuminate it, making the quick easier to see, especially in dark nails. This trick helps in ensuring you don’t cut too far.

    how to clip dog dewclaw

    Have Styptic Powder Ready

    Even the most experienced dog parents and groomers can occasionally nick the quick. It’s essential to have styptic powder on hand. If the nail starts to bleed, quickly apply the powder to stop the bleeding. It also helps to calm your dog if they’re startled by the sudden discomfort.

    File the Dew Claw

    After trimming, the edge of the dew claw can be sharp. To prevent any scratches or injuries, use a nail file or a pet-specific nail grinder to smooth out the edges. This step ensures the nail is not only shorter but also safe for both your dog and anyone they might jump on in excitement.

    Work Slowly

    Patience is the key. Especially if it’s your first time, or if your dog is nervous, it’s important to take things slow. Give your dog breaks if they’re showing signs of stress. It’s always better to trim a little bit at a time and check your progress than to rush and risk cutting too much.

    Remember, as you embark on this grooming task, every dog is unique. Their threshold for discomfort varies. It’s always good to start with positive reinforcement, like treats or affection, to make the process smoother for both you and your four-legged friend.

    Caution & Considerations

    Trimming your dog’s dew claw is a task that demands a blend of patience, precision, and preparation. Without proper care, this simple grooming exercise can lead to discomfort or even injury. To ensure a positive experience for both you and your furry friend, keep the following cautions and considerations in mind:

    1. Know Your Dog’s Tolerance Level: Every dog is different. Some might sit still during the entire process, while others could get antsy after just a few moments. It’s important to understand your dog’s comfort level and ensure you’re working within their threshold.
    2. Not All Dew Claws Are Alike: While most dogs have front dew claws, not all have them on their hind legs. Moreover, the attachment and thickness can vary. Always inspect the dew claw carefully before starting.
    3. Stay Calm: Your pet can sense your emotions. If you’re anxious or stressed about trimming the dew claw, your dog will likely pick up on that energy. Take a few deep breaths and ensure you’re calm before you begin.
    4. Avoid Force: Never hold your dog down forcefully. If they’re showing signs of distress, it might be better to take a break or even postpone the session.
    5. Seek Professional Help: If you’re unsure about any step or feel overwhelmed by the process, it’s always a good idea to consult a professional groomer or vet. They can either guide you through the process or do it for you.
    6. Monitor for After-trim Complications: While rare, there might be cases of post-trim bleeding or irritation. Always keep an eye on the trimmed area for a day or two to ensure everything’s okay. If you notice any prolonged discomfort or bleeding, consult a vet.

    Incorporating these considerations will not only ensure the safety and comfort of your beloved pet but also foster a bond of trust between you two during grooming sessions.

    overgrown dew claw

    Conclusion

    Navigating the world of canine grooming can sometimes feel like a daunting journey, especially when addressing those less frequently discussed tasks like dew claw maintenance. But with the right guidance and a touch of patience, even the most apprehensive pet owner can become a dew claw trimming pro. Remember, at the heart of this process is the well-being and comfort of our furry companions. With every trim, we’re ensuring they’re free from potential pain or discomfort. So, armed with these tips, considerations, and a healthy dose of love, you’re more than ready to give your dog the care they deserve. Happy grooming!

    dog dewclaw

    Frequently Asked Questions (FAQs)

    1. How often should I trim my dog’s dew claw?

    Answer: The frequency can vary based on the dog’s activity level and how quickly their nails grow. On average, checking the dew claw every 3-4 weeks is a good rule of thumb. If it’s starting to curve or seems overly long, it’s time for a trim.

    2. What if my dog doesn’t let me touch their dew claw at all?

    Answer: Some dogs are more sensitive or anxious about having their paws handled. In these cases, positive reinforcement using treats, patience, and gradual desensitization can help. If your dog remains resistant, seeking a professional groomer or vet for the task might be the best option.

    3. My dog’s dew claw is very close to the skin. Should I still trim it?

    Answer: If the dew claw is very close to the skin but isn’t causing any discomfort or isn’t at risk of growing into the skin, you might not need to trim it regularly. However, it’s still crucial to inspect it frequently to ensure it doesn’t become problematic in the future.

    4. I accidentally cut into the quick, and even after applying styptic powder, it still seems sore. What should I do?

    Answer: If after nicking the quick, your dog seems to be in prolonged discomfort, it’s essential to consult with a vet. They might recommend an anti-inflammatory or provide guidance on care to prevent infection.

    5. Can I use human nail clippers for the dew claw trimming?

    Answer: While it’s possible to use human nail clippers for very small or young dogs, it’s generally recommended to use pet-specific nail clippers. They are designed to handle the thickness and shape of dog nails, providing a cleaner, safer cut.

  • Can You Cut Dog Nails With Human Nail Clippers? How To Use

    Can You Cut Dog Nails With Human Nail Clippers? How To Use

    I’m sure many of us, as pet parents, have found ourselves in that moment of panic when we realize our fur-baby’s nails are getting a bit too long. The immediate thought that often springs to mind is: “Can You Cut Dog Nails With Human Nail Clippers?” Well, you’re in luck! Today on the blog, we’re diving deep into the topic of using human nail clippers on our canine companions. Whether you’re in a pinch or simply curious, I’m here to guide you through the process and answer that burning question. Let’s start this nail-trimming journey together and ensure that both you and your furry friend have a safe and comfortable experience!

    human nail clippers for dog

    Is it okay to cut a dog’s nails with human nail clippers?

    Many pet owners, at some point, have pondered this question. Before making any decisions, it’s essential to understand the differences between dog nails and human nails, as well as the tools designed specifically for each.

    Anatomy of Dog Nails vs. Human Nails

    • Dog Nails:
      • Are much thicker and tougher than human nails.
      • Have a “quick” (a vein that runs into the nail) which can bleed and cause pain if cut.
      • Are rounded in shape, making it harder to get a clean cut with flat clippers.
    • Human Nails:
      • Are flatter and less tough.
      • Don’t have a quick, so there’s less risk when trimming.

    The Concerns of Using Human Nail Clippers on Dogs

    1. Lack of Precision: Human clippers are designed for the flat profile of our nails. Using them on a rounded dog nail might not provide a clean, smooth cut.
    2. Risk of Splintering: The pressure from human nail clippers might cause dog nails to split or fracture.
    3. The Quick: Human clippers might not give you a good view of the quick, increasing the risk of accidentally cutting into it.
    4. Size of the Clippers: For larger dog breeds, human nail clippers might simply be too small to be effective.
    are human clippers safe for dogs

    So, Can You Use Them?

    While it’s possible to use human nail clippers on dogs, especially in a pinch or for smaller breeds with softer nails, it’s generally not recommended for regular grooming. The risks outweigh the benefits.

    Better Alternatives

    • Guillotine-style Clippers: Designed specifically for dogs, these provide a round cut ideal for the shape of dog nails.
    • Grinder Tools: These are electric tools that grind down the nail, minimizing the risk of cutting the quick and offering a smoother finish.
    • Professional Groomers: If you’re nervous about cutting your dog’s nails yourself, it might be worth investing in a professional’s service.

    While our love for our pets often means we look for quick solutions in times of need, it’s essential to use the right tools for the job. For the sake of your dog’s comfort and safety, invest in proper grooming tools or seek professional assistance. Your furry friend will thank you!

    boston terrier getting a nail trim

    Why use nail clippers designed for dogs?

    Our dogs are not just pets; they’re family. As responsible pet parents, ensuring their well-being and comfort is our top priority. When it comes to grooming, particularly nail trimming, using the right tool is crucial. So, why should we opt for nail clippers designed specifically for dogs? Here’s a breakdown:

    1. Anatomical Considerations

    • Nail Structure: As discussed earlier, dog nails are thicker, tougher, and more rounded than human nails. Dog-specific clippers are designed to accommodate this unique structure.
    • The Quick: Dog nails contain a quick that, if nicked, can lead to bleeding and pain. Dog clippers allow for more precision, reducing the risk of injury.

    2. Safety and Comfort

    • Grip and Control: Dog nail clippers typically come with ergonomic designs that provide a firmer grip, ensuring a stable hold and reducing the risk of accidental slips.
    • Sharpness: They are specially crafted to cut through the hard texture of dog nails cleanly, minimizing splintering or splitting.

    3. Efficiency

    • Quick Trimming: Clippers for dogs are efficient and can trim nails quickly, reducing the stress and discomfort for your dog, especially if they’re nervous or restless.
    • Variety for Different Breeds: Clippers come in various sizes and styles, ensuring that whether you have a Chihuahua or a Great Dane, there’s a tool tailored for your pet.

    4. Durability

    • Sturdy Materials: Dog nail clippers are typically made of high-quality stainless steel, ensuring they remain sharp and effective for longer periods.
    • Long-term Investment: Given their durability, investing in a good pair of dog nail clippers means you won’t need to replace them frequently.

    5. Added Features

    • Safety Guards: Some clippers come with built-in safety guards to prevent over-cutting, which is particularly beneficial for those who are new to nail trimming.
    • Lock Mechanisms: These ensure the clippers remain closed when not in use, reducing the risk of accidental injury.
    • Comfort Handles: Many clippers have rubberized or padded handles, making them comfortable to use and reducing hand fatigue.

    Choosing the right tools for our pets is a reflection of our commitment to their health and happiness. Nail clippers designed for dogs prioritize their unique anatomy, safety, and comfort, ensuring a stress-free grooming experience for both pet and owner. So, while it might be tempting to improvise with what’s on hand, investing in the proper equipment is a small gesture with significant benefits.

    Risks of Using Human Nail Clippers On Your Dog

    It’s a common misconception that because dogs and humans share similar basic nail structures, the tools used for grooming can be interchanged. However, this oversight could result in discomfort, injury, or long-term complications for your canine companion. Let’s delve into the potential risks of using human nail clippers on your dog.

    1. Inadequate Trimming

    • Uneven Cuts: Human nail clippers are flat, while dog nails are rounded. This mismatch can lead to uneven, jagged cuts.
    • Insufficient Strength: Human clippers might not be strong enough to cut through a dog’s thicker nail, leading to partial cuts or multiple attempts to trim the same nail.

    2. Nail Splintering and Fracturing

    • Pressure Imbalance: Due to the design of human nail clippers, they might exert uneven pressure on a dog’s nail. This can cause the nail to splinter or fracture, potentially leading to infections.

    3. Increased Risk of Cutting the Quick

    • Reduced Visibility: The design of human nail clippers might obscure your view, increasing the chances of cutting into the quick. This not only causes bleeding but is painful for the dog.
    • Lack of Safety Features: Unlike specialized dog nail clippers, which often come with safety guards, human clippers lack these protective features.

    4. Potential for Injury

    • Slips and Nicks: Human clippers aren’t designed for the curve and thickness of dog nails, increasing the chance of the clipper slipping and potentially injuring the dog or the person holding the clipper.

    5. Stress and Discomfort for the Dog

    • Prolonged Trimming: The inefficiency of human clippers might mean the process takes longer, which can be distressing for a dog, especially if they’re already anxious about nail trimming.
    • Reinforcing Negative Associations: If using human clippers results in pain or discomfort, the dog might develop a negative association with nail trimming, making future grooming sessions challenging.

    6. Potential for Infections

    • Jagged Edges: Uneven cuts can create jagged edges, which can snag on surfaces. If torn, these can lead to open wounds and possible infections.

    While it might seem like a convenient solution, using human nail clippers on your dog carries a range of risks, both for the dog’s physical health and their emotional well-being. It’s always best to prioritize their safety and comfort by investing in tools specifically designed for them or seeking professional grooming assistance.

    human file for dogs

    Can I File My Dog’s Nails With A Human File?

    Filing is a common practice in human nail care to smooth out rough edges, but can the same be applied to our furry companions? Let’s explore the feasibility and considerations of using a human nail file on your dog.

    1. Texture and Grit

    • Human Nail Files: These are usually designed for the softer, thinner nails of humans. They may have a finer grit which might not be effective for the tough nails of dogs.
    • Dog Nail Files: These are tailored for the harder texture of dog nails, often having a coarser grit to effectively smoothen and shape the nail.

    2. Efficiency

    • Time-Consuming: Using a human nail file might be more time-consuming because of its finer grit, which could be stressful for dogs that aren’t used to prolonged grooming sessions.
    • Repeated Filing: Given the difference in grit, you might find yourself having to file repeatedly to achieve the desired smoothness with a human nail file.

    3. Safety and Comfort

    • Potential for Friction: A human file might generate more friction, which can cause discomfort or even heat up the nail if done vigorously.
    • Handling: Dog-specific files are usually designed with longer handles to ensure a safe distance between the dog’s nail and your fingers, reducing the risk of nips or bites if the dog gets agitated.

    4. Durability

    • Wear and Tear: Because dog nails are tougher, using a human nail file might wear it out quicker than if used on human nails.

    5. Practicality for Larger Breeds

    • Insufficient Size: Human nail files might be too small or flimsy for larger dog breeds with thicker nails, making them impractical for effective filing.

    While it’s technically possible to file your dog’s nails with a human nail file, especially in a pinch, it may not be the most efficient or comfortable method for your pet. If you do decide to use one, ensure you’re gentle and patient, periodically checking the nail’s temperature to prevent discomfort from friction. For regular grooming, consider investing in a dog-specific nail file or a grinder, which is designed with the anatomy and needs of dogs in mind. This will ensure a safer, quicker, and more pleasant experience for your furry friend.

    dog getting nails dremmeled

    How To Cut Dog Nails Without Clippers?

    There are times when dog owners might not have specialized clippers on hand, or perhaps their dog has an aversion to them. In such cases, knowing alternative methods for trimming your dog’s nails can be a lifesaver. Let’s explore some safe and effective ways to cut dog nails without using clippers.

    1. Nail Grinders or Dremels

    • What Are They? These are electric tools that grind down a dog’s nails instead of clipping them. They’re especially useful for dogs with thick nails.
    • Benefits:
      • Gradual reduction of the nail length.
      • Reduces the risk of cutting into the quick.
      • Leaves a smoother finish.
    • Considerations: Introduce the grinder slowly, as the vibration and noise might initially be unsettling for some dogs.

    2. Nail Files

    • How To Use: Just as you’d file human nails, you can file your dog’s nails. Use a gentle back-and-forth motion.
    • Benefits:
      • Controlled reduction of nail length.
      • Can be less intimidating for dogs compared to clippers.
    • Considerations: This method can be time-consuming, especially for dogs with harder nails. Ensure the file is coarse enough for your dog’s nails.

    3. Regular Walks on Pavement

    • How It Works: Walking your dog regularly on rough surfaces, like concrete or asphalt, can naturally file down their nails.
    • Benefits:
      • Passive nail trimming without active intervention.
      • Great for dogs that are anxious about nail grooming.
    • Considerations: This won’t replace regular nail trimming entirely, especially for the dewclaw, but it can extend the time between active grooming sessions.

    Tips for Safe Nail Trimming Without Clippers:

    1. Go Slow: Whether you’re grinding, filing, or using any other method, take your time. The slower and more deliberate your actions, the less risk of injury.
    2. Frequent Checks: Always keep an eye on the nail’s quick, especially if you’re using an alternative method.
    3. Comfort is Key: Make sure your dog is calm and comfortable. Reward them with treats or praise during and after the session.
    4. Regular Maintenance: Even without clippers, maintaining a routine can help ensure your dog’s nails don’t become overly long.

    While clippers designed for dogs are the go-to tool for many, it’s reassuring to know there are alternatives. Whether you choose to use a grinder, file, or simply engage in regular walks on pavement, always prioritize your dog’s comfort and safety. Remember, the goal is to make the experience as stress-free as possible for both of you.

    woman with dog on couch

    Is It Better To Cut Or Grind Dog Nails?

    Dog nail maintenance is an essential part of pet care, and owners often find themselves deciding between cutting and grinding. To make an informed decision, let’s compare both methods side by side.

    1. Cutting Dog Nails

    Using specialized dog nail clippers, the nails are snipped to the desired length.

    ProsCons
    Quick process.Risk of cutting the quick.
    Clippers operate quietly.Can leave jagged or sharp edges.
    No need for electricity or batteries.Some dogs dislike the pressure of the clippers.

    2. Grinding Dog Nails

    Using a nail grinder or Dremel, the nails are gradually filed down to the desired length.

    ProsCons
    Provides a smooth and rounded nail finish.Some dogs are disturbed by the grinder’s noise and vibration.
    Offers precision in nail trimming.Process is more time-consuming than clipping.
    Effective for dogs with thick nails.Produces fine nail dust which can be bothersome.

    Factors to Consider:

    1. Dog’s Temperament: The choice might depend on whether your dog is more anxious about noises or the sensation of clippers.
    2. Owner’s Experience: Those new to dog nail grooming might find grinders offer a bit more control, while experienced owners might prefer the swiftness of clippers.
    3. Frequency of Grooming: Regular grooming might favor the speed of clippers, while occasional sessions could benefit from the finish grinders provide.

    The decision to cut or grind your dog’s nails is contingent on both your pet’s preferences and your comfort with the tools. Some owners even combine the two, cutting nails first and then smoothing the edges with a grinder. Whichever method you choose, the main goal should always be the comfort and safety of your pet. Positive reinforcement, like praise and treats, can make the grooming experience pleasant for your furry friend.

    can yo uuse scissors on dog nails

    Can You Cut Dog Nails With Scissors?

    The idea of using scissors as a tool for trimming a dog’s nails may seem convenient, especially when dog-specific clippers aren’t immediately available. But is it a viable and safe option? Let’s delve into the feasibility and concerns of using scissors for this purpose.

    1. Type of Scissors

    While it’s possible to use scissors, not just any pair will do. The scissors would need to be:

    • Sharp: A dull blade can cause crushing rather than cutting, leading to discomfort.
    • Clean: Any tool used should be sanitized to reduce the risk of infection should there be any nicks or cuts.
    • Sturdy: They need to be strong enough to handle the thickness of a dog’s nail without bending or breaking.

    2. Safety Concerns

    Using scissors comes with multiple risks:

    • Lack of Precision: Scissors, especially large ones, might not provide the accuracy that dog nail clippers offer.
    • Potential for Slips: Without the designed grip and shape of dog nail clippers, there’s a higher risk of the scissors slipping and causing injury.
    • Risk of Splintering: A scissor’s straight cut might cause the nail to splinter, leading to further complications.

    3. Comfort and Efficiency

    • Potential for Pinching: Scissors might pinch the nail before cutting, causing discomfort.
    • Multiple Cuts Needed: Unlike clippers that are designed to take off the desired length in one cut, scissors might require multiple snips, prolonging the process.

    4. Suitability for Different Breeds

    While scissors might be a makeshift tool for smaller breeds or puppies with softer nails:

    • Not Ideal for Large Breeds: For bigger breeds with thicker nails, scissors are generally not practical or safe.
    • Dewclaws: The location and angle of dewclaws can make them challenging to trim with scissors without causing discomfort.

    5. Visibility of the Quick

    • Obstructed View: Scissors might not give a clear view of the quick, increasing the risk of accidentally cutting it and causing pain and bleeding.

    Tips if Opting for Scissors:

    1. Stay Calm and Steady: Ensure both you and your dog are calm. A jittery hand increases the risk of injury.
    2. Go Slow: Approach the process with patience. Aim for small cuts to avoid going too deep.
    3. Lighting: Ensure you’re in a well-lit environment to clearly see the nail and its quick.
    4. Have Styptic Powder on Hand: In case of any accidental cuts, having styptic powder can help stop bleeding.

    While using scissors might seem like a quick solution, it’s fraught with risks that can lead to injury or trauma for your dog. If you find yourself without dog-specific clippers and feel the need to trim your dog’s nails, considering alternatives like nail grinders or filing may be safer. Always prioritize the safety and comfort of your canine companion. If in doubt, consult a professional groomer or veterinarian for guidance.

    puppy nail trim

    Can You Cut Dog Nails With Wire Cutters?

    When faced with the task of trimming a dog’s nails and without the right tools at hand, some people might wonder about using wire cutters. While they may look somewhat similar to dog nail clippers, there are crucial differences. Here’s a look into the feasibility and concerns of using wire cutters for dog nails.

    1. Design and Intended Use

    Wire cutters are designed to cut wire, which requires a different kind of shearing force compared to cutting through the organic material of a dog’s nail. Dog nail clippers, on the other hand, are specifically crafted to handle the texture, thickness, and curvature of dog nails.

    ProsCons
    Might be available in households.Not designed for the texture or shape of dog nails.
    Some might be sharp enough to cut through.Can cause uneven or jagged cuts.

    2. Safety and Precision

    Safety is a paramount concern when trimming a dog’s nails. The incorrect tool can increase the risk of injury or discomfort for the dog.

    ProsCons
    High risk of cutting the quick.
    Can cause splintering or splitting of the nail.
    Might pinch or crush the nail due to design.

    3. Comfort for the Dog

    The comfort of the dog during the nail trimming process is vital to ensure they don’t develop an aversion to nail grooming.

    ProsCons
    Can be more painful than proper nail clippers.
    Risk of causing trauma or stress to the dog.

    Factors to Consider:

    1. Urgency vs. Safety: If it’s urgent to trim a nail (e.g., a broken nail), and no other tools are available, you might be compelled to use what’s on hand. However, always consider the potential risks and discomfort.
    2. Dog’s Size and Nail Thickness: Wire cutters might be more dangerous for larger breeds with thicker nails due to the risk of crushing instead of cutting cleanly.

    While wire cutters might seem like a potential alternative in a pinch, they are not recommended for cutting dog nails. Their design, intended use, and the risks they pose make them unsuitable and potentially harmful for this task. It’s always best to invest in tools specifically designed for the job or seek professional grooming services to ensure the safety and comfort of your pet. If ever in doubt, it’s always wise to consult a veterinarian or professional groomer.

    dog needs nail trim

    Conclusion

    Navigating the world of dog nail care can be both a daunting and intricate journey. From understanding the right tools to use, to deciphering what’s myth from fact, our four-legged friends rely on us to make informed and compassionate choices for their well-being. While it might be tempting to use household tools or improvise in a pinch, it’s essential to remember that the safety and comfort of our pets should always be paramount. Specialized tools exist for a reason: to make the grooming process as smooth and stress-free as possible for both the dog and the owner.

    Regular nail maintenance not only enhances your dog’s physical health but also strengthens the bond you share. It’s a moment of trust, a subtle dance of reassurance and care. So, the next time you find yourself reaching for those clippers or grinders, take a moment to appreciate the trust your pet places in you. Armed with knowledge, the right tools, and a sprinkle of patience, you’re well on your way to ensuring those paws are in tip-top shape.

    Thank you for joining us on this journey of understanding and care. Remember, in the world of pet care, love, understanding, and a little bit of research can go a long way. Happy grooming!

    Frequently Asked Questions (FAQs)

    Is it safe to use human tools for dog nail grooming?

    While some human tools may superficially resemble dog grooming tools, they aren’t designed for the specific needs and challenges of dog nails. Using inappropriate tools can increase the risk of injury or discomfort to your pet.

    How often should I trim my dog’s nails?

    The frequency can vary depending on your dog’s activity level, age, and the surfaces they walk on. As a general rule, if you hear their nails clicking on the floor, it’s time for a trim. Typically, every 3-4 weeks is a common interval for many dogs.

    What should I do if I accidentally cut the quick?

    First, don’t panic. While it might bleed and cause some discomfort, it’s a common mistake. Apply styptic powder or cornstarch to stop the bleeding and reassure your dog. If bleeding continues for an extended period, consult your veterinarian.

    Are there any alternatives if my dog is too anxious for nail clippings?

    Absolutely. Some dogs might prefer nail grinding over clipping. Additionally, there are also anti-anxiety wraps and calming treats available. In extreme cases, you might want to consult your vet about sedative options or professional grooming services.

    Why is regular nail maintenance important for dogs?

    Long nails can cause discomfort, affect a dog’s posture and gait, and can even lead to injuries. Regular nail maintenance ensures your dog remains comfortable, healthy, and happy.

  • Brittle Nails In Dogs – Possible Causes & Solutions From An Expert

    Brittle Nails In Dogs – Possible Causes & Solutions From An Expert

    If you’ve landed here, chances are you’ve noticed something amiss with your furry friend’s nails. Those once sturdy nails, ready for play and adventure, might now appear frail or easily broken. It’s a worry we’ve all had: Why are my dog’s nails brittle? Are they painful? And importantly, what can I do about it? As an expert in canine health, I’ve delved deep into this topic to provide you with the most up-to-date insights and solutions. Our companions depend on us to keep them hale and hearty, so let’s journey together through the possible causes of brittle nails in dogs and uncover the solutions to ensure their paws remain strong and healthy. Your dog’s comfort and well-being are paramount, and I’m here to guide you every step of the way. Let’s get started!

    why does my dog have brittle nails

    Brittle Nails in Dogs – A Common Issue with Many Causes

    Our canine friends experience a variety of health issues, some of which may go unnoticed until they become a significant concern. Among these, brittle nails are a prevalent, yet often overlooked problem. While we often admire those cute paws, we might not always realize what their nails are trying to tell us. Let’s explore some common causes of brittle nails in dogs.

    1. Nails That are too Long

    A common mistake many pet owners make is not trimming their dog’s nails regularly. When nails become too long, they’re more likely to split, crack, or break. Long nails can also affect your dog’s gait and lead to joint problems over time. It’s essential to ensure regular nail trims to prevent such issues.

    2. Rough Play

    Dogs love to play! However, constant digging, roughhousing with other dogs, or scraping their nails on hard surfaces can weaken and eventually break them. While play is vital for their mental and physical health, it’s crucial to monitor the kind of play and its impact on their nails.

    3. Fungal Infections

    Just like humans, dogs can also contract fungal infections in their nails. This can result in discoloration, brittleness, and sometimes an odd odor. If you suspect a fungal infection, it’s best to consult with your veterinarian for appropriate treatment.

    4. Nail Bed Tumors

    Although rare, nail bed tumors can be a cause of brittle nails in dogs. Signs might include swelling, chronic infections, or discoloration of the nail or nail bed. Any sudden changes in your dog’s nails or surrounding skin should be addressed with your vet immediately.

    5. Symmetrical Lupoid Onychodystrophy

    This is a mouthful, isn’t it? Symmetrical Lupoid Onychodystrophy (SLO) is an immune-mediated condition where a dog’s body attacks its own nail beds. This results in painful, brittle nails that often fall off. While the exact cause of SLO isn’t known, there are treatments available to manage the condition.

    6. Improper Nutrition

    You are what you eat, and the same goes for our furry friends. A balanced diet is vital for overall health, including nail strength. Deficiencies in certain nutrients, like biotin, can result in brittle nails. It’s essential to ensure that your dog’s diet is nutritionally balanced and consult your vet if you suspect any deficiencies.

    While brittle nails in dogs can arise from various causes, understanding and identifying the root of the issue is crucial. Regular check-ups, proper grooming, and monitoring play can make a significant difference in the health of those tiny paws. Always consult with a veterinarian if you’re unsure about your dog’s nail health.

    brittle nails in dogs

    Brittle Nails are More Than Painful

    As a dog lover, watching your canine companion struggle with any health issue is heart-wrenching. Brittle nails might seem like a minor concern at first glance. After all, it’s just their nails, right? Well, not quite. The implications of brittle nails in dogs go beyond the pain they might experience. It’s essential to understand the deeper repercussions to ensure our four-legged friends lead a comfortable and happy life.

    1. Altered Mobility

    Imagine walking with an uncomfortable shoe; every step feels like a chore. For dogs with brittle nails, each paw placement can be a painful exercise. Over time, they might adjust their walking pattern to alleviate pain, leading to an unnatural gait. This could result in joint and muscle issues in the long run.

    2. Reduced Playfulness

    Rough play might be one of the causes of brittle nails, but the converse is also true. Dogs with painful, brittle nails might shy away from play. This can affect their physical activity levels, potentially leading to weight gain, reduced muscle tone, and overall lethargy.

    3. Infections

    Brittle nails can often chip, crack, or break, exposing the nail bed. This leaves a vulnerable spot for bacteria and fungi, leading to infections. If untreated, these infections can become chronic issues, causing even more pain and potential complications.

    4. Behavioral Changes

    Pain and discomfort can induce behavioral changes in dogs. Your otherwise cheerful pup might become irritable, withdrawn, or even aggressive. They may also start licking or biting at their nails excessively, trying to alleviate the discomfort.

    5. Reduced Quality of Life

    Just as in humans, constant pain or discomfort can significantly reduce a dog’s quality of life. They might become less interactive, spend more time sleeping or lying down, and show decreased interest in activities they once enjoyed.

    6. Increased Vet Visits and Costs

    Brittle nails might necessitate more frequent trips to the vet, especially if there are associated infections or if the cause is an underlying health condition. This can result in increased veterinary costs over time.

    Addressing the issue of brittle nails in dogs isn’t just about avoiding pain – it’s about ensuring their overall well-being and happiness. Recognizing the profound impact brittle nails can have on a dog’s life underscores the importance of preventive care, regular checks, and prompt treatment. Our dogs offer us unconditional love and joy; it’s our responsibility to ensure they live their lives to the fullest, free from pain and discomfort.

    injured toenail

    How to Strengthen Dogs’ Nails

    Watching your furry friend limp or refrain from play because of brittle nails can be distressing. But don’t fret! There are several steps you can take to help strengthen your dog’s nails and restore their zest for life. Let’s explore some tried-and-true methods to ensure those paws are in tip-top shape.

    Omega-3 Supplements

    Omega-3 fatty acids, commonly found in fish oil, are renowned for their myriad health benefits, including promoting better skin and nail health. By integrating Omega-3 supplements into your dog’s diet, you can potentially reduce inflammation, increase nail strength, and boost overall skin health. Always consult with your veterinarian for the appropriate dosage and recommendations tailored to your dog’s specific needs.

    Biotin Supplements

    Biotin, a part of the vitamin B complex, is essential for maintaining healthy skin, hair, and nails. Deficiencies in biotin can lead to brittle, weak nails in dogs. While many commercial dog foods already contain adequate amounts of biotin, a supplement can sometimes be beneficial for those pups with nail issues. Again, it’s best to seek advice from your vet before starting any new supplement.

    Collagen Supplements

    Collagen, a primary protein found in the body, plays a crucial role in maintaining the structural integrity of nails, skin, and hair. As dogs age, their natural collagen production can decrease. Offering collagen supplements can help restore some of this loss, leading to stronger and healthier nails. There are various canine-friendly collagen supplements available in the market, but always opt for high-quality products and consult with your vet for guidance.

    Routine Nail Trimming

    Keeping your dog’s nails trimmed isn’t just about aesthetics. Regular trims prevent the nails from becoming too long, which can lead to them being more prone to breaking. Furthermore, the act of trimming itself can promote healthier nail growth. Ensure you’re using the right tools, and if you’re unsure about the proper trimming technique, seek guidance from your veterinarian or a professional groomer.

    Healthy Diet

    Lastly, but most importantly, a balanced diet lays the foundation for all aspects of health, including nail strength. Ensure your dog’s diet is rich in quality proteins, essential fatty acids, vitamins, and minerals. Sometimes, merely switching to a higher-quality dog food can make a noticeable difference in nail health. A nutrient-rich diet not only promotes stronger nails but also supports overall well-being.

    Strengthening your dog’s nails is a combination of the right nutrition, supplements, and regular care. With consistent efforts and a proactive approach, those brittle nails can be a thing of the past. Here’s to happy paws and even happier playtimes!

    dog paw on hand

    Conclusion

    Our four-legged friends rely on us for their well-being, and their nails, though often overlooked, play a pivotal role in their overall health and comfort. From understanding the underlying causes of brittle nails to employing proactive strategies for nail health, we’ve journeyed together through the labyrinth of canine nail care. With the right balance of nutrition, supplements, and regular attention to those precious paws, we can ensure that our furry companions trot beside us with strength and vitality.

    Let’s make a pact to prioritize our dogs’ nail health, ensuring every step they take is filled with joy, confidence, and love. Remember, our canine buddies give us a lifetime of loyalty, tail wags, and unconditional love. Let’s reciprocate by giving them the best care possible, right down to the tips of their toes. Happy paw-renting, and may every dog’s journey be filled with bounding leaps and healthy landings!

    Frequently Asked Questions (FAQs)

    1. How often should I trim my dog’s nails?

    The ideal frequency varies depending on your dog’s activity level and where they play. Generally, most dogs need nail trimming every 3-4 weeks. However, if you hear their nails clicking on hard floors, it’s a sign they might need a trim sooner.

    2. Can I give my dog human supplements, like Omega-3 or Biotin?

    While certain human supplements are safe for dogs, it’s essential to ensure the correct dosage and ensure there are no added ingredients harmful to pets. It’s always best to consult with your veterinarian before giving any human-grade supplements to your dog.

    3. My dog is very resistant to nail trimming. What should I do?

    Some dogs can be nervous about nail trims. It’s crucial to create a calm environment and associate nail trimming with positive rewards. If your dog continues to resist, you might consider seeking a professional groomer or veterinarian for assistance, at least initially.

    4. How can I identify a nail bed infection in my dog?

    Signs of a nail bed infection in dogs include swelling, redness, discharge, an unpleasant odor, and noticeable pain when the area is touched. If you suspect an infection, it’s vital to seek veterinary care immediately.

    5. Is it normal for puppies to have brittle nails?

    While puppies might have softer nails than adults, they shouldn’t necessarily be brittle. If you notice your puppy’s nails breaking easily, it could be related to nutrition, their environment, or even genetics. Consult with your veterinarian to determine the cause and best course of action.

  • How to Make a Dog’s Nail Quick Recede- Timing & 3 Techniques

    How to Make a Dog’s Nail Quick Recede- Timing & 3 Techniques

    As a passionate dog owner, I know how nerve-wracking trimming a dog’s nails can be, especially if the quick has grown out too far. Overgrown quicks can lead to difficulties in nail trimming and even discomfort for your furry friend. If you’ve ever accidentally nicked the quick, you understand the guilt and pain your pooch goes through. But what if I told you there are ways to help the nail quick recede, ensuring safer and easier trims? Today, I’m diving deep into the world of canine nail care. We’ll explore the importance of timing and introduce three effective techniques to make your dog’s nail quick recede. Let’s start this journey together and make nail trims a stress-free task for both you and your furry companion!

    how to see your dogs quicks

    Why Do You Need to Cut Your Dog’s Nails?

    Having a dog is an immensely rewarding experience, and we always strive to ensure their well-being. One aspect of dog care that might not always get its due attention is nail trimming. But, why is it so important? Let’s delve into some key reasons.

    1. Preventing Overgrowth

    Long nails can become overgrown, curling back into your dog’s paw pads. This can be painful and lead to infections. Regular trims ensure that nails remain at a healthy length, preventing these complications.

    2. Comfort and Posture

    Imagine walking around with shoes that don’t fit, and you’ll get an idea of how a dog might feel with long nails. Overly long nails can change the alignment of a dog’s foot. Over time, this can lead to posture problems and even arthritis in older dogs.

    3. Reducing the Risk of Injuries

    Active dogs with long nails can easily snag them on carpets, furniture, or outdoor elements. This not only risks damaging your belongings but more importantly, it can cause painful tears in the nail or even injuries to the paw.

    4. Avoiding Quick Overgrowth

    The ‘quick’ of the nail, which supplies blood to the nail, tends to grow along with the nail. Regular trims keep the quick shorter, making nail cutting easier and reducing the risk of accidentally cutting the quick.

    5. Bonding Time

    Though it might take some getting used to, nail trimming sessions can become a bonding activity. With positive reinforcement and a gentle approach, your dog can learn to trust and even enjoy these moments with you.

    Regular nail trims are about more than just aesthetics. They’re a key aspect of comprehensive dog care, ensuring comfort, health, and a happy pup!

    groomer clipping nails

    How to Tell if Your Dog’s Nails Are Too Long

    As a dog owner, it’s crucial to understand when your dog’s nails have reached an excessive length. Long nails can lead to a multitude of problems, from simple discomfort to potential health issues. But how can you tell? Let’s explore some telltale signs.

    1. Clicking Sounds on Hard Surfaces: One of the most noticeable indicators is the sound of your dog’s nails clicking on hard surfaces, like tile or hardwood floors. If you can hear them tapping away as they walk, it’s probably time for a trim.
    2. Altered Walking or Standing Posture: If you notice your dog standing or walking in an unusual manner, long nails might be the culprit. Dogs may adjust their posture to avoid pain from overgrown nails, which can look like they are “tiptoeing.
    3. Visual Check: If you can see the nails curling when looking at your dog from the side or if they touch the ground when your dog is standing still, they’re too long.
    4. Discomfort or Pain: Dogs might chew on their nails or lick their paws excessively if their nails are causing discomfort. They might also show signs of pain when walking or running.

    How to Identify a Dog’s Quick

    Recognizing the quick in a dog’s nail is crucial to safe and effective trimming. Here’s how you can spot it:

    1. Color Differences: On light-colored nails, the quick is the pinkish section in the middle of the nail. For darker nails, you might have to rely on other methods.
    2. Nail Profile: If you look at the nail’s cross-section, you’ll notice it’s comprised of two parts: a hard outer shell and a softer center. The softer center is where the quick resides.
    3. Feel: As you start trimming the nail, you’ll first cut through the hard part. Once you get closer to the quick, the nail will feel spongier.
    dog nail anatomy

    Why Does the Quick Overgrow?

    Understanding why the quick grows is pivotal in preventive care. So why does it get long?

    1. Infrequent Trimming: Regular nail trimming can prevent the quick from extending too far. When nails aren’t cut frequently, the quick tends to grow with the nail.
    2. Age and Health: Just like in humans, as dogs age, their nails can grow faster. Some health conditions might also influence nail and quick growth.
    3. Genetics: Some breeds naturally have longer quicks than others.
    4. Inactivity: Dogs that spend a lot of time indoors or on soft surfaces don’t experience the natural nail wear that can keep nails short.

    Regularly monitoring the state of your dog’s nails and understanding the anatomy will ensure you provide the best care possible, preventing potential pain and discomfort. Always approach nail trimming with caution and knowledge to ensure a positive experience for your pup!

    how can i tell if dogs nails are too long

    Lessons From a Groomer: Nail Clipping, Ear Cleaning, and Baths

    Groomers are like the unsung heroes of the canine world, ensuring our fur-babies look and feel their best. Having spent years handling all shapes and sizes of dogs, groomers pick up a myriad of tips and tricks. Today, we’re diving into some invaluable lessons from seasoned groomers on nail clipping, ear cleaning, and the art of the perfect doggy bath.

    Nail Clipping: Not Just About Length

    1. Tools Matter: Invest in a good pair of dog nail clippers. A sharp, high-quality pair will make the process smoother for both you and your pet.
    2. Stay Calm and Reward: Your energy affects your dog. Stay calm, speak in soothing tones, and reward your dog after the session.
    3. Know Your Dog’s Limits: Some dogs can only handle a few nails at a time. It’s okay to spread out the trimming sessions over several days.
    4. Get a Good Angle: Aim to clip at a 45-degree angle, just above where the nail starts to curve.

    Ear Cleaning: Delicate But Necessary

    1. Use the Right Solution: Invest in a vet-recommended ear cleaning solution. Avoid using water as it doesn’t evaporate easily and can lead to infections.
    2. Cotton Balls, Not Q-tips: Cotton balls can effectively clean the ear without the risk of going too deep or causing injury.
    3. Watch for Signs of Infection: Regularly inspect your dog’s ears for redness, unusual odor, or excessive wax. These can be signs of an infection or ear mites.

    Baths: More Than Just Soap and Water

    1. Water Temperature Matters: Dogs’ skin is more sensitive than ours. Always use lukewarm water for their comfort.
    2. Choose the Right Shampoo: Use dog-specific shampoos. Human shampoos can disturb the pH balance of a dog’s skin.
    3. Rinse Thoroughly: Any leftover shampoo can cause irritation. Ensure every bubble is rinsed out.
    4. Brush Before and After: Brushing your dog before a bath can help remove tangles and matted fur. Doing it after helps in keeping the coat neat and reduces shedding.
    5. Dry Completely: Ensure your dog is fully dry after the bath, especially breeds with dense fur, to prevent fungal growth or skin issues.

    Grooming isn’t just about keeping your dog looking good; it’s an essential part of their health and wellness regimen. These lessons from seasoned groomers can elevate your at-home grooming game, ensuring your pup feels as fabulous as they look!

    dog getting bath

    How to Make Your Dog’s Nail Quick Recede

    Overgrown quicks in a dog’s nails can be problematic, not just because they increase the risk of accidental cuts during trimming, but also because they can cause discomfort for your pet. Thankfully, there are ways to encourage the nail quick to recede. Here’s how you can go about it:

    1. Trimming Your Dog’s Nails

    • Consistency is Key: Regularly trimming your dog’s nails can help the quick recede over time. It’s advised to trim a tiny bit off every 1-2 weeks, rather than waiting for the nails to grow long.
    • Stay Within the Comfort Zone: While it’s essential to trim consistently, you should also ensure you’re not cutting too close to the quick. This can lead to pain and bleeding.

    Pro Tip for Trimming Black Dog Nails

    For those with dogs with black nails, finding the quick can be particularly challenging. Here’s a pro tip:

    Feel the Texture: As you trim or grind the nail, pay close attention to the texture. When you get closer to the quick, the nail will become softer, and you might see a small dark circle in the middle. This indicates that you are approaching the quick, and it’s time to stop.

    2. Natural Abrasion

    • Walk on Pavement: Taking your dog for walks on concrete or asphalt can naturally file down their nails. The hard surface acts like sandpaper, gradually wearing the nail down.
    • Encourage Digging: This might sound counter-intuitive, but setting up a designated digging area in your garden can help. As dogs dig, their nails rub against the ground, naturally wearing them down.

    3. Nail Grinder (Dremel): The “Dog Nail File”

    • Gradual Filing: Unlike clippers, a Dremel or nail grinder files the nail down gradually. This is especially useful for getting closer to the quick without cutting into it. Over time, as you use the grinder, the quick will start to recede.
    • Safety First: Ensure the grinder has a safety guard to prevent going too deep. Also, keep sessions short to avoid overheating the nail.
    • Desensitization: Before using a grinder, it’s vital to get your dog accustomed to the sound and sensation. Start with short sessions, rewarding your dog, and gradually increase the time as they become comfortable.

    Encouraging the nail quick to recede requires patience and consistency. By regularly attending to your dog’s nails and understanding their anatomy, you can ensure they remain in top-notch health, reducing the chances of overgrowth and related complications.

    What if You Accidentally Cut the Quick?

    It’s a moment every dog owner dreads. You’re in the middle of a nail-trimming session, and suddenly your dog yelps, or you notice a spot of blood. You’ve accidentally cut the quick. First things first, don’t panic. While it’s distressing for both you and your pet, there are steps you can take to remedy the situation.

    1. Stay Calm and Comfort Your Dog

    • Your Reaction Matters: Dogs often take cues from their owners. If you overreact, it can heighten their distress. Stay calm, speak in soothing tones, and comfort your pet.
    • Provide Immediate Assurance: If your dog pulls away or looks upset, pause the trimming, and spend a few minutes comforting them. Offer treats or their favorite toy to distract and console.

    2. Stop the Bleeding

    • Styptic Powder: This should be a staple in your dog grooming kit. Upon contact with blood, styptic powder aids in clotting and stops the bleeding. Simply dip the bleeding nail into the powder or apply using a cotton ball.
    • Alternative Solutions: If you don’t have styptic powder on hand, you can also use cornstarch or flour. Just press the dog’s nail into the substance, or apply it with a bit of water to make a paste.
    • Avoid Touching Too Much: Once you’ve applied a clotting solution, try not to disturb the nail too much. The clotting process can take a few minutes.

    3. Check for Signs of Pain or Discomfort

    • Monitor Their Behavior: After the incident, keep an eye on your dog. If they continue to favor the injured paw, lick it excessively, or show signs of pain, it might be a good idea to consult your veterinarian.
    • Provide Pain Relief: If you sense your dog is in discomfort, you can provide some relief. Always consult your vet before giving any medication to ensure the correct dosage and safety.

    4. Reflect and Learn

    • Assess the Situation: Understand what went wrong. Was it a lapse in attention, or do you need more practice identifying the quick? Use this as a learning opportunity.
    • Seek Expert Advice: If you’re consistently struggling with nail trims, consider seeking the advice of a professional groomer or veterinarian. They can provide tips, or you might decide to let the pros handle the task in the future.

    Accidentally cutting the quick can be distressing, but remember, it’s a mistake that many dog owners make. The key is to remain calm, act swiftly, and learn from the experience. With time and practice, nail trimming can become a smooth routine for both you and your furry friend.

    broken dog nail

    What Is the Perfect Length for Your Dog’s Nails?

    Determining the ideal length for your dog’s nails is an integral aspect of pet care. Overgrown nails can cause a range of issues from discomfort to health problems, but how short is too short? Let’s delve into understanding the perfect nail length for our canine companions.

    1. The “Floor Test”

    • No Clicking Sounds: One of the most straightforward ways to gauge nail length is by listening when your dog walks on a hard surface. If you hear a clicking sound, it’s time for a trim.
    • Flat Paws: When standing, your dog’s nails should not touch the ground. If they do, it’s a clear indication they’re too long. Ideally, nails should be just above the floor when your dog is standing on a level surface.

    2. The “Look and Feel” Method

    • Curve Point: Observe the nail. If you notice it starting to curve downwards, it’s an indicator that a trim might be due.
    • Texture: As you get closer to the quick, the nail will feel softer and may start to look a bit spongy. This can help guide you on how much to trim without hitting the quick.

    3. Considering the Quick

    • Visible Quick: For dogs with transparent or light-colored nails, you can see the pinkish quick. Always trim approximately 2 millimeters away from it.
    • Receding the Quick: If you’re trying to make an overgrown quick recede, remember the process is gradual. Trim the nails a little bit every week, allowing the quick to slowly pull back.

    4. Breed and Lifestyle Considerations

    • Active Outdoor Dogs: Dogs that spend a lot of time outdoors, especially on hard surfaces, may naturally wear down their nails. They might need less frequent trims compared to indoor dogs.
    • Breed Specifics: Some breeds naturally have longer or thicker nails. For instance, Dachshunds often have longer nails, while breeds like the Boxer might have shorter, thicker nails.

    5. Prioritizing Comfort

    • Posture and Gait: Your dog’s comfort is the best indicator. If they appear to walk gingerly, are licking their paws excessively, or show changes in posture, it might indicate nail discomfort.

    Achieving the perfect nail length is a combination of observation, understanding your dog’s lifestyle, and regular maintenance. It’s less about an exact measurement and more about ensuring your dog’s comfort and health. When in doubt, consult with a professional groomer or vet for guidance. With time and practice, you’ll develop a keen sense for what’s best for your pup!

    How Long Does It Take for the Quick to Recede?

    A common question many pet owners have after understanding the importance of the nail quick is: how long does it take for an overgrown quick to recede? The answer isn’t straightforward, as several factors come into play. Let’s delve into the process of the quick’s recession and what influences its timeline.

    1. The Basics of the Quick

    • What Is the Quick? The quick is the tender, living part inside a dog’s nail. It contains blood vessels and nerves, which is why cutting into it can be painful and bloody for your dog.
    • Why It Grows: If nails are not trimmed regularly, the quick tends to grow with the nail, making it challenging to clip the nails short without hurting your dog.

    2. Factors Influencing Recession

    • Age of the Dog: Younger dogs, especially puppies, have faster-growing nails, and their quick might recede more quickly with regular trimming than in older dogs.
    • Nail Trimming Frequency: The more frequently you trim, the faster the quick can recede. For overgrown nails, trimming a little bit every week or every other week is recommended.
    • Dog’s Activity Level: Active dogs that walk or run on hard surfaces may naturally wear down their nails. This can sometimes help in making the quick recede faster, as the nail gets shorter.

    3. Average Recession Time

    • Steady Process: On average, with consistent trimming (every 1-2 weeks), you might notice the quick starting to recede in about a month. However, for the quick to significantly pull back, it can take several months of consistent nail care.
    • Individual Variability: Just as every dog is unique, the time for the quick to recede can vary from one dog to another. Some might experience faster recession, while others take longer.

    4. Tips for Encouraging Quick Recession

    • Regular Trimming: As mentioned, consistency is crucial. The more you trim, the more you signal to the quick to pull back.
    • Nail Grinding: Using a nail grinder or Dremel tool can be an effective way to get closer to the quick without cutting it. Over time, this can encourage the quick to recede.
    • Monitor and Adjust: Keep a close eye on the nails and adjust your trimming frequency based on how quickly the quick is receding.

    Patience is essential when waiting for an overgrown quick to recede. While it’s a gradual process, with consistent care, you can help ensure your dog’s nails return to a healthy length. Always prioritize your dog’s comfort and, if in doubt, consult with a professional groomer or vet for advice on the best nail care practices for your pet.

    how to make quick recede

    What if My Dog Is Afraid of the Nail Trimmers?

    It’s not uncommon for dogs to be wary of nail trimmers. The sight, sound, and sensation can be unnerving for them. Add to that a past experience of accidentally cutting the quick, and it’s understandable why some dogs dread nail trimming sessions. If your dog is one of them, there are ways to make this essential grooming task less stressful for both of you.

    1. Understand the Fear

    • Past Experiences: If your dog has had an unpleasant experience with nail trimmers in the past, such as a painful quick cut, they might associate the tool with pain.
    • Lack of Exposure: For some dogs, simply the unfamiliarity with the nail trimmers can cause anxiety. They might not understand what it is or what it does.

    2. Gradual Desensitization

    • Start Slow: Introduce the nail trimmers without actually cutting the nails. Let your dog sniff and inspect the tool. Praise and reward them for calm behavior around it.
    • Short Sessions: Begin with short sessions, trimming only one nail or even just a part of one nail. Gradually increase the number of nails you trim in one session over time.

    3. Positive Reinforcement

    • Treats and Praise: Every time you trim a nail or even bring out the trimmers, reward your dog with their favorite treat and shower them with praise.
    • Make it Fun: Turn nail trimming into a game or a bonding activity. For instance, trim a nail, then play a quick game or give belly rubs.

    4. Consider Alternatives

    • Grinding Tools: Some dogs might find nail grinders (like Dremels) less intimidating than clippers. However, introduce them slowly as the sound can be off-putting for some pets.
    • Professional Help: If your dog remains fearful, it might be worth considering a professional groomer or veterinarian to handle nail trims. They have experience in calming nervous pets and can often complete the task swiftly and efficiently.

    5. Create a Calm Environment

    • Choose the Right Spot: Pick a quiet, comfortable place for nail trimming. Avoid areas with lots of distractions or noises.
    • Stay Calm: Your dog can pick up on your emotions. If you’re anxious or stressed about trimming their nails, they will likely feel the same way. Breathe deeply, speak in soothing tones, and take breaks if needed.

    6. Training and Familiarity

    • Touch Training: Spend time daily touching and handling your dog’s paws without the intent to trim. This can help desensitize them to having their paws handled.
    • Tool Familiarity: Leave the nail trimmers out in a common area where your dog can see and smell them regularly. This can help reduce the unfamiliarity and fear over time.

    Building trust and creating a positive association with nail trimmers can take time, especially if your dog has had negative experiences in the past. Be patient, consistent, and always prioritize your dog’s comfort. Remember, the goal isn’t just to trim their nails but to ensure the process is as stress-free as possible for your furry friend.

    can i make quick recede

    Consider Working With a Veterinary Professional

    When it comes to your dog’s health and well-being, sometimes the best course of action is to seek the expertise of a veterinary professional. Whether you’re facing challenges with nail trimming, identifying health issues, or simply seeking guidance for routine care, vets and their teams bring a wealth of knowledge and experience. Let’s discuss the advantages and scenarios when you might want to collaborate with these experts.

    1. Expertise and Experience

    • Professional Training: Veterinary professionals undergo years of education and training to understand the intricacies of animal anatomy, behavior, and health.
    • Handling Skills: They have experience in managing various dog breeds, temperaments, and specific health concerns, ensuring that procedures are carried out safely and efficiently.

    2. Addressing Nail Trimming Concerns

    • Overgrown Nails and Quick: If your dog’s nails are severely overgrown, a vet can guide you on safely trimming them back, possibly over multiple visits, while monitoring the quick’s recession.
    • Fear and Anxiety: For dogs that are extremely anxious or aggressive about nail trimming, a veterinary clinic can provide a controlled environment, potentially using mild sedatives if deemed necessary and safe.

    3. Health Evaluations

    • Nail Disorders: Discolorations, thickened nails, or other abnormalities might indicate fungal infections, tumors, or other health issues that require professional attention.
    • Post-Traumatic Concerns: If you’ve accidentally cut the quick and it becomes infected or isn’t healing properly, a vet can provide appropriate treatment and care advice.

    4. Tools and Technology

    • Advanced Equipment: Veterinary clinics are equipped with professional-grade tools that can address specific challenges, like high-speed nail grinders for thick nails or digital magnification for precision.
    • Immediate First Aid: In case of unexpected injuries or complications, a vet clinic has the necessary first aid and medication on hand to address the situation immediately.

    5. Educational Opportunities

    • Guided Demonstrations: If you’re new to dog care or are unsure about nail trimming techniques, many veterinary professionals are happy to provide demonstrations and tips during your visit.
    • Workshops and Classes: Some clinics offer workshops on topics like basic grooming, understanding dog behavior, and other pet care essentials.

    6. Building Trust

    • Consistent Visits: Regularly visiting the same vet helps in building trust. Your dog gets familiar with the environment, smells, and the people, which can reduce anxiety over time.
    • Positive Reinforcements: Many vets use treats, toys, and positive reinforcement techniques to make the experience more pleasant for your pet.

    Working closely with a veterinary professional doesn’t just ensure your dog’s physical well-being; it also provides peace of mind. You’ll know that you’re making informed decisions, using the best techniques, and accessing expert advice whenever needed. Whether it’s for routine care, addressing specific challenges, or emergency situations, establishing a good relationship with a vet is invaluable for every responsible pet owner.

    nail trim by vet

    Utilizing Dog Groomers

    While veterinary professionals are essential for health-related concerns, dog groomers are the go-to experts when it comes to keeping your dog looking and feeling their best. These trained professionals specialize in the aesthetic and hygiene aspects of dog care, ensuring your pet is both clean and comfortable. Let’s explore the benefits and scenarios when turning to a trusted groomer might be your best bet.

    1. Expertise in Grooming

    • Skilled Techniques: Dog groomers are trained in the art of grooming, understanding the different coat types, breeds, and the best approaches for each.
    • Tailored Services: Whether your dog needs a simple bath, a detailed trim, or specific styling, groomers can provide a range of services tailored to your pet’s needs.

    2. Nail Trimming and Beyond

    • Specialized Tools: Groomers are equipped with a variety of nail trimmers and grinders suitable for different nail types and sizes.
    • Quick Identification: Experienced groomers can easily identify and avoid the quick, ensuring a painless experience for your dog. They’re also adept at handling minor bleeding instances, should the quick accidentally get nicked.

    3. Bathing and Skin Care

    • Correct Products: Groomers know which shampoos and conditioners are suitable for different coat types, and can address specific issues like dry skin, ticks, or fleas.
    • Thorough Cleaning: Areas that owners might find tricky to clean, such as the ears or under the tail, are all in a day’s work for groomers.

    4. Styling and Haircuts

    • Breed-Specific Cuts: From Poodles to Shih Tzus, every breed has its specific look. A professional groomer knows how to trim and style your dog to match breed standards or your personal preferences.
    • Seasonal Styles: Whether it’s a summer shave to keep your dog cool or a winter trim that still offers some protection against the cold, groomers can adjust their techniques based on the season.

    5. Safe and Comfortable Environment

    • Designed for Grooming: Grooming salons are designed with the safety and comfort of pets in mind. Slip-resistant surfaces, adjustable tubs, and specialized drying areas all contribute to a positive grooming experience.
    • Distraction Techniques: Many groomers are skilled at distracting anxious pets with treats, toys, or soothing sounds, making the process smoother.

    6. Detecting Abnormalities

    • Observant Eye: While groomers aren’t a replacement for vets, their hands-on approach means they often spot issues like skin infections, lumps, or parasites early on. This can be invaluable for early intervention.

    A reputable dog groomer is more than just a luxury; they’re a valuable resource in your pet care toolkit. Regular grooming sessions can improve your dog’s comfort, reduce health risks, and even strengthen the bond between you and your pet, as they return home looking and feeling refreshed. When choosing a groomer, always check reviews, ask for recommendations, and ensure they have the appropriate certifications or training. Your dog deserves the best!

    Conclusion

    Navigating the realm of dog nail care can seem overwhelming, with its unique set of challenges and a myriad of techniques to master. But at the heart of it all lies a simple truth: our dogs rely on us for their comfort and well-being. Whether you’re meticulously mastering the art of nail trimming at home, seeking the expert touch of professional groomers, or consulting with trusted veterinary professionals for those intricate concerns, each step you take is a testament to the love and care you hold for your furry friend.

    Remember, every dog is unique, and what works for one might not work for another. It’s about finding the rhythm that suits both you and your pet, ensuring that their tails keep wagging and their paws stay prancing happily. With patience, consistency, and the right knowledge at your disposal, nail care can transition from a daunting chore to a rewarding routine.

    As you journey through the ups and downs of pet ownership, always cherish the moments of joy, learning, and growth. After all, our dogs offer us unconditional love, loyalty, and a lifetime of memories. Ensuring their comfort, one nail at a time, is just one of the many ways we can give back.

    Thank you for joining us on this comprehensive dive into dog nail care. We hope this guide empowers you to make the best decisions for your beloved pet. Happy grooming! 🐾

    Frequently Asked Questions (FAQs)

    How often should I trim my dog’s nails?

    While the exact frequency can vary based on your dog’s activity level and the surfaces they walk on, most dogs will benefit from a nail trim every 3-4 weeks. Monitor your dog’s nails regularly to determine the best schedule for them.

    I accidentally cut the quick. What should I do next?

    First, don’t panic. It can be distressing for both you and your dog, but it’s a common mistake. Apply styptic powder or cornstarch to the bleeding nail to help stop the bleeding. If it continues to bleed heavily or shows signs of infection, consult your veterinarian.

    My dog absolutely refuses to let me trim their nails. What are my options?

    You can try desensitizing your dog to the process with positive reinforcement or consider alternative tools like nail grinders. If your dog remains extremely anxious, it might be best to consult a professional groomer or veterinarian who can safely trim their nails for you.

    Can I use human nail clippers on my dog?

    While it’s technically possible for very small dogs or puppies, it’s not recommended. Dog nail clippers are designed specifically for the thickness and shape of dog nails. Using human nail clippers can cause splintering or uneven cuts.

    How can I tell if my dog’s nails are the right length?

    A good rule of thumb is that if your dog’s nails touch the ground when they walk, they’re too long. Ideally, dog nails should have a slight clearance from the floor. Additionally, long nails can cause discomfort or lead to posture issues, so regular checks are essential.

  • How To Fix Curled Dog Nails- Cutting Curled Under Dog Toe Nails

    How To Fix Curled Dog Nails- Cutting Curled Under Dog Toe Nails

    Hey there, fellow dog lovers! If you’ve landed on this blog, chances are you’ve noticed your furry friend’s nails curling under their paws, causing discomfort or even pain. Just like our own nails, our dogs’ nails need regular maintenance to stay healthy and comfortable. Curled dog nails can pose a real challenge, and knowing how to safely address them is crucial for your pet’s well-being. Whether you’re a first-time dog parent or a seasoned canine companion, this guide on “How To Fix Curled Dog Nails” will equip you with the knowledge and techniques to confidently and safely trim those curled under toe nails. Let’s make those pawdicures stress-free and effective!

    How to Cut Curled Dog Nails

    Dogs are part of our family, and just as we’d care for a family member’s needs, our dogs’ health, including their nails, is essential. Curled under nails can cause discomfort and lead to various issues if not addressed promptly. Let’s delve into how you can safely trim curled dog nails at home.

    Step 1: Examine the Nail

    Before diving into the cutting process, it’s essential to take a close look at your dog’s nail. Understanding the structure will help you avoid cutting into the ‘quick’, which is the sensitive part of the nail with blood vessels. For dogs with translucent nails, the quick is the pinkish section. For dogs with darker nails, the task is trickier. Always look for a change in nail texture or color. Knowing where the quick is will guide you on how much you can trim.

    Step 2: Get Your Tools Ready

    Having the right tools is half the battle. For trimming curled nails:

    • Dog Nail Clippers: These are specially designed for dogs’ nails, and they come in various forms – guillotine-style, scissor-style, or grinder tools. Choose what you’re most comfortable with.
    • Styptic Powder: This is a must-have in case you accidentally cut into the quick. It will help stop the bleeding quickly.
    • Treats: Rewarding your dog during and after the process can make it a positive experience for them.

    Step 3: Cut the Nail

    Position your dog in a comfortable and steady position. If you have someone to assist you by holding the dog, that’s even better. Begin by making small cuts at the tip of the nail, approaching the quick cautiously. If you’re unsure, it’s always better to cut less than to risk cutting too much. If you notice a white or grayish oval inside the nail, stop! This indicates you’re getting close to the quick.

    Step 4: Clean the Pad

    After trimming, there might be some nail filings or debris. Gently clean the pad using a soft, damp cloth to ensure no remnants can cause irritation. This step is particularly crucial for dogs that have had severely curled nails as they might have accumulated dirt or debris.

    Step 5: Dry the Foot

    Once you’ve cleaned the footpad, it’s crucial to ensure it’s thoroughly dry to prevent any fungal or bacterial infections. Pat it gently with a soft towel. Avoid using hair dryers unless it’s on a cool setting, as the heat can be uncomfortable or harmful to your dog’s skin.

    Remember, if you’re ever unsure or uncomfortable cutting your dog’s curled nails, consulting a veterinarian or professional groomer is always the best course of action. They can provide guidance, or you can leave the task entirely in their experienced hands.

    fix curled dog nail

    How to Cut a Curled Dew Claw

    Dew claws, often referred to as the “thumb” of the dog, are a unique set of nails that are higher up on the foot, and they don’t always make contact with the ground. Because of this, they don’t wear down as naturally as the other nails, making them prone to curling. A curled dew claw can grow into your dog’s skin, leading to pain, inflammation, and possible infections. Here’s how you can safely trim a curled dew claw at home:

    Step 1: Understand the Dew Claw

    Before proceeding, recognize that the dew claw is structured differently than other nails. Since it doesn’t wear down naturally, it might grow longer, and the quick might extend further than you’d expect. Be cautious and understand the anatomy before you start.

    Step 2: Prepare Your Dog

    Dew claws can be a bit more sensitive than other nails, so it’s essential to ensure your dog is calm. You might want to play with them or give them a short walk to expend some energy first. Once ready, have them lie down in a comfortable position.

    Step 3: Have Your Tools Handy

    Just as with other nails, you’ll need:

    Step 4: Trim the Dew Claw

    Hold the dew claw away from the leg to have a clear view. Begin by trimming small bits off the tip, being especially careful as you approach the quick. If the claw has curled into the skin, you might need to approach it from a different angle, cutting bit by bit to avoid hurting your pet.

    Step 5: Monitor for Infections

    If the dew claw was curled severely or grown into the skin, there’s a risk of infection. After trimming, clean the area gently with an antiseptic. Over the next few days, check for signs of redness, swelling, or pus. If you notice any of these, or if your dog seems to be in pain, consult your veterinarian immediately.

    Step 6: Consistent Maintenance

    Dew claws require regular attention because they don’t naturally wear down. Make a schedule to check and, if necessary, trim the dew claw every few weeks.

    Cutting a curled dew claw can be a bit nerve-wracking, especially if it’s your first time. If you’re unsure or apprehensive, always consider seeking help from a professional groomer or veterinarian. The well-being and comfort of your furry friend always come first!

    how to clip curved nails

    Dog Clippers for Curled Nails

    Trimming your dog’s curled nails is essential for their comfort and health, and having the right tools can make the process much smoother and less stressful for both of you. Here’s a breakdown of the best dog clippers for curled nails:

    Guillotine Clippers

    ProsCons
    Best for Small to Medium BreedsMight not work efficiently on very thick nails
    Simple MechanismBlade dulls over time and will require replacement
    guillotine clippers

    Scissor Clippers (Also known as Miller’s Forge Clippers):

    ProsCons
    Strength: Can handle thick, tough nailsRequires more strength and stability in hand
    Variety: Available in different sizes
    Precision: Allows for more precise cuts
    miller's forge clippers

    Grinder Tools (e.g., Dremel Tools):

    ProsCons
    Smooth FinishNoise and vibration might unsettle some dogs
    Gradual Reduction: Less risk of cutting into the quickTakes longer than traditional clipping
    Versatility: Suitable for all dog sizes and nail typesRegular maintenance to replace grinding bands/heads
    dremel tool for dog nails

    Tips for Choosing the Best Clippers:

    1. Your Dog’s Size and Nail Thickness: Consider the size and breed of your dog. Thicker nails will require stronger clippers.
    2. Comfort Grip: Ensure the clipper has an ergonomic design.
    3. Safety Features: Some clippers come with safety guards.
    4. Sharpness: Ensure blades are sharp. Dull blades can lead to painful nail splits.

    Remember, always approach nail trimming with patience, care, and love. If in doubt or feeling uneasy, seeking a professional’s help is always the best approach.

    overgrown dog nails

    Tips to Clip Curled Nails

    Trimming curled nails can be a bit daunting, especially if it’s your first time or if the curling is severe. To ensure a stress-free and safe experience for both you and your furry friend, consider the following expert tips:

    1. Stay Calm and Confident: Your dog can sense your emotions. If you’re nervous, your pet will likely become anxious too. Take deep breaths and ensure you’re calm before starting the process.
    2. Good Lighting is Key: Proper visibility is crucial when trimming nails, especially curled ones, to avoid cutting the quick. Make sure you’re in a well-lit area or use a flashlight if needed.
    3. Start Small: When dealing with curled nails, it’s essential to trim small bits at a time, checking your progress regularly to avoid over-trimming or cutting into the quick.
    4. Regular Check-ups: To prevent nails from curling excessively, make it a routine to check and trim your dog’s nails every few weeks. Regular maintenance can prevent future complications.
    5. Positive Reinforcement: Reward your dog with treats or praises during and after the nail trimming process. This association can make future trims easier and less stressful.
    6. Know When to Stop: If your dog becomes too anxious or aggressive, it’s okay to pause and continue later or on another day. Forcing the process might lead to accidents or increased fear of nail trimming in the future.
    7. Have Styptic Powder Ready: Accidents happen. If you cut into the quick, having styptic powder or cornstarch at hand helps stop bleeding quickly.
    8. Get a Helping Hand: If your dog is fidgety, having someone help hold or soothe them can make the process smoother.
    9. Use the Right Clippers: As discussed earlier, using the right clippers for your dog’s nail type and size is crucial. Always ensure they’re sharp and clean before use.

    Remember, nail trimming is an essential aspect of pet care. With patience, the right tools, and regular practice, it becomes an easy and stress-free routine for both you and your dog.

    dog nail curled into paw pad

    Conclusion

    Navigating the world of dog nail care, especially when dealing with curled nails, can indeed feel like a daunting task. However, as any dedicated pet parent knows, these little challenges are all part and parcel of the incredible journey of sharing our lives with our four-legged companions. With the right knowledge, tools, and a sprinkle of patience, even tasks like nail trimming can become a bonding experience. Remember, it’s not just about keeping those paws pretty; it’s about ensuring our fur babies are comfortable, healthy, and happy. So, the next time you find yourself fretting over those spiraled nails, take a deep breath, revisit these tips, and know that you’re not alone. Every snip, clip, and trim you make is a testament to the love and care you shower on your pet. Happy grooming to all the dedicated paw-rents out there!

    Frequently Asked Questions

    How often should I check and trim my dog’s nails?

    Answer: Ideally, you should check your dog’s nails every couple of weeks. Depending on your dog’s activity level and the surfaces they walk on, some may require more frequent trims, while others might not. Curled nails or those that touch the ground when your dog is standing still definitely need attention.

    What should I do if I accidentally cut the quick?

    Answer: First, don’t panic. While it might bleed and cause discomfort for your dog, it’s a manageable situation. Quickly apply styptic powder or cornstarch to the bleeding nail to help it clot. Reassure your dog with a calm voice and perhaps offer a treat. If bleeding persists for more than a few minutes, consult your veterinarian.

    My dog is terrified of nail clippers. What can I do?

    Answer: Building positive associations is key. Start by letting your dog sniff and get familiar with the clippers without using them. Reward them with treats and praise for calm behavior around the tool. Gradually work your way up to touching their paws with the clippers, then clipping a single nail, and so on. Patience and consistent positive reinforcement will help ease their anxiety over time.

    Can I use human nail clippers on my dog?

    Answer: It’s not recommended. Dog nail clippers are specifically designed to handle the thickness and shape of dog nails. While human nail clippers might work for very small puppies or toy breeds, they aren’t ideal and may cause splitting or cracking of the nail.

    How do I know if my dog’s nails are too long?

    Answer: A clear indicator is if you can hear your dog’s nails clicking on the floor when they walk. Also, if your dog’s nails touch the ground when they’re standing still or cause the paws to splay, they’re likely too long. Regularly inspecting your dog’s nails will help you gauge the right length and prevent them from curling.

  • The Easy Way To Trim Your Puppy’s Nails At Home- Step By Step

    The Easy Way To Trim Your Puppy’s Nails At Home- Step By Step

    Ah, the familiar click-clack of puppy nails on the floor! If you’re hearing that more often, it might be time for a little nail trimming session. We get it – trimming your puppy’s nails can feel daunting, especially if you’re worried about accidentally hurting your fur baby. But what if we told you there’s an easy, stress-free way to do it right at home? Welcome to our step-by-step guide on the painless process of keeping those tiny paws perfectly manicured. Whether you’re a seasoned dog parent or a newbie, this blog is here to help. Say goodbye to expensive pet salon trips and hello to a confident, DIY nail-trimming experience. So, grab your pupper, settle down, and let’s dive into the world of hassle-free home grooming!

    trimming puppy nails at home

    When Should You First Clip Puppies’ Nails?

    As the proud parent of a bouncy new puppy, you’ve probably ticked off a list of “firsts” with your little one – the first walk, first treat, and maybe even the first bark at the neighbor’s cat. But one “first” that often raises a flurry of questions is the nail trimming session. So, when exactly should you introduce your furry bundle of joy to the world of nail clipping?

    The answer is sooner than you might think! Most vets and pet grooming experts recommend starting as early as 3-4 weeks old. That might sound super early, but there’s a method to the madness. Introducing your pup to nail trimming while they’re still a wee little thing helps them get acclimatized to the process, making it a lot less stressful for both of you as they grow.

    But, if you’ve adopted an older puppy or missed that early window, fret not! The key is to start as soon as you notice their nails getting a tad too long or when they begin that all-too-familiar click-clacking sound on your floor.

    Remember, consistency is your best friend. Regular, gentle trimming not only keeps your puppy’s nails in check but also makes the experience a routine part of their life. And hey, while it might feel a tad overwhelming at first, armed with the right tools and a sprinkle of patience, you’ll soon become a nail trimming pro.

    when should i clip puppy nails

    Are My Puppy’s Nails Too Long?

    When it comes to our furry friends, it’s often the little things that raise the biggest concerns. One question that nudges many puppy parents is: “Are my puppy’s nails too long?” Figuring this out can be a bit puzzling, especially for first-time dog owners. Thankfully, there are telltale signs and easy checks to guide you. So, let’s jump right in!

    The Click-Clack Test

    • One of the most apparent signs is the sound. If you hear a noticeable click-clack while your puppy walks on hard surfaces, it’s a clear hint that those nails might need a trim.
    • But remember, some breeds naturally have longer quicks (the sensitive part of the nail), so even after a trim, you might still hear some clicking. The key is to observe any change in the intensity of the sound.

    The Visual Check

    • Look at your puppy’s paws when they’re standing still. The nails shouldn’t touch the ground. If they do, they’re probably too long.
    • Examine the nail’s curvature. A nail that curls inwards could soon become ingrown, causing discomfort or even pain for your pup.

    The Comfort Test

    • Does your puppy pull away or show discomfort when you touch their paws? While this could be a sign of many things, overly long nails might be the culprit.
    • Overgrown nails can cause pain and even affect your puppy’s posture and gait. Watch out for any limping or unusual walking patterns.

    Tips for Regular Nail Checkups

    • Make it a routine. Incorporate nail checks into your regular grooming sessions or cuddle times.
    • Use natural light when possible. It’ll help you spot any overgrowth or potential problems.
    • Always be gentle. If your puppy seems agitated or stressed during a check, give them a break and try again later.

    In the end, knowing when to trim your puppy’s nails is a mix of observation and understanding your puppy’s unique needs. When in doubt, a quick vet check or consultation with a professional groomer can offer clarity.

    how do i clip puppy nails

    Trimming Puppy Nails

    The mere thought of wielding nail clippers near your precious pup can send even the bravest of pet owners into a mild panic. But here’s the good news: with the right approach, tools, and a touch of patience, trimming your puppy’s nails can transition from a daunting task to a bonding ritual. As you embark on this grooming journey, our comprehensive guide on ‘Trimming Puppy Nails’ is here to lead the way. Whether you’re grappling with a squirmy puppy or simply nervous about getting the length just right, we’ve got your back. Read on, and let’s transform that nail-trimming apprehension into confident expertise!

    What to Cut Puppy Nails With – Human Clippers vs. Pet Clippers

    Let’s face it: puppies and their endearing antics have a magical way of melting our hearts and making us reach out for anything close at hand when it comes to their care. So, you might wonder, in a pinch, can you grab your trusty pair of human nail clippers to give those growing puppy nails a quick snip?

    The answer is a bit nuanced.

    Understanding Human Clippers vs. Pet Clippers

    1. Design & Shape:

    • Human Clippers: These are typically designed flat, making them perfect for our relatively flat nails.
    • Pet Clippers: On the other hand, canine clippers are made to accommodate the rounded shape of dog nails, offering a more precise and comfortable cut.

    2. Size & Strength:

    • Human Clippers: They might be suitable for the tiniest of puppies with soft, delicate nails. However, as your pup grows, their nails become harder and thicker, possibly rendering human clippers ineffective.
    • Pet Clippers: These are crafted to handle the strength and thickness of a dog’s nails, ensuring a clean cut without splintering.

    So, Can You Use Human Clippers?

    While it’s not the ideal choice, in a pinch (and with a very young or small breed pup), you might be able to get away with using human clippers. But, there are a few things to keep in mind:

    • Be Extra Careful: Puppy nails have a “quick” – a blood vessel running inside. It’s easier to accidentally snip this with human clippers, causing discomfort or bleeding.
    • Perfect for Emergencies: If you notice a small nail snag and you’re far from your grooming kit, a human nail clipper can act as a temporary solution to prevent the nail from tearing further.
    • Not a Long-term Solution: For regular grooming and as your puppy grows, investing in a proper set of dog nail clippers will make the process safer and more comfortable for both of you.

    While human clippers can serve as an emergency stand-in, they aren’t designed for the complexities of puppy nails. To ensure your furry friend’s comfort and safety (and your peace of mind), it’s worth having a dedicated set of canine clippers in your grooming toolkit. After all, our little furballs deserve the best, don’t they?

    clipping my puppy's nails

    How to Cut Newborn Puppy Nails

    Ah, newborn puppies! Those tiny, wriggling bundles of joy with their soft fur, adorable yawns, and… surprisingly sharp nails? If you’re raising a litter or have just brought a newborn puppy home, you might be surprised at how quickly those little claws can grow. But when it comes to trimming the nails of such a delicate being, caution is the name of the game. Fear not! Here’s your gentle guide to safely navigating this task.

    Why Trim Newborn Puppy Nails?

    Before we delve into the ‘how,’ it’s essential to understand the ‘why.’ Newborn puppies have incredibly sharp nails, which they can inadvertently use to scratch their mother during nursing, or even hurt themselves or their littermates. Regular trims ensure everyone stays safe and scratch-free.

    Gearing Up

    You don’t need heavy-duty clippers for these tiny nails. Human nail clippers or small pet nail clippers will do just fine for the task.

    Steps to Trim Newborn Puppy Nails:

    1. Find a Quiet Spot: Look for a calm, well-lit space to make the process as stress-free as possible. Remember, puppies are sensitive to their surroundings.
    2. Gently Hold the Puppy: Cradle the puppy in one hand or on your lap. It helps if you have someone to assist, but if you’re solo, make sure you have a secure grip without squeezing too tight.
    3. Check the Nail: Look for the translucent part of the nail – this is what you’ll be trimming. Avoid the pinkish area, which is the ‘quick,’ containing blood vessels and nerves.
    4. Make the Cut: Gently snip the tip of the nail without getting too close to the quick. If the nails are clear, it’s easier to spot the quick. For darker nails, make small, conservative cuts.
    5. Stay Calm: If the puppy gets squirmy, take a short break and soothe them with gentle pets or soft whispers.
    6. Post-trim Rewards: After the trim, give your puppy some gentle cuddles or return them to their cozy spot. The idea is to associate nail trimming with positive experiences.

    What If I Cut the Quick?

    Accidents can happen. If you nick the quick and it bleeds, don’t panic. Apply some styptic powder or cornstarch to stop the bleeding. And remember, it’s a learning process; you’ll get better with time!

    Trimming a newborn puppy’s nails might feel like you’re handling the finest porcelain, but with patience and practice, it becomes a straightforward and rewarding task. Keeping those tiny nails in check ensures your little one grows into a happy, healthy dog with excellent paw hygiene habits!

    pitbull giving paw

    How to Cut Puppy Nails with Human Clippers

    If you’ve ever been caught in a pinch (pun intended) without your trusty dog nail clippers, you might’ve wondered, “Can I use my own nail clippers for my pup?” While using human clippers isn’t the ideal choice for full-grown dogs, they can be a temporary solution for puppies, especially the smaller breeds. So, if you find yourself in this situation, here’s how to approach it safely and efficiently.

    1. Prepare Your Puppy

    • Relaxation Time: Before you start, spend a few minutes petting and calming your puppy. This can help reduce their anxiety.
    • Good Lighting: Position yourself in a well-lit area. This helps in clearly identifying the ‘quick’ of the nail, which you’ll want to avoid cutting.

    2. Proper Holding Technique

    • Hold the Paw Firmly: With one hand, hold the puppy’s paw gently but firmly. This will give you better control and reduce the chances of any sudden movements.
    • Hold the Clippers Vertically: Unlike the horizontal positioning you’d use on human nails, holding the clippers vertically (perpendicular to the nail) is more effective for dog nails.

    3. Start with Small Cuts

    • Identify the Quick: This is the pinkish area within the nail where blood vessels are located. For puppies with darker nails, the quick may be harder to spot, so always err on the side of caution.
    • Trim Bit by Bit: Since you’re using human clippers, it’s crucial to make small, gradual trims. This gives you better control and reduces the risk of cutting into the quick.

    4. Soothe and Reward

    After each nail or if your puppy gets restless, give them soothing praise. Once you’re done with all the nails, reward them with a treat or their favorite toy. Positive reinforcement can make future trimming sessions easier.

    While human nail clippers can work for puppies in specific situations, it’s always a good idea to invest in a pair of dog nail clippers for the long run. They are designed for the job and will make the process smoother and safer for both you and your furry friend.

    puppy toenails

    How To Grind Puppy Nails

    For some puppy parents, the very thought of snipping their fur baby’s nails induces mild panic. What if you could ditch the clippers altogether and opt for a smoother, often less stressful method? Enter: nail grinders. This tool, which essentially sands down the nail instead of cutting it, can be a game-changer. Let’s navigate the how-tos of grinding those little puppy claws safely and effectively.

    Why Opt for Grinding?

    Grinding can offer several advantages over clipping:

    • Gradual Reduction: It allows you to trim the nail bit by bit, reducing the risk of nicking the quick.
    • Smooth Finish: Grinders leave a rounded, smooth edge, minimizing the chances of snags.
    • Less Stress: For puppies scared of the clipping sound, grinders can sometimes be a quieter, more comfortable alternative.

    Choosing the Right Grinder

    There are many pet nail grinders on the market, but look for one that:

    • Has multiple speed settings.
    • Is relatively quiet, so it doesn’t startle your puppy.
    • Comes with safety guards to prevent over-grinding.

    Step-by-Step Guide to Grinding Puppy Nails

    1. Preparation is Key: Introduce the grinder to your puppy gradually. Let them sniff and inspect it. Turn it on so they get used to the sound, rewarding them with treats for calm behavior.
    2. Choose a Comfortable Spot: Opt for a well-lit area where both you and your puppy can relax. Holding your puppy securely or having someone assist can be very helpful.
    3. Hold the Grinder: Grip the grinder in a way that feels stable in your hand. Remember, confidence on your part can translate to comfort for your pup.
    4. Start Grinding: Hold your puppy’s paw firmly and start with the tip of the nail, grinding in short bursts to prevent heat buildup. Always move from the tip towards the base of the nail, following its natural curve.
    5. Watch the Quick: As with clipping, you want to avoid the quick. Grinding offers a bit more control, but always proceed with caution, especially as the nail gets shorter.
    6. Smooth It Out: Once you’ve reached the desired length, you can use the grinder in a circular motion around the tip of the nail to smooth out any rough edges.
    7. Post-Grind Praise: Always end the session with plenty of praise, cuddles, and perhaps a treat. This positive reinforcement can make future sessions much easier.

    Safety First

    While grinders come with safety features, it’s essential to:

    • Never grind in one spot for too long to avoid heat buildup.
    • Regularly inspect the grinder for wear and tear.
    • Always read the manufacturer’s instructions and safety guidelines.

    Grinding can be a fantastic alternative to traditional clipping, especially for anxious pups or parents nervous about using clippers. With patience, consistency, and positive reinforcement, grinding your puppy’s nails can become a stress-free grooming ritual for you both.

    Video Demonstration: Grinding a Dog’s Nails

    How to Use Dog Nail Scissors on Your Puppy’s Nails

    There’s a certain charm in watching your playful pup run around, but hearing the click-clack of long nails on the floor? Not so much. While there are several tools available for trimming your dog’s nails, dog nail scissors remain a popular choice for many puppy parents. Easy to handle and precise, these scissors can be the perfect grooming companion if used correctly. Let’s dive into the world of dog nail scissors and master the art of trimming those petite puppy paws.

    Understanding Dog Nail Scissors

    Unlike regular scissors or guillotine-style clippers, dog nail scissors are specially designed for our canine companions. They often have:

    • Curved blades to match the natural curve of a dog’s nail.
    • Textured grips for secure handling.
    • A safety stop feature to prevent over-cutting (in some models).

    Step-by-Step Guide to Using Dog Nail Scissors

    1. Prep Your Pup: Start by getting your puppy used to the scissors. Let them sniff and explore them. Giving a treat after this initial exploration can create a positive association.
    2. Pick a Well-Lit Area: Good lighting is essential. It helps you clearly see the nail, especially the ‘quick’, which you want to avoid cutting.
    3. Hold Your Puppy: If your pup is squirmy, it might be helpful to have someone hold them gently. Alternatively, holding them in your lap or placing them on a non-slip surface can work.
    4. Grip the Scissors: Hold the nail scissors in your dominant hand with a firm, confident grip. Ensure your fingers are through the loops for better control.
    5. Position and Snip: Lift one of your puppy’s paws and gently separate the toes. Position the scissors so that they’re parallel to the nail tip. Make a confident, clean cut, taking care not to get too close to the quick.
    6. Check and Continue: After each snip, check the nail for any rough or jagged edges. If you find any, you can gently smooth them out with a nail file. Continue this process for all the nails.
    7. Treat and Praise: Once you’re done, shower your pup with praise and maybe even a treat. Making the experience positive ensures smoother sessions in the future.

    Tips for a Safe Trim

    • Spotting the Quick: On clear nails, the quick is the pinkish area. Avoid cutting into it to prevent pain and bleeding. For darker nails, make smaller cuts to be on the safe side.
    • Stay Calm: If you’re nervous, your puppy will pick up on that energy. Take deep breaths, and if you’re unsure, it’s better to trim less rather than risk cutting the quick.
    • Accidents Happen: If you do cut the quick, don’t panic. Apply styptic powder or cornstarch to stop the bleeding and comfort your pup.

    Using dog nail scissors can be an efficient way to keep your puppy’s nails in check. With a steady hand, a calm demeanor, and a dash of patience, you and your furry friend will breeze through nail trimming sessions, ensuring those paws remain healthy and your floors scratch-free!

    make puppy nails less sharp

    How to Make Puppy Nails Less Sharp

    Oh, the joys of puppyhood! Their playful antics, those loving licks, and those… sharp nails? If you’ve ever been on the receiving end of a playful puppy’s scratch, you know just how surprisingly sharp those little nails can be. While regular trimming is essential, sometimes what you need is to simply dull those claws a bit, ensuring playtime remains fun and scratch-free. Let’s explore the techniques to make those puppy talons a tad less pointy.

    How to File Puppy Nails

    Filing can be a gentle and effective way to smooth out your puppy’s nails post-trim, or even in between trims. This method not only reduces the sharpness but also minimizes the risk of nails snagging on carpets, furniture, or your favorite sweater. Here’s a step-by-step guide to safely file those tiny nails.

    1. Choose the Right Tool: There are specific nail files designed for dogs, but a regular emery board (like the ones used for human nails) can also do the trick for puppies. If you’re tech-savvy and want to speed up the process, consider investing in a pet nail grinder.
    2. Create a Calm Atmosphere: Play some soft music or sit in a quiet room to help keep your puppy at ease. This calm setting can make the filing process less intimidating.
    3. Hold Your Puppy’s Paw Gently: Using one hand, firmly but gently grasp your puppy’s paw. This gives you control and keeps the nail steady.
    4. Start Filing: Place the nail file or grinder at the tip of the nail. With gentle motions, file in one direction – from the top of the nail downward. This ensures a smooth finish and minimizes splitting.
    5. Check Your Progress: Every few strokes, feel the tip of the nail to check its sharpness. Your goal is to have a smooth, rounded edge.
    6. Reward and Repeat: After filing each nail, give your puppy some praise or a small treat. This makes the experience positive and reinforces good behavior. Move on to the next nail and repeat the process.
    7. Post-Filing Check: Once all nails are filed, do a quick check to ensure they’re even and at the desired length. Sometimes in the process, one might miss a nail or not file enough.

    Bonus Tips for Using a Nail Grinder:

    • Introduce Slowly: Before using it on your puppy, turn on the grinder and let your pup get used to its sound and vibration.
    • Short Sessions: Prolonged grinding can cause heat buildup which might be uncomfortable. It’s best to use the grinder in short bursts.
    • Safety Guard: If your grinder has a safety guard, it can help prevent over-grinding and protect the paw pads and fur from getting caught.

    Filing your puppy’s nails might seem like a minute detail, but it can greatly enhance the comfort of your pet and anyone interacting with them. Whether you opt for the traditional file or the modern grinder, the goal remains the same: to have a happy, well-groomed pup with nails that are safe for snuggles and play!

    puppy toenails

    What to Do for a Puppy Nail Infection

    Nail infections in puppies can be a concerning experience for pet parents. These infections are not only painful for our furry friends but also require prompt attention. Dive into this guide to understand the steps to take if you believe your puppy is suffering from a nail infection.

    Signs of a Nail Infection

    1. Swelling: The area around the nail appears red and inflamed.
    2. Discharge: Pus, which might be yellow or green, could seep from the infected area.
    3. Limping: Your puppy might avoid placing weight on the infected paw.
    4. Excessive Licking or Biting: The pup might incessantly focus on the affected nail, indicating discomfort.
    5. Foul Odor: An unusual, off-putting smell might emanate from the infected nail.

    Immediate Actions to Take

    1. Keep It Clean: Use warm water and a gentle antiseptic to clean the area, ensuring you dry it well afterward.
    2. Avoid Further Injury: Discourage your puppy from licking or biting the problematic nail. Consider using an e-collar or protective booties if needed.
    3. Limit Activity: Minimize actions that could worsen the infection, such as vigorous play or digging.

    Visit the Vet

    It’s essential to consult a veterinarian when you spot signs of an infection:

    1. Professional Diagnosis: The vet can confirm if it’s indeed an infection or another issue.
    2. Medication: Depending on the diagnosis, antibiotics, antifungal meds, or ointments might be prescribed.
    3. Guidance: The veterinarian will offer valuable advice on aftercare and preventive steps to avoid future issues.

    Preventing Future Infections

    1. Regular Nail Trims: Maintaining a proper nail length can reduce injury risks, which might become gateways for infections.
    2. Paw Washes: Clean your puppy’s paws after outdoor adventures, especially if they’ve explored muddy terrains.
    3. Check for Injuries: Regularly examine your puppy’s paws and nails for signs of damage or abnormalities.

    While puppy nail infections can be alarming, with the correct approach, they are entirely manageable. Stay attentive to your puppy’s needs, seek timely veterinary advice, and invest in preventive care. Those tiny paws, laden with boundless joy and affection, truly deserve the utmost attention and care!

    clip puppy nails

    How to Stop Puppy Nails from Bleeding

    We’ve all been there. That heart-sinking moment when, after a nail trim, you notice a tiny bead of blood forming at the tip of your puppy’s nail. Whether you’re a seasoned dog owner or a newbie, causing your pup any discomfort can make you feel gutted. Accidentally cutting into the ‘quick’ of the nail is a common mishap, but thankfully, it’s one that can be swiftly managed. Let’s navigate how to stop the bleeding and ensure your puppy is comfortable and safe.

    Immediate Steps to Take

    1. Stay Calm: Your puppy can pick up on your emotions. If you panic, they might too. Breathe deeply and remember, while it’s unpleasant, it’s usually not a severe injury.
    2. Apply Styptic Powder: This is a must-have in your pet first aid kit. Dab a small amount of styptic powder on the bleeding nail using a cotton ball or swab. The powder quickly stops the bleeding and aids in clotting. If you don’t have styptic powder on hand, cornstarch or baking soda can serve as temporary alternatives.
    3. Apply Pressure: Using a clean cloth or tissue, gently apply pressure to the nail for a few minutes or until the bleeding stops.
    4. Comfort Your Puppy: Offer some soothing words and gentle pets. A treat can help distract them from the discomfort and also act as a reward for being brave.

    Post-Care and Monitoring

    1. Avoid Immediate Play: Try to keep your puppy calm for a little while to prevent further bleeding. Avoid games that might result in them hitting the injured nail.
    2. Inspect the Nail: Over the next day, take a few moments to inspect the nail. Ensure it’s healing and not showing signs of infection like swelling or discharge.
    3. Clean the Area: Gently clean the affected nail with some warm water to prevent any potential infections.
    4. Note for Next Time: If you’ve identified the quick this time, you’ll have a better idea of where to avoid cutting during the next nail trimming session.

    Prevention Tips

    • Invest in Good Lighting: Ensure you’re trimming your puppy’s nails in a well-lit environment so you can clearly see the nail structure.
    • Go Slow: Especially if you’re new to nail trimming or if your dog has dark nails, make small cuts to gauge the nail’s structure.
    • Regular Trims: Regular nail trims can help the quick recede, making it easier to trim without hitting it.

    Accidentally causing your puppy’s nail to bleed can be distressing, but remember, mistakes happen even to the best of us. With the right knowledge and tools at hand, you can quickly manage the situation, ensuring your pup’s wellbeing and further cementing your bond. Because after all, being there for our furry friends, especially during their little mishaps, is what pet parenting is all about.

    use styptic powder

    Common Questions About Puppy Nails

    Puppy nail care might seem straightforward, but there are so many nuances and questions that pop up along the way. From their growth rate to their color, let’s address some of the most commonly asked questions about puppy nails.

    How Fast Do Puppy Nails Grow?

    Puppy nails tend to grow quite rapidly. On average, you might find the need to trim your puppy’s nails every 3-4 weeks. However, the exact growth rate can vary based on breed, age, diet, and genetics. Regular walks, especially on concrete or asphalt, can also naturally wear down the nails and reduce the frequency of trims.

    Why are My Puppy’s Nails White?

    White or clear nails are just one of the many natural nail color variations in dogs. The color of a dog’s nails is determined by the pigments produced by their body. If your puppy has white or clear nails, it simply means there’s a lack of pigmentation. It’s entirely normal and nothing to be concerned about.

    Why are My Puppy’s Nails Black?

    Black nails, just like white ones, are a natural color variation. If your puppy has black nails, it means there’s a presence of melanin, the pigment responsible for darker shades. Some dogs can even have a mix of black and white nails, which is entirely normal.

    Do Puppy Nails Fall Out?

    Puppy nails don’t “fall out” like baby teeth. However, they can break or chip if they’re too long or if the puppy is active on rough surfaces. Regular trims and nail maintenance can help prevent breaks and splits.

    Can I Paint My Puppies Nails?

    Yes, but with caution! If you wish to paint your puppy’s nails, ensure you’re using a dog-safe nail polish. These polishes are non-toxic and specifically formulated for pets. Never use human nail polish, as it can contain harmful chemicals. Also, be sure your puppy doesn’t ingest any polish or polish remover.

    Why are my Puppy’s Nails Peeling?

    Peeling or splitting nails can be a result of various factors:

    • Trauma: If your puppy has been especially active or has dug into rough terrains, their nails might get chipped or peeled.
    • Diet: Nutritional deficiencies can lead to weaker nails. Ensure your puppy is on a balanced diet.
    • Health Issues: Certain health conditions or infections can lead to nail problems. If you notice excessive peeling, it might be a good idea to consult a vet.
    how to clip puppy nails

    Conclusion

    Navigating the world of puppy nail care can initially feel like a walk on a rocky path – full of uncertainties and potential little mishaps. But with the right knowledge, tools, and a sprinkle of patience, it transforms into a bonding journey, one where you’re ensuring those adorable paws remain in the pink (or black, or white) of health.

    Each scratch, paw tap, or playful leap is a testament to your care, echoing the trust your puppy places in you. So, whether you’re mastering the art of the grind, considering a splash of color, or soothing a minor boo-boo, always remember: it’s not just about nails. It’s about building moments, trust, and ensuring your furry friend treads through life with confidence and comfort.

    In the vast landscape of puppy parenthood, nails are but a small chapter. Yet, they symbolize the care, commitment, and love we pour into every aspect of our pups’ lives. So, here’s to many more nail trims, cuddles, and tail wags. After all, every little clip and file echoes the heartbeat of the bond we share with our four-legged companions.

  • How Long Should Dog Nails Be? Correct Nail Length Trim Tips

    How Long Should Dog Nails Be? Correct Nail Length Trim Tips

    Hello fellow dog parents! When it comes to our furry friends, we all strive to ensure they’re in optimal health, and often, that care extends right down to their paws. Ever found yourself wondering, “How long should my dog’s nails be?” or “Am I trimming them correctly?” You’re not alone! Ensuring the right nail length is not just about aesthetics; it’s a crucial aspect of their overall well-being. Too long, and they could face discomfort or even injury; too short, and you might hurt their sensitive quicks. Fear not, in this comprehensive guide, we’ll discuss the perfect nail length for your pooch, offering you trim tips that guarantee a happy, healthy dog. Let’s get those paws looking and feeling their best!

    how long should dog nails be

    How Long Should Dog Nails Be?

    First and foremost, understanding the significance of your dog’s nail length is essential.

    1. Comfort: Just like our nails, if a dog’s nails are too long, they can cause discomfort. Every time they step, the pressure pushes their nails back into their nail beds which can be painful.
    2. Posture & Gait: Overgrown nails can affect the way a dog walks. They might adjust their posture and gait to avoid the discomfort, which can lead to skeletal issues over time.
    3. Injury Prevention: Long nails are more prone to getting caught in carpets or other surfaces, which can result in tears or breaks. This is not only painful but can sometimes lead to infections.

    So, How Long Should Dog Nails Be?

    The ideal length varies depending on the breed and the individual dog, but here are some general guidelines:

    1. Hearing the ‘Click’: If your dog walks on a hard surface and you hear their nails clicking, it’s usually a sign that they’re too long.
    2. Ground Touch: When standing, your dog’s nails (especially the front nails) should either just touch the ground or be slightly above it. If the nails are constantly pressing into the ground, it’s trimming time.
    3. Curve Check: Examine the curve of your dog’s nails. If they’re starting to curl under, they’ve grown too long.

    Tips for Maintaining the Right Nail Length

    • Regular Trimming: Depending on the growth rate, you may need to trim your dog’s nails every 2-4 weeks. Some breeds might need more frequent trims.
    • Invest in Quality Tools: A good pair of dog nail clippers or a dremel can make the task easier and more efficient.
    • Check for the Quick: The ‘quick’ is the sensitive part of the nail that has blood vessels. Always be careful not to cut into this. If your dog has clear nails, the quick will appear pink. For dogs with dark nails, you’ll have to trim a little at a time and look for a dark circle in the center of the nail – that’s where the quick starts.
    • Stay Calm, Reward Often: Especially if your dog isn’t used to nail trims, ensure you make the experience as positive as possible. Treats, praises, and patience go a long way.

    Seek Professional Help if Unsure

    If you’re ever in doubt about how to trim your dog’s nails or fear you might hurt them, consult with a professional. Many groomers and veterinarians offer this service and can even provide you with tips tailored to your dog.

    To wrap up, maintaining the right nail length for your dog is vital for their comfort and health. With regular checks and trims, you’ll ensure your furry friend stays in tip-top shape from nose to tail—and nails!

    dog nail length

    How to Find the Quick on Dog Nails

    Before diving into how to find the quick, it’s important to understand what it is. The quick is the sensitive part of a dog’s nail that contains blood vessels and nerves. Accidentally cutting into the quick can cause pain and bleeding, making it crucial to identify its location during nail trims.

    Identifying the Quick on Different Nail Colors

    The ease of locating the quick often depends on the color of your dog’s nails. Let’s break it down:

    1. Clear or White Nails:
      • The quick is generally easier to spot on these nails.
      • It appears as a pinkish area within the nail.
      • The tip of the nail will be translucent, and as you approach the quick, the nail starts to look more opaque with a pinkish hue.
    2. Dark or Black Nails:
      • These are more challenging since the quick is not directly visible.
      • Begin trimming small bits off the nail’s tip. As you trim closer to the quick, you’ll start to see a homogeneous dark dot in the center. This indicates you’re nearing the quick, and it’s time to stop.

    Tips for Safely Navigating the Quick

    • Trim in Good Lighting: This will give you the best visibility, especially for darker nails.
    • Opt for Nail Clippers with a Quick Sensor: Some advanced clippers come equipped with sensors that indicate when you’re getting close to the quick.
    • Take Small Cuts: Especially if you’re unsure, taking off small bits at a time allows you more control and minimizes the risk of cutting the quick.
    • Keep Styptic Powder Handy: This is a coagulant that can stop bleeding quickly if you accidentally cut the quick. Simply dab a bit on the bleeding tip.

    When in Doubt, Consult a Professional

    If you’re nervous about trimming your dog’s nails yourself or are unsure about finding the quick, there’s no shame in seeking help. Veterinarians, groomers, or even fellow dog owners can offer guidance. Remember, safety first!

    In essence, identifying the quick is an essential skill for anyone looking to trim their dog’s nails. With patience, good lighting, and the right tools, you can master this task and ensure a pain-free experience for your furry pal.

    dog nail anatomy

    How to Clip Your Dog’s Nails Without Hurting Them

    For many dogs, the sight of nail clippers can be a cause for panic. The first step in ensuring a stress-free trimming session is familiarizing your dog with the tool.

    1. Desensitize with Sight and Sound:
      • Start by simply showing the clippers to your dog. Allow them to sniff and investigate without making any move to trim.
      • Then, make the clipping sound by snipping the clippers in the air so your dog becomes accustomed to the noise.
    2. Positive Reinforcement:
      • Whenever your dog remains calm around the clippers, reward them with treats or verbal praise.
      • This associates the presence of the clippers with positive outcomes.
    3. Touch Their Paws:
      • Before diving into trimming, spend a few days gently touching your dog’s paws, applying slight pressure to mimic the feeling of a nail trim.
      • This will desensitize them to the sensation and reduce anxiety.

    Clip a Little At A Time

    Being overzealous with the clippers can result in cutting the quick, so taking it slow is crucial.

    1. Good Lighting: Ensure you’re in a well-lit area to clearly see the nail, especially the quick.
    2. Hold the Paw Firmly but Gently: This provides you with control and reduces the chances of making an accidental deep cut.
    3. Trim Small Bits: Start by snipping just the tip of the nail. If the nail is dark, you’re looking for a change in the nail’s center as mentioned in the previous section. If it’s clear, steer clear of the pinkish region.

    Continue to Trim

    Once you’ve established comfort and started the trimming process, it’s essential to keep up the momentum without rushing.

    1. Regular Sessions: Instead of waiting for the nails to grow very long, establish a routine. Regular trims mean you’re only dealing with small bits of growth each time.
    2. Check Angles: Hold the clipper at a slight angle (around 45 degrees) towards the tip of the nail. This ensures a clean cut without splintering.
    3. Reassure and Reward: Dogs can get anxious even if they’re familiar with the process. Continually reassure them with a calm voice and provide treats intermittently.
    4. Know When to Stop: If your dog becomes overly anxious or agitated, it’s okay to stop and resume another day. Forcing the process can create negative associations.

    Ultimately, the key to clipping your dog’s nails without causing discomfort lies in patience, familiarity, and positive reinforcement. It’s a skill, and like all skills, it gets easier with time and practice. If ever in doubt, don’t hesitate to consult with a professional or watch tutorials for added confidence.

    how to trim dog nails

    How to Tell If Your Dog’s Nails Are Too Long

    One of the many responsibilities of being a dog parent is ensuring the comfort and health of your pup, right down to their toes. But how can you tell if your dog’s nails are verging on too lengthy? Overgrown nails can lead to a range of issues, from simple discomfort to potential health problems. Recognizing the signs is essential for timely intervention.

    Visible Signs of Overgrown Nails

    Your dog’s paws provide the first and most evident clues. Here’s what to look out for:

    1. The ‘Click’ Sound: If you hear a clicking sound when your dog walks on hard surfaces, that’s a clear sign the nails are too long.
    2. Curled Nails: Overgrown nails tend to curl under. If they’re curling towards the paw pad or are already touching it, it’s time for a trim.
    3. Altered Gait: Watch how your dog walks. If they’re trying to walk gingerly or tiptoe, it could mean the nails are causing discomfort.

    Physical and Behavioral Indicators

    Sometimes, the signs are more subtle or result from the effects of the overgrown nails:

    1. Limping or Favoring One Leg: This might indicate that a nail is causing pain or has even grown into the paw pad.
    2. Reluctance to Play or Walk: If your dog suddenly seems less enthusiastic about activities they usually love, long nails might be to blame.
    3. Visible Discomfort When Touching Their Paws: If they pull away or show signs of discomfort when you handle their paws, it’s a potential indicator.

    Potential Health Implications

    Long nails are not just an aesthetic concern; they can have real health implications:

    1. Posture Issues: Extended nails can cause your dog to adjust their posture to avoid pain, which can lead to skeletal and muscular issues in the long run.
    2. Increased Risk of Injury: Nails that are too long are more likely to get caught on something and tear. Such injuries can be painful and may lead to infections.

    Regular Paw Checks are Key

    Make it a habit to inspect your dog’s paws regularly. This proactive approach will help you catch any overgrowth early on and ensure your furry friend’s comfort and health.

    In conclusion, understanding the ideal length of your dog’s nails and being vigilant for signs of overgrowth will go a long way in ensuring they stay active, happy, and pain-free. After all, our four-legged companions deserve nothing but the best!

    short dog toenails

    How Often To Clip A Dog’s Nails

    Before we delve into the frequency of nail trims, it’s vital to acknowledge that, just like us humans, every dog is unique. Factors like their activity level, the surfaces they regularly walk on, and their age can all influence how fast those nails grow. Yet, regardless of these variables, regular nail trims are essential to keep our furry pals comfortable and healthy.

    General Guidelines on Frequency

    While there isn’t a one-size-fits-all answer, there are some broad guidelines that can serve as a starting point:

    1. Puppies: Their nails tend to grow rapidly. You might find yourself needing to trim them weekly.
    2. Active Outdoor Dogs: Dogs that spend a lot of time outdoors, especially on harder surfaces like concrete, may naturally wear down their nails and require less frequent trims. Every 3-4 weeks might suffice.
    3. Indoor or Older Dogs: Their nails aren’t worn out as much, so you may need to clip them every 2-3 weeks.
    4. Noticeable Growth: Regardless of the above timelines, if you notice that your dog’s nails are getting long or hear the tell-tale clicking on hard floors, it’s time for a trim.

    Factors Influencing Nail Growth

    To pinpoint a more tailored nail-trimming schedule for your dog, consider these aspects:

    1. Breed and Size: Smaller breeds often seem to have faster-growing nails. Larger breeds, especially if they’re active, might wear their nails down naturally with play and exercise.
    2. Lifestyle: A dog that lounges around the home all day may need more frequent trims compared to one that’s regularly running or walking on varied surfaces.
    3. Nail Color: Dogs with clear nails make it easier for owners to see the quick and therefore, might get their nails trimmed more accurately and frequently. Dark nails can sometimes lead to more cautious, less frequent trims.

    The Importance of Consistency

    While determining the exact frequency, the key is consistency. Regular nail checks and trims:

    • Prevent Overgrowth: Which can lead to pain or injuries.
    • Make Trimming Easier: The more frequently you trim, the more accustomed your dog becomes to the process, making it less stressful for both of you.
    • Avoid Health Issues: Long nails can cause a dog’s foot to splay, leading to posture and skeletal problems.

    In wrapping up, the frequency of nail trims varies for each dog. It’s always a good idea to consult with your vet or a professional groomer initially to get a recommendation tailored to your pup. With attentive care and regular check-ins on those paws, you’ll ensure your dog remains both happy and healthy from tip to tail!

    trimmed dog toenails

    Conclusion

    From understanding the intricacies of the nail quick to recognizing signs of overgrowth, and from mastering the art of trimming to determining the perfect trimming schedule, the journey of dog nail care might seem daunting at first glance. But as we’ve navigated through each topic, one truth becomes evident: with patience, knowledge, and a dash of love, ensuring our furry friend’s comfort is wholly within our grasp.

    The health and happiness of our dogs often lie in the little details. Regular nail care not only prevents potential health issues but also offers an opportunity for bonding—a moment where, amidst the hustle and bustle of life, we pause to care for a creature that offers us boundless love in return.

    So, the next time you hear the gentle click-clack of your dog’s nails or reach for those clippers, remember that each snip is a step towards their well-being. And as always, whether you’re a seasoned pro or a nervous newbie, there’s a vast community of dog lovers and professionals ready to lend advice or a helping hand.

    In the world of dog care, nails might seem like a small aspect, but they hold the weight of our dog’s comfort. Here’s to many more pain-free frolics, spirited sprints, and cozy cuddles with our four-legged family members!

    Frequently Asked Questions (FAQs)

    What if I accidentally cut the quick while trimming my dog’s nails?

    It’s not uncommon for even experienced pet owners to occasionally nick the quick. If this happens, remain calm and use styptic powder or a styptic pencil to stop the bleeding. Apply gentle pressure with a clean cloth if needed. It’s essential to comfort your dog and maybe offer a treat to soothe any anxiety. If bleeding continues or you’re concerned about the cut, consult with your vet.

    Can I use human nail clippers on my dog?

    While it might be tempting, human nail clippers aren’t designed for dog nails, especially for larger breeds. Dog nail clippers are shaped and sized specifically for dog nails and provide a safer, more efficient cut. For small breeds or puppies, some owners use human nail clippers, but specialized dog nail clippers or grinders are recommended for the best results.

    How can I calm my anxious dog before nail trimming?

    Start by introducing the clippers without the intention of trimming. Allow your dog to sniff them and get familiar. Positive reinforcement, like treats or praise, can help create positive associations. Desensitizing your dog to having their paws touched can also make a difference. If your dog remains anxious, consider seeking the help of a professional groomer or vet, or using calming aids like wraps or sprays.

    Are nail grinders better than clippers?

    Both tools have their advantages. Grinders can be great for dogs with thick nails, offering a smoother finish and reducing the risk of splitting. They’re also useful for gradual trimming. However, some dogs might be scared of the vibrating sensation and noise. Clippers provide quick, precise cuts but come with the risk of cutting the quick if not used carefully. The best tool often depends on your dog’s comfort and your confidence in using it.

    How do I know if I’m trimming enough, or if I’m trimming too much?

    A good rule of thumb is if your dog’s nails touch the ground when they’re standing still, they’re likely too long. When trimming, cut just before the curve of the nail to prevent over-trimming. If you’re uncertain or anxious, it’s always a good idea to consult with a professional groomer or vet for guidance. Regular checks and maintenance can also help in keeping the nails at an optimal length.

  • Dog Whitening Shampoo to Brighten Your Dog’s Coat – Top Vet Picks

    Dog Whitening Shampoo to Brighten Your Dog’s Coat – Top Vet Picks

    As a holistic veterinarian with over a decade of experience, I’ve always emphasized the importance of a comprehensive approach to pet care. This means not only focusing on treating ailments but also on preventive measures and overall well-being. One aspect that often gets overlooked, yet plays a significant role in a dog’s health and confidence, is the quality of their coat.

    A bright, clean coat is not just about aesthetics; it’s a reflection of a dog’s overall health and well-being. Over the years, I’ve encountered numerous pet parents who are concerned about the dullness or discoloration of their dog’s white or light-colored fur. While diet, health, and regular grooming play crucial roles, the right choice of shampoo can make a world of difference.

    In this article, we’ll delve into the realm of dog whitening shampoos. I’ll share my top picks based on years of research and firsthand experience, aiming to guide you towards making an informed decision for your furry friend. After all, our pets deserve the best, and it’s our responsibility to ensure they shine, both inside and out.

    best whitening shampoo

    Why Use a Dog Whitening Shampoo?

    Understanding the nuances of canine care is essential for every pet parent. One question I often encounter in my practice is, “Why should I use a whitening shampoo for my dog?” Let’s delve into the reasons:

    1. Targeted Cleaning for Specific Coats:
      • Not all dog coats are the same. Light-colored or white fur tends to show stains and discolorations more prominently than darker coats. Whitening shampoos are formulated to address these specific challenges, ensuring that your dog’s coat remains as pristine as possible.
    2. Safe Stain Removal:
      • Everyday activities, from playing in the yard to snuggling on the sofa, can lead to various stains on your dog’s coat. These can range from mud to food spills. Whitening shampoos are designed to tackle these stains without the use of harsh chemicals, ensuring your dog’s skin remains undisturbed.
    3. Enhanced Brightness and Shine:
      • Beyond just stain removal, whitening shampoos often contain ingredients that enhance the natural brightness and shine of your dog’s coat. This not only makes your pet look more vibrant but also feels softer to the touch.
    4. Maintaining Skin Health:
      • A good whitening shampoo doesn’t just focus on the fur. It also takes into account the skin underneath. By choosing a quality product, you’re ensuring that while the coat gets the brightness it deserves, the skin remains moisturized and free from irritations.
    5. Holistic Well-being:
      • As a holistic veterinarian, I believe in the interconnectedness of physical appearance and internal health. A bright, clean coat not only boosts your dog’s confidence but also indicates a well-maintained and healthy lifestyle.

    Using a dog whitening shampoo isn’t just about aesthetics. It’s about providing comprehensive care that addresses the unique needs of light-colored and white fur, ensuring your pet feels as good as they look.

    best whitening shampoo for dogs

    Factors to Consider When Choosing a Whitening Shampoo

    When it comes to selecting the ideal whitening shampoo for your dog, it’s essential to be both informed and discerning. Here are some key factors to keep in mind:

    1. Ingredients

    • Natural and Safe: Prioritize shampoos with natural ingredients, steering clear of harmful chemicals and artificial fragrances. Ingredients such as chamomile, lavender, and aloe vera not only clean effectively but also have soothing properties.
    • Active Whitening Agents: Seek out ingredients known for their brightening and whitening capabilities, like optical brighteners or natural blueing agents. These enhance the coat’s natural shine without causing harm.

    2. Skin Sensitivity

    • Dogs can have skin as sensitive as ours. It’s crucial to opt for hypoallergenic shampoos devoid of irritants. If your dog has had skin issues in the past, a consultation with your vet before choosing a shampoo is advisable.

    3. Brand Reputation

    • With the convenience of online shopping comes the advantage of reviews. Choose brands with a strong reputation in the pet care industry and positive feedback from fellow pet parents.

    4. pH Balanced

    • Dogs have a distinct skin pH compared to humans. It’s essential to pick a shampoo that’s pH balanced for dogs to ensure their skin remains irritation-free and retains its natural oils.

    5. Price vs. Quality

    • While budgeting is essential, so is ensuring you’re getting good value. Sometimes, investing a tad more in a quality product can prevent potential complications in the future.

    6. Eco-Friendly

    • As we grow more environmentally conscious, it’s worth considering shampoos that are biodegradable and packaged eco-friendly. This way, you’re caring for both your pet and the planet.

    7. Ease of Use

    • Factors like the shampoo’s consistency, its lathering capability, and ease of rinsing can significantly impact the bathing experience. These might seem minor, but they can make a world of difference for both you and your dog.

    By keeping these guidelines in mind, you’ll be better equipped to make an informed decision, ensuring your furry friend receives the best care possible.

    white dog getting bath

    How to Use Dog Whitening Shampoo for Best Results

    Achieving that pristine, gleaming coat for your dog involves more than just selecting the right shampoo. The application process plays a pivotal role. Here’s a step-by-step guide to ensure you get the most out of your dog whitening shampoo:

    1. Pre-Bath Preparation

    • Brush the Coat: Before bathing, brush your dog’s coat thoroughly to remove any tangles, mats, and loose fur. This ensures the shampoo penetrates evenly.
    • Wet the Fur: Using lukewarm water, wet your dog’s coat thoroughly. This helps in the even distribution of the shampoo.

    2. Applying the Shampoo

    • Amount: Pour a generous amount of shampoo into your palm. The exact amount will depend on your dog’s size and the thickness of their coat.
    • Massage: Gently massage the shampoo into your dog’s coat, working from the neck down to the tail. Ensure you cover all areas, paying special attention to stained or discolored patches.

    3. Let it Sit

    • Most whitening shampoos benefit from being left on the coat for a few minutes. This allows the active ingredients to work effectively. Always follow the instructions on the label for the recommended duration.

    4. Rinsing

    • Thoroughly Rinse: Using lukewarm water, rinse your dog thoroughly. Ensure all shampoo residues are washed out, as any remnants can cause skin irritations.

    5. Post-Bath Care

    • Towel Dry: Gently pat your dog dry with a soft towel. Avoid vigorous rubbing as it can tangle the fur.
    • Blow Drying: If you choose to blow dry, use a low heat setting and keep the dryer at a safe distance to prevent overheating.
    • Brush Again: Once your dog is dry, give them another thorough brushing to keep the coat smooth and shiny.

    By following these steps diligently, you’ll not only achieve a brighter and cleaner coat but also ensure your dog’s skin remains healthy and irritation-free. Remember, consistency is key, so make this routine a regular part of your dog’s grooming regimen for the best results.

    bathing white husky

    Common Myths and Misconceptions about Dog Whitening Shampoos

    In the realm of pet care, myths and misconceptions abound, and dog whitening shampoos are no exception. It’s essential to separate fact from fiction to make informed decisions for your furry friend. Let’s debunk some of the most common myths:

    1. Whitening Shampoos Contain Bleach

    • Truth: Quality dog whitening shampoos do not contain bleach or any harmful chemicals. Instead, they utilize natural ingredients and optical brighteners to enhance the coat’s whiteness without causing any damage.

    2. They’re Harsh on the Skin

    • Truth: While there might be some low-quality products on the market, reputable whitening shampoos are formulated to be gentle on a dog’s skin. Many contain soothing ingredients like aloe vera and chamomile to ensure the skin remains moisturized and irritation-free.

    3. Whitening Shampoos are Only for White Dogs

    • Truth: While they’re primarily designed for white or light-colored coats, whitening shampoos can benefit dogs of all colors. They help enhance the natural shine and brightness of the coat, making it look more vibrant.

    4. Frequent Use Can Damage the Coat

    • Truth: Quality whitening shampoos are designed for regular use. As long as you’re following the product’s instructions and ensuring thorough rinsing, there’s minimal risk of damaging the coat.

    5. Human Whitening Shampoos Can Be Used on Dogs

    • Truth: Dogs have a different skin pH compared to humans. Using human products, even if they’re whitening shampoos, can disrupt this balance and lead to skin irritations. Always opt for products specifically formulated for dogs.

    It’s always crucial to approach pet care with a discerning eye and an open mind. By debunking these myths, we hope to provide clarity and ensure that your dog receives the best care possible, leading to a bright, healthy coat they can proudly flaunt.

    white dog getting bath

    1) Top Performance Bright Magic Dog Shampoo Shampoo

    Top Performance Bright Magic Dog Shampoo Shampoo is a pet grooming product designed to enhance the appearance of a pet’s coat. It comes in a 17-ounce bottle and features a cherry scent that leaves pets smelling pleasant after baths. This formula is safe for young pets, suitable for puppies and kittens as young as 6 weeks old. It is known for brightening and highlighting the coat’s color, making it lustrous and vibrant.

    Pros:

    • Brightening Formula: The shampoo effectively brightens and highlights the coat of dogs and cats, giving them a more attractive appearance.
    • Safe for Young Pets: It can be used on puppies and kittens as young as 6 weeks old, making it suitable for a wide range of ages.
    • Pleasant Scent: The cherry scent of the shampoo leaves pets smelling great and fresh.

    Cons:

    • Price: The product may be relatively expensive, especially when considering the 17-ounce bottle’s cost, which may not last long with frequent use.
    • Scent Longevity: While the shampoo has a pleasant scent, some users have noted that it doesn’t last very long after the bath.

    The Top Performance Bright Magic Dog Shampoo Shampoo is a popular choice for pet owners looking to enhance their pets’ coat appearance and leave them smelling nice. It’s particularly well-suited for young pets. However, potential buyers should be aware of the product’s price and the fact that the scent may not linger on the pet for an extended period.

    Top Performance Bright Magic Dog Shampoo and Cat Shampoo

    2) Petpost | Dog Whitening Shampoo

    Petpost’s Dog Whitening Shampoo is a powerful whitening treatment specifically designed for dogs with white fur, such as Maltese, Shih Tzu, and Bichon Frise breeds. It offers a soothing watermelon scent and comes in a 16-ounce size. The formula is plant-based, featuring extracts from coconut and aloe, and it does not contain harsh chemicals or bleach. Petpost claims it can effectively whiten your dog’s coat and provide a fresh look. They also offer a “100% Happy Dog Guarantee,” promising a refund if you’re not satisfied.

    Pros:

    • Effective Whitening: The shampoo is designed to effectively whiten a dog’s coat, making it a suitable choice for owners of white-furred breeds.
    • Soothing Scent: The watermelon scent provides a pleasant grooming experience for both the dog and the owner.
    • Plant-Based Formula: The use of plant-based ingredients and the absence of harsh chemicals or bleach make it a safer and more environmentally friendly choice.

    Cons:

    • Not Suitable for All Stains: The product may not completely remove deeply ingrained stains, and some stains may require time to naturally grow out and be trimmed.
    • Scent Sensitivity: Some dogs may be sensitive to scents, so the watermelon scent might not be suitable for all pets.

    Petpost’s Dog Whitening Shampoo offers a potentially effective solution for pet owners looking to maintain or enhance the whiteness of their dog’s coat, particularly for specific breeds. However, it may not completely eliminate all types of stains, and some dogs may have sensitivities to scents, which should be considered before use.

    Petpost | Dog Whitening Shampoo

    3) PET CARE Sciences Dog Whitening Shampoo – Dog Shampoo for White Dogs

    PET CARE Sciences Dog Whitening Shampoo is designed for white dogs to brighten their coats and even darken black coats. It features a sulfate-free formula with a long-lasting Mountain Fresh fragrance. The shampoo is gentle, free from harmful ingredients like MEA, TEA, DEA, sulfate, phthalate, and paraben, making it suitable for sensitive skin. It is plant-based and removes excess oils without stripping essential oils from the coat. The product is proudly made in the USA and comes in various sizes, offering a solution for dog owners looking to enhance and maintain the whiteness of their pets’ fur.

    Pros:

    • Brightens and darkens coats: This shampoo effectively enhances the whiteness of white dog coats and can even darken black coats.
    • Gentle and safe: The sulfate-free, plant-based formula is gentle on dogs’ skin, making it suitable for dogs with sensitive skin.
    • Long-lasting fragrance: The Mountain Fresh fragrance leaves dogs smelling fresh and clean after each wash.

    Cons:

    • Price: Some customers may find the product a bit pricey compared to other dog shampoos on the market.
    • Limited to specific coat colors: This shampoo is primarily designed for white and black coats, which may not be suitable for dogs with different coat colors.

    PET CARE Sciences’ Dog Whitening Shampoo is a reliable choice for dog owners looking to maintain or enhance the whiteness of their pets’ coats. Its gentle and safe formula, coupled with a pleasant fragrance, offers a positive grooming experience for both dogs and their owners. However, potential buyers should consider the price and whether the product is suitable for their dog’s specific coat color before purchasing.

    PET CARE Sciences 16 fl oz Dog Whitening Shampoo - Dog Shampoo for White Dogs

    4) Lillian Ruff Ultra-Brightening Professional Whitening Shampoo for Dogs

    The Lillian Ruff Ultra-Brightening Professional Whitening Shampoo is a pet grooming product designed to brighten and whiten the coats of dogs and cats while also hydrating their skin. It contains natural essential oils and is pH-balanced, making it suitable for various pet types. This shampoo is known for removing stains, yellowing, and odors from pets’ fur, leaving it brighter and whiter. It also features a pleasant coconut scent that deodorizes and calms pets during bath time. Moreover, it is made in the USA and comes with a money-back guarantee.

    Pros:

    • Effective Whitening: The shampoo effectively removes stains and yellowing, restoring the natural brightness of your pet’s coat.
    • Hydrating Formula: It contains aloe and coconut oil, which hydrate and soothe your pet’s skin, making it suitable for sensitive skin types.
    • Deodorizing Scent: The coconut scent not only deodorizes but also provides a pleasant fragrance, leaving your pet smelling fresh.

    Cons:

    • Limited to White Coats: This shampoo is most effective on white or lighter-colored fur, and its brightening effects may not be as noticeable on dogs with darker coats.
    • Not Tearless: Unlike some pet shampoos, this product is not labeled as tearless, so extra care may be needed to avoid contact with your pet’s eyes.

    Lillian Ruff Ultra-Brightening Professional Whitening Shampoo is a quality grooming product that can enhance the appearance of your pet’s coat, especially for white or light-colored pets. Its hydrating and deodorizing properties make it a good choice for pet owners seeking to maintain their pet’s fur and skin health.

    5) Chris Christensen White on White Whitening Treatment Dog Shampoo

    The Chris Christensen White on White Whitening Treatment Dog Shampoo is designed to brighten and enhance the coat color of dogs, making it particularly suitable for white and light-colored breeds. It effectively removes yellow stains and imparts a lustrous sheen to darker coat colors as well. The shampoo is safe to use and does not contain harsh chemicals, bleaching agents, or softening agents. It is designed for all coat types and lasts up to 4 weeks without rubbing off on hands or clothing.

    Pros:

    • Versatile Use: Suitable for all coat colors, making it a versatile choice for dog owners with various breeds.
    • Color Correction: Acts as an optic intensifying treatment, effectively removing yellow stains and enhancing the vibrancy of darker coat colors.
    • Safe and Long-Lasting: Contains no harmful chemicals, and its effects can last for up to 4 weeks, providing a long-lasting solution for maintaining a dog’s coat appearance.

    Cons:

    • Scent: Some users may find the citrus scent of the shampoo less appealing or strong.
    • Stain Removal Effectiveness: While it generally works well, it may not completely remove tough stains in a single use and might require multiple applications.

    The Chris Christensen White on White Whitening Treatment Dog Shampoo offers a versatile and safe solution for dog owners looking to maintain the appearance of their pets’ coats. It effectively removes yellow stains and enhances coat colors, making it a valuable grooming tool for dog owners and professionals alike. However, users should be aware of the scent and the need for multiple applications for stubborn stains.

    Chris Christensen White on White Whitening Treatment Dog Shampoo

    Conclusion

    In the vast world of canine care, the choices we make for our furry companions are reflections of our love and commitment to their well-being. A dog’s coat, gleaming and vibrant, is more than just a visual delight; it’s a testament to their overall health and the care they receive.

    Whitening shampoos, when chosen and used correctly, can be a game-changer, transforming dull and stained coats into radiant mantles of pride. But as with all aspects of pet care, it’s essential to be informed, discerning, and always prioritize the health and happiness of our four-legged friends.

    As you embark on this journey to achieve that pristine coat for your dog, remember that it’s a blend of the right products, proper techniques, and consistent care. And in those moments when your dog gleams in the sunlight, know that it’s not just the shampoo working its magic, but the combined effort of love, care, and informed choices.

    Here’s to bright days and even brighter coats!

    Frequently Asked Questions

    Q: How often should I use a whitening shampoo on my dog?

    A: The frequency depends on your dog’s activity level, coat type, and specific needs. For most dogs, using a whitening shampoo once every 2-4 weeks is sufficient. However, always follow the product’s recommendations and consult with your vet if unsure.

    Q: Can I use a whitening shampoo on my puppy?

    A: While many whitening shampoos are gentle, it’s essential to ensure the product you choose is suitable for puppies. Always check the label for age recommendations and consider consulting with your vet for guidance.

    Q: My dog has sensitive skin. Are whitening shampoos safe for them?

    A: Many whitening shampoos are formulated to be hypoallergenic and suitable for dogs with sensitive skin. Look for products with natural, soothing ingredients like aloe vera and chamomile. However, always conduct a patch test before full application to ensure no adverse reactions.

    Q: Will whitening shampoos change the natural color of my dog’s coat?

    A: No, whitening shampoos are designed to enhance and brighten the coat’s natural color, not change it. They work by removing stains and discolorations, giving the coat a cleaner and more vibrant appearance.

    Q: Can I combine whitening shampoos with other grooming products, like conditioners or detanglers?

    A: Yes, you can use other grooming products in conjunction with whitening shampoos. After thoroughly rinsing out the shampoo, you can apply conditioners or detanglers as you normally would. Just ensure that all products are suitable for your dog’s coat and skin type.

  • How To Hold A Small Dog To Trim Nails- Easy & Safe Home Restraint

    How To Hold A Small Dog To Trim Nails- Easy & Safe Home Restraint

    Every dog parent knows that maintaining their furry friend’s health isn’t just about a balanced diet and regular check-ups—it’s also about the little things, like nail care. If you’re a proud owner of a petite pup, you might’ve noticed how challenging it can be to trim their tiny nails. The mere sight of nail clippers can send them scurrying under the bed! But, just like our nails, a dog’s nails left unchecked can cause discomfort or even health issues.

    So, how do you keep those petite paws in tip-top shape without causing distress to your four-legged companion? Fear not, because this comprehensive guide is tailored just for you. From understanding the unique anatomy of small dog nails to mastering the art of easy and safe home restraint, we’ve got you covered. Let’s embark on this journey together, ensuring your little furball has neat nails without the fuss or the stress!

    holding small dog for nail trim

    Understanding Small Dog Anatomy and Behavior

    Small dogs, with their heightened sensitivity and often more cautious nature, can be especially apprehensive when it comes to nail trimming:

    • Perceived Threat: From a dog’s perspective, a looming object (like clippers) approaching their paws can be intimidating.
    • Past Experiences: If they’ve had a painful nail-trimming experience before, such as cutting into the quick, they might remember and become fearful of a repeat incident.
    • General Discomfort: Just as some people are ticklish or sensitive about their feet being touched, some dogs are wary about their paws being handled.

    The Structure of a Dog’s Nail

    Knowing the anatomy of your dog’s nail is crucial for a safe trimming experience:

    • Nail Shell: This is the hard, outermost layer that we see and typically trim.
    • Quick: This part supplies blood to the nail. It’s sensitive and can bleed if nicked. In clear nails, it appears as a pinkish area, but it can be harder to spot in darker nails.
    • Nail Bed: Just like in humans, this is the skin beneath the nail. It’s sensitive and should be avoided during trimming.
    • Paw Pads: These are the cushioned parts of a dog’s foot and are not directly involved in trimming but are essential to be aware of during the process to avoid any accidental nips or discomfort.
    anatomy of dog nail

    Recognizing and Addressing Small Dog Behavior

    Understanding your dog’s body language can make the trimming process smoother:

    • Tail Position: A tail tucked between the legs can indicate fear, while a wagging tail might suggest they’re at ease.
    • Ear Posture: Ears laid flat back can be a sign of distress or nervousness.
    • Vocal Cues: Growling, whining, or whimpering can indicate discomfort or stress. If these cues are noticed, it’s essential to take a break or reassess your approach.
    • Tips for Calming Anxious Dogs:
      • Positive Reinforcement: Always reward your dog for good behavior during trimming, be it through treats, praise, or play.
      • Frequent Breaks: If your dog seems agitated, take breaks and return to trimming later.
      • Desensitization: Gradually introduce your dog to the trimming process, starting with simply touching their paws, then introducing the clippers without actually cutting.

    When you take the time to understand your small dog’s anatomy and behavior, you’re not only ensuring a safer nail trimming experience but also strengthening the bond between you and your pet. After all, every interaction is an opportunity to build trust and make your pup feel loved and cared for!

    small dog how to give nail trim

    Preparing Your Small Dog for Nail Trimming

    Creating a Calm Environment

    The atmosphere in which you trim your dog’s nails can play a significant role in their comfort level. Here’s how to set the mood right:

    • Choosing the Right Space: Opt for a quiet room with good lighting. This ensures you can see the nail structure clearly and minimizes distractions for your dog.
    • Calming Aids: Consider using calming sprays, diffusers, or even dog-specific calming music to create a relaxed ambiance.
    • Comfortable Surface: Whether it’s a non-slip mat on a table or a soft blanket on the floor, ensure the surface is secure and comfy for your pet.

    Familiarizing Your Dog with the Tools

    Introduce the tools gently, turning them into a non-threatening part of the routine:

    • Show and Tell: Allow your dog to sniff and inspect the clippers or grinder. Pair this introduction with treats, so they associate the tool with positive rewards.
    • Sound Acclimation: If you’re using a grinder, turn it on a few times before the actual trim to let your dog get used to its sound.
    • Practice Runs: Touch your dog’s paws with the tool without actually trimming. This helps them get used to the sensation.

    Reward-based Positive Reinforcement

    Building positive associations is key to a stress-free nail-trimming experience:

    • Treats: Every time your dog allows you to touch their paw, or after a successful nail trim, reward them with their favorite treat.
    • Praise: Dogs love to be told they’re doing a good job. Use a cheerful voice to praise them often during the process.
    • Playtime: After the session, engage in a short play session. This reinforces the idea that nail trimming leads to fun times.

    Remember, patience is your best friend here. Some dogs may take longer to adapt to the process than others, and that’s okay. Preparing your dog for nail trimming isn’t just about the act itself—it’s about fostering trust and ensuring your furry friend feels safe and loved every step of the way

    trim small dog nails

    Essential Tools for Safe Nail Trimming

    Choosing the Right Tools for Small Dogs

    Every tool isn’t suitable for every dog, especially when it comes to petite paws. Here’s a guide to picking the right one:

    • Scissor Clippers: Ideal for dogs with thinner nails, they offer precision, especially in tight spaces.
    • Guillotine Clippers: Best for dogs with medium-thickness nails. The nail is inserted into a hole and a blade slices it off.
    • Grinders: Electric tools that wear down the nail. They’re great for dogs with thicker nails and for smoothing out rough edges after clipping.

    Importance of Sharp Instruments

    Dull tools aren’t just ineffective; they can be dangerous:

    • Clean Cuts: Sharp tools provide a clean cut without splitting or fraying the nail.
    • Quick Trimming: They allow for quick trims, which means less stress for both you and your dog.
    • Safety: Dull clippers can crush the nail instead of cutting it, potentially causing injury.

    Caring for Your Tools

    To ensure longevity and safety:

    • Regular Checks: Inspect your tools before each session to make sure they’re in good condition.
    • Cleaning: After every use, clean them to prevent bacterial buildup. Warm soapy water and a soft brush can do the trick for most tools.
    • Sharpening and Replacing: Keep blades sharp. If they’ve become too dull or damaged, it might be time to replace them.

    Every artist needs their set of tools, and when it comes to grooming your small dog, having the right tools in prime condition is half the battle. Whether you’re a seasoned dog parent or just starting out, ensuring you’re equipped with the best tools for the job will make the nail trimming process smoother and safer for your beloved pet.

    tools for small dog nail trim

    The Step-by-Step Guide: How to Hold Your Small Dog

    Positioning: Finding the Right Hold for Your Pup

    Depending on your dog’s size and comfort, there are a few methods you can employ:

    • Lap Method: For very small dogs, place them on your lap, with their head facing away from you. This method offers comfort as they can feel your body warmth and heartbeat.
    • Table Method: Place a non-slip mat on a table and have your dog stand or lie on it. This method gives you a better view and angle to work from.
    • Floor Method: For slightly bigger small dogs or those who feel more secure on the ground, you can have them lie on the floor while you trim.

    Safe Restraint Techniques: Ensuring Comfort and Security

    Handling your dog the right way can make the whole process go smoothly:

    • Holding the Paw: Gently hold the paw you’re working on. If your dog pulls away, give them a moment and try again.
    • Positioning the Head: If you have someone to assist you, they can gently hold the dog’s head to distract and comfort them. If you’re alone, position your dog’s head away from the paw you’re working on to prevent sudden nips.
    • Stabilizing the Body: Use your free arm to gently hug or stabilize your dog, offering them a sense of security.

    Recognizing Signs of Distress and Taking a Break

    Just like us, dogs have their limits. Here’s how to know when your pup needs a pause:

    • Pulling Away: If your dog consistently pulls their paw away, they might need a short break.
    • Vocalizing: Whining, growling, or yipping can be signs of discomfort or fear.
    • Avoidance: If your dog keeps trying to get away or hide, consider taking a more extended break or even trying again another day.

    In the world of dog grooming, patience truly is a virtue. As you guide your pup through the process, always prioritize their comfort and well-being. Remember, it’s not a race; it’s about ensuring your little one’s nails are neat, all while cementing the trust between the two of you.

    holding my small dog for nail trims

    Trimming Techniques for Small Dog Nails

    Locating the quick is crucial to prevent discomfort and potential bleeding:

    • For Clear Nails: Look for a pinkish area inside the nail – that’s the quick. Always trim a bit in front of it to avoid any injuries.
    • For Dark Nails: The process is trickier. Start by making small cuts and look for a change in the nail’s color and texture. When you see a small dark dot surrounded by a lighter circle, you’re close to the quick.

    The Right Angle: Cutting with Care

    The way you approach the nail matters:

    • Angle of Approach: Hold the clipper at a 45-degree angle towards the tip of the nail to ensure a clean and safe cut.
    • Small Snips: Especially for dark nails, make several smaller cuts rather than one large one. This will reduce the risk of cutting into the quick.
    grinder for small dog nails

    Using a Grinder: Smooth and Safe

    Grinding can be a great alternative or supplement to clipping:

    • Short Intervals: Instead of continuous grinding, use short bursts to prevent overheating the nail.
    • Check Progress: Pause frequently to check how close you are to the quick. The nail will start to become softer as you approach it.
    • Smoothing Edges: Grinders excel at eliminating any rough edges, making it comfortable for your dog and preventing snags.

    What to Do If You Cut the Quick

    Mistakes can happen, even to the best of us. Here’s what to do if you accidentally nick the quick:

    • Stay Calm: Dogs can pick up on our stress. Remain calm, and your dog is more likely to stay calm too.
    • Stop the Bleeding: Use a styptic powder or pencil to stop the bleeding. If you don’t have one, cornstarch or flour can work in a pinch.
    • Comfort Your Dog: They might be in a bit of pain or shock. Comfort them with gentle words, petting, or their favorite treat.

    Nail trimming is as much an art as it is a science. With practice, patience, and the right techniques, you’ll master the skill, ensuring your petite pooch’s paws are always in pristine condition. And remember, it’s not just about nail care—it’s a bonding experience that deepens the trust and love between you and your furry companion.

    groomer with white dog

    Aftercare and Rewards

    Post-trim Paw Inspection

    Once you’ve finished trimming, it’s crucial to ensure everything looks good and your dog is comfortable:

    • Check for Rough Edges: Feel each nail to ensure no rough or sharp edges can cause discomfort or get snagged. If you find any, smooth them out with a grinder or nail file.
    • Examine for Redness or Swelling: This could indicate some irritation or minor injury during the process. Keep an eye on it, and if it doesn’t subside within a day or two, consider consulting your vet.
    • Paw Massage: Give your dog’s paws a gentle massage. This not only feels good for them but also helps increase circulation after the trim.

    Rewarding Your Furry Friend

    Positive reinforcement can make future nail trimming sessions easier:

    • Treat Time: Offer your dog their favorite treat as a reward for their patience and cooperation.
    • Play Session: Engage in a short play session with their favorite toy. It’s a great way to burn off any pent-up energy from the nail-trimming session.
    • Cuddle and Praise: A good old cuddle and some loving words can do wonders. It reaffirms your bond and comforts your dog after the grooming session.

    Routine Check-ins

    Consistent care can make nail trimming less frequent:

    • Regular Paw Checks: Between trims, regularly check your dog’s nails to monitor their growth and condition.
    • Schedule Reminders: Keeping a consistent schedule, like trimming nails every couple of weeks, can prevent overgrowth and make the process quicker each time.

    Aftercare isn’t just about ensuring your dog’s paws are in great shape; it’s about solidifying the positive experience around nail trimming. Your dog’s comfort, happiness, and health are paramount. By following these aftercare and reward tips, you’re not only taking care of their nails but also nurturing the loving relationship you share with your furry companion.

    Troubleshooting Common Challenges

    Overcoming Fear and Anxiety

    Many dogs have negative associations with nail trimming, which can make the process a challenge:

    • Gradual Exposure: Introduce the tools slowly over days or even weeks, allowing your dog to sniff and get used to them. Pair this introduction with treats to build positive associations.
    • Distractions: Using toys, treats, or even a lick mat smeared with peanut butter can divert your dog’s attention while you work on their nails.
    • Training Sessions: Train your dog to offer their paw, using positive reinforcement. This way, they’ll associate giving their paw with treats, making the nail trimming process smoother.

    Dealing with Wiggly Dogs

    Some dogs can’t sit still, which can pose a challenge:

    • Wrap Technique: A large towel or blanket can be gently wrapped around your dog, exposing only one paw at a time. This not only restricts movement but can also provide a comforting swaddle.
    • Short Sessions: Instead of trying to trim all the nails in one go, focus on one or two nails at a time, spreading the process over several days.
    • Enlist Help: Having a family member or friend to hold and comfort your dog can make a world of difference.
    chihuahua nail trim

    Addressing Overgrown Nails

    Neglected nails can sometimes become too long:

    • Incremental Trimming: Instead of trying to get the nail to the desired length in one session, trim a little bit every week. This allows the quick (the sensitive part of the nail) to recede gradually.
    • Regular Maintenance: Once you’ve achieved the desired nail length, maintain it with regular trims to prevent recurrence.

    Handling Past Negative Experiences

    A previous painful experience can make dogs wary of nail trims:

    • Rebuilding Trust: Start fresh, taking baby steps. Even if it’s just touching their paws without trimming, always use positive reinforcement.
    • Professional Help: Consider seeking the assistance of a professional dog trainer or behaviorist to help recondition your dog’s response to nail trimming.

    Facing challenges when trimming your dog’s nails is perfectly normal, and you’re not alone. The key is to be patient, gentle, and consistent. Remember, every dog is unique, so what works for one might not work for another. The goal is to ensure that the nail trimming experience is as positive and stress-free as possible for your furry friend.

    small dog paws

    Regular Nail Maintenance: Creating a Routine

    The Importance of Routine Nail Care

    Consistent nail care is vital for your dog’s overall health and comfort:

    • Prevent Pain: Overgrown nails can curve and dig into the paw pads, causing discomfort or even injury.
    • Healthy Posture: Long nails can alter your dog’s stance and gait, potentially leading to joint issues or other musculoskeletal problems.
    • Avoid Snags: Properly maintained nails reduce the risk of them getting caught in carpets, clothes, or other materials.

    Setting a Schedule: How Often to Trim

    The frequency of trims depends on your dog’s lifestyle and the rate of nail growth:

    • Active Outdoor Dogs: Dogs that frequently walk on concrete or hard surfaces might naturally wear down their nails and require less frequent trims.
    • Indoor and Less Active Dogs: These dogs usually need more regular trims, often every 2-4 weeks.
    • Monitor Growth: Regularly check the nails to gauge the trimming frequency that works best for your dog.
    small dog nail maintenance

    Making Nail Trims an Enjoyable Routine

    A positive experience ensures easy and frequent nail maintenance:

    • Consistent Environment: Always trim in the same quiet, calm environment, so your dog knows what to expect.
    • Routine Time: Try to trim at the same time of day when your dog is naturally calmer, like after a walk or play session.
    • Positive Reinforcement: Reward your dog after each session, reinforcing the idea that nail trims lead to good things.

    Keeping Track: Record Keeping

    Maintaining a record can be beneficial, especially if more than one person is involved in pet care:

    • Calendar Notes: Mark the dates you’ve trimmed your dog’s nails on a calendar. This visual aid can help you establish and adhere to a consistent schedule.
    • Progress Journal: Especially if you’re working on building trust or handling challenges, jotting down observations can help you notice patterns and make necessary adjustments.

    By establishing a regular nail maintenance routine, you’re ensuring that your dog remains comfortable, healthy, and happy. It’s a small gesture, but it speaks volumes about the care and love you have for your four-legged companion. Over time, with consistency and patience, nail trims can become just another pleasant routine you both look forward to.

    how often do trim dog nails

    Conclusion

    Navigating the world of canine nail care can seem daunting at first glance. Those tiny nails hold a lot of responsibility – from ensuring your furry friend’s comfortable walks to preventing potential health issues. But, as we’ve journeyed through this guide, it’s clear that with the right knowledge, tools, and a sprinkle of patience, nail trimming can transform from a dreaded chore into a bonding experience.

    Every snip, every gentle hold, and every treat given post-trim is a testament to the love and care we have for our four-legged companions. Over time, with consistent routines and positive reinforcement, even the most nail-trim-wary dog can come to view the process as just another form of pampering.

    As you embark or continue on this nail-trimming journey, remember that it’s more than just about maintenance – it’s a dance of trust, understanding, and love between you and your pet. And just like any dance, with practice and time, it becomes a harmonious routine that both dancer and partner look forward to. Here’s to many more happy and safe nail trims with your beloved pup! 🐾

    Frequently Asked Questions

    How do I know if I’m cutting too close to the quick?

    Answer: The quick is the sensitive part of the nail that supplies blood. For dogs with clear nails, it’s visible as a pinkish area. Always trim in front of it. For darker nails, you’ll need to make small cuts and look for a small dark dot surrounded by a lighter circle, indicating you’re nearing the quick.

    What should I do if my dog seems extremely anxious or fearful about nail trimming?

    Answer: Gradual exposure and positive reinforcement are key. Start by letting your dog get familiar with the tools, rewarding them for calm behavior. Over time, progress to touching their paws, then to trimming a nail or two, always pairing the experience with treats or praise. If anxiety persists, consulting a professional dog trainer or behaviorist may be beneficial.

    My dog’s nails are very overgrown. Can I trim them back to the desired length in one session?

    Answer: If nails are significantly overgrown, the quick has likely extended as well. It’s safer to trim a little bit of the nail every week, allowing the quick to gradually recede. Over several sessions, you’ll be able to get the nails to the desired length.

    Can I use human nail clippers on my small dog?

    Answer: While it’s technically possible to use human nail clippers for tiny breeds, it’s not recommended. Dog nail clippers are designed to handle the thickness and shape of dog nails. Using the right tool ensures a cleaner cut and reduces the risk of nail splitting or other injuries.

    What should I do if I accidentally cut the quick and it starts to bleed?

    Answer: First, remain calm to prevent further stressing your dog. Apply styptic powder or pencil to the bleeding nail to help it coagulate and stop bleeding. If you don’t have styptic products on hand, cornstarch or flour can be used in a pinch. If bleeding persists for more than a few minutes, contact your veterinarian.

  • Why Is My Dog Limping After a Nail Trim? Possible Reasons

    Why Is My Dog Limping After a Nail Trim? Possible Reasons

    Every pet owner’s intention is to keep their furry friends comfortable and well-groomed. But what happens when a routine nail trim, meant to bring relief, leaves your dog limping? The sight can be alarming and laden with guilt. But before you jump to conclusions or drown in worry, let’s unravel this mystery together. In this blog, we’ll explore the possible reasons behind your dog’s unexpected discomfort post-nail trim, offering insights and guidance on what to do next. Whether you’re a seasoned dog parent or new to the canine world, understanding the root cause can be key to ensuring your pup’s paws remain healthy and pain-free. Read on to help your four-legged friend stride with confidence once again!

    dog limping after nail trim

    Did Trimming My Dog’s Nails Make Him Lame?

    A simple nail trim should ideally not cause lameness in your dog. However, if not done correctly or if certain circumstances come into play, your dog might exhibit discomfort or limping. Let’s dive into the possible reasons:

    1. Quick Was Cut

    The quick is a sensitive part of your dog’s nail filled with nerves and blood vessels. If trimmed too close or nicked:

    • Immediate pain: Your dog might yelp or show signs of distress.
    • Bleeding: The nail will bleed, which can be quite alarming.
    • Lingering pain: This can result in limping for several hours or even a few days.

    2. Over-Trimming

    Even if the quick isn’t cut, trimming too much nail at once can make your dog’s paws sensitive.

    • Exposed new layers: Removing too much nail can expose layers not used to touching the ground.
    • Sensitive pads: Your dog might walk gingerly due to unfamiliar feelings.

    3. Nail Splintering

    Using blunt or poor-quality clippers can cause the nail to splinter.

    • Rough edges: Splintered nails can have jagged edges, causing discomfort.
    • Risk of infection: Open areas from splinters can be a breeding ground for bacteria.

    4. Pre-existing Conditions

    Sometimes, the limping isn’t directly caused by the nail trim, but the process might exacerbate a pre-existing condition.

    • Undetected injuries: An unnoticed paw or leg injury might become more evident after a trim.
    • Arthritic joints: Handling the paws and legs can cause discomfort to a dog with arthritis.

    5. Stress and Anxiety

    Some dogs are naturally anxious about nail trims.

    • Physical response: A stressed dog might tense up, putting strain on their muscles or joints.
    • Post-trim anxiety: The experience can leave a dog feeling vulnerable, leading them to walk differently for a bit.

    While it’s essential to regularly trim your dog’s nails for their overall health and comfort, it’s equally vital to be informed and careful during the process. If your dog is limping after a nail trim, it’s crucial to assess the situation, provide immediate care if necessary, and consult with your vet for guidance. Remember, prevention is always better than cure: educate yourself on the right nail trimming techniques, and consider professional grooming if you’re uncertain. Your dog’s paws are in your hands!

    nail trim then dog is limping

    Nail Injury or Muscle or Tendon Damage

    When our beloved furry friends experience discomfort, it’s crucial to determine the root cause, especially when limping or lameness occurs. Nail injuries are commonly mistaken for muscle or tendon damage due to overlapping symptoms. Let’s delve into each to differentiate them and understand the signs, causes, and treatments.

    Nail Injury

    Nail injuries in dogs are relatively common, especially if they’re active or their nails aren’t regularly maintained.

    Signs:

    • Bleeding from the nail.
    • Swelling around the nail bed.
    • Licking or biting at the affected nail incessantly.

    Common Causes:

    • Accidental nicks during nail trimming.
    • Nails getting caught in carpets, gaps, or other surfaces.
    • Breaking or cracking due to excessive length.

    Treatment:

    • Stop the bleeding using styptic powder or cornstarch.
    • Keep the paw clean to avoid infection.
    • Consult with a veterinarian if the injury seems severe or doesn’t heal.

    Muscle or Tendon Damage

    Muscle or tendon injuries might be more challenging to diagnose as they occur within the dog’s body, making the signs less overt.

    Signs:

    • Limping or favoring one leg.
    • Swelling or warmth in the affected area.
    • Reluctance to move, jump, or play.

    Common Causes:

    • Overexertion during play or exercise.
    • Traumatic events like falls or accidents.
    • Pre-existing conditions or age-related degeneration.

    Treatment:

    • Rest and restrict movement to prevent further injury.
    • Cold or warm compresses to reduce inflammation.
    • Veterinary consultation for pain management, physical therapy, or surgery if severe.

    Whether it’s a nail injury or muscle/tendon damage, both conditions can be painful for your pet. As a responsible pet owner, it’s vital to observe any changes in your dog’s behavior or movement. Always consult with a veterinarian when in doubt. Regular check-ups, proper grooming, and a safe environment can go a long way in preventing such injuries.

    Dog Limping After Grooming [What Went Wrong?]

    Grooming sessions are generally a time for pampering, freshening up, and ensuring the overall well-being of our canine companions. But what happens when your previously sprightly dog starts limping post-grooming? It’s a concern that no dog owner wants to face. This unexpected outcome can leave you puzzled, concerned, and seeking answers. In this section, we’ll delve into the potential mishaps or oversights during grooming that can lead to such distressing scenarios. Whether it’s a nail trim gone awry, a brush snagging a hidden mat, or something even more obscure, understanding the “what” and “why” is the first step to preventing it in the future. Let’s uncover the mysteries behind dog limping post-grooming and ensure your furry friend’s next spa day is both enjoyable and incident-free.

    dog spa day grooming day bath

    6 Reasons for Dog Limping After Grooming

    When your dog comes home from a grooming session, a joyful and energetic response is what you’d naturally expect. However, if they’re limping, it’s a clear sign something’s amiss. Understanding the potential causes can help you address the issue promptly and prevent future complications. Let’s delve into the six reasons that might be causing this post-grooming discomfort.

    1. Muscle Strains and Sprains

    During grooming, dogs are often placed in positions that they’re not accustomed to. Staying still for extended periods or sudden jerks can lead to:

    • Tense muscles: Overstretched or constricted muscles can cause minor strains.
    • Ligament issues: Quick or unexpected movements can result in sprains.

    2. Joint Injuries and Arthritis

    The grooming process can sometimes aggravate pre-existing conditions or lead to new ones, especially in older dogs.

    • Handling stress: Incorrect lifting or repositioning can stress joints.
    • Existing conditions: If your dog already has arthritis, the grooming process might exacerbate their discomfort.

    3. Pad and Nail Injuries or Over-trimming

    The most direct link between grooming and limping often lies in the paws.

    • Nail nicks: Accidentally cutting the quick can cause significant pain.
    • Over-trimming: Removing too much nail or pad hair can lead to sensitivity.
    dog hurts painful after nail trim

    4. Heat Exhaustion or Dehydration

    Grooming salons, especially during busy times, can be warmer than expected. If not monitored, dogs can suffer from:

    • Overheating: Extended time under dryers or in a warm environment can lead to heat stress.
    • Dehydration: Lack of available water during prolonged grooming sessions can worsen the situation.

    5. Allergic Reactions or Skin Irritation

    Different grooming products suit different dogs, and sometimes a mismatch can occur.

    • Product reactions: Some dogs might be allergic to specific shampoos, conditioners, or other grooming products.
    • Physical irritants: Rough brushes or abrasive tools can cause skin redness and irritation.

    6. Abusive Groomer

    A topic no pet owner wants to consider, but it’s essential to be vigilant about who handles your dog.

    • Rough handling: Inappropriate or aggressive handling can result in physical injuries.
    • Signs of stress: A traumatized dog might not only limp but show signs of anxiety, fear, or depression post-grooming.

    Regular grooming is vital for your dog’s health and well-being, but it’s equally crucial to ensure the experience is safe and comfortable. If your dog limps post-grooming, understanding these potential reasons can guide your next steps, whether it’s medical attention, a discussion with the groomer, or seeking a new grooming service. Always prioritize your dog’s comfort and safety above all.

    Signs and Symptoms of Dog Limping After Grooming

    A dog’s behavior and body language are crucial indicators of their well-being. While limping is the most evident sign something went awry during the grooming process, there are other subtle (and not so subtle) signals your dog might be in distress. Recognizing these symptoms early on can help you address the issue promptly, ensuring your canine companion gets back to their happy, active self in no time. Let’s delve into these signs in detail.

    1. Obvious Limping, Favoring a Leg or Limb

    This is the most direct and noticeable sign of discomfort.

    • Uneven gait: Your dog might hobble or skip steps.
    • Hesitation: They might be reluctant to put weight on the affected leg.

    2. Difficulty Standing or Walking

    While it’s more subtle than outright limping, changes in your dog’s mobility can be telling.

    • Struggling to rise: If they find it hard to stand up from a resting position, it can indicate pain or discomfort.
    • Unsteadiness: They might wobble or have an unstable gait when walking.

    3. Swelling or Bruising in the Affected Area

    Physical signs on or around the leg can point towards injuries or irritations.

    • Visible swelling: Check the paws, joints, and muscles for any inflamed areas.
    • Discoloration: Bruises, especially in light-furred dogs, can be signs of trauma.

    4. Whimpering or Yelping When Touched

    Vocal indications are a clear sign of distress and discomfort.

    • Sensitive spots: If your dog yelps or pulls away when you touch a specific area, it’s likely the source of pain.
    • General vocal distress: Apart from yelping, signs like whimpering, groaning, or growling when moving or touched can indicate pain.

    Observing your dog closely after grooming can provide valuable insights into their comfort and health. Always be attuned to these signs and symptoms, and if in doubt, consult with a veterinarian. Early detection and intervention can prevent minor issues from becoming major problems. Remember, your furry friend relies on you to ensure their well-being, so always prioritize their health and happiness.

    paw hurts after nail clipping trim

    How to Prevent Your Dog From Limping After Grooming?

    Grooming is an essential part of your dog’s well-being, but the aftermath shouldn’t leave your furry friend in discomfort. While occasional accidents might occur, many of the reasons behind post-grooming limping can be preventable. As the adage goes, prevention is better than cure. So, let’s explore strategies to ensure that your dog’s grooming experience is both pleasant and safe.

    1. Choosing the Right Groomer

    The person handling your dog plays a pivotal role in their grooming experience.

    • Reputation: Seek recommendations from fellow dog owners or online reviews. A reputable groomer will prioritize safety.
    • Training and Experience: Ensure the groomer has formal training and experience, especially with your dog’s breed or specific needs.
    • Cleanliness and Equipment: Visit the grooming salon beforehand. A clean environment and well-maintained equipment are good indicators of professionalism.

    2. Preparing Your Dog

    Familiarity and comfort can significantly reduce the chances of injury.

    • Regular Handling: Regularly touch and handle your dog’s paws, ears, and other sensitive areas. This makes them more accustomed to the grooming process.
    • Pre-grooming Walk: A brisk walk before the session can help in burning off excess energy, making your dog calmer during grooming.
    • Communicate Concerns: If your dog has specific issues or sensitivities, ensure the groomer is aware.

    3. Be Present During the Session

    While not all grooming salons allow this, being there can be beneficial.

    • Provide Comfort: Your presence can calm a nervous dog, making the process smoother.
    • Monitor Handling: Observing the groomer’s technique ensures your dog isn’t being mishandled or stressed.

    4. Set the Right Expectations

    Clear communication with your groomer can prevent many issues.

    • Express Preferences: If you prefer a specific nail length or coat length, let the groomer know.
    • Feedback Loop: After the session, provide feedback. If you felt something went well or not-so-well, a good groomer would appreciate knowing.

    A positive grooming experience is crucial for both your dog’s physical and mental well-being. By being proactive and ensuring your dog is in safe, capable hands, you can drastically reduce the chances of post-grooming discomfort. Always prioritize your dog’s safety, comfort, and happiness – because they deserve nothing but the best!

    take dog to vet when limping

    When Should I Take My Dog to the Vet After Limping?

    Limping in dogs can range from a minor stumble to a symptom of a more significant underlying issue. While our first instinct as responsible pet owners might be to comfort our furry companions and hope for the best, sometimes it’s vital to take action. The big question, however, is when? Let’s discuss the tell-tale signs and scenarios that should prompt a trip to the vet.

    1. Persistent Limping

    If your dog’s limping doesn’t improve within 24-48 hours, it’s time to consult a veterinarian. Persistent discomfort indicates that the problem isn’t just a small sprain or temporary pain.

    2. Severe Pain

    It’s distressing to see our pets in pain. If your dog yelps, whines, or growls when the affected area is touched or when they move, it’s a sign they need immediate medical attention.

    3. Swelling or Deformity

    Visible swelling or any deformation in a leg or joint is cause for concern. It might indicate fractures, dislocations, infections, or other serious conditions.

    4. Reluctance to Move

    If your dog, usually active and lively, is suddenly hesitant to move, stand, or even get up, it’s a clear sign that they’re in significant discomfort.

    5. Associated Symptoms

    Limping accompanied by other symptoms like fever, loss of appetite, lethargy, or behavioral changes means there’s more than meets the eye. In such cases, a vet’s comprehensive examination is essential.

    6. Known Trauma

    If you’re aware that your dog had a traumatic experience, like a fall or a run-in with a car, even if they seem okay initially, it’s good to get them checked. Some injuries aren’t immediately apparent.

    7. Age and Pre-existing Conditions

    Elderly dogs or those with pre-existing conditions such as arthritis or hip dysplasia may suffer from exacerbated symptoms after minor incidents. A slight stumble for them could lead to more significant complications than it would for a younger or healthier dog.

    Our dogs rely on us to recognize when they’re in distress. Limping, while a clear sign of discomfort, has varying degrees of severity. Always trust your instincts as a pet owner. If you feel something’s off, it’s better to be safe and consult with a vet. Remember, it’s not just about addressing the immediate issue but ensuring the long-term well-being of your furry best friend.

    hurt paw my dog is limping

    Can You Treat Limping at Home?

    As a dog owner, it’s only natural to want to comfort and care for your furry friend when they’re feeling under the weather. Limping, while it can be distressing, is a common issue that many pet owners face. Depending on the severity and cause, some cases of limping might be manageable at home. However, always remember the golden rule: When in doubt, consult with a veterinarian. With that said, let’s discuss some scenarios where home care might be appropriate and how to go about it.

    1. Rest and Observation

    For minor sprains or strains, sometimes all your dog needs is a bit of downtime.

    • Limit activity: Consider keeping your dog in a confined space or on a leash to prevent them from running or jumping.
    • Observe: Keep a close eye on their behavior. If the limping worsens or doesn’t improve in a day or two, it’s vet time.

    2. Cold and Warm Compresses

    Just as with humans, compresses can be beneficial in reducing pain and swelling.

    • Cold Compress: Ideal for recent injuries, a cold pack can minimize inflammation. Apply for 15 minutes, ensuring there’s a cloth barrier between the ice and the skin.
    • Warm Compress: Useful for relieving muscle stiffness or older injuries. Apply a warm cloth to the affected area for about 15 minutes.

    3. Check for Foreign Objects

    Sometimes, the culprit is a tiny thorn, shard of glass, or pebble stuck in the paw.

    • Gentle Examination: Carefully inspect your dog’s paw pads and between their toes. If you find an object, use sterilized tweezers to remove it gently.
    • Clean the Area: After removal, clean the area with mild antiseptic to prevent infection.

    4. Over-the-Counter Pain Relievers

    Important: Many human pain relievers are toxic to dogs. Do not administer without consulting your vet.

    • Safe Dosage: If your vet has previously recommended a specific OTC pain reliever for minor pains, ensure you give the correct dosage.

    5. Massage and Gentle Stretching

    This can help with minor muscle strains or stiffness.

    • Gentle Strokes: Use your hands to gently massage the affected area, improving blood flow.
    • Stretching: Very carefully and gently, you can try stretching your dog’s leg, but stop immediately if they show signs of discomfort.

    While there are measures you can take to comfort your limping dog at home, it’s crucial to approach the situation with caution. What might seem like a minor issue could be more severe under the surface. Always prioritize your dog’s well-being, and if their condition doesn’t improve or if you’re unsure about the cause of the limp, seek professional advice. Your dog’s health and comfort are always worth that extra step.

    dog in pain when to see the vet to take

    Conclusion

    Navigating the world of pet care can sometimes feel like treading uncharted waters, especially when faced with unexpected challenges like post-grooming limping. Yet, armed with the right knowledge, patience, and a dash of intuition, you can ensure that your four-legged companion receives the best care possible. Remember, our pets don’t have a voice of their own, so they rely on us to be their advocates. By staying informed and proactive, you not only address immediate concerns but also pave the way for a lifetime of joy and health for your beloved dog. Here’s to many more wagging tails and happy trails ahead!

    Frequently Asked Questions (FAQs)

    Why is my dog limping after a nail trim?

    Limping after a nail trim can be due to various reasons. The most common cause is “quicking” the dog, which means cutting into the blood vessel and nerve that runs through each nail, causing pain and discomfort. Other reasons can include stress, over-trimming, or even an unnoticed injury to the paw during the process.

    Can dogs be sore after grooming?

    Yes, dogs can sometimes be sore after grooming. This can be due to various reasons like handling during grooming, potential nicks or cuts, skin irritations from products used, or even stress from the grooming experience itself. Additionally, if mats were removed or there was excessive tugging on the fur, the skin could be sensitive post-grooming.

    Why is my dog not walking after grooming?

    If your dog is reluctant to walk post-grooming, it could be due to physical discomfort or emotional stress. Physical causes might include injuries, over-trimmed nails, skin irritations, or even muscle strains from being in a specific position for an extended period. Emotional reasons could stem from anxiety or stress during the grooming session.

    How long does a dog limp take to heal?

    The healing time for a dog’s limp largely depends on its cause. Minor sprains or strains might resolve within a day or two with rest. More severe injuries, like fractures or ligament tears, could take weeks to months and might require medical intervention. Always consult with a vet for a proper diagnosis and recovery timeline.

    Should I restrict my dog’s movement if they’re limping?

    Yes, it’s generally a good idea to limit your dog’s activity if they’re limping. By preventing excessive movement, you reduce the risk of aggravating the injury. Ensure they have a comfortable resting spot and, if necessary, confine them to a smaller space or use a leash during bathroom breaks.

  • How To Cut Dogs Black Nails Without Cutting The Quick

    How To Cut Dogs Black Nails Without Cutting The Quick

    For many dog owners, trimming their furry friend’s black nails can be a daunting task. The fear of accidentally cutting into the ‘quick’—the sensitive inner part of the nail that contains blood vessels and nerves—often makes the process anxiety-inducing. But with the right knowledge, tools, and techniques, it doesn’t have to be a challenging chore. Welcome to our comprehensive guide on how to cut your dog’s black nails safely and effectively. Whether you’re a first-timer or looking to refine your skills, we’re here to provide you with expert advice, tips, and step-by-step instructions to ensure a painless experience for both you and your beloved pet. Let’s embark on this journey to paw-fect nail care together!

    black toenails on dogs

    Understanding Dog nail anatomy

    When it comes to grooming our pets, a little knowledge about their anatomy goes a long way. Before diving into the process of trimming your dog’s black nails, it’s essential to get familiar with the basic structure of a dog’s nail. Here’s a breakdown:

    The Outer Shell

    • Keratin: This is the tough, external part of the nail that we see and trim. Made of a protein called keratin, it’s designed to protect the inner structures of the nail and offer traction.
    • Color: Dog nails can be transparent, white, black, or a mix. Black nails are often perceived as tricky because the ‘quick’ isn’t easily visible. However, with practice and attention to detail, trimming them becomes manageable.

    The Quick

    • Purpose: The quick is the living tissue inside the nail. It supplies blood to the nail and supports growth.
    • Appearance: On lighter nails, the quick appears pinkish. But on black nails, it’s challenging to differentiate from the outer keratin shell.
    • Sensitivity: The quick is sensitive. Accidentally cutting or nicking it can cause pain and bleeding. It’s the primary reason why pet owners are cautious when trimming darker nails.

    The Nail Bed

    • Location: Beneath the hard outer shell of the nail lies the nail bed.
    • Function: It’s the tissue responsible for the production of the nail. A healthy nail bed ensures healthy nail growth.
    • Protection: The nail bed is a vulnerable area. Injuries or infections can lead to complications in nail growth or even more serious issues.

    The Dewclaw

    • Position: Often referred to as the “thumb” of the dog, the dewclaw is a bit higher up on the leg, away from the main paw. Not all dogs have them, and some might even have them on their back legs too.
    • Trimming: Since the dewclaw doesn’t touch the ground, it doesn’t wear down naturally. Therefore, it’s crucial to keep an eye on it and trim when necessary to prevent it from growing into the dog’s skin.

    In understanding the anatomy of a dog’s nail, we can approach the trimming process with confidence and care. Now that you’re familiar with the various parts and their functions, you’re better equipped to give your dog a safe and comfortable nail trim.

    understanding the anatomy of a dogs nail

    Nail trimming tools

    When it comes to nail trimming, using the right tools can make all the difference between a smooth, stress-free experience and a challenging one. Here’s a breakdown of the most common tools available and how to decide which is best for your furry friend.

    Scissor Clippers (also known as Miller’s Forge trimmers)

    • Appearance: They look like scissors but have semicircular notches to hold the nail in place.
    • Best For: Small to medium-sized dogs with softer nails. They provide a good amount of control during the trimming process.
    • Usage Tip: Ensure the blades are sharp to avoid crushing the nail, which can be uncomfortable for your pet.
    scissor clippers for dog nails

    Guillotine Clippers

    • Appearance: These have a hole where you insert the dog’s nail. As you squeeze the handle, a blade slides across and trims the nail.
    • Best For: Smaller dogs with thinner nails. Not recommended for larger dogs or those with very hard nails, as they might crush rather than cut.
    • Usage Tip: Like the scissor clippers, keep the blade sharp for efficient and painless cuts.
    tools to trim dog nails that are black

    Grinder Tools (often referred to as Dremels)

    • Function: Instead of cutting the nail, these tools grind it down with a rotating material.
    • Best For: Dogs that are afraid of clippers or for owners who want more control over the trimming process. Suitable for dogs of all sizes and nail types.
    • Usage Tip: Introduce the tool slowly to your dog, as the vibration and noise can be startling. Start by grinding a small amount at a time, checking frequently to ensure you don’t get too close to the quick.
    nail grinder dremel for dog nails

    Styptic Powder

    • Purpose: While not a trimming tool, styptic powder is essential in the nail-cutting process. If you accidentally cut the quick, applying this powder will help stop the bleeding quickly.
    • Usage Tip: Always have styptic powder on hand when trimming your dog’s nails. In case you don’t have any, cornstarch or flour can work as a temporary alternative.
    styptic powder for dog nails

    Nail File

    • Purpose: To smooth out any rough edges after trimming.
    • Usage Tip: Regular filing can reduce the frequency of required trims. It’s also a gentler way to keep your dog’s nails in check, especially for those who are nervous about the process.
    scratch board nail file for dog nails

    When selecting nail trimming tools, consider your dog’s size, nail thickness, and your comfort level with the tool. Whatever tool you choose, remember that patience, positive reinforcement, and regular practice will make the process smoother for both you and your canine companion.

    Trimming black nails – A Step-By-Step Guide

    Taking the plunge to trim your dog’s black nails might seem daunting, but with a systematic approach and a calm demeanor, you can make it a hassle-free experience for both you and your pup. Here’s a step-by-step guide to help you through the process:

    Make Your Pooch Comfortable

    • Familiarize With Tools: Before you start trimming, let your dog sniff and get used to the tools. This can make them less anxious when the actual trimming begins.
    • Positive Reinforcement: Use treats, praises, or their favorite toy to associate nail trimming with positive experiences. The goal is to reduce anxiety and make them look forward to the process.
    • Pick a Calm Time: It’s best to trim when your dog is calm, perhaps after a long walk or play session, when they’re naturally tired.

    Get into Nail Trimming Position

    • Positioning: If your dog is small, placing them on a table might make it easier. For larger breeds, having them lie down on their side can work well. Ensure the area has good lighting to help you see better.
    • Hold the Paw: Gently but firmly grasp the dog’s paw. Push lightly on each toe pad to extend the nail for a clearer view and easier cutting.

    Locate the Quick

    • Using a Flashlight: For black nails, shining a flashlight beneath the nail can help in spotting the quick. It will appear as a dark shadow inside the nail.
    • Start From the Tip: If you’re uncertain about the location of the quick, start trimming a small bit from the tip and work your way in gradually.

    Trim or Grind the Nail Quickly, Safely, and Confidently

    • Trim in Small Increments: Especially for black nails, take off small bits at a time to avoid cutting into the quick.
    • Look for the ‘Bullseye’: As you trim closer to the quick, you’ll notice a small, whitish circle with a black dot in the center. This is an indicator that the quick is near, and you should stop cutting.
    • Use Grinders with Care: If using a grinding tool, ensure you don’t hold it on the nail for too long, as it can generate heat and cause discomfort.

    Take Your Time, and Repeat Regularly

    • Regular Trims: Regular trimming ensures the quick doesn’t grow too long, making the process easier over time. Aim to trim every 3-4 weeks, depending on your dog’s nail growth rate.
    • Stay Calm: Your dog will pick up on your emotions. If you’re calm and confident, they’re more likely to be at ease. If you do nick the quick, don’t panic. Apply styptic powder, reassure your dog, and try again later.

    With consistency and patience, nail trimming will eventually become a routine and seamless part of your pet care activities.

    filing dog nails

    When to get help with dog nail trimming

    Trimming your dog’s nails can be a challenging endeavor for both novice and experienced pet owners alike. While it’s certainly possible to master the technique with patience and practice, there are instances when seeking professional assistance is the best course of action. Here are some scenarios when it might be time to call in the experts:

    1. Aggressive Behavior: If your dog becomes aggressive or overly anxious during the nail trimming process, it can pose a risk to both you and your pet. Professionals are trained to handle such behavior and can ensure the procedure is done safely.
    2. Frequent Nicks: If you find that you’re consistently cutting into the quick, causing pain and bleeding for your dog, it might be time to consult a professional. They can offer guidance, demonstrate proper technique, or take over the task altogether.
    3. Thick or Overgrown Nails: Sometimes, due to neglect or other health issues, a dog’s nails can become extremely thick or overgrown. In such cases, the expertise of a groomer or vet can ensure the nails are trimmed without causing injury.
    4. Health Concerns: If your dog has a health condition or an injury that makes nail trimming more complex, it’s wise to consult with your veterinarian. They can provide specialized care and recommendations tailored to your dog’s specific needs.
    5. Lack of Proper Tools: If you don’t have the right tools for the job or aren’t confident in their quality, it’s better to get assistance rather than risking injury to your pet.
    6. Initial Guidance: If you’re a new dog owner or unfamiliar with the nail trimming process, visiting a groomer or vet for the first few times can be beneficial. They can provide a hands-on demonstration, giving you more confidence to handle the task at home in the future.
    7. Routine Check-Ups: Even if you trim your dog’s nails at home, having a professional look over your work periodically ensures you’re doing it correctly and maintaining your dog’s paw health.

    In conclusion, while many dog owners successfully trim their pets’ nails at home, it’s essential to recognize when professional assistance is warranted. Always prioritize your dog’s well-being and comfort. If you’re ever in doubt, seeking help from a groomer or veterinarian is a responsible and caring choice.

    black toe nails on dog without bleeding

    What to do if you cut the quick

    Accidentally cutting into the quick of your dog’s nail can be a distressing experience for both you and your pet. The quick is the sensitive, vascular portion within the nail, and cutting into it can cause pain and bleeding. However, while it’s an incident that most pet owners want to avoid, it’s also a common mishap. If you find yourself in this situation, here’s what you should do:

    1. Stay Calm: Your initial reaction might be to panic, especially if your dog yelps or there’s significant bleeding. However, it’s crucial to remain calm. Your pet will pick up on your emotions, and if you’re agitated, it can further stress them out.
    2. Stop the Bleeding: Use styptic powder or styptic pencils, which are specifically designed to quickly clot blood. Gently press the powder onto the bleeding nail tip until the bleeding stops. If you don’t have styptic powder, cornstarch or flour can act as temporary alternatives. Simply dip the nail into the powder or apply with a bit of pressure.
    3. Comfort Your Dog: Once the bleeding has stopped, comfort your dog. They may be feeling anxious or in pain, so some gentle petting, soft words of comfort, or even their favorite treat can help divert their attention and soothe them.
    4. Clean the Area: Ensure the paw is clean to prevent any potential infections. Rinse the foot gently with some warm water and pat dry. Keep an eye on it for a few days to ensure it doesn’t become red or swollen.
    5. Take a Break: If you’ve cut the quick, consider ending the nail trimming session for the day. It’s likely that your dog is stressed, and pushing to trim more nails might not be productive.
    6. Evaluate Your Technique: If you’re consistently cutting into the quick, you might need to re-evaluate your trimming technique. Consider trimming smaller portions of the nail at a time or consulting with a professional for guidance.
    7. Seek Veterinary Assistance: If the bleeding doesn’t stop after several minutes, or if you notice any signs of infection in the days following, contact your veterinarian. They can provide further care and advice.

    Remember, accidents happen. While cutting the quick is unpleasant, with the right steps, it’s a manageable situation. Over time, with practice and care, you’ll become more confident in your nail-trimming abilities, reducing the chances of such incidents.

    how to not cut the nail quick in black nailed dogs

    More grooming tips

    Grooming is an integral aspect of dog care. It doesn’t just keep them looking their best; regular grooming ensures their health and comfort. If you’re keen on elevating your pet care game, here are some more grooming tips to consider:

    1. Brushing Regularly: Depending on your dog’s coat type, regular brushing can help prevent matting, reduce shedding, and distribute natural oils, keeping their fur glossy. Invest in a quality brush suitable for your dog’s coat.
    2. Bathing: While dogs don’t need frequent baths, knowing when and how to bathe them is essential. Use dog-specific shampoos and ensure you rinse thoroughly. Always dry your dog completely, especially in cooler weather.
    3. Eye Care: Wipe away any discharge from your dog’s eyes using a soft, damp cloth. For breeds prone to tear staining, consider using dog-specific wipes or solutions.
    4. Ear Cleaning: Check your dog’s ears regularly for signs of dirt, wax, or infection. Clean them using a vet-recommended solution and a cotton ball, but avoid using cotton swabs deep inside the ear.
    5. Dental Care: Oral hygiene is crucial. Brush your dog’s teeth regularly with dog-specific toothpaste. Dental chews and toys can also help in reducing tartar buildup.
    6. Paw Care: Beyond nail trimming, check your dog’s paws for any signs of injury, cracks, or pebbles lodged between the pads. In winters, consider using paw balms to protect against salt and ice.
    7. Regular Check-ups: While grooming, it’s a good opportunity to check for any abnormalities, like lumps, bumps, or skin infections. If you notice anything unusual, consult your vet.
    8. Use Quality Products: Invest in high-quality, dog-specific grooming products. They might be a tad more expensive, but they’re designed for your dog’s unique needs.
    9. Stay Calm and Positive: Just as with nail trimming, your dog will respond to your emotions during grooming. Keep the experience positive using treats, praise, and gentle reassurances.
    10. Seek Professional Help: If you’re unsure about any aspect of grooming or if your dog has specific needs, don’t hesitate to seek out a professional groomer. They can provide guidance, tips, and even regular grooming services.

    Remember, grooming isn’t just about maintaining your dog’s appearance; it’s a bonding experience that ensures your pet’s well-being and comfort. With regular care and the right techniques, you’ll ensure your furry friend stays happy, healthy, and looking their best!

    easy dog nail trims for pups with black toe nails

    Conclusion

    Caring for our furry companions extends beyond walks in the park and the occasional treat. Regular grooming, particularly nail maintenance, plays a pivotal role in ensuring their health, comfort, and happiness. While the prospect of trimming black nails or tackling matted fur may seem daunting, armed with the right knowledge, tools, and a dash of patience, these tasks become more manageable and even rewarding.

    Remember, every stroke of the brush, every careful nail trim, and every gentle wash not only contributes to their physical well-being but also strengthens the bond you share with your pet. Whether you choose to handle grooming tasks at home or lean on the expertise of professionals, the underlying goal remains the same: to provide the best for our loyal companions who offer us unconditional love.

    So, the next time you approach a grooming session, see it as an opportunity—an opportunity to learn, bond, and ensure that your dog not only looks their best but feels their best too. Happy grooming!

    Frequently Asked Questions (FAQs)

    Q: How often should I trim my dog’s nails?

    A: The frequency varies based on your dog’s activity level and the surfaces they walk on. Generally, most dogs need their nails trimmed every 3-4 weeks. However, if you hear their nails clicking on the floor, it’s a sign they might need a trim sooner.

    Q: What if I don’t have styptic powder and I cut the quick?

    A: If you accidentally cut the quick and don’t have styptic powder on hand, you can use cornstarch or flour as a temporary solution. Apply it to the bleeding nail with gentle pressure. However, it’s beneficial to keep styptic powder in your dog grooming kit for such situations.