*This page may include affiliate links, which means that if you make a purchase through one of the product links, we may receive a small commission. For full affiliate disclosure please see our disclaimer page.
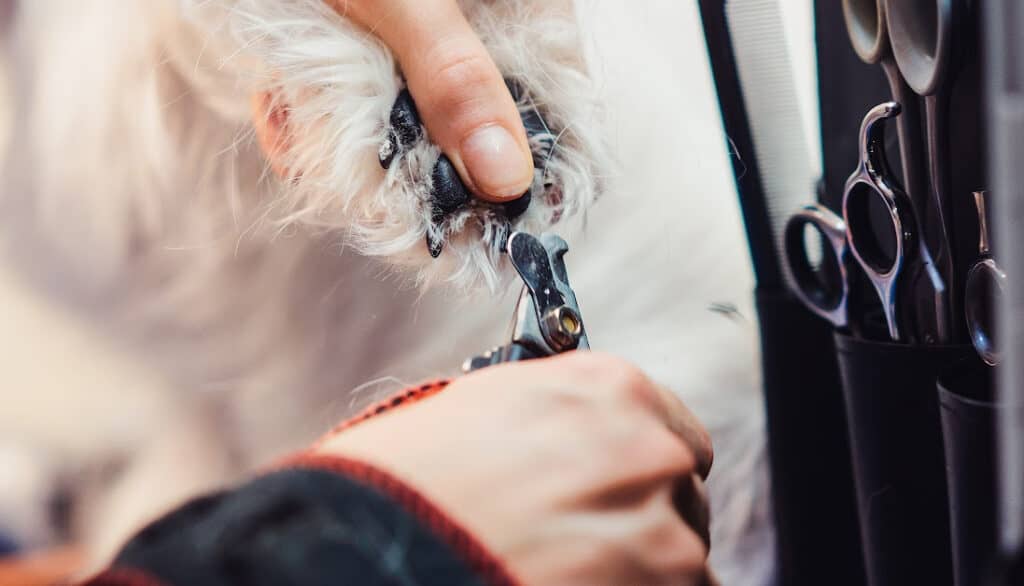
Trimming your dog’s nails is more than just a cosmetic chore; it’s a vital aspect of their overall health and well-being. But, if you’ve ever been intimidated by the thought of accidentally cutting into the quick or simply navigating the myriad of tools available, you’re not alone. Enter the guillotine dog nail clippers—a popular, efficient, and user-friendly choice for many pet owners. This comprehensive guide will shed light on how to use guillotine dog nail clippers safely, ensuring a stress-free and comfortable experience for both you and your furry friend. Dive in as we demystify the process, step by step, so you can clip with confidence!

How to tell if your dog’s nails need clipping
Dogs might not pop into your salon chair and ask for a pedicure, but their nails can tell you a lot about their grooming needs. Overgrown nails can lead to a variety of health problems for your pooch, so it’s essential to recognize the signs. Here are some clear indicators that it’s time to grab those clippers:
1. Click-Clack Sound
Every time your dog walks on a hard floor, and you hear a distinctive clicking noise, that’s a telltale sign. Healthy dog nails shouldn’t make contact with the ground in such a manner.
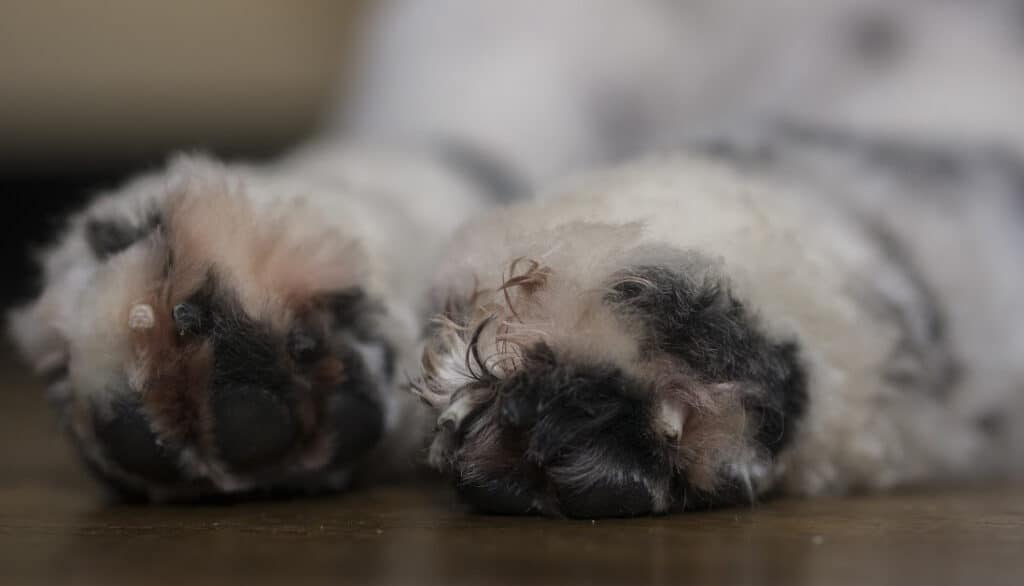
2. Sideways Growth
Inspect the nails. If they are growing in a curved manner, almost sideways, then they are probably too long. In extreme cases, they can even grow back into the paw pad, which is painful.
3. Trouble Walking
Watch your dog’s gait. If they seem to be walking more gingerly or are limping, overgrown nails might be the culprit. Long nails can alter the way a dog positions its foot and moves.
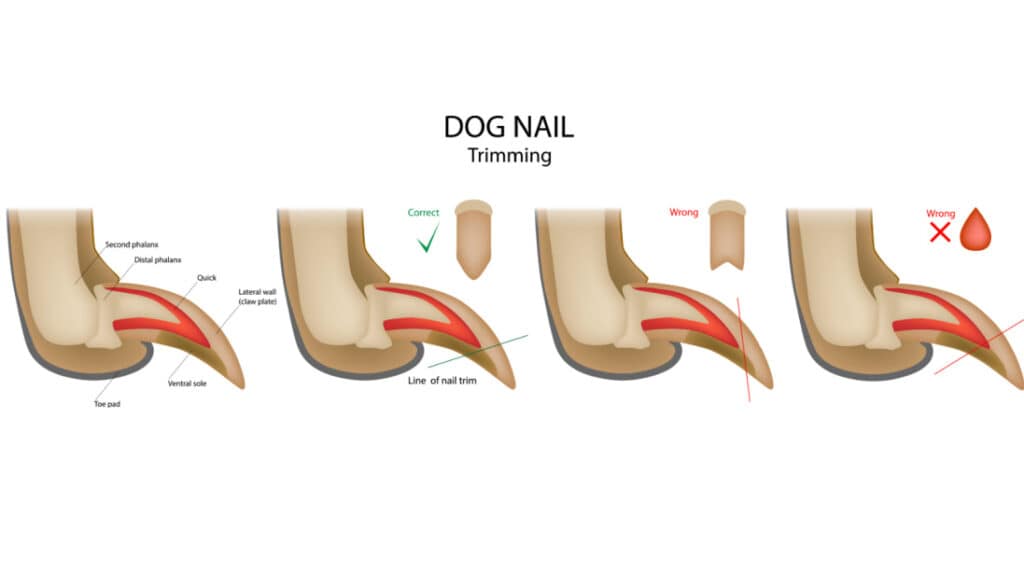
4. Visible Quick
For dogs with clear nails, you can see the “quick,” which is a darker, inner part of the nail containing blood vessels and nerves. If there’s only a tiny bit of clear nail beyond the quick, it’s time for a trim.
5. Scratching You More Than Usual
If your usually gentle pet suddenly starts scratching you with their paws and it feels sharper than usual, their nails might have grown longer than is comfortable for them (or you!).
6. Nails Catching on Fabrics
Whether it’s your carpet, the couch, or your favorite sweater, if your dog’s nails are getting caught frequently, it’s a signal they need a trim.
7. Discomfort or Pain
If your dog starts licking their paws excessively or seems sensitive when you touch their feet, long or damaged nails might be causing discomfort.
Tips for Regular Maintenance
To avoid reaching the stage where your dog’s nails become noticeably overgrown, consider:
- Setting a Schedule: Depending on your dog’s activities and the surfaces they walk on, you might need to trim their nails every few weeks or once a month.
- Regular Inspections: Make a habit of checking their nails during regular grooming or bath time.
Remember, regular nail trims not only keep your dog comfortable but also prevent potential health issues. So, keep those clippers close and ensure your furry friend’s paws are always in tip-top shape!
Are guillotine dog nail clippers better than bypass types? What’s the difference?
Choosing the right type of dog nail clippers can feel overwhelming, especially when faced with various options, each boasting its unique features. Two of the most popular styles are the guillotine and bypass types. Let’s break down their differences and determine which might be better suited for your dog’s grooming needs.
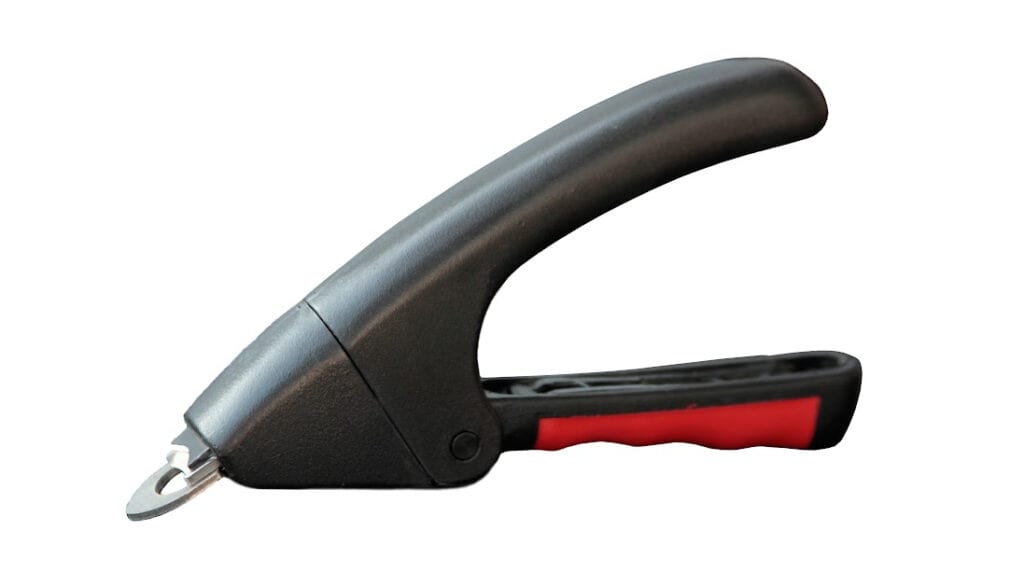
Guillotine Dog Nail Clippers:
- Mechanism: These clippers work just like a guillotine. Once the nail is placed through a small hole, a blade slides across to trim the nail.
- Best For: Typically recommended for smaller dogs due to the size and the amount of force they exert. They might not be as effective for larger dogs with thicker nails.
- Advantages:
- Quick and easy to use for small nails.
- Often results in a cleaner cut for smaller breeds.
- Less force is required to clip the nail, which can be easier on the hands.
- Disadvantages:
- Blade needs to be changed regularly to ensure a clean cut.
- Not suitable for thicker nails, as they can crush rather than clip.
Bypass Dog Nail Clippers (Scissor Type):
- Mechanism: They look and work similarly to scissors, where two blades bypass each other to create the cut.
- Best For: Suitable for dogs of all sizes, from small breeds to larger ones with thicker nails.
- Advantages:
- Strong and durable, ideal for thicker nails.
- Typically last longer without needing blade replacements.
- Offer more control, which can be beneficial for dogs that fidget.
- Disadvantages:
- They can crush the nail if not sharp.
- Might be more intimidating to some dogs due to their size and appearance.
So, Which Is Better?
The decision between guillotine and bypass clippers boils down to personal preference and your dog’s size and nail thickness. If you have a smaller dog with delicate nails, guillotine clippers might be your best bet. On the other hand, if you’re dealing with a larger breed or one with sturdy nails, bypass clippers offer the strength and control you might need.
Regardless of your choice, always ensure your clippers are sharp, clean, and in good condition. A dull blade can cause splintering or crushing of the nail, which is uncomfortable for your pup.
In addition to the type of clipper, your comfort and confidence in using the tool are crucial. If you’re unsure, consider consulting with a professional groomer or vet for advice tailored to your dog’s specific needs.
How to Clip Your Dog’s Nails With Guillotine Clipper
Trimming your dog’s nails might sound daunting, especially if you’ve never done it before. Using a guillotine clipper can simplify the process when done correctly. Here’s a step-by-step guide to help you navigate this essential grooming routine:
Step 1. Get Your Dog Used To The Guillotine Clipper
Before you even think about trimming, it’s essential to make your dog familiar with the clipper. This will help reduce any anxiety or fear.
- Desensitize: Let your dog inspect and sniff the clipper for a few days before the actual trimming.
- Touch Their Paws: Regularly handle your dog’s paws, pressing gently on each toe, so they become accustomed to the sensation.
- Mimic the Trimming Motion: With the clipper’s blade retracted, mimic the trimming motion on their nails without actually cutting, so they get used to the feel of the tool.
Step 2. Clip Away!
Once your dog is comfortable, it’s time to start the trimming process:
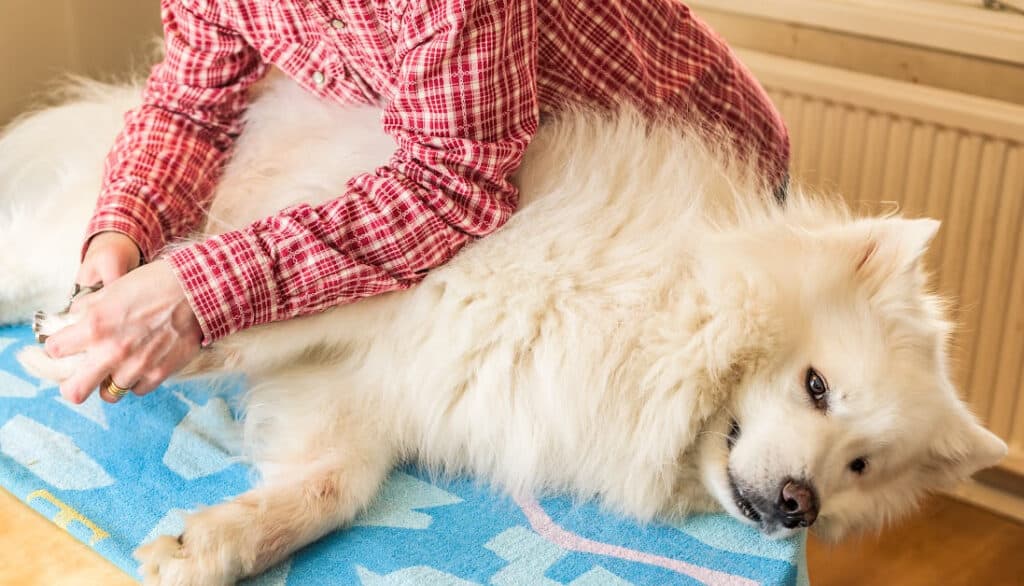
- Find a Comfortable Spot: Opt for a well-lit area. If your dog is small, you can place them on a table or your lap. For larger breeds, the floor works best.
- Hold the Paw Firmly: Gently but firmly grasp your dog’s paw. Press lightly on the pad to extend the nail.
- Position the Clipper: Insert the nail into the hole of the guillotine clipper, ensuring you’re not too close to the quick. If your dog has clear nails, the quick will appear as a pinkish area inside the nail.
- Clip: Once positioned correctly, squeeze the clipper’s handles together to cut the nail. Make sure to cut perpendicular to the nail.
Step 3. Load On the Praise!
Positive reinforcement goes a long way. After each nail or even a successful trimming session:
- Verbal Praise: Cheerfully tell your dog how good they are.
- Treats: Offer a small treat or their favorite toy as a reward.
- Petting: A good cuddle or petting session can help reassure your dog.
Step 4. File Down Nail Edges
After trimming, nails can have sharp edges. To prevent scratching and ensure a smooth finish:
- Use a nail file or grinder to smooth out the tips.
- Be gentle and ensure you don’t file too close to the quick.
Oh No, I Cut My Dog’s Quick!
Accidents happen. If you cut into the quick:
- Stay Calm: Your dog will pick up on your anxiety, so try to remain calm.
- Staunch the Bleeding: Use styptic powder or a styptic pencil to stop the bleeding. If you don’t have these on hand, cornstarch can work in a pinch.
- Comfort Your Dog: They might be in pain or shock. Offer comfort and maybe a treat to distract them.
- Check for Infection: Over the next few days, keep an eye on the nail to ensure there’s no sign of infection.
Remember, practice makes perfect. The more you trim your dog’s nails, the more confident and efficient you’ll become. If ever in doubt, consult with a professional groomer or veterinarian for guidance.
How to hold dog nail clippers
Holding dog nail clippers correctly ensures both precision and safety. The right grip will give you control, reduce the risk of injury, and make the process smoother for both you and your dog. Here’s a guide on how to achieve the optimal grip based on the type of nail clipper you’re using:
Guillotine Clippers:
- Thumb Placement: Your thumb should go into the single, large loop of the clipper. This loop is where the squeezing action will come from.
- Finger Placement: Your remaining fingers should wrap around the body of the clipper, stabilizing it. Your index finger can rest near the top, guiding the motion.
- Orientation: Ensure that the hole (where you insert the nail) faces you, so you can see exactly where you’re cutting. This helps in avoiding the quick.
Bypass (Scissor-type) Clippers:
- Thumb and Finger Loops: Bypass clippers come with two loops. Place your thumb in one and your fingers (usually index and middle) in the other.
- Solid Grip: Your remaining fingers should wrap around the handles for additional support and control.
- Orientation: While cutting, make sure the clipper’s blades are perpendicular to the nail to prevent splitting.
General Tips for Both Types:
- Relaxed Grip: While you want control, avoid gripping too tightly as this might cause your hand to shake or tire quickly.
- Stabilize the Dog’s Paw: Use your free hand to hold the dog’s paw gently but firmly. This gives you better control and helps in keeping the nail steady.
- Wrist Movement: Focus on moving from the wrist rather than the whole arm. This provides better precision and control.
- Short and Quick Clips: Especially if you’re new to this or if your dog is anxious, make short and quick clips. This minimizes any discomfort for the dog and reduces the risk of cutting into the quick.
Properly holding the nail clippers can make a significant difference in the nail-trimming experience. The more confident and controlled you are, the more at ease your dog will be. Remember, if you’re ever unsure, there’s no harm in seeking a demonstration or advice from a professional groomer or vet.

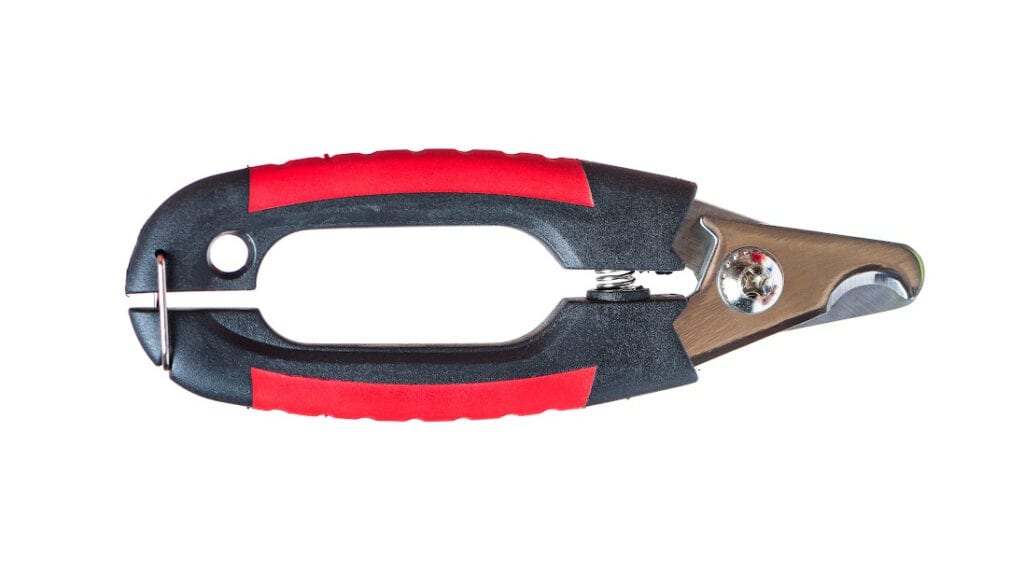
What is the guard for on dog nail clippers?
Ah, the trusty guard on dog nail clippers—often overlooked but undeniably handy for those venturing into the world of dog pedicures. If you’ve ever wondered about that little metal piece protruding from your clipper and its role in your dog’s grooming routine, you’re not alone. Let’s dive into its purpose and how it can make nail trimming a tad bit easier for you and your furry friend.
Purpose of the Guard:
- Safety Feature: The primary function of the guard is to prevent over-trimming. It acts as a barrier, ensuring you don’t cut too much of the nail off in one go. This is especially useful for those less experienced in dog nail trimming, as it reduces the risk of accidentally cutting into the quick.
- Consistent Length: The guard helps in achieving a uniform length across all nails. This consistency not only looks neat but also ensures your dog’s paws remain balanced and comfortable when walking.
- Reducing Anxiety: For pet parents who are a little nervous about the trimming process, the guard offers an extra layer of reassurance. Knowing there’s a mechanism in place to prevent cutting too deeply can provide a confidence boost.
Using the Guard Effectively:
- Adjust If Possible: Some advanced nail clippers come with adjustable guards. Depending on your dog’s nail size and your comfort level, you can set the guard to allow more or less of the nail through for clipping.
- Ensure Visibility: While the guard is helpful, you still want to see what you’re doing. Make sure it doesn’t obstruct your view of the nail, especially the quick.
- Remember, It’s a Guide: While the guard is a useful tool, it’s essential to remember that it’s just a guide. Always pay attention to the nail’s anatomy, especially if your dog has darker nails where the quick isn’t easily visible.
While the guard on dog nail clippers might seem like a minor feature, it plays a significant role in ensuring a safe and stress-free trimming experience. However, as with all tools, it’s crucial to use it correctly and in conjunction with your judgment. If ever in doubt, a quick chat with a seasoned groomer or vet can offer insights tailored to your pup’s specific needs. Happy trimming!
How to sharpen guillotine dog nail clippers
Sharp guillotine dog nail clippers are essential for a quick, clean cut. Dull clippers can crush or splinter a dog’s nails, causing discomfort or even injury. If you’ve noticed that your clippers aren’t cutting as smoothly as they once did, it might be time to sharpen them. Here’s a step-by-step guide on how to bring that sharp edge back to your guillotine dog nail clippers:
1. Disassemble the Clippers:
Before sharpening, it’s crucial to disassemble the clippers for safety and to get a good angle on the blade.
- Remove the Blade: Most guillotine clippers have a small retaining ring or screw that holds the blade in place. Using a screwdriver or pliers, carefully remove this to detach the blade.
2. Clean the Blade:
Once you have the blade removed:
- Wipe away any nail fragments or dirt using a cloth.
- Clean the blade with soapy water, rinse, and dry thoroughly. This removes any accumulated grime and allows for more effective sharpening.
3. Sharpening with a File:
- Choose the Right File: A diamond taper file or a ceramic rod is ideal for this purpose due to their fine grit and precision.
- Angle & Motion: Hold the blade at an angle (usually around 45 degrees) to the file. Using smooth, consistent strokes, slide the blade down the file from the base to the tip.
- Check Your Progress: After several strokes, check the blade’s sharpness by feeling it with your fingers (move your fingers from the base to the tip to avoid cutting yourself).
4. Reassemble the Clippers:
Once satisfied with the sharpness:
- Place the blade back into its slot on the clippers.
- Reattach the retaining ring or screw to secure the blade in place.
5. Test the Clippers:
Before using them on your dog, test the clippers on a small, thin stick or a piece of paper. This ensures the blade is sharp and reattached correctly.
6. Maintenance and Safety:
- Regular Checks: Regularly inspect your clippers for signs of dullness or damage. Keeping them sharp will ensure they work efficiently and safely.
- Replacement: Sometimes, blades are past their prime or too damaged. In such cases, it’s more effective to replace the blade or the entire clipper.
- Store Properly: After use, clean and store your clippers in a dry place to prevent rusting or damage.
Sharpening guillotine dog nail clippers might require a bit of patience, but it’s a skill worth mastering. Not only does it save money in the long run, but it also ensures your dog’s nail trimming experience is as smooth and stress-free as possible. If you’re ever uncertain about the sharpness or assembly, don’t hesitate to seek advice from a professional groomer or pet supply store.

Guillotine vs. Others
When trimming your dog’s nails, the right tool is pivotal for both safety and ease. The market offers a variety of dog nail clippers, but most fall into a few primary categories. Here’s a detailed comparison between guillotine clippers and other prominent types, using tables for a clearer breakdown of their pros and cons.
1. Guillotine Clippers:
- How They Work: Guillotine clippers have a hole where the dog’s nail is inserted. A blade slides across this hole to trim the nail when the handles are squeezed.
| Pros | Cons |
|---|---|
| Ideal for small to medium-sized dogs with relatively thin nails. | Can crush or splinter the nail if not sharp. |
| Straightforward cutting action can be less intimidating for some users. | Not suitable for very thick or large nails. |

2. Scissor (Bypass) Clippers:
- How They Work: Resembling scissors, they’re tailored for dog nails. Some models feature a curved blade to fit the nail’s shape.
| Pros | Cons |
|---|---|
| Perfect for thicker nails or larger dogs. | Might be excessive for tiny dogs or puppies. |
| Offers more control over the cutting angle. | Their size can be more intimidating for some users. |
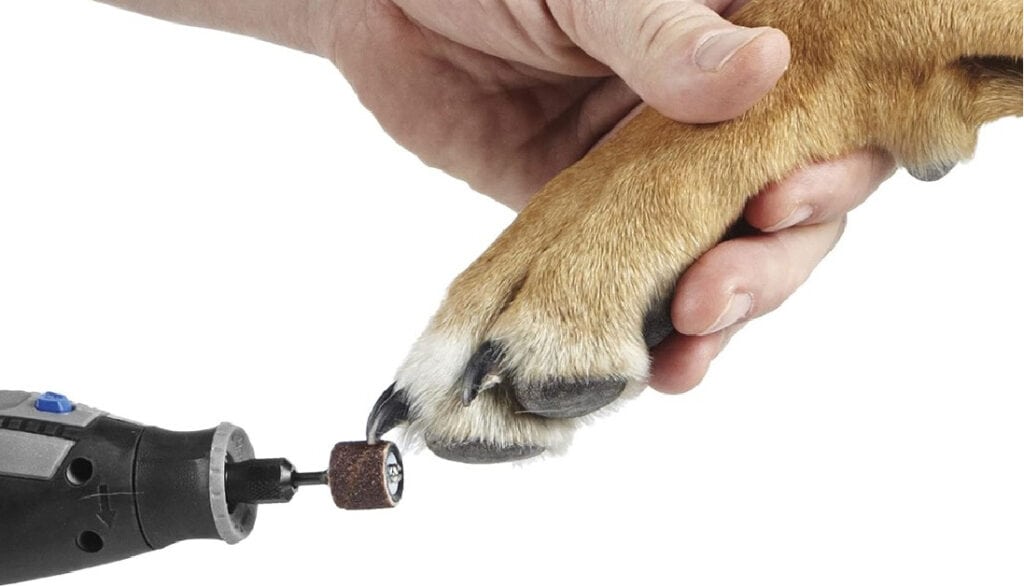
3. Grinder Tools (Rotary):
- How They Work: These electronic tools grind down the nail using a rotating component.
| Pros | Cons |
|---|---|
| Suitable for dogs with very thick nails. | The noise and vibration can unsettle some dogs. |
| Lowers the risk of cutting into the quick. | Requires more time than straightforward clipping. |
| Produces a smooth nail edge, reducing scratchiness. | Needs regular battery replacements or recharging. |
Which One is Best?
Choosing the right tool depends on the dog’s characteristics and the owner’s comfort level. Factors to consider include:
- Dog’s Size and Nail Thickness: A Chihuahua’s needs differ vastly from those of a Saint Bernard.
- User’s Comfort: Some may find the guillotine’s squeezing action simpler, whereas others might favor the scissor clippers’ familiar mechanism.
- Dog’s Temperament: A skittish dog might not bear the sound or vibration of a grinder, but a calmer one might have no issues.
Ultimately, regardless of your choice, ensure you use the tool correctly and maintain it well. If uncertain, consult a professional groomer or veterinarian.
Conclusion
Trimming your dog’s nails is more than just a grooming ritual; it’s an essential act of care that ensures their comfort, health, and overall well-being. With the myriad of options available in the market, choosing the right tool might feel overwhelming, but remember, the perfect clipper is the one that aligns with both your dog’s needs and your comfort.
Whether you’re a fan of the swift precision of the guillotine, the robust control of the scissor clippers, or the gentle touch of the rotary grinder, the key lies in regular maintenance, patience, and gentle handling. After all, this isn’t just about aesthetics or routine—it’s a bonding moment, a time when you reassure your dog that you’re looking out for them.
Remember, the journey to a perfect trim isn’t just about the tool but also the hand that wields it. Stay informed, practice often, and always prioritize your dog’s comfort. And when in doubt? Seek expert advice. Your furry friend’s trust and wagging tail will be the best indicators that you’ve made the right choice.
Frequently Asked Questions (FAQs)
It’s common for dogs to be wary of unfamiliar objects. Start by introducing the clipper slowly. Let them sniff and get acquainted without actually trimming. Positive reinforcement with treats and praise can also help. Over time and with consistent exposure, most dogs will become accustomed to the tool.
The frequency depends on your dog’s lifestyle and the rate at which their nails grow. Generally, most dogs need their nails trimmed every 3-4 weeks. If you hear their nails clicking on hard surfaces, it’s a sign they’re due for a trim.
First, don’t panic. While it might bleed and cause your dog some discomfort, it’s not life-threatening. Apply styptic powder or cornstarch to the bleeding nail to help it clot faster. Give your dog some comfort and be sure to be extra cautious next time.
Both methods have their advantages. Clipping is quick and efficient, while grinding can give a smoother finish and may be better for dogs with thick nails. The best method often comes down to the dog’s temperament and the owner’s comfort level.
While it’s technically possible for very small breeds or puppies, human nail clippers aren’t designed for the thickness and shape of dog nails. It’s always best to use tools specifically designed for dogs to ensure safety and effectiveness.