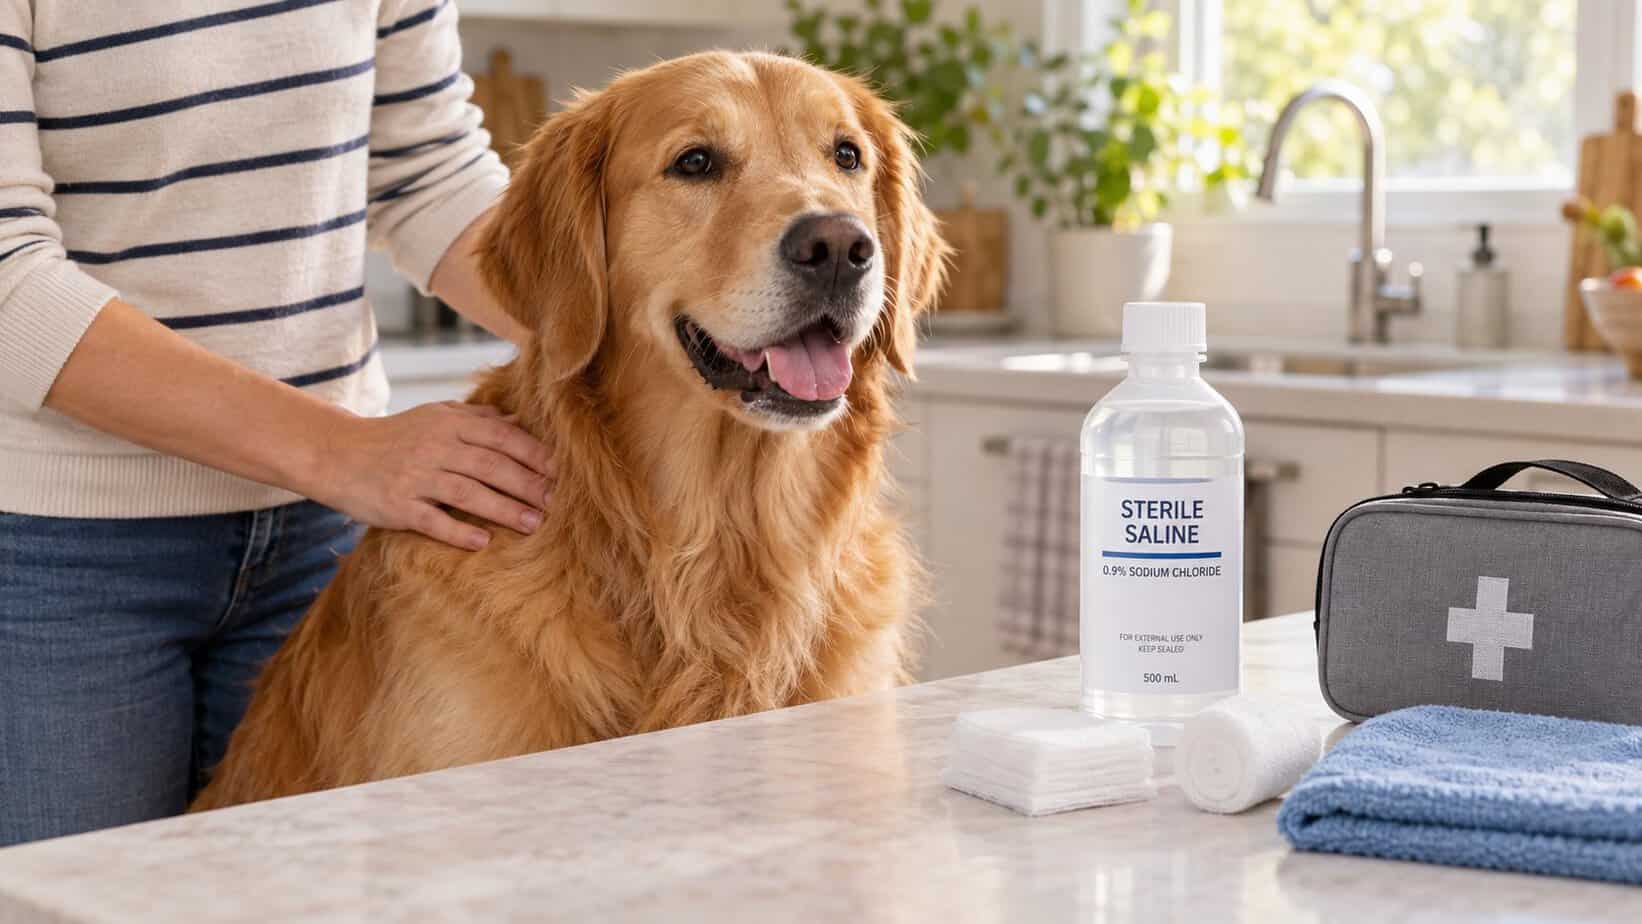
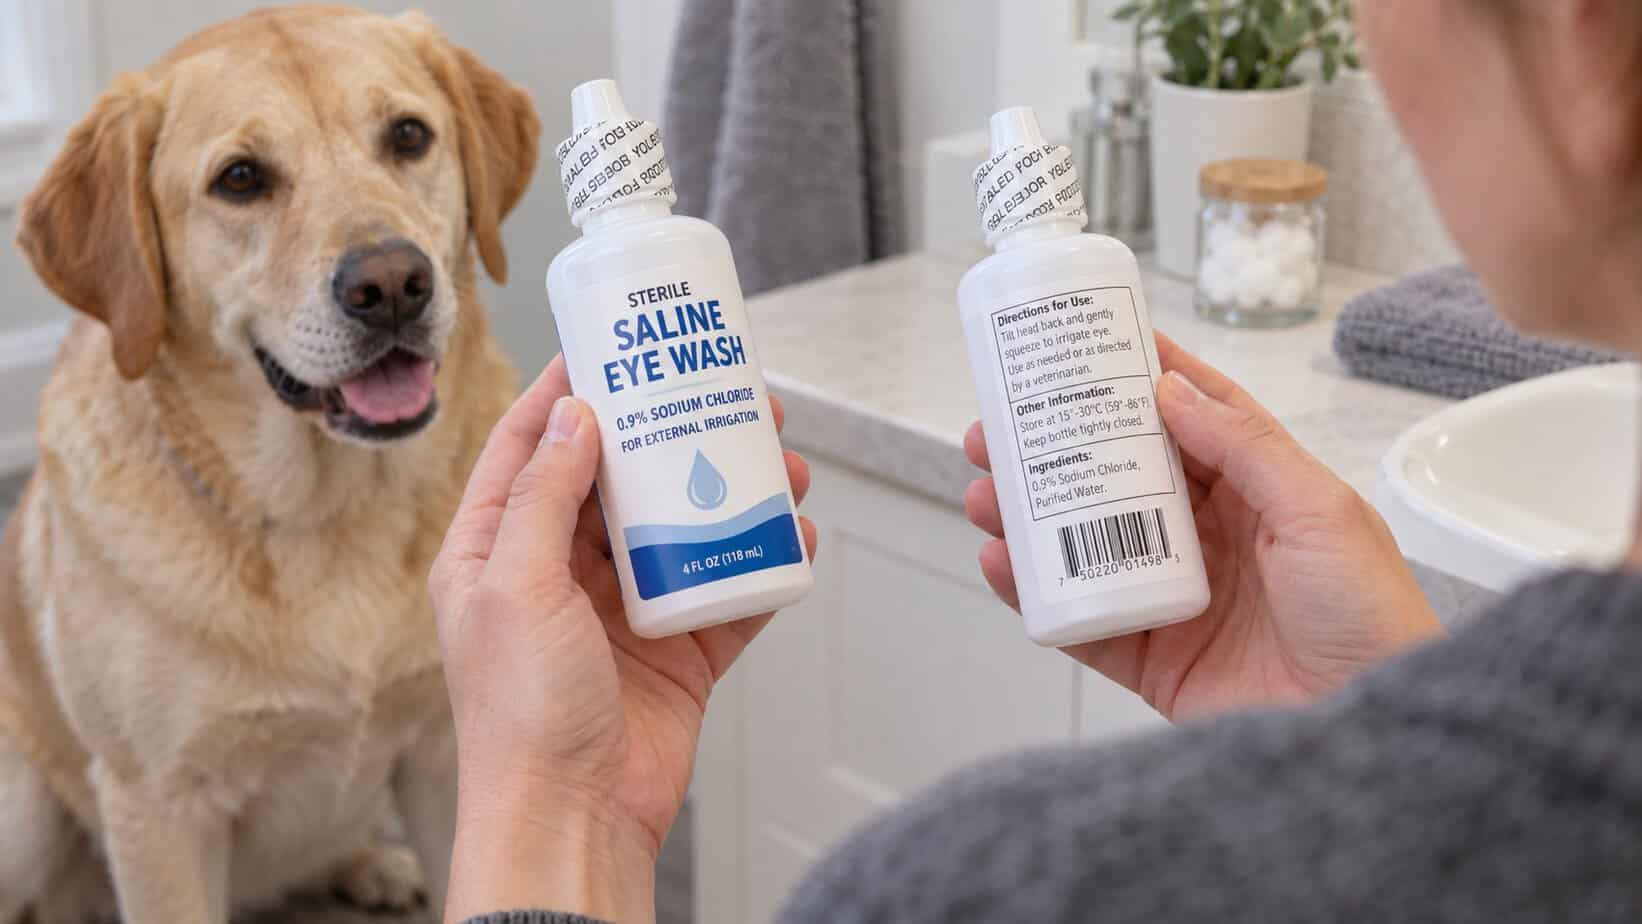
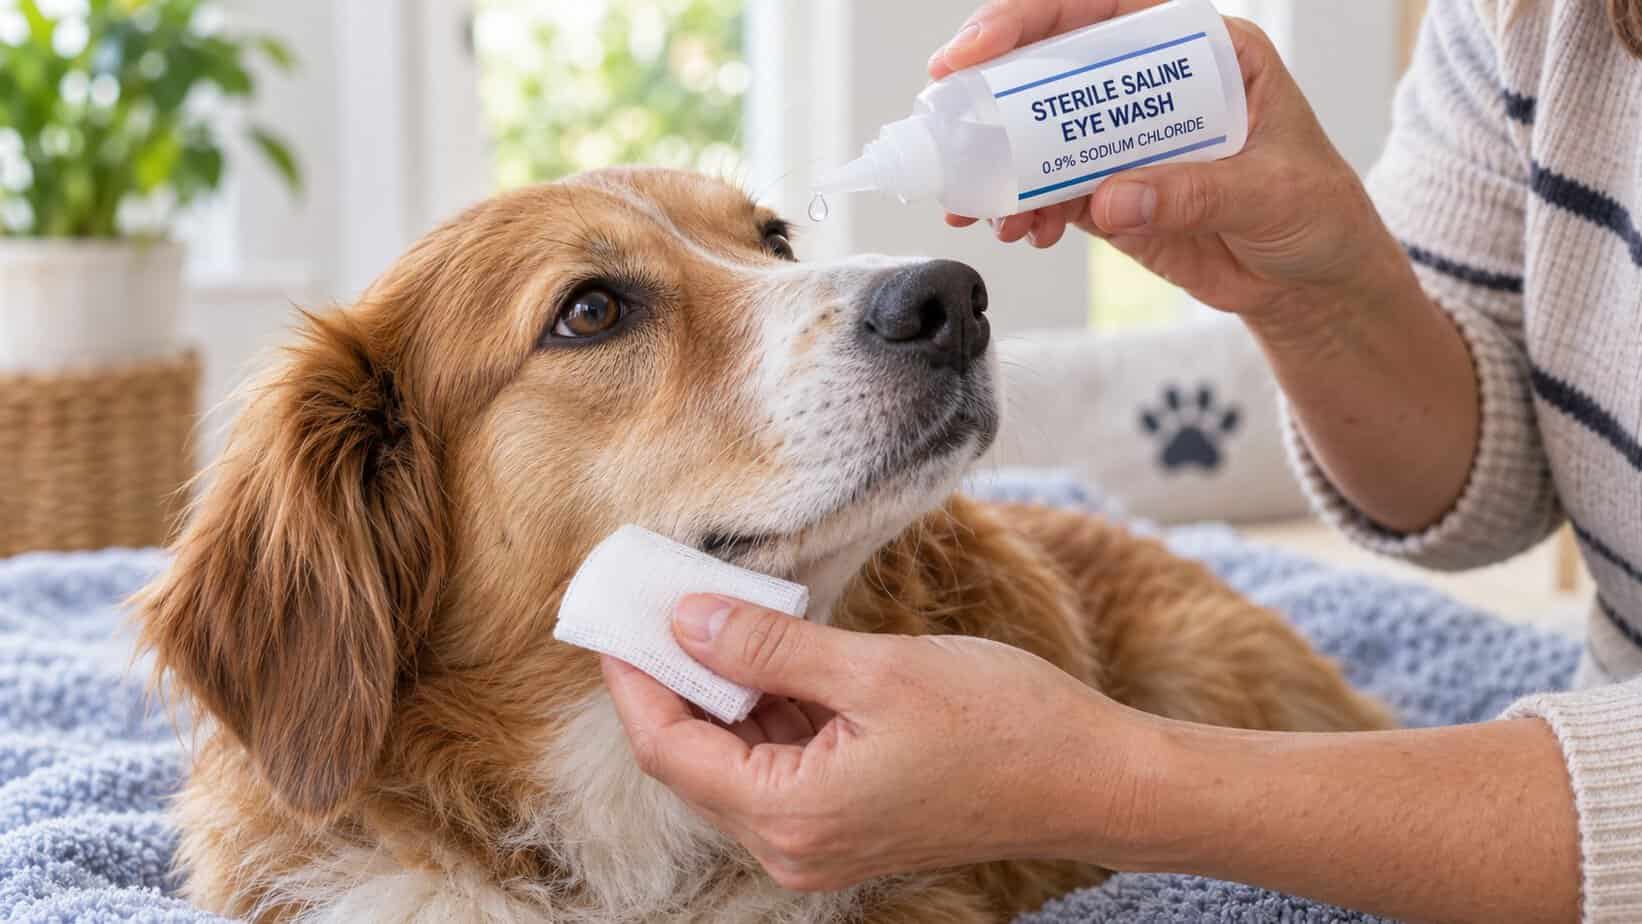
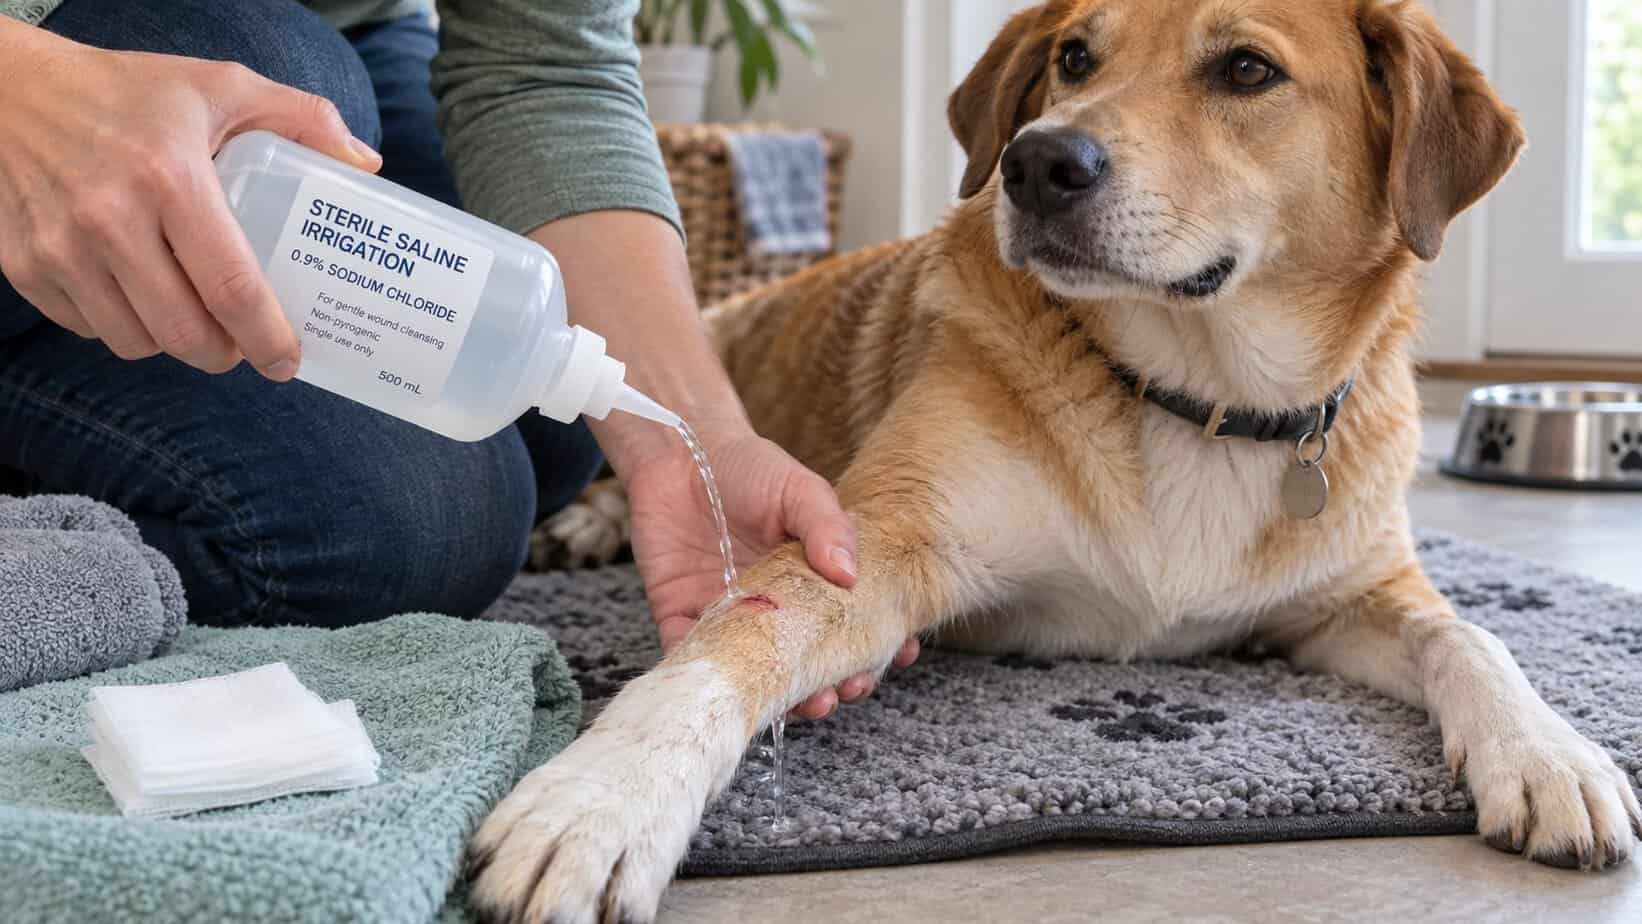
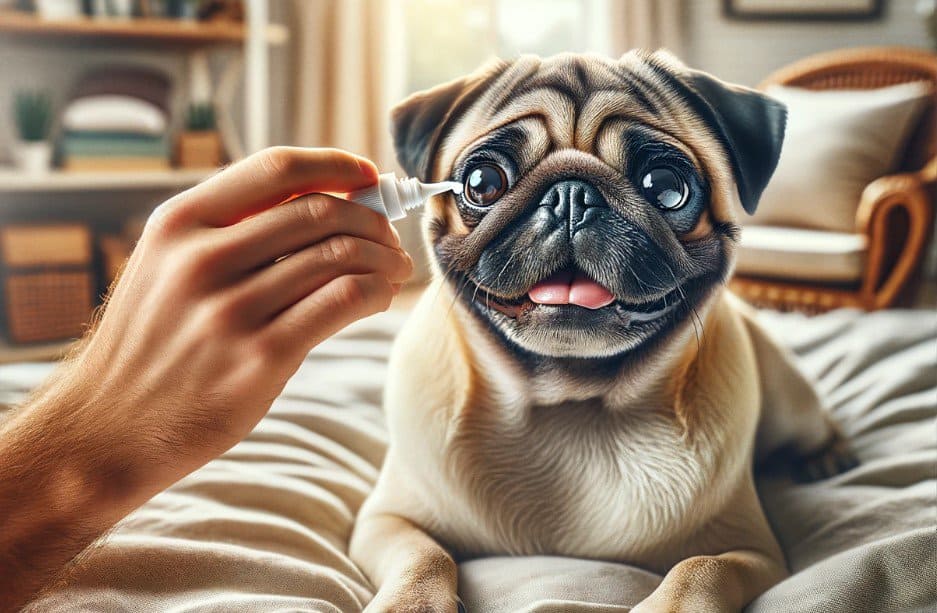
Yes, you can use saline solution on dogs for limited external rinsing. For most at-home uses, choose a sealed, sterile product that contains plain 0.9% sodium chloride and is labeled as eye wash or irrigation. It can gently wash loose debris from the surface of an eye or a minor skin wound. It is not an antiseptic, and it does not treat infection. [1][2]
The body area matters just as much as the label. A product that is suitable for wound irrigation may not be packaged for the eyes. Contact lens cleaners, medicated eye drops, nasal decongestants, and injectable fluids are not interchangeable with plain saline. Never inject saline labeled for irrigation. [1]
Quick Answer: Which Saline Is Safe for Dogs?
Look for simple wording on the front and back of the package:
Usually Appropriate for Limited External Rinsing
Sterile saline eye wash with plain 0.9% sodium chloride for the eye surface
Sterile 0.9% sodium chloride irrigation solution for minor wounds or skin
A new, sealed container that has not expired
A container with a clean tip that has not touched skin, fur, the eye, or another surface
Avoid Unless Your Veterinarian Specifically Prescribed It
Multipurpose contact lens solution, enzymatic cleaner, or contact lens disinfectant
Redness-relief eye drops or any medicated human eye product
Medicated nasal spray or decongestant
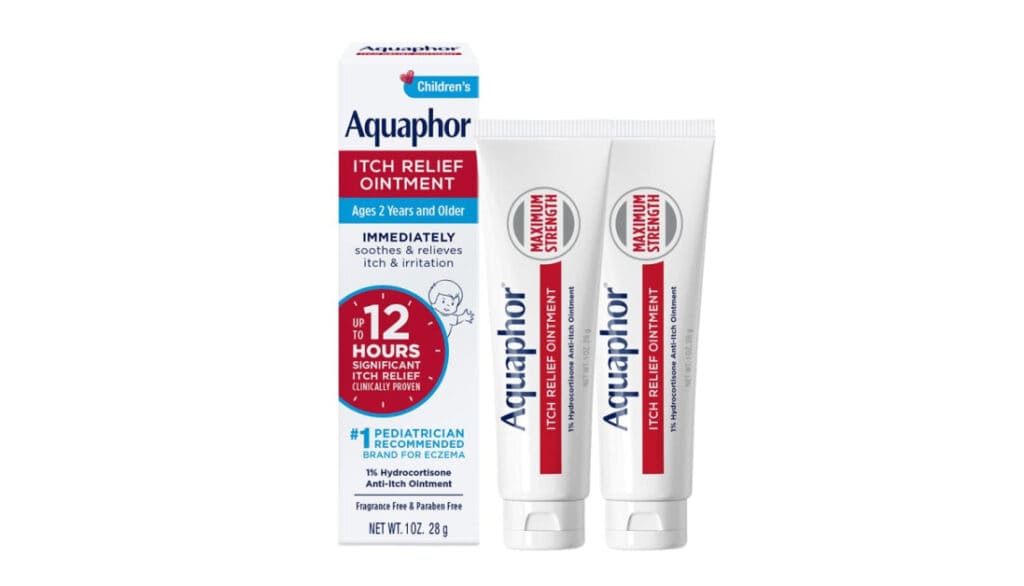
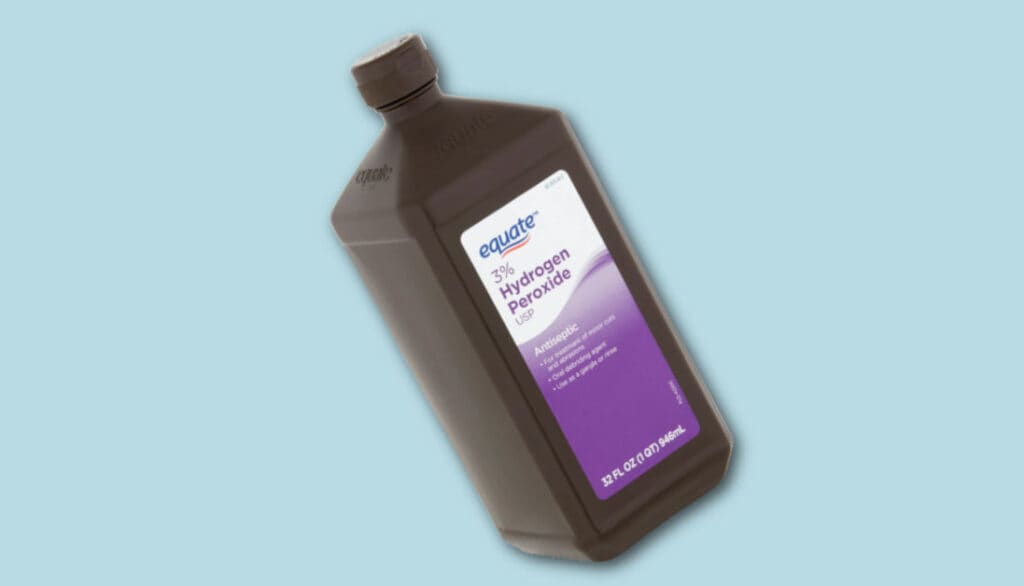
Products containing alcohol, hydrogen peroxide, chlorhexidine, fragrance, essential oils, or other active ingredients
Saline irrigation solution used as an injection, oral rehydration drink, or home fluid treatment
The word “saline” is not enough by itself. Read the full label. When the package lists more than sodium chloride and sterile water, pause and confirm that the product is intended for the exact body site you plan to rinse.
How to Use Saline on Dogs by Body Area
For Your Dog’s Eyes
Sterile saline eye wash can help rinse dust, loose debris, or mild surface discharge from a dog’s eye. The American College of Veterinary Ophthalmologists specifically distinguishes sterile saline eye wash from contact lens solution and advises against using contact lens solution on a pet’s eye. [3]
To rinse an eye gently:
Wash and dry your hands.
Check the label again. It should say sterile saline eye wash and should not contain medication or a contact lens disinfectant.
Keep the bottle tip away from the eye, eyelids, lashes, fur, and your fingers.
Hold the eyelids open without squeezing the eye.
Let a gentle stream flow across the surface and out toward the side of the face.
Blot wet fur with clean gauze or a soft cloth. Do not rub the eye.
If your dog uses prescribed eye drops or ointment, ACVO recommends using the rinse 10 to 15 minutes before the medication so the medicine is not washed away. Follow your veterinarian’s directions if they differ. [3]
A rinse is reasonable for loose surface debris, but it should not delay care for squinting, obvious pain, cloudiness, swelling, blood, a chemical splash, a lodged object, a scratch, or discharge that returns quickly. Eye problems can worsen fast, and rubbing at a painful eye may cause more damage.
For Minor Wounds and Skin
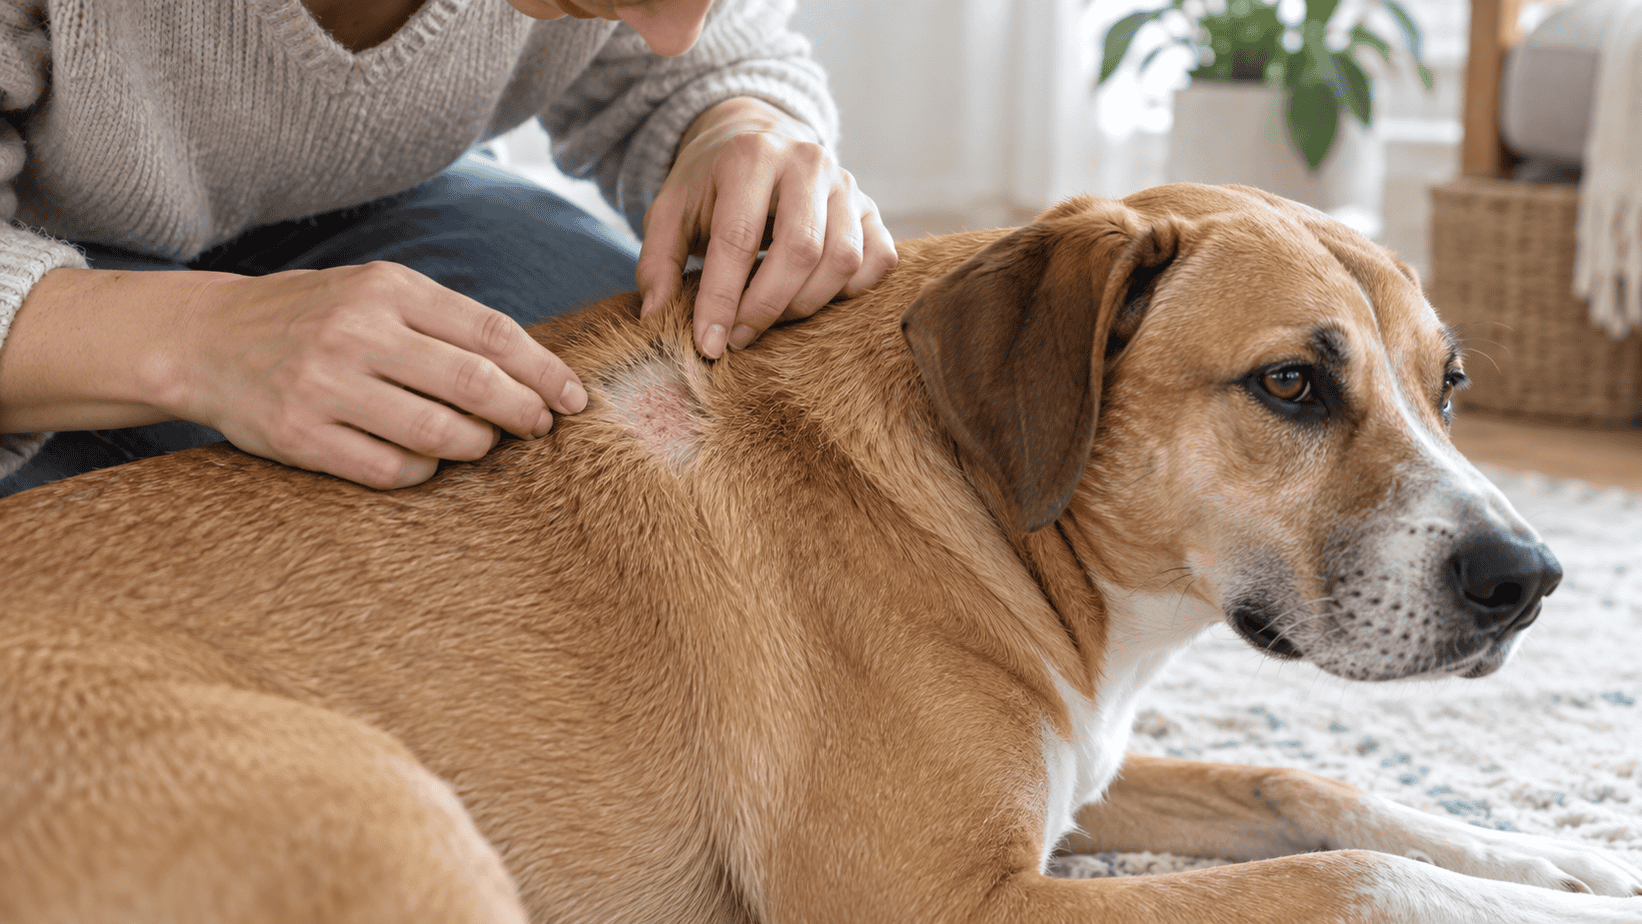
Saline is useful for one simple job: lavage, which means washing debris away. Merck Veterinary Manual describes 0.9% sodium chloride as gentle on healing tissue while also making clear that it is not antiseptic. [2]
For a small, shallow scrape:
Wash your hands and keep your dog as calm as possible.
If the area is bleeding, apply steady pressure with clean gauze. Do not keep lifting the gauze to check every few seconds.
Once bleeding is controlled, rinse with a generous amount of sterile saline using a gentle stream.
Let the fluid carry dirt away. Do not scrub raw tissue or force fluid into a puncture.
Blot the surrounding fur and skin. Avoid rubbing the wound itself.
Prevent licking and watch the area over the next day for increasing redness, heat, swelling, odor, discharge, or pain.
Large-volume rinsing removes more debris, but pressure should stay gentle for home first aid. Excessive pressure can push contamination deeper into tissue. [2]
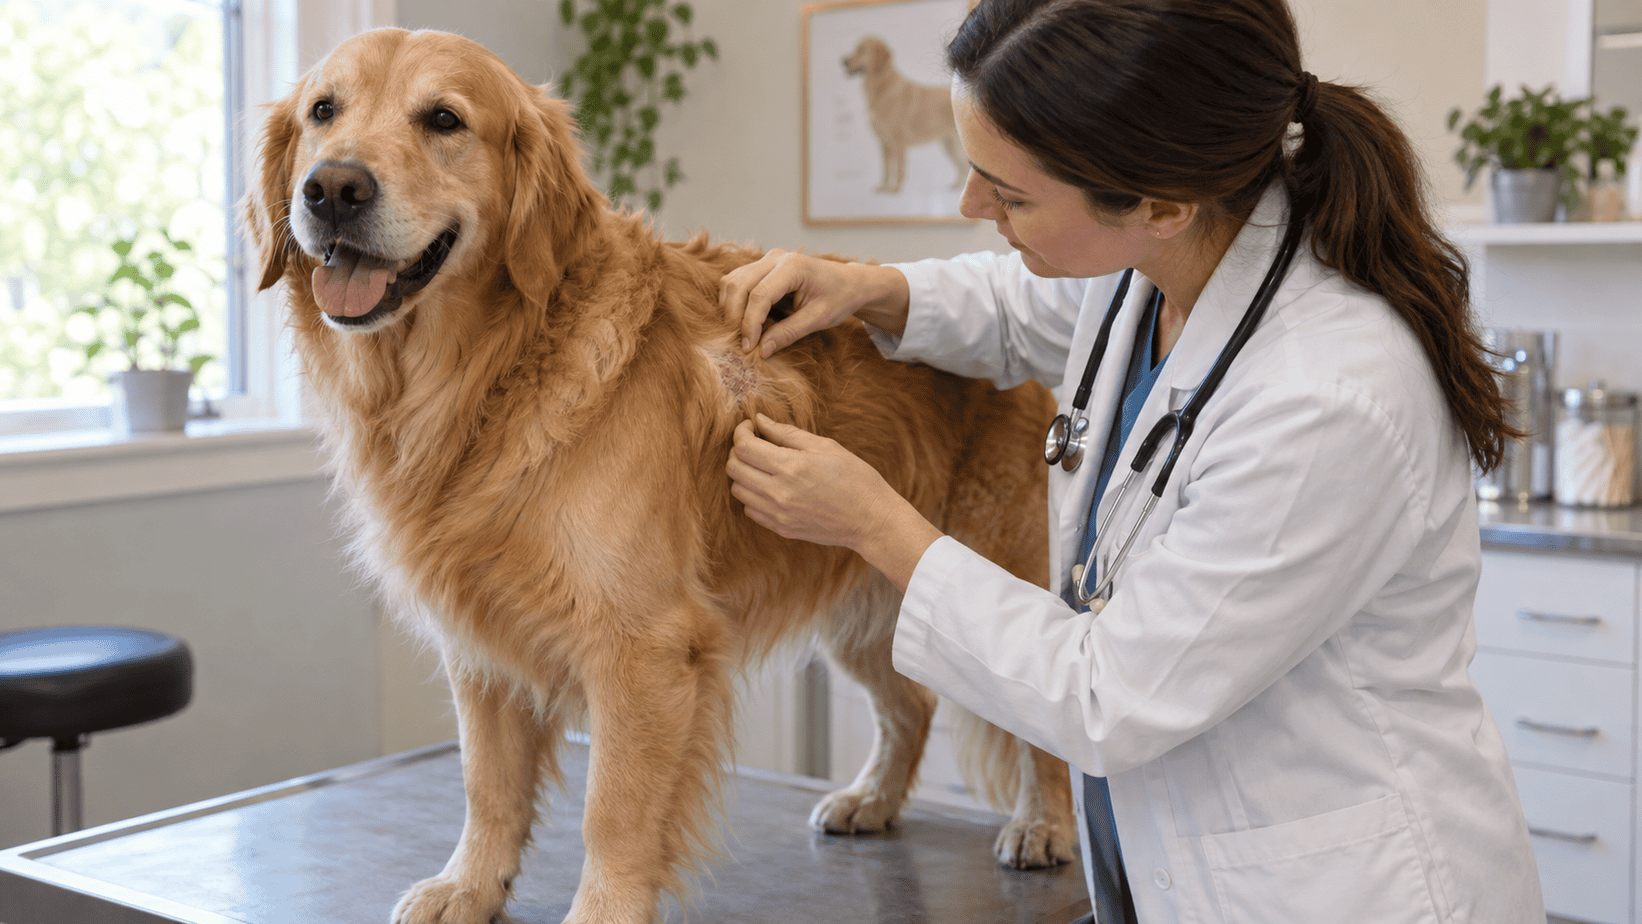
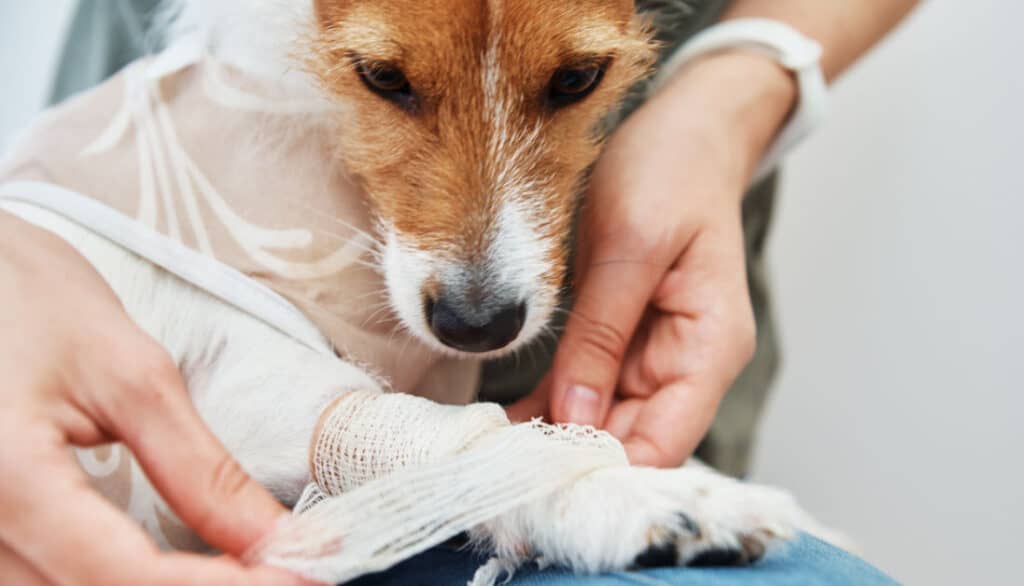
A deep, gaping, heavily contaminated, puncture, or bite wound needs veterinary assessment. The same is true when bleeding will not stop, material is embedded, a joint may be involved, or your dog seems weak or unusually painful. Saline can clean the surface while you arrange care, but it cannot show how much damage lies underneath.
For Your Dog’s Nose
A dog’s nose is not a wound to flush. Do not press the tip of a wound-wash bottle into a nostril or send a forceful stream into the nasal passages. If a veterinarian recommends saline drops or mist for a specific problem, use the exact product and technique they give you.
Nasal discharge can come from several causes, so repeated rinsing can hide a pattern without solving it. Seek prompt help for trouble breathing, a nosebleed that does not settle, facial swelling, a suspected grass awn or other foreign object, or persistent discharge from only one nostril. One-sided discharge and pawing at the face can be clues that a foreign object is present. [4]
For Your Dog’s Ears
There is an important difference between wiping the visible outer ear and filling the ear canal.
For a little dirt on the ear flap, you may moisten clean gauze with plain sterile saline and wipe only what you can easily see. You do not need to rinse saline off afterward. Blot away the excess and let the outer ear dry.
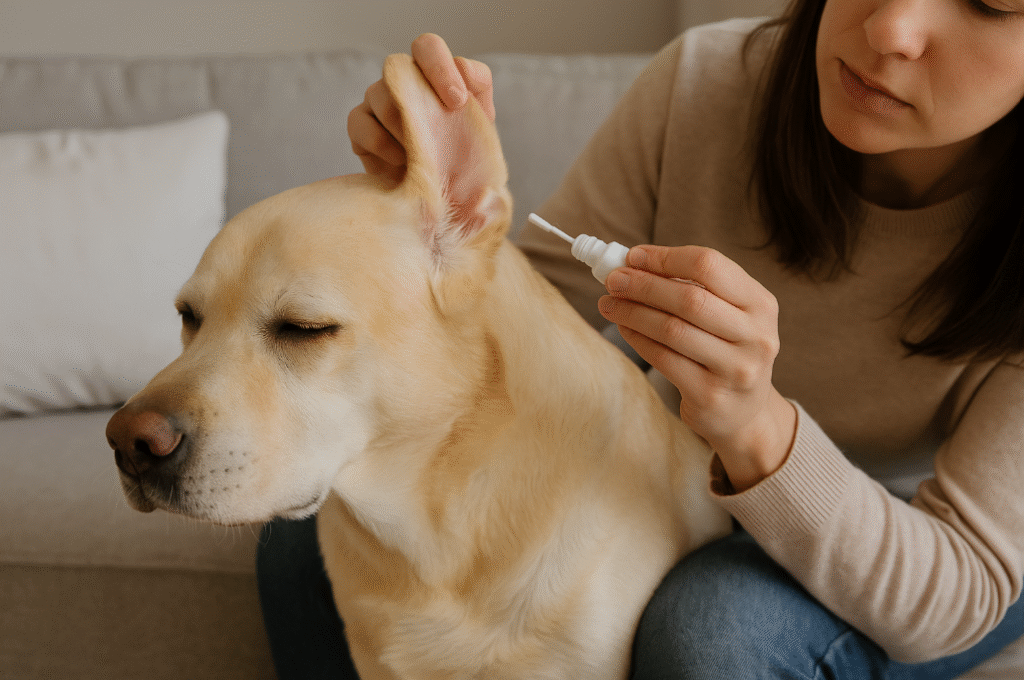
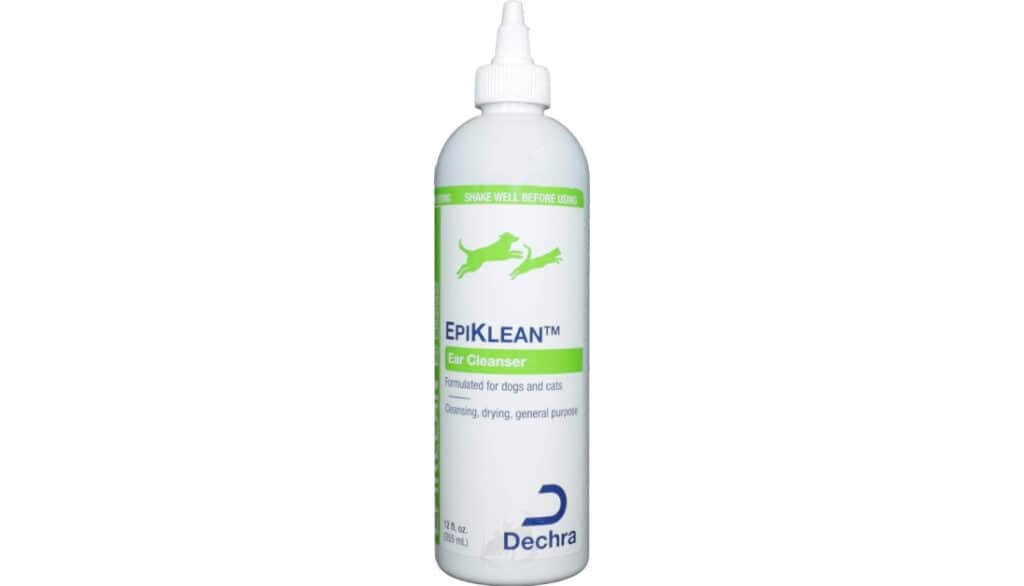
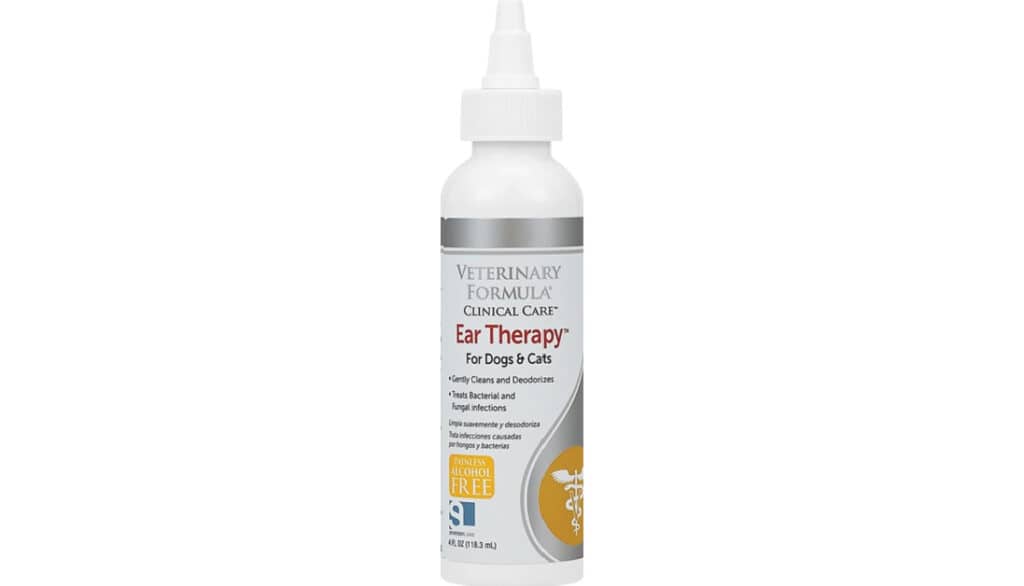
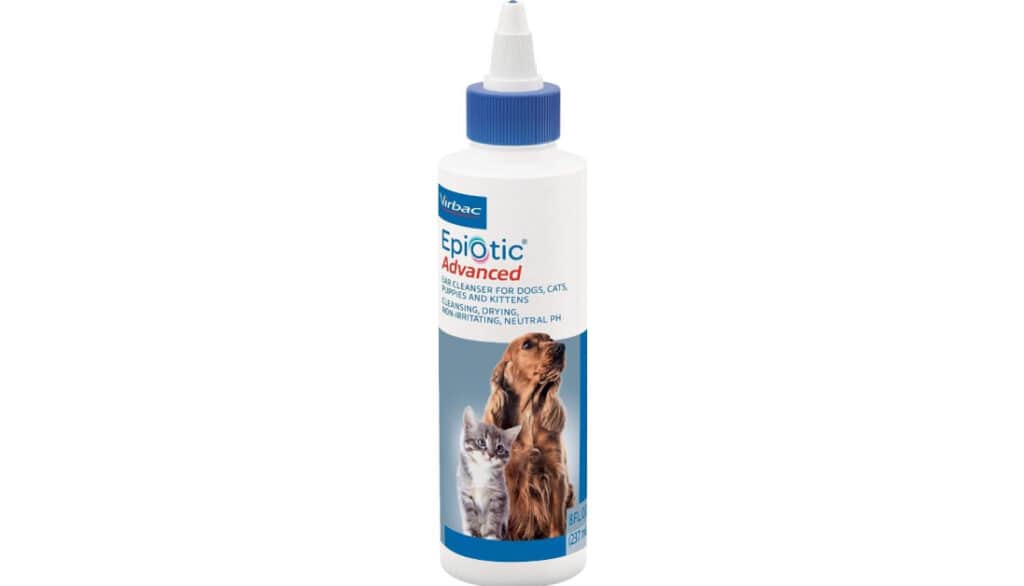
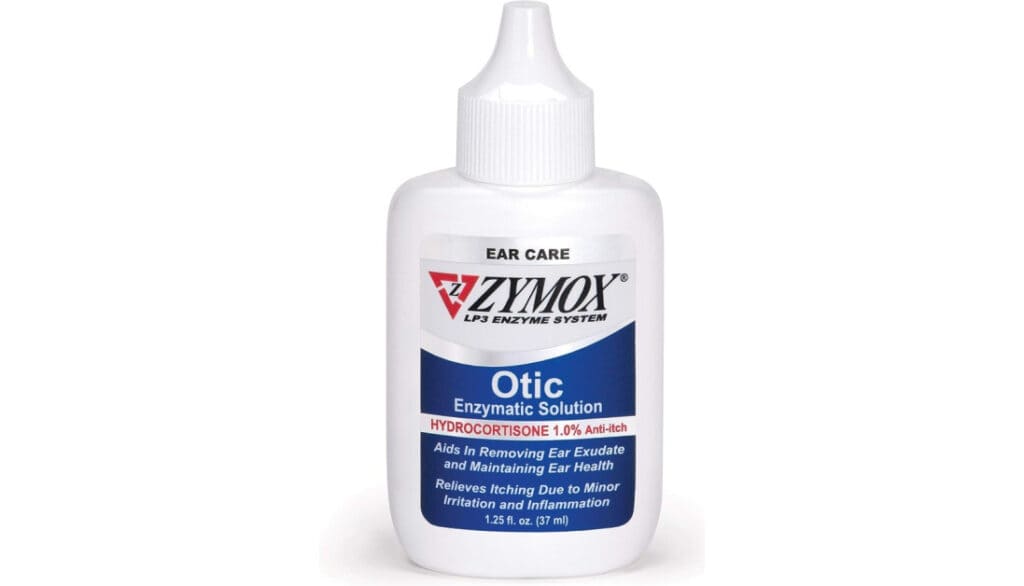
For the ear canal, use a canine ear-cleaning solution selected for your dog’s needs rather than assuming plain saline is the right cleaner. Ear products are chosen partly by the type of debris, the condition of the canal, and whether infection is present. Cornell University College of Veterinary Medicine recommends gentle technique, avoiding forceful pressure, allowing the dog to shake, and wiping only as far as a finger can comfortably reach. Cotton swabs can push material deeper. [5]
Stop if cleaning hurts. Redness, odor, discharge, head shaking, itching, or tenderness can signal infection or allergic ear disease. A head tilt, loss of balance, or sudden severe pain deserves prompt examination. [5]
What Saline Can and Cannot Do
Saline Can
Rinse loose dirt, dust, discharge, and small particles from a surface
Help clean a minor wound without the tissue toxicity associated with some harsh household products
Moisten gauze for wiping the visible outer ear or surrounding skin
Serve as one short first-aid step while you decide whether more care is needed
Saline Cannot
Reliably kill bacteria or work as an antiseptic
Cure an eye, ear, skin, or wound infection
Replace antibiotics, antifungal medicine, pain relief, or another prescribed treatment
Remove an embedded foreign object
Repair a corneal ulcer, deep wound, or damaged eardrum
Rehydrate a sick dog when given by mouth or injected at home
Make every product labeled “saline” safe for every body area
That distinction is the heart of safe use. Cleaning and treating are different jobs. Saline may support comfort and visibility, but the cause still matters.
Should You Make Saline at Home?
For eyes, the nose, and the ear canal, use a sealed sterile product intended for that body site. A homemade mixture is not sterile, even when the water was boiled, and kitchen measurements can produce the wrong concentration. It also becomes contaminated during mixing, cooling, storage, and handling.
For a minor skin wound, commercial sterile saline is still the most predictable choice. If it is not available, clean running tap water can also be used to wash away surface debris. Veterinary wound guidance accepts warm saline or tap water for lavage, so there is usually no reason to improvise and store a homemade mixture. [6]
Do not use a homemade preparation in an eye, nose, or ear canal. Do not nebulize or inject it. Do not keep a mixed jar on the counter for repeated use.
When Saline Is Not Enough
Eye Signs That Need Prompt Care
Arrange an examination when your dog is squinting, holding an eye closed, pawing at the face, or showing marked redness, swelling, cloudiness, blood, or light sensitivity. A chemical exposure, sharp injury, or object stuck in or around the eye is also urgent. Rinsing may be part of first aid, but it is not a diagnosis.
Wound Signs That Need Prompt Care
Get help for a bite, puncture, deep cut, gaping edge, heavy contamination, uncontrolled bleeding, embedded material, exposed deeper tissue, or a wound near the eye, chest, abdomen, or a joint. Increasing heat, swelling, odor, discharge, pain, or low energy can mean the problem is moving beyond simple first aid. Merck notes that dirty, infected, and puncture wounds often need additional medical management. [2]
Ear and Nose Signs That Need Prompt Care
Ear pain, strong odor, thick discharge, a head tilt, balance trouble, or sudden hearing changes should not be managed with repeated rinsing. For the nose, breathing trouble, facial swelling, ongoing bleeding, or one-sided discharge needs an examination. These signs give useful clues about the underlying problem.
A Whole-Dog View of Repeat Irritation
A rinse can be soothing, but recurring discharge or itching is your dog’s way of showing that something else may be going on. Repeated ear trouble, for example, may be connected to allergies, mites, moisture, anatomy, or infection. Cornell notes that ear infection often has an underlying condition and that overcleaning can also irritate healthy ears. [5]
The same whole-dog thinking helps with recurring eye discharge and slow-to-settle skin irritation. Notice when the problem started, whether it is one-sided, what makes it better or worse, and whether there are changes in food, environment, grooming, medications, or general health. Those patterns help a veterinarian look beyond the surface.
Gentle cleaning has a place. Endless cleaning without asking why does not.
Final Thoughts
Plain sterile saline can be a useful item in a dog first-aid kit. Choose 0.9% sodium chloride in packaging intended for the body site, use it as a gentle external rinse, and keep the container tip clean. Remember that saline washes. It does not disinfect, cure infection, or replace an examination when your dog is painful or the problem keeps returning.
If you are unsure, take a photo of the product label and the affected area before calling your veterinary team. That small step can make the conversation faster and more specific.
Frequently Asked Questions
Is Human Saline Safe for Dogs?
Plain, sterile 0.9% sodium chloride sold for eye wash or irrigation can be appropriate for limited external use in dogs. The label and intended use matter more than whether the package is marketed for people. Do not use medicated drops, decongestants, contact lens disinfectants, or an irrigation product as an injection.
Can I Use Contact Lens Solution in My Dog’s Eyes?
No. Contact lens cleaning and disinfecting solutions may contain ingredients that are not meant for direct use on a dog’s eye. ACVO specifically warns against contact lens solution and recommends sterile saline eye wash instead. [3]
Does Saline Need to Be Rinsed Out of a Dog’s Ear?
If you used a small amount on gauze to wipe the visible outer ear, no second rinse is needed. Blot excess moisture. If your veterinarian instructed you to place a solution in the canal, follow that product’s directions, let your dog shake, and wipe only the material you can easily reach. Stop if the ear is painful. [5]
Can Homemade Saline Be Used on Dogs?
A sealed sterile product is best, especially for eyes and other sensitive areas. Homemade mixtures are not sterile and can have the wrong concentration. For a minor skin wound when saline is unavailable, clean running tap water is a reasonable rinse. Do not use homemade saline in the eyes, nose, or ear canal, and never inject it. [6]
Can Saline Treat an Eye, Ear, or Wound Infection?
No. Saline can wash away loose debris, but it is not an antiseptic and does not treat bacterial, fungal, or other infections. If redness, pain, swelling, odor, or discharge persists or worsens, your dog needs an examination and treatment directed at the cause. [2]
This article provides general education and does not replace an examination, diagnosis, or individualized advice from your veterinarian. Contact a veterinary professional if you are concerned about your dog’s symptoms.
Lindsie Parks is the founder of Healthy Happy Dogs and holds a bachelor’s degree in biology. She brings more than 19 years of experience across veterinary medicine, animal welfare, practice leadership, nutrition, cold laser therapy, rescue work, and emergency animal response. Her goal is to give pet parents clear information, practical options, and greater confidence in the decisions they make for their animals.
*This page may include affiliate links, which means that if you make a purchase through one of the product links, we may receive a small commission. For full affiliate disclosure please see our disclaimer page.
When it comes to our furry friends, their health and wellbeing are always at the top of our priority list. Just as humans occasionally need medications to soothe ailments or prevent health issues, our pets sometimes require them too. One such medication that has stirred up discussions among pet parents is Omeprazole for dogs. Originally known for its use in humans to treat conditions like heartburn, acid reflux, and stomach ulcers, it’s no surprise that many are curious about its application in canine care. But is it safe? Is it the same formulation we take? And are there better alternatives?
As a devoted pet owner, you deserve clear, accurate answers. This comprehensive guide aims to delve deep into the subject, providing insights from a vet’s perspective on the uses, dosage, side effects, and even alternative treatments for your beloved pooch. Let’s embark on this informative journey together, ensuring that our four-legged family members receive the best care possible.
Is Omeprazole for Dogs Safe?
Navigating the world of medications for our canine companions can sometimes feel like walking through a maze. One turn leads to promising benefits, while another might lead to cautionary tales. So, where does Omeprazole fit in this labyrinth of dog health?
Omeprazole, commonly recognized in human medicine as a go-to remedy for various gastrointestinal issues, has indeed found its place in veterinary care. But, like all medications, it’s not a simple “one size fits all” scenario.
For many dogs, Omeprazole acts as a godsend. Administered under the watchful eye of a vet, it can alleviate painful symptoms, improve quality of life, and bring relief from conditions like gastric ulcers or acid reflux. When you use it correctly and follow the recommended dosages and guidelines, it’s generally safe for canine use.
However, there’s a catch – emphasis on the “when used correctly.” Like any medication, potential misuse or overuse can lead to complications. This is why it’s paramount to consult with a veterinarian before administering Omeprazole or any new medication to your dog. They can offer insights tailored to your dog’s unique health profile, considering factors like age, weight, existing health conditions, and other medications.
In summary, while Omeprazole can be a beneficial tool in a vet’s arsenal for treating specific canine conditions, its safety largely hinges on responsible usage and professional guidance.After all, as we journey through the intricate maze of pet healthcare, it’s always best to have an expert guide by our side.
Omeprazole for Humans vs. Dogs: Is There a Difference?
Have you ever stood in front of your medicine cabinet, eyed a pill bottle, and thought, “Could this work for my pup?” Especially when you see certain medications, like Omeprazole, in both human and veterinary contexts. Let’s demystify this together.
At its core, the active ingredient in Omeprazole stays the same whether packaged for humans or dogs. Both designs aim to reduce stomach acid production and treat conditions like acid reflux or ulcers.So, in essence, the basic drug is the same.
However – and this is a big however – there are nuances to consider. The formulation or the additional inactive ingredients in human medications might differ from those in veterinary versions. These seemingly minor differences can be significant for our pets. For instance, certain additives harmless to us might be intolerable or even harmful for dogs.
Moreover, the concentration or dosage available in human Omeprazole might not align with what’s appropriate for our four-legged friends. This is where things can get tricky and why a simple “pill-splitting” method isn’t always advisable.
The takeaway? While the core of Omeprazole remains consistent across the board, the devil is in the details. Before raiding our medicine cabinets with the noble intention of helping our pets, it’s crucial to consult with a veterinarian. They’ll provide insights on safe usage and ensure our good intentions don’t inadvertently lead to unwanted complications.
Uses of Omeprazole in Dogs
Ah, the versatile world of Omeprazole! Just as this little pill carves a niche in human medicine, it finds various uses in the realm of canine care. Let’s uncover some of the most common scenarios where our furry friends might benefit from this medication.
Gastric Ulcers
What are they? Simply put, gastric ulcers form as sores on a dog’s stomach lining. They can be a real bother, causing discomfort and pain for our pets.
How does Omeprazole help? Omeprazole acts as a stomach shield. By reducing the amount of acid the stomach produces, it allows ulcers the chance to heal and prevents them from worsening. It’s like giving the stomach a little breather.
Acid Reflux (GERD)
What is it? Similar to the heartburn humans often complain about after a spicy meal, dogs can experience acid reflux, too. This is when stomach acid irritates the esophagus, leading to symptoms like coughing, gagging, or even vomiting.
How does Omeprazole help? By acting as an acid suppressant, Omeprazole ensures that there’s less acid available to reflux into the esophagus. Think of it as turning down the volume on acid production, making meal times and post-meal lounging more comfortable for our pups.
Preventative Measures
Why consider it? Vets sometimes prescribe medications or administer treatments to dogs that might raise the risk of stomach issues. In these cases, they might introduce Omeprazole as a precaution.
How does Omeprazole help? By keeping acid levels in check, Omeprazole can act as a protective layer, ensuring that other necessary treatments don’t come at the cost of stomach health.
Delving into the world of dog health can sometimes feel like decoding a complex puzzle. But as we understand each piece like Omeprazole, we equip ourselves better to ensure our furry companions lead comfortable, happy lives. Remember, always work closely with your vet to determine the best course of action for your pet’s unique needs.
Side Effects of Omeprazole in Dogs
Navigating the realm of medications is a bit like setting sail on open waters. The destination is clear (better health!), but unexpected waves can arise along the journey. In the case of Omeprazole, while it offers many benefits, it’s essential to be aware of potential side effects that might surface. Let’s examine these closely so you can steer the ship with confidence.
Common Side Effects of Omeprazole
While not every dog will experience these, it’s good to have them on your radar:
Digestive Upset: This might manifest as diarrhea, vomiting, or even flatulence.
Loss of Appetite: You might notice Fido is less enthusiastic about mealtime. It’s a temporary reaction some dogs have while adjusting to the medication.
Lethargy: Just as we might feel a bit off after starting a new medication, dogs can too. They might seem a bit more tired or less playful initially.
Less Common, but Serious Side Effects of Omeprazole
These are rarer, but it’s crucial to be aware and consult your vet if you spot them:
Blood in Stools or Vomit: This is a sign that something isn’t sitting right, literally. It’s essential to address this promptly.
Severe Diarrhea: An occasional upset tummy is one thing, but persistent diarrhea needs attention.
Neurological Issues: If your pup seems unusually dizzy, uncoordinated, or has tremors, it’s a clear sign to get in touch with your veterinarian.
While the list might seem a tad daunting, remember that many dogs take Omeprazole without any hitches. The goal isn’t to alarm but to arm you with knowledge. Every dog is unique, and what works seamlessly for one might require adjustments for another. Always maintain open communication with your vet and monitor your dog’s behavior and health closely when introducing any new medication. Being proactive ensures smooth sailing, even on the medicinal seas!
How to Give Omeprazole to Your Dog
Let’s face it – administering medicine to our canine companions can sometimes feel like a mission. When dogs wriggle, suddenly avoid treats, or spit out a pill you thought they swallowed, you need a mix of patience and technique to handle the task. Here’s a step-by-step guide on how to make the Omeprazole-giving process smoother for both you and your fur-baby.
Step-by-step Administration of Omeprazole
Preparation: Ensure you have the correct dosage ready. Always double-check the pill or liquid measurement before administering.
Use Pill Pockets: If you’re using pill form, consider pill pockets – these tasty treats can be a game-changer. Hide the pill inside, and most dogs will gobble it up, none the wiser.
Liquid Form: If your vet has prescribed a liquid form of Omeprazole, use a syringe or dropper. Ensure your dog is calm, gently open their mouth, and administer the liquid to the side of the cheek, not directly down the throat to prevent choking.
Follow with a Treat: Positive reinforcement works wonders. After successfully administering the medicine, give your dog their favorite treat. This not only rewards them but also ensures that the pill goes down smoothly.
Monitor After Administration: Keep an eye on your dog for a few minutes after giving the medicine. This ensures they don’t spit it out and helps in spotting any immediate adverse reactions.
Omeprazole Dosing Chart For Dogs
Please note that the following is a general guideline. Always use the specific dosage recommended by your vet:
Remember, giving medication is a mix of art and science. While you aim for precision in dosage, the method might need some creative adjustments based on your dog’s temperament and preferences. Always prioritize safety, create a calm environment, and of course, give cuddles after completing the task to make the process smoother for next time!
Omeprazole Alternatives & Dr. Candy’s Recommendations
It’s worth exploring alternative routes, especially when we have expert guidance to light the way. Dr. Candy, with her vast experience and dedication to animal health, has some noteworthy recommendations to consider:
Famotidine
What is it? People often recognize Famotidine by its commercial name, Pepcid, as another acid-reducing medication.
Why I recommend it: For some dogs, Famotidine might be gentler on the system, offering similar benefits without some of the side effects associated with Omeprazole.
Usage Tips: As with any medication, it’s essential to consult with a vet regarding dosage and suitability for your specific pet.
Prilosec
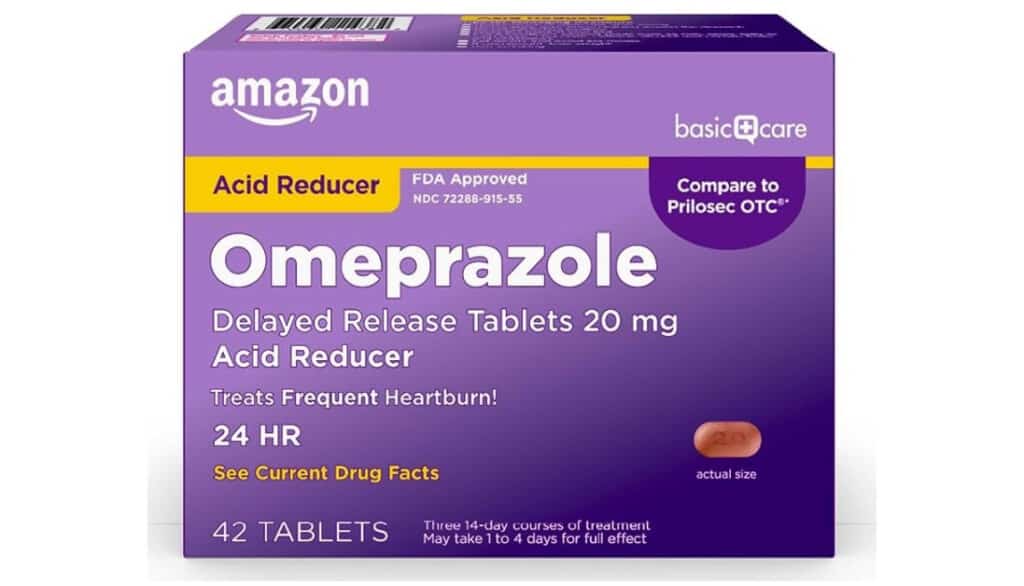
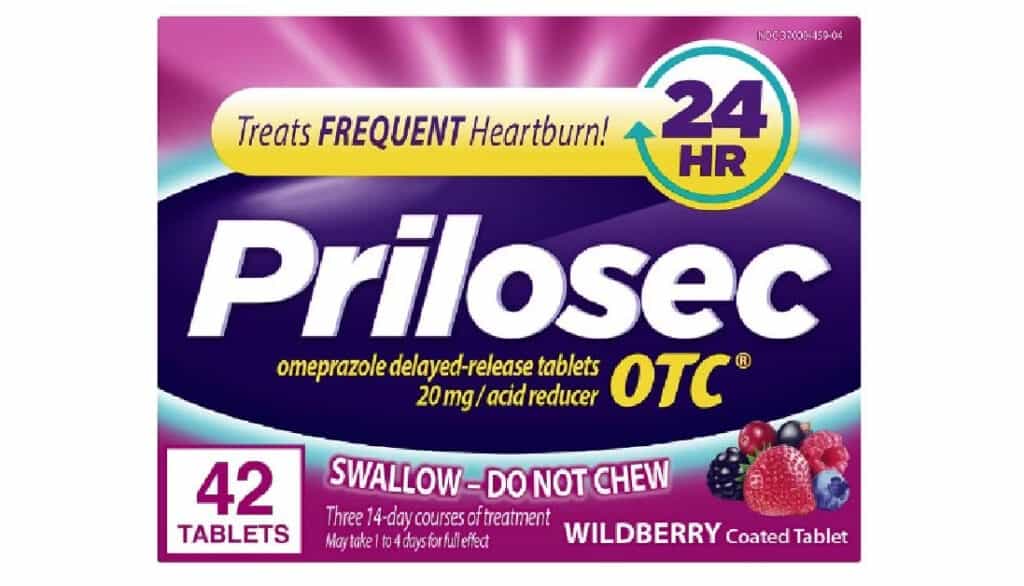
What is it? A bit confusing, right? While Omeprazole and Prilosec might seem interchangeable, Prilosec is actually a brand name for Omeprazole.
Why I recommend it: The brand-specific formulation might sometimes offer a more consistent therapeutic effect due to its proprietary makeup.
Usage Tips: Always follow prescribed doses and watch for any reactions, especially when switching from generic Omeprazole to Prilosec.
Slippery Elm
What is it? Venturing into the realm of natural remedies, people have used the herb slippery elm for centuries to treat various ailments.
Why I recommend it: For dogs that have minor digestive issues or for those who prefer a more holistic approach, slippery elm can soothe the digestive tract and reduce inflammation.
Usage Tips: Since it’s a natural remedy, it’s crucial to source high-quality products. And, as always, discuss with your vet before introducing it to your dog’s regimen.
Health isn’t a one-size-fits-all approach. Every dog is a unique individual, and what works wonders for one might require tweaking for another. By staying informed, consulting experts, and always prioritizing our pet’s wellbeing, we can confidently navigate the multiple avenues of animal healthcare.
Conclusion
Journeying through the world of canine health can often feel like a maze, with its twists, turns, and overwhelming options. But with the right information, a keen eye, and a loving heart, we can chart a course that leads to the well-being of our four-legged family members. Omeprazole, like many other tools in our pet care arsenal, holds the promise of relief and comfort for our dogs when used wisely. However, as with all health decisions, a close partnership with your veterinarian ensures that the choices we make are in the best interests of our furry companions.
Navigating pet health isn’t just about medications or treatments; it’s a testament to the lengths we’ll go to ensure our pets lead the healthiest, happiest lives. Whether you’re exploring Omeprazole or seeking alternative routes, the compass that guides you should always be love, care, and informed choices. Here’s to many more tail-wagging, happy moments with your loyal companion!
Frequently Asked Questions
How is Omeprazole useful?
Omeprazole is a medication that is used to prevent and/or treat stomach ulcers. The FDA (U.S. Food & Drug Administration) has approved this drug for use in horses and humans. The FDA allows veterinarians to prescribe and use products containing this drug in other animal species in certain situations. You and your veterinarian can discuss why this drug is the most appropriate choice.
How long until I will know if Omeprazole is working, and how long will the effects of this medication last?
This medication should help your animal feel better within 1 to 2 days. Your animal’s clinical signs should improve after that time. The effects of this medication are short-lived, meaning they will stop working within 24 hours, although the benefits may be prolonged if your animal has decreased kidney and/or liver function.
If my animal gets too much of Omeprazole (an overdose), what should I do?
Usually, overdoses of omeprazole are not serious, but if you know or think your animal got too much of this medication and they are showing adverse effects, contact your veterinarian or an animal poison control center for further advice. Animal poison control centers that are open 24 hours a day include: Pet Poison HELPLINE (855-764-7661) and ASPCA Animal Poison Control Center (888- 426-4435); a consultation fee is charged for these services.
How should Omeprazole be given?
– For this medication to work, give it exactly as your veterinarian has prescribed. Do not cut or break tablets unless instructed to by your veterinarian or pharmacist. It’s a good idea to always check the prescription label to be sure you are giving the drug correctly. – Omeprazole should be given about 30 minutes before a meal, generally the first meal of the day. If your animal vomits or acts sick after getting it on an empty stomach, give it with the meal instead. If vomiting continues, contact your veterinarian.
What should I do if I miss giving a dose of Omeprazole?
If you miss a dose, wait and give the next dose when it is usually time to do so. Do not double-up doses or give an extra dose.
What other information is important for Omeprazole?
– Omeprazole is available OTC (over-the-counter, without a prescription). Do not give omeprazole (or any other OTC medications) to your animal without first consulting a veterinarian. – Do not change or switch dosage forms without first consulting with a veterinarian or pharmacist, as the dose may not be the same. – Use of this drug may not be allowed in certain animal competitions. Check rules and regulations before entering your animal in a competition while this medication is being administered.
A note about your dog’s health
This article provides general education and does not replace an examination, diagnosis, or individualized advice from your veterinarian. Contact a veterinary professional if you are concerned about your dog’s symptoms.
Dr. Candy Akers earned her Doctor of Veterinary Medicine degree from Oklahoma State University in 2009 after completing undergraduate studies at the University of Delaware. Her experience includes companion-animal nutrition, chronic disease, allergies, autoimmune conditions, cold laser therapy, wildlife rehabilitation, and emergency wildlife response. She combines conventional veterinary knowledge with a whole-animal perspective to help pet parents understand their options and recognize when individualized veterinary care is needed.
*This page may include affiliate links, which means that if you make a purchase through one of the product links, we may receive a small commission. For full affiliate disclosure please see our disclaimer page.
As our furry friends age or face health challenges, navigating the world of veterinary medications can be overwhelming for dog owners. Butorphanol, a name that might sound intimidating at first, is one such medication you might encounter, especially if your dog deals with specific respiratory issues or pain. But what exactly is butorphanol? Is it safe for your loyal companion? And how does it compare to human medications? Designed to shed light on these questions, this guide dives deep into the world of butorphanol for dogs. From its uses and dosage to potential side effects and natural complementary treatments, we’re here to provide a comprehensive overview. So, take a deep breath (no pun intended) and let’s embark on this informative journey, ensuring your pup gets the best care possible!
Is Butorphanol Safe for Dogs?
When it comes to the health and well-being of our beloved pets, safety is always a paramount concern. Butorphanol, commonly prescribed in the veterinary world, is no exception to the scrutiny every responsible dog owner should apply when introducing new medications.
Safety Profile
At its core, butorphanol is an opiate analgesic, which means it relieves pain. Veterinarians prescribe it for various reasons, from cough suppression to pain relief post-surgery. When used appropriately and guided by a professional, dogs can safely take butorphanol. It’s worth noting, however, that like all medications, the key lies in the correct dosage and careful monitoring.
Precautions
While butorphanol is generally considered safe, there are precautions that should be heeded:
Age and Health: Older dogs or those with kidney or liver problems may metabolize drugs differently. Always inform your vet about any underlying health conditions your pet might have.
Interactions: Butorphanol can interact with other medications. Ensure your vet knows about all other drugs or supplements your dog is taking.
Sensitivity: Some dogs might be more sensitive to the effects of butorphanol, experiencing more pronounced side effects. Keeping a close watch during the initial stages of administration can be crucial.
Risk of Butorphanol Overdose
Like any medication, there’s a risk of overdose with butorphanol. Administering more than the recommended dosage can lead to complications. Symptoms can include difficulty breathing, extreme drowsiness, or even loss of consciousness. If you suspect an overdose or observe any alarming reactions, seek emergency veterinary care immediately.
To sum up, butorphanol can be safe for dogs when used judiciously and under the guidance of a veterinarian. Always ensure you’re administering the correct dose, be aware of potential interactions, and monitor your dog closely for any adverse reactions. Your dog’s health and safety are paramount, and staying informed is the first step in ensuring they receive the best care.
Is Butorphanol for Dogs the Same as for Humans?
Navigating the maze of medications available for both humans and pets can sometimes lead to confusion. A question many pet owners ponder is whether the drugs given to their furry friends are the same as those prescribed to humans. When it comes to butorphanol, there’s a story to tell.
The Basic Compound
Butorphanol, at its molecular level, remains consistent whether it’s meant for humans or dogs. In essence, the active ingredient that provides its therapeutic effect is the same. Doctors prescribe butorphanol to both humans and dogs for its analgesic (pain-relieving) and antitussive (cough-suppressing) properties.
Formulation Differences
While the core compound is consistent, the formulation might differ. Human medications often come with additional ingredients or concentrations designed specifically for human physiology. These might not be safe or effective for dogs. For instance, a pill designed for humans might contain a coating or other ingredients that could be harmful or less digestible for dogs.
Dosage and Strength
The strength and dosage of butorphanol will differ greatly between humans and dogs. What’s considered a safe and effective dose for a human could be dangerous for a dog and vice versa. This difference is because of variations in metabolism, size, and physiology between the species.
Regulations and Approvals
Drugs intended for humans go through a different set of regulatory approvals than those for animals. Even if the active ingredient remains the same, testers and regulators approve the process differently to ensure safety and efficacy for the target audience, whether two-legged or four-legged.
The Bottom Line
While the base compound of butorphanol remains the same for both humans and dogs, it’s imperative not to interchange or substitute one for the other. Always use medications precisely as prescribed by the respective medical or veterinary professional. If you ever run out of your dog’s prescription or mistakenly believe that the human version could be a temporary replacement, resist the urge and consult your vet. It’s always better to be safe and ensure our pets receive treatments tailored specifically to their needs.
Dogs, much like humans, can suffer from a range of ailments and conditions that require medical intervention. Butorphanol is a versatile medication often prescribed in the veterinary realm. Let’s discuss the primary reasons veterinarians turn to butorphanol when treating man’s best friend.
For Cough
Mechanism of Action: Butorphanol acts as an antitussive, meaning it suppresses the urge to cough. It affects certain parts of the brain to reduce the cough reflex.
Applications: Dogs with conditions like kennel cough or other respiratory diseases that cause persistent coughing can use it. However, it’s essential to treat the underlying cause alongside symptom management.
For Collapsed Trachea
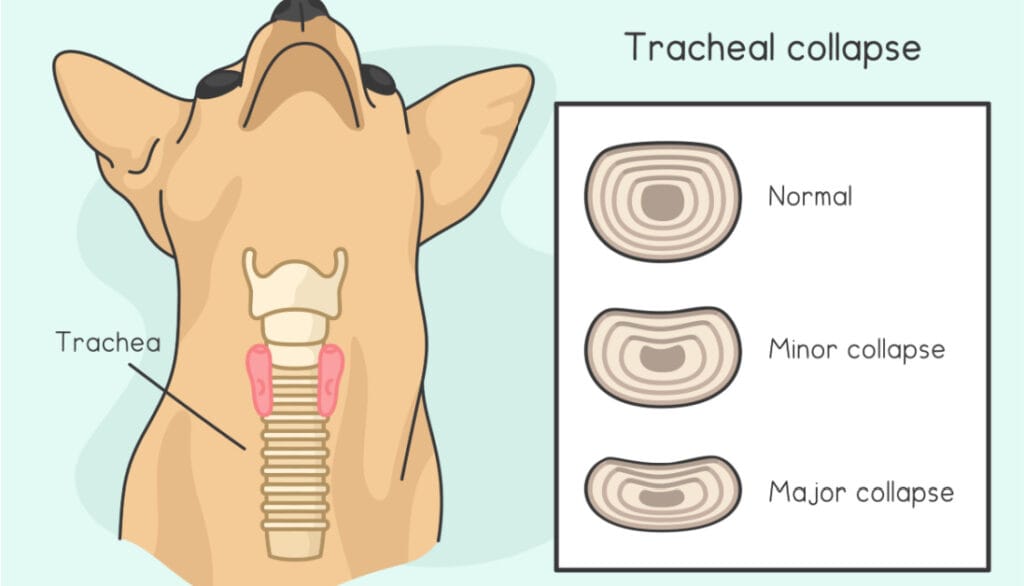
What is a Collapsed Trachea?: The trachea (windpipe) weakens or collapses in a condition called a collapsed trachea, causing breathing difficulties for dogs and often producing a characteristic “goose honk” cough.
How Butorphanol Helps: While butorphanol won’t treat the condition itself, it can alleviate the symptoms. By suppressing the cough reflex, it provides relief to dogs suffering from the discomfort and distress of frequent coughing.
Pain Relief
Types of Pain: Butorphanol is primarily an opiate analgesic, making it effective against various pain types, including post-operative pain, injury-induced pain, or chronic pain from conditions like arthritis.
How it Works: The drug works by acting on certain receptors in the brain, altering the perception of pain. It’s especially useful for short-term pain management, given its relatively short duration of action.
Comparison to Other Analgesics: While effective, butorphanol might not be as potent as some other opiates. However, its safety profile and reduced risk of side effects can make it a preferred choice in certain scenarios.
Butorphanol boasts a range of uses, from cough suppression to pain management. However, it’s crucial to remember that while it might alleviate symptoms, it might not address the root cause of some conditions, like a collapsed trachea. Always consult with a veterinarian regarding the best treatment plan tailored for your pet’s unique needs, ensuring they lead a comfortable and happy life.
Butorphanol Dosage Chart For Dogs
Remember, you must base the dosage of butorphanol on the dog’s weight, age, health status, and the condition you are treating. Here are some possible dose ranges for butorphanol in dogs:
Dog’s Weight
Recommended Butorphanol Dosage
Under 10 lbs
0.1 – 0.5 mg/kg
10 – 30 lbs
0.2 – 0.6 mg/kg
30 – 60 lbs
0.3 – 0.7 mg/kg
Over 60 lbs
0.4 – 0.8 mg/kg
**This table is entirely illustrative and should not be taken as medical advice. Always consult a veterinarian to determine the correct dosage of butorphanol for your dog based on its specific needs and circumstances.
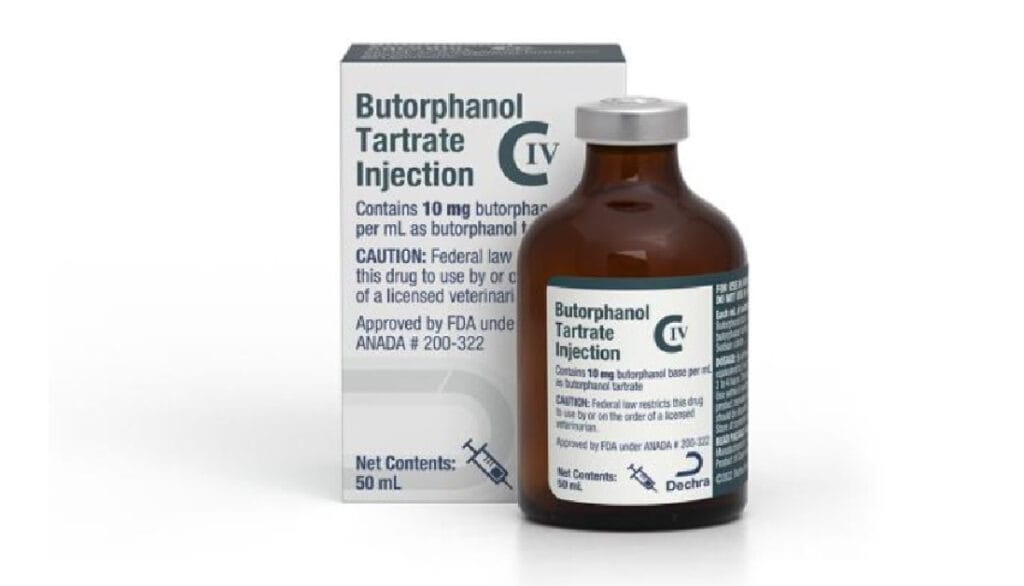
Forms of Butorphanol
Butorphanol’s versatility isn’t just in its range of uses but also in the different formulations it comes in. Drug manufacturers create each form with specific applications and advantages to ensure the best possible care for dogs based on their unique needs. Let’s dive into the various forms of butorphanol and their respective characteristics.
Liquids (Oral Solutions)
Description: This form is typically a liquid solution meant to be administered orally. It may come with a dropper or syringe for accurate dosing.
Advantages:
Easier administration for dogs that might resist tablets.
Faster absorption and onset of action.
Can adjust the dose with precision.
Considerations:
Shorter shelf life than some other forms.
Some dogs might not like the taste, requiring it to be mixed with food.
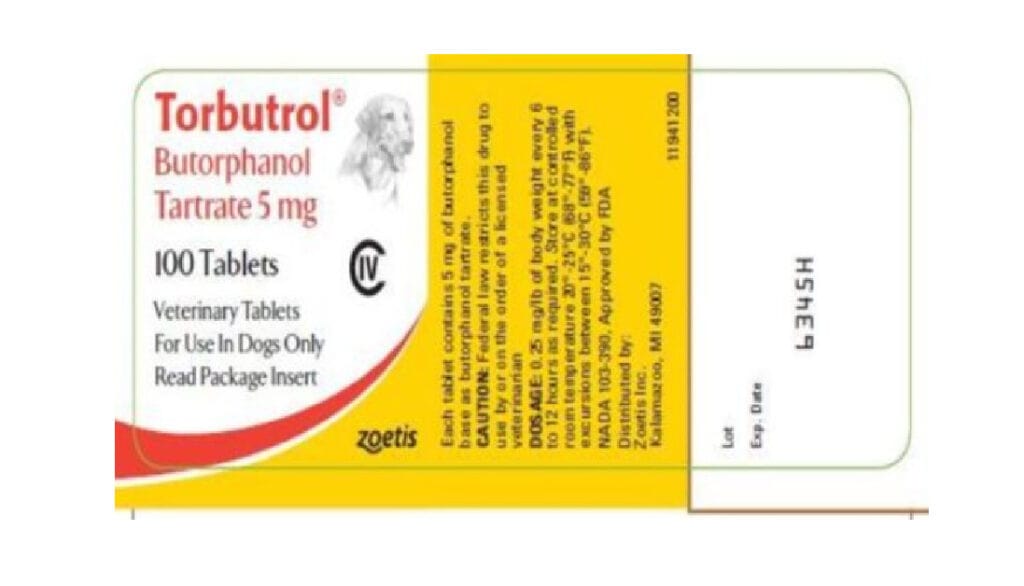
Oral Tablets/Capsules
Description: These are traditional solid forms, either as a tablet or encapsulated powder.
Advantages:
Longer shelf life.
Convenient for travel or on-the-go dosing.
Considerations:
Some dogs might resist taking tablets or capsules.
Breaking tablets for accurate dosing can sometimes result in uneven amounts.
Injections (Injectable Solution)
Description: This is a liquid form meant to be administered through an injection. It is often used in veterinary clinics or hospitals.
Advantages:
Immediate and potent action.
Useful for dogs that can’t take oral medications due to vomiting or other reasons.
Ensures complete dosage (no loss as might happen with oral solutions if the dog spits it out).
Considerations:
Requires a trained individual for administration.
Some dogs might experience discomfort at the injection site.
Not as convenient for regular at-home administration.
Choosing the right form of butorphanol depends on the dog’s specific condition, the owner’s comfort level with administration, and the dog’s own preferences or behaviors. It’s always important to discuss with a veterinarian the most suitable form for your pet, ensuring that they not only get the medication they need but also in a manner that causes the least stress or discomfort.
Side Effects of Butorphanol
Butorphanol, like all medications, can have potential side effects. While it’s a valuable drug for managing pain and other conditions in dogs, it’s essential for pet owners to be aware of its possible side effects to ensure the safety and well-being of their canine companions. All dogs may not experience these side effects, and many of them might be mild, but taking a proactive step in pet care requires staying informed.
Common Side Effects:
Sedation: One of the most frequently observed side effects. Dogs might seem drowsy or less alert.
Ataxia: This refers to uncoordinated or stumbling movements, often as a result of the drug’s sedative effect.
Decreased Heart Rate: Some dogs might experience a drop in their heart rate.
Decreased Respiratory Rate: A potential decrease in the number of breaths a dog takes per minute.
Vomiting and Diarrhea: Gastrointestinal upset can sometimes occur.
Increased Urination: Some dogs might urinate more frequently than usual.
Less Common Side Effects:
Appetite Changes: This could be either an increased or decreased appetite.
Agitation or Anxiety: Though it’s a sedative, some dogs might react oppositely and become restless.
Digestive Issues: Beyond vomiting and diarrhea, some dogs might experience gas or bloating.
Changes in Vision: Rare, but some dogs might have dilated pupils or seem to have altered vision.
Severe Side Effects (Seek Veterinary Care Immediately):
Difficulty Breathing: If your dog seems to be struggling to breathe, seek help right away.
Allergic Reaction: Symptoms might include swelling, intense itching, hives, or difficulty breathing.
Prolonged Sedation: If your dog seems excessively drowsy and doesn’t respond to stimuli, it might be a cause for concern.
Collapse: Any sudden weakness or collapse warrants immediate veterinary attention.
Interactions:
It’s also important to note that butorphanol can interact with other medications. If your dog is on any other treatment, whether it’s prescription or over-the-counter, always inform your veterinarian.
While the above list might seem intimidating, it’s important to understand that many dogs tolerate butorphanol well, and the benefits often outweigh potential risks. Regularly monitor and openly communicate with your veterinarian to catch and manage any side effects effectively early on.
Remember, every dog is unique, so it’s about finding the right balance for your pet’s individual needs. Always prioritize their comfort and well-being, and don’t hesitate to reach out to professionals when in doubt.
How Long Does Butorphanol Last?
Understanding the duration of action of a medication is vital. It not only dictates the dosing frequency but also helps pet owners anticipate the window of relief for their pets and be aware of potential side effects. When it comes to butorphanol, its duration in the system is an essential aspect of its pharmacological profile.
Duration of Action
Butorphanol, when administered to dogs, generally has a relatively short duration of action. On average, its analgesic (pain-relieving) effects last:
Oral administration: Effects might be noticed within 30 minutes to an hour after dosing, and the pain-relieving properties often last between 2 to 4 hours.
Injectable form: The onset is quicker, usually within minutes, but its duration is typically in the same 2 to 4-hour range.
Factors Influencing Duration
Several factors can influence how long butorphanol lasts in a dog’s system:
Metabolism: Just like humans, dogs have individual metabolic rates. Some dogs might process medications faster or slower than the average.
Age: Older dogs might have a slower metabolism, meaning drugs could stay in their system for a longer period.
Health Conditions: Liver and kidney function play a pivotal role in drug processing. Dogs with compromised organ function might metabolize drugs differently.
Other Medications: If your dog is on other medications, these can potentially affect the metabolism of butorphanol.
Clinical Implications
Because butorphanol has a relatively short duration of action, you might need to administer it more frequently than some other pain relievers. This frequent dosing can be both an advantage (flexibility in adjusting dosages) and a limitation (more frequent dosing might be challenging for some pet owners).
While butorphanol is effective in providing relief, its short-lived action necessitates a clear understanding and commitment to dosing schedules. Always monitor your dog’s reaction post-administration to gauge the effectiveness and duration in real-world scenarios. And, as always, consult with your veterinarian about any concerns or if you feel the medication’s effects aren’t lasting as long as expected.
How to Give Butorphanol to Your Dog
Administering medication to your pet can sometimes be a daunting task, especially if your furry friend is anxious or uncooperative. But with the right techniques and a calm approach, giving butorphanol to your dog can become a straightforward process. Here’s a guide to help you through it:
1. Read the Prescription Carefully
Before anything else, always ensure you’re clear about the dosage, frequency, and any specific instructions from the veterinarian.
2. Prepare the Medication
Oral Solutions: If it’s a liquid form, shake the bottle well (if instructed), and draw up the required amount using a syringe or dropper.
Tablets/Capsules: Have the pill ready. If your dog is reluctant to take tablets, consider a pill pocket or wrapping it in a tasty treat.
3. Choose a Calm Environment
Select a quiet spot with minimal distractions. This will help keep your dog calm and make the process smoother.
4. Positioning
For Oral Solutions/Tablets: Hold your dog’s muzzle gently and tilt its head slightly back. Using your other hand, insert the dropper between the cheek and back teeth or place the pill as far back on the tongue as possible. Close the mouth and gently hold it shut while encouraging swallowing by massaging the throat.
For Injections: A veterinarian or trained professional typically performs this. If a professional instructs you to administer injections at home, make sure you receive proper training in the technique and always select a different site for each injection.
5. Positive Reinforcement
After administering the medication, reward your dog with praise, a gentle petting session, or a small treat (if allowed). This positive reinforcement can make future administrations easier.
6. Monitor for Reactions
Always keep an eye on your dog after giving medication to ensure there’s no adverse reaction. Look for signs of distress, excessive drooling (for oral medications), or any other unusual behavior.
7. Storage
Store butorphanol as advised by the veterinarian or as per the label. You should generally store it in a cool, dry place, keep it away from sunlight, and ensure it’s out of reach of children and pets.
8. Missed Doses
If you miss giving a dose, administer it as soon as you remember. However, if it’s close to the next dose, skip the missed one and continue with the regular schedule. Never give a double dose.
9. Seek Assistance for Difficulties
If your dog consistently resists taking the medication or if you feel unsure, don’t hesitate to consult your vet. They might offer alternative solutions or techniques.
Administering butorphanol, like any medication, requires patience, consistency, and care. Familiarizing yourself with the process and ensuring a positive experience for your dog will make the task easier over time. Remember, the goal is to make your pet comfortable and healthy, so always approach the situation with calmness and compassion.
Complementary Natural Products To Butorphanol That You Can Add To Your Treatment Plan
Dr. Candy’s Recommendations
Incorporating natural products alongside traditional medicines like butorphanol can offer holistic care for your dog, potentially boosting the therapeutic effects or even offering relief from some side effects. However, always consult with a veterinarian before introducing any new product into your dog’s regimen to ensure safety and compatibility. Here’s a list of natural products and their potential benefits:
1. Breathe Essential Oils
Description: People believe that certain essential oils promote respiratory health and alleviate congestion.
Potential Benefits:
Eucalyptus and peppermint oils can help clear nasal passages.
Lavender can offer calming effects, reducing stress.
Caution: Ensure any essential oil used is pet-safe. Always dilute them and never apply directly to the skin or let pets ingest them.
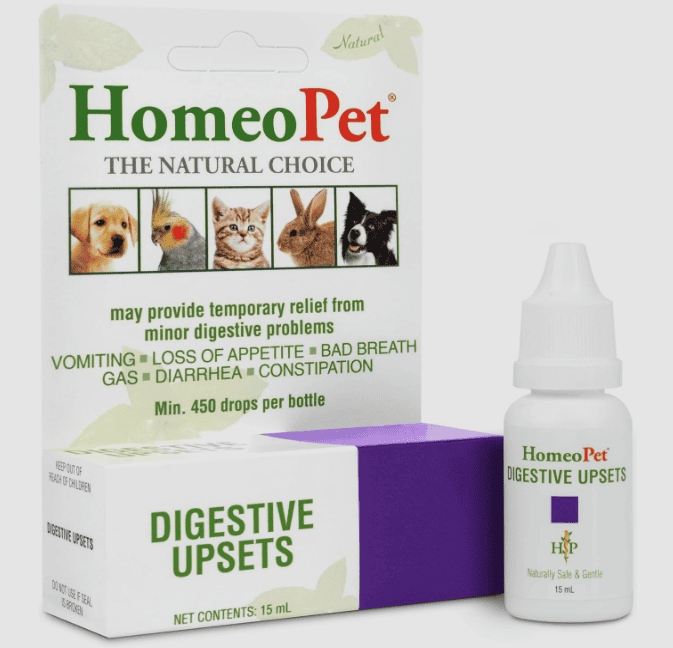
Description: A brand known for its natural homeopathic remedies for pets, this remedy helps provide temporary relief from barky cough, sneezing, and dry nose.
Dosage:
Dosing for Dogs/ Cats under 20 lbs/10 kg , 5 drops; 20-100 lbs/ 10-50 kg, 10 drops; over 100 lbs/50 kg, 15 drops. In acute cases the doses can be given every 15 minutes for the first hour, every 30 minutes in the second hour, once in the third hour, then reducing to 1 dose 3 times daily.
Dose this liquid medicine directly into your pet’s mouth, in their water, or at meal or snack time 3 times a day until symptoms improve.
Natural additions and complementary products can offer a multi-pronged approach to your dog’s health, working alongside prescribed medications for optimal benefits. However, it’s crucial to remember that natural doesn’t always mean safe. Always consult your veterinarian, keep an eye out for any reactions, and ensure that the chosen products are safe and beneficial for your pet.
Conclusion
Navigating the world of canine health and well-being can often seem overwhelming with the myriad of options and decisions to make. Butorphanol stands as a testament to modern veterinary medicine’s ability to offer relief and comfort to our furry friends. While it’s an effective solution for various ailments, as with any medication, knowledge is key. Informing yourself about its uses, dosage, side effects, and complementary treatments ensures you make the best choices for your beloved companions.
Moreover, embracing a holistic approach, which marries traditional medicine with complementary natural products, can offer a comprehensive care plan tailored to individual needs. Always remember, the goal is to ensure the happiness and health of your pet, so regular consultations with your trusted veterinarian and continuous education are paramount.
In the journey of pet ownership, the well-being of our furry family members is a shared responsibility between owners, veterinarians, and even the wider community. Here’s to creating a world where our pets thrive, brimming with joy, health, and boundless energy!
Frequently Asked Questions
How is Butorphanol useful?
Butorphanol is an opiate drug used as a cough suppressant in dogs and, in a variety of species, as a pain reliever. It is also used in combination with other drugs as a sedative or restraining agent. Sometimes butorphanol is used during chemotherapy to prevent chemotherapy-induced vomiting. The FDA (U.S. Food & Drug Administration) has approved this drug for use in dogs, cats, and horses (not for horses to be used for food) as a pain reliever and as a cough suppressant for dogs.
How long until I will know if Butorphanol is working, and how long will the effects of this medication last?
This medication should help your animal feel better within 1 to 2 hours. Your animal’s clinical signs should improve after that time. The effects of this medication are short-lived, meaning they will stop working within 24 hours, although the benefits may be prolonged if your animal has decreased kidney and/or liver function.
What are the side effects of Butorphanol?
Side effects that usually are not serious include: – Sedation (sleepiness, drowsiness) is the most common; however, some animals may become overly excited with this drug. – Gastrointestinal effects (decreased appetite, vomiting, constipation, or diarrhea [rare]) can be seen. You don’t have to be overly concerned if you see any of these signs unless they are severe, worsen, or continue to be a problem.
Side effects that may be serious orindicate a serious problem: – Respiratory depression (rare; troubled breathing, inability to wake your animal up).
Contact your veterinarian immediately if you see any of these signs.
If my animal gets too much of Butorphanol (an overdose), what should I do?
If you witness or suspect an overdose, contact your veterinarian or an animal poison control center for further advice. Animal poison control centers that are open 24 hours a day include: ASPCA Animal Poison Control Center (888-426-4435) and Pet Poison HELPLINE (855-764-7661); a consultation fee is charged for these services.
How should Butorphanol be given?
For this medication to work, give it exactly as your veterinarian has prescribed. It’s a good idea to always check the prescription label to be sure you are giving the drug correctly. – Butorphanol can be given either as an oral tablet or injection. This drug comes in many different-sized tablets and strengths for injection. Make sure that you are using the correct amount as prescribed by your veterinarian. – Tablets may be given either with food or on an empty stomach. Should your animal vomit or act sick after receiving the drug on an empty stomach, try giving the next dose with food or a small treat. If vomiting continues, contact your veterinarian.
What should I do if I miss giving a dose of Butorphanol?
If you miss a dose, give it when you remember and then wait the amount of time between doses recommended by your veterinarian before giving another dose. Do not double-up or give extra doses.
A note about your dog’s health
This article provides general education and does not replace an examination, diagnosis, or individualized advice from your veterinarian. Contact a veterinary professional if you are concerned about your dog’s symptoms.
Dr. Candy Akers earned her Doctor of Veterinary Medicine degree from Oklahoma State University in 2009 after completing undergraduate studies at the University of Delaware. Her experience includes companion-animal nutrition, chronic disease, allergies, autoimmune conditions, cold laser therapy, wildlife rehabilitation, and emergency wildlife response. She combines conventional veterinary knowledge with a whole-animal perspective to help pet parents understand their options and recognize when individualized veterinary care is needed.
Ah, the joys of pet ownership! We share our homes, our hearts, and yes, sometimes even our beds with these four-legged family members. But being a pet parent isn’t just about the wagging tails and puppy kisses; it’s also about ensuring our furry friends are in the best of health. When your veterinarian prescribes a medication like Tylosin for your dog, you naturally have a ton of questions. Is it safe? How do you administer it? And, of course, are there any alternatives? As a responsible dog owner, you’re in the right place to find out. This blog will unravel the mystery behind Tylosin, its uses, dosages, side effects, and more. Whether you’re a seasoned dog owner or a newbie just starting out, consider this your comprehensive guide to Tylosin for dogs. So, fetch a comfy seat (treats optional!), and let’s dig into everything you need to know.
What is Tylosin?
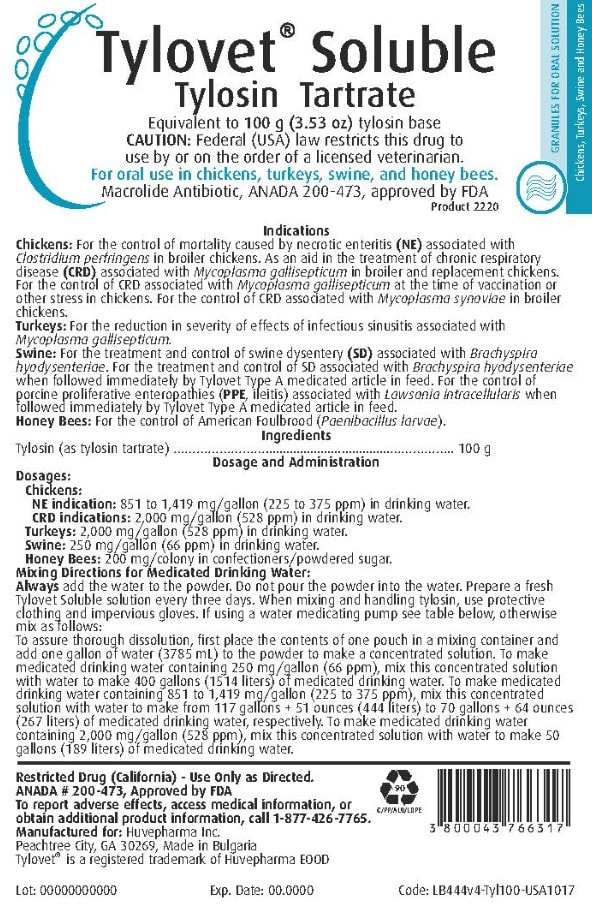
Tylosin is an antibiotic that belongs to the macrolide class. Its primary use is to treat infections caused by certain bacteria. Originally developed for use in livestock and poultry, it has since gained popularity in the treatment of certain conditions in small animals, including our beloved dogs.
Here’s a more in-depth look:
Historical Background: Introduced in the 1960s, Tylosin primarily served in veterinary medicine to treat bacterial infections in a wide range of animals. Its effectiveness against a variety of bacterial strains made it a favorite among livestock farmers.
Main Components and Active Ingredients: The active ingredient, Tylosin Tartrate, is the component that fights against bacterial infections. It acts by inhibiting protein synthesis in bacteria, making it harder for them to grow and multiply.
Uses in Dogs: Over time, veterinarians began to recognize the benefits of Tylosin for dogs, particularly in treating certain gastrointestinal conditions. One of the most common uses in dogs is for the treatment of chronic diarrhea, especially when caused by certain bacterial strains or inflammations like colitis.
Other Applications: While its primary use is antibacterial, Tylosin also has anti-inflammatory properties which can be beneficial in treating some inflammatory conditions in dogs.
Note that while Tylosin can work incredibly well, you should always use it under a veterinarian’s guidance. Like all antibiotics, you must ensure it fits your dog’s specific condition and use it responsibly to prevent antibiotic resistance.
In the following sections, we’ll delve into the specifics of how Tylosin works, how to administer it, and the important considerations every pet owner should be aware of before starting their dog on this medication.
How Does Tylosin Work?
At its core, Tylosin is a warrior against bacteria, but how does it manage to keep these microscopic invaders at bay? To truly understand Tylosin’s effectiveness, we need to delve a bit into the cellular level and its interaction with bacteria.
Targeting Protein Synthesis: Tylosin works by inhibiting protein synthesis in bacteria. Every bacterium needs to produce proteins to function, grow, and replicate. By interfering with this vital process, Tylosin effectively stalls the bacteria’s lifecycle, making it unable to multiply and spread.
Bacteriostatic vs. Bactericidal: While some antibiotics are bactericidal (they kill bacteria directly), Tylosin is primarily bacteriostatic. This means it doesn’t necessarily kill the bacteria but prevents them from growing and multiplying. This halt in bacterial growth allows the dog’s immune system to catch up and eliminate the invaders.
Specificity to Gram-positive Bacteria: Tylosin effectively combats a range of Gram-positive bacteria, which have a specific type of cell wall structure. This includes bacteria like Staphylococcus, Streptococcus, and certain Mycoplasma species. It’s also effective against some Gram-negative bacteria, though its primary strength lies with the Gram-positive ones.
Anti-inflammatory Properties: Beyond its antibacterial prowess, Tylosin has demonstrated anti-inflammatory effects. For dogs with conditions like colitis—an inflammation of the inner lining of the colon—this dual action can provide substantial relief. By reducing inflammation and tackling bacterial culprits, Tylosin can restore a sense of balance to the dog’s gastrointestinal tract.
Understanding the ‘how’ behind Tylosin is crucial, especially when considering its use for our canine companions. It’s not just about eliminating bacteria; it’s about creating an environment where our dogs’ own defenses can flourish and help restore them to their playful, tail-wagging selves. Always consult with a veterinarian to ensure Tylosin is the right choice for your pup’s specific needs.
Administering medication to our furry friends can sometimes feel like a daunting task. With Tylosin, the good news is that there are multiple forms and methods to choose from, ensuring that both you and your dog have the smoothest experience possible. Here’s a breakdown:
Oral Administration:
Capsules/Pills: Vets often provide Tylosin in capsule or pill form. Depending on your dog’s size and the prescription, they might instruct you to administer a full or partial pill. You can hide these in treats, mix with food, or give them directly.
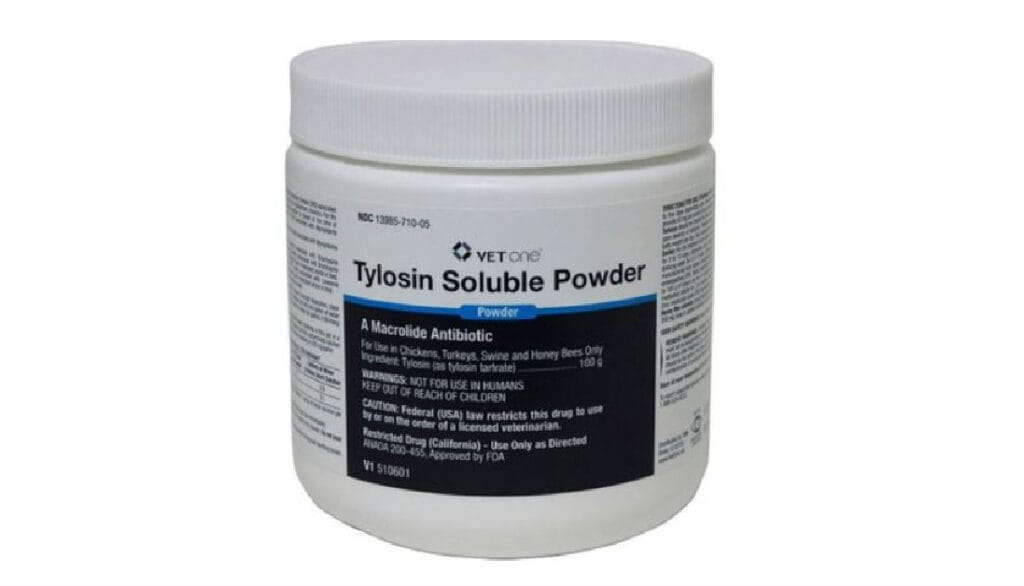
Powder: Some vets like to prescribe Tylosin in a powder that you can blend into your dog’s meals. This option works well if you need dosage flexibility or if your dog dislikes pills.
Liquid (Soluble): Some manufacturers offer soluble Tylosin versions, which you can mix with water or food, though they’re less common.
Intramuscular Injection:
In specific cases or conditions, a veterinarian might administer Tylosin via an intramuscular injection. Clinicians often use this method in clinical settings, although it’s less common for routine at-home treatments.
Considerations for Giving Tylosin:
With Food: Tylosin is typically well-tolerated when given with food. This can also help reduce the chances of stomach upset.
Consistency: It’s essential to administer the antibiotic at consistent times each day to maintain steady levels in the dog’s system.
Complete the Course: Just like with human antibiotics, it’s vital to ensure your dog completes the entire prescribed course of Tylosin, even if symptoms improve. This helps prevent antibiotic resistance.
Storage:
Powder and Pills: Store these in a cool, dry place, away from direct sunlight.
Liquid: If you’re using a soluble form, it may require refrigeration. Always check the label or consult with your vet about proper storage.
Monitoring:
Watch for Allergies: Though rare, dogs can be allergic to medications, including Tylosin. Symptoms might include hives, difficulty breathing, or swelling. Contact your vet immediately if you suspect an allergic reaction.
Appetite and Behavior: Monitor your dog’s appetite and behavior. If you notice a significant change or any signs of illness, consult your vet.
Remember, while Tylosin is generally safe and effective, it’s not a one-size-fits-all solution. Your vet will provide guidance tailored to your dog’s specific needs, ensuring the best possible outcome. As always, when in doubt, reach out to a professional. Your dog’s health and comfort are worth that extra bit of care!
Is Tylosin Safe for Dogs?
As with any medication, the first question we often ask ourselves is, “Is this safe for my furry friend?” Tylosin, when used correctly and under veterinary supervision, is generally safe for dogs. However, like all drugs, there are nuances to consider and precautions to take.
Safety Profile:
FDA Approval: The FDA approves Tylosin for use in certain livestock animals, but it’s important to note that its use in dogs is “off-label.” This means the FDA hasn’t specifically approved it for dogs.
However, veterinarians often prescribe medications off-label when they believe the benefits outweigh potential risks based on their medical expertise.
Common Usage: Vets have used Tylosin for years in veterinary medicine for dogs despite its off-label status, and many are familiar with its safety profile and potential side effects.
Potential Concerns:
Overuse & Antibiotic Resistance: Like all antibiotics, the overuse or misuse of Tylosin can contribute to antibiotic resistance. This is when bacteria evolve and become immune to the antibiotic’s effects. It’s crucial to administer the drug as prescribed and complete the full course, even if your dog seems better.
Liver Function: If a dog has liver problems or a history of liver disease, it’s essential to discuss this with your vet.
The liver metabolizes Tylosin, so dogs with liver concerns might require regular monitoring.
Drug Interactions: Tylosin may interact with other medications, so always inform your vet of any other drugs, supplements, or treatments your dog is receiving.
Puppies & Senior Dogs: Age can play a role in how a dog reacts to medication. Puppies, with their developing systems, and senior dogs, with potential age-related health issues, might have different responses to Tylosin. Always consult with your vet about age-specific concerns.
Pregnant or Lactating Dogs: If your dog is pregnant or nursing, it’s crucial to discuss with your vet before administering Tylosin.
While Tylosin is generally safe for many dogs, individual circumstances and health profiles can vary. The key to ensuring the safety and effectiveness of Tylosin—or any medication—is open communication with your vet and careful observation of your dog while they’re on the treatment. By staying informed and vigilant, you can ensure your pup gets the benefits of the medication while minimizing potential risks.
Tylosin Side Effects or Cautions
Every medication, no matter how commonly used or well-tolerated, carries the potential for side effects. While Tylosin is generally safe for dogs, it’s essential for pet owners to be aware of possible side effects and exercise necessary precautions. Here’s a comprehensive look:
1. Potential Side Effects of Tylosin:
Digestive Issues: The most common side effects are gastrointestinal in nature. Some dogs might experience:
Diarrhea or loose stools
Vomiting or nausea
Decreased appetite
Allergic Reactions: Though rare, dogs can develop an allergic reaction to Tylosin. Symptoms to watch out for include:
Swelling, particularly of the face, lips, or tongue
Hives or skin rashes
Difficulty breathing or rapid breathing
Sudden onset of itchiness
Yeast Overgrowth: Long-term use can occasionally lead to yeast overgrowth in the intestines, which might require additional treatment.
2. Cautions When Using Tylosin:
Administer As Prescribed: Always give the prescribed dosage and follow your veterinarian’s instructions closely. Overdosing can exacerbate side effects or lead to other health concerns.
Avoid Abrupt Withdrawal: Don’t suddenly stop giving Tylosin without consulting your veterinarian, especially if it’s been a long-term treatment.
Interactions with Other Drugs: Tylosin can interact with other medications. Always inform your vet about any other drugs your dog might be taking, including over-the-counter meds, supplements, and herbal remedies.
Monitoring During Treatment: Especially if your dog is on Tylosin for an extended period, regular vet check-ups can help monitor liver function and ensure the medication remains appropriate for your dog’s condition.
Use in Specific Populations: If your dog is very young, elderly, pregnant, lactating, or has pre-existing health conditions, a discussion with your veterinarian before starting Tylosin is paramount.
Antibiotic Resistance: Using antibiotics inappropriately can contribute to antibiotic resistance, where bacteria become immune to the drug’s effects. This is a growing global health concern. Ensure you use Tylosin responsibly and as directed.
3. What to Do If You Observe Tylosin Side Effects:
Immediate Action: If you notice severe reactions, especially symptoms of an allergic reaction like swelling or difficulty breathing, seek veterinary care immediately.
Milder Symptoms: For less urgent side effects, such as mild diarrhea or a slight decrease in appetite, make a note of the symptoms and discuss with your vet at the earliest opportunity. They might adjust the dosage or suggest other supportive care.
Record Keeping: Keeping a diary or log of any observed side effects can be helpful. This not only provides your vet with a clear picture but can also help in tailoring the best treatment plan moving forward.
In conclusion, while Tylosin has proven to be a beneficial drug for many dogs, vigilance on the part of the pet owner is crucial. By being observant and maintaining open communication with your veterinarian, you can ensure your dog benefits from the treatment while minimizing potential adverse effects.
Uses of Tylosin for Dogs
Tylosin has been a staple in veterinary medicine for several decades. While it originated in the livestock sector, its efficacy and safety profile soon caught the attention of small animal veterinarians. In dogs, Tylosin has several key uses:
1. Chronic Diarrhea and Gastrointestinal Issues:
Colitis: Veterinarians commonly prescribe Tylosin for dogs to treat colitis, an inflammation of the colon. Its anti-inflammatory and antibiotic properties soothe the gut lining and tackle bacterial imbalances contributing to the problem.
Antibiotic-Responsive Diarrhea (ARD): Some dogs experience persistent diarrhea that responds well to antibiotic treatment, even without identifying a specific bacterial cause. In these situations, veterinarians often choose Tylosin for its proven effectiveness.
2. Bacterial Infections:
Specific Infections Treatment: Tylosin effectively treats certain Gram-positive bacteria, such as Staphylococcus, Streptococcus, and some Mycoplasma species. Veterinarians use it to treat infections these bacteria cause in different parts of the body.
Prevention: In certain situations, especially in kennels or shelters, veterinarians might use Tylosin prophylactically to prevent bacterial infections, especially during outbreaks or when risks are high.
3. Respiratory Issues:
Mycoplasma Infections: Tylosin is effective against certain Mycoplasma species, which can cause respiratory issues in dogs. Doctors can prescribe it to treat coughs or other respiratory symptoms that result from this type of infection.
4. Soft Tissue Infections:
Skin and Ear Infections: When bacteria susceptible to Tylosin cause infections of the skin or ears, you can use this antibiotic to treat them.
Caveats:
Always Under Supervision: Always administer Tylosin under the supervision and guidance of a veterinarian, despite its multiple uses and benefits. It’s essential to ensure it’s the right treatment for the dog’s specific condition.
Short-term vs. Long-term: Some conditions might require short-term use of Tylosin, while others, like chronic gastrointestinal issues, might see the drug prescribed for longer durations. Regular vet check-ups are crucial, especially for long-term use, to monitor any potential side effects or changes in the dog’s condition.
Tylosin is a versatile medication with various applications in canine health. Its longstanding history in veterinary medicine attests to its efficacy, but as always, individualized veterinary advice is paramount to ensure a dog’s health and well-being.
Tylosin Dosage Chart for Dogs
When it comes to administering Tylosin or any medication to dogs, getting the correct dosage is crucial for effectiveness and safety. Below, we’ll provide general guidelines, an age and weight-based dosage chart, and tips for ensuring accurate dosing.
General Dosage Guidelines:
The typical dosage range for Tylosin in dogs is around 5-20 mg/kg once to twice daily.
The specific condition being treated determines the exact dosage and duration.
Always administer the exact dose prescribed by the veterinarian and follow their instructions closely.
Age and Weight-Based Dosage Chart:
Weight Range
Puppies (Up to 6 Months)
Adult Dogs (6 Months & Older)
Senior Dogs (8 Years & Older)
Up to 10 lbs
5 mg
5-10 mg
5 mg
10-20 lbs
10 mg
10-20 mg
10 mg
20-40 lbs
20 mg
20-40 mg
20 mg
40-60 lbs
30 mg
40-60 mg
40 mg
60-80 lbs
40 mg
60-80 mg
60 mg
Over 80 lbs
50 mg
80-100 mg (max)
80 mg
Note: This table provides general dosage guidelines based on weight and age. However, individual needs can vary, so always consult with your veterinarian for the exact dosage.
Tips for Ensuring Accurate Tylosin Dosing:
Use a Dedicated Measuring Tool: If you’re administering liquid or powder form, use a dedicated measuring spoon or syringe provided by your vet or pharmacy. Avoid using household spoons as they can vary in size.
Consistency is Key: Administer the medication at the same time(s) each day to maintain a consistent level in the dog’s system.
Monitor for Side Effects: Especially when starting a new medication, observe your dog for any side effects or adverse reactions.
Avoid Splitting Pills Without Guidance: If your dog requires a dosage that isn’t available in a pre-made pill, consult your vet about splitting the tablet. Some medications can lose effectiveness if broken.
Store Medication Properly: Store the medication as directed, usually in a cool, dry place, to preserve its potency.
Check Expiry: Regularly check the expiry date on the medication. Out-of-date medication can lose its effectiveness and may not be safe.
Double-Check Dosage: Especially if multiple people in a household might administer medication, have a system in place to track doses, so the dog isn’t accidentally given too much.
While the chart provides a general guideline, it’s crucial to reiterate that individual needs can vary. The veterinarian’s prescribed dose should always be the primary guide. Proper dosing ensures the medication’s efficacy and the safety of your furry friend.
Forms of Tylosin
Tylosin is a versatile antibiotic, and to cater to the various needs of animals, including dogs, it’s available in several forms. Each form has its advantages, making it suitable for different scenarios and preferences.
1. Tylosin Powder:
Overview: This is one of the most common forms of Tylosin, especially for livestock. For dogs, the powder can be mixed with their food, ensuring they consume the entire dose.
Advantages:
Allows for easy dose adjustments.
Can be mixed with wet or dry food.
Suitable for dogs that resist taking pills.
Considerations:
Ensure even mixing to guarantee the dog receives the full dosage.
Some dogs might be wary if they detect a change in their food.
2. Tylosin Capsules:
Overview: Tylosin capsules contain the antibiotic in a powdered form, enclosed in a gelatin casing. They can be given directly or opened to mix the inner powder with food.
Advantages:
Convenient and quick to administer.
Capsules can sometimes be easier for dogs to swallow than tablets.
Dosage is pre-measured, reducing the margin for error.
Considerations:
Some dogs might resist swallowing capsules.
Opening capsules to mix with food might make dosing less precise if not all contents are consumed.
3. Tylosin Liquid (Injectable or Oral Solution):
Overview: Liquid Tylosin can either be an injectable solution or an oral suspension. The former is administered via injection, usually by a vet, while the latter is given orally.
Advantages:
Liquid solutions can be more comfortable for some dogs to consume, especially if mixed with a tasty treat.
Injectable form ensures that the dog receives the entire dose.
Considerations:
The oral solution must be shaken well before use to ensure even distribution of medication.
Injectable forms can be more invasive and might not be suitable for frequent dosing.
4. Tylosin Tablets:
Overview: Tylosin tablets are a compact form that contains a pre-measured dose of the antibiotic.
Advantages:
Easy to administer for dogs accustomed to taking pills.
Convenient for travel or on-the-go dosing.
Considerations:
Some dogs might resist or spit out tablets.
Breaking tablets for dose adjustment can sometimes lead to uneven dosages.
Choosing the Right Form of Tylosin:
The ideal form of Tylosin for your dog will depend on various factors:
Frequency of Dosing: If it’s a one-time or short-term treatment, an injectable solution might be more straightforward. For long-term treatments, oral solutions or powders might be more manageable.
Dog’s Preferences: Some dogs have no issues with tablets or capsules, while others might prefer a powder mixed in their food.
Owner’s Convenience: If you’re comfortable giving injections and it’s the recommended form, that might be your choice. Otherwise, oral options might be more practical.
Always consult with your veterinarian about which form of Tylosin is most suitable for your dog’s condition and lifestyle. Regardless of the type, ensuring that your dog receives the correct dose on the recommended schedule is paramount for the medication’s success.
How Long Does Tylosin Last in the System?
The duration Tylosin remains active within a dog’s system can be essential knowledge for pet owners. Understanding this information is vital both for grasping the medication’s effectiveness and for knowing how long any potential side effects might take to subside after discontinuing the drug.
Pharmacokinetics of Tylosin:
Absorption: After oral administration, Tylosin is rapidly absorbed from the dog’s gastrointestinal tract. Peak plasma concentrations (the highest level of the drug in the bloodstream) typically occur within 1 to 2 hours post-dosing.
Distribution: Tylosin, being a lipophilic compound, distributes widely throughout the body. This distribution is a reason it’s effective against infections in various parts of the body.
Metabolism & Elimination: The liver metabolizes Tylosin, and the breakdown products, along with some unchanged Tylosin, are excreted primarily via bile into the feces. A smaller amount is eliminated through the urine.
Duration in the System:
Half-life: The half-life of a drug indicates the time it takes for the concentration of the drug in the bloodstream to reduce by half. For Tylosin, the half-life in dogs is roughly 1 to 2 hours.
Complete Elimination: Based on its half-life and general pharmacokinetic principles, Tylosin is expected to be largely eliminated from a dog’s system within 6 to 12 hours. However, trace amounts might remain for up to 24 hours or longer, depending on various factors like the dog’s age, metabolism, liver function, and kidney function.
Considerations:
Duration of Effectiveness: While Tylosin may be cleared from the system within hours, its therapeutic effects can last longer. This lasting effect is because the drug has already exerted its action on bacteria or the condition being treated.
Dosing Frequency: Due to its relatively short half-life, Tylosin is often prescribed to be given once to twice daily to maintain therapeutic levels in the dog’s system.
Drug Interactions: The presence of other medications can sometimes impact how long Tylosin remains in the system. Always inform your veterinarian of any other medications or supplements your dog is taking.
Age and Health: Older dogs or those with compromised liver or kidney function might process and eliminate medications more slowly than younger or healthier dogs.
While Tylosin is metabolized and excreted relatively quickly, its therapeutic effects are sustained, ensuring that the drug remains effective. As always, pet owners should follow the dosing regimen provided by the veterinarian to maintain optimal therapeutic levels and should consult their vet with any concerns or queries about the medication.
How Long Should Your Dog Take Tylosin?
You should administer Tylosin to a dog for a duration that depends on several factors. These factors are the type of infection or condition you are treating, the dog’s overall health, and the dog’s response to the medication.
General Guidelines:
Specific Condition: The duration of Tylosin treatment often hinges on the particular condition being addressed:
For intestinal infections, treatment might last anywhere from a few days to several weeks.
For chronic conditions like colitis (inflammation of the colon), the treatment could extend for weeks or even months, depending on the severity and response.
Veterinarian’s Prescription: Always adhere to the recommended treatment duration provided by the vet. If unsure or if there seems to be no improvement, seek clarification rather than discontinuing or extending the medication on your own.
Completion of Full Course: Even if your dog appears to have recovered, it’s crucial to complete the entire prescribed course of antibiotics, including Tylosin. Discontinuing antibiotics prematurely can result in a resurgence of the infection or lead to antibiotic resistance.
Regular Check-ups: Especially for prolonged treatments, regular veterinary check-ups are essential. The vet will assess how the dog is responding to the treatment and decide whether to continue, adjust the dose, or switch to another medication.
Factors Influencing Tylosin Treatment Duration:
Severity of the Condition: Acute infections might require a shorter treatment course, while chronic or severe infections might necessitate a longer period of medication.
Age and Health of the Dog: Puppies, older dogs, or those with compromised immune systems might require extended treatment durations to ensure complete recovery.
Potential Side Effects: If your dog experiences significant side effects, your veterinarian might adjust the duration or switch to a different medication.
Reinfection or Recurrence: Some conditions, especially gastrointestinal ones, can recur. In such cases, your vet might prescribe another course of Tylosin or recommend preventative measures.
Tylosin Cautions and Considerations:
Monitor for Side Effects: While Tylosin is generally safe, any new or worsening symptoms should be immediately reported to the vet.
Avoid Overuse: Over-reliance or prolonged use of antibiotics without a valid reason can contribute to antibiotic resistance. Always use Tylosin judiciously, as prescribed.
Regular Communication: Keeping open communication with your veterinarian ensures that any concerns or observations about your dog’s health are addressed promptly.
The length of time your dog should take Tylosin varies based on individual circumstances. Always follow your veterinarian’s advice, keep an eye out for any changes in your dog’s condition, and never hesitate to seek guidance if unsure about the medication’s duration or effects.
Alternatives To Tylosin
Dr. Candy’s Recommendations:
While Tylosin is effective for various conditions in dogs, there might be situations where an alternative is needed, either due to potential side effects, resistance, or individual dog needs. Dr. Candy, with her vast experience in veterinary care, recommends the following alternatives and complementary treatments to Tylosin:
1. Slippery Elm:
What it is:Slippery Elm, a tree native to North America, offers its inner bark for medicinal preparations.
Uses: Slippery Elm soothes and coats the digestive tract, benefiting conditions such as diarrhea, colitis, and stomach and intestine inflammation.
Advantages: As a natural remedy, Slippery Elm typically produces fewer side effects than synthetic drugs. It treats the stomach gently and works well with other treatments.
2. Homeopet Digestive:
What it is:HomeoPet Digestive is a homeopathic remedy designed to alleviate digestive issues in pets.
Uses: It can treat various gastrointestinal symptoms like diarrhea, gas, vomiting, and constipation.
Advantages: As a homeopathic solution, it’s typically gentle on pets, non-addictive, and can work alongside other treatments without interference.
Uses: Probiotics are beneficial bacteria that help restore and maintain a healthy balance in the digestive system. They can aid in managing and preventing gastrointestinal issues, especially after antibiotic treatments which can disrupt the gut’s natural flora.
Advantages: Probiotics can boost the dog’s immune system, improve digestion, and reduce the likelihood of digestive issues.
4. Glacier Peak Pet Wellness Life Stress Scan:
What it is: This is a diagnostic tool that tests for food sensitivities and environmental stressors in pets.
Uses: By identifying specific sensitivities, owners can tailor their dog’s diet and environment to reduce potential triggers and related symptoms.
Advantages: Addressing the root cause (like a specific food sensitivity) can sometimes reduce the need for medications, leading to a more holistic approach to the dog’s health.
Dr. Candy’s recommendations emphasize a balanced approach to pet care, incorporating both traditional medications and natural remedies. While Tylosin is effective, considering alternatives and complementary treatments can provide a more comprehensive and holistic approach to a dog’s health. Always consult with a veterinarian before starting, stopping, or combining any treatments.
Complementary Natural Products to Tylosin That You Can Add To Your Treatment Plan
Incorporating natural products into your dog’s treatment regimen can provide a holistic approach to health and healing. These products, when used alongside conventional treatments, can complement and sometimes enhance their effects, ensuring a more rounded and effective treatment strategy. Here are some complementary natural products you can consider:
Benefits:Omega-3s, primarily found in fish oils, have anti-inflammatory properties. They can benefit dogs with skin allergies, joint issues, and certain inflammatory conditions.
How to Administer: Available in liquid form or capsules, it can be added to your dog’s food.
Benefits: Probiotics help maintain a balanced gut flora, especially important after antibiotic treatments that can disrupt the natural balance of the digestive system.
How to Administer: This product comes in a capsule form. Simply open the capsule and administer the correct dosage on your dogs food as a daily supplement.
3. Digestive Enzymes:
Benefits: Assist in breaking down food components, ensuring better nutrient absorption and reduced gastrointestinal issues.
How to Administer: Generally in powder form, it can be sprinkled over your dog’s meal.
4. Turmeric (Curcumin):
Benefits: Known for its potent anti-inflammatory and antioxidant properties, it can help with joint health, inflammation, and overall immune system support.
How to Administer:Turmeric can be mixed with a bit of black pepper (which increases its absorption) and added to food. There are also commercial supplements available specifically for pets.
5. CBD Oil:
Benefits: CBD has gained traction for its potential anti-inflammatory, pain-relieving, and calming effects. It can be helpful for dogs with anxiety, pain, or inflammation.
How to Administer: CBD oil can be given directly or mixed with food. Ensure you’re using a dog-appropriate product and dose.
6. Milk Thistle:
Benefits: Known for supporting liver health, it can be especially beneficial for dogs on medications that may impact the liver.
How to Administer: Supplements are often available in capsule or liquid form.
7. Glucosamine and Chondroitin:
Benefits: These compounds support joint health and can be beneficial for dogs with arthritis or joint issues.
How to Administer: They are usually available in chewable tablet form or as liquids.
8. Herbs:
Benefits: Many herbs like chamomile, ginger, and peppermint can have calming, anti-inflammatory, or digestive benefits for dogs.
How to Administer: Depending on the herb, they can be offered as teas, added to food, or given as supplements.
Things to Remember:
Consultation is Key: Always consult with your veterinarian before introducing any new product into your dog’s regimen. Natural doesn’t always mean safe, and some products can interfere with medications or have side effects of their own.
Quality Matters: Opt for high-quality products from reputable brands. Ensure that they are suitable for pets and don’t contain harmful additives.
Start Slow: When introducing a new natural product, start with a lower dose and monitor for any reactions or changes.
Incorporating natural products into your dog’s treatment plan can offer an array of health benefits, but always ensure that these are suitable for your dog’s specific needs and conditions. They should complement, not replace, prescribed treatments unless advised otherwise by a veterinarian.
Conclusion
Caring for our furry friends often means diving deep into the realm of treatments, medications, and health regimens. Tylosin, as we’ve explored, is one of the tools in our arsenal to ensure the well-being of our pets. But like any medication, it’s vital to approach its use with knowledge and understanding. From recognizing its forms to gauging its appropriate dosage and exploring its alternatives, every piece of information equips us better to make informed decisions for our canine companions.
It’s heartening to know that in today’s world, we have the luxury of blending conventional medications with natural remedies, creating a comprehensive treatment plan that looks at health holistically. Dr. Candy’s insights and recommendations remind us of the importance of always seeking the best for our pets, be it through age-old herbs or cutting-edge medications.
Ultimately, as pet owners, our goal is the happiness and health of our four-legged family members. Whether you’re considering Tylosin or its alternatives, always remember that open communication with your veterinarian and staying informed are your best allies.
Thank you for journeying with us through this comprehensive look at Tylosin for dogs. We hope this guide serves you well and helps pave the way for many happy, tail-wagging days ahead! 🐾
Frequently Asked Questions
How is Tylosin useful?
The FDA (U.S. Food & Drug Administration) has approved this drug for use in treating infections in dogs, cats, turkeys, chickens, cattle, pigs, and honeybees. The oral powder approved for turkeys, chickens, and pigs is most commonly used in companion animals (pets) to treat inflammatory bowel disease and in treating feline infectious peritonitis (FIP). You and your veterinarian can discuss why this drug is the most appropriate choice.
How long until I will know if Tylosin is working, and how long will the effects of this medication last?
– This medication should start having effects within 1 to 2 hours; however, you may not see the effects of this medication outwardly. – Your animal should begin feeling better within 1 to 2 days. – The effects of this medication are short-lived, meaning they will stop working within 24 hours, although the benefits may be prolonged if your animal has decreased kidney and/or liver function.
If my animal gets too much of Tylosin (an overdose), what should I do?
Tylosin is relatively safe in most overdose situations. If you witness or suspect an overdose, contact your veterinarian or an animal poison control center for further advice. Animal poison control centers that are open 24 hours a day include: Pet Poison HELPLINE (855-764-7661) and ASPCA Animal Poison Control Center (888-426-4435); a consultation fee is charged for these services.
How should Tylosin be given?
For this medication to work, give it exactly as your veterinarian has prescribed. It’s a good idea to always check the prescription label to be sure you are giving the drug correctly. – The drug may be given either with food or on an empty stomach. If your animal vomits or acts sick after receiving the drug on an empty stomach, try giving the next dose with food or a small treat. If vomiting continues, contact your veterinarian. – Tylosin powder has an extremely bitter taste. Placing the dose of powder in an empty gelatin capsule or cold butter may help your animal take it better. Liquids made from mixing the powder in water should be thrown out after 3 days and a new solution made up.
What should I do if I miss giving a dose of Tylosin?
If you miss a dose, give it when you remember, but if it is close to the time for the next dose, skip the dose you missed and give it at the next scheduled time. After that, return to the regular dosing schedule. Do not double-up or give extra doses.
What other information is important for Tylosin?
Use of this drug may not be allowed in certain animal competitions. Check rules and regulations before entering your animal in a competition while this medication is being administered.
A note about your dog’s health
This article provides general education and does not replace an examination, diagnosis, or individualized advice from your veterinarian. Contact a veterinary professional if you are concerned about your dog’s symptoms.
Dr. Candy Akers earned her Doctor of Veterinary Medicine degree from Oklahoma State University in 2009 after completing undergraduate studies at the University of Delaware. Her experience includes companion-animal nutrition, chronic disease, allergies, autoimmune conditions, cold laser therapy, wildlife rehabilitation, and emergency wildlife response. She combines conventional veterinary knowledge with a whole-animal perspective to help pet parents understand their options and recognize when individualized veterinary care is needed.
As a dedicated pet owner, there’s nothing more distressing than seeing your furry friend in discomfort or distress. From incessant itching due to allergies to bouts of anxiety, dogs, much like humans, experience a plethora of health issues. While there are many medicines available to help manage these ailments, understanding them is vital for the well-being of our pets. One such medication that’s gained traction in the veterinary world is Hydroxyzine. This versatile drug promises relief for various symptoms, but like any medication, it’s essential to know its ins and outs.
In this blog, we will delve deep into Hydroxyzine for dogs. From its various uses and recommended dosages to potential side effects, we’ve got you covered. We’ll even touch upon natural alternatives that can complement your dog’s treatment plan. So, whether you’ve just heard of Hydroxyzine or are considering it for your four-legged buddy, join us on this informative journey to make the best healthcare decisions for your pet.
What is Hydroxyzine?
Hydroxyzine, an antihistamine, primarily blocks or reduces the effects of the chemical histamine in the body. The body produces histamine in response to an allergic reaction, leading to symptoms like itching, hives, runny nose, and watery eyes. By blocking the action of histamine, Hydroxyzine helps in alleviating these symptoms.
Developers initially created Hydroxyzine for human use in the 1950s. However, over the years, veterinarians discovered its benefits for animals, especially dogs, and began prescribing it for various conditions.
Apart from its antihistamine properties, Hydroxyzine also has sedative effects. This makes it useful not just for allergies but also for conditions that require calming the pet, such as anxiety or nausea.
It’s worth noting that while Hydroxyzine can be immensely beneficial, it’s a prescription medication. This means you should only administer it under the guidance of a veterinarian who knows your dog’s health history and specific needs.
In the subsequent sections, we will delve deeper into the different brand names, specific uses, and other pertinent information about this versatile medication. But at its core, Hydroxyzine serves as a testament to the advancements in veterinary medicine, bridging the gap between human and animal healthcare to provide relief to our furry companions.
Brand Names For Hydroxyzine
When discussing medications, the active ingredient delivers the intended therapeutic effect. For us, Hydroxyzine is that ingredient. However, like many drugs, several brand names market Hydroxyzine, which helps consumers recognize it and veterinarians prescribe it. It’s like recognizing a popular tissue paper brand, even when the basic product is simply tissue. Here are some common brand names that sell Hydroxyzine:
Atarax: Atarax, one of the most widely recognized names, primarily treats itching caused by allergies.
Vistaril: Another popular brand, Vistaril is often prescribed for its sedative properties, helping manage anxiety in pets.
Hytuss: Less common than the above two but still a noteworthy name in the world of Hydroxyzine.
Rezine: A brand that might not be as prominently known but is equally effective as its counterparts.
Vistazine: Often found in liquid forms, it’s useful for dogs that might have difficulty with oral tablets or capsules.
These brand names, while different in labeling and sometimes in formulation (like added flavors or forms), primarily contain Hydroxyzine as their active ingredient. When considering any of these brands for your pet, it’s crucial to consult with your veterinarian. They will not only guide you to the appropriate brand based on availability and your pet’s preference, but they will also ensure your dog gets the correct dosage and form best suited for its needs.
Uses of Hydroxyzine in Dogs
Hydroxyzine, while initially developed for humans, has proven to be a multifaceted tool in the veterinary medicine chest. Its versatility lies in its ability to address various conditions that often plague our furry companions.
Allergies: Just like humans, dogs too can fall prey to seasonal allergies or react to specific allergens in their environment. These reactions can manifest as itching, hives, or even respiratory symptoms. Hydroxyzine, with its antihistamine properties, works to block or reduce the effects of histamine, providing relief from these allergic symptoms.
Atopy: A chronic skin allergy often triggered by environmental factors such as pollen, mold, or dust mites, atopy can cause significant discomfort for dogs. Regular itching, redness, and inflammation are common signs. Hydroxyzine can help manage these symptoms by reducing the allergic response.
Dermatitis: This general term for skin inflammation can be due to a myriad of causes, including allergies, irritants, or even underlying health conditions. Hydroxyzine’s anti-inflammatory and antipruritic (anti-itch) properties make it a suitable option for alleviating the distress associated with dermatitis.
Nausea: Beyond its allergy-relieving capabilities, Hydroxyzine also possesses antiemetic properties, meaning it can help reduce nausea and prevent vomiting. If your pet is experiencing gastrointestinal upset or nausea due to motion sickness, Hydroxyzine might be a recommended choice.
Anxiety: The sedative effects of Hydroxyzine are not just useful for its anti-nausea properties. These calming effects can also be beneficial for dogs that experience anxiety, be it from environmental factors like thunderstorms or situational triggers like vet visits. Hydroxyzine can help keep them calm and reduce anxiety-driven behaviors.
It’s imperative to understand that while Hydroxyzine is effective, it isn’t a cure. Instead, it manages and alleviates symptoms. It’s often used in conjunction with other treatments or lifestyle changes to ensure a comprehensive approach to your pet’s health.
Hydroxyzine Dosage Chart For Dogs
Weight of Dog
Recommended Dosage
Frequency
Under 10 lbs
5-10 mg
Once or twice daily
10-25 lbs
10-25 mg
Once or twice daily
25-50 lbs
25-50 mg
Once or twice daily
Over 50 lbs
50-100 mg
Once or twice daily
Points to Remember:
Weight-based Dosage: The dosage primarily depends on the weight of the dog, but the specific condition being treated and the dog’s overall health also play a role.
Frequency: Depending on the severity of the symptoms and the specific condition, Hydroxyzine can be given once or twice a day. For instance, mild itching may require a single daily dose, while severe allergic reactions might necessitate a twice-daily regimen.
Formulation Matters: The dosage might differ based on the formulation (tablet, capsule, liquid). Ensure you’re using the correct measurement tools, especially for liquid forms.
Veterinarian’s Guidance: This chart is a general guideline. The optimal dosage for your dog might differ based on factors beyond weight, like age, other health conditions, and tolerance to the medication.
Monitor for Side Effects: Whenever introducing a new medication or changing dosage, closely monitor your dog for any signs of side effects or adverse reactions.
Always keep in mind that while such charts offer valuable insights, there’s no substitute for personalized advice from a professional veterinarian who’s familiar with your dog’s health history and needs.
When it comes to administering medication to our pets, having options can be a blessing. Some dogs might be more receptive to liquids over tablets or vice versa. Thankfully, Hydroxyzine is available in multiple forms to cater to different needs and preferences. Let’s delve into these various forms and their specifics:
Tablets/Capsules:
Description: These are the most common forms in which Hydroxyzine is available. They come in various strengths, usually denoted in milligrams (mg).
Usage: Can be given directly to the dog or hidden in treats, food, or pill pockets to make ingestion easier.
Sizes: Common sizes include 10mg, 25mg, and 50mg, though the availability may vary based on the brand and region.
Liquid Solution:
Description: A liquid form of Hydroxyzine, which might be flavored to make it more palatable for pets.
Usage: Can be given using a dropper or syringe, often directly into the dog’s mouth or mixed with a small amount of food.
Measure: Ensure you’re using the correct measuring device to provide the right dosage. A dropper or syringe is usually provided with the medication.
Compounded Forms:
Description: Some pharmacies offer compounded versions of Hydroxyzine. This means the medication is tailored to the specific needs of the pet, which can be useful for dogs with specific allergies, dietary restrictions, or for those that are particularly resistant to taking medications.
Options: Can include flavored chews, different flavored liquids, or even topical forms, depending on the compounding pharmacy.
Choosing the Right Form:
Selecting the best form of Hydroxyzine for your dog often comes down to your pet’s preferences and the ease of administration. Some dogs might be more receptive to swallowing a pill, while others might prefer the taste of a liquid solution. Here are some tips:
Palatability: Liquid forms, especially those that are flavored, might be more palatable for some dogs.
Ease of Administration: If you find it challenging to give your dog tablets or capsules, liquid forms or compounded chews might be more straightforward.
Dosage Precision: Liquid forms can offer more precise dosage adjustments, especially for smaller dogs or those in between standard tablet sizes.
Regardless of the form chosen, always ensure you’re administering the correct dosage and consult with your veterinarian about which form might be best suited for your dog’s needs.
Side Effects of Hydroxyzine In Dogs
As with any medication, Hydroxyzine, while beneficial, can come with potential side effects. While many dogs tolerate it well, it’s crucial for pet owners to be aware of possible reactions so they can promptly address any issues that arise. Here’s a rundown of the common and not-so-common side effects associated with Hydroxyzine in dogs:
Common Side Effects:
Sedation: Given its sedative properties, many dogs might experience drowsiness after taking Hydroxyzine. This is often expected and might even be the desired effect, especially if treating anxiety.
Dry Mouth: Some dogs might experience increased thirst due to the drying effect of the medication.
Increased Urination: It’s not uncommon for dogs on Hydroxyzine to urinate more frequently.
Gastrointestinal Disturbances: This can include symptoms like nausea, vomiting, or diarrhea. However, these are less common and if persistent, should be discussed with a vet.
Less Common Side Effects:
Incoordination: Some dogs might appear clumsy or unsteady on their feet.
Rapid Heart Rate: An increased heart rate isn’t typical but can occur in some dogs.
Respiratory Depression: In rare cases, especially if overdosed, Hydroxyzine can cause a decrease in the respiratory rate, which can be dangerous.
Hypotension: A drop in blood pressure is a rare but potential side effect.
Signs of an Allergic Reaction:
Just as vets use Hydroxyzine to treat allergic reactions, some dogs might paradoxically have an allergy to the medication itself. Signs of an allergic reaction include:
If any of these signs are observed, it’s essential to seek veterinary care immediately.
Points to Consider:
Monitoring: Always monitor your dog after administering any new medication, including Hydroxyzine. This ensures you quickly notice and address any adverse reactions.
Dosage: Many side effects, especially the severe ones, are often linked to overdosing. Ensure you’re giving the correct dose, and never administer more than the vet-recommended amount.
Interactions: Hydroxyzine can interact with other medications, which can amplify some side effects. Always inform your vet of any other medications or supplements your dog is taking.
In conclusion, while Hydroxyzine is generally safe and well-tolerated by many dogs, it’s essential to be aware of potential side effects. If you observe any unusual behaviors or symptoms after administration, always consult with your veterinarian.
Cautions When Using Hydroxyzine In Dogs
Hydroxyzine can address a range of conditions in dogs, but you should observe certain precautions to ensure your pet’s safety and well-being. Awareness of these cautions can help prevent potential adverse effects and interactions.
1. Pre-existing Conditions:
Certain health conditions may make Hydroxyzine less suitable or require adjustments in dosage. It’s essential to inform your vet if your dog has:
Liver or kidney disease
Glaucoma
Heart conditions
Seizure disorders
Prostate enlargement
Urinary retention issues
2. Other Medications:
Hydroxyzine can interact with other drugs. Always provide your veterinarian with a comprehensive list of medications and supplements your dog is taking. Particular attention should be given if your dog is on:
Other sedatives or CNS depressants
Certain anticholinergic agents
Epinephrine
Barbiturates
3. Pregnancy and Lactation:
The safety of Hydroxyzine in pregnant or nursing dogs is not well-established. If your dog is pregnant, intending to breed, or lactating, discuss the potential risks and benefits with your vet.
4. Age Considerations:
Elderly dogs or very young puppies might be more susceptible to the effects of Hydroxyzine, requiring a dosage adjustment or close monitoring.
5. Duration of Treatment:
While you can give Hydroxyzine to your dog for extended periods, you should regularly visit your vet to evaluate its ongoing effectiveness and watch for any potential side effects or health changes.
6. Avoid Overdosing:
Always stick to the prescribed dose. If you suspect an overdose, which might manifest as excessive sedation, respiratory depression, or hypotension, seek veterinary attention immediately.
7. Sudden Discontinuation:
While Hydroxyzine doesn’t typically cause withdrawal, always consult your vet before stopping the medication, especially after long-term use.
8. Storage:
Store Hydroxyzine in a cool, dry place, away from direct sunlight and out of reach of children and pets.
Points to Remember:
Open Communication: Maintaining transparent communication with your veterinarian is crucial. Any changes in behavior, new symptoms, or concerns should be promptly discussed.
Follow Directions: Always adhere to the veterinarian’s instructions regarding dosage, frequency, and duration.
Regular Check-ups: Periodic vet visits can help assess the ongoing efficacy of the medication and catch potential issues early on.
In conclusion, while Hydroxyzine offers various benefits for dogs, understanding and observing these cautions can ensure the treatment remains both effective and safe.
Drug Interactions
When introducing any new medication to your dog, it’s essential to be aware of potential drug interactions, as these can affect how the medicine works and may increase the risk of side effects. Hydroxyzine, although a helpful drug for various conditions in dogs, can interact with certain other medications. Here’s what you should be aware of:
1. Central Nervous System Depressants:
Examples: Barbiturates (like Phenobarbital), benzodiazepines (like diazepam or alprazolam), and certain anesthetics.
Potential Interaction: Combining Hydroxyzine with other CNS depressants can amplify the sedative effects, leading to increased drowsiness, respiratory depression, or even coma in severe cases.
2. Anticholinergic Drugs:
Examples: Atropine, some antihistamines, tricyclic antidepressants (like amitriptyline), and certain medications used for urinary incontinence (like tolterodine).
Potential Interaction: Concurrent use can increase the risk of anticholinergic side effects such as dry mouth, urinary retention, constipation, and potential overheating.
3. Sympathomimetic Agents:
Examples: Epinephrine, norepinephrine, or certain medications used for asthma like albuterol.
Potential Interaction: Hydroxyzine can enhance the effects of these agents, potentially leading to an increased heart rate or elevated blood pressure.
Potential Interaction: Using Hydroxyzine with other antihistamines can result in additive sedative effects and an increased risk of side effects.
5. Monoamine Oxidase Inhibitors (MAOIs):
Examples: Selegiline or certain anti-depressants not typically used in dogs.
Potential Interaction: These can enhance the anticholinergic effects of Hydroxyzine.
Points to Remember:
Full Disclosure: Always inform your veterinarian of all medications, supplements, and over-the-counter products your dog is taking.
Monitoring: If your dog must take Hydroxyzine with another drug known for interactions, frequent monitoring and dose adjustments might be necessary.
Immediate Attention: If you observe any unexpected symptoms or reactions in your dog after administering Hydroxyzine alongside another medication, seek veterinary attention immediately.
While Hydroxyzine is generally safe for many dogs, it’s crucial to be aware of potential drug interactions to ensure the safety and efficacy of the treatment.
How Long Does Hydroxyzine Last?
Understanding the duration of a medication’s effect is crucial, as it not only informs dosing intervals but also gives pet owners an idea of what to expect in terms of relief for their dogs. With Hydroxyzine, its duration of action can be pivotal in managing symptoms like itching, anxiety, or nausea.
1. Onset of Action:
Typically, after oral administration, Hydroxyzine begins to show its effects within 30 minutes to an hour.
2. Peak Effects:
Hydroxyzine usually reaches its maximum concentration or peak effects within 2 to 3 hours after administration.
3. Duration of Action:
For most dogs, the effects of Hydroxyzine can last anywhere from 4 to 8 hours. However, some dogs, especially those more sensitive to the drug or receiving higher doses, might experience longer-lasting sedative effects.
4. Factors Affecting Duration:
Size and Weight: Smaller dogs might metabolize and eliminate drugs differently than larger breeds.
Age: Elderly dogs, or very young puppies, might experience prolonged effects due to differences in metabolism.
Health Status: Dogs with liver or kidney issues might metabolize Hydroxyzine slower, leading to prolonged effects.
Concurrent Medications: As discussed in the drug interactions section, certain medications can influence how Hydroxyzine is processed in the body.
5. Elimination:
The liver primarily metabolizes Hydroxyzine, and the body excretes it through urine. The average half-life in dogs (the time it takes to eliminate half the drug from the body) is about 3 to 4 hours, but individual factors can cause variation.
Points to Remember:
Consistent Dosing: Given its duration of action, Hydroxyzine is often prescribed to be given multiple times a day, especially for conditions that require continuous relief, such as allergies. Ensure you’re administering it at consistent intervals as directed by your vet.
Monitor for Prolonged Effects: Especially when starting the medication, observe your dog for prolonged sedation or other effects. If the dog seems excessively drowsy or lethargic well beyond the 8-hour mark, consult your veterinarian.
Avoid Missing Doses: Consistency is key, especially for chronic conditions. If you miss a dose, give it as soon as you remember. If it’s close to the time for the next dose, skip the missed dose and return to the regular schedule. Do not double the dose to catch up.
While Hydroxyzine offers several hours of relief, it’s essential to administer it consistently and be aware of its duration to ensure optimum benefits for your pet.
How to Administer Hydroxyzine to Your Dog
Ensuring the proper administration of medication is just as important as the medication itself. When given correctly, Hydroxyzine can offer maximum benefits with minimal side effects. Here’s a step-by-step guide to ensure you’re administering Hydroxyzine safely and effectively to your dog:
1. Read the Prescription Label:
Always start by carefully reading the prescription label. This will give you information on the correct dosage, frequency, and any special instructions provided by your veterinarian.
2. Measure the Dose:
If using liquid forms, use a syringe or the provided measuring tool to get the exact amount.
For tablets or capsules, ensure you’re using the correct strength and number of pills.
3. Administering the Dose:
Oral Tablets/Capsules: You can give these directly by placing them at the back of the dog’s throat, then gently holding the mouth shut and massaging the throat to encourage swallowing. Alternatively, you can hide the pill in a treat or use a pill dispenser.
Liquid Form: Gently lift the side of your dog’s lip and insert the syringe or dropper between the cheek and gums. Slowly squirt the medicine into the back of the mouth. Ensure you’re not introducing the liquid too quickly or forcefully to prevent choking.
4. Make it Palatable:
If your dog is resistant, consider using pill pockets or wrapping the tablet in a small piece of food. This can make the process smoother and less stressful for both of you.
5. Monitor for Reactions:
After giving the medication, keep an eye on your dog for a little while to ensure there are no immediate adverse reactions or signs of distress.
6. Store Properly:
Store Hydroxyzine in a cool, dry place, away from direct sunlight and out of reach of children and other pets.
7. Stay Consistent:
Ensure you’re administering Hydroxyzine at consistent intervals as directed by your vet. This is crucial for conditions that require continuous relief.
8. Missed Doses:
If you miss a dose, give it as soon as you remember. If it’s close to the time for the next dose, skip the missed dose and return to the regular schedule. Never double the dose to catch up.
9. Seek Feedback:
If you find it consistently challenging to give your dog Hydroxyzine, or if your dog reacts poorly, seek feedback and alternatives from your vet.
Points to Remember:
Positive Reinforcement: Reward your dog with praise, petting, or a small treat after administering the medication. This can create a positive association and make future doses easier.
Safety First: If your dog becomes overly aggressive or stressed, stop and consult with your veterinarian about possible alternative methods or medications.
Check for Interactions: Especially if introducing any new supplements or medications, ensure there’s no risk of interaction with Hydroxyzine.
While giving medication to pets can sometimes be challenging, understanding the best techniques and practices can make the process smoother. Remember, consistency and patience are key.
Complementary Natural Products to Hydroxyzine for Your Treatment Plan
Dr. Candy’s Recommendations
While Hydroxyzine is a potent medication for various conditions in dogs, sometimes integrating natural products and supplements can offer additional relief or act as alternatives for milder symptoms. These complementary products can either boost the effects of Hydroxyzine or offer a natural solution where chemical medications might not be necessary. Always consult with your veterinarian before introducing any new remedies.
1. Omega-3 Fatty Acids:
Benefits: These can help reduce inflammation, boost the immune system, and promote healthy skin and coat.
Benefits: Known for its calming effects, lavender can help reduce anxiety and stress.
Application: Always dilute essential oils and introduce slowly. A couple of drops can be placed on a bandana or diffused in the room. Ensure the oil is 100% pure.
6. Coconut Oil:
Benefits: It has anti-inflammatory properties and can promote healthy skin and a shiny coat.
Application: Can be applied topically to itchy areas or added in small amounts to food.
Points to Remember:
Consultation is Key: Before introducing any natural product, consult with your vet to ensure it’s safe for your specific dog and won’t interfere with any ongoing medications, including Hydroxyzine.
Allergies: Just as with any other product, dogs can be allergic to natural remedies. Start with small amounts and monitor your dog for any adverse reactions.
Quality Matters: Ensure you’re choosing high-quality, organic, and pet-safe products. Especially with essential oils, ensure they’re 100% pure without additives.
Natural products can offer valuable complementary relief alongside or sometimes in place of medications like Hydroxyzine.
Conclusion
Navigating the health and well-being of our furry companions can be a complex journey, filled with decisions about their care and treatment. Hydroxyzine, as we’ve explored, offers substantial benefits for dogs struggling with allergies, anxiety, and other conditions. Its efficacy, however, lies not just in the drug itself, but in our understanding of its proper use, potential side effects, and complementary treatment options.
The world of pet care is ever-evolving, with a blend of modern medications and natural remedies coming to the fore. As responsible pet owners, it’s our duty to stay informed and make decisions in consultation with trusted veterinarians. Whether you’re leaning towards pharmaceutical solutions like Hydroxyzine or considering natural remedies, always prioritize your dog’s unique needs and well-being.
Remember, every dog is individual, and what works best for one might differ for another. Continuous observation, regular check-ups, and open communication with your vet will ensure your dog gets the best care possible. After all, our pets offer us unconditional love, and they deserve nothing less than our unconditional commitment to their health and happiness.
Thank you for joining us on this deep dive into Hydroxyzine for dogs. Here’s to many happy, itch-free, and calm tail-wagging days ahead!
Frequently Asked Questions
How is hydroxyzine medication useful?
Allergies cause histamine release, which causes itchy skin. Hydroxyzine blocks histamine’s effects to reduce itchiness associated with allergies. It can also be used as treatment for itching related to certain types of cancers (eg, mast cell tumors). Like other antihistamines, the response to this drug can vary between animals and be unpredictable, so your veterinarian may try several different antihistamines to see which one works best for your animal. Hydroxyzine may be used with another antihistamine to improve its effects.
The FDA (U.S. Food & Drug Administration) has approved this drug for use in humans, but it is not officially approved for use in animals. The FDA allows veterinarians to prescribe products containing this drug in different species or for other conditions in certainbut it is situations. You and your veterinarian can discuss why this drug is the most appropriate choice.
How long until I will know if hydroxyzine is working, and how long will the effects of this medication last?
This medication should help your animal feel better within 1 to 2 hours. Your animal’s clinical signs should improve after that time. The effects of this medication are short-lived, meaning they will stop working within 24 hours, although the benefits may be prolonged if your animal has decreased kidney and/or liver function.
What are the side effects of hydroxyzine?
Side effects that usually are not serious include: – Sedation (sleepiness, fatigue) is the most common side effect. Most animals will become tolerant to this effect with time and will not get as sleepy when given the medication. – Excitement. Occasionally, hydroxyzine causes some animals to become overly excited. – Dogs: Muscle tremors (uncommon). – Cats: Greater thirst, behavior changes (uncommon). – Lack of appetite, low blood pressure (uncommon). You don’t have to be overly concerned if you see any of these signs unless they are severe, worsen, or continue to be a problem. Contact your veterinarian if this happens.
Side effects that may be serious or indicate a serious problem: Dogs: Seizures. These are rare; contact your veterinarian immediately if they occur.
If my animal gets too much hydroxyzine (an overdose), what should I do?
Small overdoses of hydroxyzine are usually not serious, but larger overdoses may be serious. Excessive drowsiness, excitability, tremors, stumbling, collapsing (passing out), higher body temperature, or seizures are all signs of possible overdose. If you witness or suspect an overdose, contact your veterinarian or an animal poison control center immediately for further advice. Animal poison control centers that are open 24 hours a day include: ASPCA Animal Poison Control Center(888-426-4435) and Pet Poison HELPLINE (855-764-7661); a consultation fee is charged for these services.
How should hydroxyzine be given?
For hydroxyzine to work, give it exactly as your veterinarian has prescribed. It’s a good idea to always check the prescription label to be sure you are giving the drug correctly. – Hydroxyzine may be given either with food or on an empty stomach. If your animal vomits or acts sick after receiving the drug on an empty stomach, try giving the next dose with food or a small treat. If vomiting continues, contact your veterinarian. – Liquid forms of this medication must be measured carefully. Your veterinarian or pharmacist can help by providing special measuring spoons or syringes. Shake the oral suspension well before each use. – If you have difficulty getting your animal to take the medicine, contact your veterinarian or pharmacist for tips to help with dosing and reducing the stress of medication time.
What should I do if I miss giving a dose of hydroxyzine?
If you miss a dose, give it when you remember, but if it is close to the time for the next dose, skip the dose you missed and give it at the next scheduled time. After that, return to the regular dosing schedule. Do not double-up or give extra doses.
What other information is important for using hydroxyzine safely in dogs?
– Because this drug can cause dry mouth, be sure your pet has access to water at all times. – Use of this drug may not be allowed in certain animal competitions. Check rules and regulations before entering your animal in a competition while this medication is being administered.
A note about your dog’s health
This article provides general education and does not replace an examination, diagnosis, or individualized advice from your veterinarian. Contact a veterinary professional if you are concerned about your dog’s symptoms.
Dr. Candy Akers earned her Doctor of Veterinary Medicine degree from Oklahoma State University in 2009 after completing undergraduate studies at the University of Delaware. Her experience includes companion-animal nutrition, chronic disease, allergies, autoimmune conditions, cold laser therapy, wildlife rehabilitation, and emergency wildlife response. She combines conventional veterinary knowledge with a whole-animal perspective to help pet parents understand their options and recognize when individualized veterinary care is needed.
Navigating the world of canine health can sometimes feel like deciphering a complex puzzle. Navigating the plethora of medications, treatments, and natural remedies can easily overwhelm us as we strive to make the best choices for our furry friends. That’s why today, we’re diving deep into the subject of Triamcinolone for dogs. You might’ve come across this name during a vet visit or while scouring the web for answers about doggy health issues.
Whatever the reason, we’re here to demystify this drug, discuss its uses, side effects, and even delve into some natural complementary products that can enhance your pet’s overall well-being. Think of this as your go-to guide, written with care and a pinch of love, to ensure your tail-wager gets the best possible care. So, grab a cup of tea (or perhaps a dog treat for your loyal companion) and let’s embark on this informative journey together!
What is Triamcinolone?
Triamcinolone, often nestled amidst an array of medical terminologies, is a synthetic corticosteroid. But let’s break that down in simpler terms. Corticosteroids are a type of medication that mimics the action of steroids naturally produced by our adrenal glands, and yes, your dog has them too!
This particular medication falls under the umbrella of glucocorticoids, which means it’s adept at reducing inflammation, suppressing immune responses, and even fighting certain types of cancers. Imagine it as a versatile tool in a veterinarian’s toolbox, useful for tackling a range of ailments.
Its versatility is partly what makes Triamcinolone a go-to for many vets. Whether it’s addressing skin allergies, calming down an overactive immune system, or providing relief from chronic inflammatory conditions, Triamcinolone steps in like a reliable friend, ensuring our canine buddies get the relief they so rightfully deserve.
But, like all medicines, it’s not just about knowing the ‘what’, but also the ‘how’, ‘when’, and ‘why’. So, as we explore further, you’ll get a comprehensive view of how Triamcinolone can play a role in your dog’s healthcare journey. Stick with us; we’re just scratching the surface!
Uses of Triamcinolone in Dogs
It’s a beautiful thing, watching our dogs play, explore, and enjoy life’s simple pleasures. But, as with all creatures, they too can face health challenges. In such times, medicines like Triamcinolone step in to lend a helping paw. Let’s dig into the array of uses this versatile medication offers for our canine companions.
1. Anti-Inflammatory Superstar: Inflammation can be a real dampener, causing discomfort, pain, or even chronic ailments. Triamcinolone acts like a superhero cape for our pets, combatting inflammation in conditions such as allergies, skin conditions, or joint pain. Its powerful anti-inflammatory properties provide much-needed relief, ensuring that wagging tail doesn’t miss a beat!
2. Immunosuppressive Agent: While a robust immune system is generally a boon, sometimes it can become too active, targeting the body’s own cells. Autoimmune disorders, where the body mistakenly attacks itself, can be distressing. That’s where Triamcinolone steps in, calming the immune system and ensuring it doesn’t go into overdrive.
3. Tackling Addison’s Disease: Hypoadrenocorticism, more commonly known as Addison’s disease, is a condition where the body doesn’t produce enough corticosteroids. Triamcinolone can act as a supplement, helping to balance out the body’s internal environment and alleviate symptoms.
4. An Antineoplastic Agent: While it’s a heart-wrenching topic, some dogs do face the challenge of cancer. In specific cases, you can use Triamcinolone as an antineoplastic or anticancer agent to combat this formidable foe.
Understanding the uses of Triamcinolone provides a foundation, but it’s essential to remember that, like all medications, it’s vital to use it under the guidance of a trusted veterinarian. They will ensure that the treatment fits your pet’s specific needs and condition perfectly. After all, each dog is unique, and you should tailor their healthcare specifically for them!
Triamcinolone Dosage Chart
Please note: This chart is a general guideline. Always consult with your veterinarian for the precise dosage tailored to your dog’s specific needs.
Weight of Dog
Dosage for Anti-Inflammatory
Dosage for Immunosuppression
Dosage for Addison’s Disease
Dosage for Antineoplastic Use
Up to 10 lbs
0.25 – 0.5 mg
0.5 – 1 mg
0.25 – 0.5 mg
Consult Vet
11-20 lbs
0.5 – 1 mg
1 – 2 mg
0.5 – 1 mg
Consult Vet
21-40 lbs
1 – 2 mg
2 – 4 mg
1 – 2 mg
Consult Vet
41-60 lbs
2 – 3 mg
3 – 6 mg
2 – 3 mg
Consult Vet
61-80 lbs
3 – 4 mg
4 – 8 mg
3 – 4 mg
Consult Vet
Over 80 lbs
4 – 5 mg
5 – 10 mg
4 – 5 mg
Consult Vet
Anti-Inflammatory: Used for conditions where inflammation is the primary concern, such as allergies, certain skin conditions, or arthritic joint pain.
Immunosuppression: In cases of autoimmune disorders, we often need to suppress the immune system.
Addison’s Disease: For the treatment and management of hypoadrenocorticism, where the body does not produce sufficient corticosteroids.
Antineoplastic Use: The dosage for cancer treatments varies significantly based on the type of cancer, stage, and other individual factors. Always consult with a veterinarian for this.
Disclaimer: This chart is meant to provide a general overview. Individual needs can vary based on the dog’s health condition, age, other medications, and more. Always rely on a veterinarian’s expert advice when administering Triamcinolone or any other medication.
Available Forms of Triamcinolone
Triamcinolone, like many medications, comes in various forms to cater to different needs and conditions. This versatility ensures that administering the medication is as convenient and effective as possible for our four-legged companions. Let’s discuss these different avatars of Triamcinolone and understand their unique characteristics.
1. Liquids:
Description: This is a solution form of Triamcinolone, often available as an oral suspension.
Usage: It’s generally given directly into the dog’s mouth using a dropper or mixed with a small amount of food.
Benefits: Liquid forms allow for easy dose adjustments and can be a boon for pets that are resistant to swallowing pills.
2. Oral Tablets/Capsules:
Description: These are the most common forms and come as pills or capsules containing a specific amount of Triamcinolone.
Usage: Given directly by mouth, often hidden inside a treat or pill pocket to make ingestion easier.
Benefits: They provide a precise dosage, are easy to administer for most dogs, and can be stored conveniently.
3. Injections:
Description: Triamcinolone injections deliver the drug directly into the bloodstream or a specific area.
Usage: Administered by a veterinarian, these can be given into a muscle (intramuscular), under the skin (subcutaneous), or directly into a joint or lesion.
Benefits: Rapid action, suitable for dogs that cannot or should not take oral medications, and beneficial for localized conditions like specific joint inflammations.
4. Topical Preparations:
Description: These are creams, ointments, or gels containing Triamcinolone, designed for external application.
Usage: Applied directly to the affected skin areas.
Benefits: Direct treatment of skin conditions, reduced systemic effects compared to oral forms, and provides localized relief.
Choosing the right form of Triamcinolone for your dog depends on the condition being treated, the dog’s preferences, and the veterinarian’s recommendations. Each form has its pros and cons, but the overarching goal remains the same: to provide relief and support for our beloved pets in their times of need. As always, it’s imperative to follow the vet’s guidance when it comes to administering any form of medication.
Side Effects of Triamcinolone in Dogs
Every medication, no matter how beneficial, comes with the potential for side effects. Understanding these is crucial so you can keep a watchful eye on your canine companion and ensure they remain in the pink of health. Here’s a breakdown of the side effects that may arise from administering Triamcinolone to dogs:
1. Increased Thirst and Urination: Triamcinolone, like other corticosteroids, can lead to polydipsia (increased thirst) and polyuria (increased urination). You might notice your dog drinking more water and needing more frequent potty breaks.
2. Increased Appetite: Dogs on Triamcinolone might show an increased appetite, sometimes leading to weight gain.
3. Gastrointestinal Issues: Stomach upset, including vomiting and diarrhea, can occasionally occur. Long-term use might also increase the risk of gastric ulcers.
4. Suppressed Immune System: Being an immunosuppressive agent, Triamcinolone can potentially make your dog more susceptible to infections.
5. Behavioral Changes: Some dogs might exhibit signs of restlessness, anxiety, or even aggression. Others might seem lethargic or depressed.
6. Skin and Coat Changes: Prolonged use can lead to a thinner coat, dry skin, or the development of acne or hot spots.
7. Muscle Weakness: In some cases, dogs might exhibit signs of muscle loss or weakness.
8. Delayed Healing: Wounds or infections might take longer to heal due to the immunosuppressive nature of the drug.
9. Development of Cushing’s Disease: With prolonged use at high doses, there’s a risk of inducing Cushing’s disease, a condition where the body produces too much cortisol.
10. Potential for Diabetes: Long-term use can increase the risk of diabetes, especially in predisposed dogs.
A Few Points to Ponder:
Short-Term vs. Long-Term: While short-term use is generally safe, prolonged use increases the risk of side effects. It’s essential to weigh the benefits against potential risks.
Communication is Key: Always keep an open line of communication with your vet. If you notice any unusual behavior or symptoms in your dog, it’s vital to bring it to their attention promptly.
Every Dog is Unique: Just like humans, dogs can react differently to medications. What might cause side effects in one dog might be completely benign for another.
Being informed empowers you to offer the best care for your furry friend. While Triamcinolone can be a wonderful aid in treating various conditions, always remain observant and proactive in monitoring your dog’s health. After all, they rely on us to ensure they live their happiest, healthiest lives!
Drug Interactions
Just like when we mix different ingredients in a recipe, combining medications can sometimes result in unexpected outcomes. It’s essential to be aware of potential drug interactions, ensuring the safety and well-being of our pets. Here’s a rundown of some interactions to consider when your dog is on Triamcinolone:
1. Non-Steroidal Anti-Inflammatory Drugs (NSAIDs): Examples include aspirin, carprofen (Rimadyl), and meloxicam (Metacam). Combining Triamcinolone with these drugs can increase the risk of gastrointestinal ulcers or bleeding.
2. Diuretics: Medications like furosemide (Lasix) can potentially enhance the potassium-depleting effects of corticosteroids, leading to lower potassium levels in the body.
3. Vaccines: Since Triamcinolone suppresses the immune system, it may reduce the efficacy of vaccines or increase the risk of neurological reactions to certain vaccines.
4. Insulin: Corticosteroids can alter blood glucose levels. If your dog is diabetic and on insulin, the insulin dosage might need adjustment when Triamcinolone is introduced.
5. Certain Antifungal Medications: Drugs like ketoconazole can increase the potency and duration of Triamcinolone, potentially intensifying its effects and side effects.
6. Phenobarbital: Long-term use of this medication can reduce the efficacy of Triamcinolone.
7. Anticholinesterase Agents: Used to treat myasthenia gravis, these agents can cause severe muscle weakness when combined with corticosteroids.
8. Digoxin: Triamcinolone can elevate the risk of arrhythmias when administered alongside digoxin.
A Couple of Crucial Points:
Open Dialogue: Before starting Triamcinolone, always provide your vet with a comprehensive list of all medications, supplements, and over-the-counter treatments your dog is taking. An informed vet is the best defense against harmful interactions.
Observe and Report: If you notice any unusual behavior or symptoms in your dog after introducing a new medication or changing dosages, contact your vet immediately.
Understanding potential drug interactions is essential in ensuring that all medications work harmoniously in benefiting your dog’s health. Remember, while it might seem like a lot to keep track of, your vet is always there to guide you through the process. Trust in their expertise and always prioritize open communication for the sake of your furry family member’s well-being.
How Long Does Triamcinolone Last?
Understanding the duration of a drug’s effect is crucial for maintaining effective and consistent treatment. It helps caregivers know when the next dose is due and what to expect in terms of relief and potential side effects. Here’s a breakdown of how long Triamcinolone typically lasts in dogs:
1. Duration of Action:
Triamcinolone is a medium to long-acting corticosteroid. Once administered:
Oral Tablets/Capsules: The effects can last anywhere from 12 to 48 hours, with most dogs requiring once or twice-daily dosing.
Injections: Depending on the specific formulation and the condition being treated, the effects of an injection can last from a few days to several weeks.
Topical Preparations: The duration largely depends on the condition of the skin, the severity of the issue, and how the skin metabolizes the drug, but generally, relief can be seen for 12-24 hours.
Liquids: Much like the oral tablets, the effects can last from 12 to 48 hours.
2. Factors Influencing Duration:
Metabolism: Just as every dog has its own unique personality, each one metabolizes drugs differently. Some dogs might process Triamcinolone more quickly than others.
Health Conditions: Dogs with liver or kidney issues might metabolize the drug slower or faster than dogs without such conditions.
Age: Older dogs may process medications more slowly than their younger counterparts.
3. What to Remember:
Consistency is Key: It’s important to administer the medication at the same times each day to maintain a consistent level of the drug in the dog’s system, especially for conditions that require continuous suppression, like allergies or autoimmune disorders.
Missed Doses: If you miss a dose, give it as soon as you remember. However, if it’s close to the time of the next dose, skip the missed dose and resume the regular schedule. Avoid doubling up, as this can lead to increased side effects.
Triamcinolone’s longevity in a dog’s system is influenced by multiple factors, from the specific form of medication to the individual characteristics of the dog. Always follow your vet’s dosage recommendations and keep an eye out for any signs that might indicate the need for an adjustment. Remember, the aim is consistent relief, and understanding the drug’s duration helps ensure your pet remains comfortable and happy.
How to Administer Triamcinolone to Your Dog
Ensuring the correct administration of medication is just as crucial as the drug itself. Proper administration guarantees that the medication is most effective while minimizing potential discomfort for your furry friend. Here’s a step-by-step guide on how to administer Triamcinolone to your dog:
1. Oral Tablets/Capsules:
Step 1: Check the prescribed dose and ensure you have the correct number of tablets or capsules.
Step 2: If your dog is eager, try giving the pill directly as a “treat.” If they’re skeptical, consider using pill pockets, wrapping it in a tasty treat, or disguising it in their food.
Step 3: Ensure they swallow it! Some dogs are crafty about spitting out medication.
2. Liquids:
Step 1: Shake the bottle if instructed. Draw up the correct dose using the provided dropper or syringe.
Step 2: Approach your dog calmly and gently open their mouth.
Step 3: Administer the liquid on the side of their mouth, allowing them to swallow. It can help to offer a tasty treat afterward as a reward.
3. Injections:
NOTE: Unless you’ve been specifically trained by your vet, it’s likely they will handle injection administration.
Step 1: Ensure the injection site is clean.
Step 2: If administering at home, draw up the correct dose into a sterile syringe, ensuring no air bubbles.
Step 3: Inject as instructed by your vet – subcutaneously (under the skin) or intramuscularly (into the muscle).
4. Topical Preparations:
Step 1: Ensure the affected area is clean and dry.
Step 2: Apply the cream, ointment, or gel as directed. This might be a thin layer or a specific amount.
Step 3: Prevent your dog from licking or scratching the area. This might require the use of a cone or e-collar.
General Tips:
Stay Calm and Positive: Your demeanor influences your pet. Stay calm and use a reassuring tone.
Reward Good Behavior: Praise your dog and give them a treat or extra attention after administering the medication.
Stick to a Schedule: Administering the medication at the same time each day helps maintain consistent levels in the body and establishes a routine.
Store Properly: Ensure that Triamcinolone is stored as per the instructions, away from light, heat, and out of reach of children and pets.
Wash Your Hands: Especially if handling topical preparations, always wash your hands before and after administration.
Remember, administering medication is a process that becomes more manageable with practice. Don’t be disheartened if the first few times are challenging. Always communicate any difficulties to your vet – they can offer additional guidance or alternative solutions to make the process smoother for both you and your four-legged buddy.
Complementary Natural Products to Enhance Treatment
While modern medications like Triamcinolone offer powerful benefits, many pet parents look for complementary natural products to support their dog’s overall well-being. These products, when used correctly, can enhance the primary treatment, providing a more holistic approach to canine health. Here’s a spotlight on some natural complementary products to consider:
The adrenal glands help the body adapt to stress through the release of corticosteroids and hormones.
Best used with sudden stressful events and ongoing stress (internal or external)
Probiotics:
Especially if your dog has had any gastrointestinal side effects from medications, probiotics can help restore gut balance, ensuring optimal digestion and nutrient absorption.
Points to Keep in Mind:
Consultation: Always consult your veterinarian before adding any natural or complementary products to your dog’s treatment plan. They can provide guidance on dosages and ensure there’s no interference with primary medications.
No Direct Replacements: Remember, while these products can support and enhance, they are not direct replacements for any medication. It’s essential to continue the primary treatment as prescribed by your vet.
Individual Responses: Just like humans, every dog is unique. Monitor your pet’s response to any new product and adjust (under veterinary guidance) as necessary.
Blending modern medicine with natural remedies can offer a comprehensive approach to canine health. By ensuring everything works in harmony, you’re giving your furry friend the best chance at a happy, healthy life.
Conclusion
Our four-legged companions rely on us to provide them with the best care, both medically and holistically. In navigating the vast landscape of canine health, the power of knowledge cannot be understated. With Triamcinolone offering a potent solution for specific health issues, it’s essential to be well-informed about its uses, dosages, and potential interactions. Moreover, blending modern medications with complementary natural products, like the Standard Process Canine Adrenal Support, can offer a comprehensive approach to well-being, ensuring our furry friends lead vibrant, comfortable lives.
As pet parents, we always want the best for our beloved dogs. And while the journey to optimal health can sometimes be overwhelming, remember that every step taken is a stride towards happier tails and brighter doggy smiles. So, here’s to informed choices, holistic health, and the unbreakable bond we share with our canine companions.
Frequently Asked Questions
How is triamcinolone used in dogs?
In animals, triamcinolone can be used to treat hypoadrenocorticism (Addison’s disease) and can be used as an anti-inflammatory drug, immunosuppressive drug, and antineoplastic (anticancer) agent. You and your veterinarian can discuss why this drug is the most appropriate choice.
How long until I will know if triamcinolone is working, and how long will the effects of triamcinolone last?
This medication should help your animal feel better within 1 to 2 hours. Your animal’s clinical signs should improve after that time. The effects of this medication are moderate in duration, meaning they may last for a few days, although the benefits may be prolonged if your animal has decreased kidney and/or liver function.
What are the side effects of triamcinolone?
Side effects that usually are not serious include: – Greater appetite, thirst, and need to urinate. – Vomiting, diarrhea. – Mild behavioral changes. – Panting more than normal (in dogs). You don’t have to be overly concerned if you see any of these unless they are severe, worsen, or continue to be a problem. Contact your veterinarian if this happens.
If my animal gets too much triamcinolone (an overdose), what should I do?
Contact your veterinarian or an animal poison control center for further advice if an overdose is suspected. Animal poison control centers that are open 24 hours a day include: Pet Poison HELPLINE (855-764-7661) and ASPCA Animal Poison Control Center (888-426-4435); a consultation fee is charged for these services.
What should I do if I miss giving a dose of triamcinolone?
If you miss a dose, give it when you remember, but if itis close to the time for the next dose, skip the dose you missed and give it at the next scheduled time. After that, return to the regular dosing schedule. Do not double-up or give extra doses.
How should I store triamcinolone?
– Store this medication in the original prescription bottle or an approved dosage reminder container (ie, pill minder) at room temperature and protected from light. – If your veterinarian or pharmacist has made (compounded) a special formulation for your animal, follow the storage recommendations and expiration date for the product. – Keep away from children and other animals.
A note about your dog’s health
This article provides general education and does not replace an examination, diagnosis, or individualized advice from your veterinarian. Contact a veterinary professional if you are concerned about your dog’s symptoms.
Dr. Candy Akers earned her Doctor of Veterinary Medicine degree from Oklahoma State University in 2009 after completing undergraduate studies at the University of Delaware. Her experience includes companion-animal nutrition, chronic disease, allergies, autoimmune conditions, cold laser therapy, wildlife rehabilitation, and emergency wildlife response. She combines conventional veterinary knowledge with a whole-animal perspective to help pet parents understand their options and recognize when individualized veterinary care is needed.
Every pet owner knows that feeling of concern when our furry friends fall ill or sustain an injury. Trusting in the expertise of our veterinarians, we rely on them to recommend the best medications for our pets. One such frequently prescribed antibiotic for our canine companions is Clavamox. But as with any medication, it’s crucial to be informed about what we’re giving our pets: How does it work? What are its side effects? Are there any natural remedies that can complement its benefits? Welcome to our comprehensive guide on Clavamox in dogs, where we delve deep into its uses, dosages, potential side effects, and much more.
With insights from veterinary experts, this blog aims to equip you with all the knowledge you need to ensure your dog’s well-being. Whether you’re a new dog parent or an experienced one looking for some clarity, our guide will shed light on all your Clavamox-related queries. Let’s embark on this informative journey together, ensuring our pets remain happy, healthy, and well-taken-care-of.
What is Clavamox?
Clavamox is a potent antibiotic commonly prescribed for dogs, as well as cats. A combination of two main ingredients, amoxicillin and clavulanic acid, makes up this medication. Together, these ingredients pack a powerful punch against a broad spectrum of bacteria that might cause various infections in dogs.
1. Amoxicillin: This is a penicillin antibiotic that works against bacteria by preventing them from building their cell walls. This leads to the eventual destruction of the bacteria. On its own, amoxicillin can be effective, but some bacteria produce a substance called beta-lactamase, which can make them resistant to the effects of amoxicillin.
2. Clavulanic Acid: This is where clavulanic acid comes in. Acting as a beta-lactamase inhibitor, it ensures that the bacteria’s resistance mechanisms are curtailed, making them susceptible to the destructive effects of amoxicillin.
The blend of these two ingredients in Clavamox increases the range of bacteria it can act against, making it particularly useful for treating a variety of bacterial infections in dogs, from skin infections to urinary tract infections and even some forms of respiratory infections.
The beauty of Clavamox lies in its combination approach: while amoxicillin targets bacteria, clavulanic acid ensures that these bacteria don’t develop resistance, ensuring a more effective treatment for our pets.
In a nutshell, Clavamox serves as a frontline defense against many common bacterial infections that might afflict our dogs, ensuring that they return to their playful and lively selves in no time.
Brand/Generic Names For Clavamox
When navigating the world of pet medications, it’s essential to recognize the distinction between brand names and generic names. This understanding can make all the difference when purchasing or discussing medications with your veterinarian or pharmacist. Let’s break down the brand and generic nomenclature for Clavamox.
1. Generic Name: The fundamental ingredients that make up Clavamox are amoxicillin and clavulanic acid. This combination is often referred to by these active ingredients. In the realm of human medicine, this combination might be familiar to some as Augmentin, especially when used in human healthcare.
2. Brand Name:Clavamox is the most commonly recognized brand name for this antibiotic combination when prescribed for pets. It’s manufactured by Zoetis, one of the leading companies in animal health. When veterinarians prescribe this antibiotic, they often use the brand name, Clavamox, though the generic version with the same active ingredients may also be available.
Why does this distinction matter?
Understanding the difference between the brand and generic names is crucial for several reasons:
Cost: Generic versions of medications often cost less than their brand-name counterparts. If you’re looking to save on pet medications, knowing the generic name can be beneficial when shopping around or discussing options with your veterinarian.
Availability: Sometimes, due to supply chain issues or other market factors, a brand-name drug might be temporarily unavailable. Knowing the generic name allows pet owners to find suitable alternatives without compromising on treatment quality.
Consistency: While the active ingredients remain the same between brand-name and generic drugs, the fillers or binding agents might differ. In rare cases, pets might have sensitivities to these agents. Thus, if you switch between brand-name and generic, it’s essential to monitor your dog for any adverse reactions.
While Clavamox is the prominent brand name associated with the antibiotic combination of amoxicillin and clavulanic acid for pets, being aware of its generic constituents can provide flexibility, potential cost savings, and a broader understanding when discussing your dog’s health.
Uses For Clavamox in Dogs
As a dog owner, understanding why a veterinarian prescribes a particular medication is crucial. This knowledge ensures peace of mind and allows for proactive care. Clavamox, with its powerful antibiotic combination of amoxicillin and clavulanic acid, has a range of uses in treating various bacterial infections in our canine companions.
1. Skin and Soft Tissue Infections:
Abscesses: Clavamox can effectively treat abscesses caused by bacteria, helping reduce swelling, pain, and pus formation.
Wounds: Whether post-surgical or due to an injury, Clavamox can help in preventing or treating bacterial infections in wounds.
Pyoderma: This refers to any skin disease that leads to pus production. Clavamox is often prescribed to address bacterial causes of pyoderma.
2. Dental Infections:
Clavamox can effectively combat bacteria responsible for dental abscesses, gum infections, and other oral cavity infections.
3. Urinary Tract Infections (UTIs):
Bacteria are a common culprit behind UTIs in dogs. Clavamox is regularly prescribed to treat these infections, relieving symptoms like frequent urination, blood in urine, or pain.
4. Respiratory Infections:
Clavamox can be used to treat certain bacterial infections affecting the respiratory system, such as bronchitis or pneumonia.
5. Bone Infections:
In some cases, bacteria can infect a dog’s bones, leading to conditions like osteomyelitis. Clavamox can be effective in treating such infections, especially when caught early.
6. Ear Infections:
While there are multiple causes for ear infections in dogs, bacterial infections are among the common reasons. Clavamox can help address bacterial ear infections, reducing inflammation, pain, and discharge.
Why Clavamox?
The strength of Clavamox lies in its dual-action approach. Amoxicillin targets the bacteria, while clavulanic acid ensures that these bacteria don’t develop resistance. This combination ensures a broad spectrum of action against numerous bacteria types, making it a favored choice among veterinarians.
Clavamox serves as a versatile antibiotic in the arsenal of canine health. From skin to bones, this medication plays a pivotal role in addressing various bacterial infections, ensuring our furry friends remain in their prime health. Always consult with your veterinarian regarding the best treatment options and to understand if Clavamox is the right fit for your dog’s condition.
Clavamox Dosage Chart for Dogs
Clavamox Dosage Chart for Dogs
Dog’s Weight
Clavamox Tablet Dosage (mg)
Clavamox Liquid Dosage (mL)
5 lbs
31.25 mg
0.5 mL
10 lbs
62.5 mg
1.0 mL
20 lbs
125 mg
2.0 mL
30 lbs
187.5 mg
3.0 mL
40 lbs
250 mg
4.0 mL
50 lbs
312.5 mg
5.0 mL
60 lbs
375 mg
6.0 mL
70 lbs
437.5 mg
7.0 mL
80 lbs
500 mg
8.0 mL
90 lbs
562.5 mg
9.0 mL
100 lbs
625 mg
10.0 mL
Dosage Frequency: Typically, Clavamox is administered twice daily.
Considerations:
Type of Infection: The severity and type of infection can alter the required dosage. A vet might prescribe a higher or lower dose based on the dog’s specific condition.
Formulation: Clavamox comes in different forms, such as chewable tablets and liquid suspension. Ensure you understand the correct measurement based on the prescribed formulation.
Duration: Typically, the course of Clavamox lasts between 5 to 7 days, but it might be extended based on the dog’s response to treatment.
Missed Dose: If a dose is missed, give it as soon as you remember. However, if it’s close to the time for the next dose, skip the missed dose and continue with the regular schedule.
IMPORTANT: This chart serves as a general guideline. Individual circumstances, such as the dog’s overall health, age, other medications, and specific condition, can influence the appropriate dosage. Always consult with your veterinarian for personalized advice and never administer Clavamox without a prescription.
Forms of Clavamox
Understanding the various forms in which Clavamox is available helps dog owners administer the medication effectively and ensures that the pet receives the right dosage. Here’s a breakdown of the different forms of Clavamox available for dogs:
1. Chewable Tablets:
Description: These are flavored tablets designed to make the administration process more manageable, especially for dogs that might resist taking medications.
Available Dosages: Clavamox chewable tablets are typically available in 62.5 mg, 125 mg, 250 mg, and 375 mg strengths.
Pros: They are often more palatable for dogs, making the medication process smoother. They also ensure a precise dose.
Cons: Some dogs might still refuse to take them or could have dietary restrictions that make flavored medications problematic.
2. Liquid Suspension (Drops):
Description: This is a liquid form of Clavamox that can be measured and administered using a dropper or syringe.
Preparation: Before the first use, the liquid suspension needs to be reconstituted (mixed) with water. After mixing, it’s stored in the refrigerator.
Pros: It’s easier to administer to dogs that resist tablets or require a dosage that’s challenging to achieve with tablets. It’s also ideal for puppies or smaller dogs.
Cons: The liquid form has a shorter shelf life once mixed, typically around 10 days. It also requires refrigeration, and some owners might find it messier or more challenging to ensure their dog swallows the entire dose.
3. Standard Tablets (Non-chewable):
Description: These are the traditional, non-flavored tablets.
Available Dosages: Similar to chewable tablets, they come in varying strengths such as 62.5 mg, 125 mg, 250 mg, and 375 mg.
Pros: These offer precise dosing and have a longer shelf life than the liquid suspension.
Cons: Some dogs might resist swallowing standard tablets, and they might need to be hidden in food or use a pill dispenser.
Points to Consider When Choosing a Form:
Dog’s Preference: Some dogs might prefer chewables over liquid or vice versa. Understanding your pet’s preference can make the medication process smoother.
Ease of Administration: Consider which form you’re most comfortable administering, especially if you’ll be giving the medication for several days.
Dosage Accuracy: It’s crucial to ensure the correct dosage, so choose a form that allows you to administer the prescribed amount accurately.
Storage and Shelf Life: Consider the storage requirements (like refrigeration for the liquid form) and how long you’ll need to administer the medication.
Clavamox offers flexibility in its administration, catering to the varied preferences of dogs and their owners. Whether your dog is a chewer, a licker, or a stubborn medication-taker, there’s likely a form of Clavamox that will suit both your needs.
Side Effects of Clavamox In Dogs
While Clavamox is a commonly prescribed and generally safe antibiotic for dogs, like any medication, it can have potential side effects. Being informed about these side effects can help dog owners identify any issues early and seek veterinary advice when needed.
1. Allergic Reactions:
Symptoms: Swelling of the lips, face, or tongue; hives; difficulty breathing; rapid heartbeat.
Note: Allergic reactions, while rare, require immediate veterinary attention. If you suspect your dog is having an allergic reaction to Clavamox, discontinue the medication and contact your vet promptly.
2. Gastrointestinal Issues:
Diarrhea: Some dogs might experience loose or watery stools. If diarrhea is severe, persistent, or bloody, contact your veterinarian.
Vomiting: It’s not uncommon for some dogs to vomit after taking Clavamox, especially if given on an empty stomach.
Loss of Appetite: Some dogs might eat less while on Clavamox.
3. Changes in Behavior:
Lethargy: Some dogs might become less active or seem drowsy.
Hyperactivity: Conversely, some dogs might become overly active or restless.
4. Yellowing of the Skin or Eyes (Jaundice):
This could indicate a liver problem and requires immediate veterinary attention.
5. Drooling or Changes in Urination:
Excessive drooling after administering Clavamox or changes in the frequency or color of urination can be side effects.
Tips to Mitigate Side Effects:
With Food: Administering Clavamox with a small amount of food can help reduce the risk of stomach upset.
Consistent Timing: Give Clavamox at evenly spaced intervals, as directed by your vet, to maintain consistent drug levels in your dog’s system.
Monitor: Keep a close eye on your dog after administering Clavamox, especially the first few times, to catch any adverse reactions early.
Consult with Vet: If any side effect concerns you, or if your dog seems particularly uncomfortable, don’t hesitate to contact your veterinarian for advice.
Most dogs tolerate Clavamox well, and the benefits of treating bacterial infections typically outweigh the risks of potential side effects. However, being observant and proactive in recognizing and addressing these side effects ensures that our canine companions remain safe and comfortable during their course of treatment.
Cautions When Using Clavamox In Dogs
Using Clavamox or any medication necessitates a degree of caution to ensure the safety and wellbeing of your pet. Being informed about potential risks and precautions ensures that you’re well-prepared to provide your dog with the best care while they’re on medication.
1. Pre-existing Health Conditions:
Liver or Kidney Issues: Dogs with liver or kidney diseases might metabolize and excrete drugs differently. Ensure your vet is aware of any known conditions before starting Clavamox.
Allergies: If your dog has had allergic reactions to other penicillin-based drugs, they might also be allergic to Clavamox.
2. Pregnancy and Lactation:
While Clavamox is generally considered safe for pregnant or lactating dogs, it’s essential to discuss any potential risks with your veterinarian.
3. Drug Interactions:
Other Antibiotics: Clavamox can interact with other antibiotics, especially those of the tetracycline or chloramphenicol classes.
Antacids: Medications that reduce stomach acidity might interfere with the absorption of Clavamox.
Probenecid: This drug can increase the amount of amoxicillin in the dog’s bloodstream, potentially leading to side effects.
4. Overdose Risks:
Accidental overdoses can occur. Signs might include muscle spasms, seizures, or severe vomiting. If you suspect an overdose, seek veterinary attention immediately.
5. Duration of Treatment:
It’s essential to complete the entire course of Clavamox, even if your dog seems better. Stopping the medication early can lead to antibiotic resistance or a recurrence of the infection.
6. Missed Doses:
If you forget a dose, give it as soon as you remember. If it’s close to the next dose’s time, wait and continue with the regular schedule. Never give two doses at once.
Being cautious ensures that your dog benefits from the therapeutic effects of Clavamox without unnecessary risks. Regularly communicate with your veterinarian, report any unusual behaviors or side effects, and always follow the prescribed dosage and duration to ensure your dog’s health and safety.
Drug Interactions
When your dog is on medication, it’s crucial to be aware of potential drug interactions, as certain combinations can either diminish the effect of the drugs or amplify potential side effects. Clavamox, being an amalgamation of amoxicillin and clavulanate, has some potential interactions with other drugs. Here’s what you should know:
1. Other Antibiotics:
Tetracyclines and Macrolides: These classes of antibiotics may diminish the bactericidal effects of Clavamox. Using them concurrently can decrease the efficacy of Clavamox in treating infections.
Chloramphenicol: This antibiotic can also interfere with the bactericidal effects of Clavamox.
2. Antacids, Laxatives, and Food:
Medications or substances that modify the stomach’s pH level can affect the absorption rate of Clavamox. If your dog is on antacids or certain types of laxatives, it may influence the efficacy of Clavamox.
Important Considerations:
Always Inform Your Vet: When discussing any medication for your dog, always inform your veterinarian of any other drugs, supplements, or over-the-counter treatments your dog is currently taking or has recently taken.
Avoid Human Medications: Never give your dog human medications without explicit instruction from a veterinarian. Many human drugs can be harmful or fatal to pets.
Observe for Adverse Effects: If your dog is on multiple medications, be vigilant in monitoring them for any unusual behaviors, reactions, or symptoms that might indicate an interaction.
Stick to the Prescription: Always give the prescribed dose at the recommended times. If you suspect an interaction or if your dog seems to be experiencing side effects, contact your vet immediately.
Drug interactions can be complex, and while Clavamox is a widely used and generally safe antibiotic for dogs, it’s essential to approach its administration with an understanding of potential interactions. Ensuring that you’re fully informed and in regular communication with your veterinarian is the best way to ensure your dog’s safety and health while on medication.
How Long Does It Last?
When prescribing Clavamox for dogs, pet owners often wonder about the medication’s duration in the system, its shelf life, and how long treatment might last. Here’s a detailed breakdown:
1. Duration in the Dog’s System:
Half-Life: The half-life of a drug is the time it takes for half of it to be eliminated from the system. Clavamox’s active ingredients, amoxicillin and clavulanate, have a half-life ranging from 1 to 1.5 hours in dogs. This means that most of the drug is out of a dog’s system within 6 to 9 hours, which is why Clavamox is often prescribed to be given twice daily.
2. Treatment Duration:
Standard Duration: The length of time a dog needs to be on Clavamox can vary based on the type and severity of the infection. Generally, treatment durations range from 5 to 14 days.
Follow the Vet’s Prescription: It’s imperative to complete the full course of antibiotics, even if your dog seems to have recovered. Stopping early can lead to antibiotic-resistant bacteria or an infection resurgence.
Re-Evaluation: If there’s no improvement in your dog’s condition after a few days of starting Clavamox, it’s essential to consult your veterinarian. They might need to adjust the treatment or consider alternative medications.
3. Shelf Life and Storage:
Tablets: Clavamox tablets typically have a shelf life of several years if stored in a cool, dry place away from direct sunlight. Always check the expiration date before administering.
Liquid Suspension: Once mixed with water, Clavamox liquid suspensions should be refrigerated and used within 10 days. Unused portions after this period should be discarded.
4. Signs of Drug Degradation:
Color or Consistency Changes: If the Clavamox suspension changes color, becomes cloudier than usual, or has an off odor, it might be a sign of degradation and shouldn’t be used.
Tablet Discoloration: Tablets that appear discolored or crumbly may have degraded and might not be effective.
Understanding how long Clavamox lasts, both in the dog’s system and on your shelf, is crucial for ensuring effective treatment. Always adhere to your vet’s recommended treatment duration, store the medication appropriately, and remain vigilant to signs that the drug might have degraded or expired.
How To Give Clavamox To Your Dog
Administering medication to your dog can sometimes be a challenge, especially if they’re wary of unfamiliar items or tastes. Here are step-by-step instructions and tips on how to give Clavamox, be it in tablet or liquid form, to your dog.
1. Clavamox Tablets:
Step 1: Read the prescription label carefully for the correct dosage.
Step 2: Ensure your hands are clean.
Step 3: Hold the tablet between your thumb and forefinger.
Step 4: Using your other hand, gently open your dog’s mouth by holding onto the upper jaw.
Step 5: Tilt the head back slightly and place the tablet as far back on the tongue as possible.
Step 6: Close the dog’s mouth and hold it shut while gently rubbing or tapping the throat to encourage swallowing.
Tips for Tablets:
Pill Dispensers: These are specially designed tools that can help make the process of giving tablets easier and safer.
Hide in Food: For dogs reluctant to take a tablet, consider hiding it in a small amount of their favorite treat or a special pill pocket treat.
2. Clavamox Liquid Suspension:
Step 1: Ensure the suspension is well shaken so the medication is evenly distributed.
Step 2: Use the provided syringe or dropper to draw up the prescribed dose.
Step 3: Approach your dog calmly and gently open its mouth.
Step 4: Insert the tip of the syringe or dropper into the side of the mouth, between the cheek and back teeth.
Step 5: Slowly dispense the liquid. Allow your dog to swallow before dispensing more.
Tips for Liquid Suspension:
Mix with Food: If your dog is reluctant, you can mix the liquid suspension with a small amount of wet food. Ensure they consume the entire portion to get the full dose.
Tasty Treat After: Offer a treat after administering the medication as a reward and to mask any aftertaste.
General Tips:
Stay Calm: Your demeanor can influence your dog’s behavior. Approach the process calmly and confidently.
Consistent Timing: Give Clavamox at evenly spaced intervals to maintain consistent drug levels in your dog’s system.
Monitor for Reactions: After administering, keep an eye on your dog for any immediate allergic reactions or side effects.
Praise and Positive Reinforcement: Always reward your dog after giving medication. This can make future administrations smoother.
Giving Clavamox to your dog might require some patience and technique, especially the first few times. With consistent positive reinforcement and a calm approach, it will become a more straightforward task over time, ensuring your pet gets the treatment they need.
Complementary Natural Products That You Can Add To Your Treatment Plan
In conjunction with conventional treatments like Clavamox, many pet owners seek natural remedies to boost overall health and potentially alleviate side effects. Here’s a guide to some complementary products you might consider. Always consult your vet before introducing any new product to ensure it’s safe and appropriate for your dog’s specific situation.
What It Is: A calcium supplement derived from lactic acid.
Benefits: Can support cell functions and maintain proper calcium levels, especially if the dog’s diet is lacking or if there’s a need for additional calcium during recovery.
What They Are: Beneficial bacteria that promote a healthy gut environment.
Benefits: Antibiotics like Clavamox can sometimes disrupt the natural balance of the gut flora. Probiotics can help restore this balance, prevent diarrhea, and boost overall digestive health.
What They Are: Essential fatty acids found in fish oils or flaxseed oil.
Benefits: Omega-3s have anti-inflammatory properties and can support skin, coat, and joint health. They can also boost immunity and promote overall well-being.
What It Is: A herb known for its immune-boosting properties.
Benefits: Can support immune function, helping dogs to better fend off infections.
Points to Remember:
Always Consult Your Vet: While these natural products can be beneficial, they might not be suitable for all dogs or might interact with other medications. Always discuss with your veterinarian before adding any new supplement or remedy.
Monitor Your Dog: After introducing a new product, observe your dog for any changes or reactions to ensure they’re tolerating it well.
Quality Matters: Always opt for high-quality, reputable brands when purchasing natural products to ensure they’re safe and effective.
Natural products can be a valuable adjunct to conventional treatments, potentially boosting a dog’s overall health and speeding recovery. By being informed and working closely with your vet, you can craft a comprehensive treatment plan that benefits your furry friend.
Conclusion
The health and well-being of our four-legged companions is always a priority for pet owners. When your vet prescribes Clavamox for your dog, it comes with a responsibility to understand the medication fully—from its uses and side effects to the potential natural products that can complement the treatment.
Clavamox is a trusted antibiotic in the veterinary world, effective in treating a variety of infections. While its benefits are significant, being aware of the potential side effects and interactions is crucial. By taking a proactive approach, understanding dosages, and monitoring your dog’s reactions, you can ensure that the treatment is both effective and safe.
Moreover, the world of natural supplements offers promising avenues for enhancing your dog’s overall health and bolstering their immune system. But remember, the key is always collaboration with your veterinarian. They offer a wealth of knowledge and expertise that ensures your dog gets the best care possible.
In the journey of pet ownership, there will inevitably be bumps along the road. But with knowledge, vigilance, and the right resources, you can navigate these challenges confidently, ensuring many happy, healthy years ahead for your beloved pet.
Frequently Asked Questions
What is the generic version of Clavamox?
The generic version of Clavamox is a combination of amoxicillin and clavulanate potassium.
What is Clavamox Used For in dogs?
Clavamox is an antibiotic that is commonly prescribed for dogs to treat a variety of bacterial infections, including those affecting the skin, urinary tract, respiratory system, and wounds.
How much Clavamox should I give my dog?
The dosage of Clavamox depends on the weight of the dog and the type and severity of the infection being treated. It’s essential to follow your veterinarian’s recommended dosage. Never administer any medication without consulting a veterinarian first.
How many times a day do I give Clavamox to my dog?
Typically, Clavamox is given to dogs twice a day. However, the exact frequency may vary based on the veterinarian’s instructions.
Do I need to refrigerate Clavamox?
If you have Clavamox in liquid form (oral suspension), then yes, it should be refrigerated. However, Clavamox tablets do not require refrigeration.
Should I give my dog Clavamox with or without food?
It’s generally recommended to give Clavamox to dogs with food to reduce the potential for gastrointestinal upset.
What do I do if I give my dog too much Clavamox?
If you suspect you’ve given your dog an overdose of Clavamox, contact your veterinarian or an emergency animal clinic immediately. Overdose symptoms may include vomiting, diarrhea, or changes in behavior.
What should I do if I miss giving a dose of Clavamox?
If you miss a dose, give it as soon as you remember. If it’s close to the time for the next dose, skip the missed dose and go back to the regular dosing schedule. Do not give two doses at once. Always consult with your veterinarian if you have concerns about dosing.
A note about your dog’s health
This article provides general education and does not replace an examination, diagnosis, or individualized advice from your veterinarian. Contact a veterinary professional if you are concerned about your dog’s symptoms.
Dr. Candy Akers earned her Doctor of Veterinary Medicine degree from Oklahoma State University in 2009 after completing undergraduate studies at the University of Delaware. Her experience includes companion-animal nutrition, chronic disease, allergies, autoimmune conditions, cold laser therapy, wildlife rehabilitation, and emergency wildlife response. She combines conventional veterinary knowledge with a whole-animal perspective to help pet parents understand their options and recognize when individualized veterinary care is needed.
As a loving pet parent, you’re always seeking the best treatments and remedies for your furry friend, especially when they’re in discomfort or pain. Enter Methocarbamol – a drug that might have cropped up during your recent vet visit or while you were scouring the internet looking for relief options for your dog.
While it may seem like just another medical term, it’s essential to understand the ins and outs of Methocarbamol for dogs to make informed decisions about their health. In this guide, we’ll unravel the mysteries surrounding Methocarbamol, from its brand names and primary uses to its dosages, side effects, and even natural alternatives. Dive in with us as we explore everything you need to know to ensure your canine companion remains safe, happy, and healthy!
What is Methocarbamol?
Methocarbamol, often known to many by its brand names, is a centrally-acting muscle relaxant that’s commonly prescribed in human medicine. It is primarily used to treat skeletal muscle spasms, those involuntary, often painful muscle contractions. The drug works by decreasing nerve impulses to the muscles, ensuring they relax and don’t contract unnecessarily.
In the context of veterinary medicine, Methocarbamol has found its way into the toolkits of many veterinarians due to its efficacy in treating various muscle-related issues in pets, including our four-legged canine buddies. Whether it’s a spasm from a sudden injury, muscle poisoning due to ingestion of certain toxins, or chronic muscle issues, Methocarbamol offers potential relief.
However, just like any other medication, it’s crucial to understand not just its benefits but also its potential side effects, interactions, and dosages. This comprehensive approach ensures we’re always prioritizing the health and well-being of our pets, administering treatments with knowledge and care. So, let’s delve deeper into the world of Methocarbamol and see how it might be beneficial for our dogs.
Methocarbamol Brand Names
When you’re browsing the shelves of your local pharmacy or listening closely during a vet appointment, you might come across Methocarbamol under various brand names. Recognizing these names can be crucial, ensuring you’re obtaining the right medication for your dog’s needs.
Robaxin®: Perhaps the most widely recognized brand name for Methocarbamol, Robaxin is a staple in many pharmacies and is used both in human and veterinary medicine.
Marbaxin®: Specifically formulated for pets, Marbaxin is another brand that’s tailored for veterinary use, making it a common recommendation by many vets for muscle spasm-related issues in animals.
Skelaxin®: While not as common as Robaxin, Skelaxin is another brand under which Methocarbamol can be found, primarily used in human medicine but sometimes prescribed off-label for pets.
Carbacot®: Another brand variant, Carbacot might not be as commonly seen as Robaxin or Marbaxin but is still Methocarbamol and can be prescribed depending on availability and a veterinarian’s preference.
It’s essential to note that while the primary component, Methocarbamol, remains consistent across these brand names, the formulations might differ slightly, especially concerning inactive ingredients. Therefore, always consult with your veterinarian about which brand is most suitable for your dog’s unique needs. It’s also a good practice to stick to the same brand throughout the treatment duration to ensure consistency unless otherwise directed by your vet.
Methocarbamol Uses in Dogs
Just like humans, our canine companions can suffer from a variety of muscle-related issues, making the need for effective muscle relaxants evident in veterinary medicine. Methocarbamol, with its proven efficacy, has been a preferred choice for several reasons.
Muscle Spasms and Inflammation:
One of the primary uses of Methocarbamol in dogs is for the treatment of muscle spasms, which can be caused by acute injuries, overexertion, or underlying health conditions. The drug helps relax contracted muscles, providing relief from pain and discomfort.
Intoxication/Poisoning:
Methocarbamol is effective in treating muscle tremors caused by the ingestion of certain toxins. For instance, if a dog ingests rat poison or certain types of insecticides, it can lead to muscle tremors or spasms. Methocarbamol helps alleviate these symptoms by relaxing the muscles.
Chronic Muscular Conditions:
Some dogs, especially as they age or due to genetic predispositions, may suffer from chronic muscle issues. Methocarbamol can be prescribed as part of the long-term management plan for such conditions.
Post-surgical Care:
After certain surgical procedures, especially those involving the musculoskeletal system, dogs may experience muscle spasms or pain. Methocarbamol can be used to manage these post-operative symptoms, ensuring a more comfortable recovery process.
Intervertebral Disc Disease (IVDD):
IVDD is a condition where the cushioning discs between the vertebrae of the spinal column either bulge or burst (herniate) into the spinal cord space. This can lead to nerve inflammation, pain, and sometimes muscle spasms. Methocarbamol can be prescribed to manage the muscle spasms associated with this condition.
While Methocarbamol serves as a versatile tool in treating a variety of muscle-related issues in dogs, it’s paramount that it’s administered under the guidance and prescription of a veterinarian. Given the diverse range of issues it addresses, correct dosage and duration are critical to achieving the desired therapeutic effects without compromising the health of our pets.
Methocarbamol Dosage Chart for Dogs
Determining the correct dosage of Methocarbamol for your dog is crucial to ensure its efficacy and safety. The dosage varies depending on the dog’s weight, the condition being treated, and the individual dog’s response to the medication. Below is a general dosage guideline; however, it’s of utmost importance to follow your veterinarian’s advice and prescription, as they’ll provide the exact dosage suitable for your dog’s specific needs.
Note: This is a general overview and should not replace a veterinarian’s recommendation.
Weight of Dog
Typical Methocarbamol Dosage Range
Up to 10 lbs
125 – 500 mg
11-25 lbs
250 – 1000 mg
26-50 lbs
500 – 1500 mg
51-75 lbs
750 – 2250 mg
76 lbs and over
1000 – 3000 mg
Frequency: Methocarbamol is typically administered 1 to 3 times a day, depending on the condition being treated and the veterinarian’s recommendation.
Adjustments: The dosage might be adjusted based on how your dog responds to the medication. Always monitor your pet for any side effects and report them to your veterinarian immediately.
Duration: The length of treatment will depend on the condition. For acute issues like an injury or poisoning, the treatment might be short-term. However, for chronic conditions or post-surgical care, Methocarbamol might be prescribed for a longer duration.
Tapering Off: It’s essential not to stop the medication abruptly, especially if it has been prescribed for a longer time. Your vet might advise tapering the dosage gradually.
Remember, the above chart provides a general idea, but individual requirements can differ. Always store Methocarbamol out of reach of pets and children and use a pill dispenser or organizer to track the medication, ensuring consistent dosing and preventing accidental double doses.
Side Effects of Methocarbamol for Dogs
Just as with any medication, while Methocarbamol can be extremely beneficial in treating muscle spasms and related issues in dogs, it’s not without potential side effects. Being informed about these will allow you to monitor your dog closely and ensure that any adverse reactions are caught and addressed promptly.
Drowsiness or Sedation: One of the most common side effects, Methocarbamol may cause your dog to become drowsy or less alert than usual. This is generally mild and may decrease as your dog becomes accustomed to the medication.
Weakness or Lethargy: Some dogs might appear weaker or less energetic, especially shortly after receiving a dose.
Stomach Upset: Gastrointestinal issues such as vomiting, diarrhea, or loss of appetite can occur in some dogs. If these symptoms persist or are severe, it’s essential to contact your vet.
Coordination Difficulties: In some cases, dogs may experience problems with coordination, appearing unsteady on their feet or having difficulty navigating their environment.
Allergic Reactions: While rare, allergic reactions can occur. Symptoms might include difficulty breathing, swelling of the lips, tongue, or face, or hives. If you notice any of these signs, seek emergency veterinary care.
Changes in Urination: You might notice your dog urinating more or less than usual or showing changes in the color or consistency of their urine.
Increased Thirst or Salivation: Some dogs might exhibit an increased desire to drink or may drool more than usual.
Eye Changes: In very rare instances, Methocarbamol can affect the eyes, leading to changes in vision or eye appearance. If you notice anything unusual about your dog’s eyes, contact your veterinarian.
Behavioral Changes: Some dogs might become more anxious, agitated, or exhibit behaviors that are out of the ordinary.
What to Do If You Notice Methocarbamol Side Effects:
Always keep a close watch on your dog after administering any new medication, including Methocarbamol.
Document any side effects, noting their severity and duration.
If the side effects are mild and short-lived, they might resolve on their own. However, if they persist or are concerning, stop the medication and consult with your veterinarian immediately.
Never adjust the dosage or stop the medication abruptly without consulting your vet.
It’s worth noting that while side effects are possible, many dogs tolerate Methocarbamol well when administered at the correct dosage and under a veterinarian’s guidance. Being informed and observant ensures your dog receives the benefits of the medication while staying safe.
Cautions When Using Methocarbamol for Dogs
Administering Methocarbamol to your canine companion requires vigilance and awareness of certain precautions to ensure their safety. Here are some important cautions to keep in mind:
Pre-existing Conditions: Dogs with certain medical conditions, including kidney or liver disease, may not be ideal candidates for Methocarbamol, or they may require adjusted dosages. Always provide your veterinarian with a complete medical history of your dog before starting the medication.
Pregnancy and Lactation: The effects of Methocarbamol on pregnant or lactating dogs are not well-documented. If your dog is pregnant, nursing, or you plan to breed, consult with your veterinarian before administering the drug.
Long-term Use: If Methocarbamol is prescribed for an extended period, regular check-ups and possibly periodic blood tests might be recommended to monitor liver and kidney function and ensure no adverse effects are developing.
Concurrent Medications: Methocarbamol can interact with other medications your dog might be taking. Always inform your veterinarian about all medications, supplements, or over-the-counter drugs your dog is on.
Abrupt Cessation: Avoid suddenly stopping Methocarbamol, especially if your dog has been on it for a while. Your veterinarian might recommend a tapering schedule to prevent potential withdrawal symptoms or flare-ups of the condition being treated.
Overdose: Always ensure that Methocarbamol is stored out of reach of pets and children. If you suspect an overdose, seek emergency veterinary care immediately. Symptoms might include severe drowsiness, difficulty breathing, loss of coordination, or seizures.
Environmental Stress: Dogs on Methocarbamol may be more sensitive to abrupt environmental changes, loud noises, or other stressors. Consider this when planning events or activities that might be stressful for your pet.
While Methocarbamol can be a beneficial medication for many dogs, it’s essential to approach its use with an abundance of caution.
Methocarbamol Drug Interactions
When using medications, understanding possible drug interactions is paramount for ensuring safety and efficacy. Methocarbamol, like all drugs, has the potential to interact with other medications. Being informed of these interactions allows for more informed decisions and better care for your pet.
Central Nervous System (CNS) Depressants: Medications that depress the central nervous system can have their effects enhanced when combined with Methocarbamol. This includes drugs like:
Effect: Combining these medications might lead to increased sedation, dizziness, or respiratory depression.
Anticholinergic Drugs: Some drugs have anticholinergic effects, and when combined with Methocarbamol, might lead to increased side effects.
Examples include certain antihistamines, tricyclic antidepressants, and some antispasmodics.
Effect: Possible side effects might include dry mouth, urinary retention, constipation, or blurred vision.
Pyridostigmine: This drug, used for conditions like myasthenia gravis, might have its effects reduced when given with Methocarbamol.Effect: Reduced efficacy of pyridostigmine, potentially leading to a flare-up of myasthenia gravis symptoms.
Other Muscle Relaxants: Combining Methocarbamol with other muscle relaxants might lead to additive effects.
Examples include baclofen and tizanidine.
Effect: Enhanced muscle relaxation, but with increased risk of side effects like drowsiness or respiratory depression.
Monoamine Oxidase Inhibitors (MAOIs): These are a class of antidepressants. When combined with Methocarbamol, there might be enhanced effects of the MAOI.
Examples include selegiline or tranylcypromine.
Effect: Potentially increased side effects associated with MAOIs, like high blood pressure or serotonin syndrome.
Key Takeaways
It’s essential to understand that the above list isn’t exhaustive, and individual dogs might react differently to medication combinations. The key takeaways are:
Always inform your veterinarian about any and all medications, supplements, or over-the-counter products your dog is taking.
If a new medication is prescribed for your dog, remind your veterinarian that your pet is on Methocarbamol.
Monitor your dog closely when starting a new medication or adjusting the dose of a current one. Note any changes in behavior, health, or side effects.
If you suspect a drug interaction or see adverse reactions, contact your veterinarian immediately.
Being proactive and informed about potential drug interactions ensures that Methocarbamol remains a beneficial tool in your dog’s health regimen without posing unnecessary risks.
How Long Does Methocarbamol Last?
How Long Does Methocarbamol Last in Dogs?
Understanding the duration of action of Methocarbamol in dogs is vital for several reasons. It aids in determining the dosing frequency, understanding when its effects will peak and wear off, and it can provide clues about when side effects might become evident or abate. Here’s what you should know:
Onset of Action: After administering Methocarbamol, especially in oral forms, you can generally expect to see its effects begin within 1 to 2 hours. This can vary depending on the dog’s metabolism, the presence of food in the stomach, and the specific condition being treated.
Peak Effects: The maximum therapeutic effect of Methocarbamol is typically observed within 2 to 4 hours post-administration. This is when the drug’s concentration in the bloodstream is highest.
Duration of Action: The effects of Methocarbamol, depending on the dosage and individual differences among dogs, typically last between 4 to 6 hours. This means that for continuous relief, the medication may need to be administered multiple times a day, as advised by your veterinarian.
Elimination Half-life: The half-life of a drug refers to the time it takes for half of the drug’s active amount to be eliminated from the body. For Methocarbamol, the half-life in dogs ranges between 1 to 2 hours. However, just because the drug’s concentration reduces by half doesn’t mean its effects entirely stop. It simply begins to taper off.
Complete Elimination: Most of the Methocarbamol dose will be eliminated from a dog’s system within 8 to 12 hours. This duration can be longer in dogs with liver or kidney issues, as these organs play a crucial role in processing and excreting the drug.
Points to Consider:
The frequency of dosing will often be determined by the specific condition being treated and the severity of symptoms. While some dogs might require multiple doses a day, others might do well with just one dose.
Methocarbamol’s effects might vary slightly based on the formulation. For instance, injectable forms might act quicker but might also be eliminated faster.
Always monitor your dog after administering the drug to understand how long it takes for it to begin working and when its effects start to wane.
If you ever miss a dose, consult with your veterinarian about the best course of action. Avoid doubling up on doses unless specifically directed.
In conclusion, while the general durations are provided here, it’s crucial to remember that individual dogs might process and respond to Methocarbamol slightly differently. Always adhere to your veterinarian’s guidance regarding dosing frequency and monitor your dog for optimal therapeutic benefits.
How to Give Methocarbamol to Your Dog
Administering medications to dogs can sometimes be a challenging task. The key to success lies in patience, gentle handling, and often a bit of ingenuity. Here are step-by-step instructions and tips for giving Methocarbamol to your dog:
1. Read the Prescription Label:
Always start by reading the label to ensure you’re giving the correct dosage. It will also indicate how often to administer the medication.
2. Prepare the Medication:
If the Methocarbamol is in pill form, take out the necessary number of tablets or portion of a tablet.
For liquid forms, ensure you have the correct measurement ready in a syringe or dropper.
3. Position Your Dog:
If your dog is small, place them on a non-slip surface at a comfortable height, like a table with a towel or mat.
For larger dogs, it might be easier to administer the medication while they’re standing or sitting.
4. Administering the Pill:
Hold the pill between your thumb and index finger.
Use your other hand to gently open your dog’s mouth by pressing the lips against the teeth and tilting the head slightly upward.
Place the pill as far back on the tongue as possible.
Close the mouth and gently hold it shut. Blow softly on your dog’s nose or stroke their throat to encourage swallowing.
5. Administering Liquid Medication:
Hold the syringe or dropper containing the Methocarbamol liquid.
Gently open your dog’s mouth and insert the tip of the syringe or dropper to the side, between the teeth and cheek.
Slowly push the plunger to release the medication, allowing your dog time to swallow.
6. Offer a Treat or Food:
After successfully administering the medication, offer a small treat or some food. This can act as a reward and can also help ensure the pill is swallowed if hidden in the treat or food.
There are special pill pockets available in pet stores that can be used to hide the pill, making it easier for your dog to ingest.
7. Liquid Mixing:
If you have difficulty administering liquid directly, consider mixing it with a small amount of a tasty liquid treat, like low-sodium broth, provided it’s approved by your vet.
8. Monitor for Reactions:
Especially the first time you administer Methocarbamol, watch your dog for a few minutes to ensure they don’t vomit or show signs of an adverse reaction.
9. Store the Medication Properly:
Ensure Methocarbamol is stored as per the manufacturer’s guidelines, typically in a cool, dry place away from sunlight. Always keep it out of reach of children and pets.
Tips:
Consistency is key. Try to administer the medication at the same times each day.
If your dog is particularly resistant, consider asking your vet if a different form of the medication (like liquid instead of pills) might be available.
Some dogs might be pill-averse. Using a pill dispenser tool, available at pet stores, can help in such cases.
Always remember to handle your dog gently and with patience. If you’re calm and reassuring, it’ll make the process smoother for both of you. If you consistently struggle with administering the medication, don’t hesitate to reach out to your veterinarian for alternative solutions or additional guidance.
Complementary Natural Products To Methocarbamol That You Can Add to Your Treatment Plan
When using Methocarbamol for conditions like muscle spasms in dogs, many pet owners are drawn to natural remedies. These products can potentially enhance the effects of Methocarbamol or provide support in ways traditional medications might not cover. Their organic nature makes them a favorite for those leaning towards a holistic approach to canine health. Nevertheless, always discuss with your vet before incorporating any of these into your pet’s treatment plan. Here’s a closer look at some popular natural alternatives:
Note: There is no direct OTC alternative and you should not stop this medication unless your supervising veterinarian directs you to.
The following are products that support your dog, and are not direct replacements for any medication.
These are complementary products that can be added to your treatment plan without interfering with your dog’s medication.
Benefits: A go-to for many, these supplements are recognized for boosting joint health and alleviating arthritis symptoms, making them suitable for muscle spasms linked to joint concerns.
How to use: Look for dog-specific chewable tablets, capsules, or liquids.
Omega-3 Fatty Acids (Fish Oil)
Benefits: Renowned for their anti-inflammatory attributes, Omega-3s are a boon for dogs dealing with muscle or joint inflammation.
How to use: Whether in liquid or soft gel capsule form, ensure the product is free of harmful contaminants.
Benefits: A powerhouse of anti-inflammatory and antioxidant properties, turmeric can be instrumental in minimizing pain and inflammation.
How to use: While available in powders and capsules, if opting for the raw spice, pair with black pepper to improve absorption.
CBD Oil
Benefits: CBD has become a focal point for its potential in reducing inflammation, pain, and relaxing muscles.
Massage and Physical Therapy
Benefits: Not a product per se, but techniques like massage can significantly relieve muscle tension, enhance blood flow, and foster relaxation.
How to use: Engage with professionals, either a canine massage or physical therapist, for the best results.
Essential Oils
Benefits: Oils, especially lavender, are believed to instill calmness and diminish anxiety, valuable if stress triggers your dog’s spasms.
How to use: Use diluted essential oils, ensuring their safety for canines. Employ a diffuser or seek guidance from a holistic vet.
Vitamin E
Benefits: An excellent antioxidant, Vitamin E, can bolster muscle health and contribute to general wellness.
How to use: Available as capsules or liquids, it’s vital to adhere to the right dosage as per your dog’s weight.
Bach Flower Remedies
Benefits: Some advocates argue that certain flower essences, like the Rescue Remedy, can help balance a pet’s emotions, indirectly aiding muscle issues.
How to use: Administer the drops directly or add to water.
Probiotics
Benefits: Even though they don’t directly target muscles, a well-maintained gut promotes general health, possibly aiding quicker recovery.
How to use: Go for probiotics designed specifically for dogs, available in various forms like powders, capsules, or chews.
In closing, while these natural solutions can offer supplementary benefits, they shouldn’t substitute Methocarbamol or any other prescribed medications. Always keep your vet in the loop about any natural products you’re eyeing to prevent any potential complications or interactions.
Conclusion
Methocarbamol is a potent medication that can offer significant relief to dogs suffering from muscle spasms and related conditions. Like all medications, it’s crucial to approach its use with care, understanding both its benefits and potential risks. By taking the time to research and become informed – as you’ve done by reading this article – you’re taking an essential step towards ensuring your furry friend’s well-being.
Always remember the importance of a veterinarian in any treatment plan. Whether you’re exploring complementary natural products or just seeking advice on dosing, their expertise is invaluable. Your dog’s health and safety should always be the top priority.
In the end, it’s the love, care, and attention we give to our pets that make the most significant difference. Medications like Methocarbamol are tools in our arsenal to ensure their comfort and quality of life. By combining these tools with an informed, proactive approach, you’re doing the best for your canine companion.
Frequently Asked Questions
What is Methocarbamol, and how does it work for dogs?
Methocarbamol is a muscle relaxant primarily used to treat muscle spasms in dogs. It helps by decreasing nerve impulses that cause muscle spasms, providing relief to the affected animal.
How often should I administer Methocarbamol to my dog?
The frequency of administration depends on the dog’s condition and the veterinarian’s recommendations. Always follow the prescription label and consult your vet for dosage instructions.
Are there any natural supplements I can give alongside Methocarbamol?
Yes, there are complementary natural products such as glucosamine, chondroitin, omega-3 fatty acids, and CBD oil that can be considered. However, always discuss with your vet before adding any supplement to your dog’s treatment.
How will I know if my dog is experiencing side effects from Methocarbamol?
Common side effects include drowsiness, dizziness, and stomach upset. If you observe any unusual behavior or symptoms in your dog, contact your veterinarian immediately.
Can Methocarbamol interact with other medications?
Yes, Methocarbamol can interact with certain drugs, affecting its efficacy or causing adverse reactions. Always inform your veterinarian about any other medications your dog is taking.
What should I do if I miss giving a dose to my dog?
If you miss a dose, give it as soon as you remember. However, if it’s close to the next scheduled dose, skip the missed one and continue with the regular schedule. Avoid giving double doses.
A note about your dog’s health
This article provides general education and does not replace an examination, diagnosis, or individualized advice from your veterinarian. Contact a veterinary professional if you are concerned about your dog’s symptoms.
Dr. Candy Akers earned her Doctor of Veterinary Medicine degree from Oklahoma State University in 2009 after completing undergraduate studies at the University of Delaware. Her experience includes companion-animal nutrition, chronic disease, allergies, autoimmune conditions, cold laser therapy, wildlife rehabilitation, and emergency wildlife response. She combines conventional veterinary knowledge with a whole-animal perspective to help pet parents understand their options and recognize when individualized veterinary care is needed.
Over the years, I’ve encountered countless cases of ear infections and complications in our furry friends. Many of these issues could have been prevented with proper ear hygiene and the right cleaning solutions. It’s crucial for dog owners to understand the importance of ear health and the role it plays in the overall well-being of their pets. In this blog, I’ll be sharing my expert insights on the best over-the-counter ear cleaners for dogs, ranked based on their efficacy and safety. My aim is to guide you in making informed choices that ensure the health and comfort of your beloved canine companions. Let’s dive in and explore the world of dog ear care together.
Why is Regular Ear Cleaning Important for Dogs?
Dogs, much like humans, can be susceptible to a variety of ear-related issues. Their ears, especially in breeds with floppy or dense ear structures, provide an ideal environment for the growth of bacteria and yeast. Regular ear cleaning is not just a grooming routine; it’s a preventive health measure. Here’s why it’s paramount:
Prevention of Infections: The warm, moist environment inside a dog’s ear can be a breeding ground for bacteria and yeast. Regular cleaning helps remove the debris and wax that these microorganisms thrive on, reducing the risk of infections.
Early Detection of Issues: Regularly checking and cleaning your dog’s ears allows you to spot potential problems early on, such as mites, ticks, or foreign objects. Early detection can prevent complications and make treatments more effective.
Avoidance of Painful Conditions: Ear infections can be extremely painful for dogs. They might shake their heads, scratch incessantly, or even whine. Regular cleaning can prevent such discomfort and pain.
Improved Hearing: Just like in humans, excessive wax or debris can impair a dog’s hearing. By maintaining clean ears, you ensure that your dog’s hearing is at its best.
Strengthening the Bond: The act of cleaning your dog’s ears can also serve as a bonding activity. It’s a time for you to reassure your pet, making them feel safe and cared for.
Prevention of Odors: Unclean ears can produce a foul smell, which is often the first sign pet owners notice when an infection is present. Regular cleaning keeps your dog smelling fresh.
Regular ear cleaning is not just about aesthetics or hygiene; it’s about ensuring the health, comfort, and happiness of your canine companion. As a veterinarian, I cannot stress enough the importance of this simple yet crucial routine. By incorporating it into your pet care regimen, you’re taking a proactive step towards a happier and healthier pet.
Factors to Consider When Choosing an Ear Cleaner
Selecting the right ear cleaner for your dog is crucial. With a myriad of products available in the market, it can be overwhelming for pet owners to make an informed choice. As a veterinarian, I’ve seen the good, the bad, and the ugly when it comes to ear cleaning solutions. Here are some essential factors you should consider:
Ingredients:
Natural vs. Chemical: Some cleaners boast all-natural ingredients, which can be gentler on your dog’s ears. However, some conditions might require stronger, medicated solutions. Always check the ingredient list and be wary of harsh chemicals that might irritate your dog’s ears.
Active Agents: Look for ingredients known to combat common ear issues, such as salicylic acid for yeast or hydrocortisone for inflammation.
Consistency:
Liquid vs. Gel: While liquid solutions can penetrate deeper and are easier to apply, gels might stay in the ear longer, providing prolonged relief. The choice often depends on your dog’s specific needs and your comfort in applying the product.
Application Method:
Drops, Wipes, or Sprays: Drops are the most common and can be effective for deeper cleaning. Wipes are great for surface cleaning and quick touch-ups, while sprays can be easier for some pet owners to apply without stressing the dog.
pH Balance: A balanced pH ensures that the cleaner is neither too acidic nor too alkaline, both of which could irritate the ear canal. Ideally, an ear cleaner should mimic the natural pH of a dog’s ear.
Price and Brand Reputation: While it’s tempting to go for cheaper options, it’s essential to ensure you’re getting a quality product. Research brands, read reviews, and if in doubt, consult with your veterinarian.
Alcohol vs. Alcohol-Free: Alcohol can be effective in drying out the ear, which can be beneficial in some cases. However, it can also cause stinging, especially if the ear is inflamed or has open sores. Alcohol-free solutions might be gentler for regular cleaning.
Fragrance: While a pleasant scent might be appealing to pet owners, some fragrances can irritate a dog’s sensitive ears. It’s often best to opt for fragrance-free or cleaners with natural, mild scents.
In essence, choosing the right ear cleaner for your dog is a balance between efficacy and gentleness. It’s always a good idea to start with a milder solution and consult with your veterinarian, especially if your dog has a history of ear issues or shows signs of discomfort after cleaning.
Top 5 OTC Dog Ear Cleaners Ranked by Dr. Candy
Navigating the vast array of over-the-counter dog ear cleaners can be daunting. As a veterinarian, I’ve had the opportunity to test, review, and recommend various products to my clients. Based on my experience and observations, here are my top 5 picks for OTC dog ear cleaners:
Dechra EpiKlean Ear Cleanser for Cats and Dogs
Dechra EpiKlean Ear Cleanser is an all-purpose cleaner specifically designed for cats and dogs that are free from ear infections but require routine cleaning. The cleanser is proudly made in the USA, ensuring high-quality production and safety standards. The product is formulated to cleanse and dry the ears of pets, preventing potential irritants and obstructions, including moisture that can lead to fungal growth.
PROs:
The cleanser is versatile, suitable for both cats and dogs.
It is manufactured in the USA, ensuring adherence to American safety standards.
The product effectively removes potential irritants and moisture, reducing the risk of fungal infections.
CONs:
Regular maintenance is required as it’s designed for pets that are ear infection-free.
The cleanser is not antifungal or antibacterial, so it may not be suitable for treating existing infections.
Veterinary Formula Clinical Care Ear Therapy
Veterinary Formula Clinical Care Ear Therapy is a medicated treatment formulated to alleviate infections, inflammation, and wax build-up. It is suitable for both dogs and cats, ensuring a broad spectrum of use. The formula is pH balanced, alcohol-free, and contains aloe vera to soothe the ear canal.
PROs:
Alleviates infections, inflammation, and wax build-up effectively.
Suitable for both dogs and cats, offering versatility.
Contains aloe vera, providing a soothing effect on the ear canal.
CONs:
May require consistent application for optimal results.
Some animals might be sensitive to its ingredients.
Virbac Epi-Otic Advanced Ear Cleanser for Dogs
Virbac Epi-Otic Advanced Ear Cleanser is a non-irritating ear cleanser formulated with anti-adhesive properties to prevent microbial attachment. It is specifically designed for dogs with chronic otitis externa, a condition of the outer ear. The cleanser’s patented anti-odor technology eliminates ear canal odor, making it a suitable solution for maintaining ear hygiene.
PROs:
Formulated with anti-adhesive properties that deter microbial growth.
Designed to address chronic otitis externa in dogs, targeting a specific health concern.
Features patented anti-odor technology to combat ear canal odor.
CONs:
The product might be more specialized and not suitable for general ear cleaning.
Some dogs might be sensitive to the ingredients, leading to potential irritation.
Zymox Otic Enzymatic Solution for Dogs
Zymox Otic Enzymatic Solution is a non-invasive solution designed to treat acute and chronic otitis externa caused by bacterial, fungal, and yeast infections. The solution contains hydrocortisone, which aids in reducing inflammation and itchiness. It is a no-pre-cleaning treatment, meaning it can be directly applied to the ears without the need for prior cleaning.
PROs:
Effectively treats acute and chronic otitis externa caused by various infections.
Contains hydrocortisone to alleviate inflammation and itching.
Simplifies the treatment process with its no-pre-cleaning feature.
CONs:
The solution may not be suitable for all dogs, especially those with known allergies to ingredients.
Consistent usage is required for optimal results, which might be cumbersome for some pet owners.
Vet’s Best Ear Relief Wash Cleaner for Dogs
Vet’s Best Ear Relief Wash Cleaner for Dogs is a veterinarian-formulated ear cleaner designed to cleanse and soothe raw, irritated, itchy, and smelly dog ears. The formula is alcohol-free and contains a unique blend of natural ingredients such as yucca, clove oil, and echinacea. It’s suitable for all dogs and puppies over 12 weeks old and is designed to prevent ear odor, itching, and the accumulation of wax.
PROs:
Veterinarian-formulated, ensuring a professional and effective approach to ear care.
Contains natural ingredients, reducing the risk of side effects and allergic reactions.
Alcohol-free formula, ensuring it’s gentle on the dog’s ears and doesn’t cause dryness.
CONs:
May require regular application for optimal results.
Some dogs might be sensitive to certain natural ingredients, necessitating patch testing before full use.
While these are my top picks, it’s essential to choose a product that aligns with your dog’s specific needs. Always monitor your dog’s reaction after using a new product and consult with your veterinarian if you notice any adverse reactions or if the ear issues persist.
How to Properly Clean Your Dog’s Ears
Cleaning your dog’s ears might seem like a daunting task, especially if your furry friend is a bit skittish. However, with the right technique and a calm approach, it can be a stress-free experience for both of you. I’ve guided countless pet owners through this process. Here’s a step-by-step guide to ensure you’re cleaning your dog’s ears safely and effectively:
Preparation:
Gather Supplies: Ensure you have your chosen ear cleaner, cotton balls or pads, and treats for rewarding your dog afterward.
Choose a Calm Environment: Find a quiet spot where your dog feels comfortable, away from distractions.
Positioning Your Dog:
If possible, have someone assist you by gently holding the dog or providing comfort. For smaller dogs, placing them on a table or elevated surface might make the process easier.
Inspect the Ear:
Before cleaning, take a moment to inspect the ear. Look for signs of redness, swelling, discharge, or any foreign objects. If you notice severe issues, it might be best to consult with a vet before proceeding.
Application of the Cleaner:
Gently hold the ear flap (pinna) upright to expose the ear canal.
Carefully pour or squeeze the recommended amount of ear cleaner into the ear canal. Ensure you don’t insert the applicator tip too deep.
Gently massage the base of the ear for about 20-30 seconds. You should hear a squishing sound, which helps in breaking up debris inside.
Allow Your Dog to Shake:
After massaging, let go of the ear. Your dog will likely shake its head, which helps in bringing the loosened debris and excess cleaner to the surface.
Wipe Away Debris:
Using a cotton ball or pad, gently wipe the inside of the ear flap and the entrance of the ear canal. Do not insert anything deep into the ear canal.
Continue wiping until no more debris comes out on the cotton.
Reward and Comfort:
Once done, reward your dog with a treat and some affection. This positive reinforcement will make future cleanings easier.
Repeat for the Other Ear:
If both ears need cleaning, repeat the process for the other ear.
Post-Cleaning Inspection:
After cleaning, inspect the ears again to ensure they look clean and free from redness or irritation.
Tips:
Never use Q-tips or pointed objects in your dog’s ear, as they can push debris further in or damage the eardrum.
If your dog shows signs of discomfort or pain during cleaning, stop immediately and consult with a veterinarian.
Regularly inspecting and cleaning your dog’s ears can prevent many common ear issues.
Cleaning your dog’s ears is an essential aspect of their overall health and well-being. With patience, consistency, and the right technique, it can become a routine both you and your dog get accustomed to.
Signs Your Dog Might Need a Professional Ear Cleaning or Check-Up
While regular at-home ear cleaning is beneficial for maintaining your dog’s ear health, there are instances when professional intervention is necessary. Here are some signs that indicate your dog might need a professional ear cleaning or a check-up:
Persistent Scratching: If your dog is constantly scratching its ears or shaking its head, even after regular cleanings, it could be a sign of an underlying issue.
Unpleasant Odor: A foul smell emanating from the ears is often a clear indication of an infection.
Visible Discharge: Yellow, brown, or bloody discharge is a cause for concern. It can be indicative of bacterial or yeast infections, or even a ruptured eardrum.
Redness and Swelling: If the inner ear appears red, swollen, or feels warm to the touch, it could be a sign of inflammation or infection.
Whining or Pain: If your dog yelps when its ears are touched or seems in pain, it’s crucial to seek professional help immediately.
Hearing Loss: If you notice your dog isn’t responding to sounds or commands as usual, or seems disoriented, it could be experiencing hearing issues.
Unusual Behavior: Changes in behavior, like loss of balance, walking in circles, or tilting the head to one side, can be indicative of inner ear problems or more severe conditions.
Foreign Objects: Dogs are curious creatures. If you suspect they’ve gotten something stuck in their ear, like grass seeds, twigs, or even insects, it’s best to let a professional remove it to avoid injury.
Chronic Issues: Some dogs, especially certain breeds, are prone to recurrent ear issues. If you find yourself treating the same problem repeatedly, a vet might offer a more long-term solution or identify an underlying cause.
While regular home maintenance is essential, there are times when professional care is non-negotiable. Always trust your instincts as a pet owner. If something seems off, it’s better to be safe and consult with your veterinarian.
Conclusion
Ear health is an integral aspect of your dog’s overall well-being. As we’ve explored in this guide, regular ear cleaning can prevent a myriad of issues, from minor irritations to severe infections. But it’s not just about cleaning; it’s about being observant, understanding the signs of potential problems, and seeking professional help when needed.
As a veterinarian, I’ve witnessed the difference proactive ear care can make in a dog’s life. It’s not just about preventing discomfort or health issues; it’s about ensuring your furry friend can enjoy the world around them without the hindrance of ear problems. Whether you’re choosing an ear cleaner or learning the proper cleaning technique, always prioritize your dog’s comfort and safety.
Thank you for joining me on this journey into the world of canine ear care. I hope this guide empowers you to make informed decisions for your pet’s health. Remember, a little attention to detail and regular care can lead to a happier, healthier life for your beloved companion.
Frequently Asked Questions
How often should I clean my dog’s ears?
Answer: The frequency of ear cleaning varies depending on the breed, age, and health of your dog. Dogs with floppy ears or those prone to ear infections might require more frequent cleanings, perhaps once a week. On the other hand, dogs with upright ears and no history of ear issues might only need cleaning once a month. Always monitor your dog’s ears and adjust the cleaning routine based on their needs.
What should I do if my dog seems to be in pain after an ear cleaning?
Answer: If your dog shows signs of discomfort, pain, or unusual behavior after an ear cleaning, it’s crucial to stop using the product and consult with your veterinarian immediately. They can provide guidance on the next steps and recommend alternative products or treatments if needed.
Are there any breeds that are more prone to ear issues?
Answer: Yes, some breeds are more susceptible to ear problems due to their ear structure, hair growth inside the ear, or genetic predispositions. Breeds with floppy ears, like Basset Hounds, Cocker Spaniels, and Golden Retrievers, often require more diligent ear care. Regular inspections and cleanings can help prevent issues in these breeds.
Can I use human ear cleaners or home remedies for my dog?
Answer: It’s essential to use products formulated specifically for dogs. Human ear cleaners or home remedies might not be pH balanced for dogs and could cause irritation or adverse reactions. If you’re considering a home remedy, always consult with your veterinarian first.
Is it safe to clean my dog’s ears if I suspect an infection?
Answer: If you suspect an infection, it’s best to consult with a veterinarian before attempting to clean your dog’s ears. Cleaning an infected ear without proper guidance can exacerbate the issue or cause pain to your dog. Your vet can provide appropriate treatments and guide you on cleaning protocols during the healing process.
A note about your dog’s health
This article provides general education and does not replace an examination, diagnosis, or individualized advice from your veterinarian. Contact a veterinary professional if you are concerned about your dog’s symptoms.
Dr. Candy Akers earned her Doctor of Veterinary Medicine degree from Oklahoma State University in 2009 after completing undergraduate studies at the University of Delaware. Her experience includes companion-animal nutrition, chronic disease, allergies, autoimmune conditions, cold laser therapy, wildlife rehabilitation, and emergency wildlife response. She combines conventional veterinary knowledge with a whole-animal perspective to help pet parents understand their options and recognize when individualized veterinary care is needed.
We all know that familiar pang of worry when we spot something amiss with our furry friends – be it a limp, a cough, or those watery eyes that hint at an infection. Eye infections, particularly, can sneak up on our canine companions and leave us feeling helpless, especially if we’re not sure how to treat them at home. With a myriad of information online, and numerous products claiming to be the ultimate solution, finding the right ointment for a dog eye infection can be a tad overwhelming.
That’s where this guide comes in. After extensive consultations with vets and personal experiences with my own four-legged buddy, I’ve come to rely on one over-the-counter ointment: Terramycin. In this blog, we’ll dive deep into what makes Terramycin a trusted choice, its ingredients, and how it stands up against other home remedies. Plus, for those who lean towards more natural treatments, I’ve got you covered with some alternative homeopathic options.
So, if you’re scrambling to find an effective solution to your dog’s eye infection, or simply prepping for potential future flare-ups, you’re in the right place. Let’s ensure our dogs get the care they deserve, right from the comfort of our homes!
What is Terramycin?
Terramycin, often regarded as a wonder drug in the world of veterinary medicine, isn’t a new name for many seasoned pet owners. But if you’re unfamiliar, allow me to introduce you to this versatile ointment.
Historical Context and Discovery:
Terramycin, scientifically known as oxytetracycline, was first introduced to the world in the 1950s by Pfizer. It heralded a new era in antibiotic research, becoming one of the first broad-spectrum antibiotics. This meant it could combat a wide variety of bacterial infections, making it a staple in many medical and veterinary toolkits.
Popularity and Trusted Recommendation by Vets:
Over the decades, Terramycin has earned its reputation not just by effectively treating infections but also due to its safety profile. Veterinarians around the globe often recommend it for its efficacy against a wide range of bacterial eye infections in animals. It’s not uncommon to find Terramycin in the medicine cabinets of breeders, farmers, and everyday pet parents like you and me.
The true magic of Terramycin lies in its mechanism of action. It inhibits protein synthesis in bacteria, preventing them from growing and multiplying. This gives the body’s immune system a chance to catch up and clear out the invaders, restoring your dog’s eyes to their clear, vibrant state.
In essence, Terramycin is more than just an ointment; it’s peace of mind in a tube, ensuring our beloved dogs get relief from discomfort and a speedy recovery from eye infections.
What Does Terramycin Treat?
When it comes to the health of our furry friends, particularly their eyes, we all yearn for a solution that’s both broad in its efficacy and specific in its action. Terramycin, with its rich history and trusted reputation, fits that bill perfectly. So, what exactly does this wonder ointment treat? Let’s dive in.
1. Bacterial Conjunctivitis:
Commonly known as “pink eye,” bacterial conjunctivitis can cause redness, swelling, and discharge in your dog’s eyes. It’s one of the most frequent eye ailments in canines. Terramycin helps by targeting the bacteria responsible, clearing up the infection, and reducing the associated discomfort.
2. Keratitis:
This is an inflammation of the cornea which can be caused by several bacteria. Left untreated, it can lead to more severe complications. Thankfully, Terramycin is effective against many of the bacterial culprits behind keratitis.
3. Blepharitis:
An inflammation of the eyelids, blepharitis can make your dog’s eyes appear crusty and can be quite painful. Terramycin helps soothe the inflammation and tackle the underlying bacterial cause.
4. Corneal Ulcer:
While corneal ulcers have several causes, when they are the result of a bacterial infection, Terramycin can be a lifesaver. It aids in healing the ulcer by eliminating harmful bacteria and preventing secondary infections.
5. Prevention:
Apart from treating active infections, Terramycin is also used as a preventive measure. If your dog has recently had eye surgery or an injury, Terramycin can help ward off potential bacterial infections.
In summary, Terramycin’s broad-spectrum nature makes it a go-to for numerous bacterial eye infections in dogs. However, always remember, while it’s an excellent tool in the arsenal against bacterial infections, it won’t be effective against fungal or viral infections. If you’re ever in doubt about the nature of your dog’s eye condition or the best course of treatment, always consult with a veterinarian.
Ingredients in Terramycin
Understanding what goes into our pets’ treatments is vital. It’s not just about ensuring safety but also about appreciating how the product works. Let’s peel back the label on that tube of Terramycin and delve into its ingredients.
1. Active Ingredient: Oxytetracycline Hydrochloride
The star of the show, oxytetracycline hydrochloride, belongs to the tetracycline class of antibiotics. As we’ve discussed earlier, its primary role is to inhibit bacterial protein synthesis, thus stopping the bacteria from multiplying and allowing the body’s immune system to destroy them. Oxytetracycline is broad-spectrum, which means it’s effective against a variety of bacteria.
2. Active Ingredient: Polymyxin B Sulfate
This is another potent antibiotic compound found in Terramycin. Polymyxin B specifically targets gram-negative bacteria, complementing the action of oxytetracycline. Together, these two ensure a wide range of bacteria are addressed, making the ointment highly versatile.
3. Inert Ingredients:
While the specific composition might vary slightly based on the manufacturer, Terramycin typically contains ingredients to ensure the ointment remains stable, easy to apply, and safe for use in the eyes. These may include:
Petrolatum: Acts as a base, helping the ointment stay in place once applied and ensuring prolonged contact with the eye.
Lanolin: A natural moisturizer that helps soothe the eye and keep it lubricated, providing additional comfort to your pet.
Mineral Oil: Aids in the smooth application and can assist in keeping the eye moisturized.
Safety and Allergens:
While Terramycin is generally safe for most dogs, it’s essential to be aware of its ingredients in case your pet has specific allergies. Always monitor for any adverse reactions when first applying the ointment and consult your vet if you’re uncertain.
In essence, the ingredients in Terramycin work harmoniously to combat bacterial infections. The active components tackle the bacteria, while the inert ingredients ensure the ointment is comfortable, safe, and easy to apply.
Administering any medication to our pets can sometimes feel like a daunting task. The eyes, being such a sensitive area, require gentle care and precision. To help you out, here’s a step-by-step guide on applying Terramycin ointment to your dog’s eyes safely and effectively.
1. Preparation:
Clean Hands: Start by washing your hands thoroughly with soap and water. Ensure they’re clean to prevent introducing any additional bacteria to your dog’s eye.
Clean the Eye: If your dog’s eye has discharge or crustiness, gently clean the area with a soft, damp cloth or a sterile saline solution. Remember to pat dry with a clean towel.
2. Get Your Dog Comfortable:
If your dog is skittish or unfamiliar with eye treatments, it might be helpful to have a second person assist. One can hold and soothe the dog, while the other administers the ointment.
You can also place your dog on a table or hold smaller breeds in your lap, wrapping them gently in a towel to keep them still.
3. Application:
Hold the tube of Terramycin using your thumb and forefinger.
Gently pull down your dog’s lower eyelid using your free hand to create a small pocket for the ointment.
Squeeze a small amount (typically about 1/4 inch) of the ointment directly into the pocket. Avoid touching the tube’s tip to the eye or any surface to prevent contamination.
Release the eyelid and let your dog blink, spreading the ointment across the eye.
4. Post-Application:
Offer your dog a treat or some gentle praise for staying still. This positive reinforcement can make future applications easier.
Recap the Terramycin tube tightly and store it in a cool, dry place.
Wash your hands again after the application.
5. Frequency and Duration:
While it’s always best to follow your vet’s instructions, the general recommendation for Terramycin is to apply it 2-4 times daily. The duration will depend on the severity of the infection and how quickly your dog responds to the treatment. Typically, it’s advised to continue treatment for 48 hours after symptoms have subsided to ensure the infection is fully addressed.
6. Tips and Precautions:
Always monitor your dog after application to ensure they don’t rub their eyes, which might remove the ointment.
If your dog shows any signs of an allergic reaction or the condition worsens, stop the treatment and consult your veterinarian immediately.
Avoid using the ointment past its expiration date.
By following these steps and being gentle and patient, applying Terramycin to your dog’s eyes should be a breeze. Remember, consistency is key to a quick recovery!
Alternative Home Remedies for Dog Eye Infections
While Terramycin is a reliable and effective solution for many bacterial eye infections, some pet owners seek alternative or complementary treatments, especially from the natural world. Let’s explore some of these home remedies that can help soothe your dog’s eye discomfort.
1. Homeopathic Drops:
Overview:Homeopathic eye drops, often made from natural herbs and minerals, aim to alleviate symptoms without introducing strong chemicals.
Where to Find: These drops can be sourced from specialty pharmacies or natural food stores. Always ensure that any product you choose is safe for pets.
Usage: Follow the instructions on the label or as prescribed by your vet. Generally, these drops can be administered 2-3 times daily.
2. Chamomile Tea:
Overview: Chamomile is renowned for its soothing and anti-inflammatory properties. When used as a rinse, it can help reduce irritation and redness.
Preparation: Brew a cup of chamomile tea and let it cool down to room temperature. Use a tea bag for convenience, ensuring there are no added flavors or preservatives.
Usage: Soak a clean cloth in the cooled tea and gently wipe your dog’s eye. Alternatively, you can use a dropper to apply a few drops of the tea to the infected eye.
3. Saline Solution:
Overview: A simple saline solution can help clean the eye and remove debris or discharge. It mimics the natural tears and can be soothing for inflamed eyes.
Preparation: Mix a teaspoon of salt in a cup of boiled, then cooled water. Stir until the salt dissolves completely.
Usage: Dip a clean cloth or cotton ball into the solution and gently clean your dog’s eye. You can also use a dropper to apply it directly.
4. Goldeneye/Rod Tea Treatment:
Overview: Not as commonly known as chamomile, goldeneye (or goldenrod) has properties that can benefit eye health.
Preparation: Similar to chamomile, steep the goldeneye/rod in hot water, then allow it to cool to room temperature.
Usage: Use a clean cloth to apply the tea to the dog’s eye or use a dropper for direct application.
Precautions and Recommendations:
Always test a small amount of any remedy to check for adverse reactions before full application.
While these remedies can be soothing, they might not replace the need for antibiotics in severe bacterial infections. It’s always best to consult with your vet before starting or switching treatments.
Ensure that any product or ingredient you’re using is safe for pets. Some natural remedies suitable for humans might not be safe for dogs.
Whether you’re leaning towards a more natural approach or looking for complementary treatments to work alongside antibiotics, these remedies can offer some relief. However, always prioritize the advice of your veterinarian.
Potential Risks and Side Effects
Any form of medication, whether prescribed or over-the-counter, can present risks and side effects. When it comes to our furry friends, we must be informed and vigilant. Let’s delve into the potential risks and side effects associated with eye treatments like Terramycin and other remedies.
1. Terramycin (Oxytetracycline and Polymyxin B):
Allergic Reactions: Some dogs might develop an allergic response to one of the ingredients in the ointment. Signs include increased redness, swelling, itchiness, or rashes around the eyes.
Irritation: There may be a stinging or burning sensation upon initial application. If this persists or seems severe, it’s essential to consult with your vet.
Secondary Infections: On rare occasions, prolonged use can lead to fungal infections in the eye.
2. Homeopathic Drops:
Ineffectiveness: While they can be soothing, homeopathic treatments may not always address the root cause of the infection.
Allergic Reactions: As with any medication, there’s a potential for an allergic response. Always monitor closely after the first application.
3. Herbal Teas (like Chamomile and Goldeneye/Rod):
Potential Irritants: Not all dogs will react the same way to herbal treatments. Some might find certain herbs irritating.
Contamination Risk: If the tea isn’t prepared with clean, boiled water or if the herbs aren’t sourced from reputable providers, there’s a risk of introducing contaminants.
4. Saline Solution:
Salt Concentration: If the saline solution is too salty, it can cause discomfort or dryness. Always ensure a mild concentration.
General Tips and Precautions:
Monitor After Application: After applying any treatment, keep an eye on your dog for the next few hours to notice any adverse reactions.
Avoid Mixing Treatments: Unless advised by a vet, avoid using multiple treatments simultaneously as this can lead to interactions or increased irritation.
Consultation: If in doubt, always reach out to your veterinarian. They can provide guidance tailored to your dog’s specific needs and conditions.
Consistency in Observation: Even if the initial applications don’t cause any side effects, it’s essential to be consistently observant. Side effects can manifest after several applications.
Storage: Ensure all treatments are stored appropriately, away from heat and direct sunlight, and out of reach of children and pets.
In summary, while treatments like Terramycin and home remedies can offer relief and healing, being aware of the potential risks helps ensure the safety and well-being of our beloved pets. Always prioritize their comfort and health, and when in doubt, seek professional advice.
Conclusion
Our canine companions bring boundless joy, unwavering loyalty, and heartwarming moments into our lives. In return, they rely on us to ensure their well-being and health. When it comes to issues like eye infections, the wealth of information and treatment options available can be overwhelming. However, armed with the right knowledge and guidance, addressing such concerns becomes a smoother journey.
From the tried-and-tested effectiveness of Terramycin to the soothing touch of natural remedies, there are various paths to ensuring your dog’s eye health. As we’ve highlighted throughout this guide, the key is always to prioritize safety, be observant, and maintain open communication with your veterinarian.
Every dog is unique, and what works for one might not necessarily be the best fit for another. But with patience, care, and the insights we’ve shared, you can navigate the realm of canine eye care with greater confidence and peace of mind.
Thank you for joining us on this deep dive into treating dog eye infections at home. We hope you’ve found this guide informative and helpful. Always remember: the sparkle in your dog’s eyes is a reflection of the love and care they receive. Here’s to many more years of that beautiful, healthy sparkle!
A note about your dog’s health
This article provides general education and does not replace an examination, diagnosis, or individualized advice from your veterinarian. Contact a veterinary professional if you are concerned about your dog’s symptoms.
Dr. Candy Akers earned her Doctor of Veterinary Medicine degree from Oklahoma State University in 2009 after completing undergraduate studies at the University of Delaware. Her experience includes companion-animal nutrition, chronic disease, allergies, autoimmune conditions, cold laser therapy, wildlife rehabilitation, and emergency wildlife response. She combines conventional veterinary knowledge with a whole-animal perspective to help pet parents understand their options and recognize when individualized veterinary care is needed.
For a healthy dog with one small, mildly itchy patch of intact skin, a plain 1% hydrocortisone product can be a reasonable short-term option. Of the three human products reviewed here, my pick for a dry, localized spot is Aquaphor Itch Relief Ointment because the ointment base stays where you put it. Amazon Basic Care is lighter and easier to spread. PROcure adds calendula and moisturizers, but its longer ingredient list deserves extra scrutiny.
Do not put hydrocortisone in your dog’s eyes, ear canal, nose, mouth, or genital area. Skip it on open, oozing, crusted, painful, or infected skin, and prevent licking. If the itch is widespread, keeps returning, or comes with odor, discharge, swelling, or hair loss, the cream is not the real solution.
This article contains affiliate links. If you buy through one of these links, Healthy Happy Dogs may earn a commission at no extra cost to you.
Quick Answer: Which OTC Hydrocortisone Cream Is Best?
If I am choosing among the three products already reviewed on this page, I prefer Aquaphor Itch Relief Ointment for a small, dry patch. An ointment is thicker than a lotion, so it tends to stay on the skin and adds a protective, moisturizing layer. That same thickness makes it a poor choice for a wet, greasy, or oozing area.
Amazon Basic Care Maximum Strength Anti-Itch Intensive Healing Lotion is the easier option when you want a thin layer that spreads without leaving much residue. PROcure Hydrocortisone Cream with Calendula may appeal to families who prefer a botanical-leaning formula, but botanicals do not automatically make a product safer or more effective for a dog.
There is also a good argument for choosing a pet-labeled 1% hydrocortisone product. The strength may be familiar, but the directions and vehicle were designed with pets in mind. That can remove some of the guesswork. Cornell’s canine hot-spot guidance notes that generic 1% hydrocortisone can be used as part of care for an otherwise healthy dog, which is why I do not treat every human formula as automatically off-limits [1]. I do, however, check the entire label.
Can You Use Human Hydrocortisone Cream on a Dog?
Sometimes, yes. The safest version of that answer has five parts:
The active ingredient is plain hydrocortisone at 1%.
The dog is generally healthy.
The irritated area is small, superficial, and intact.
The product has no concerning added medication.
The dog cannot lick the treated area.
The words “hydrocortisone 1%” on the front do not tell you everything. Human creams may also contain numbing agents, pain relievers, antibiotics, antifungals, fragrances, or other active ingredients. Some human topical medicines are dangerous when pets lick them. A peer-reviewed review of household pet exposures describes how accidental contact with human dermatology products can cause serious harm, depending on the ingredient and amount [2]. That is why I want pet parents to read the Drug Facts panel, not just the brand name.
If your dog has diabetes, Cushing’s disease, a weakened immune system, a history of steroid reactions, or is pregnant or nursing, do not improvise with an OTC steroid. The same is true for a very young puppy or a dog already taking a steroid medication. Those situations deserve individualized advice.
What Hydrocortisone Does, and What It Cannot Fix
Hydrocortisone is a low-potency corticosteroid medicine. Applied to the skin, it can calm inflammation, redness, and itching [3]. That can make a dog more comfortable and may help interrupt the itch-scratch cycle for a short time.
What it cannot do is identify why the skin is itchy. Hydrocortisone does not kill fleas or mites. It does not treat a bacterial or yeast infection. It does not remove a grass awn, change a food allergy, or fix repeated contact with an irritating shampoo. By quieting redness, it can even make an infection or other underlying problem look less obvious for a while.
I think of hydrocortisone as a small fire extinguisher, not a renovation crew. It can settle a minor flare while you remove the trigger and watch the skin. If you keep reaching for it, that pattern is useful information. Something underneath the itch needs attention.
How to Choose a Safer OTC Product
Start with the complete ingredient list. For simple short-term use, I look for one active medication: hydrocortisone 1%. I avoid combination formulas unless I have a specific reason to use every active ingredient. Products with lidocaine, benzocaine, pramoxine, zinc oxide, antibiotic drugs, antifungal drugs, essential oils, or strong fragrance should not be treated as interchangeable with plain hydrocortisone.
Next, match the vehicle to the skin:
Ointment is thick and useful for a dry, small patch. It can trap moisture, so avoid it on wet or oozing skin.
Cream is less greasy and works well on a small, dry-to-normal patch.
Lotion spreads easily but is easier for a dog to lick and may contain more inactive ingredients.
Spray can be convenient on hairy areas, but overspray near the face is a concern.
Check the package every time you replace a product. Formulas can change. If the label is missing, hard to read, expired, or different from what you expected, do not use it on your dog.
Aquaphor Itch Relief Ointment is my first choice of these three when the irritated spot is small, dry, and not infected. The ointment base helps the medication stay in contact with the skin. Use only a very thin film. A heavy layer does not work better, and it gives your dog more to lick.
Do not use an ointment to seal in moisture over a hot, weeping, or smelly lesion. That kind of skin needs a closer look.
Amazon Basic Care Maximum Strength Anti-Itch Intensive Healing Lotion is easier to spread and feels lighter on the skin. That may be useful for a small area where an ointment would mat the coat or collect dirt.
The tradeoff is that lotion can travel. Keep it away from the eyes and mouth, and supervise your dog until the layer has dried. Recheck the current ingredient panel before every new purchase because a familiar product name does not guarantee an unchanged formula.
PROcure Hydrocortisone Cream with Calendula combines 1% hydrocortisone with calendula, aloe, coconut oil, olive oil, and other inactive ingredients listed by the manufacturer [4]. It may suit an owner who prefers a cream with botanical and moisturizing ingredients.
I would not call it stronger, safer, or more healing because it contains calendula. A longer ingredient list can be a benefit for one dog and an irritation risk for another. Use a tiny test area first, and stop if redness or itching increases.
How to Apply Hydrocortisone Cream Safely
Look before you treat. The area should be small, intact, and only mildly red or itchy. Do not cover a puncture, bite, burn, lump, surgical site, or raw hot spot with OTC cream.
Clean gently. If needed, wipe away surface dirt with lukewarm water or a pet-safe cleanser, then pat the area completely dry. Do not scrub irritated skin.
Test a tiny spot. Apply a rice-grain amount to a small portion of the area and watch for more redness, swelling, or discomfort.
Use a thin film. More is not better. Follow the current product label and any instructions your veterinarian has given for your dog.
Prevent licking. Offer a supervised walk, food puzzle, or calm activity while the product dries. A well-fitted recovery collar may be needed for a dog who will not leave the area alone.
Wash your hands after application. Do not bandage or tightly cover the area unless your veterinarian specifically recommends it. Covering can increase moisture and medication absorption.
When Not to Use Hydrocortisone
Skip home treatment and arrange veterinary care when the skin is open, bleeding, ulcerated, wet, crusted, swollen, hot, painful, or foul-smelling. Pus, dark discharge, rapid spread, hair loss, or a dog who seems ill also points away from a simple itch.
Location matters. Do not put OTC hydrocortisone:
In or directly around the eyes
Inside the ear canal
On the nose, lips, or inside the mouth
On the genitals or anus
On an open wound or surgical incision
Across a large part of the body
For paws, a tiny amount on intact skin may be reasonable, but paws are easy to lick and problems between the toes often involve infection, allergy, a foreign object, or moisture. For ears, cream on the outer flap is very different from cream inside the canal. Head shaking, odor, discharge, or pain needs an ear exam.
A Holistic Look at Recurring Itchy Skin
My holistic approach addresses the whole dog and the factors behind the itch. I start by looking for patterns: Where did the irritation begin? Is it seasonal? Are the paws, ears, belly, or base of the tail affected? Did symptoms appear after a new shampoo, lawn treatment, food, medication, boarding stay, or flea exposure? These details guide a focused plan that supports skin health while addressing what may be triggering the irritation.
Healthy skin begins with consistent daily care. I prioritize gentle grooming, a complete and balanced diet, reliable flea prevention, clean bedding, and a bathing routine that protects the skin and coat. I also encourage pet parents to record flare dates, affected areas, products used, and their dog’s response. Photos taken in consistent lighting help us track progress and make informed adjustments.
Thoughtful use of natural therapies is part of holistic veterinary care. Each treatment should have a clear purpose and be appropriate for the individual dog. When hydrocortisone is part of the plan, I keep topical care focused rather than layering essential oils, vinegar, peroxide, alcohol, or multiple herbal products onto the same area. Inflamed skin needs carefully chosen care, especially where a dog can lick. A targeted approach lets us assess each treatment’s benefit and build a plan around what helps your dog.
When Your Dog Needs Veterinary Care
Get prompt care if your dog has facial swelling, trouble breathing, collapse, widespread hives, severe pain, a rapidly spreading rash, or repeated vomiting after licking a product. Those are not wait-and-see signs.
Arrange an exam soon when itching lasts more than a few days, keeps returning, disrupts sleep, causes self-trauma, or involves the ears or feet. The same applies to odor, discharge, thickened skin, scabs, hair loss, or more than one body area.
Bring the product package or a clear photo of the label. The complete ingredient list is more useful than saying “itch cream.” If your dog swallowed more than a quick lick, has symptoms, or the formula contains another active drug, contact your veterinarian or a pet poison service right away.
Final Thoughts
For a small, dry, mildly itchy patch on intact skin, plain 1% hydrocortisone can have a narrow, useful role. Of the three preserved human products, Aquaphor Itch Relief Ointment is my top choice for a dry localized spot. A pet-labeled 1% product is often the simpler option when you want dog-specific directions.
Keep the job small: verify the ingredients, apply the thinnest film, prevent licking, and watch the skin. If you find yourself treating the same place again, stop chasing the itch and look for the cause.
Frequently Asked Questions
Can I Use Human 1% Hydrocortisone on My Dog?
Sometimes. A plain 1% product may be used briefly on a healthy dog’s small area of intact, mildly irritated skin. Check every active and inactive ingredient, avoid sensitive locations, and prevent licking. A pet-labeled product is a good choice when you want directions designed for dogs.
What if My Dog Licks Hydrocortisone Cream?
One quick lick of a small amount of plain 1% hydrocortisone may only cause drooling or stomach upset, but the full formula matters. Wipe away the remaining product, check the label, and call your veterinarian or a pet poison service if your dog swallowed more, develops symptoms, or the cream contains other active drugs.
Can I Put Hydrocortisone Cream on My Dog’s Paws?
A tiny amount may be reasonable on intact skin where your dog cannot lick it. Do not use it on cracked pads, between-toe swelling, discharge, odor, or a possible foreign object. Repeated paw licking commonly needs a cause-based exam.
Can Hydrocortisone Go in or Near My Dog’s Ear?
Do not put an OTC skin cream inside the ear canal. A small amount on intact outer-ear skin is a different situation, but head shaking, pain, odor, or discharge can signal an ear infection and needs veterinary care.
How Long Can I Use Hydrocortisone Cream on My Dog?
Use it for the shortest practical time and follow the current label or your veterinarian’s instructions. If the area is not clearly improving within a few days, worsens at any time, or returns after treatment stops, discontinue it and have the skin evaluated.
2. Asad, U., Boothe, D., & Tarbox, M. (2020). Effect of topical dermatologic medications in humans on household pets. Baylor University Medical Center Proceedings, 33(1), 131-132. https://doi.org/10.1080/08998280.2019.1679003
Dr. Candy Akers earned her Doctor of Veterinary Medicine degree from Oklahoma State University in 2009 after completing undergraduate studies at the University of Delaware. Her experience includes companion-animal nutrition, chronic disease, allergies, autoimmune conditions, cold laser therapy, wildlife rehabilitation, and emergency wildlife response. She combines conventional veterinary knowledge with a whole-animal perspective to help pet parents understand their options and recognize when individualized veterinary care is needed.
Hello, dear pet parents! As a veterinary professional, I completely understand the worry and concern that arise when you see your beloved four-legged friend limping. Your first instinct? To alleviate their pain as swiftly and effectively as possible. Many of us have found ourselves wondering, “Can I give my dog aspirin for a limp?” The short answer is, no.
It’s commendable that you’ve taken the time to research and understand the implications of this seemingly simple question. In this article, we’ll delve deep into the world of canine health, discussing the potential benefits and risks of administering aspirin to your dog. It’s essential to approach your pet’s health with knowledge and caution, and I’m here to guide you through. Remember, our ultimate goal is to ensure the safety and well-being of your furry companion.
Understanding the Cause of Your Dog’s Limp
Observing your dog limping can be a heart-wrenching experience. As they look up at you with those trustful eyes, it’s only natural to feel an urge to help them immediately. But before jumping to conclusions or remedies, it’s pivotal to comprehend the root cause of the limp. Every limp tells a story.
1. Acute Injuries:
Just like us, dogs can have their off days. They might step wrongly on a rocky path, play a bit too rough with a fellow pup, or perhaps jump from a height that’s just a tad too much. Sprains, strains, and minor injuries can cause sudden limping.
2. Chronic Issues:
Conditions like arthritis, hip dysplasia, or degenerative joint diseases might lead to a more gradual onset of limping. These often are age-related, but genetics and breed predispositions can play a role too.
3. Infections and Diseases:
Ticks carrying Lyme disease or fungal infections can infiltrate the paw or joint areas, causing discomfort and limping. It’s always a good idea to check between their toes and around the paw pads for any signs of infections, injuries, or foreign objects.
4. Nail and Paw Problems:
A broken nail, a small cut on the paw, or even an embedded thorn can be the culprit. It might seem minor to us, but for a dog, even the smallest foot issue can be immensely painful.
5. Bone Issues:
Fractures or bone cancers can also lead to limping. These are more serious concerns and require immediate veterinary attention.
It’s crucial to approach your dog’s limping with a blend of empathy and detective work. While it might be tempting to simply administer pain relief, understanding the cause is essential. After all, treating the symptom without addressing the underlying problem can lead to more complications down the road. Always consult with your veterinarian for a proper diagnosis. Remember, our dogs communicate with us in many ways, and a limp is a clear sign that they need our attention and care.
What is Aspirin?
Ah, aspirin! A common household name that many of us reach for when that annoying headache strikes or when our joints seem to be voicing their protest after a long day. But what really is this little pill that has stood the test of time, and why has it been a trusted companion in many medicine cabinets?
1. A Historical Glimpse:
Aspirin, or acetylsalicylic acid as the scientists would call it, has roots tracing back thousands of years. Ancient civilizations, including the Greeks and Egyptians, used willow bark – a natural source of salicylates – to alleviate aches and pains. It wasn’t until the late 1800s that aspirin was synthesized and patented, forever changing the landscape of over-the-counter pain relief.
2. The Science Behind the Magic:
Without getting too technical (and trust me, the chemistry can get dizzying!), aspirin works by inhibiting certain enzymes in our body. This results in reduced production of substances that cause inflammation and pain. It’s like telling those pain-causing agents, “Hey, take a break!”
3. More Than Just Pain Relief:
Over the years, researchers have found aspirin to be quite the overachiever. Apart from pain relief, it’s often prescribed in low doses to reduce the risk of heart attacks or strokes. Its ability to thin the blood makes it a valuable tool in certain medical scenarios.
4. A Word of Caution:
While aspirin might seem like a wonder drug, it’s not without its side effects. For humans, prolonged use can lead to issues like stomach ulcers. This brings us to an essential question: If it has side effects for us, what about our canine companions? (But more on that later!)
To wrap up our aspirin 101: it’s a versatile drug with a rich history and a wide array of applications. However, like with anything, knowledge and caution are paramount. Before popping that pill—or thinking of giving it to your furry friend—it’s always wise to understand what it is and how it works.
Can Dogs Safely Take Aspirin?
The age-old saying “what’s good for the goose is good for the gander” doesn’t always hold true, especially when it comes to our dogs. The debate around giving our furry companions human medications, like aspirin, is one that has pet parents buzzing with questions. So, can you share your headache remedy with a limping Lassie or a pained Pooch?
1. A Different Metabolism:
First things first, dogs are not just furry humans. Their metabolism—how they process and break down substances—is quite different from ours. While we might metabolize certain drugs safely, the same isn’t always true for our pets. This difference can alter the effects of aspirin on their system.
2. Possible Benefits:
In some cases, vets might prescribe aspirin for short-term relief from pain and inflammation. Yes, it can act as a temporary solution for conditions like arthritis or minor injuries. But emphasis on the ‘temporary’!
3. Dosage Matters:
If you ever find yourself in a situation where aspirin seems like the only option, dosage is crucial. A small slip in the amount can result in adverse effects. Generally, it’s essential to consult with a veterinarian to get the dosage right. And please, resist the urge to guesstimate!
4. Beware of Side Effects:
Dogs can exhibit side effects from aspirin, just like humans. Stomach upset, ulcers, or even kidney issues are some of the risks involved. Monitoring for signs like vomiting, diarrhea, or behavioral changes is crucial after administering aspirin.
5. Regular vs. Occasional Use:
It’s one thing to give aspirin occasionally under a vet’s guidance and quite another to use it regularly. Continuous usage can heighten the risk of side effects and potentially lead to more severe health concerns.
In a nutshell, while aspirin can sometimes be given to dogs under specific circumstances, it’s not a decision to take lightly. Always, and I mean always, consult with a veterinarian before heading to the medicine cabinet. Our pets trust us to make the best decisions for them, and armed with the right knowledge, we can ensure they lead happy, pain-free lives.
Risks of Giving Aspirin to Dogs
I know, I know. As pet parents, it feels like we’re always navigating a minefield of “dos” and “don’ts.” And when it comes to aspirin, the terrain gets a tad tricky. While it’s tempting to think, “It helps me; why not Fido?” we need to tread with care. Let’s delve into the potential pitfalls of sharing your aspirin stash with your four-legged friend.
1. Stomach and Digestive Issues:
Just like in humans, aspirin can irritate a dog’s stomach lining. This can lead to gastritis, ulcers, or even perforations. Signs to look out for include vomiting (sometimes with blood), diarrhea, or a lack of appetite. And trust me, seeing your pet lose their zest for their favorite treat is not a sight you’d enjoy.
2. Bleeding Complications:
Aspirin has an anti-clotting effect. While this is beneficial in certain human conditions, for dogs, it can pose a risk. Even minor injuries could lead to prolonged bleeding, and surgeries or procedures can become riskier.
3. Kidney and Liver Concerns:
These vital organs bear the brunt of processing and eliminating many drugs, aspirin included. Over time, or with an overdose, they can be adversely affected, leading to reduced function or even failure.
4. Aspirin Toxicity:
Overdosing is a real concern. Symptoms of aspirin toxicity include rapid breathing, tremors, seizures, and even coma. If you ever suspect an overdose, it’s a race against time; seek veterinary attention immediately.
5. Drug Interactions:
If your dog is on other medications, aspirin can interfere or react with them, leading to a myriad of potential complications. This is yet another reason why consulting with your vet is non-negotiable.
6. Hypersensitivity Reactions:
Though rare, some dogs might have an allergic or hypersensitive reaction to aspirin. This can manifest as swelling, hives, difficulty breathing, or other concerning symptoms.
To wrap up this cautionary chapter: using aspirin for dogs is a bit like navigating stormy seas. Sure, you might reach calm waters, but there are many risks along the way. Before casting off into the aspirin sea, anchor yourself with sound advice from a veterinarian. Our canine companions look to us for guidance and protection, and with knowledge on our side, we can steer clear of troubled waters.
Alternatives to Aspirin for Dogs
Seeing our furry buddies in discomfort nudges us into problem-solving mode. While aspirin is a tempting quick-fix, it’s not the only arrow in our quiver. Thankfully, the world of veterinary medicine has evolved and presented us with alternatives that might be safer and more tailored to our canine companions. Let’s explore some of these alternatives, shall we?
1. Veterinary-Approved NSAIDs:
Not all NSAIDs (Non-Steroidal Anti-Inflammatory Drugs) are created equal. Some are specifically formulated for dogs, taking their unique physiology into account. Examples include Carprofen, Meloxicam, and Deracoxib. They tend to have fewer side effects than aspirin, but always monitor for any changes in your dog’s behavior or health.
2. Natural Supplements and Remedies:
Mother Nature has bestowed us with a treasure trove of natural pain-relieving and anti-inflammatory agents. Glucosamine, chondroitin, and fish oil are often hailed for their joint-supporting benefits. Turmeric, with its active ingredient curcumin, has also gained popularity for its anti-inflammatory properties. But remember, natural doesn’t always mean safe. Dosage and potential allergies are things to keep in mind.
3. Physical Therapy:
You’d be surprised at how much a structured physical therapy regimen can help. Whether it’s post-surgery or for chronic pain management, regular exercises, massages, or even hydrotherapy can bring about significant relief.
4. Acupuncture:
Ancient practices to the rescue! Acupuncture for dogs is gaining traction. By targeting specific points on the body, it’s believed to enhance circulation and release pain-reducing chemicals. Skeptical? Many pet parents swear by its effectiveness.
5. Comfort Measures:
Sometimes, simple changes can bring about big relief. Orthopedic beds, warm compresses, or even ramps to avoid stairs can make your dog’s life much more comfortable.
6. Prescription Pain Medications:
In some cases, your veterinarian might prescribe stronger pain medications like Tramadol or Gabapentin. These are for more severe pain scenarios and should be used strictly as prescribed.
In essence, while aspirin might be the age-old go-to, it’s not the only tool at our disposal. Exploring alternatives, especially under the guidance of a veterinarian, can lead to safer, more effective solutions for our pets’ pain and discomfort. After all, they rely on us to provide the best, and with the plethora of options available, we can certainly rise to the occasion.
Safe Administration Tips if You Decide to Give Aspirin
I get it. Sometimes, despite knowing all the potential risks, you might find yourself in a situation where aspirin seems like the only viable option. Maybe it’s a weekend, or you’re miles away from the nearest vet. If you absolutely must go down this route, it’s essential to do so safely. Here are some guidelines and a handy dosing chart to help ensure you administer aspirin to your dog in the safest way possible.
1. Consultation First: Always, always consult your veterinarian before giving aspirin to your dog, even if it’s just a phone call.
2. Opt for Buffered Aspirin: Buffered aspirin is less acidic, making it a tad gentler on your dog’s stomach. It’s designed specifically for canine consumption.
3. Always with Food: Giving aspirin on an empty stomach can increase the risk of ulcers. Ensure your dog has eaten something before administering the tablet.
4. No Human Coatings: Some human aspirins have coatings (like enteric) that can be difficult for dogs to digest. It might stay longer in their system, leading to potential overdosing.
5. Monitor for Side Effects: Keep a close eye on your dog after giving them aspirin. Any signs of distress, bleeding, or unusual behavior warrants immediate veterinary attention.
6. Start Small: If you’re unsure about the dose, it’s always safer to start with a smaller amount and observe your dog’s reaction.
Dosing Chart:
(Please note: This chart is a general guideline. Individual dog needs can vary, so always consult with your veterinarian for precise dosing)
Dog’s Weight
Recommended Dose
Under 10 lbs
Consult your vet
10-30 lbs
81 mg (baby aspirin) every 12-24 hours
30-50 lbs
162 mg (two baby aspirins) every 12-24 hours
50-100 lbs
325 mg (one regular strength tablet) every 12-24 hours
Over 100 lbs
Consult your vet
To wrap up, while aspirin might sometimes be a necessary route, it’s essential to approach it with caution and care. Think of it as a temporary band-aid, not a long-term solution. Our dogs rely on our wisdom and love to navigate their health hurdles, and with meticulous attention, we can ensure they remain happy, healthy, and wagging their tails.
Signs It’s Time to See a Veterinarian
As pet parents, we often pride ourselves on understanding our furry companions. From that mischievous glint in their eyes when they’ve gotten into the trash to the contented sigh they let out during cuddles, we’re usually in tune with their moods and quirks. But sometimes, amidst the tail wags and belly rubs, there are signs that things might be amiss. Knowing when it’s time to swap your detective hat for a trip to the vet’s office can make all the difference. Here’s what to keep an eye out for:
Persistent Limping: If a limp lasts or seems painful, seek expert advice.
Appetite Changes: Skipping meals or overeating could be warning signs.
Abnormal Thirst & Urination: Increased intake or more frequent urination might indicate health concerns.
Weight Changes: Sudden fluctuations should be noted.
Breathing Issues: Excessive panting or coughing are serious.
Digestive Issues: Consistent upsets, vomiting, or constipation are red flags.
Behavioral Shifts: Sudden mood changes could be pain-related.
Unusual Odors: Bad breath or odd smells can hint at infections or dental issues.
Visible Distress Signs: Lumps, wounds, or swelling need attention.
Excessive Scratching/Shaking: This could suggest allergies or infections.
The takeaway? Trust your gut and your knowledge of your dog. If something feels off, it probably is. While our dogs might not speak our language, they have a myriad of ways to communicate with us. It’s our responsibility to listen, observe, and act. Remember, when in doubt, it’s always better to err on the side of caution. A trip to the vet, even if just for peace of mind, is worth its weight in gold.
Conclusion
Navigating the world of canine health can often feel like a balancing act on a tightrope. On one hand, we have our undying love for our furry friends and an innate desire to see them pain-free and frolicking. On the other, there’s a maze of information, medication, and decisions to weave through. Aspirin, while a household name for us, throws up its own set of challenges when we consider it for our four-legged companions.
The essence of this journey through the aspirin quandary is not about painting aspirin as a villain. Instead, it’s about understanding its place, its risks, and its alternatives. Knowledge is our strongest ally, and when paired with the advice of veterinary professionals, we’re armed to make the best choices for our pets.
So, the next time your dog limps into the room or seems under the weather, remember: you’ve got tools in your arsenal. Sometimes it’s a simple remedy, and other times it’s the reassuring voice of your vet on the phone. But always, at the heart of it, is a bond between you and your dog — a bond that calls for care, understanding, and above all, love.
Stay informed, trust your instincts, and here’s to countless more days of wagging tails, wet noses, and joyful barks!
Frequently Asked Questions (FAQs)
Can I give my dog the same aspirin I take for headaches or pain?
While it’s technically possible for dogs to consume human aspirin in some scenarios, it’s crucial to get the dosage right and be aware of the risks. Always consult with your veterinarian before administering any human medication to your pet.
How long can I give my dog aspirin if needed?
Aspirin is best used as a short-term solution for pain and inflammation in dogs. If your dog’s symptoms persist or if you find the need to administer aspirin regularly, it’s essential to consult your veterinarian for a more sustainable and safe treatment plan.
My dog accidentally ingested a large amount of aspirin. What should I do?
If you suspect your dog has consumed a large amount or overdose of aspirin, it’s vital to seek emergency veterinary care immediately. Symptoms of aspirin toxicity can escalate quickly, so timely intervention is crucial.
Are there any specific signs to look for after giving my dog aspirin?
Monitor your dog for any unusual behavior, digestive upsets (like vomiting or diarrhea), excessive panting, changes in appetite, or signs of distress. If any of these symptoms appear, contact your vet promptly.
Can I combine aspirin with other pain relief medications for my dog?
Combining medications can lead to adverse reactions or increase the risk of overdose. Always consult with your veterinarian before administering any combination of medications to ensure the safety and well-being of your pet.
A note about your dog’s health
This article provides general education and does not replace an examination, diagnosis, or individualized advice from your veterinarian. Contact a veterinary professional if you are concerned about your dog’s symptoms.
Dr. Candy Akers earned her Doctor of Veterinary Medicine degree from Oklahoma State University in 2009 after completing undergraduate studies at the University of Delaware. Her experience includes companion-animal nutrition, chronic disease, allergies, autoimmune conditions, cold laser therapy, wildlife rehabilitation, and emergency wildlife response. She combines conventional veterinary knowledge with a whole-animal perspective to help pet parents understand their options and recognize when individualized veterinary care is needed.
Over the years, I’ve come across numerous dogs with a variety of eye issues – from simple irritations to more serious infections. Often, the solution lies in the timely application of the right dog eye ointment, but I’ve observed that many owners are either unaware of these products or unsure about how to use them effectively.
That’s why I’ve put together this comprehensive guide. My aim is to demystify the world of dog eye ointments, helping you understand their purpose, recognize symptoms of eye infections, and apply treatments correctly. And, for those wondering where to purchase over-the-counter solutions, I’ve got that covered too.
What Dog Eye Ointments Are For
Maintaining the health of your dogs eyes is crucial for the overall well-being and happiness of our pets. But why exactly might your dog need eye ointment, and what role does it play in their eye care?
Protection and Healing: Dog eye ointments serve as a protective barrier, often shielding the sensitive eye tissues from further irritants while providing a conducive environment for healing. Whether it’s a minor scratch or an external particle, a suitable ointment can offer immediate relief and faster recovery.
Treatment of Infections: Just as we might use antibiotic ointment for our infections, certain dog eye ointments contain antibiotics to treat bacterial infections in a dog’s eye. These infections can be caused by a range of factors, including injury, foreign bodies, or underlying health conditions.
Lubrication: Some dogs, especially certain breeds or older dogs, may suffer from dry eyes (keratoconjunctivitis sicca). In such cases, lubricating ointments can help keep their eyes moist and reduce discomfort.
Reduction of Inflammation and Pain: Certain ointments are formulated with anti-inflammatory agents that can decrease swelling and pain. This is particularly helpful in cases of eye injuries or post-surgical recovery.
Treatment of Specific Conditions: There are specialized ointments designed to tackle specific issues, such as corneal ulcers, conjunctivitis, or certain fungal infections. Using the correct ointment for the diagnosed condition is vital to ensure effective treatment and recovery.
Dog eye ointments play a multi-faceted role in the realm of canine eye care and are indispensable tools in a pet parent’s arsenal. However, always consult your veterinarian before applying any ointment. Each dog is unique, and what works for one might not necessarily be the best choice for another.
Examples of Commonly Recommended Dog Eye Ointments
When it comes to treating eye conditions in dogs, several ointments have proven both safe and effective over the years. While the best course of action is always to consult with your veterinarian for specific recommendations, here are some commonly recommended dog eye ointments that you might come across:
Description: Terramycin is a broad-spectrum antibiotic ointment often prescribed for bacterial infections of the eye.
Main Use: Treats conditions like conjunctivitis, corneal ulcers, and certain inflammatory eye disorders.
2. Neopolydex (Neomycin, Polymyxin B, and Dexamethasone)
Description: A combination antibiotic and steroid ointment, Neopolydex is useful for both treating infections and reducing inflammation.
Main Use: Beneficial for eye injuries with associated swelling or infections complicated by inflammation.
3. Optimmune (Cyclosporine)
Description: This ointment is specifically designed for dogs with dry eyes (keratoconjunctivitis sicca). It helps increase tear production while also reducing inflammation.
Main Use: Chronic dry eye conditions, where it helps restore moisture and comfort.
4. Tetravet (Tetracycline)
Description: Another antibiotic ointment, Tetravet is effective against a range of bacteria that might cause eye infections.
Main Use: Used to treat bacterial eye infections, including conjunctivitis and certain corneal conditions.
5. Gentak (Gentamicin)
Description: Gentak is a potent antibiotic ointment effective against several types of bacteria.
Main Use: Primarily used for bacterial conjunctivitis and other bacterial-caused eye infections.
The world of dog eye ointments is vast, and the above examples are just the tip of the iceberg. It’s essential to understand that while OTC (Over The Counter) ointments can be beneficial, it’s paramount to seek a veterinarian’s guidance. Your pet’s specific symptoms, the underlying cause, breed, age, and other factors can all influence the best choice of treatment. Proper diagnosis and tailored treatment ensure not only quick relief but also the long-term well-being of your furry friend’s eyes.
Symptoms That May Indicate Your Dog Has An Eye Infection
A dog’s eyes are expressive and can convey a multitude of emotions, but they’re also sensitive and can be prone to infections. As a vigilant pet parent, it’s essential to recognize the signs that might indicate an eye problem in your canine companion. While some symptoms can be subtle, others might be glaringly evident. Here’s a guide to help you understand and identify symptoms that may suggest your dog has an eye infection:
1. Redness or Swelling
Description: The white part of the eye (sclera) may appear redder than usual, or the eyelids might be swollen.
Possible Causes: Conjunctivitis, foreign body irritation, or other inflammatory conditions.
2. Discharge
Description: You might notice a clear, mucus-like, or even pus-filled discharge coming from one or both eyes.
Possible Causes: Bacterial or viral infections, tear duct issues, or irritants.
3. Excessive Tearing or Watery Eyes
Description: Continuous watering of the eyes or damp fur around the eyes.
Possible Causes: Foreign body irritation, allergies, or infections.
4. Cloudiness or Change in Eye Color
Description: A cloudy appearance or any color changes to the eye’s natural look.
Possible Causes: Cataracts, glaucoma, corneal injuries, or infections.
5. Frequent Blinking or Squinting
Description: Your dog might blink more than usual or appear to be squinting.
Possible Causes: Discomfort due to foreign bodies, dry eyes, or infections.
6. Rubbing or Scratching at the Eye
Description: Your dog may use its paw to rub the eye or scratch around it.
Possible Causes: Irritation, foreign body presence, or infections.
7. Sensitivity to Light
Description: Your dog might seem to avoid bright light or prefer staying in dimly lit areas.
Possible Causes: Uveitis, glaucoma, or other internal eye problems.
8. Behavioral Changes
Description: In response to discomfort or pain, your dog might become more reclusive, aggressive, or show a lack of interest in activities they usually enjoy.
Possible Causes: Severe eye conditions or infections causing pain.
It’s vital to understand that while some of these symptoms might indicate a simple, easily treatable problem, others could be signs of more severe conditions. Always consult with your veterinarian if you notice any of these symptoms or any other unusual behavior related to your dog’s eyes. Timely intervention can make a significant difference in outcomes and ensure your dog’s eyes remain healthy and bright.
How To Apply Dog Eye Ointment Step By Step
Administering eye ointment to your furry friend can sometimes feel like a daunting task, especially if it’s your first time. However, with a little preparation and patience, it can become a smooth process for both you and your pet. Here’s a step-by-step guide to help you apply dog eye ointment effectively and safely:
Wash Your Hands
Why It’s Important: Keeping your hands clean ensures that no additional contaminants or bacteria are introduced to your dog’s eye.
Tips: Use mild soap and warm water. Ensure your hands are dry before handling the ointment tube.
Gather Supplies
Items You’ll Need:
The prescribed eye ointment
A clean cloth or tissue
Treats (optional, but useful for rewarding your dog post-application)
Tips: Keep everything close by to ensure the process is as quick and hassle-free as possible.
Create a Calm Environment
Why It’s Important: A relaxed dog will be more cooperative, making the application process smoother.
Tips: Choose a quiet room with soft lighting. Talk to your dog in a gentle, reassuring voice. You can also have a favorite toy or treat nearby as a distraction.
Hold Your Dog Comfortably
Positioning: If you have a smaller dog, it might be easier to place them on a table or your lap. For larger dogs, sitting beside them or having them lie down can work.
Tips: It’s essential that both you and your dog are comfortable. If your dog is anxious, consider asking someone they trust to help hold them gently but firmly.
Open the Eye Ointment Tube
Tips: Ensure the tube’s tip doesn’t touch any surface, including your hands or the dog’s eye, to prevent contamination.
Gently Pull Down the Lower Eyelid
Why It’s Important: Creating a small pouch in the lower eyelid ensures the ointment gets applied to the whole eye.
Tips: Use your thumb or a finger to pull down the eyelid gently.
Apply the Ointment
Instructions: Gently squeeze the ointment tube, applying a thin strip or the recommended amount into the pouch you’ve created with the lower eyelid.
Tips: Avoid touching the eye with the tube. If you’re unsure about the amount, consult with your vet.
Let Your Dog Blink
Why It’s Important: Blinking will help spread the ointment across the eye.
Tips: If your dog doesn’t blink, you can gently close their eyelid and massage softly to spread the ointment.
Reward and Positive Reinforcement
Why It’s Important: Making the experience positive ensures future applications will be easier.
Tips: Give your dog a treat or play a short game. This will help them associate the process with positive outcomes.
Remember, consistency and patience are key. The more routinely you do this, the more accustomed your dog will become, making the process smoother over time. If you face any challenges or notice any adverse reactions, don’t hesitate to consult your veterinarian for advice or alternative methods.
Dr. Candy’s Recommendation
When it comes to eye ointments for our canine companions, the choices are numerous. However, over my years in veterinary practice, one product consistently stands out for its effectiveness and safety: Terramycin. I’d like to shed some light on why Terramycin is often my go-to recommendation for many common eye conditions in dogs.
What is Terramycin Eye Ointment?
Terramycin is an antibiotic ointment that contains two potent ingredients: Oxytetracycline and Polymyxin B. Together, these antibiotics provide a broad spectrum of activity against the bacteria commonly responsible for eye infections in dogs.
Why Choose Terramycin?
Broad-Spectrum Antibiotic: Its dual-action formula tackles a wide variety of bacterial infections, making it a versatile treatment option.
Safety: Terramycin has been used for decades and has a well-established safety profile when used as directed.
Ease of Application: The ointment is smooth and easy to apply, causing minimal discomfort to your pet.
Fast-Acting: Many pet parents report seeing improvements in their dog’s symptoms in just a few days of starting the treatment.
Terramycin Product Information
Ingredients: Oxytetracycline and Polymyxin B
Dosage: The amount and frequency of application should be based on your veterinarian’s recommendation, typically applied 2-4 times daily.
Storage: Store at room temperature, away from direct sunlight.
Terramycin Cautions & Considerations
Consultation: While Terramycin is available over-the-counter, always consult with your veterinarian before starting any treatment to ensure it’s the right choice for your dog’s specific condition.
Allergies: As with any medication, there’s a potential for allergic reactions. Monitor your dog for any adverse reactions and consult your vet if you notice anything unusual.
Concurrent Medications: If your dog is on other eye medications, ensure there’s an interval of at least 5-10 minutes between applying different products.
Avoid Contamination: Ensure the tip of the ointment tube doesn’t touch any surfaces, including the eye, to prevent any potential contamination.
In conclusion, while there are many effective eye ointments on the market, Terramycin often tops my list due to its proven track record and versatility. However, it’s crucial to remember that every dog is unique. Always prioritize professional guidance and ensure that any treatment aligns with your dog’s specific needs and condition.
Where to Buy OTC Dog Eye Ointment
The health and well-being of our furry companions are always a top priority for pet owners. Thankfully, for less severe eye conditions or for preventive care, several over-the-counter (OTC) eye ointments are available. Knowing where to buy these products can save time, reduce stress, and ensure you’re getting quality products. Here are some reliable places and tips for purchasing OTC dog eye ointments:
1. Pet Supply Stores
Overview: Most large pet supply chains and even local pet stores carry a selection of OTC dog eye ointments.
Pros: The convenience of in-store shopping allows you to ask staff for recommendations and see the product firsthand.
Cons: The variety might be limited depending on the store’s size and stock.
2. Online Retailers
Popular Options: Websites like Amazon, Chewy, Petco, and Petsmart offer a vast range of OTC eye ointments.
Pros: Online platforms often provide customer reviews, which can be helpful when deciding on a product. Plus, the convenience of home delivery can’t be beaten.
Cons: Always ensure you’re buying from a reputable seller to avoid counterfeit or expired products.
3. Veterinary Clinics
Overview: Many veterinary clinics stock popular OTC eye ointments, even if a prescription isn’t required.
Pros: Buying from your vet’s office ensures you’re getting a quality product, and you can get professional advice on the spot.
Cons: Prices might be slightly higher than other sources.
4. Pharmacies
Overview: Some human pharmacies also carry pet products, including OTC dog eye ointments.
Pros: Convenient, especially if you’re already there for other purchases.
Cons: Their pet product range might be limited.
Tips for Buying OTC Dog Eye Ointment:
Read Labels Carefully: Ensure the product is specifically meant for dogs and check for any active ingredients.
Check Expiry Dates: Like all medications, eye ointments have a shelf life. Always check the expiry date before purchasing.
Seek Recommendations: If unsure about which product to buy, don’t hesitate to ask your veterinarian or fellow dog owners for their preferences.
Beware of Extremely Low Prices: If a deal seems too good to be true, be cautious. Counterfeit pet products do exist, and they can be harmful.
Storage: Once purchased, store your dog’s eye ointment as instructed, usually in a cool, dry place away from direct sunlight.
While there are several places to buy OTC dog eye ointments, always prioritize quality and your pet’s safety. Ensure you’re informed, and when in doubt, consult with a professional to make the best choice for your canine companion.
Conclusion
Our canine companions bring so much joy, affection, and unforgettable moments into our lives. In return, it’s our responsibility to ensure they lead healthy, happy lives. One crucial area of this care is their eye health, a small area that can sometimes be overlooked until a problem draws our attention.
From understanding the signs of eye infections to knowing the best ointments to use and where to purchase them, being equipped with the right knowledge is paramount. Terramycin, as I’ve highlighted, stands out as a trusted recommendation, but always remember that individual needs may vary. Your veterinarian remains the best source of advice tailored to your pet’s unique situation.
The world is a vast playground filled with wonders for our dogs to see, from chasing after a squirrel to watching a butterfly flutter by. By taking proactive steps in maintaining their eye health, we can ensure they continue to see and enjoy the beauty around them.
Thank you for joining me on this journey to better understand and care for our dog’s eyes. Together, let’s make every wag, bark, and blink count.
Frequently Asked Questions
How often should I check my dog’s eyes for signs of infection?
Answer: Ideally, it’s good to inspect your dog’s eyes at least once a week. However, if your dog has been exposed to areas with a lot of dirt, dust, or potential allergens, you might want to check more frequently. Always be on the lookout for symptoms like redness, excessive tearing, or discharge.
Can I use human eye ointment for my dog?
Answer: While some ingredients in human eye ointments might be similar to those in dog-specific products, it’s crucial not to use human medication on your dog without consulting a veterinarian. Some ingredients safe for humans might be harmful to dogs.
My dog doesn’t like having ointment applied. Do you have any tips to make it easier?
Applying ointment can be challenging for some dogs. Start by creating a calm environment, use positive reinforcement with treats, and consider having someone your dog trusts help hold and comfort them. Over time, with consistency and patience, many dogs become more accustomed to the process.
How long does it typically take to see improvements after starting an eye ointment like Terramycin?
Many pet owners notice improvements within a few days of starting treatment with Terramycin. However, the response can vary depending on the severity of the infection and the dog’s overall health. Always complete the recommended duration of treatment, even if the symptoms seem to have subsided.
Are there any side effects associated with OTC dog eye ointments?
Like all medications, there’s a potential for side effects, though they’re generally rare with OTC eye ointments. Potential reactions could include increased redness, swelling, or itching. If you observe any unusual symptoms or behaviors in your dog after starting an ointment, stop its use and consult your veterinarian immediately.
A note about your dog’s health
This article provides general education and does not replace an examination, diagnosis, or individualized advice from your veterinarian. Contact a veterinary professional if you are concerned about your dog’s symptoms.
Dr. Candy Akers earned her Doctor of Veterinary Medicine degree from Oklahoma State University in 2009 after completing undergraduate studies at the University of Delaware. Her experience includes companion-animal nutrition, chronic disease, allergies, autoimmune conditions, cold laser therapy, wildlife rehabilitation, and emergency wildlife response. She combines conventional veterinary knowledge with a whole-animal perspective to help pet parents understand their options and recognize when individualized veterinary care is needed.
The best OTC antifungal spray for dogs is a dog-labeled formula that matches the skin problem and the body area. For a small, reachable patch of yeast-prone skin, I look for an azole antifungal, often paired with chlorhexidine. My longstanding OTC pick is GNC Ultra Medicated Antifungal Spray. Its current label lists 1% chlorhexidine gluconate and 0.25% ketoconazole. [1]
A spray is not the answer for every itchy dog. Fleas, allergies, bacterial infections, mites, ringworm, and contact irritation can look similar at home. Before you reach for a bottle, check whether the problem is localized, whether the skin is intact, and whether the label fits your dog’s age and treatment area.
What Makes an OTC Antifungal Spray a Good Choice?
Look for a Dog-Labeled Antifungal Active
I choose by the active-ingredient panel, not by the loudest promise on the front of the bottle. Ketoconazole and miconazole are azole antifungals. Chlorhexidine is an antiseptic that can add activity against bacteria and yeast. A combination formula can make sense when a dog’s surface-skin problem may involve more than one organism.
A systematic review found strong evidence for a topical regimen combining 2% miconazole with 2% chlorhexidine for canine Malassezia dermatitis. [2] A broader veterinary review also supports topical therapy as an important tool for superficial bacterial and yeast skin infections. [3] That evidence supports the ingredient classes and the topical approach. It does not prove that every spray works equally well, and it does not create one universal treatment schedule.
An itch-relief spray without an antifungal active may soothe skin, but it is not the same kind of product. Turn the bottle around and read the active ingredients, species, age limit, treatment area, warnings, and directions.
Choose a Formula and Format That Fit the Area
Sprays are most practical for small, accessible areas where you can part the coat and reach the skin. Paws, the lower legs, and some skin folds may fit that description. A thick coat, widespread rash, painful skin, or a problem inside the ear canal calls for a different plan.
I use a simple three-part fit check:
Does the dog have a surface-skin problem that reasonably fits yeast or fungus?
Can the product reach the affected skin without getting into the eyes, mouth, nose, ear canal, or genitals?
Does the label permit use on a dog of this age and on skin in this condition?
If any answer is no or uncertain, pause before spraying.
First Decide What Kind of Skin Problem You Are Treating
Signs That Fit Localized Yeast Overgrowth
Malassezia yeast normally lives on canine skin. It can overgrow when the skin environment changes. Common clues include redness, greasy or scaly skin, a noticeable odor, darkening over time, and repeated licking or chewing. Paws, lip folds, neck folds, armpits, and the groin are frequent trouble spots. [4]
Those signs are useful clues, not a diagnosis. A dog with only one itchy foot may have a splinter, contact irritation, an allergy flare, or a bacterial infection. If the same patch keeps returning, testing can save you from cycling through products that never address the cause.
Problems That Need a Different Plan
Ringworm is a fungal infection, but it can spread to other animals and people. A visible spray may be only one part of the treatment and environmental-control plan. Circular hair loss also has other causes, so guessing from appearance is risky.
Do not spray into the eyes, mouth, nose, or ear canals. The GNC label says not to use its product on broken or inflamed skin. [1] Raw, draining, painful, or rapidly spreading areas deserve an examination. Nasal discharge, coughing, breathing changes, fever, marked tiredness, or appetite loss do not fit a simple surface-skin spray problem.
Over the years, I have evaluated many antifungal sprays for dogs. GNC Ultra Medicated Antifungal Spray remains my practical OTC pick for a small, reachable skin area when the label fits the dog and the problem.
Here are the current label facts I want dog parents to know:
Active ingredients: chlorhexidine gluconate 1.00% and ketoconazole 0.25%.
Species and age: for dogs at least 8 weeks old.
Application distance: hold the bottle 8 to 10 inches from the affected area.
Skin condition: do not use on broken or inflamed skin.
Ingestion: do not allow the dog to ingest the product.
Follow-up: if the problem persists for more than 7 days or gets worse, consult a veterinarian. [1]
Product labels can change. Compare the bottle in your hand with the current label before you use it. I also would not assume that ingredients mentioned on an old product page, such as tea tree oil or aloe, are present unless they appear on the current package.
The product recommendation is one piece of a whole-dog plan. I want to calm the surface flare while also looking at moisture, allergy triggers, nutrition, grooming, and skin-barrier health.
How to Use Antifungal Spray on a Dog
Prepare the Skin
Start in good light. Part the coat and look closely. If the skin is open, very inflamed, wet with discharge, or painful, stop and choose veterinary care instead of this product.
For intact skin, gently remove loose surface debris if needed. Do not scrub an irritated patch. Take a clear baseline photo from a consistent distance so you can compare the same area later.
Apply the Spray
Read the bottle before every new course because directions differ between products. For GNC Ultra Medicated Antifungal Spray, hold the bottle 8 to 10 inches away and spray the affected area as directed on the label. [1] Keep the mist away from the face, ear canals, and other sensitive areas.
Use only the amount and frequency stated on the current label or provided by your veterinarian. More product is not automatically better. Mixing several medicated topicals can irritate the skin and make it harder to tell what is helping.
Prevent Licking and Track the Response
Supervise your dog until the area is dry. A calm food puzzle, short leash walk, or quiet cuddle can keep the tongue away without rubbing off the product. If your dog cannot stop licking, ask your veterinarian about a temporary protective option.
Each day, note four things: odor, redness, licking, and spread. Use your photos to compare the patch under similar lighting. The GNC label directs dog parents to seek veterinary advice if the problem lasts more than 7 days or worsens. [1] You do not need to keep switching bottles when the pattern tells you the diagnosis may be wrong or incomplete.
Treat the Root Cause of Recurring Yeast
Moisture and Skin Folds
Warm, moist skin gives yeast a comfortable place to multiply. Dry paws after wet walks. Check between the toes after swimming. Keep deep folds clean and dry, and make sure grooming products rinse out fully.
Routine antifungal spraying on healthy skin is not my goal. I would rather reduce the conditions that allow repeated overgrowth. If a fold stays damp, the coat mats close to the skin, or a dog licks the same paw every evening, those details can point us toward the next useful change.
Allergies, Nutrition, and Skin-Barrier Health
Recurring Malassezia dermatitis often accompanies another problem, especially allergy or altered skin-barrier function. [4] The yeast may be the visible flare while the underlying trigger keeps resetting the cycle.
From a holistic perspective, I review the whole pattern. That includes food quality, seasonal changes, indoor and outdoor exposures, flea control, grooming habits, medications, and any health condition that may change the skin. A species-appropriate, minimally processed diet may support overall skin health, but there is no single menu that fixes every itchy dog. Food changes should be purposeful, nutritionally complete, and matched to the individual.
A topical spray can help reduce a surface flare. Recurrence is useful feedback that the skin environment still needs attention.
Natural Support for Fungal and Irritated Skin
Botanical care deserves the same careful standard as conventional care. A systematic review of medicinal plants in canine dermatology found potentially useful antibacterial, antifungal, anti-inflammatory, and skin-supportive activity for plants including calendula, St. John’s wort, chamomile, and sage. The authors also highlighted limits in the clinical evidence. [5]
That is why I prefer properly formulated dog skin products over a homemade essential-oil spray. Concentration, purity, the carrier, licking risk, and the condition of the skin all matter. Natural support can complement a sensible antifungal plan, but it should not cover up pain, a spreading lesion, or a repeatedly missed diagnosis.
When a Spray Is Not Enough
Stop home treatment and arrange veterinary care when the area spreads quickly, becomes raw or draining, smells markedly worse, swells, or seems painful. Eye, face, or ear-canal involvement also needs a more precise approach.
Book an examination for circular hair loss that could be contagious, repeated relapses, several affected body regions, or a dog who seems unwell. Seek prompt care for nasal discharge, coughing, breathing changes, marked tiredness, or poor appetite. These signs fall outside the role of an OTC skin spray.
If an appropriate product has not helped within the label’s time frame, the next step is not a stronger guess. Skin cytology, fungal testing, or another focused test may reveal yeast, bacteria, dermatophytes, mites, allergy, or a mixed problem.
Final Thoughts
Choose an OTC antifungal spray by the dog-specific label, active ingredients, treatment area, and skin condition. For a small, accessible patch that fits the label, an azole plus chlorhexidine is a practical ingredient combination. My longstanding product pick is GNC Ultra Medicated Antifungal Spray, with the safeguards described above.
Save the label, take a baseline photo, and track the area for 7 days. If the skin worsens, the problem spreads, or the same flare returns, let the pattern guide you toward the root cause rather than another round of trial and error.
Frequently Asked Questions
What Spray for Dogs Has Antifungal Ingredients?
Look for a dog-labeled spray with an azole antifungal such as ketoconazole or miconazole. Some formulas pair the antifungal with chlorhexidine. The active-ingredient panel, age limit, warnings, and treatment area matter more than a broad itch-relief claim.
Can I Use Human Antifungal Spray on My Dog?
I do not recommend substituting a human spray without veterinary guidance. Human products can have different strengths, inactive ingredients, directions, and ingestion risks. Choose a dog-labeled product that fits the body area and follow its current label.
How Often Can I Use Antifungal Spray on My Dog?
Follow the exact frequency on that product’s current label or the schedule your veterinarian gives you. There is no safe universal frequency for every spray. Using more often can irritate skin or expose a dog to extra product without treating the real cause.
Does Antifungal Spray Work for Ringworm in Dogs?
A topical antifungal may be part of a ringworm plan, but ringworm can be contagious and may require diagnostic testing, broader treatment, and environmental cleaning. Do not assume every circular patch is ringworm or that one spray is a complete solution.
What If My Dog Licks Antifungal Spray?
Prevent licking and follow the label’s first-aid directions. If your dog ingests the product, develops drooling, vomiting, weakness, or another concerning sign, contact your veterinarian or a pet poison service promptly. Keep the bottle available so the exact ingredients can be reviewed.
References
DailyMed. (2018). GNC Medicated Spray: Chlorhexidine gluconate and ketoconazole spray. U.S. National Library of Medicine. DailyMed product label
Negre, A., Bensignor, E., & Guillot, J. (2009). Evidence-based veterinary dermatology: A systematic review of interventions for Malassezia dermatitis in dogs. Veterinary Dermatology, 20(1), 1-12. https://doi.org/10.1111/j.1365-3164.2008.00721.x
Mueller, R. S., Bergvall, K., Bensignor, E., & Bond, R. (2012). A review of topical therapy for skin infections with bacteria and yeast. Veterinary Dermatology, 23(4), 330-341, e62. https://doi.org/10.1111/j.1365-3164.2012.01057.x
Tresch, M., Mevissen, M., Ayrle, H., Melzig, M., Roosje, P., & Walkenhorst, M. (2019). Medicinal plants as therapeutic options for topical treatment in canine dermatology? A systematic review. BMC Veterinary Research, 15, 174. https://doi.org/10.1186/s12917-019-1854-4
A note about your dog’s health
This article provides general education and does not replace an examination, diagnosis, or individualized advice from your veterinarian. Contact a veterinary professional if you are concerned about your dog’s symptoms.
Dr. Candy Akers earned her Doctor of Veterinary Medicine degree from Oklahoma State University in 2009 after completing undergraduate studies at the University of Delaware. Her experience includes companion-animal nutrition, chronic disease, allergies, autoimmune conditions, cold laser therapy, wildlife rehabilitation, and emergency wildlife response. She combines conventional veterinary knowledge with a whole-animal perspective to help pet parents understand their options and recognize when individualized veterinary care is needed.
Hello, I’m Dr. Candy Akers, and I’ve dedicated my life to understanding the intricate world of veterinary medicine. Over the years, I’ve encountered countless cases that have both challenged my expertise and deepened my passion for animal care. One such topic that often arises in my practice is the use of medications, specifically Otomax, for our beloved pets. It’s crucial for pet owners to be well-informed about the treatments they administer, understanding not just the benefits but also the potential risks. In this blog, I aim to shed light on Otomax, its ingredients, its uses, and its alternatives. My goal is to provide you with a comprehensive guide, rooted in professional experience and scientific knowledge, so you can make the best decisions for your furry family members. Let’s embark on this informative journey together.
What is Otomax?
Otomax is primarily formulated to treat acute and chronic otitis externa, an inflammation of the outer ear canal. Otitis externa can be caused by yeast, bacterial infections, or both. The combination of ingredients in Otomax makes it a potent treatment against the inflammation, bacterial, and fungal infections commonly found in cases of otitis externa.
However, like all medications, Otomax should be used with caution and under the guidance of a veterinarian. It’s essential to ensure that the eardrum is intact before administering the ointment, as the medication can be harmful if it reaches the middle or inner ear.
Key Ingredients of Otomax Ointment: A Comprehensive List
Otomax is a prescription ointment used primarily in veterinary medicine, specifically for dogs. It’s a combination medication that contains three active ingredients:
Betamethasone: This is a corticosteroid that helps reduce inflammation, itching, and redness. It’s particularly effective in reducing the swelling and discomfort associated with certain skin conditions.
Clotrimazole: An antifungal agent, clotrimazole is effective against a variety of fungal infections. It’s commonly used to treat yeast infections in a dog’s ear, which can be a frequent issue for some breeds.
Gentamicin: This is an antibiotic that fights against a wide range of bacteria. When used in combination with the other ingredients in Otomax, it can help treat bacterial infections that might accompany or exacerbate fungal infections.
Otomax is a multifunctional ointment designed to combat a range of ear-related issues in dogs. Its combination of anti-inflammatory, antifungal, and antibiotic properties make it a go-to for many veterinarians when treating otitis externa. However, as with all treatments, understanding its uses, benefits, and potential side effects is crucial for the well-being of our pets.
The Primary Uses: What is Otomax Ointment Used For?
Otomax ointment is a versatile medication that has been formulated to address a range of ear-related issues in dogs. Its unique combination of ingredients makes it particularly effective for several conditions:
Otitis Externa Treatment: The primary use of Otomax is to treat acute and chronic otitis externa. Otitis externa refers to the inflammation of the external ear canal. This condition can be particularly uncomfortable for dogs, leading to symptoms like itching, redness, swelling, and discharge. The causes can range from bacterial to fungal infections or even a combination of both. Otomax’s three active ingredients work in tandem to combat these infections and reduce inflammation, providing relief to the affected animals.
Bacterial Infections: The gentamicin in Otomax is effective against a variety of bacteria, making the ointment a suitable treatment for bacterial infections in the ear. This includes infections caused by Pseudomonas aeruginosa and Staphylococcus aureus, among others.
Fungal Infections: Dogs can sometimes develop fungal or yeast infections in their ears, especially in warm, humid conditions. The clotrimazole in Otomax targets these fungal pathogens, particularly those caused by the Candida and Malassezia (previously known as Pityrosporum) species.
Anti-Inflammatory Properties: Dogs with ear infections often experience significant discomfort due to inflammation. The betamethasone in Otomax acts as an anti-inflammatory agent, reducing swelling, redness, and pain in the ear canal.
It’s important to note that while Otomax is effective for the conditions mentioned above, it should always be used under the guidance of a veterinarian. Proper diagnosis is crucial to ensure that the medication addresses the underlying issue and doesn’t exacerbate any existing conditions. Additionally, regular monitoring during treatment is essential to track the pet’s progress and ensure no adverse reactions occur.
Know Your Ingredients: The Science Behind Otomax
Otomax is more than just a simple ointment; it’s a carefully formulated combination of ingredients, each playing a crucial role in treating various ear conditions in dogs. Let’s delve deeper into the science behind each of these components.
1. Betamethasone
Betamethasone is a corticosteroid, a class of steroids that are known for their potent anti-inflammatory properties. When applied topically:
Mechanism of Action: Betamethasone works by suppressing the inflammatory response at a cellular level. It does this by inhibiting the release of inflammatory mediators and reducing the dilation of blood vessels.
Benefits: This ingredient helps reduce symptoms like redness, swelling, itching, and pain, which are common in conditions like otitis externa.
Considerations: While effective, corticosteroids like betamethasone can have side effects if used excessively or for prolonged periods. It’s essential to follow the veterinarian’s prescribed dosage and duration.
2. Clotrimazole
Clotrimazole is an antifungal agent that’s effective against a variety of fungal species.
Mechanism of Action: Clotrimazole targets the cell membrane of fungi, disrupting its structure and leading to the death of the fungal cell.
Benefits: It’s particularly effective against yeast infections in dogs’ ears, which can be caused by fungi like Candida and Malassezia.
Considerations: While clotrimazole is generally safe, it’s essential to ensure that the eardrum is intact before applying any medication containing this ingredient.
3. Gentamicin
Gentamicin is an aminoglycoside antibiotic known for its broad-spectrum activity against various bacteria.
Mechanism of Action: Gentamicin works by binding to bacterial ribosomes, inhibiting protein synthesis and leading to bacterial cell death.
Benefits: It’s effective against several bacteria, including Pseudomonas aeruginosa and Staphylococcus aureus, which can cause ear infections in dogs.
Considerations: As with all antibiotics, it’s crucial to complete the full course of treatment, even if symptoms improve, to prevent antibiotic resistance.
Understanding the science behind Otomax’s ingredients provides a clearer picture of how this ointment works and why it’s effective for treating various ear conditions in dogs. Each ingredient has been carefully chosen for its specific action, and together, they offer a comprehensive solution for ear infections and inflammations. As always, it’s essential to consult with a veterinarian before starting any treatment to ensure the safety and well-being of our furry friends.
Cautions When Using Otomax: Safety First
While Otomax is a powerful and effective ointment for treating various ear conditions in dogs, it’s essential to approach its use with caution. Like all medications, there are specific guidelines and potential risks that pet owners should be aware of to ensure their pet’s safety and well-being.
1. Intact Eardrum is Crucial
Before administering Otomax, it’s imperative to ensure that the dog’s eardrum is intact. If the eardrum is ruptured and the medication reaches the middle or inner ear, it can lead to complications, including hearing loss or balance issues.
2. Follow the Prescribed Dosage
Always adhere to the dosage and duration recommended by the veterinarian. Overuse or prolonged use of Otomax can lead to potential side effects, including increased risk of secondary infections or resistance to the antibiotic component.
3. Monitor for Allergic Reactions
While rare, some dogs might be allergic to one or more of the ingredients in Otomax. Signs of an allergic reaction include increased redness, swelling, itching, or any unusual behavior. If you suspect an allergic reaction, discontinue use and consult your veterinarian immediately.
4. Avoid Contact with Eyes
Otomax is formulated for ear use only. If it accidentally comes into contact with the eyes, it can cause irritation. In such cases, rinse the eyes thoroughly with clean water and seek veterinary advice.
5. Store Properly
Keep Otomax in a cool, dry place, away from direct sunlight. Ensure it’s out of reach of children and pets to prevent accidental ingestion or misuse.
6. Do Not Use Expired Medication
Always check the expiration date before using Otomax. Using expired medication can reduce its effectiveness and may even be harmful.
7. Consultation for Pregnant or Lactating Dogs
If your dog is pregnant or lactating, consult with your veterinarian before using Otomax. The effects of the medication on unborn or nursing puppies are not well-documented, so it’s best to approach with caution.
Otomax, while beneficial, should be used responsibly and with an understanding of its potential risks. By following the recommended guidelines and being aware of the cautions, pet owners can ensure that their dogs receive the best care while minimizing potential side effects. Always prioritize your pet’s safety and consult with a veterinarian if you have any concerns or questions about Otomax or any other medication.
Exploring Safer Alternatives: Best Over-The-Counter Substitute to Otomax
Dr. Candy’s Recommendation
While Otomax is a trusted prescription ointment for treating various ear conditions in dogs, there are instances where pet owners might be looking for over-the-counter (OTC) alternatives. Whether it’s due to concerns about potential side effects, the desire for a more natural approach, or simply the convenience of OTC availability, it’s essential to know your options. One such notable alternative is the Zymox Veterinarian Strength Topical Cream with 1% Hydrocortisone for Dogs.
Zymox Veterinarian Strength Topical Cream with 1% Hydrocortisone for Dogs
Zymox is a reputable brand in the pet care industry, known for its enzyme-based products that tackle a range of infections.
Active Ingredient: The primary active ingredient in this topical cream is hydrocortisone, which is a corticosteroid. At a 1% concentration, it effectively reduces inflammation, itching, and redness associated with skin conditions.
Enzyme-Based Approach: Zymox products are known for their patented LP3 Enzyme System. This system uses a combination of enzymes to combat bacterial, fungal, and yeast infections without the use of antibiotics.
Benefits:
Natural Defense: The enzymes in Zymox products mimic the body’s natural defense mechanism, making them a more natural approach to treating infections.
Reduced Risk of Resistance: Since Zymox doesn’t rely on antibiotics, there’s a reduced risk of bacteria developing resistance.
Safe for Regular Use: Zymox is gentle enough for regular use, making it suitable for chronic conditions or as a preventive measure.
Usage: It’s essential to follow the instructions on the product label or consult with a veterinarian for the best results. Generally, the cream is applied once a day for 7 to 14 days, depending on the severity of the condition.
Other OTC Alternatives
While Zymox is a prominent alternative, there are other OTC products available that might suit different needs or preferences. Always ensure that you research each product thoroughly and consult with a veterinarian before making a switch.
Choosing the right treatment for your pet is a crucial decision that impacts their comfort and well-being. While Otomax is a powerful prescription ointment, it’s reassuring to know that there are effective OTC alternatives like Zymox Veterinarian Strength Topical Cream available. As always, prioritize your pet’s safety and well-being, and don’t hesitate to seek professional advice when exploring new treatments.
Conclusion
In the world of pet care, the choices we make for our furry companions can feel overwhelming. From the food they eat to the toys they play with, and most importantly, the medications they take – every decision impacts their well-being. As a dedicated pet owner, you’re always on the lookout for the best options, seeking knowledge that ensures your pet’s health and happiness. I hope that you feel confident in your knowledge of options and the use of Otomax.
Frequently Asked Questions
1. Why is it essential to ensure the eardrum is intact before using Otomax?
Answer: If the eardrum is ruptured and Otomax reaches the middle or inner ear, it can lead to complications such as hearing loss, balance issues, or deeper infections. Always have a veterinarian check the eardrum’s integrity before starting any ear medication.
2. Are there any natural remedies I can consider as an alternative to Otomax?
Answer: Yes, there are natural remedies like apple cider vinegar solutions, coconut oil, and herbal extracts that some pet owners use for minor ear issues. However, it’s crucial to consult with a veterinarian before trying any home remedies to ensure they’re safe and appropriate for your pet’s condition.
3. How long does it typically take to see improvements in my dog’s ear condition after using Otomax or its alternatives?
Answer: While many dogs show improvement within a few days of starting treatment, the duration can vary based on the severity of the condition. Always follow the recommended treatment course and consult with your veterinarian if you don’t notice any improvement within a week.
4. Can I use Otomax for other pets, like cats or rabbits?
Answer: Otomax is primarily formulated for dogs. Using it for other animals without a veterinarian’s guidance can be risky. Always consult with a veterinarian before administering any medication to pets other than dogs.
5. If my dog has used Otomax in the past, can I administer it again without a new prescription if the same symptoms reappear?
Answer: It’s essential to consult with a veterinarian before re-administering Otomax, even if your dog has used it in the past. The symptoms might look similar, but the underlying cause could be different. Using the ointment without a proper diagnosis might not address the issue and could even exacerbate it.
A note about your dog’s health
This article provides general education and does not replace an examination, diagnosis, or individualized advice from your veterinarian. Contact a veterinary professional if you are concerned about your dog’s symptoms.
Dr. Candy Akers earned her Doctor of Veterinary Medicine degree from Oklahoma State University in 2009 after completing undergraduate studies at the University of Delaware. Her experience includes companion-animal nutrition, chronic disease, allergies, autoimmune conditions, cold laser therapy, wildlife rehabilitation, and emergency wildlife response. She combines conventional veterinary knowledge with a whole-animal perspective to help pet parents understand their options and recognize when individualized veterinary care is needed.
Hello, I’m Dr. Candy Akers, and I’ve dedicated my life to the well-being of our furry companions. Over the years, I’ve encountered countless cases of dogs with minor injuries that, if left untreated, can lead to severe complications. It’s a common misconception that a small scratch or cut on a dog will heal on its own without any intervention. However, just as with humans, these seemingly insignificant wounds can become breeding grounds for bacteria, leading to infections and prolonged healing times. That’s why I cannot stress enough the importance of having a reliable antiseptic spray on hand.
In this blog, I’ll be sharing my top recommendations for over-the-counter antiseptic sprays that promote fast healing. I’ll also guide you on the correct way to use these sprays to ensure your dog’s swift recovery. Let’s prioritize the health and comfort of our pets, ensuring they remain active and happy.
Why Do Dogs Need Antiseptic Sprays?
Dogs, with their boundless energy and insatiable curiosity, are natural explorers. Whether it’s a romp in the park, a dig in the backyard, or a playful tussle with a fellow canine, they’re always on the move. However, this active lifestyle also makes them prone to minor injuries. Here’s why antiseptic sprays are essential for our four-legged friends:
Prevention of Infections: Just like humans, dogs are susceptible to bacterial infections. A small cut or scrape, if left untreated, can become a hotspot for bacteria. Antiseptic sprays act as a first line of defense, killing harmful bacteria and preventing potential infections.
Quick Healing: Antiseptic sprays not only disinfect the wound but also create an environment conducive to healing. Many sprays contain ingredients that promote cell regeneration and reduce inflammation, ensuring a faster recovery.
Pain Relief: Some antiseptic sprays come with added pain-relieving ingredients. These can provide immediate relief to a dog in discomfort, making them less likely to lick or bite the affected area, which can further exacerbate the injury.
Protection from External Contaminants: Dogs love to play in varied environments, from grassy fields to muddy puddles. An antiseptic spray forms a protective barrier over wounds, shielding them from dirt, debris, and other external contaminants.
Cost-Effective Treatment: Treating a minor injury promptly with an antiseptic spray can prevent complications that might require more extensive and expensive veterinary care in the future.
Antiseptic sprays are an indispensable tool in a dog owner’s arsenal. They offer immediate treatment for minor injuries, ensuring our pets remain healthy and active. As a veterinarian, I’ve seen firsthand the difference timely intervention can make, and I always advocate for proactive care. After all, prevention is always better than cure.
Dr. Candy’s Top Recommendations for Antiseptic Sprays
Over the years, I’ve had the opportunity to evaluate and test numerous antiseptic sprays available in the market. While many of them offer good results, there are a few that stand out due to their efficacy, ingredients, and overall performance. Here are my top recommendations:
1) Vetericyn Plus Dog Wound Care Spray | Healing Aid and Skin Repair
Introduction: The Vetericyn Plus Dog Wound Care Spray is a versatile and effective solution designed to aid in the healing of various skin issues in animals, making it an excellent choice for pet owners. Here are three pros and two cons based on the information provided:
Pros:
Versatile Application: This product is highly versatile, capable of addressing a wide range of skin issues in animals, including cuts, abrasions, scratches, rashes, and hot spots. Its versatility makes it a valuable addition to any pet owner’s first-aid kit, as it can be used on various types of wounds.
Non-Cytotoxic Formula: Vetericyn Plus is formulated to clean wounds without causing harm to healthy tissue, creating an ideal environment for proper wound healing. This non-cytotoxic property distinguishes it from some other products on the market, ensuring that it aids in the healing process without causing additional damage.
Safe and Trusted: Manufactured in the USA by a reputable company, Vetericyn has gained trust among pet owners as a reliable at-home animal health product. It contains no antibiotics or steroids, making it safe for prolonged use, from newborn puppies to aging dogs.
Cons:
Limited Information: The product description on the webpage lacks detailed information about its ingredients and specific use cases. For customers seeking more in-depth knowledge about the product’s components and how it works, this limited information may be a drawback.
Potential Sensitivity: While the product is generally safe, individual animals may exhibit sensitivities or allergies to certain ingredients. Pet owners should monitor their pets for any adverse reactions, and it would be beneficial if the product provided clearer guidance on how to identify and handle such situations.
Why I Recommend It: The Vetericyn Plus Dog Wound Care Spray offers a versatile and non-cytotoxic solution for addressing a variety of skin issues in animals. Its safety and effectiveness, coupled with its reputation as a trusted product, make it a valuable addition to any pet owner’s toolkit. However, potential customers may find the lack of detailed information about the product’s ingredients and possible sensitivities as areas for improvement. Overall, it presents a compelling option for pet owners seeking a reliable wound care solution for their beloved animals.
2) Vetnique Labs Dermabliss Dog Chlorhexidine Spray
The Vetnique Labs Dermabliss Dog Allergy and Itch Relief is a pet care product formulated to address common skin irritations and allergies in dogs and cats. This medicated relief spray offers a convenient solution for pet parents seeking to alleviate their furry friends’ skin problems. Below are three pros and two cons based on the information provided:
Pros:
Veterinary Strength Formula: Dermabliss contains 2% Chlorhexidine and 1% Ketoconazole, making it a veterinary strength formula. This high-potency composition is effective in targeting and addressing common skin irritations in pets, offering a reliable solution for skin issues.
Soothing and Effective: This spray combines active ingredients with soothing Aloe Vera, providing an effective yet gentle solution for pets’ skin problems. It aims to alleviate discomfort and itching without causing further irritation, making it a suitable choice for pets with sensitive skin.
Safe for Dogs and Cats: Dermabliss is safe to use on both dogs and cats of all ages, making it a versatile product for pet households. The ability to use it on various pets adds to its convenience and value, catering to a broader range of pet owners.
Cons:
Limited Information on Ingredients: The product description lacks detailed information about all the ingredients used in Dermabliss. Customers who are concerned about potential allergens or specific components may find it challenging to assess its suitability for their pets without more comprehensive ingredient information.
May Not Address All Skin Issues: While Dermabliss is designed to address common skin irritations and allergies, it may not be effective for more severe or specific skin conditions that require specialized treatment. Pet owners with pets suffering from such conditions may need to seek alternative solutions or consult a veterinarian.
Why I Recommend It: The Vetnique Labs Dermabliss Dog Allergy and Itch Relief offers a veterinary strength formula for addressing common skin irritations in dogs and cats. Its soothing and effective composition, coupled with its safety for both dogs and cats, makes it a convenient choice for pet owners seeking to alleviate skin problems in their furry companions. However, the limited ingredient information and the potential inability to address all skin issues may be areas for improvement. Overall, it provides a valuable option for pet parents looking for a straightforward solution to common pet skin irritations.
In the vast world of pet care products, these two antiseptic sprays have consistently delivered outstanding results. As a veterinarian, my primary concern is the well-being of our furry companions, and I can confidently say that these products align with that goal. Whether you’re dealing with a minor scratch or a more significant wound, having one of these sprays on hand can make a world of difference.
How To Use Antiseptic Spray For Dogs
Using an antiseptic spray correctly is crucial to ensure the effective treatment of wounds and to promote swift healing. Here’s a step-by-step guide on how to use these sprays for optimal results:
Preparing the Wound:
Cleaning the Area: Before applying any antiseptic, it’s essential to clean the wound thoroughly. Gently wash the affected area with lukewarm water and mild soap to remove any dirt or debris.
Pat Dry: Once cleaned, pat the area dry with a soft, clean cloth or towel. It’s crucial to ensure the wound is dry to allow the antiseptic to work effectively.
Applying the Spray:
Positioning: Hold the spray bottle a few inches away from the wound to ensure even coverage.
Spray Evenly: Apply a generous amount of the antiseptic spray, ensuring the entire wound and its surrounding area are covered.
Avoid Touching: Try not to touch the wound or the nozzle of the spray bottle to prevent contamination.
Post-application Care:
Monitor the Wound: Keep an eye on the wound for signs of healing or any indications of infection, such as increased redness, swelling, or discharge.
Limit Licking: Dogs have a natural instinct to lick their wounds. However, this can slow the healing process and introduce bacteria. Consider using an Elizabethan collar (commonly known as a “cone”) to prevent your dog from reaching the wound.
Reapply as Needed: Depending on the severity of the wound and the specific product’s instructions, you may need to reapply the spray once or twice daily.
Consultation:
When to See a Vet: If the wound doesn’t show signs of improvement within a few days or if you notice signs of an infection, it’s essential to consult your veterinarian for further guidance.
While antiseptic sprays are a fantastic tool for treating minor injuries, it’s crucial to use them correctly. By following the steps outlined above, you can ensure your dog’s wounds heal quickly and without complications. Remember, our pets rely on us for their well-being, so let’s give them the best care possible.
Benefits of Over-The-Counter (OTC) Antiseptic Sprays
Over-the-counter antiseptic sprays have become a staple in many pet owners’ first aid kits, and for good reasons. These readily available solutions offer a host of benefits that make them an excellent choice for treating minor injuries in dogs. Let’s delve into the advantages of OTC antiseptic sprays:
Immediate Access:
OTC antiseptic sprays are available without a prescription, allowing pet owners to quickly address wounds as soon as they occur. Immediate treatment can prevent complications and speed up the healing process.
Cost-Effective:
Compared to prescription medications or treatments, OTC antiseptic sprays are generally more affordable. This cost-effectiveness ensures that pet owners can always have a reliable treatment option on hand without breaking the bank.
Tried and Tested:
Many OTC antiseptic sprays have been on the market for years and have undergone rigorous testing. Their continued presence on store shelves is a testament to their efficacy and safety.
Versatility:
These sprays are formulated to treat a wide range of minor injuries, from cuts and scrapes to insect bites. Their broad-spectrum action makes them a versatile tool in a pet owner’s arsenal.
Ease of Use:
OTC antiseptic sprays come in user-friendly packaging with clear instructions, making them easy to apply even for those without medical training.
Safety:
Most OTC antiseptic sprays are formulated with safety in mind. They are free from harsh chemicals and are gentle on a dog’s skin, reducing the risk of adverse reactions.
Travel-Friendly:
Due to their compact size, OTC antiseptic sprays are easy to carry, making them a must-have for trips, hikes, or any outdoor activity with your furry friend.
OTC antiseptic sprays offer a combination of convenience, efficacy, and safety, making them an invaluable resource for every dog owner. While they are excellent for treating minor injuries, it’s essential to remember that severe wounds or persistent issues should always be addressed by a veterinarian. As always, the well-being of our pets should be our top priority.
Safety Precautions When Using Antiseptic Sprays
While antiseptic sprays are designed to be safe and effective for treating minor injuries in dogs, it’s essential to use them with care. Here are some safety precautions to keep in mind when using these products:
Read the Label:
Always start by reading the product’s label and instructions. Different sprays may have varying ingredients and application methods. Familiarizing yourself with these details ensures you use the product correctly and safely.
Avoid Contact with Eyes and Mouth:
While most antiseptic sprays are formulated for external use, they can irritate a dog’s eyes and mouth. Ensure you apply the spray carefully, avoiding these sensitive areas.
Test for Allergies:
Before fully applying the spray to a wound, it’s a good idea to test a small amount on a patch of your dog’s skin. Monitor for any adverse reactions, such as redness, itching, or swelling.
Keep Out of Reach:
Store antiseptic sprays in a place inaccessible to pets and children. While they are generally safe, ingestion or misuse can lead to complications.
Do Not Substitute for Veterinary Care:
Antiseptic sprays are excellent for treating minor injuries, but they are not a replacement for professional veterinary care. If a wound is deep, doesn’t heal, or shows signs of infection, consult a veterinarian immediately.
Wash Hands After Use:
After applying the spray, wash your hands thoroughly. This prevents any potential transfer of the antiseptic to your eyes, mouth, or other sensitive areas.
Monitor Your Dog Post-Application:
Keep an eye on your dog after applying the antiseptic spray. Ensure they don’t lick or scratch the treated area, as this can slow the healing process and introduce bacteria.
Check Expiration Date:
Like all medical products, antiseptic sprays have an expiration date. Using an expired product can reduce its effectiveness and may even harm your pet. Regularly check and replace outdated products.
While antiseptic sprays are a valuable tool for pet owners, their safety and effectiveness lie in their correct usage. By following the precautions listed above, you can ensure that you’re providing the best care for your furry friend while keeping them safe from potential risks.
Conclusion
Our furry companions bring immeasurable joy and love into our lives, and in return, it’s our responsibility to ensure their well-being and comfort. Minor injuries, though seemingly insignificant, can escalate if not treated promptly and correctly. Antiseptic sprays serve as a first line of defense, offering immediate relief and promoting swift healing. As we’ve explored in this blog, the right product, when used with care and precaution, can make a world of difference in your dog’s recovery.
But beyond the products and techniques, it’s the diligence and love of a pet owner that truly matters. By staying informed and proactive, we can ensure that our pets remain healthy, active, and by our side for many years to come. After all, they’re not just pets; they’re family. Here’s to many more tail wags, playful barks, and cherished moments with our four-legged friends.
Frequently Asked Questions
1. What spray for dogs is antiseptic?
Antiseptic sprays for dogs are specially formulated solutions designed to disinfect and promote healing of minor wounds, cuts, and scrapes. Popular recommendations include the GNC Ultra Medicated Antiseptic Spray and Vetnique Labs Dermabliss Dog, among others.
2. Is antiseptic spray good for dogs?
Yes, antiseptic sprays are beneficial for dogs. They help in preventing bacterial infections in wounds, provide pain relief, and create an environment conducive to quick healing. However, it’s essential to choose a product specifically designed for dogs and follow the recommended usage instructions.
3. How often can you use antiseptic sprays on dogs?
The frequency of application depends on the specific product and the severity of the wound. Generally, for minor injuries, antiseptic sprays can be applied once or twice daily. However, always refer to the product’s label for specific instructions and consult a veterinarian if unsure.
4. Where can you buy antiseptic dog spray?
Antiseptic sprays for dogs can be purchased at pet supply stores, veterinary clinics, and online retailers. It’s always a good idea to read reviews and possibly consult with a veterinarian before making a purchase.
5. Can I use human antiseptic spray on dogs?
While some human antiseptic sprays might be safe for dogs, it’s not always recommended. Dogs have different skin pH levels and sensitivities than humans. Using a product formulated for humans might cause irritation or an allergic reaction in dogs. It’s always best to use products specifically designed for canine use and consult a veterinarian if in doubt.
A note about your dog’s health
This article provides general education and does not replace an examination, diagnosis, or individualized advice from your veterinarian. Contact a veterinary professional if you are concerned about your dog’s symptoms.
Dr. Candy Akers earned her Doctor of Veterinary Medicine degree from Oklahoma State University in 2009 after completing undergraduate studies at the University of Delaware. Her experience includes companion-animal nutrition, chronic disease, allergies, autoimmune conditions, cold laser therapy, wildlife rehabilitation, and emergency wildlife response. She combines conventional veterinary knowledge with a whole-animal perspective to help pet parents understand their options and recognize when individualized veterinary care is needed.
Pet owners are always on the lookout for ways to ensure their furry friends are healthy and safe. If you’ve ever found yourself rummaging through your medicine cabinet seeking a solution to a minor mishap involving your dog, you’ve likely come across that familiar brown bottle – hydrogen peroxide. Widely used for its antiseptic properties in humans, is hydrogen peroxide safe for dogs? As you strive to provide the best care for your beloved pup, understanding the dos and don’ts of common household items is crucial. Dive into our comprehensive guide on hydrogen peroxide and its safety implications for dogs. We’ve gathered essential insights to equip you with the knowledge every responsible dog owner should have. Let’s unravel the mystery together!
Some Wounds Always Require Veterinary Care
As dedicated pet parents, we always want the best for our furry friends. However, no matter how prepared or cautious we might be, accidents can happen. And when they do, it’s crucial to know when a simple cleaning won’t suffice and when professional veterinary care is an absolute must. While some minor scrapes can often be treated at home, certain injuries and wounds necessitate an immediate trip to the vet.
Deep Lacerations or Puncture Wounds
Depth matters: Superficial scrapes might be manageable, but deep cuts that expose underlying tissue, muscle, or bone definitely require professional attention.
Origin of wound: Animal bites or injuries from sharp objects, like nails or shards of glass, can introduce harmful bacteria and necessitate more advanced care.
Wounds with Embedded Foreign Objects
Visibility: Even if you see a thorn or piece of gravel, it’s not always safe to remove it yourself. Some objects can cause more damage when extracted without proper technique.
Potential complications: Foreign objects can cause infections, abscesses, or other complications if not properly addressed.
Injuries Near Vital Areas
Eye injuries: Any wound or trauma near the eye can impact your pet’s vision and needs immediate evaluation.
Joint injuries: Wounds near or on joints can impair movement and may involve deeper structures.
Wounds that Won’t Stop Bleeding
Constant flow: If you’re unable to stop the bleeding with basic first aid after a few minutes, it’s time to see the vet.
Pooling blood: If blood is pooling or there’s a significant amount lost, this is a clear sign of an emergency.
Signs of Infection
While this may develop after an initial injury, it’s vital to monitor any wound for:
Swelling
Foul odor
Pus or discharge
Increased warmth around the wound area
Excessive redness
It’s always better to err on the side of caution. If you’re unsure about the severity of your pet’s wound or its potential complications, a visit to the veterinarian is always the wisest choice. Your pet’s health and comfort should always be a priority, and it’s essential to ensure they get the necessary care during their time of need.
When to Use (and NOT to Use) Hydrogen Peroxide for Cleaning Pet Wounds
For many of us, hydrogen peroxide has been a staple in our medicine cabinets for as long as we can remember. This bubbly, clear solution is known for its disinfecting properties and has been a go-to for cleaning minor cuts and scrapes. But when it comes to our pets, is it always the right choice? Let’s delve into the situations where hydrogen peroxide might be beneficial and the times when it’s best left on the shelf.
When to Use Hydrogen Peroxide for Pet Wounds
Fresh, Superficial Wounds: If your pet has a fresh scrape that’s just on the surface, a diluted hydrogen peroxide solution can be considered for initial cleaning. Ensure it’s diluted, usually with equal parts water, to minimize tissue irritation.
When NOT to Use Hydrogen Peroxide for Pet Wounds
Deep Wounds: Hydrogen peroxide can delay wound healing, especially in deeper lacerations. Its bubbling action can damage underlying healthy tissue and impede the healing process.
Repeated Cleaning: While it might be okay for an initial clean, it’s not suitable for repeated wound cleaning. Repeated application can cause irritation and delay healing.
Older Wounds: If a wound isn’t fresh, using hydrogen peroxide might not only be ineffective but could also introduce additional complications.
Around Sensitive Areas: Eyes, ears, and mucous membranes can be easily irritated by hydrogen peroxide. It’s crucial to avoid using it near these regions.
If Your Vet Advises Against It: Always remember, your veterinarian knows your pet’s health the best. If they suggest avoiding hydrogen peroxide, heed their advice.
In essence, while hydrogen peroxide has its moments in pet care, it’s not a one-size-fits-all remedy. Always approach wound care with caution and prioritize consultation with a professional. Your pet’s well-being and quick recovery should always be at the forefront of any decision you make.
Why Hydrogen Peroxide is NOT Ideal for Cleaning Pet Wounds
When we think of first aid, many of us reach for that familiar brown bottle: hydrogen peroxide. Its effervescent action on contact with a wound and its reputation as a disinfectant can give us a reassuring feeling that we’re taking action against potential infection. However, when it comes to our furry companions, hydrogen peroxide might not be the knight in shining armor we once believed it to be. Let’s explore why this household staple is often discouraged for wound care in pets.
Damages Living Tissue
Hydrogen peroxide’s bubbling effect is not just about cleaning the wound. Unfortunately, it doesn’t differentiate between bacteria and healthy living cells. This means:
It can destroy the very cells needed for wound repair.
This cellular damage can slow down the healing process, increasing the risk of complications.
Delays Healing
While it may seem counterintuitive given its cleaning properties, hydrogen peroxide can:
Cause vasoconstriction, reducing blood flow to the wound area.
With decreased blood flow, essential nutrients and cells necessary for wound repair may not reach the site as efficiently.
Can be Painful
Our pets may not always show it, but hydrogen peroxide can cause discomfort.
The fizzing action can irritate the wound.
Repeated use can exacerbate this discomfort, causing distress to your pet.
Drying Effect
Hydrogen peroxide can dry out a wound, creating a less optimal environment for healing.
Dry wounds can become itchy, leading to increased scratching or licking, further delaying healing and introducing new complications.
Risk of Ingestion
Pets, especially dogs, have a knack for licking their wounds.
If a pet licks a wound treated with hydrogen peroxide, they might ingest some of the solution.
While small amounts may not be harmful, larger quantities can cause stomach upset.
Better Alternatives Available
Today, there are many pet-specific wound cleaning solutions available that are gentler and more effective.
Saline solution, for example, is often recommended for wound cleaning as it’s gentle and mimics the body’s natural fluids.
In conclusion, while hydrogen peroxide has served many households for years, it’s essential to understand its limitations, especially concerning our pets. Sometimes, the tried-and-true remedies we’ve grown up with need a second glance. Always prioritize your pet’s comfort and well-being, and when in doubt, consult with your veterinarian for the best wound care advice.
Alternatives to Using Hydrogen Peroxide to Clean a Wound
As we’ve established, while hydrogen peroxide is a common household item with disinfecting properties, it’s not always the ideal choice for wound cleaning, especially for pets. Thankfully, there are safer and often more effective alternatives available that can help promote healing while minimizing discomfort. Let’s dive into some of these options.
Saline Solution
Nature’s Mimic: Saline closely mirrors our body’s natural fluids, making it gentle yet effective for cleaning wounds.
DIY: You can make a saline solution at home by dissolving a teaspoon of salt in a cup of boiled, cooled water.
Chlorhexidine Solution
Antiseptic Qualities: Chlorhexidine is an antiseptic used in various veterinary and human health applications.
Safe & Effective: It’s gentler than hydrogen peroxide and effective in cleaning wounds without damaging living tissues.
Application: Always dilute with water (typically to a tea-like color) to ensure it’s not too strong for the wound.
Aloe Vera
Natural Healer: Aloe Vera has natural healing and soothing properties.
Use with Caution: Ensure you’re using 100% pure aloe without additives, and remember, while topical application can be beneficial, ingestion can be harmful to pets.
Honey
Ancient Remedy: Used for centuries in wound care, honey offers antimicrobial properties.
Go for Quality: Manuka honey, in particular, has gained popularity in modern wound care due to its enhanced healing properties.
Water
Immediate Action: In the absence of anything else, flushing a wound with clean, cool water can help remove large debris and contaminants.
Temporary Solution: While water can help in the initial cleaning, it’s beneficial to follow up with an antiseptic solution.
Commercial Pet Wound Cleansers
Tailored for Pets: Many pet care brands offer wound cleaning solutions specifically formulated for animals, ensuring they’re gentle and effective.
Convenience: These are often ready-to-use and come with applicators or sprays, making the process easier.
In wrapping up, it’s essential to recognize that every wound and situation is unique. While the alternatives mentioned above can be great options, always consider the wound’s severity, location, and any specific needs of your pet. In cases of deep wounds, punctures, or uncertainty, it’s always wise to consult with a veterinarian to get the best possible care for your furry friend.
Simple Pressurized Saline is One of the Best Options for Initial Flushing of a Wound
When faced with a fresh wound, be it on ourselves or our beloved pets, the initial response is paramount. Amid the variety of cleaning solutions and methods, one stands out as particularly reliable and effective: pressurized saline. Let’s delve into why this simple solution is often hailed as a top pick for the first response in wound care and how you can prepare it right at home.
Mimics Natural Body Fluids
Saline solution is primarily just salt and water, closely resembling the body’s natural fluids. This makes it less likely to irritate the wound or surrounding tissue, offering a gentle yet effective cleansing action.
Reduces Bacterial Load
While saline might seem basic, its flushing action helps clear out debris and reduces the bacterial load in and around the wound, minimizing the risk of infection.
No Harsh Chemicals
Unlike many commercial wound cleaners, saline doesn’t introduce any harsh chemicals or potential irritants, making it suitable for sensitive areas or individuals.
Easily Accessible and Affordable
The ingredients for saline are straightforward and usually available in most households, making it an affordable and accessible choice for immediate wound care.
The Power of Pressurization
Pressurized saline, either from a squeeze bottle or syringe, offers added benefits:
The force can help dislodge foreign objects or contaminants.
It provides a deeper cleaning action than merely dabbing with a soaked cloth.
Homemade Saline Solution Recipe
Making a saline solution at home is straightforward. Here’s a simple recipe:
Ingredients:
1 teaspoon of non-iodized salt (sea salt or table salt without iodine is ideal)
1 cup of boiled distilled water or filtered water
Instructions:
Bring the water to a boil and let it cool slightly.
While still warm, dissolve the teaspoon of salt in the water.
Allow the solution to cool to room temperature.
Store in a clean, airtight container. For pressurized application, you can use a clean squeeze bottle or a syringe (without the needle) for more focused pressure.
Note: It’s best to make fresh saline solution when you need it and discard any leftovers after 24 hours to ensure it remains uncontaminated.
In conclusion, while there’s an array of options for wound care, sometimes the simplest solutions prove to be the best. Saline solution, especially when pressurized, provides a gentle, effective, and affordable method for initial wound cleaning. Whether you’re dealing with a scraped knee or a pet’s minor injury, it’s a handy remedy to have in your first aid repertoire.
When is it OK to Use Hydrogen Peroxide in Cleaning Pet Wounds?
Hydrogen peroxide has long been a staple in many households, often employed to cleanse and disinfect wounds. But when it comes to our pets, its use is a topic of debate among veterinarians and pet care experts. While it’s not universally recommended due to various concerns, there are specific situations where hydrogen peroxide might be considered appropriate for wound cleaning. Let’s explore those instances.
Superficial Abrasions
Hydrogen peroxide can be employed for very superficial scrapes and abrasions, as its bubbling action can help lift dirt and debris from the wound.
Points to Consider:
Always use a diluted solution, typically mixing equal parts of water and hydrogen peroxide.
Avoid repeated applications, as this can delay healing and irritate the skin.
Initial Disinfection
For fresh wounds, especially those that have come into contact with potentially contaminated surfaces, a one-time use of hydrogen peroxide can be considered for its disinfectant properties.
Points to Consider:
After the initial disinfection, switch to milder cleaning agents like saline for subsequent wound care.
Remember, hydrogen peroxide doesn’t differentiate between harmful bacteria and beneficial skin cells, so its frequent use can impede the healing process.
Precautions and Things to Remember
Not for Deep Wounds: Hydrogen peroxide can damage the deeper tissue layers, potentially delaying healing and causing more harm than good.
Avoid Sensitive Areas: Areas such as eyes, ears, and mucous membranes can be easily irritated by hydrogen peroxide.
Monitor for Irritation: If your pet shows signs of increased discomfort, redness, or swelling after using hydrogen peroxide, discontinue its use and consult with your veterinarian.
Always Consult: When in doubt, it’s always best to consult with a veterinarian before applying any substance to your pet’s wounds.
In essence, while hydrogen peroxide does have potential applications in pet care, its use should be approached with caution. Understanding when and how to use it safely can make a difference in ensuring your pet’s swift recovery and overall well-being.
Other Uses for Hydrogen Peroxide
Hydrogen peroxide is a versatile household product that goes beyond just wound care. For pet owners, it’s handy to know the various ways this common solution can be utilized in day-to-day pet care scenarios. Here’s a closer look at some of the other applications of hydrogen peroxide in the realm of pet care.
Skunk Odor Removal
Anyone who’s had a pet sprayed by a skunk knows how potent and persistent that smell can be! Hydrogen peroxide, when combined with baking soda and dish soap, can create a safe and effective de-skunking solution.
Mix the ingredients together in an open container (don’t store in a sealed bottle as it can explode due to gas buildup).
Using gloves, apply the mixture to your pet’s fur, avoiding the eyes, ears, and mouth.
Let it sit for about five minutes, then rinse thoroughly.
Always make a fresh batch when needed.
Cleaning Ear Wax
Some pets, especially certain dog breeds, are prone to ear wax buildup. A diluted hydrogen peroxide solution can assist in softening and removing this wax.
Points to Consider:
Always consult with your vet before using hydrogen peroxide in your pet’s ears.
Ensure the solution is appropriately diluted, typically a mix of equal parts water and hydrogen peroxide.
Disinfecting Pet Toys and Accessories
From chew toys to food bowls, pets’ belongings can become breeding grounds for bacteria. A diluted hydrogen peroxide solution can be used as a non-toxic disinfectant.
Instructions:
Mix equal parts of water and hydrogen peroxide.
Wipe down or soak pet items in the solution.
Rinse thoroughly (especially important for items like bowls).
Whitening Fur Stains
Some pets, especially white-furred breeds, can develop tear or saliva stains. A diluted solution of hydrogen peroxide can help lighten these stains.
Points to Consider:
Always conduct a patch test to ensure no adverse reactions or irritations.
Be cautious to avoid the eyes and mouth while applying.
Preventing Algae in Water Bowls
A few drops of hydrogen peroxide in your pet’s water bowl can help prevent the growth of algae, especially if the bowl is kept outdoors.
Points to Consider:
Always use food-grade hydrogen peroxide for this purpose.
Consult with a vet to determine a safe concentration.
In wrapping up, while hydrogen peroxide holds multiple uses in pet care, always prioritize safety. Remember that concentration matters, and what’s safe for one pet might not be for another. As a pet owner, your best resource will always be a trusted veterinarian, so don’t hesitate to reach out and consult before trying something new. After all, it’s all about keeping our furry friends happy and healthy!
How to Monitor Your Pet’s Healing
Taking care of a wound or injury is just the beginning; monitoring your pet’s healing process is equally vital. It helps ensure that the wound is healing as expected and helps in identifying any potential complications early on. Here’s a comprehensive guide to effectively oversee your furry friend’s recovery.
Check the Wound Regularly
Visual Inspection: At least once a day, inspect the wound for signs of healing, such as reduced redness, swelling, and a gradual decrease in discharge.
Photograph the Wound: Taking daily or regular photos can help you track subtle changes over time, giving a visual progression of the healing process.
Recognize Signs of Healthy Healing
Reduction in Redness: While initial redness is common, it should reduce over time.
Formation of Scabs: A scab is a natural protective barrier that shields the wound as new skin forms beneath.
Gradual Shrinkage: The wound size should decrease as the skin starts to regenerate and close the gap.
Reduction in Pain or Discomfort: Your pet should seem more at ease each day, indicating less pain associated with the wound.
Be Alert to Warning Signs
Persistent Swelling: While some swelling is normal initially, if it continues or worsens, it might indicate an infection or other complications.
Foul Odor: An unpleasant smell coming from the wound can be a sign of bacterial infection.
Increased Heat: If the wound feels warmer than surrounding areas, it might indicate inflammation or infection.
Pus or Discharge: While a small amount of clear discharge can be normal, yellow, green, or bloody discharge can signal complications.
Behavioral Changes: If your pet becomes lethargic, refuses food, or shows signs of distress, they may be feeling unwell.
Keep the Wound Clean
Gently cleaning the wound as advised by your vet helps in preventing infections and complications. Depending on the wound’s nature, a mild saline solution or a prescribed antiseptic might be recommended.
Limit Physical Activity
Based on the wound’s location and severity, limit your pet’s physical activity. Overexertion can strain the wound, possibly leading to reopening or complications.
Prevent Chewing or Licking
While pets often instinctively lick wounds, excessive licking can slow healing and introduce bacteria. Consider using protective collars or lightweight bandages to deter this behavior.
Stay on Top of Medications
If your veterinarian has prescribed antibiotics or pain medication, ensure your pet receives the full course, even if they seem better. This ensures that any underlying bacteria are thoroughly eradicated.
Regular Vet Check-ups
Schedule follow-up visits with your veterinarian to assess the healing progress. They can provide expert insights, address concerns, and adjust treatment plans if necessary.
In conclusion, while the initial treatment of a wound is crucial, the steps you take afterward play a pivotal role in your pet’s recovery. Stay observant, be patient, and always prioritize your pet’s comfort. And remember, when in doubt, your veterinarian is just a call away to guide you through the healing journey.
How to Tell if Your Pet’s Wound is Infected
When our beloved pets suffer from injuries or wounds, ensuring their rapid and complication-free healing becomes a priority. One of the primary concerns during the healing process is the potential for infection. Identifying signs of an infection early can make all the difference in your pet’s recovery. Here’s a guide to help you discern if your pet’s wound might be infected.
Prolonged Redness and Swelling
While some redness and swelling can be expected initially, persistent or increasing redness after a few days might be a sign of infection. Swelling that doesn’t subside or intensifies can also be concerning.
Warmth Around the Wound Area
If you gently touch the area surrounding the wound and it feels significantly warmer than other parts of your pet’s body, it might indicate inflammation or an ongoing infection.
Discharge or Pus
A clear discharge in the initial stages of healing can be typical. However, if the wound starts oozing yellow, green, or even bloody pus, it’s a clear sign of infection.
Foul Odor
An unpleasant smell emanating from the wound is a common symptom of bacterial infection. A clean, healing wound shouldn’t produce any significant odor.
Lethargy or Behavioral Changes
Your pet might seem more tired than usual, lose their appetite, or become unusually aggressive or irritable due to the discomfort or pain associated with an infected wound.
Fever
Just like humans, pets can develop a fever when battling an infection. If your pet seems overly warm, is shivering, or shows other signs of fever, an infection might be the cause.
Increased Pain or Sensitivity
If your pet shows signs of increased discomfort, such as flinching when you come close to the wound or being reluctant to be touched, it could be due to the pain from an infection.
Delayed Healing
Wounds that don’t seem to be healing or look worse as days go by, rather than better, might be struggling with infection.
Loss of Appetite
An infected wound can make your pet feel unwell overall, leading to a reduced appetite or outright refusal to eat.
Excessive Licking or Chewing
While pets naturally tend to lick their wounds, excessive licking, biting, or chewing at the site can be their way of addressing discomfort, itchiness, or pain, often associated with infection.
Final Thoughts:
If you observe any of these signs, it’s essential to consult with your veterinarian promptly. Early intervention can prevent complications, ensuring your pet’s swift and full recovery. Remember, while keeping the wound clean is crucial, never self-prescribe treatments or antibiotics, as incorrect treatment can exacerbate the situation. Your vet will provide the best advice tailored to your pet’s specific needs.
How to Tell if Your Pet’s Wound Is Healing
Wound care for pets isn’t just about immediate treatment; it’s also essential to track the healing process. Monitoring the recovery ensures that everything is on the right track and helps spot potential issues before they escalate. Here’s how you can ascertain that your pet’s wound is on the path to successful healing.
Reduction in Swelling and Redness
The initial stages of a wound might exhibit redness and swelling. However, as the healing progresses, you should notice a gradual decline in both. The skin should begin to revert to its usual color and texture.
Formation of a Scab
A scab’s formation is a good sign as it indicates that the body is actively working to heal the wound. The scab serves as a protective cover, allowing the skin underneath to regenerate. As healing continues, the scab might start flaking away, revealing new skin beneath.
Diminishing Discharge
While a fresh wound might produce some clear fluid, known as exudate, this should decrease as days go by. The absence of yellow, green, or bloody discharge, which can signify infection, is a good indicator of healthy healing.
Decrease in Pain
As the wound starts healing, the pain and discomfort levels should subside. You might notice your pet becoming more active, less irritable, and showing less concern or focus on the wound area.
The Edges of the Wound Get Closer
For open wounds, you’ll notice the edges of the wound gradually moving closer together. This “contracting” is a sign of the skin working to close the wound.
Regrowth of Hair
Over time, as the skin heals entirely, you should observe the regrowth of fur or hair around the wound area. This is a final step in the healing process and a reassuring sign that your pet’s skin has mostly recovered.
Increase in Overall Energy and Appetite
A pet on the mend will often exhibit a resurgence in energy and a return to regular eating habits. Their demeanor will shift from possibly lethargic or listless to more lively and engaged.
Wound Size Reduces
The wound’s overall size should decrease over time. This reduction is a combination of the wound’s edges contracting and new skin forming.
Final Thoughts:
While these signs indicate a healthy healing trajectory, it’s still vital to maintain regular check-ins with your veterinarian, especially if any concerns arise. Healing can vary based on the wound’s nature, location, and your pet’s overall health. Always trust your instincts; you know your pet best, and if something feels off, it’s always a good idea to seek professional advice. Your dedication to monitoring their recovery, combined with expert care, ensures that your pet gets back to their playful self in no time.
Conclusion
Wounds and injuries can be distressing, not just for our pets, but for us as their caretakers. But with knowledge comes empowerment. Understanding the ins and outs of wound care, from the suitability of hydrogen peroxide to the subtle signs of healing, equips you with the tools to make the best decisions for your pet’s health.
It’s heartening to see the resilience and strength pets display, even when faced with discomfort. And while they rely on their innate ability to heal, they also count on our love, care, and diligence to guide them through their recovery.
Remember, the bond between you and your pet is like no other. It’s built on trust, understanding, and mutual care. So, even as you navigate the intricacies of wound management, always prioritize their comfort, trust your instincts, and collaborate closely with your veterinarian.
As you come to the end of this guide, we hope you feel more prepared and confident. Whether it’s a minor scrape or a more significant injury, armed with this knowledge, you’ll be better positioned to support your furry friend on their journey back to frolics, tail wags, and purrs. Because after all, a happy pet means a happy home.
This article provides general education and does not replace an examination, diagnosis, or individualized advice from your veterinarian. Contact a veterinary professional if you are concerned about your dog’s symptoms.
Dr. Candy Akers earned her Doctor of Veterinary Medicine degree from Oklahoma State University in 2009 after completing undergraduate studies at the University of Delaware. Her experience includes companion-animal nutrition, chronic disease, allergies, autoimmune conditions, cold laser therapy, wildlife rehabilitation, and emergency wildlife response. She combines conventional veterinary knowledge with a whole-animal perspective to help pet parents understand their options and recognize when individualized veterinary care is needed.