*This page may include affiliate links, which means that if you make a purchase through one of the product links, we may receive a small commission. For full affiliate disclosure please see our disclaimer page.
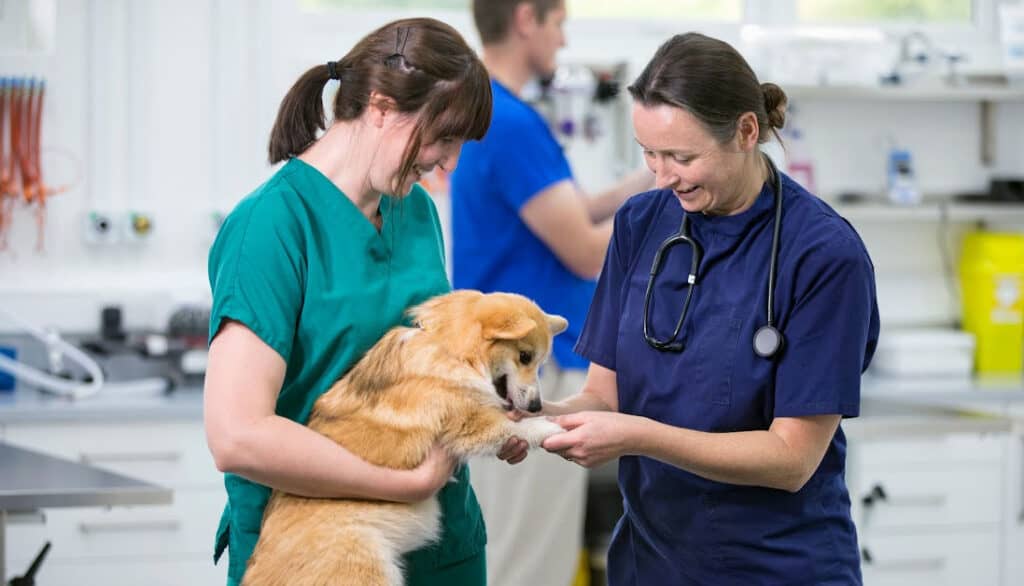
When a dog’s toenail grows extremely long it can curl in towards the foot. And over time it can actually pierce and become embedded in your dog’s paw pad. Sometimes pet parents don’t even notice it until their dog starts limping or licking. The nail can grow in various directions, but when it starts to grow into your dog’s foot it can cause some pain and infection. Here is what to do if your dog’s toenail is curled into their paw.
Do You Need A Vet To Treat A Toenail That Has Curled Into Your Their Paw?
Most of the time, you do not need assistance from a veterinarian when your dog’s toenail is curled into their paw. However, if your dog is extremely painful and sensitive in the area, a vet can administer pain medications and sedatives. If an infection has developed deep in paw tissues then a round of antibiotics may help the foot heal faster.
The Steps To Treating A Dog With a Toenail Curled Into Their Paw:
Get A Good Look
Prepare Materials & Supplies
Cut The Nail
Remove Ingrown Piece
Clean Pad Area
Dry Foot Completely
Apply Antibacterial Ointment
Monitor Healing
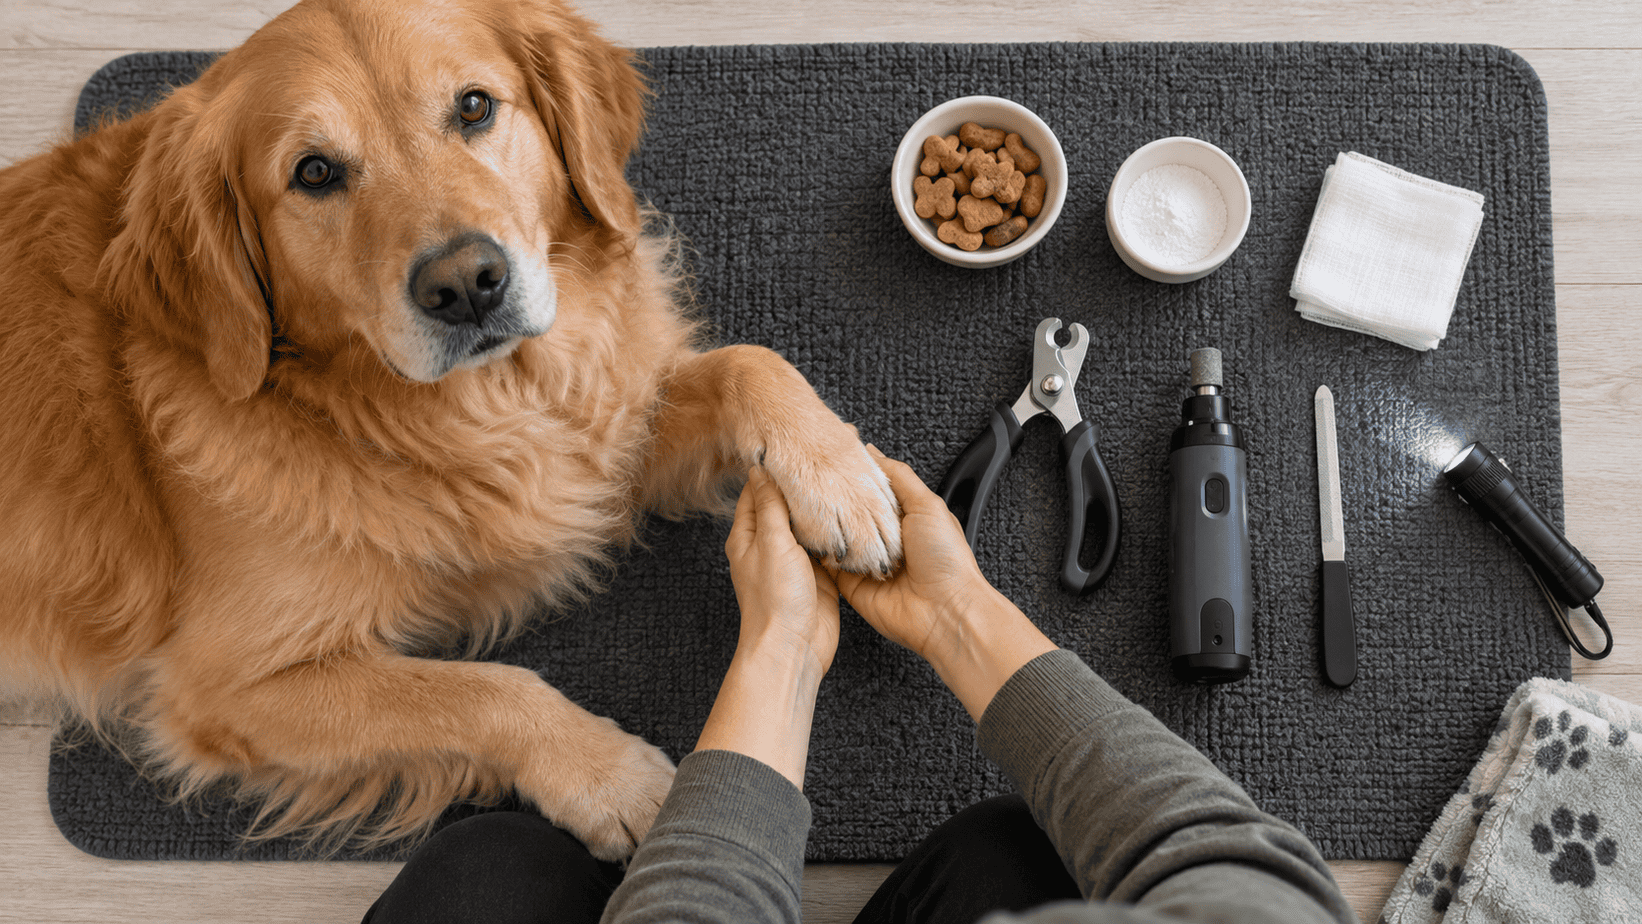
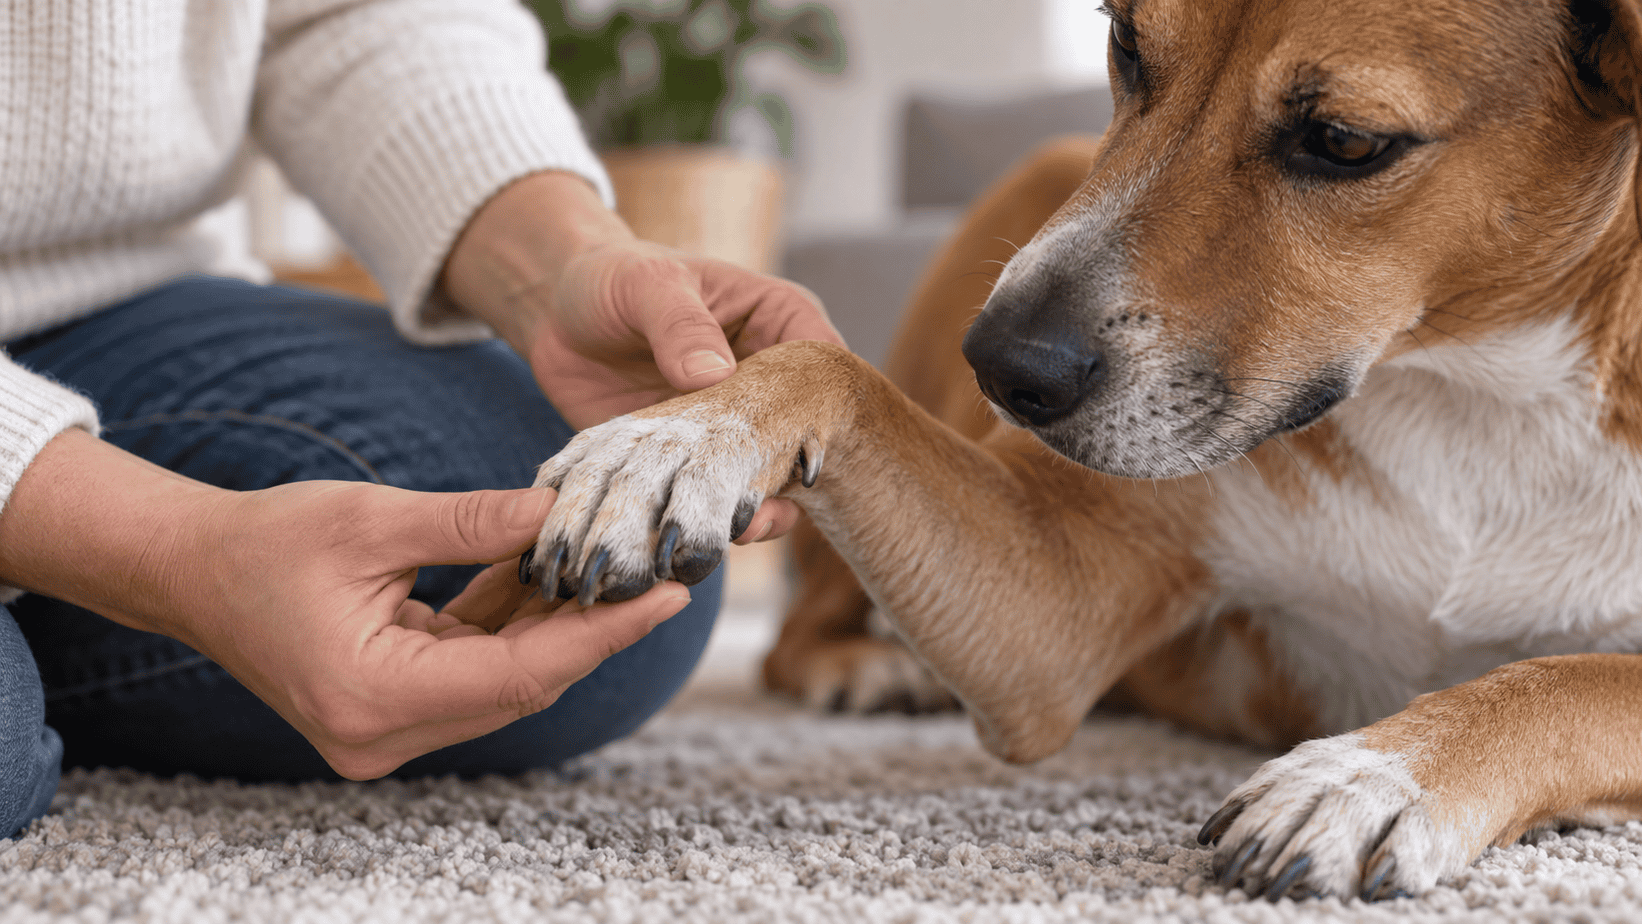
You need to examine the area to get a good look at what is going on with your dog’s toenail. To accomplish this you might need to clip hair, grab a flashlight or find a friend to assist you.
PRO-TIP: I usually have a small flashlight in my doggie first aid kit, but recently I have found that an even better solution is a headlamp so I can use two hands to evaluate the nail problem.
After you get a good look at the situation, the next step is to gather the supplies that you will need. The most important materials would include sharp nail clippers, cotton balls, hydrogen peroxide, antibacterial ointment, and someone to help you.
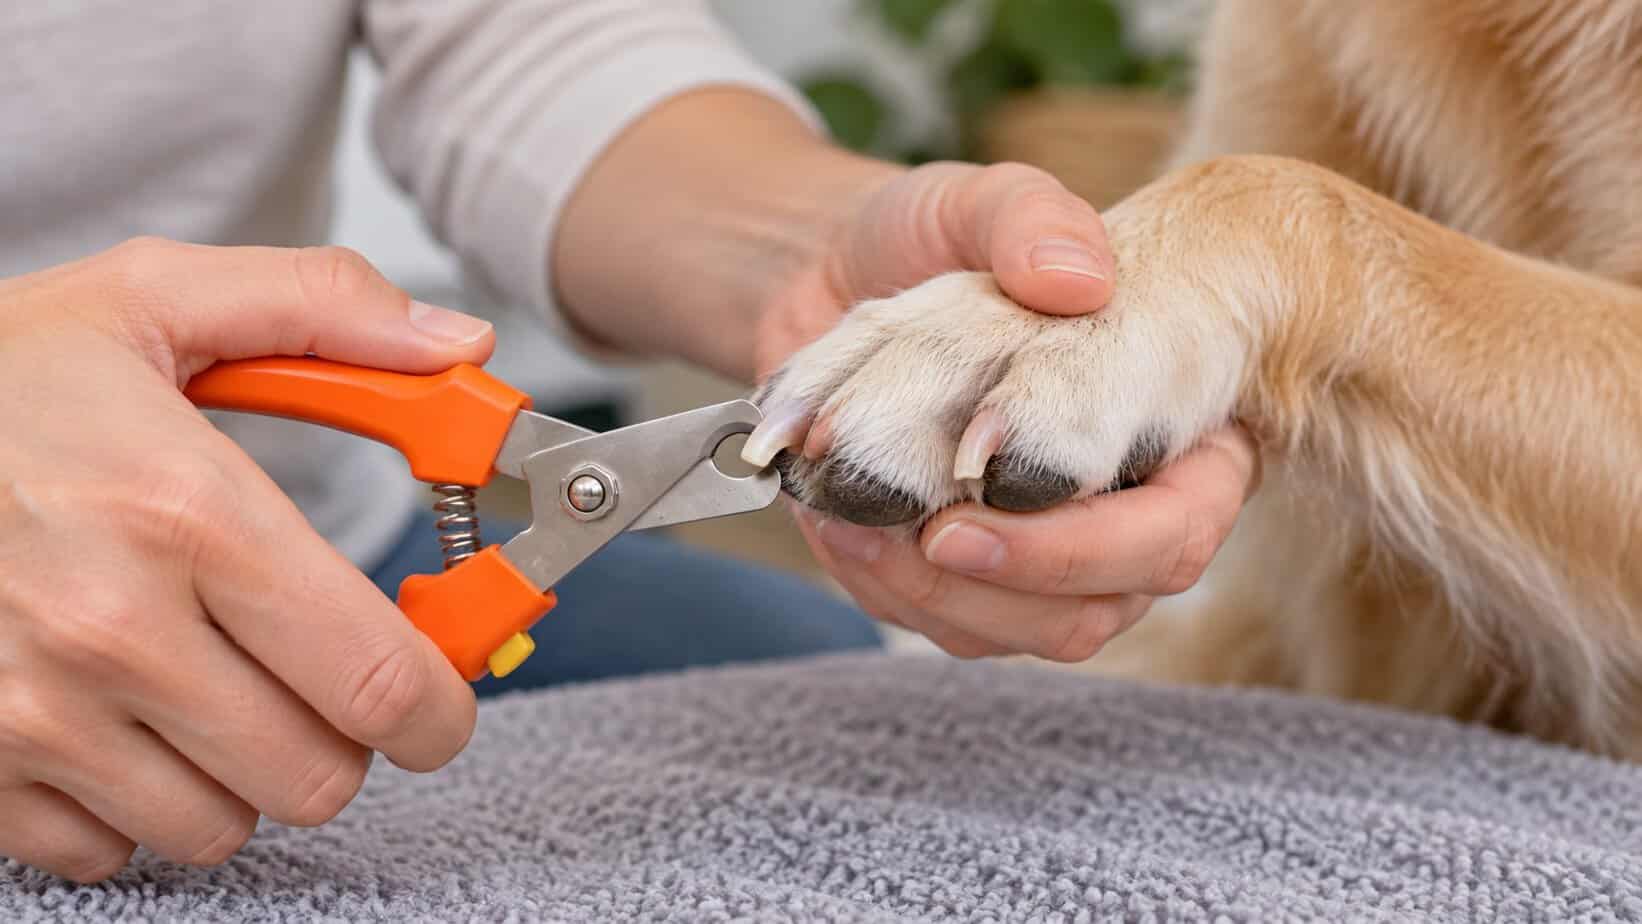
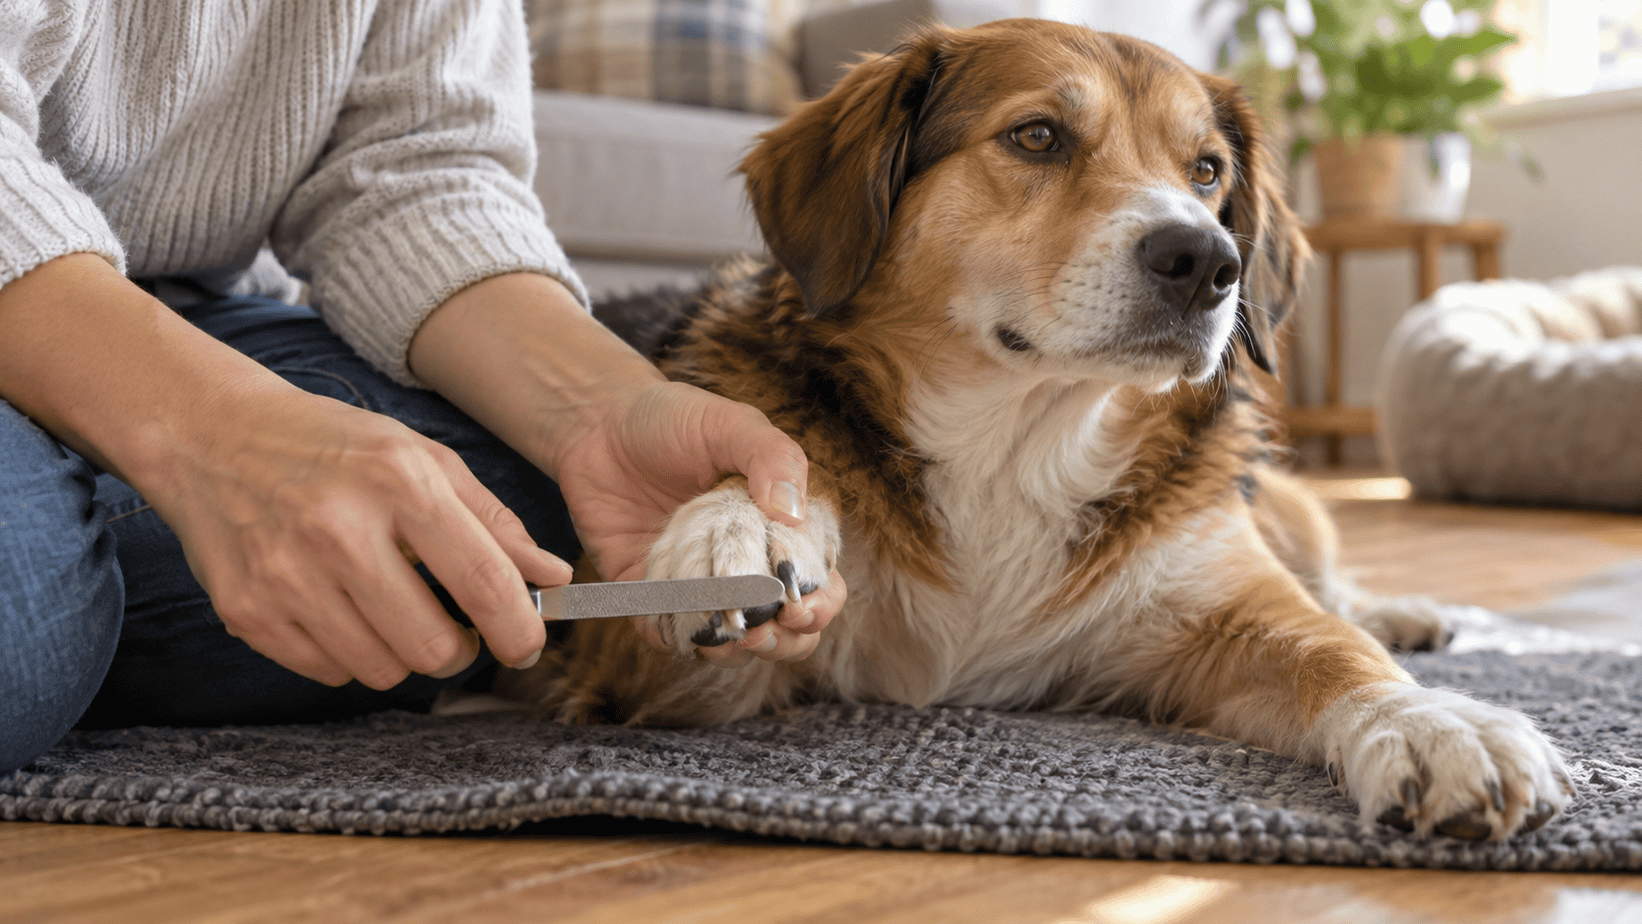
When you are ready, find the tip of the nail to trim. If you cannot tell which end is the tip, just estimate the middle of the curved nail and quickly cut the nail using clean, sharp pet nail clippers. I have found this type of nail trimmer to work the best in this situation.
This step may be uncomfortable for your dog, so cutting the nail quickly can minimize secondary tissue trauma, pinching, squeezing, smashing, and additional nail damage. After cutting the toenail, the end piece will usually fall out on its own. If half of the nail does not fall out, you may need forceps or tweezers to gently pull out the end of the nail.
How To Clean A Wound Left By A Toenail Curled Into Their Paw
After you have removed the nail from the paw pad, you should clean the wound. Lots of dirty stuff could be hiding in there so we need to clean it up. Warm water with a small amount of gentle hand soap will do the trick. The best antiseptic for this situation is regular hydrogen peroxide. Soak a cotton ball with the peroxide and dab it on the wound.
Now, we need to let the area dry completely. At this stage, try not to let your dog lick the toe. I know this is easier said than done. You can distract them with a yummy chew treat, put a sock over the paw, or use an e-collar cone to prevent licking. Usually just supervising them for a few minutes will allow it to dry. Alternately, a blow dryer on the low setting with no heat can speed things along.
After the paw pad has dried completely, we want to apply some sort of antibacterial ointment or cream.
What Do I Do If The Toenail Is Ingrown?
In cases of ingrown toenails, we recommend using a safe antibacterial ointment. This will help heal the paw pad and kick out any infection present. When applying the antibacterial ointment to the paw puncture, use only a small amount and use the original regular strength generic products. Make sure there are no pain relief ingredients nor other additives.
At this time, it pays to make an effort to prevent your dog from licking off all of the ointment right away. If your dog licks the wound excessively then the ointment will not do its job to kick out any infection. On top of that, licking can leave moisture behind which promotes yeast growth and additional bacteria may be introduced from your dog’s mouth.
When it comes to infection on and around paws, dogs actually heal quickly. Some people wrongly assume that paws are at high risk for infection because these parts touch the floor, the grass, dirt, and other yucky areas. But over the years I have seen direct proof of the tough immune system in a dog’s, and other animals, feet. Deep or long lasting infections are rare and most cases do not need oral antibiotics.
SIDE NOTE: However, if your veterinarian recommends antibiotics due to the extent of the infection, make sure to take the medication as directed and always finish the whole course.
How Do These Curved Ingrown Nails Happen?
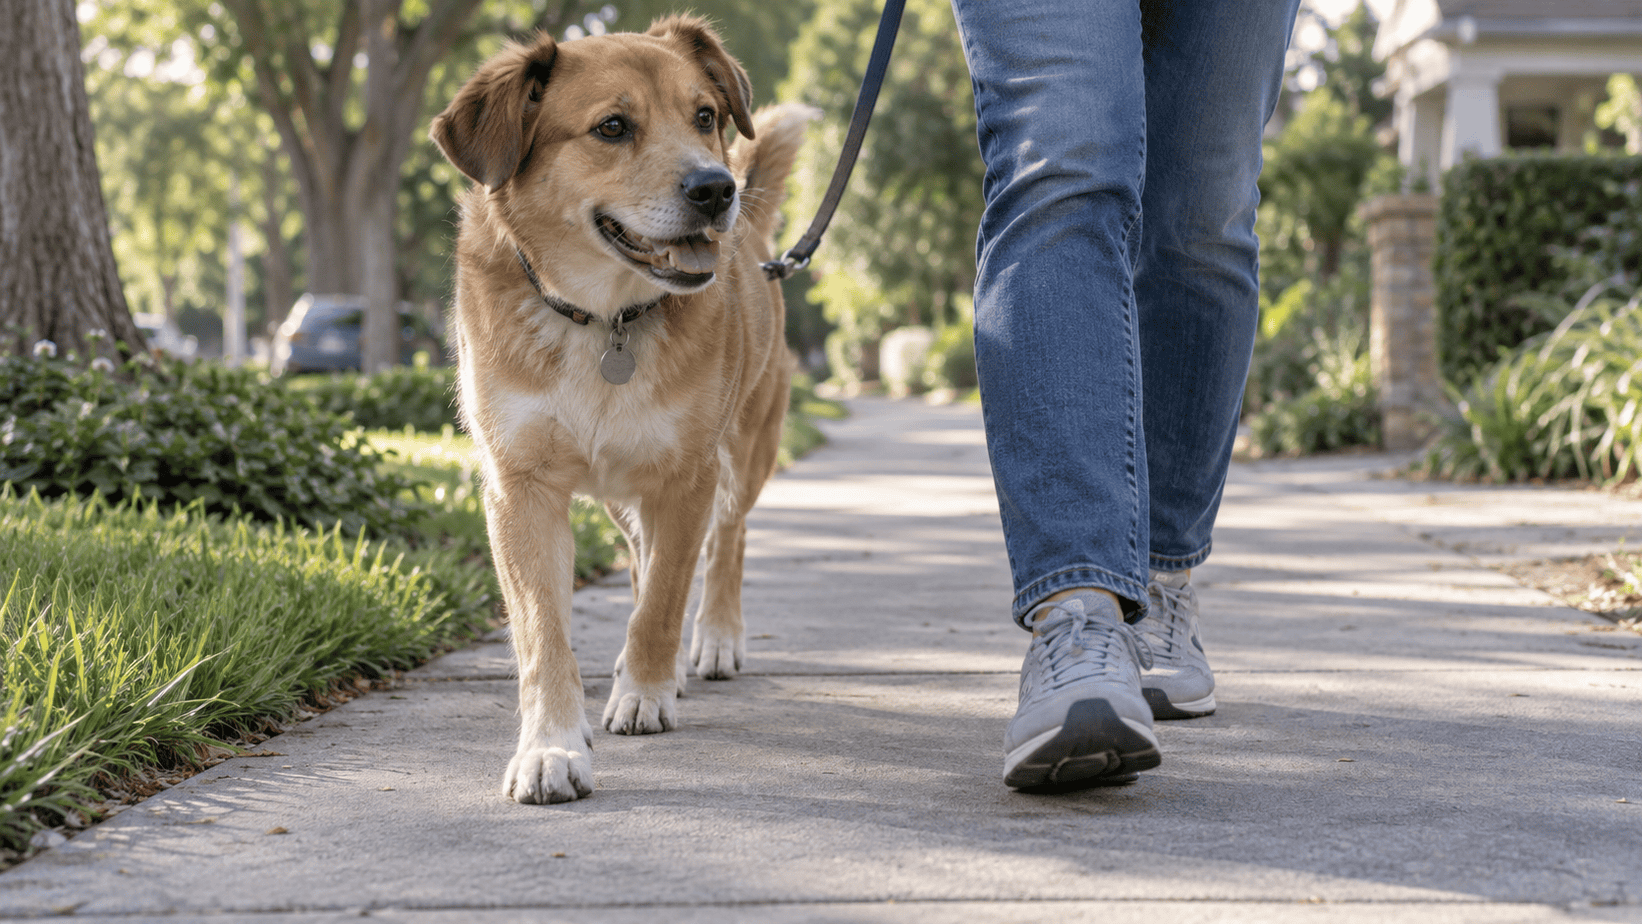
Nails that are curled and growing into your dog’s own paw pad are usually caused by toenails that are not trimmed nor worn down naturally. Dog toenails are designed to dig in dirt and grip things. When running or chasing, the toenails give extra traction to their feet. So, if your dog is not hitting the trails or pounding the pavement, nails are not worn down naturally and trimming will be needed. As your dog’s nails become longer, they start to curve downwards and continue back towards the toes. If they get long enough, they will grow under the foot near the paw pads. Then each step will cause the nail to dig into the bottom of the paw pad. At this stage, pain and discomfort could be present although animals are really good at hiding pain.
Which Dogs Are More At Risk for Nails Curled Into The Paws?
Ingrown nails can happen to any dog, but certain qualities can make some dogs at a higher risk for this occurrence. These curled nail conditions happen more frequently in small breed dogs and happen more often in older dogs. Senior dogs usually receive less exercise than younger dogs. Other risk factors include breeds with dew-claws or double dew-claws. Additionally, nail curvature may change due to past injuries or trauma.
What Are The Signs Of A Dog’s Nail Curling Into Their Foot?
Signs or symptoms that your dog has an ingrown toenail could include:
Licking or chewing the toe
Bleeding from foot
Yelping or growling in pain
Smelly infection or discharge
Pinkish swelling around the toes
Limping or favoring a paw
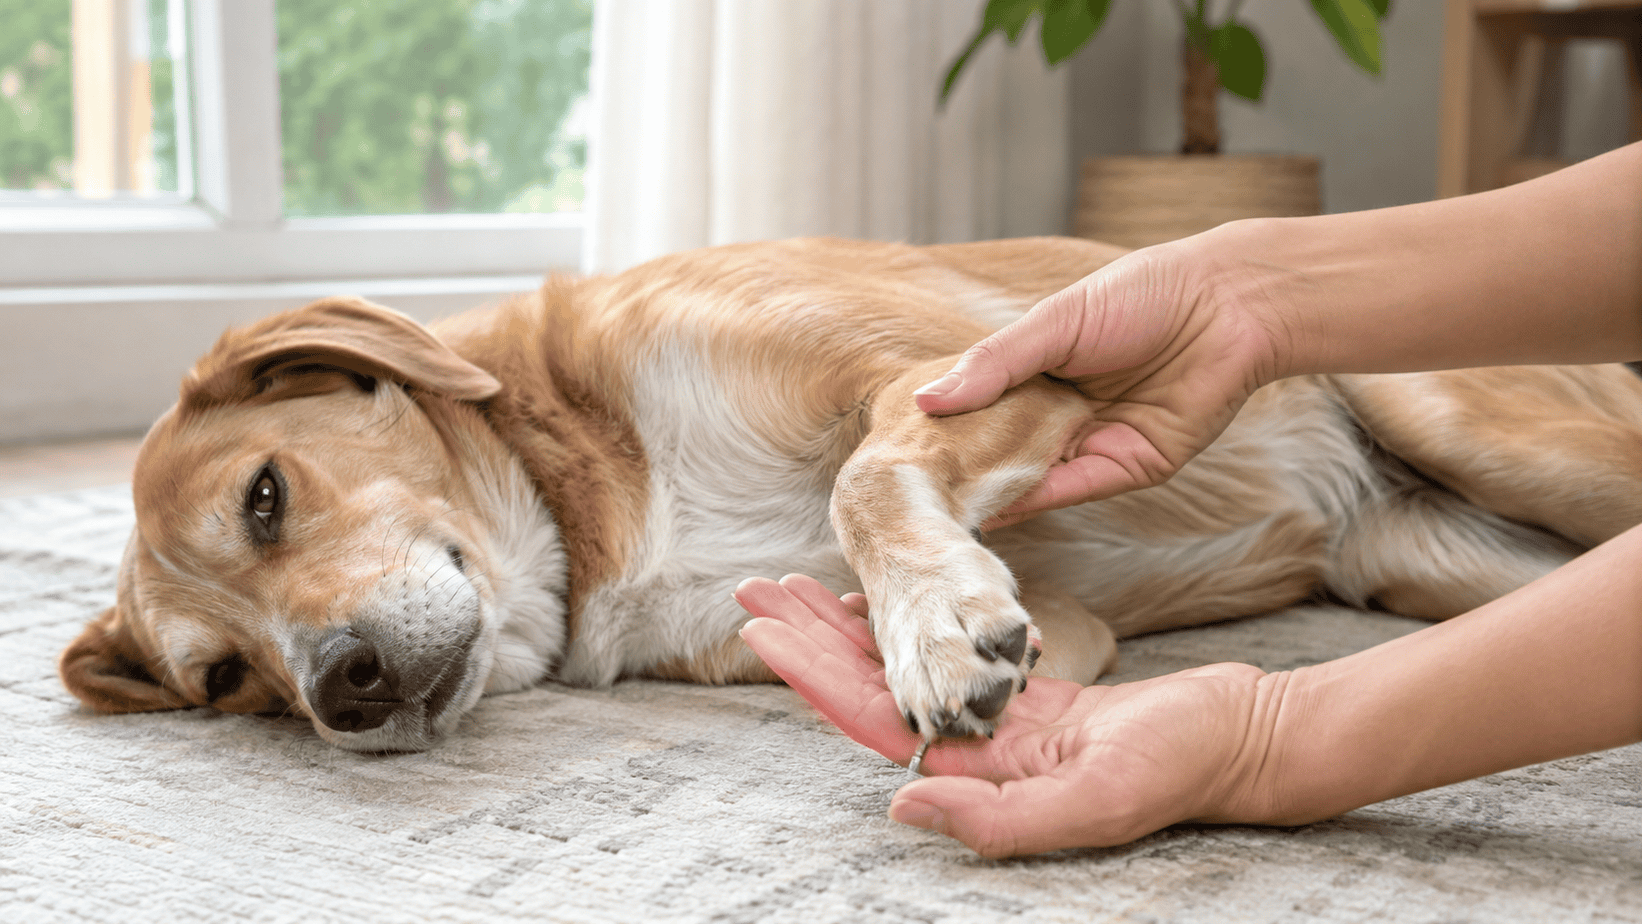
Cindy Lou waits calmly while I check her overgrown toenails.
How Can I Prevent Ingrown Nails In My Dog?
The easiest way to prevent a nail-to-paw pad clash is to trim your dog’s nails regularly. Get into a routine and start by clipping nails every two weeks. Then move to every 3 weeks, then 4 weeks, etc. These small trims will help the nail quick recede to a more natural length.
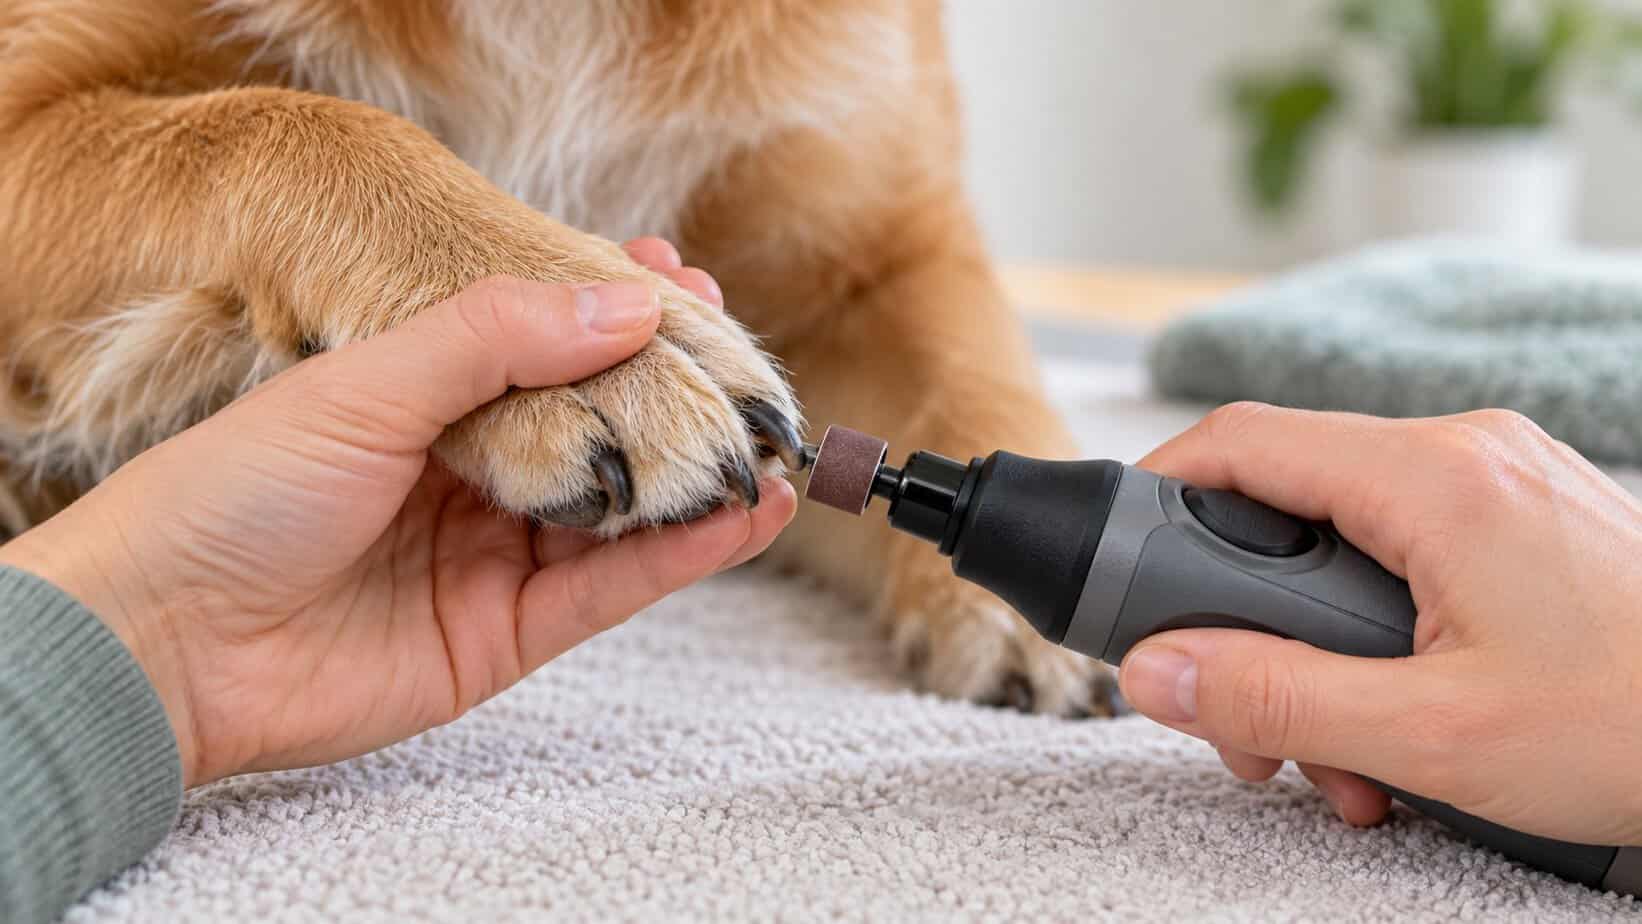
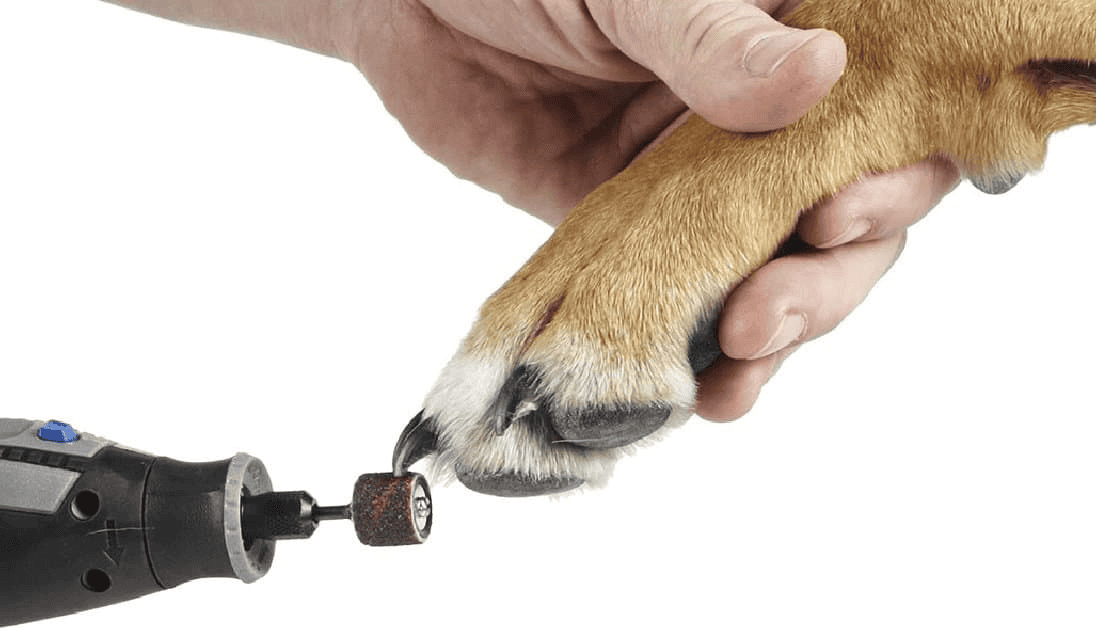
PRO-TIP: Using a Dremel or grinding tool also stimulates the nails to regress to a normal shorter position. The vibrations of the grinder act as a body signal that nails are too long and that they are hitting the ground forcefully with each step. I especially like the Dremel tool because it is quiet. When used appropriately, Dremel-type tools do not hurt, but may “tickle” some dogs.
Getting your dog more exercise will also help prevent these injuries. Keeping your dog active will help them stay healthy and look great in more ways than one. Monitor your dog’s nails and feet, checking at least once a week. You can put a recurring reminder on your smartphone calendar to send yourself reminder notifications.
There are Tons of Resources To Help You Maintain Your Pup’s Toenails At Home
You can order the maintenance supplies you need online and can watch hundreds of YouTube videos demonstrating how to clip your dog’s nails. Give yourself some time and go slow as you navigate this important part of health maintenance. However, I also know how intimidating it can be to trim your dog’s nails. It is surprisingly common for those of us in the animal care field to not be able to trim our own personal dog’s nails. If you try but cannot make the situation a positive one, then go ahead and call your vet.
Other helpful resources are pet groomers and pet stores. In some areas, they even have mobile nail services for dogs! A nail expert, like Nailed it! Denver comes to your home at a scheduled time, trims your pup’s nails, and even sweeps up the mess! Just follow the steps above to fix the toenail, and your pup will be stepping pain-free soon!
A note about your dog’s health
This article provides general education and does not replace an examination, diagnosis, or individualized advice from your veterinarian. Contact a veterinary professional if you are concerned about your dog’s symptoms.
Dr. Candy Akers earned her Doctor of Veterinary Medicine degree from Oklahoma State University in 2009 after completing undergraduate studies at the University of Delaware. Her experience includes companion-animal nutrition, chronic disease, allergies, autoimmune conditions, cold laser therapy, wildlife rehabilitation, and emergency wildlife response. She combines conventional veterinary knowledge with a whole-animal perspective to help pet parents understand their options and recognize when individualized veterinary care is needed.
*This page may include affiliate links, which means that if you make a purchase through one of the product links, we may receive a small commission. For full affiliate disclosure please see our disclaimer page.
Yes, long nails can hurt dogs. The most direct problems happen when a nail presses against the ground, snags and tears, splits near the sensitive quick, or curls into a paw pad. Still, a little clicking on the kitchen floor does not automatically mean your dog is in pain. It means the nails deserve a closer look.
You may have heard that long nails always change a dog’s gait and eventually cause arthritis. The evidence is not that simple. A 2026 pilot study of seven healthy dogs found no significant change in major gait measurements before and after nail trimming. [1] I still want nails kept comfortable and safe, but I do not want you blaming every stiff step on the toenails.
From a whole-dog perspective, nail length belongs beside activity level, walking surfaces, paw shape, mobility, age, nail quality, and how your dog feels about having their feet handled. Looking at the complete picture leads to better care and usually a calmer trim.
Can Long Nails Hurt Dogs?
Long nails are most likely to hurt when they create direct pressure or damage. A very long nail can press into the ground each time the dog stands. It can also catch in carpet, decking, or brush and tear. Nails that keep growing may curve toward the pad, and dewclaws are easy to miss because they do not touch the ground and wear down naturally. These problems can be uncomfortable or painful, and a torn or embedded nail can become a much bigger paw problem. [2]
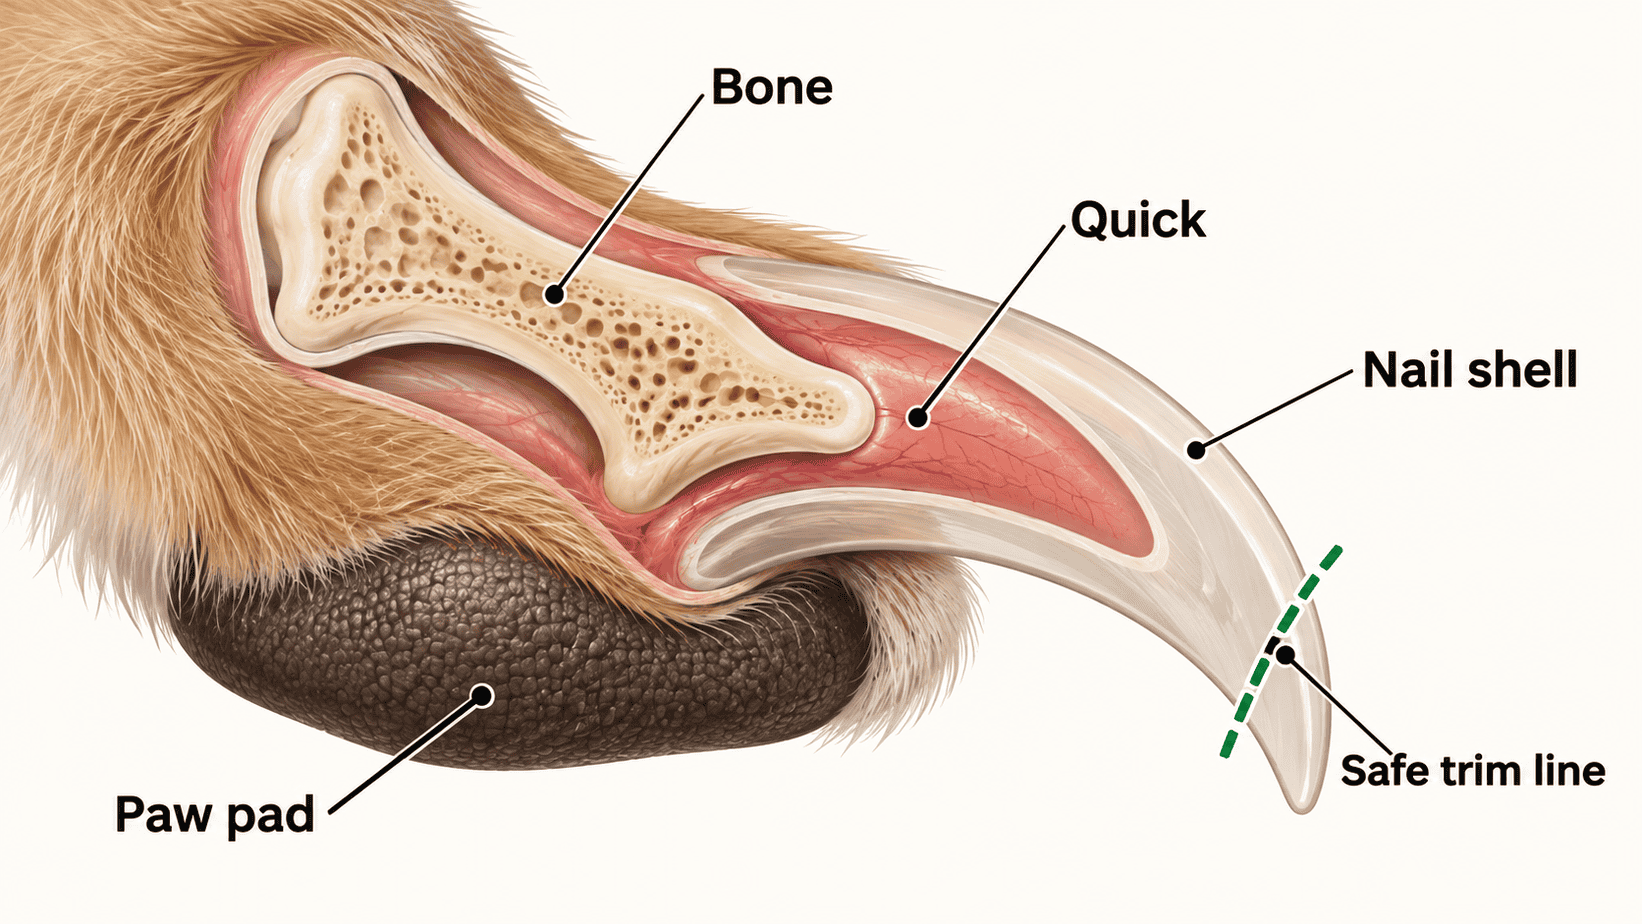
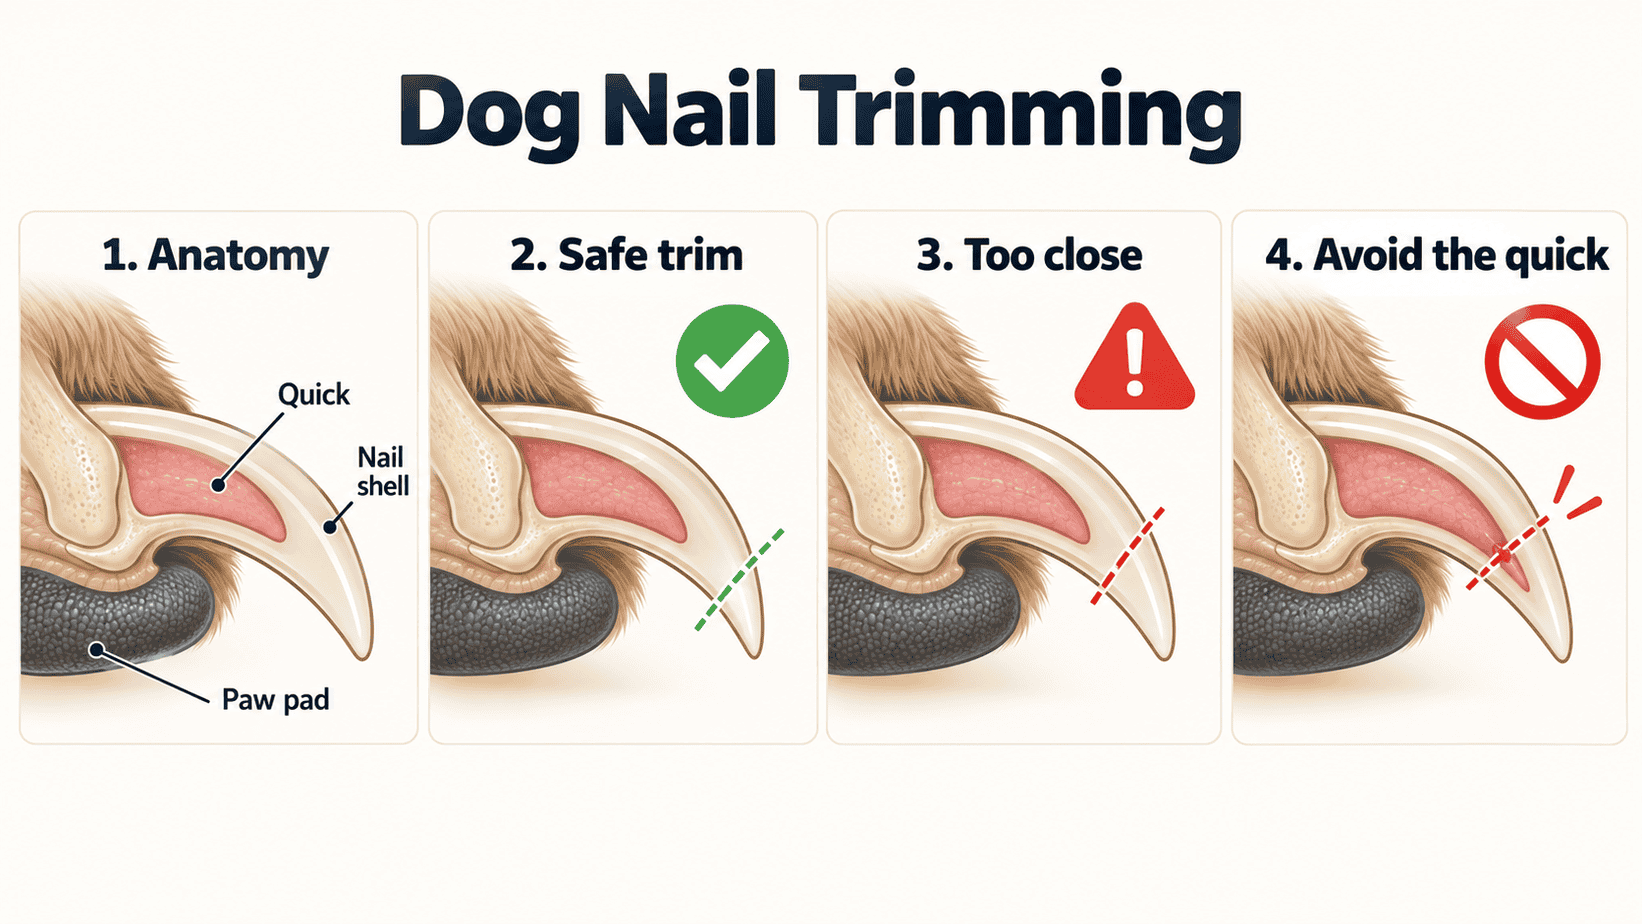
Inside each nail is the quick, which contains nerves and blood vessels. The hard outer nail protects it. A trim into the quick hurts and bleeds, and a split that exposes it can be quite tender. That is why thoughtful, gradual trimming is kinder than waiting until the nails need a major correction.
How to Tell When Your Dog’s Nails Are Too Long
Start with your dog standing naturally on a flat surface. In many dogs, a comfortable nail sits close to the floor without pushing hard into it. Paw shape varies, though, so I look for several clues instead of trusting one rule.
Check for:
Nails that rest firmly on the floor or lift the toes when your dog is standing
A pronounced hook, sideways curve, or twist
A nail that catches on fabric, carpet, or bedding
Toes that look spread or a foot that is placed differently from the others
Licking or chewing one toe
Flinching when a nail is touched
Limping, avoiding a paw, or suddenly resisting normal walks
A dewclaw curving toward the skin
A visible curvature or twist in the nails is a clear sign they’ve grown too long. You can spot it during a quick paw check and act before the nail reaches the paw pad, leading to pain and potential infections.
Clicking is less absolute. Some dogs click on hard floors even when their nails are a reasonable length because of foot shape, how they move, or the floor itself. Use the sound as a reminder to inspect the feet. If the nails are clicking loudly, touching the ground at rest, and beginning to curve, a trim is probably due.
How Long Nails Cause Problems
The clearest risks are local to the nail and paw:
Pressure: A nail that bears weight against the floor can make standing or walking uncomfortable.
Snagging and tearing: Extra length gives carpet loops, deck gaps, and brush more nail to catch.
Splitting: A crack can travel toward the quick and expose sensitive tissue.
Pad penetration: A tightly curved nail can grow into the paw pad, causing a wound and sometimes infection.
A longer quick: When nails remain long, the quick may extend farther toward the tip, so the nail cannot safely be shortened all at once.
I also look at why the nails became long. A young, active dog who runs on firm ground may wear nails differently from a senior who takes shorter walks on grass. Reduced nail wear can follow reduced mobility, which means the nails may be a clue rather than the sole cause of an awkward gait.
I have had several special-needs dogs that were missing limbs or required the use of a cart. In these dogs I had to check their paws and nails more often.
If several nails become brittle, misshapen, loose, or painful at the same time, look beyond grooming. That pattern can point to a nail-bed or whole-body problem that needs a proper examination. Occasionally, nutritional deficiencies could cause changes in toenail structure.
What Research Says About Nail Length and Gait
The first objective study to compare dogs before and after a nail trim was published in 2026. In seven clinically healthy dogs, researchers found no significant changes in stride length, stance time, or major force measurements after trimming. They did find small changes in paw length and side-to-side pressure movement. [1]
This was a small pilot, so it does not answer every question about severely overgrown nails, painful nail disease, or dogs who already have mobility problems. It does tell us not to leap from “long nails can hurt” to “long nails always change the whole gait and cause arthritis.” Keep the nails at a comfortable length because direct pressure, tearing, splitting, and pad penetration are reason enough.
How to Trim Overgrown Dog Nails Safely
Before You Start
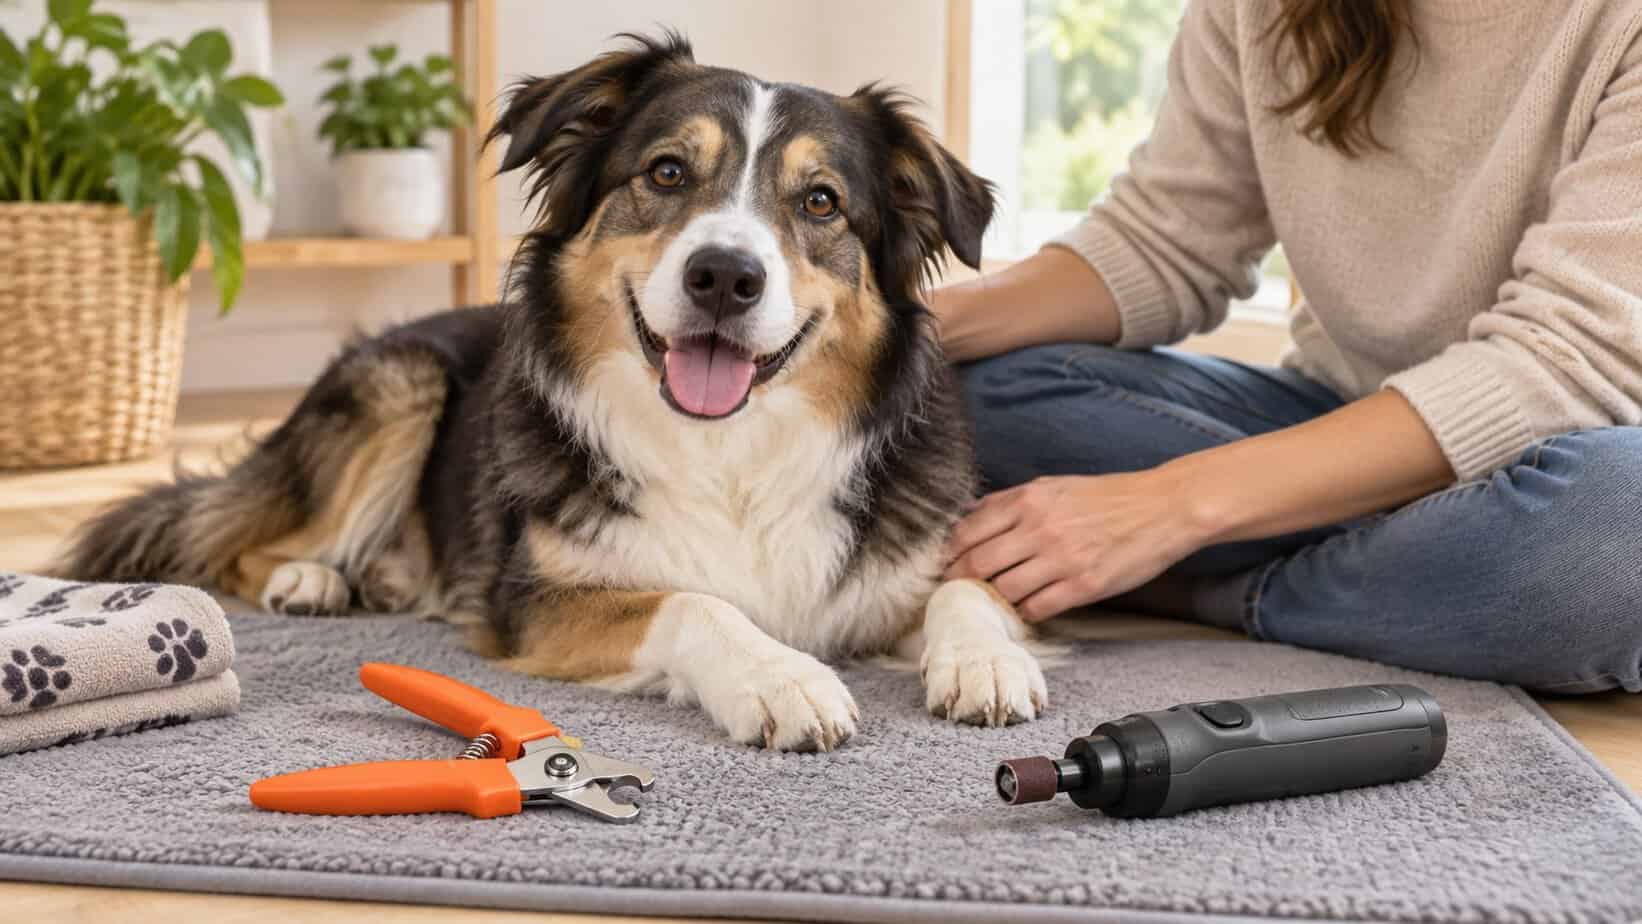
Choose a bright spot with non-slip footing. Have sharp dog nail clippers or a grinder, styptic powder, and a few high-value treats within reach. Check all the nails before you begin, including every dewclaw, so there are no surprises halfway through.
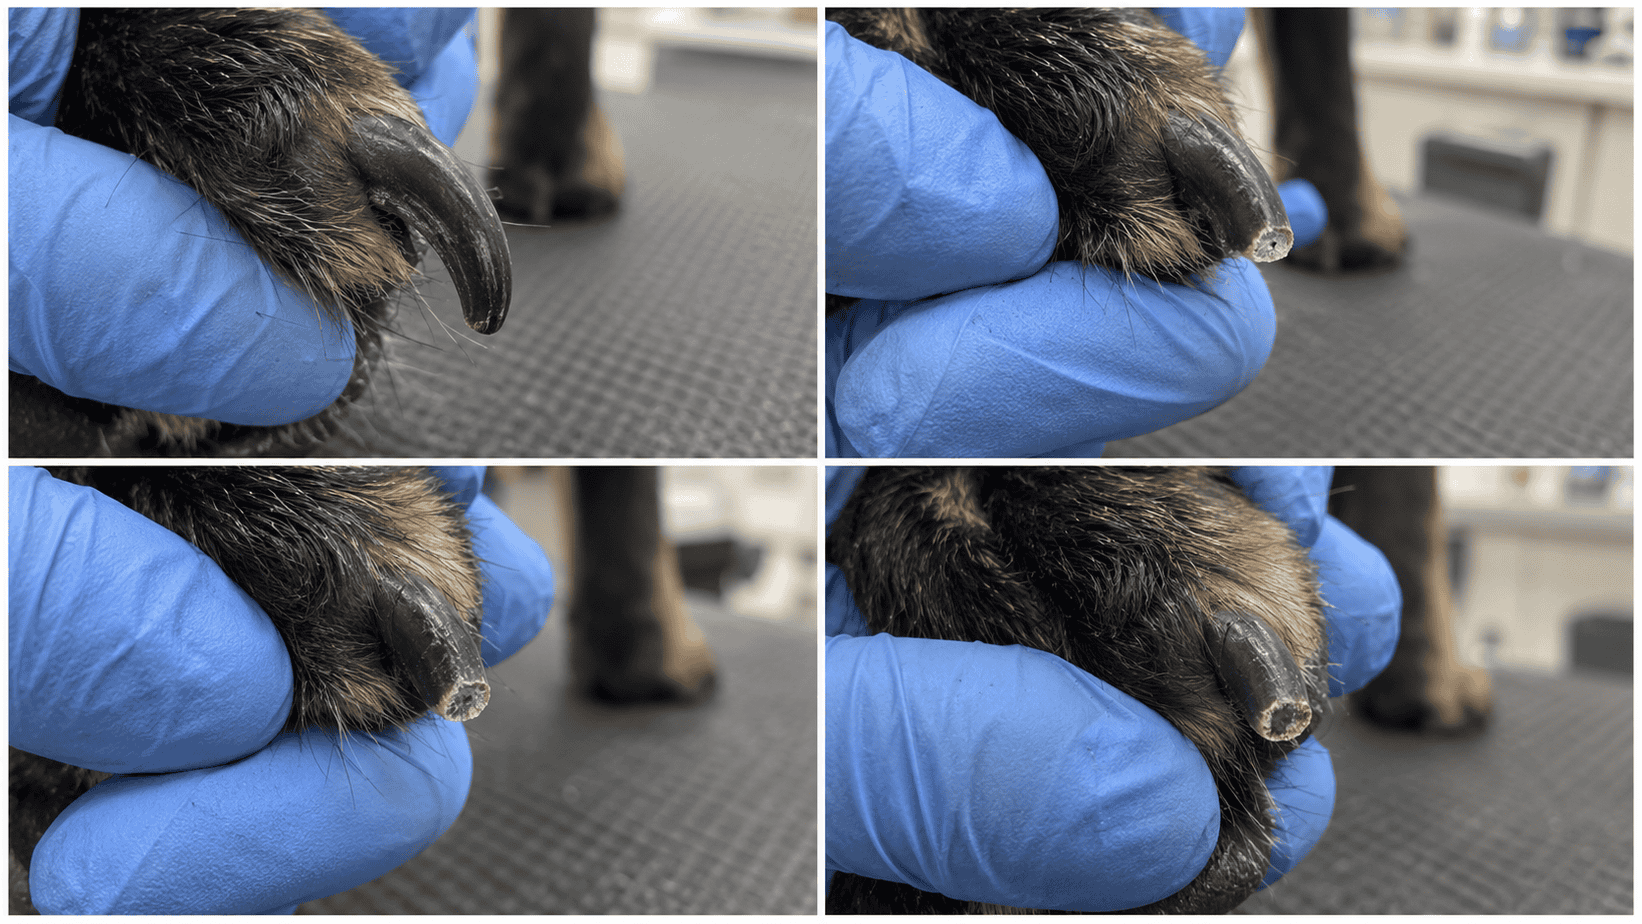
On a light nail, the pink quick is often visible. On a dark nail, take off a very thin slice at a time. As you move inward, the dry, pale center begins to look darker and softer. Stop before you reach that center. If you cannot tell where the safe edge is, there is no prize for guessing. A groomer or veterinary technician can show you on your own dog.
A grinder removes tiny amounts and rounds rough edges, but the sound and vibration bother some dogs. Clippers are faster, but a dull pair can squeeze or split the nail. The best tool is the one that is sharp, comfortable in your hand, and tolerated by your dog.
If the Quick Is Long
Do not try to restore a short nail in one dramatic session. Trim or grind a small amount, then repeat the process regularly as the quick retreats. Weekly micro-trims work well for many dogs with overgrown nails, but the pace depends on the dog and how close you can safely work. [2]
Severely curved nails, nails close to the pad, and very thick dark nails are reasonable jobs for an experienced groomer or veterinary team. Once the nails are manageable, small home touch-ups are much easier to maintain.
If You Cut the Quick
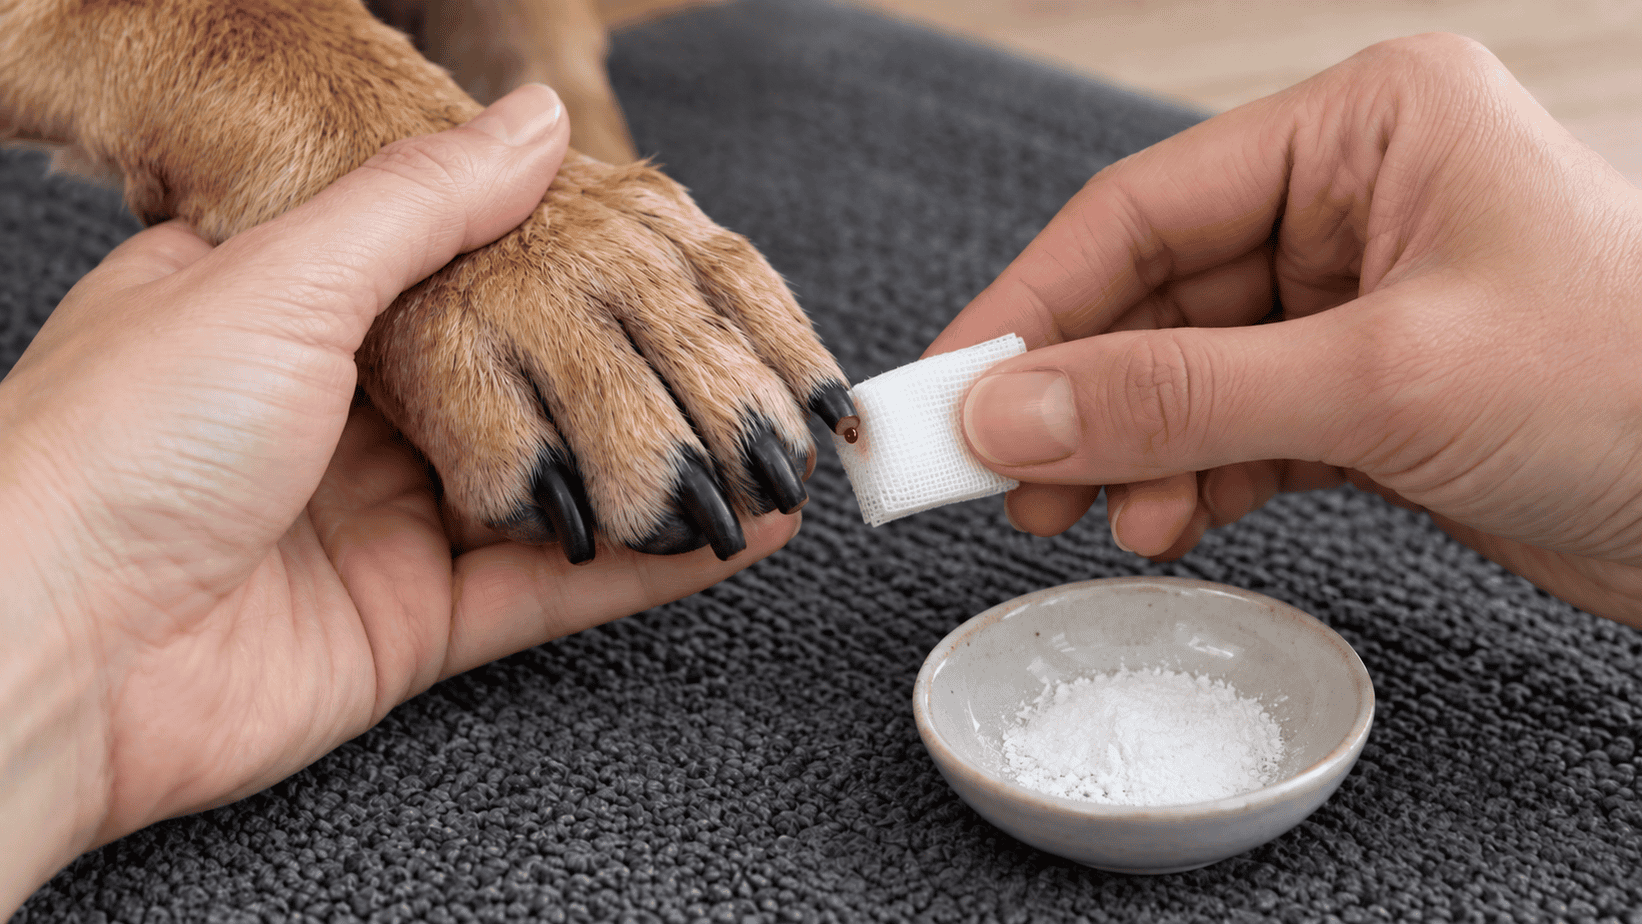
Stay calm and press styptic powder against the nail. If you do not have it, cornstarch or flour can help encourage clotting. Gentle, steady pressure matters more than repeatedly lifting the cloth to check. Merck’s veterinary first-aid guidance recommends pressure or a clotting aid for a bleeding nail and professional help when a broken piece will not come away easily. [3]
If bleeding continues despite pressure, the nail is split toward the base, or your dog is very painful, let a veterinary professional take over.
Helping a Dog Who Hates Nail Trims
Nail-trim fear is not stubbornness. In a 2022 study of 35 dogs, heart rate rose during nail trimming, nearly half of the dogs struggled intensely or escalated to aggression for at least one nail, and almost one in three had experienced a painful trim in the past. [4]
Break the job into pieces your dog can handle:
Touch the leg, reward, and stop.
Touch the paw and one toe, reward, and stop.
Show the tool without using it.
Introduce the sound or a gentle touch of the tool.
Trim one nail, then end on a calm success.
A full set of nails does not have to happen in one sitting. Two nails today and two tomorrow can be a lovely plan. If your dog panics, growls, snaps, or cannot stay safely positioned, do not wrestle through it. A cooperative-care trainer, experienced groomer, or veterinary team can help build a safer routine.
Special Care for Senior Dogs
Older dogs often need more frequent checks because they may walk less and naturally wear the nails down less. Give them a non-slip mat, support the body comfortably, and avoid pulling an arthritic leg far out to the side. Short sessions are easier on sore joints and tired muscles.
If your senior still seems stiff or reluctant to walk after the nails are comfortably shortened, keep looking. Nail care can remove one source of irritation, but it cannot diagnose or fix every mobility problem.
When a Nail Problem Needs Professional Help
A groomer is a good choice for routine overgrowth when the nail and surrounding skin look healthy. A veterinary visit is more appropriate when you see:
A nail embedded in the paw pad
A deep split, loose nail, or break near the base
Bleeding that does not stop with pressure
Swelling, warmth, discharge, or odor
Persistent limping or marked pain
Several nails becoming brittle, deformed, loose, or painful
These are no longer simple length questions. The goal is to treat the injury or underlying cause, not just make the nail shorter.
Final Thoughts
Long nails can hurt dogs, but the practical message is simpler than the scary claims you may see online. Check the feet often, pay special attention to curves and dewclaws, and trim small amounts before the job becomes difficult. Calm, regular care protects the nail and the relationship you are building with your dog.
If nail day has become a wrestling match, make the next session shorter. One calm nail is progress.
Frequently Asked Questions
Do Dogs Feel Better After a Nail Trim?
Dogs with nails pressing into the floor, catching, or curving toward the pads can be more comfortable after a safe trim. A dog without those problems may not show a dramatic change, and trimming will not solve an unrelated mobility condition.
How Often Should Dog Nails Be Trimmed?
Many dogs need a check every two to four weeks, but the actual trim schedule depends on growth, activity, walking surfaces, paw shape, and age. Look at the nails rather than relying only on the calendar. Dewclaws often need attention sooner because they do not wear on the ground.
Can Long Nails Cause Arthritis?
Current evidence does not prove that routine nail overgrowth causes arthritis. Long nails can create local pressure and injury, and severely overgrown nails may make walking awkward. The 2026 pilot did not find significant changes in global gait after trimming, so claims that long nails automatically cause arthritis go beyond what has been shown.
What If the Quick Is Too Long?
Shorten the nail gradually with small, frequent trims instead of trying to reach the ideal length in one session. Weekly micro-trims work for many dogs. Stop before the darker, softer center of the nail, or ask an experienced professional to demonstrate the safe stopping point.
Are Clicking Nails Always Too Long?
No. Clicking is a helpful reminder to inspect the feet, but floor type, paw shape, and movement can affect the sound. Ground contact at rest, pronounced curvature, twisting, snagging, and toe discomfort give you a fuller picture.
This article provides general education and does not replace an examination, diagnosis, or individualized advice from your veterinarian. Contact a veterinary professional if you are concerned about your dog’s symptoms.
Dr. Candy Akers earned her Doctor of Veterinary Medicine degree from Oklahoma State University in 2009 after completing undergraduate studies at the University of Delaware. Her experience includes companion-animal nutrition, chronic disease, allergies, autoimmune conditions, cold laser therapy, wildlife rehabilitation, and emergency wildlife response. She combines conventional veterinary knowledge with a whole-animal perspective to help pet parents understand their options and recognize when individualized veterinary care is needed.
*This page may include affiliate links, which means that if you make a purchase through one of the product links, we may receive a small commission. For full affiliate disclosure please see our disclaimer page.
Hello, dear readers and fellow canine enthusiasts! When it comes to our furry companions, we often consider their nutrition, exercise, and overall health. Yet, one aspect that tends to fly under the radar is the growth of their nails. “How fast do dog nails grow?” is a question that many dog owners ponder, especially when it feels like they’ve just trimmed those claws, only to find them tapping on the floor again shortly after. Nail care is more than just an aesthetic concern; it’s about comfort and health. With this guide, “How Fast Do Dog Nails Grow- Nail Length Growing Guide,” we aim to provide you with a comprehensive understanding of your dog’s nail growth rate, factors that influence it, and tips to maintain them properly. Journey with us as we delve into the intricacies of your pooch’s paws and ensure they’re always in tip-top shape!
How Fast Do Dog Nails Grow?
The speed at which dog nails grow can vary based on the breed, age, activity level, and other factors. Here’s a general breakdown:
Soft Surfaces: Less wear, leading to noticeable growth
Tips for Healthy Dog Nails:
Regularly check your dog’s nails, ideally every 1-2 weeks.
Use the right tools for nail trimming to ensure a smooth cut.
Pay attention to the quick of the nail to avoid injuries.
If unsure about nail trimming, consult with a veterinarian or professional groomer.
What Happens If You Don’t Cut Dogs Nails?
1. Overgrowth and Discomfort
When a dog’s nails become too long, they can cause discomfort or even pain. As the nails grow, they can force the toes to spread apart unnaturally or cause the nails to twist to the side, leading to discomfort when walking.
2. Injury and Breaks
Long nails are more susceptible to splitting, cracking, or breaking. If a nail breaks, it can be very painful for the dog and may even bleed. In severe cases, broken nails can lead to infections if not treated promptly.
3. Altered Gait and Posture
A dog’s posture and gait can be negatively affected by long nails. When nails touch the ground as the dog walks, it exerts pressure back into the nail bed, creating pain or discomfort. Over time, this can lead to a change in how the dog walks, potentially causing joint strain or other orthopedic issues.
4. Reduced Traction
Long nails can reduce a dog’s ability to grip surfaces, particularly on tile or hardwood floors. This can increase the risk of slipping, which could lead to injuries.
5. Ingrown Nails
Just like humans, dogs can also suffer from ingrown nails. This happens when the nail grows back into the paw pad. Ingrown nails are painful, can become infected, and often require veterinary intervention.
6. Reduced Socialization
If a dog associates its long, painful nails with certain activities like walking or playing, it might become hesitant or resistant to participate. This can lead to reduced socialization and activity, affecting their overall well-being and mental health.
Regular nail trims are essential for maintaining your dog’s health and comfort. Not only does it prevent potential physical complications, but it also ensures your furry friend remains active and happy. Always keep an eye on the length of your dog’s nails and trim them regularly, either at home or with the help of a professional groomer.
Tips for Shortening Nails
Ensuring that your dog’s nails are kept at a healthy length is crucial for their overall well-being. Here are some effective tips to help you maintain or reduce their nail length:
1. Regular Trimming
The simplest and most direct way to keep nails short is by trimming them regularly. Depending on how fast your dog’s nails grow, you might need to do this every two to four weeks.
2. Use the Right Tools
Invest in a good quality pair of dog nail clippers. There are different types, such as guillotine-style or scissor-style clippers. Some dog owners also prefer using a rotary tool or nail grinder, which files down the nails.
3. Start Young
If you have a puppy, start the nail trimming routine early. Puppies who get used to having their feet handled and nails trimmed at a young age are usually more accepting of the process as adults.
4. Gradual Reduction for Overgrown Nails
If nails are extremely overgrown, don’t try to cut them short all at once. Instead, trim a little bit off at a time over several weeks to allow the quick (the sensitive part of the nail) to recede naturally.
5. Positive Reinforcement
Reward your dog with treats and praise during and after nail trimming. This can help make the experience more positive for them, making future trims easier.
6. Familiarize Yourself with the Quick
The “quick” is the blood vessel that runs through the nail. Cutting into it can cause pain and bleeding. In light-colored nails, the quick is the pinkish section. For dogs with dark nails, it’s harder to see, so only trim a small amount at a time or use a flashlight behind the nail to help locate it.
7. Frequent Walks on Pavement
Walking your dog regularly on pavement or concrete can help naturally file down their nails. However, be cautious during hot weather, as hot surfaces can burn a dog’s paw pads.
8. Consult with Professionals
If you’re unsure about trimming your dog’s nails yourself, consider taking your pet to a professional groomer or veterinarian. They can give you a demonstration or provide tips tailored to your specific dog.
9. Stay Calm and Confident
Dogs often pick up on our emotions. If you’re nervous about cutting their nails, they’ll likely become anxious too. Taking a calm and confident approach will make the process smoother for both of you.
When to Trim Your Dog’s Nails
Knowing when to trim your dog’s nails is crucial for their comfort, health, and overall well-being. Let’s delve into the various indicators and best practices associated with nail trimming.
1. Clicking Sounds on Hard Surfaces
One of the most common signs that it’s time to trim your dog’s nails is when you hear them clicking or tapping as they walk on tile, hardwood, or other hard surfaces.
2. Observation
Curvature: If the nails start to curve downwards or sideways, it’s an indication that they’re getting too long.
Touching the Ground: When your dog is standing still, their nails shouldn’t touch the ground. If they do, it’s time for a trim.
3. Discomfort or Altered Gait
If your dog starts to walk differently, limps, or seems to be in discomfort when walking, long nails might be the cause.
4. Regular Check-ups
Even if none of the above signs are evident, it’s a good practice to check your dog’s nails:
Puppies: Every week, as they tend to grow quickly.
Adult Dogs: Every 2-4 weeks.
5. Post-Activity Check
After activities like playing in the mud or swimming, nails can become softer and more vulnerable to breaking. It’s a good idea to inspect and, if necessary, trim them post such activities.
6. Check the Dewclaws
The dewclaws, or the nails higher up on the paw, don’t always touch the ground and therefore don’t wear down naturally. Regularly check these, as they can grow in a circular pattern back into the paw if left unattended.
7. After Bath Time
Nails are softer after a bath, making it a good time to trim them. If you integrate nail trimming into the post-bath routine, it can become a regular habit.
8. Based on Previous Growth Rate
Every dog is unique. Some dogs may need nail trims every two weeks, while others might go a month or more. By observing and understanding your dog’s nail growth rate, you can set a more personalized trimming schedule.
Regular nail maintenance is vital for a dog’s health and comfort. By staying observant and integrating nail checks into routine care, you can ensure that your furry friend’s paws remain in tip-top shape.
What Causes Toenail Breakage in Dogs?
Toenail breakage in dogs can be distressing for both the pet and the owner. Understanding the root causes can help in preventing such incidents and ensuring your dog remains pain-free and happy. Here are the most common causes:
1. Overgrown Nails
Long nails are more prone to snagging and getting caught on surfaces like carpets, gaps in wooden floors, or between deck planks. This can lead to sudden breaks or cracks.
2. Trauma
Running, playing, or roughhousing can sometimes lead to toenail injuries, especially if the dog stops suddenly or collides with an object. Jumping off elevated surfaces or getting a nail caught while moving can also result in trauma.
3. Brittle Nails
Some dogs naturally have brittle nails, or they may develop them due to medical conditions, age, or nutritional deficiencies. Brittle nails are more likely to split, crack, or break.
4. Infections or Fungal Diseases
Infections, especially fungal ones, can weaken the nail structure. A weak nail is more susceptible to breakage.
5. Tumors or Growths
In rare cases, tumors or growths on the nail bed or in the nail matrix can cause deformities and weaknesses, making breakages more likely.
6. Allergies
Dogs with allergies may excessively lick or chew their paws, weakening the nails over time and making them prone to breakages.
7. Poor Nutrition
A diet deficient in essential nutrients can lead to weaker nails. Proper nutrition, including specific vitamins and minerals, is vital for strong and healthy nails.
8. Frequent Exposure to Water
Dogs that spend a lot of time swimming or in wet environments might experience softer nails, which can be more prone to tearing or breaking.
9. Genetic Predisposition
Some dog breeds or individual dogs may be genetically predisposed to have weaker or more brittle nails, leading to more frequent breaks.
Toenail breakage in dogs can result from a combination of environmental, genetic, and health factors. It’s essential to keep an eye on the condition of your dog’s nails and provide the necessary care, nutrition, and preventive measures to minimize the risk of breakage. If you notice frequent breakages or any signs of infection, it’s wise to consult a veterinarian.
Conclusion
Our dogs rely on us for more than just food and love; they need us to ensure their overall well-being, and a significant part of that is nail care. While seemingly a small detail in the grand scheme of pet ownership, the health and length of a dog’s nails can greatly impact their comfort, mobility, and overall quality of life. By understanding the intricacies of nail growth, the repercussions of neglect, and the potential causes of nail issues, you’re better equipped to provide the best care possible for your furry friend. Regular nail maintenance might require a bit of time and patience, but the rewards—a happy, healthy, and sprightly companion—are well worth the effort. After all, every small act of care we show contributes to a lifetime of happiness for our loyal pals. So, grab those clippers, offer a comforting pat, and take a step toward ensuring your dog’s paws are always in top-notch condition!
Frequently Asked Questions
1. How often should I trim my dog’s nails?
The frequency varies depending on the breed, age, activity level, and individual growth rate of the dog. However, a general guideline is every 2-4 weeks for adult dogs and weekly for puppies.
2. What should I do if I accidentally cut into the quick?
If you accidentally cut into the quick, don’t panic. It will bleed and may be painful for the dog. Apply styptic powder or cornstarch to the bleeding nail to help stop the bleeding. Comfort your dog and ensure they’re calm before proceeding or deciding to continue another day.
3. Can long walks or runs replace the need for nail trims?
While walking or running on hard surfaces can naturally file down a dog’s nails, it may not be sufficient for all nails, especially the dewclaws. Regular checks and trims are still necessary to ensure all nails are at a healthy length.
4. My dog is terrified of nail trims. What can I do?
Start with positive reinforcement, rewarding your dog for calm behavior during nail checks. You can also desensitize them by handling their paws regularly without trimming. If anxiety persists, consider seeking the help of a professional groomer or veterinarian, or try anti-anxiety aids and tools.
5. Are there any dog breeds particularly prone to nail problems?
While all dogs can experience nail issues, some breeds with certain genetic predispositions, like the Dachshund, might have more nail-related problems. It’s essential to be aware of your breed’s specific health concerns and monitor their nails closely.
A note about your dog’s health
This article provides general education and does not replace an examination, diagnosis, or individualized advice from your veterinarian. Contact a veterinary professional if you are concerned about your dog’s symptoms.
Dr. Candy Akers earned her Doctor of Veterinary Medicine degree from Oklahoma State University in 2009 after completing undergraduate studies at the University of Delaware. Her experience includes companion-animal nutrition, chronic disease, allergies, autoimmune conditions, cold laser therapy, wildlife rehabilitation, and emergency wildlife response. She combines conventional veterinary knowledge with a whole-animal perspective to help pet parents understand their options and recognize when individualized veterinary care is needed.
*This page may include affiliate links, which means that if you make a purchase through one of the product links, we may receive a small commission. For full affiliate disclosure please see our disclaimer page.
As a loving pet owner, ensuring the well-being and comfort of your furry friend is always a top priority. One essential but often overlooked aspect of dog care is nail maintenance. You might be wondering, “How much is too much when it comes to grinding my dog’s nails?” or “How can I ensure I don’t hurt my pet in the process?” You’re not alone in these concerns. This blog aims to shed light on the often murky waters of dog nail care, specifically addressing the pivotal question: When to stop grinding dog nails? Dive in as we unpack the signs to watch out for and provide handy tips to avoid the quick – ensuring a safe and painless grooming experience for your four-legged companion.
How to Avoid Failures While Cutting Your Dog’s Nails
Ensuring your dog’s nails are well-maintained is more than just aesthetics; it’s about health, comfort, and safety. However, it can be an intimidating process for both owners and their pets. Let’s explore methods to make this process smoother and more efficient, minimizing any potential mishaps.
Cut Your Dog’s Nails Regularly
Regular maintenance reduces the chances of the nails growing too long.
Shorter intervals between trims mean less stress for your dog as they become familiar with the routine.
It prevents nails from becoming overly curved, which can lead to painful ingrown nails.
Use an Electric Pet Nail Grinder
Nail grinders minimize the risk of cutting into the quick.
They give a smoother finish compared to traditional clippers.
Grinders are especially beneficial for dogs with thicker nails that are difficult to cut.
Choose the Right Moment for Cutting Your Dog’s Nails
Opt for a time when your dog is calm, perhaps after exercise or a meal.
Avoid nail trimming when your dog is overly excited or anxious.
Create a calm environment, free from loud noises or other distractions.
Ease your Pet into Paw Handling
Regularly touch and massage your dog’s paws, so they become accustomed to handling.
Reward your dog with treats or praise when they allow you to handle their paws.
Gradually introduce nail cutting tools without actually using them, so your dog gets familiar with them.
Introduce the Electric Pet Nail Grinder
Start by simply letting your dog sniff and explore the grinder.
Turn on the grinder away from your dog initially, so they get used to the sound.
Accidents happen. Styptic powder quickly stops bleeding if you accidentally cut into the quick.
Always keep it nearby during nail trimming sessions.
If you don’t have styptic powder, cornstarch can also be effective in a pinch.
Hold the Paw Firmly When Cutting Your Dog’s Nails
A firm grip ensures stability and prevents sudden movements.
However, be gentle. Too much pressure can make your dog uncomfortable.
Holding the paw up, rather than out to the side, can often give you a better angle for trimming.
Hold the Tool at a 45-Degree Angle
Holding at this angle helps avoid cutting into the quick.
It offers a cleaner cut or grind.
Regularly check the nail’s progress, ensuring you don’t trim too much at once.
Praise and Reward After Each Session
Always end each nail-trimming session on a positive note.
Offer treats, verbal praises, or playtime as a reward for their patience and good behavior.
This positive reinforcement encourages better cooperation in subsequent sessions.
Stay Calm and Patient
Your dog can sense your emotions. If you’re anxious or stressed, your dog will pick up on that, making them nervous as well.
Take deep breaths if you feel overwhelmed. Remember, you can always take a break and return to the task later.
If you’re uncertain, consider observing a professional groomer or veterinarian the first few times. This hands-on learning can help boost your confidence.
Educate Yourself
Continuously educate yourself about your specific dog breed. Some breeds have unique nail considerations.
Watch videos, attend workshops, or consult with your vet regularly for nail-trimming tips.
The more you know, the better equipped you’ll be to handle unexpected situations.
Regularly Check the Tools
Ensure that your tools, be it clippers or grinders, are sharp and in good working condition.
Dull tools can split or crack the nail, causing pain and discomfort.
Clean your tools after each session to maintain hygiene and prolong their life.
Seek Professional Help When Needed
If you ever feel uncertain or uncomfortable cutting your dog’s nails, there’s no shame in seeking professional help.
Professional groomers and vets have experience with various breeds and nail types.
Occasionally having your dog’s nails trimmed by a professional can also provide you with a benchmark for future at-home trims.
By following these guidelines and remaining patient, nail trimming can become a stress-free routine for both you and your pet. Remember, it’s always okay to take breaks and return to the task if your dog becomes overly anxious. Safety and comfort are paramount.
How Do You Know When to Stop Grinding Your Dog’s Nails?
Grinding your dog’s nails is an effective alternative to traditional clipping, offering precision and minimizing risks. However, it’s essential to know when to stop to ensure your dog’s safety and comfort. Let’s delve into the indicators and tips that signal it’s time to halt the grinding process.
Watch for the White Ring
As you grind closer to the quick, a small white ring or dot will start to appear in the center of the nail.
This white ring indicates that you are approaching the quick and should stop soon.
For dogs with darker nails, this can be more challenging to spot, so proceed with caution.
Check the Nail Temperature
Continuous grinding can generate heat, causing discomfort to your dog.
If the nail feels warm to the touch, it’s a good idea to give it a break before continuing.
Your dog might also pull their paw away or show signs of discomfort due to the heat.
Observe Your Dog’s Behavior
Dogs will often give signs when they’re uncomfortable. They might try to pull their paw away, whine, or show signs of distress.
If your dog starts to show discomfort or anxiety, it might be time to pause or stop the grinding process.
Feel the Nail Thickness
As you grind, periodically feel the nail’s thickness between your fingers.
When the nail feels considerably thinner and more pliable, you are likely nearing the quick.
Stay within Safe Lengths
Always maintain a conservative length when grinding your dog’s nails.
It’s safer to err on the side of slightly longer nails than to risk injuring the quick.
Consistent Check-ins
Regularly check the progress of the nail as you grind.
Pause every few seconds, especially as you get closer to the desired length, to ensure you don’t overdo it.
Use a Flashlight for Dark Nails
For dogs with black or dark-colored nails, shining a flashlight from underneath the nail can help in identifying the quick.
The quick will appear as a darker shadow within the nail, signaling that you’re nearing your stop point.
Consult with a Professional
If you’re ever uncertain about how much to grind, consider a consultation with a professional groomer.
They can provide guidance on safe lengths for your dog’s specific breed and nail type.
In essence, understanding when to stop grinding your dog’s nails revolves around observation, gentle touch, and a good sense of your pet’s comfort. With practice and patience, you’ll become more adept at recognizing these signs, ensuring a safe and stress-free experience for both you and your furry friend.
How Often Should You Grind Dog’s Nails?
Regular nail maintenance is vital for your dog’s health and comfort. While the frequency of grinding can vary based on several factors, establishing a consistent routine is essential. Here’s a comprehensive guide on determining how often you should grind your dog’s nails.
Activity Level and Lifestyle
Active Dogs: Dogs that are frequently active, especially on hard surfaces like concrete, naturally wear down their nails. These dogs might need less frequent nail grinding.
Indoor Dogs: Dogs that spend most of their time indoors on soft surfaces like carpets won’t wear their nails down naturally. They typically require more regular nail grinding.
Nail Growth Rate
Every dog is unique. Some dogs have nails that grow faster than others. Regularly check the nail length to determine the appropriate grinding frequency.
Age of the Dog
Puppies: Puppy nails grow very quickly. You might find that younger dogs require more frequent nail grinding.
Senior Dogs: Older dogs might be less active, leading to less natural wear of their nails. Regular checks and possibly more frequent grinding sessions might be needed.
Type of Nail
Hard Nails: Breeds with harder nails might not wear them down as quickly through regular activity. Such breeds often benefit from more frequent grinding.
Soft Nails: Soft nails tend to wear down or break naturally but still require consistent check-ups to ensure they’re at a comfortable length.
General Guidelines
Weekly to Bi-weekly: For most dogs, checking the nails weekly and grinding every two weeks is a good starting point.
Monthly: For dogs that naturally wear down their nails or have slower nail growth, a monthly check and grind might suffice.
Visual and Audible Checks
If you hear your dog’s nails clicking on the floor when they walk, it’s usually a sign that their nails are too long and need grinding.
Visually inspect the nails. If they seem overly curved or long, it’s time for a grind.
Safety First
It’s always better to grind a little bit more often than to wait too long and risk the quick growing out with the nail. Longer nails can also cause discomfort or lead to other issues like ingrown nails or impaired walking.
Post Grinding Check
After grinding, if you notice your dog’s nails still touch the ground when they’re standing, you’ll know to adjust your routine accordingly.
While there are general guidelines, the exact frequency of nail grinding depends largely on your dog’s individual needs. It’s essential to strike a balance between their natural lifestyle and the need for regular grooming. By staying attentive to your dog’s nails and adjusting based on their specific conditions, you’ll ensure their paws stay healthy and comfortable.
Does Grinding Dogs Nails Hurt Them?
It’s a common concern among pet owners: Will grinding my dog’s nails cause them pain? In essence, when done correctly, grinding your dog’s nails is a safe and effective method of nail maintenance that should not cause any pain. However, there are nuances to consider. Let’s explore the matter in-depth.
The Advantages of Grinding
Smooth Finish: Grinding provides a smoother finish to the nail compared to clipping. This reduces the chance of nails snagging on surfaces or splitting.
Precision: Grinders offer more control, which allows for a gradual reduction of the nail’s length, minimizing the risk of cutting into the quick.
Less Pressure: Unlike clippers that exert sudden pressure, grinders gently wear down the nail, which can be more comfortable for some dogs.
Potential Sources of Discomfort
Heat: Continuous grinding can create friction, which produces heat. If the nail gets too hot, it can be uncomfortable for the dog.
Vibration: Some dogs might be sensitive to the vibration caused by the grinder. This sensation can feel odd but typically doesn’t cause pain.
Noise: The sound of the grinder can be unsettling for some dogs, leading to anxiety. While this isn’t physical pain, mental distress is worth noting.
The Quick
The quick is a sensitive part of the nail containing nerves and blood vessels.
Grinding Too Deep: Just like cutting, if you grind into the quick, it will cause pain and bleeding. However, the gradual nature of grinding often gives you more reaction time to stop before reaching the quick.
Recognizing the Quick: As you approach the quick, a small white or grayish ring or dot will often appear in the center of the nail. It’s a signal to stop grinding.
Ensuring a Painless Experience
Regular Maintenance: Regular nail grinding ensures the quick doesn’t extend too much, making the process easier and reducing chances of injury.
Training and Familiarity: Gradually introducing your dog to the grinder, its noise, and sensation can make the experience less stressful.
Short Sessions: Instead of grinding each nail down in one go, it might be less stressful to do a little bit on each nail and then cycle through them again. This method can also help avoid generating too much heat on a single nail.
Equipment Quality: A good quality grinder with multiple speed options allows for better control and can be gentler on the dog’s nails.
Professional Consultation
If you’re uncertain or your dog seems particularly averse to the grinding process, it might be a good idea to consult a professional groomer or vet. They can provide guidance, tips, and even demonstrations.
When done correctly and with the dog’s comfort in mind, grinding your dog’s nails should not cause them pain. Like any grooming process, it requires patience, understanding, and a bit of practice to ensure a positive experience for both you and your pet.
What Shape Should Dog Nails Be to Grind?
Grinding is an effective method for maintaining a dog’s nails, but it’s crucial to know the ideal shape and length to aim for during the process. The shape of a dog’s nails can significantly impact their comfort and overall paw health. Let’s delve into the desired nail shape and how to achieve it through grinding.
Natural Curve
Dog nails naturally have a curve, and it’s essential to respect this natural shape when grinding.
Over-grinding or flattening the curve can lead to discomfort and may cause the nail to grow unnaturally.
Avoiding Overextension
Nails that are too long can cause discomfort when walking, leading to posture issues and potential injuries.
Ideally, when your dog is standing on a flat surface, their nails shouldn’t touch the ground. If they do, it’s an indication they might be too long.
Rounded Tips
One of the benefits of grinding versus clipping is the ability to achieve a smooth, rounded finish at the tip.
Rounded tips prevent nails from snagging on carpets, clothes, or other surfaces and reduce the risk of accidental scratches.
Maintain a Gradual Taper
When grinding, work the nail to create a gentle taper from the base to the tip.
A gradual taper respects the nail’s natural shape and ensures the strength and integrity of the nail.
Avoiding the Quick
The quick, a sensitive vein inside the nail, dictates how short you can safely grind the nail.
Aim to grind the nail close to, but not touching, the quick. For clear nails, the quick is visible as a pinkish area. For darker nails, watch for a small white ring or dot which indicates you’re approaching the quick.
Checking from Different Angles
Periodically, pause and inspect the nail from various angles. This approach ensures even grinding and helps you achieve a consistent shape across all nails.
Flat Base with a Curved Top
Think of the ideal nail shape as a semi-circle. The base (where it connects to the paw) should be relatively flat, while the upper part maintains a natural curve.
Feedback from Your Dog
Dogs often indicate when something doesn’t feel right. If your dog starts to pull away or shows signs of discomfort, it may be an indication that you need to adjust the shape or check your grinding technique.
Regular Checks and Maintenance
Frequent checks will help you identify when it’s time to grind again. Regular maintenance ensures that the nails remain in the ideal shape, making each grinding session simpler and faster.
In summary, the goal when grinding your dog’s nails is to emulate and maintain their natural shape, ensuring comfort, and avoiding any potential health issues. With patience and practice, you can master the technique, ensuring that your dog’s nails are in the best possible shape for their health and well-being.
Conclusion
Taking care of your furry friend extends beyond just feeding and regular walks. The often overlooked practice of nail maintenance plays a pivotal role in their comfort and overall health. While the process of grinding might initially seem daunting, with the right knowledge, tools, and a gentle approach, it becomes a straightforward task. By understanding the nuances—like when to stop grinding, how often to do it, what shape to aim for, and ensuring it’s a pain-free experience—you’re not just trimming nails; you’re paving the way for a happier, healthier pet.
Every moment spent in this endeavor also serves to strengthen the bond between you and your canine companion. They learn to trust you even more, recognizing the care and love behind each action. So, as you embark on this journey of regular nail care, remember that with each grind, you’re not just shaping a nail, but also fostering trust and ensuring your pet’s pawsitive well-being. Happy grinding!
Frequently Asked Questions (FAQs)
Q: Can I switch between clipping and grinding for my dog’s nails, or should I stick to one method?
A: Yes, you can switch between methods depending on your comfort level and your dog’s tolerance. Some dog owners clip the nails first to achieve the desired length and then use a grinder to smooth out the edges. It’s essential to ensure your dog is comfortable with both processes and to be especially cautious not to cut or grind too close to the quick.
Q: How long will it take for my dog to get used to the grinding process?
A: Each dog is different. Some might become accustomed after a few sessions, while others may take longer. It’s crucial to introduce the grinder gradually, letting your dog get used to its sound and vibration. Starting with short sessions and providing treats and praise can help make the experience more positive.
Q: What should I do if I accidentally grind into the quick and my dog’s nail starts bleeding?
A: First, remain calm. While it can be distressing, accidents happen. Have styptic powder or a styptic pencil on hand; these can help stop the bleeding when applied to the nail. If you don’t have these, you can also use cornstarch or flour in a pinch. If the bleeding continues for an extended period or seems excessive, contact your veterinarian.
Q: How do I choose the best grinder for my dog’s nails?
A: Look for grinders that have multiple speed settings, which allow for better control. It’s also beneficial to choose a grinder with a safety guard to reduce the chances of grinding too deeply. Reading reviews and consulting with your veterinarian or a professional groomer can provide additional recommendations tailored to your dog’s specific needs.
Q: My dog is extremely anxious about nail grinding, even after multiple tries. What should I do?
A: In cases of extreme anxiety, it’s essential to prioritize your dog’s well-being. You can try alternative methods like clipping or consult a professional groomer who may have techniques and tools to make the process more comfortable. It might also be helpful to consult with your vet about possible calming treatments or techniques that can make nail grooming more manageable.
A note about your dog’s health
This article provides general education and does not replace an examination, diagnosis, or individualized advice from your veterinarian. Contact a veterinary professional if you are concerned about your dog’s symptoms.
Dr. Candy Akers earned her Doctor of Veterinary Medicine degree from Oklahoma State University in 2009 after completing undergraduate studies at the University of Delaware. Her experience includes companion-animal nutrition, chronic disease, allergies, autoimmune conditions, cold laser therapy, wildlife rehabilitation, and emergency wildlife response. She combines conventional veterinary knowledge with a whole-animal perspective to help pet parents understand their options and recognize when individualized veterinary care is needed.
*This page may include affiliate links, which means that if you make a purchase through one of the product links, we may receive a small commission. For full affiliate disclosure please see our disclaimer page.
If you’re like me, you know that nail-trimming day can sometimes feel like an Olympic event. Whether it’s the nervous dance we do around our furry friend, the hopeful bribery with their favorite treats, or that deep sigh of relief once it’s all over—many of us have been there. Nail trims are essential for our pups, but for some reason, many of our four-legged companions seem to view the humble nail clipper as their arch-nemesis. But what if I told you that nail trimming doesn’t have to be a dramatic episode? Yep, it’s true! Over the years, I’ve gathered some tried-and-true techniques to transform this daunting task into a stress-free experience, both for you and your dog. In this blog, we’ll explore five safe and effective ways to calm your dog to cut nails, ensuring that the process is as smooth and comfortable as possible. Grab your doggo, a cozy spot, and let’s get started!
1. Understanding Your Dog’s Fear
Before we jump into tactics and strategies, let’s take a moment to understand our pups a bit better. Understanding why our dogs may be afraid can make all the difference in addressing their fears compassionately.
Why Some Dogs Are Afraid of Nail Trims
Past Traumas: Just like humans, dogs can develop fears based on past experiences. If they’ve had a painful nail trim before (like cutting into the quick), they might associate the clippers with pain.
The Sensation: Dogs have heightened senses. The pressure of nail cutting, even when painless, is an unfamiliar sensation for them.
Sound and Vibration: The sound of the clippers or the slight vibration it might cause can be startling or unnerving for some dogs.
Natural Instinct: It’s worth noting that in the wild, showing vulnerability can be risky. Allowing their paws to be held exposes them to a vulnerable position.
Recognizing the Signs of Stress in Your Dog
Understanding when your dog is stressed is vital to ensure their comfort. Here are some signs:
Vocalizations: Whining, whimpering, or growling can be indicators of distress.
Body Language: Tucked tail, pinned ears, and dilated pupils are all signs your dog is feeling uneasy.
Avoidance Behavior: If they’re hiding, trying to pull their paw away, or constantly looking away from you and the clippers, they’re probably anxious.
Excessive Grooming: Some dogs might lick their paws or lips excessively when they’re nervous.
It’s essential to remember that every dog is an individual. What terrifies one might not faze another, and vice versa. By truly understanding our canine companion’s fears and signals, we can approach nail trimming with empathy and kindness, ensuring a positive experience for both. After all, as they say, knowledge is power – or in this case, the power to give a gentle, stress-free trim!
2. Preparing the Environment
Alright, now that we’ve dipped our toes into the world of canine emotions, let’s set the stage! The environment in which you trim your dog’s nails plays a huge role in how the experience unfolds. Think of it as setting the mood for a relaxing spa day instead of a trip to the dentist.
The Role of a Familiar and Quiet Space
Comfort Zone: Always choose a spot where your dog feels at ease. This might be their favorite lounging area or where they often play. Familiarity breeds comfort!
Avoid Distractions: Reduce sudden loud noises or other potential distractions. Perhaps wait until the mail has been delivered so the doorbell doesn’t ring, or do it at a time when the neighborhood kids aren’t playing loudly outside.
The Importance of the Right Tools
Quality Clippers: Invest in a pair of quality dog nail clippers that are sharp and the right size for your dog. Dull clippers can cause splitting or crushing of the nail, which is uncomfortable.
Safety First: Consider clippers with safety guards to avoid over-trimming. And always have styptic powder on hand just in case you nick the quick.
Alternative Tools: For dogs especially nervous about clippers, consider using a nail grinder. They’re quieter and reduce the chances of cutting the quick. Just ensure you introduce the grinder slowly, so the vibration doesn’t startle them.
How Ambient Music or White Noise Can Help
Soothing Sounds: Just as some of us humans enjoy calming music during a massage, dogs can also benefit. Consider playing some soft instrumental music or nature sounds to create a serene atmosphere.
Drown Out the Scary Noises:White noise machines or even a fan can help mask any unexpected noises that might occur during the session, ensuring your dog isn’t suddenly jolted by a car honk or other startling sounds.
Setting up the perfect environment is akin to laying the foundation for a house. With the right surroundings and tools, you’re paving the way for a relaxed and efficient nail-trimming experience. After all, our pups deserve nothing but the best!
3. Desensitization and Positive Reinforcement
Hey, dog lovers! As we embark on this topic, let’s acknowledge something: change can be hard, especially when it involves confronting our fears. But with patience, consistency, and a sprinkle of positivity, we can help our furry friends adjust. Here’s how to use desensitization and positive reinforcement to make nail trims a walk in the park… or at least less of a hurdle.
Introduction to Desensitization and Its Importance
Baby Steps: Desensitization is all about introducing our dogs to nail trimming slowly and in controlled increments. Instead of jumping straight into a full-blown nail trim, we break the process down into baby steps.
Building Trust: This approach not only helps in reducing fear but also builds trust. When our dogs understand that the clipper or grinder isn’t out to get them, they’re more likely to cooperate.
Step-by-Step Guide to Desensitization
Clipper Introduction: Before you even think of trimming, let your dog inspect the nail clipper or grinder. Place it near their toys or feeding area for a few days. Curiosity might just get the better of them!
Mock Trimming Sessions: Hold your dog’s paw gently and mimic the motion of trimming without actually doing it. This helps them get used to the sensation.
Short Sessions: Once they seem more comfortable, try trimming just one nail and then giving them a break. Slowly increase the number of nails you trim in one sitting over time.
Consistent Practice: Regular, short sessions are better than rare, long ones. It keeps the routine familiar and less daunting.
The Magic of Positive Reinforcement
treats Galore: After every positive interaction with the nail trimmer or a successful trim, reward your dog with their favorite treat. It builds a positive association.
Verbal Praise: Don’t underestimate the power of a cheerful “Good job!” or “Well done!”. Dogs pick up on our enthusiasm and love being praised.
Playtime: Maybe after a nail trimming session, engage in a short play session. It serves as both a distraction and a reward.
Remember, desensitization and positive reinforcement is a journey, not a destination. There might be setbacks, but with persistence, understanding, and lots of love, nail trimming can become a stress-free, or dare we say, enjoyable activity for you and your pup!
4. Physical Relaxation Techniques
Hello to all the pet enthusiasts out there! Now that we’ve journeyed through understanding, preparation, and gentle desensitization, let’s dive into some hands-on (or paws-on) techniques. These physical relaxation strategies are like giving your dog a mini spa session. The idea is to combine the comforts of a massage with the necessity of a nail trim. Let’s pamper those paws!
Gentle Massage Techniques for Relaxation
Paw Massages: Start by gently massaging the pads of their feet. The soft circular motions can help to soothe any tension they might be holding in their paws.
Full Body Massage: Gradually expand your touch, moving up their legs, along their spine, and to their neck. Paying attention to areas your dog particularly enjoys can be a game-changer.
Pressure Points Known to Help Dogs Calm Down
Base of the Ear: Gently rubbing the base of your dog’s ears can have a calming effect. It’s a sensitive spot many dogs love being petted or massaged.
Chest Rub: Many dogs find gentle strokes or circular massages on the chest soothing. It’s a great way to bond and promote relaxation.
The Role of Calming Wraps or Anxiety Vests
Swaddling Comfort: Just as swaddling can soothe a baby, a calming wrap provides gentle, constant pressure that can help calm a nervous dog. It’s especially handy for pups who have a heightened fear of nail trims.
How They Work: These vests or wraps apply gentle pressure to the dog’s body, which can produce a calming effect. It’s similar to the concept of weighted blankets for humans.
Integrating these relaxation techniques isn’t just about nail trims. It’s about enhancing the bond between you and your dog, understanding their body language, and providing comfort. Every massage, every gentle rub is a reminder that you’re there for them, through the fun times and the nail trims. So, next time, before you pick up those clippers, take a moment to indulge in some relaxation techniques. It could turn your dog’s nail-trimming session from a chore to a cherished moment.
PRO TIP: Calming Essential Oils
Alright, before we continue, here’s a little golden nugget of advice for those looking to go the extra mile in ensuring a tranquil atmosphere for their dogs.
Harnessing the Power of Essential Oils:Certain essential oils are known for their calming properties. When used correctly and safely, they can provide an added layer of relaxation for your furry friend.
Lavender: This oil is renowned for its soothing properties, not just for humans but for dogs as well. A whiff of lavender can help reduce anxiety and stress.
Chamomile: Known for its natural calming effects, chamomile can aid in soothing an upset or nervous dog.
Frankincense: This ancient essential oil can provide a sense of tranquility and peace for both dogs and humans.
How to Use:
Diffuse with Care: Use a diffuser in the room, starting with a low concentration. Ensure it’s not too strong, as dogs have a much more sensitive sense of smell than humans.
DIY Calming Sprays: You can make a diluted spray using a few drops of essential oil in water. Spritz it in the room or on your dog’s bed. Avoid direct contact with the skin or spraying it on their face.
Consult with a Vet: Before using any essential oils, always consult with your veterinarian, especially if your dog has a medical condition or is pregnant.
Caution! While many essential oils can be beneficial, some can be toxic to dogs. Always ensure you’re using dog-safe oils and avoid oils like tea tree, cinnamon, citrus, and pennyroyal, among others.
Essential oils can be a beautiful addition to your relaxation toolkit, providing a serene backdrop for those nail-trimming days. Remember, the key is moderation and always prioritizing your pup’s comfort and safety.
5. Natural Calmatives and Supplements
While setting the mood and mastering the technique are pivotal, sometimes our fur-babies need an extra nudge towards relaxation. Nature offers a variety of gentle helpers that can promote calmness in our pets. So, let’s explore the world of natural calmatives and supplements that can make nail trimming a zen-like experience for your dog.
Herbal Remedies Known to Calm Dogs
Valerian Root: Often used as a sleep aid for humans, this herb can also help reduce anxiety in dogs. It’s nature’s answer to creating a relaxed state of mind.
Chamomile: We mentioned it as an essential oil, but chamomile in its natural form or as a tea can also be a mild relaxant for dogs when ingested.
Passionflower: Historically used to treat restlessness and agitation, passionflower can provide a calming effect without causing drowsiness.
Natural Supplements to Consider
L-Theanine: An amino acid found in green tea, L-Theanine can promote relaxation and reduce irritability without sedation.
Hemp Oil or CBD for Dogs: Gaining popularity for its wide range of health benefits, CBD (when derived from hemp and containing 0.3% THC or less) can be a great way to alleviate anxiety in dogs. Always opt for high-quality, pet-specific products.
Calming Treats and Chews
Pre-Made Options: Several companies offer calming chews or treats infused with a mix of the above ingredients, making it easy to administer before nail trims.
Homemade Treats: If you’re the DIY type, consider making treats infused with dog-safe calming herbs. Not only do you control the ingredients, but the act of giving a homemade treat can also reinforce your bond.
When to Administer
For most calmatives and supplements, timing is crucial. Administering them 30 minutes to an hour before nail trimming allows them to take effect just when you need them most.
A Friendly Reminder: Always consult your veterinarian before introducing any new supplements or herbs into your dog’s routine. Every dog is unique, and what works for one might not be suitable for another. Plus, it’s essential to ensure there are no interactions with any existing medications or health conditions.
Natural calmatives and supplements are a testament to nature’s brilliance. With their aid, nail trimming can evolve from a dreaded task to a peaceful ritual, drawing you and your canine companion even closer. Mother Nature’s got your back, and so do we!
Conclusion
Whew! We’ve traversed quite the journey together, haven’t we? From understanding our dog’s fears to immersing ourselves in the holistic world of natural calmatives. But here’s the crux of it all: nail trimming isn’t merely about grooming—it’s a chance to bond, to communicate, and to showcase our unwavering love and care.
By now, we hope you’re equipped with a toolbox brimming with strategies and tips to make nail trims a more serene experience for both you and your furry friend. Remember, patience is key. Some dogs might take longer to adjust than others, but with consistent effort, understanding, and a lot of heart, even the most nail-trim-averse pup can come around.
Your dog is more than just a pet; they’re family. Every moment, be it playtime or a simple grooming session, is an opportunity to deepen that connection. So the next time you approach those clippers, do it with confidence, armed with knowledge and the comforting thought that you’re doing the best for your canine companion.
Here’s to more wagging tails, contented woofs, and hassle-free nail trims. Until next time, keep pampering those paws and cherish every moment with your four-legged friend!
Frequently Asked Questions (FAQs)
1. How often should I trim my dog’s nails?
Answer: The frequency of nail trims varies depending on your dog’s activity level and where they spend most of their time. Dogs that walk on hard surfaces may naturally wear down their nails and need less frequent trims. However, on average, most dogs will benefit from a nail trim every 3-4 weeks. Always check your dog’s nails regularly and trim when necessary to prevent overgrowth.
2. What should I do if I accidentally cut the ‘quick’ of my dog’s nail?
Answer: It happens to the best of us! If you accidentally cut the quick, causing it to bleed, remain calm. Apply styptic powder or cornstarch to the bleeding nail to help clot it. Gently press it against the nail for a few seconds. If bleeding continues or if your dog appears in pain, consult your veterinarian.
3. Are there specific essential oils I should avoid for dogs?
Answer: Yes, while some essential oils can be beneficial, others can be toxic to dogs. Some oils to avoid include tea tree, cinnamon, citrus, pennyroyal, and many more. Always research and consult with your vet before introducing any new oil to your dog’s environment.
4. Can I use human nail clippers on my dog?
Answer: It’s recommended to use dog-specific nail clippers. Human nail clippers might not be strong enough to cut through a dog’s nail, especially for larger breeds, and could cause splitting or uneven cuts. There are various types of dog nail clippers available, including scissor-type and guillotine-type, to suit different needs.
5. My dog is extremely fearful, and even with these methods, nail trimming is a struggle. What should I do?
Answer: If your dog is excessively fearful, it might be beneficial to consult with a professional dog trainer or behaviorist. They can provide specialized techniques tailored to your dog’s needs. In extreme cases, consider seeking the assistance of your vet or a professional groomer who can provide a safe and stress-free experience for your pet.
A note about your dog’s health
This article provides general education and does not replace an examination, diagnosis, or individualized advice from your veterinarian. Contact a veterinary professional if you are concerned about your dog’s symptoms.
Dr. Candy Akers earned her Doctor of Veterinary Medicine degree from Oklahoma State University in 2009 after completing undergraduate studies at the University of Delaware. Her experience includes companion-animal nutrition, chronic disease, allergies, autoimmune conditions, cold laser therapy, wildlife rehabilitation, and emergency wildlife response. She combines conventional veterinary knowledge with a whole-animal perspective to help pet parents understand their options and recognize when individualized veterinary care is needed.
To use guillotine dog nail clippers, place only the free tip of your dog’s nail through the stationary ring. Hold the clipper perpendicular to the nail, keep the moving blade oriented the way the manufacturer shows, and squeeze once to remove a tiny tip. On the common guillotine design, the blade moves up through the bottom of the ring as the handles close. [1]
Stop well before the quick, which contains blood vessels and nerves. If the nail is black, take paper-thin slices and inspect the cut surface after each one. The goal is not to finish every nail. It is to make one clean, safe cut at a time.
How Guillotine Dog Nail Clippers Work
A guillotine clipper has a small stationary ring and a sliding blade. The free nail tip goes through the ring. When you squeeze the handles, the blade moves across the opening and cuts the nail.
That simple design is one reason many people like it. You can see the tip inside the ring, and the cutting motion is quick. The tradeoff is fit. A small opening or dull blade may pinch or crush a thick nail instead of making a clean cut.
Before using any model, open and close it without a nail inside. Watch which part stays still and which part moves. Read the manufacturer’s directions because the handle shape, blade holder, and replaceable-blade system can vary.
The original Resco Deluxe guillotine clipper is available in a standard size and an alternate size. Match the opening to the nail rather than choosing by breed name alone.
Choose the opening by nail thickness rather than breed. A nail should pass freely through the ring without squeezing.
Before You Start
First, check whether the nails actually need trimming. Look while your dog is standing on a firm, non-slip surface. Nails that taper to a fine hook, snag fabric, curve toward the pad, or change how the toes sit may need attention. Clicking on a hard floor can be one clue, but it does not always mean the nails are too long. Natural wear and foot shape vary. [2]
Gather everything before you pick up a paw:
Guillotine clippers that fit the nail
Bright, steady light
Styptic powder and clean gauze
Small, high-value treats
A non-slip mat
A file or grinder if you want to smooth the edge
Inspect the clipper. The blade should move smoothly and meet the ring cleanly. Do not use a rusty, chipped, loose, or dull tool. Move long paw hair out of the way so you can see the full nail.
Check the nail itself, too. A nail that is split, bleeding, swollen, draining, growing into the pad, or painful before you touch it is not a routine home trim.
How to Use Guillotine Dog Nail Clippers Step by Step
Let Your Dog Inspect the Tool
Put the closed clipper on the floor and scatter treats nearby. Let your dog approach it. On another short session, touch a paw, show the clipper, and reward. You can snip a piece of dry pasta away from the paw so your dog hears the sound without feeling pressure. Dogs Trust recommends building this comfort in gradual steps and stopping if the dog becomes worried. [2]
Hold the Paw Without Twisting the Leg
Support the paw in a position that feels natural. Small dogs may be comfortable beside you or on your lap. Larger dogs often do well standing or lying on a non-slip mat. Keep the wrist or ankle in line with the leg. Do not pull the paw far backward just to improve your view.
Use one hand to hold the toe steady. Gentle control is enough. If your dog repeatedly pulls away, stiffens, pants hard, growls, or stops taking treats, pause.
Position the Stationary Ring
Slide only the thin, free tip of the nail through the stationary ring. Keep the clipper perpendicular to the nail rather than twisting it sideways. The ring should sit comfortably around the nail without squeezing it.
Look from more than one angle before you cut. On a clear nail, keep a visible margin in front of the pink quick. If the nail is too thick for the opening or you cannot see the tip clearly, switch tools.
Make One Small, Deliberate Cut
Steady the toe, breathe, and squeeze the handles in one smooth motion. Do not jerk the tool or rush several cuts. Washington State University’s veterinary guidance places the nail tip in the stationary ring with the clipper perpendicular to the nail before squeezing the handle. [1]
Start smaller than you think you need. VCA recommends removing very small amounts, about one to two millimeters at a time, especially when the quick is long or hard to judge. [3]
Check the Nail Before Cutting Again
Release the paw for a moment and reward your dog. Look at the new cut surface in bright light. If there is still a dry, solid margin and your dog is relaxed, you may take another thin slice. When you are uncertain, stop.
Smooth a sharp edge with a file or a brief touch from a grinder. Keep fur clear of rotary tools and use short touches so heat does not build up.
How to Trim Clear and Black Nails
Clear nails give you the easiest landmark. The quick usually looks pink inside the nail. Leave a comfortable space in front of it because the tip can be harder to see than the wider base.
Black nails require smaller cuts. Begin at the narrow hook and take a paper-thin slice. The center of the cut surface may change from dry and pale to darker, softer, or shinier as you approach living tissue. Those signs vary between dogs, so treat any change as a reason to become more conservative.
A flashlight may help on a thin nail, but it will not reveal every dark quick. Never keep cutting only because you expected to see one specific dot or color. Stop if the view is unclear or your dog suddenly reacts.
When Guillotine Clippers Are the Wrong Tool
Guillotine clippers are often comfortable for small or medium nails, but the dog’s nail and the tool must fit each other. A thick nail forced through a small ring may be pinched or crushed. A bypass nail clipper may give better leverage on a thick nail, while a Dremel PawControl grinder removes nail gradually and leaves a smooth edge.
Removes nail gradually and can smooth a clipped edge. Introduce the sound slowly and use short touches to limit heat.
Switch tools or get help when:
The nail does not fit freely through the ring
The clipper bends, pinches, or leaves a ragged edge
The nail is brittle, cracked, split, or misshapen
A nail has curled into or against the paw pad
The toe is swollen, painful, bleeding, or draining
Your dog cannot remain safely comfortable for the cut
An experienced groomer can demonstrate a better fit. A veterinarian is the right choice for an embedded nail, injured nail bed, infection signs, marked pain, or limping.
Guillotine vs. Scissor Clippers vs. Grinder
No tool wins for every dog.
Guillotine clippers are compact, quiet, and easy on the hands when the ring fits. They can be awkward on very thick nails and depend on a sharp, aligned blade.
Scissor or bypass clippers offer more leverage and a wider opening. They may suit large or thick nails, but a dull pair can still pinch or split the nail.
Grinders remove small amounts and smooth the edge. They take longer, can create heat, and may worry dogs who dislike sound or vibration.
Choose the tool that fits the nail, feels controlled in your hand, and allows your dog to stay calm. Some owners clip the hooked tip, then use a grinder for the final smoothing.
What the Guard Can and Cannot Do
Some nail clippers include an adjustable plate or guard that limits how far a nail can enter. Most classic guillotine clippers rely on the ring itself and do not have the same guard found on many scissor-style clippers.
A guard cannot see the quick. Quick length varies between dogs, between nails, and over time. Treat a guard as a rough length guide, never as permission to cut without looking.
Helping a Fearful Dog
Fear is a reason to make the job smaller. Reward your dog for looking at the clipper, hearing it close, accepting a paw touch, and briefly holding one toe. Fear Free guidance supports treating one nail or one paw as a successful session. [4]
A lick mat or helper who quietly delivers treats may help, but do not pin the dog down. If your dog refuses food, freezes, repeatedly escapes, growls, or snaps, stop. VCA notes that some severely distressed dogs need professional handling and, in selected cases, veterinary medication or sedation for safe nail care. [3]
You are building trust for the next trim, too. Ending early can be the most productive choice.
If You Cut the Quick
Stay calm. Press styptic powder onto the nail tip, then hold firm pressure with clean gauze for several minutes. Try not to lift the gauze repeatedly because that can disturb the forming clot.
Keep your dog quiet until the bleeding has stopped. Cornstarch is sometimes used as a temporary backup, but styptic powder and pressure are more dependable.
Call your veterinarian if bleeding is heavy, continues despite firm pressure, restarts repeatedly, or comes from a split or torn nail. Also call if your dog has a known bleeding disorder or takes medication that affects clotting.
Cleaning and Maintaining Guillotine Clippers
Brush away nail dust after each use. If the manufacturer permits washing, dry every part completely before storage. Check that the blade slides evenly and that screws, rings, or retaining parts are secure.
Many guillotine clippers use a replaceable blade. Follow the manufacturer’s instructions for the correct replacement and orientation. Home filing can change the cutting angle, create a burr, or leave the blade misaligned. Never test an edge by running a finger across it.
Replace a damaged blade or tool. A clean cut is kinder to the nail and easier for you to control.
Frequently Asked Questions
Which Way Should Guillotine Dog Nail Clippers Face?
Place the free nail tip through the stationary ring and hold the tool perpendicular to the nail. On the common design, the blade travels up through the bottom of the ring as the handles close. Confirm the moving-blade direction on your exact model before the first cut.
Are Guillotine Clippers Better Than Scissor Clippers?
They can be easier on small or medium nails and comfortable for people with limited hand strength. Scissor clippers often give more room and leverage for thick nails. Fit, blade condition, dog comfort, and your control matter more than the label.
Can I Use Guillotine Clippers on Black Nails?
Yes, if the nail fits the ring and you make paper-thin cuts. Inspect the cut surface after every slice and stop at any darker, softer, or shinier center. When you cannot judge the safe margin, ask a groomer or veterinary professional to demonstrate.
How Often Should I Replace the Blade?
Replace it when the manufacturer recommends or when it drags, pinches, tears, or no longer makes a clean cut. Frequency depends on the clipper, how often it is used, and the thickness of the nails.
Can I Use Human Nail Clippers on My Dog?
Human clippers may work on a very young puppy’s tiny nail, but they are not shaped for most dog nails. A dog-specific guillotine, scissor clipper, or grinder gives better fit and control.
Dr. Candy Akers earned her Doctor of Veterinary Medicine degree from Oklahoma State University in 2009 after completing undergraduate studies at the University of Delaware. Her experience includes companion-animal nutrition, chronic disease, allergies, autoimmune conditions, cold laser therapy, wildlife rehabilitation, and emergency wildlife response. She combines conventional veterinary knowledge with a whole-animal perspective to help pet parents understand their options and recognize when individualized veterinary care is needed.
As a devoted dog parent, I know the challenges we often face when it comes to grooming our furry friends. One frequently overlooked aspect of canine care is the dew claw— that little ‘thumb’ nail on the side of their leg. Left unattended, it can grow into the skin, leading to pain and potential infection. If you’ve been wondering about the best approach to handle this delicate task, you’re in the right place. Welcome to my comprehensive guide on “How To Trim A Dog’s Dew Claw – Easy Step By Step.” Whether you’re a newbie to dog grooming or just looking for some refreshers, this blog will ensure that you can confidently and safely keep those dew claws in check. Let’s make grooming a stress-free experience for both you and your pup!
6 Tips for Trimming Your Dog’s Dew Claw
Grooming your dog involves more than just baths and brush-outs. One often overlooked yet essential area of canine care is the dew claw—a tiny ‘thumb’ nail that requires just as much attention as the rest. While it might seem intimidating to trim this delicate part, with the right guidance, it’s a breeze! Here are six expert tips to ensure a safe and stress-free dew claw trimming experience for both you and your furry companion.
Dew Claws Can Become Ingrown
Understanding the anatomy of your dog’s dew claw is essential. Unlike other nails, dew claws don’t touch the ground, so they don’t naturally wear down. If neglected, they can grow in a circular manner back into the dog’s skin, causing discomfort or even infections. Regular check-ups are essential to prevent them from becoming ingrown.
Dew Claws May Be Sore
Always approach dew claw trimming with a gentle touch. Some dogs have dew claws that are loosely attached, while others are firmly attached to the leg. Because of this variability, they can sometimes be more sensitive than other nails. Ensure your dog is relaxed and comfortable, and always pay attention to their reactions while trimming.
Use a Flashlight to See the Quick
One of the main challenges of trimming a dog’s nails is avoiding the ‘quick,’ which is the blood vessel running through the nail. Accidentally cutting this can cause bleeding. Using a flashlight (or even your phone’s flashlight) behind the dew claw can help illuminate it, making the quick easier to see, especially in dark nails. This trick helps in ensuring you don’t cut too far.
Have Styptic Powder Ready
Even the most experienced dog parents and groomers can occasionally nick the quick. It’s essential to have styptic powder on hand. If the nail starts to bleed, quickly apply the powder to stop the bleeding. It also helps to calm your dog if they’re startled by the sudden discomfort.
File the Dew Claw
After trimming, the edge of the dew claw can be sharp. To prevent any scratches or injuries, use a nail file or a pet-specific nail grinder to smooth out the edges. This step ensures the nail is not only shorter but also safe for both your dog and anyone they might jump on in excitement.
Work Slowly
Patience is the key. Especially if it’s your first time, or if your dog is nervous, it’s important to take things slow. Give your dog breaks if they’re showing signs of stress. It’s always better to trim a little bit at a time and check your progress than to rush and risk cutting too much.
Remember, as you embark on this grooming task, every dog is unique. Their threshold for discomfort varies. It’s always good to start with positive reinforcement, like treats or affection, to make the process smoother for both you and your four-legged friend.
Caution & Considerations
Trimming your dog’s dew claw is a task that demands a blend of patience, precision, and preparation. Without proper care, this simple grooming exercise can lead to discomfort or even injury. To ensure a positive experience for both you and your furry friend, keep the following cautions and considerations in mind:
Know Your Dog’s Tolerance Level: Every dog is different. Some might sit still during the entire process, while others could get antsy after just a few moments. It’s important to understand your dog’s comfort level and ensure you’re working within their threshold.
Not All Dew Claws Are Alike: While most dogs have front dew claws, not all have them on their hind legs. Moreover, the attachment and thickness can vary. Always inspect the dew claw carefully before starting.
Stay Calm: Your pet can sense your emotions. If you’re anxious or stressed about trimming the dew claw, your dog will likely pick up on that energy. Take a few deep breaths and ensure you’re calm before you begin.
Avoid Force: Never hold your dog down forcefully. If they’re showing signs of distress, it might be better to take a break or even postpone the session.
Seek Professional Help: If you’re unsure about any step or feel overwhelmed by the process, it’s always a good idea to consult a professional groomer or vet. They can either guide you through the process or do it for you.
Monitor for After-trim Complications: While rare, there might be cases of post-trim bleeding or irritation. Always keep an eye on the trimmed area for a day or two to ensure everything’s okay. If you notice any prolonged discomfort or bleeding, consult a vet.
Incorporating these considerations will not only ensure the safety and comfort of your beloved pet but also foster a bond of trust between you two during grooming sessions.
Conclusion
Navigating the world of canine grooming can sometimes feel like a daunting journey, especially when addressing those less frequently discussed tasks like dew claw maintenance. But with the right guidance and a touch of patience, even the most apprehensive pet owner can become a dew claw trimming pro. Remember, at the heart of this process is the well-being and comfort of our furry companions. With every trim, we’re ensuring they’re free from potential pain or discomfort. So, armed with these tips, considerations, and a healthy dose of love, you’re more than ready to give your dog the care they deserve. Happy grooming!
Frequently Asked Questions (FAQs)
1. How often should I trim my dog’s dew claw?
Answer: The frequency can vary based on the dog’s activity level and how quickly their nails grow. On average, checking the dew claw every 3-4 weeks is a good rule of thumb. If it’s starting to curve or seems overly long, it’s time for a trim.
2. What if my dog doesn’t let me touch their dew claw at all?
Answer: Some dogs are more sensitive or anxious about having their paws handled. In these cases, positive reinforcement using treats, patience, and gradual desensitization can help. If your dog remains resistant, seeking a professional groomer or vet for the task might be the best option.
3. My dog’s dew claw is very close to the skin. Should I still trim it?
Answer: If the dew claw is very close to the skin but isn’t causing any discomfort or isn’t at risk of growing into the skin, you might not need to trim it regularly. However, it’s still crucial to inspect it frequently to ensure it doesn’t become problematic in the future.
4. I accidentally cut into the quick, and even after applying styptic powder, it still seems sore. What should I do?
Answer: If after nicking the quick, your dog seems to be in prolonged discomfort, it’s essential to consult with a vet. They might recommend an anti-inflammatory or provide guidance on care to prevent infection.
5. Can I use human nail clippers for the dew claw trimming?
Answer: While it’s possible to use human nail clippers for very small or young dogs, it’s generally recommended to use pet-specific nail clippers. They are designed to handle the thickness and shape of dog nails, providing a cleaner, safer cut.
A note about your dog’s health
This article provides general education and does not replace an examination, diagnosis, or individualized advice from your veterinarian. Contact a veterinary professional if you are concerned about your dog’s symptoms.
Dr. Candy Akers earned her Doctor of Veterinary Medicine degree from Oklahoma State University in 2009 after completing undergraduate studies at the University of Delaware. Her experience includes companion-animal nutrition, chronic disease, allergies, autoimmune conditions, cold laser therapy, wildlife rehabilitation, and emergency wildlife response. She combines conventional veterinary knowledge with a whole-animal perspective to help pet parents understand their options and recognize when individualized veterinary care is needed.
I’m sure many of us, as pet parents, have found ourselves in that moment of panic when we realize our fur-baby’s nails are getting a bit too long. The immediate thought that often springs to mind is: “Can You Cut Dog Nails With Human Nail Clippers?” Well, you’re in luck! Today on the blog, we’re diving deep into the topic of using human nail clippers on our canine companions. Whether you’re in a pinch or simply curious, I’m here to guide you through the process and answer that burning question. Let’s start this nail-trimming journey together and ensure that both you and your furry friend have a safe and comfortable experience!
Is it okay to cut a dog’s nails with human nail clippers?
Many pet owners, at some point, have pondered this question. Before making any decisions, it’s essential to understand the differences between dog nails and human nails, as well as the tools designed specifically for each.
Have a “quick” (a vein that runs into the nail) which can bleed and cause pain if cut.
Are rounded in shape, making it harder to get a clean cut with flat clippers.
Human Nails:
Are flatter and less tough.
Don’t have a quick, so there’s less risk when trimming.
The Concerns of Using Human Nail Clippers on Dogs
Lack of Precision: Human clippers are designed for the flat profile of our nails. Using them on a rounded dog nail might not provide a clean, smooth cut.
Risk of Splintering: The pressure from human nail clippers might cause dog nails to split or fracture.
The Quick: Human clippers might not give you a good view of the quick, increasing the risk of accidentally cutting into it.
Size of the Clippers: For larger dog breeds, human nail clippers might simply be too small to be effective.
So, Can You Use Them?
While it’s possible to use human nail clippers on dogs, especially in a pinch or for smaller breeds with softer nails, it’s generally not recommended for regular grooming. The risks outweigh the benefits.
Better Alternatives
Guillotine-style Clippers: Designed specifically for dogs, these provide a round cut ideal for the shape of dog nails.
Grinder Tools: These are electric tools that grind down the nail, minimizing the risk of cutting the quick and offering a smoother finish.
Professional Groomers: If you’re nervous about cutting your dog’s nails yourself, it might be worth investing in a professional’s service.
While our love for our pets often means we look for quick solutions in times of need, it’s essential to use the right tools for the job. For the sake of your dog’s comfort and safety, invest in proper grooming tools or seek professional assistance. Your furry friend will thank you!
Why use nail clippers designed for dogs?
Our dogs are not just pets; they’re family. As responsible pet parents, ensuring their well-being and comfort is our top priority. When it comes to grooming, particularly nail trimming, using the right tool is crucial. So, why should we opt for nail clippers designed specifically for dogs? Here’s a breakdown:
1. Anatomical Considerations
Nail Structure: As discussed earlier, dog nails are thicker, tougher, and more rounded than human nails. Dog-specific clippers are designed to accommodate this unique structure.
The Quick: Dog nails contain a quick that, if nicked, can lead to bleeding and pain. Dog clippers allow for more precision, reducing the risk of injury.
2. Safety and Comfort
Grip and Control: Dog nail clippers typically come with ergonomic designs that provide a firmer grip, ensuring a stable hold and reducing the risk of accidental slips.
Sharpness: They are specially crafted to cut through the hard texture of dog nails cleanly, minimizing splintering or splitting.
3. Efficiency
Quick Trimming: Clippers for dogs are efficient and can trim nails quickly, reducing the stress and discomfort for your dog, especially if they’re nervous or restless.
Variety for Different Breeds: Clippers come in various sizes and styles, ensuring that whether you have a Chihuahua or a Great Dane, there’s a tool tailored for your pet.
4. Durability
Sturdy Materials: Dog nail clippers are typically made of high-quality stainless steel, ensuring they remain sharp and effective for longer periods.
Long-term Investment: Given their durability, investing in a good pair of dog nail clippers means you won’t need to replace them frequently.
5. Added Features
Safety Guards: Some clippers come with built-in safety guards to prevent over-cutting, which is particularly beneficial for those who are new to nail trimming.
Lock Mechanisms: These ensure the clippers remain closed when not in use, reducing the risk of accidental injury.
Comfort Handles: Many clippers have rubberized or padded handles, making them comfortable to use and reducing hand fatigue.
Choosing the right tools for our pets is a reflection of our commitment to their health and happiness. Nail clippers designed for dogs prioritize their unique anatomy, safety, and comfort, ensuring a stress-free grooming experience for both pet and owner. So, while it might be tempting to improvise with what’s on hand, investing in the proper equipment is a small gesture with significant benefits.
Risks of Using Human Nail Clippers On Your Dog
It’s a common misconception that because dogs and humans share similar basic nail structures, the tools used for grooming can be interchanged. However, this oversight could result in discomfort, injury, or long-term complications for your canine companion. Let’s delve into the potential risks of using human nail clippers on your dog.
1. Inadequate Trimming
Uneven Cuts: Human nail clippers are flat, while dog nails are rounded. This mismatch can lead to uneven, jagged cuts.
Insufficient Strength: Human clippers might not be strong enough to cut through a dog’s thicker nail, leading to partial cuts or multiple attempts to trim the same nail.
2. Nail Splintering and Fracturing
Pressure Imbalance: Due to the design of human nail clippers, they might exert uneven pressure on a dog’s nail. This can cause the nail to splinter or fracture, potentially leading to infections.
3. Increased Risk of Cutting the Quick
Reduced Visibility: The design of human nail clippers might obscure your view, increasing the chances of cutting into the quick. This not only causes bleeding but is painful for the dog.
Lack of Safety Features: Unlike specialized dog nail clippers, which often come with safety guards, human clippers lack these protective features.
4. Potential for Injury
Slips and Nicks: Human clippers aren’t designed for the curve and thickness of dog nails, increasing the chance of the clipper slipping and potentially injuring the dog or the person holding the clipper.
5. Stress and Discomfort for the Dog
Prolonged Trimming: The inefficiency of human clippers might mean the process takes longer, which can be distressing for a dog, especially if they’re already anxious about nail trimming.
Reinforcing Negative Associations: If using human clippers results in pain or discomfort, the dog might develop a negative association with nail trimming, making future grooming sessions challenging.
6. Potential for Infections
Jagged Edges: Uneven cuts can create jagged edges, which can snag on surfaces. If torn, these can lead to open wounds and possible infections.
While it might seem like a convenient solution, using human nail clippers on your dog carries a range of risks, both for the dog’s physical health and their emotional well-being. It’s always best to prioritize their safety and comfort by investing in tools specifically designed for them or seeking professional grooming assistance.
Can I File My Dog’s Nails With A Human File?
Filing is a common practice in human nail care to smooth out rough edges, but can the same be applied to our furry companions? Let’s explore the feasibility and considerations of using a human nail file on your dog.
1. Texture and Grit
Human Nail Files: These are usually designed for the softer, thinner nails of humans. They may have a finer grit which might not be effective for the tough nails of dogs.
Dog Nail Files: These are tailored for the harder texture of dog nails, often having a coarser grit to effectively smoothen and shape the nail.
2. Efficiency
Time-Consuming: Using a human nail file might be more time-consuming because of its finer grit, which could be stressful for dogs that aren’t used to prolonged grooming sessions.
Repeated Filing: Given the difference in grit, you might find yourself having to file repeatedly to achieve the desired smoothness with a human nail file.
3. Safety and Comfort
Potential for Friction: A human file might generate more friction, which can cause discomfort or even heat up the nail if done vigorously.
Handling: Dog-specific files are usually designed with longer handles to ensure a safe distance between the dog’s nail and your fingers, reducing the risk of nips or bites if the dog gets agitated.
4. Durability
Wear and Tear: Because dog nails are tougher, using a human nail file might wear it out quicker than if used on human nails.
5. Practicality for Larger Breeds
Insufficient Size: Human nail files might be too small or flimsy for larger dog breeds with thicker nails, making them impractical for effective filing.
While it’s technically possible to file your dog’s nails with a human nail file, especially in a pinch, it may not be the most efficient or comfortable method for your pet. If you do decide to use one, ensure you’re gentle and patient, periodically checking the nail’s temperature to prevent discomfort from friction. For regular grooming, consider investing in a dog-specific nail file or a grinder, which is designed with the anatomy and needs of dogs in mind. This will ensure a safer, quicker, and more pleasant experience for your furry friend.
How To Cut Dog Nails Without Clippers?
There are times when dog owners might not have specialized clippers on hand, or perhaps their dog has an aversion to them. In such cases, knowing alternative methods for trimming your dog’s nails can be a lifesaver. Let’s explore some safe and effective ways to cut dog nails without using clippers.
1. Nail Grinders or Dremels
What Are They? These are electric tools that grind down a dog’s nails instead of clipping them. They’re especially useful for dogs with thick nails.
Benefits:
Gradual reduction of the nail length.
Reduces the risk of cutting into the quick.
Leaves a smoother finish.
Considerations: Introduce the grinder slowly, as the vibration and noise might initially be unsettling for some dogs.
2. Nail Files
How To Use: Just as you’d file human nails, you can file your dog’s nails. Use a gentle back-and-forth motion.
Benefits:
Controlled reduction of nail length.
Can be less intimidating for dogs compared to clippers.
Considerations: This method can be time-consuming, especially for dogs with harder nails. Ensure the file is coarse enough for your dog’s nails.
3. Regular Walks on Pavement
How It Works: Walking your dog regularly on rough surfaces, like concrete or asphalt, can naturally file down their nails.
Benefits:
Passive nail trimming without active intervention.
Great for dogs that are anxious about nail grooming.
Considerations: This won’t replace regular nail trimming entirely, especially for the dewclaw, but it can extend the time between active grooming sessions.
Tips for Safe Nail Trimming Without Clippers:
Go Slow: Whether you’re grinding, filing, or using any other method, take your time. The slower and more deliberate your actions, the less risk of injury.
Frequent Checks: Always keep an eye on the nail’s quick, especially if you’re using an alternative method.
Comfort is Key: Make sure your dog is calm and comfortable. Reward them with treats or praise during and after the session.
Regular Maintenance: Even without clippers, maintaining a routine can help ensure your dog’s nails don’t become overly long.
While clippers designed for dogs are the go-to tool for many, it’s reassuring to know there are alternatives. Whether you choose to use a grinder, file, or simply engage in regular walks on pavement, always prioritize your dog’s comfort and safety. Remember, the goal is to make the experience as stress-free as possible for both of you.
Is It Better To Cut Or Grind Dog Nails?
Dog nail maintenance is an essential part of pet care, and owners often find themselves deciding between cutting and grinding. To make an informed decision, let’s compare both methods side by side.
1. Cutting Dog Nails
Using specialized dog nail clippers, the nails are snipped to the desired length.
Pros
Cons
Quick process.
Risk of cutting the quick.
Clippers operate quietly.
Can leave jagged or sharp edges.
No need for electricity or batteries.
Some dogs dislike the pressure of the clippers.
2. Grinding Dog Nails
Using a nail grinder or Dremel, the nails are gradually filed down to the desired length.
Pros
Cons
Provides a smooth and rounded nail finish.
Some dogs are disturbed by the grinder’s noise and vibration.
Dog’s Temperament: The choice might depend on whether your dog is more anxious about noises or the sensation of clippers.
Owner’s Experience: Those new to dog nail grooming might find grinders offer a bit more control, while experienced owners might prefer the swiftness of clippers.
Frequency of Grooming: Regular grooming might favor the speed of clippers, while occasional sessions could benefit from the finish grinders provide.
The decision to cut or grind your dog’s nails is contingent on both your pet’s preferences and your comfort with the tools. Some owners even combine the two, cutting nails first and then smoothing the edges with a grinder. Whichever method you choose, the main goal should always be the comfort and safety of your pet. Positive reinforcement, like praise and treats, can make the grooming experience pleasant for your furry friend.
Can You Cut Dog Nails With Scissors?
The idea of using scissors as a tool for trimming a dog’s nails may seem convenient, especially when dog-specific clippers aren’t immediately available. But is it a viable and safe option? Let’s delve into the feasibility and concerns of using scissors for this purpose.
1. Type of Scissors
While it’s possible to use scissors, not just any pair will do. The scissors would need to be:
Sharp: A dull blade can cause crushing rather than cutting, leading to discomfort.
Clean: Any tool used should be sanitized to reduce the risk of infection should there be any nicks or cuts.
Sturdy: They need to be strong enough to handle the thickness of a dog’s nail without bending or breaking.
2. Safety Concerns
Using scissors comes with multiple risks:
Lack of Precision: Scissors, especially large ones, might not provide the accuracy that dog nail clippers offer.
Potential for Slips: Without the designed grip and shape of dog nail clippers, there’s a higher risk of the scissors slipping and causing injury.
Risk of Splintering: A scissor’s straight cut might cause the nail to splinter, leading to further complications.
3. Comfort and Efficiency
Potential for Pinching: Scissors might pinch the nail before cutting, causing discomfort.
Multiple Cuts Needed: Unlike clippers that are designed to take off the desired length in one cut, scissors might require multiple snips, prolonging the process.
4. Suitability for Different Breeds
While scissors might be a makeshift tool for smaller breeds or puppies with softer nails:
Not Ideal for Large Breeds: For bigger breeds with thicker nails, scissors are generally not practical or safe.
Dewclaws: The location and angle of dewclaws can make them challenging to trim with scissors without causing discomfort.
5. Visibility of the Quick
Obstructed View: Scissors might not give a clear view of the quick, increasing the risk of accidentally cutting it and causing pain and bleeding.
Tips if Opting for Scissors:
Stay Calm and Steady: Ensure both you and your dog are calm. A jittery hand increases the risk of injury.
Go Slow: Approach the process with patience. Aim for small cuts to avoid going too deep.
Lighting: Ensure you’re in a well-lit environment to clearly see the nail and its quick.
Have Styptic Powder on Hand: In case of any accidental cuts, having styptic powder can help stop bleeding.
While using scissors might seem like a quick solution, it’s fraught with risks that can lead to injury or trauma for your dog. If you find yourself without dog-specific clippers and feel the need to trim your dog’s nails, considering alternatives like nail grinders or filing may be safer. Always prioritize the safety and comfort of your canine companion. If in doubt, consult a professional groomer or veterinarian for guidance.
Can You Cut Dog Nails With Wire Cutters?
When faced with the task of trimming a dog’s nails and without the right tools at hand, some people might wonder about using wire cutters. While they may look somewhat similar to dog nail clippers, there are crucial differences. Here’s a look into the feasibility and concerns of using wire cutters for dog nails.
1. Design and Intended Use
Wire cutters are designed to cut wire, which requires a different kind of shearing force compared to cutting through the organic material of a dog’s nail. Dog nail clippers, on the other hand, are specifically crafted to handle the texture, thickness, and curvature of dog nails.
Pros
Cons
Might be available in households.
Not designed for the texture or shape of dog nails.
Some might be sharp enough to cut through.
Can cause uneven or jagged cuts.
2. Safety and Precision
Safety is a paramount concern when trimming a dog’s nails. The incorrect tool can increase the risk of injury or discomfort for the dog.
Pros
Cons
–
High risk of cutting the quick.
–
Can cause splintering or splitting of the nail.
–
Might pinch or crush the nail due to design.
3. Comfort for the Dog
The comfort of the dog during the nail trimming process is vital to ensure they don’t develop an aversion to nail grooming.
Pros
Cons
–
Can be more painful than proper nail clippers.
–
Risk of causing trauma or stress to the dog.
Factors to Consider:
Urgency vs. Safety: If it’s urgent to trim a nail (e.g., a broken nail), and no other tools are available, you might be compelled to use what’s on hand. However, always consider the potential risks and discomfort.
Dog’s Size and Nail Thickness: Wire cutters might be more dangerous for larger breeds with thicker nails due to the risk of crushing instead of cutting cleanly.
While wire cutters might seem like a potential alternative in a pinch, they are not recommended for cutting dog nails. Their design, intended use, and the risks they pose make them unsuitable and potentially harmful for this task. It’s always best to invest in tools specifically designed for the job or seek professional grooming services to ensure the safety and comfort of your pet. If ever in doubt, it’s always wise to consult a veterinarian or professional groomer.
Conclusion
Navigating the world of dog nail care can be both a daunting and intricate journey. From understanding the right tools to use, to deciphering what’s myth from fact, our four-legged friends rely on us to make informed and compassionate choices for their well-being. While it might be tempting to use household tools or improvise in a pinch, it’s essential to remember that the safety and comfort of our pets should always be paramount. Specialized tools exist for a reason: to make the grooming process as smooth and stress-free as possible for both the dog and the owner.
Regular nail maintenance not only enhances your dog’s physical health but also strengthens the bond you share. It’s a moment of trust, a subtle dance of reassurance and care. So, the next time you find yourself reaching for those clippers or grinders, take a moment to appreciate the trust your pet places in you. Armed with knowledge, the right tools, and a sprinkle of patience, you’re well on your way to ensuring those paws are in tip-top shape.
Thank you for joining us on this journey of understanding and care. Remember, in the world of pet care, love, understanding, and a little bit of research can go a long way. Happy grooming!
Frequently Asked Questions (FAQs)
Is it safe to use human tools for dog nail grooming?
While some human tools may superficially resemble dog grooming tools, they aren’t designed for the specific needs and challenges of dog nails. Using inappropriate tools can increase the risk of injury or discomfort to your pet.
How often should I trim my dog’s nails?
The frequency can vary depending on your dog’s activity level, age, and the surfaces they walk on. As a general rule, if you hear their nails clicking on the floor, it’s time for a trim. Typically, every 3-4 weeks is a common interval for many dogs.
What should I do if I accidentally cut the quick?
First, don’t panic. While it might bleed and cause some discomfort, it’s a common mistake. Apply styptic powder or cornstarch to stop the bleeding and reassure your dog. If bleeding continues for an extended period, consult your veterinarian.
Are there any alternatives if my dog is too anxious for nail clippings?
Absolutely. Some dogs might prefer nail grinding over clipping. Additionally, there are also anti-anxiety wraps and calming treats available. In extreme cases, you might want to consult your vet about sedative options or professional grooming services.
Why is regular nail maintenance important for dogs?
Long nails can cause discomfort, affect a dog’s posture and gait, and can even lead to injuries. Regular nail maintenance ensures your dog remains comfortable, healthy, and happy.
A note about your dog’s health
This article provides general education and does not replace an examination, diagnosis, or individualized advice from your veterinarian. Contact a veterinary professional if you are concerned about your dog’s symptoms.
Dr. Candy Akers earned her Doctor of Veterinary Medicine degree from Oklahoma State University in 2009 after completing undergraduate studies at the University of Delaware. Her experience includes companion-animal nutrition, chronic disease, allergies, autoimmune conditions, cold laser therapy, wildlife rehabilitation, and emergency wildlife response. She combines conventional veterinary knowledge with a whole-animal perspective to help pet parents understand their options and recognize when individualized veterinary care is needed.
Brittle, flaky, cracked, or crumbling nails are a clue, not a diagnosis. One damaged nail often follows a snag, overgrowth, rough play, or a difficult trim. When several nails are painful, loose, misshapen, or falling away from the nail bed, I become more concerned about infection, inflammatory or immune-mediated claw disease, diet imbalance or poor absorption, and other health problems. The pattern matters more than the word “brittle.” [1][2]
If your dog is limping, bleeding, licking constantly, or protecting the paw, or if a nail is loose, swollen, foul-smelling, or draining, arrange veterinary care. Several changing nails also deserve a timely examination. You can protect the paw from more trauma while you wait, but do not pull off a loose nail or force a painful inspection.
Why Are My Dog’s Nails Brittle?
A dog’s claw is made from keratinized tissue. Like skin and hair, it is built over time from nutrients supplied through the diet. It also takes a surprising amount of mechanical stress as your dog walks, runs, digs, pivots, and plays. [3]
That means brittle dog nails can start in more than one place. The claw may be damaged from the outside by leverage, friction, or a snag. The nail fold or bed may be inflamed. The tissue that produces new nail may be affected by disease. The dog may also have a diet or absorption problem that makes it harder to grow healthy tissue.
I start with a simple question: Is one nail affected, or are several nails changing?
One Nail or Several? The Pattern Matters
This quick pattern guide will help you organize what you see. It cannot diagnose the cause, but it can point you toward a sensible next step. Veterinary dermatology sources consistently use distribution, pain, inflammation, and the way claws separate or regrow to narrow the possibilities. [1][5]
Pattern
What You May Notice
Possible Category
Next Step
One nail after a snag, rough play, digging, or a trim
Rough edge, visible split, or a broken tip
Local trauma or overgrowth
Prevent more snagging. Arrange care if the nail is painful, loose, or bleeding.
One or a few nails with inflamed skin around them
Redness, warmth, odor, discharge, licking, or tenderness
Infection or local inflammation
Have the paw examined. Sampling may be needed before treatment.
Several nails on multiple paws
Pain, licking, lameness, claws lifting or falling off, misshapen regrowth
Primary inflammatory or immune-mediated claw disease
Arrange a prompt veterinary evaluation.
One nail that repeatedly swells, bleeds, or changes shape
A persistent focal problem that does not grow out normally
Deeper infection, foreign material, or a nail-bed mass
Ask for a focused examination. Imaging or biopsy may be appropriate.
Several nails plus skin, coat, digestive, weight, or energy changes
A broader pattern rather than an isolated claw injury
Diet imbalance, poor absorption, or systemic disease
Request a diet and medical review.
A nail that looks dry at the tip after hard-surface wear is a different pattern from painful nail loss on several paws. Looking at all four paws, including the dewclaws, often tells you more than studying the worst-looking nail alone.
Common Causes of Brittle and Crumbling Dog Nails
Trauma, Long Nails, and Rough Surfaces
Dogs put their nails to work. Constant digging, roughhousing, scraping on hard ground, or catching a long nail in carpet can create tiny fractures that travel farther into the claw. A long nail acts like a longer lever, so the tip has more opportunity to catch and twist.
Trimming can sometimes contribute, especially if dull clippers crush the claw or if a dog moves suddenly. That does not mean you should stop nail care. It means the tool, technique, and timing should fit the dog. A groomer or veterinary professional can smooth a damaged edge and show you a lower-stress approach if home trims are difficult.
Nail-Fold Inflammation and Infection
Bacteria or fungi can be involved in disease around the nail, but color or brittleness alone cannot tell us which organism is present. Look for redness, swelling, tenderness, discharge, odor, persistent licking, or crusting around the nail fold.
An infection may begin after trauma opens the tissue around the quick. It can also be secondary to an inflammatory nail disorder. Because the treatment depends on the organism and depth of the problem, repeated home remedies can delay the test that gives the clearest answer.
Symmetric Lupoid Onychodystrophy and Other Multi-Nail Disorders
Symmetric lupoid onychodystrophy, usually shortened to SLO, is an important cause of painful disease affecting several claws. Dogs may lick their paws, limp, resist having the feet handled, lose claws, and regrow nails that are dry, brittle, misshapen, or crumbly. Secondary bacterial infection can add swelling or discharge. [1][6]
The long name can sound frightening. In practical terms, SLO is a pattern of inflammation centered on the structures that produce and support the claw. Its cause is not completely understood, and similar tissue changes can occur with other claw disorders. That is why a photograph or symptom list is not enough to confirm it.
A Persistent Problem in One Nail
One nail that repeatedly breaks, swells, ulcerates, bleeds, or changes shape deserves a different kind of attention. A foreign body, chronic infection, injury to the nail-producing tissue, or a nail-bed mass may create a focal pattern. Your veterinarian may recommend an X-ray or a tissue sample when the abnormality does not grow out or respond as expected.
Diet Quality, Absorption, and Whole-Body Health
Nutrition is part of nail health, but brittle nails do not automatically prove a vitamin deficiency. Protein supplies amino acids used to build body tissues. Essential fatty acids must come from food. Biotin and minerals such as zinc participate in normal metabolism and tissue health. Those nutrients work together, and adding one in isolation is not the same as correcting an incomplete diet. [3]
I pay closer attention to nutrition when a dog eats a restricted or unbalanced home-prepared diet, has chronic digestive signs, is losing weight, or has broader skin and coat changes. In those situations, reviewing the entire recipe and the dog’s ability to digest and absorb nutrients is more useful than guessing from a nail’s appearance.
When Brittle Nails Need Prompt Care
Please arrange prompt veterinary care if you see any of the following:
Ongoing bleeding or an exposed, injured quick
A nail that is hanging, loose, or moving abnormally
Marked pain, limping, or refusal to bear weight
Swelling, pus, odor, or heat around the nail
Repeated licking or chewing at the paw
Several nails that are lifting, splitting, or shedding
A focal nail problem that keeps returning
Low energy, poor appetite, fever, weight change, or other whole-body signs
Do not give human pain medicine unless your veterinarian specifically directs it. Common human products can be dangerous for dogs. Avoid digging into a crack, cutting close to painful tissue, or pulling a loose nail. Those steps are best handled with good lighting, pain control, and the right instruments.
What You Can Safely Do at Home
For a small, nonbleeding rough edge that is not painful, reduce rough-surface activity and prevent the nail from catching. Keep the paw clean and dry. If your dog is comfortable and you can clearly see where the healthy nail begins, a gentle file may smooth only the loose tip. Stop if the dog pulls away or the crack travels toward the quick.
Clear photos are valuable. Take one of the affected nail, one of the whole paw, and a comparison photo of the other paws. Then write down what has changed.
What to Record Before the Appointment
Which nail or nails are affected, including the dewclaws
Whether the change began suddenly or gradually
Whether your dog is licking, limping, or painful when the paw is touched
Any redness, swelling, bleeding, discharge, odor, or looseness
Recent trims, digging, rough play, new terrain, or a known snag
The complete diet, treats, chews, and every supplement
Skin, coat, digestive, weight, appetite, or energy changes
This short record helps your veterinarian see the pattern, even if the nail looks a little different on appointment day.
How Veterinarians Find the Cause
History and Paw Examination
The examination usually starts with all four paws. Your veterinarian looks at how many claws are involved, whether the pattern is symmetrical, where each crack begins, how the nail fold looks, and whether new growth is normal. The skin, coat, lymph nodes, and the rest of the dog may provide useful clues.
Diet history matters too. Bring the product labels or recipe for every food and supplement. “Home-cooked” can describe many very different diets, so ingredient amounts and formulation details are more useful than the label alone.
Tests Your Veterinarian May Consider
Not every dog needs every test. The pattern guides the workup. Cytology can examine cells and microorganisms from inflamed or draining tissue. A bacterial culture and susceptibility test may be useful when bacteria are seen and systemic antibiotics are being considered. Fungal testing may be appropriate for misshapen, brittle claws when the history and examination support that concern. [2][5]
Blood or urine tests can look for a broader health issue. Imaging can help evaluate a persistently painful or swollen digit. In selected cases, a biopsy of the nail-producing tissue or an abnormal focal lesion may be needed. Claw biopsy is more involved than a skin swab, so your veterinarian weighs the likely benefit against the discomfort and the information already available. [1][5]
Treatment Depends on the Cause
There is no single brittle dog nails treatment because the causes are different. A locally damaged claw may need careful trimming, filing, protection, and pain relief. A confirmed infection needs therapy matched to the organism and depth. A focal mass or severe damage to the digit may require surgery. Diet-related problems call for correction of the full feeding plan, not a random handful of nutrients.
SLO and related primary claw disorders often need a long-term veterinary plan. Published treatment approaches include essential fatty acids and prescription medications selected for their immune effects. Improvement can take months because a new claw grows slowly. In many dogs, the first meaningful success is less pain and fewer claws shedding, even if the regrown nails are not perfectly shaped. [4][5][6]
Nutrition and Supplements for Stronger Nails
I start with the whole dog and the whole diet. Nails are built over time, so a balanced, species-appropriate plan made from quality whole-food ingredients provides the foundation. If you prepare food at home or intentionally restrict ingredients, have the recipe reviewed for completeness. A thoughtful whole-food plan can be excellent, but variety alone does not guarantee the right nutrient balance.
Omega-3 Fatty Acids
Omega-3 fatty acids, commonly found in fish oil, are renowned for their myriad health benefits, including promoting better skin and nail health. By integrating Omega-3 supplements into your dog’s diet, you can potentially reduce inflammation, increase nail strength, and boost overall skin health. Always consult with your veterinarian for the appropriate dosage and recommendations tailored to your dog’s specific needs.
Omega-3 fatty acids have a documented place in some veterinary plans for primary claw disease, but they are not a stand-alone answer for every brittle nail. Product quality, EPA and DHA content, the rest of the diet, medical history, and concurrent medications all matter. [4][5]
Biotin
Biotin, a part of the vitamin B complex, is essential for maintaining healthy skin, hair, and nails. Deficiencies in biotin can lead to brittle, weak nails in dogs. While many commercial dog foods already contain adequate amounts of biotin, a supplement can sometimes be beneficial for those pups with nail issues. Again, it’s best to seek advice from your vet before starting any new supplement.
Biotin participates in normal nutrient metabolism, and veterinary dermatology references include it as a possible adjunct in selected claw disorders. That is not the same as evidence that every dog with splitting nails is deficient. Review the diet and the diagnosis first. [3][5]
Collagen
Collagen, a primary protein found in the body, plays a crucial role in maintaining the structural integrity of nails, skin, and hair. As dogs age, their natural collagen production can decrease. Offering collagen supplements can help restore some of this loss, leading to stronger and healthier nails. There are various canine-friendly collagen supplements available in the market, but always opt for high-quality products and consult with your vet for guidance.
Collagen is a protein source, not a proven cure for canine claw disease. If you choose a product, treat it as part of the whole diet and tell your veterinarian about it. A supplement should never delay evaluation of pain, infection, repeated nail loss, or a focal lesion.
Please do not stack multiple products or add zinc, calcium, or other nutrients blindly. More is not always better. Excesses can interfere with other nutrients and can make a balanced plan less balanced. [3]
How to Help Prevent Cracks and Splits
A prevention plan should match your dog’s nails, activity, and underlying health.
Inspect every nail and the surrounding fold regularly.
Keep nails at a functional length before they begin to click, snag, or change the way the paw lands.
Use sharp, well-maintained tools that do not crush the claw.
For a worried dog, use short sessions, calm handling, and rewards. Ask for professional help rather than forcing the trim.
Vary walking surfaces when pavement, gravel, ice, or rough ground is wearing the tips unevenly.
Use temporary paw protection when the terrain is harsh, provided the boot fits and does not rub.
Keep paws and bedding clean and dry.
Address persistent licking, allergy signs, or skin inflammation instead of focusing only on the nail.
Good care reduces preventable trauma, but it cannot guarantee that an inflammatory or immune-mediated nail disorder will not occur. Continue to watch the pattern.
Final Thoughts
One damaged nail often has a local explanation. Several painful, loose, or changing nails tell a different story and are worth investigating.
Protect the paw, document what you see, and support your dog from the inside with a well-formulated whole-food diet. Then let the diagnosis guide treatment. That balanced approach is kinder to the dog and much more useful than chasing every supplement that promises stronger claws.
Frequently Asked Questions
Why Are Several of My Dog’s Nails Crumbling at Once?
Several crumbling nails are less consistent with a simple snag. Infection, inflammatory or immune-mediated claw disease such as SLO, diet imbalance or poor absorption, and other health problems become more important when multiple paws are involved. Arrange a veterinary examination, especially if the nails are painful, loose, or shedding.
Can Brittle Dog Nails Be Caused by a Vitamin Deficiency?
Yes, an incomplete diet or poor absorption can contribute to unhealthy tissue growth, but appearance alone cannot confirm a deficiency. Review the complete diet before adding supplements. Blindly adding biotin, zinc, calcium, or other nutrients can miss the real cause and create new imbalances.
Do Omega-3, Biotin, or Collagen Supplements Help?
They may be supportive for selected dogs, but the evidence and the need differ. Omega-3 fatty acids are included in some veterinary claw-disease plans. Biotin may be used as an adjunct. Collagen is a protein source but is not a proven treatment for a specific canine claw disorder. None replaces diagnosis.
How Often Should I Trim a Dog With Brittle Nails?
Trim often enough to prevent leverage and snagging, but use an interval that fits your dog’s growth rate, activity, nail condition, and comfort. Small, calm maintenance sessions may be easier than waiting for a large trim. Ask a groomer or veterinary professional for help if the claw crushes, splits, or causes pain.
How Can I Tell Whether a Brittle Nail Is Infected?
Redness, swelling, warmth, discharge, odor, pain, and persistent licking can accompany infection. They can also occur with noninfectious inflammation, so testing may be needed. Seek care promptly when the nail is loose, the dog is limping, or the problem affects more than one claw.
References
Waisglass, S. (2018). Claw disease in the dog: Does your patient have symmetrical lupoid onychodystrophy? Canadian Veterinary Journal, 59(7), 796–798. https://pmc.ncbi.nlm.nih.gov/articles/PMC6005070/
Mueller, R. S., Friend, S., Shipstone, M. A., & Burton, G. (2000). Diagnosis of canine claw disease: A prospective study of 24 dogs. Veterinary Dermatology, 11(2), 133–141. https://pubmed.ncbi.nlm.nih.gov/34645001/
Ziener, M. L., & Nødtvedt, A. (2014). A treatment study of canine symmetrical onychomadesis (symmetrical lupoid onychodystrophy) comparing fish oil and cyclosporine supplementation in addition to a diet rich in omega-3 fatty acids. Acta Veterinaria Scandinavica, 56, 66. https://pmc.ncbi.nlm.nih.gov/articles/PMC4189663/
This article provides general education and does not replace an examination, diagnosis, or individualized advice from your veterinarian. Contact a veterinary professional if you are concerned about your dog’s symptoms.
Dr. Candy Akers earned her Doctor of Veterinary Medicine degree from Oklahoma State University in 2009 after completing undergraduate studies at the University of Delaware. Her experience includes companion-animal nutrition, chronic disease, allergies, autoimmune conditions, cold laser therapy, wildlife rehabilitation, and emergency wildlife response. She combines conventional veterinary knowledge with a whole-animal perspective to help pet parents understand their options and recognize when individualized veterinary care is needed.
As a passionate dog owner, I know how nerve-wracking trimming a dog’s nails can be, especially if the quick has grown out too far. Overgrown quicks can lead to difficulties in nail trimming and even discomfort for your furry friend. If you’ve ever accidentally nicked the quick, you understand the guilt and pain your pooch goes through. But what if I told you there are ways to help the nail quick recede, ensuring safer and easier trims? Today, I’m diving deep into the world of canine nail care. We’ll explore the importance of timing and introduce three effective techniques to make your dog’s nail quick recede. Let’s start this journey together and make nail trims a stress-free task for both you and your furry companion!
Why Do You Need to Cut Your Dog’s Nails?
Having a dog is an immensely rewarding experience, and we always strive to ensure their well-being. One aspect of dog care that might not always get its due attention is nail trimming. But, why is it so important? Let’s delve into some key reasons.
1. Preventing Overgrowth
Long nails can become overgrown, curling back into your dog’s paw pads. This can be painful and lead to infections. Regular trims ensure that nails remain at a healthy length, preventing these complications.
2. Comfort and Posture
Imagine walking around with shoes that don’t fit, and you’ll get an idea of how a dog might feel with long nails. Overly long nails can change the alignment of a dog’s foot. Over time, this can lead to posture problems and even arthritis in older dogs.
3. Reducing the Risk of Injuries
Active dogs with long nails can easily snag them on carpets, furniture, or outdoor elements. This not only risks damaging your belongings but more importantly, it can cause painful tears in the nail or even injuries to the paw.
4. Avoiding Quick Overgrowth
The ‘quick’ of the nail, which supplies blood to the nail, tends to grow along with the nail. Regular trims keep the quick shorter, making nail cutting easier and reducing the risk of accidentally cutting the quick.
5. Bonding Time
Though it might take some getting used to, nail trimming sessions can become a bonding activity. With positive reinforcement and a gentle approach, your dog can learn to trust and even enjoy these moments with you.
Regular nail trims are about more than just aesthetics. They’re a key aspect of comprehensive dog care, ensuring comfort, health, and a happy pup!
How to Tell if Your Dog’s Nails Are Too Long
As a dog owner, it’s crucial to understand when your dog’s nails have reached an excessive length. Long nails can lead to a multitude of problems, from simple discomfort to potential health issues. But how can you tell? Let’s explore some telltale signs.
Clicking Sounds on Hard Surfaces: One of the most noticeable indicators is the sound of your dog’s nails clicking on hard surfaces, like tile or hardwood floors. If you can hear them tapping away as they walk, it’s probably time for a trim.
Altered Walking or Standing Posture: If you notice your dog standing or walking in an unusual manner, long nails might be the culprit. Dogs may adjust their posture to avoid pain from overgrown nails, which can look like they are “tiptoeing.
Visual Check: If you can see the nails curling when looking at your dog from the side or if they touch the ground when your dog is standing still, they’re too long.
Discomfort or Pain: Dogs might chew on their nails or lick their paws excessively if their nails are causing discomfort. They might also show signs of pain when walking or running.
How to Identify a Dog’s Quick
Recognizing the quick in a dog’s nail is crucial to safe and effective trimming. Here’s how you can spot it:
Color Differences: On light-colored nails, the quick is the pinkish section in the middle of the nail. For darker nails, you might have to rely on other methods.
Nail Profile: If you look at the nail’s cross-section, you’ll notice it’s comprised of two parts: a hard outer shell and a softer center. The softer center is where the quick resides.
Feel: As you start trimming the nail, you’ll first cut through the hard part. Once you get closer to the quick, the nail will feel spongier.
Why Does the Quick Overgrow?
Understanding why the quick grows is pivotal in preventive care. So why does it get long?
Infrequent Trimming: Regular nail trimming can prevent the quick from extending too far. When nails aren’t cut frequently, the quick tends to grow with the nail.
Age and Health: Just like in humans, as dogs age, their nails can grow faster. Some health conditions might also influence nail and quick growth.
Genetics: Some breeds naturally have longer quicks than others.
Inactivity: Dogs that spend a lot of time indoors or on soft surfaces don’t experience the natural nail wear that can keep nails short.
Regularly monitoring the state of your dog’s nails and understanding the anatomy will ensure you provide the best care possible, preventing potential pain and discomfort. Always approach nail trimming with caution and knowledge to ensure a positive experience for your pup!
Lessons From a Groomer: Nail Clipping, Ear Cleaning, and Baths
Groomers are like the unsung heroes of the canine world, ensuring our fur-babies look and feel their best. Having spent years handling all shapes and sizes of dogs, groomers pick up a myriad of tips and tricks. Today, we’re diving into some invaluable lessons from seasoned groomers on nail clipping, ear cleaning, and the art of the perfect doggy bath.
Nail Clipping: Not Just About Length
Tools Matter: Invest in a good pair of dog nail clippers. A sharp, high-quality pair will make the process smoother for both you and your pet.
Stay Calm and Reward: Your energy affects your dog. Stay calm, speak in soothing tones, and reward your dog after the session.
Know Your Dog’s Limits: Some dogs can only handle a few nails at a time. It’s okay to spread out the trimming sessions over several days.
Get a Good Angle: Aim to clip at a 45-degree angle, just above where the nail starts to curve.
Ear Cleaning: Delicate But Necessary
Use the Right Solution: Invest in a vet-recommended ear cleaning solution. Avoid using water as it doesn’t evaporate easily and can lead to infections.
Cotton Balls, Not Q-tips: Cotton balls can effectively clean the ear without the risk of going too deep or causing injury.
Watch for Signs of Infection: Regularly inspect your dog’s ears for redness, unusual odor, or excessive wax. These can be signs of an infection or ear mites.
Baths: More Than Just Soap and Water
Water Temperature Matters: Dogs’ skin is more sensitive than ours. Always use lukewarm water for their comfort.
Choose the Right Shampoo: Use dog-specific shampoos. Human shampoos can disturb the pH balance of a dog’s skin.
Rinse Thoroughly: Any leftover shampoo can cause irritation. Ensure every bubble is rinsed out.
Brush Before and After: Brushing your dog before a bath can help remove tangles and matted fur. Doing it after helps in keeping the coat neat and reduces shedding.
Dry Completely: Ensure your dog is fully dry after the bath, especially breeds with dense fur, to prevent fungal growth or skin issues.
Grooming isn’t just about keeping your dog looking good; it’s an essential part of their health and wellness regimen. These lessons from seasoned groomers can elevate your at-home grooming game, ensuring your pup feels as fabulous as they look!
How to Make Your Dog’s Nail Quick Recede
Overgrown quicks in a dog’s nails can be problematic, not just because they increase the risk of accidental cuts during trimming, but also because they can cause discomfort for your pet. Thankfully, there are ways to encourage the nail quick to recede. Here’s how you can go about it:
1. Trimming Your Dog’s Nails
Consistency is Key: Regularly trimming your dog’s nails can help the quick recede over time. It’s advised to trim a tiny bit off every 1-2 weeks, rather than waiting for the nails to grow long.
Stay Within the Comfort Zone: While it’s essential to trim consistently, you should also ensure you’re not cutting too close to the quick. This can lead to pain and bleeding.
Pro Tip for Trimming Black Dog Nails
For those with dogs with black nails, finding the quick can be particularly challenging. Here’s a pro tip:
Feel the Texture: As you trim or grind the nail, pay close attention to the texture. When you get closer to the quick, the nail will become softer, and you might see a small dark circle in the middle. This indicates that you are approaching the quick, and it’s time to stop.
2. Natural Abrasion
Walk on Pavement: Taking your dog for walks on concrete or asphalt can naturally file down their nails. The hard surface acts like sandpaper, gradually wearing the nail down.
Encourage Digging: This might sound counter-intuitive, but setting up a designated digging area in your garden can help. As dogs dig, their nails rub against the ground, naturally wearing them down.
3. Nail Grinder (Dremel): The “Dog Nail File”
Gradual Filing: Unlike clippers, a Dremel or nail grinder files the nail down gradually. This is especially useful for getting closer to the quick without cutting into it. Over time, as you use the grinder, the quick will start to recede.
Safety First: Ensure the grinder has a safety guard to prevent going too deep. Also, keep sessions short to avoid overheating the nail.
Desensitization: Before using a grinder, it’s vital to get your dog accustomed to the sound and sensation. Start with short sessions, rewarding your dog, and gradually increase the time as they become comfortable.
Encouraging the nail quick to recede requires patience and consistency. By regularly attending to your dog’s nails and understanding their anatomy, you can ensure they remain in top-notch health, reducing the chances of overgrowth and related complications.
What if You Accidentally Cut the Quick?
It’s a moment every dog owner dreads. You’re in the middle of a nail-trimming session, and suddenly your dog yelps, or you notice a spot of blood. You’ve accidentally cut the quick. First things first, don’t panic. While it’s distressing for both you and your pet, there are steps you can take to remedy the situation.
1. Stay Calm and Comfort Your Dog
Your Reaction Matters: Dogs often take cues from their owners. If you overreact, it can heighten their distress. Stay calm, speak in soothing tones, and comfort your pet.
Provide Immediate Assurance: If your dog pulls away or looks upset, pause the trimming, and spend a few minutes comforting them. Offer treats or their favorite toy to distract and console.
2. Stop the Bleeding
Styptic Powder: This should be a staple in your dog grooming kit. Upon contact with blood, styptic powder aids in clotting and stops the bleeding. Simply dip the bleeding nail into the powder or apply using a cotton ball.
Alternative Solutions: If you don’t have styptic powder on hand, you can also use cornstarch or flour. Just press the dog’s nail into the substance, or apply it with a bit of water to make a paste.
Avoid Touching Too Much: Once you’ve applied a clotting solution, try not to disturb the nail too much. The clotting process can take a few minutes.
3. Check for Signs of Pain or Discomfort
Monitor Their Behavior: After the incident, keep an eye on your dog. If they continue to favor the injured paw, lick it excessively, or show signs of pain, it might be a good idea to consult your veterinarian.
Provide Pain Relief: If you sense your dog is in discomfort, you can provide some relief. Always consult your vet before giving any medication to ensure the correct dosage and safety.
4. Reflect and Learn
Assess the Situation: Understand what went wrong. Was it a lapse in attention, or do you need more practice identifying the quick? Use this as a learning opportunity.
Seek Expert Advice: If you’re consistently struggling with nail trims, consider seeking the advice of a professional groomer or veterinarian. They can provide tips, or you might decide to let the pros handle the task in the future.
Accidentally cutting the quick can be distressing, but remember, it’s a mistake that many dog owners make. The key is to remain calm, act swiftly, and learn from the experience. With time and practice, nail trimming can become a smooth routine for both you and your furry friend.
What Is the Perfect Length for Your Dog’s Nails?
Determining the ideal length for your dog’s nails is an integral aspect of pet care. Overgrown nails can cause a range of issues from discomfort to health problems, but how short is too short? Let’s delve into understanding the perfect nail length for our canine companions.
1. The “Floor Test”
No Clicking Sounds: One of the most straightforward ways to gauge nail length is by listening when your dog walks on a hard surface. If you hear a clicking sound, it’s time for a trim.
Flat Paws: When standing, your dog’s nails should not touch the ground. If they do, it’s a clear indication they’re too long. Ideally, nails should be just above the floor when your dog is standing on a level surface.
2. The “Look and Feel” Method
Curve Point: Observe the nail. If you notice it starting to curve downwards, it’s an indicator that a trim might be due.
Texture: As you get closer to the quick, the nail will feel softer and may start to look a bit spongy. This can help guide you on how much to trim without hitting the quick.
3. Considering the Quick
Visible Quick: For dogs with transparent or light-colored nails, you can see the pinkish quick. Always trim approximately 2 millimeters away from it.
Receding the Quick: If you’re trying to make an overgrown quick recede, remember the process is gradual. Trim the nails a little bit every week, allowing the quick to slowly pull back.
4. Breed and Lifestyle Considerations
Active Outdoor Dogs: Dogs that spend a lot of time outdoors, especially on hard surfaces, may naturally wear down their nails. They might need less frequent trims compared to indoor dogs.
Breed Specifics: Some breeds naturally have longer or thicker nails. For instance, Dachshunds often have longer nails, while breeds like the Boxer might have shorter, thicker nails.
5. Prioritizing Comfort
Posture and Gait: Your dog’s comfort is the best indicator. If they appear to walk gingerly, are licking their paws excessively, or show changes in posture, it might indicate nail discomfort.
Achieving the perfect nail length is a combination of observation, understanding your dog’s lifestyle, and regular maintenance. It’s less about an exact measurement and more about ensuring your dog’s comfort and health. When in doubt, consult with a professional groomer or vet for guidance. With time and practice, you’ll develop a keen sense for what’s best for your pup!
How Long Does It Take for the Quick to Recede?
A common question many pet owners have after understanding the importance of the nail quick is: how long does it take for an overgrown quick to recede? The answer isn’t straightforward, as several factors come into play. Let’s delve into the process of the quick’s recession and what influences its timeline.
1. The Basics of the Quick
What Is the Quick? The quick is the tender, living part inside a dog’s nail. It contains blood vessels and nerves, which is why cutting into it can be painful and bloody for your dog.
Why It Grows: If nails are not trimmed regularly, the quick tends to grow with the nail, making it challenging to clip the nails short without hurting your dog.
2. Factors Influencing Recession
Age of the Dog: Younger dogs, especially puppies, have faster-growing nails, and their quick might recede more quickly with regular trimming than in older dogs.
Nail Trimming Frequency: The more frequently you trim, the faster the quick can recede. For overgrown nails, trimming a little bit every week or every other week is recommended.
Dog’s Activity Level: Active dogs that walk or run on hard surfaces may naturally wear down their nails. This can sometimes help in making the quick recede faster, as the nail gets shorter.
3. Average Recession Time
Steady Process: On average, with consistent trimming (every 1-2 weeks), you might notice the quick starting to recede in about a month. However, for the quick to significantly pull back, it can take several months of consistent nail care.
Individual Variability: Just as every dog is unique, the time for the quick to recede can vary from one dog to another. Some might experience faster recession, while others take longer.
4. Tips for Encouraging Quick Recession
Regular Trimming: As mentioned, consistency is crucial. The more you trim, the more you signal to the quick to pull back.
Nail Grinding: Using a nail grinder or Dremel tool can be an effective way to get closer to the quick without cutting it. Over time, this can encourage the quick to recede.
Monitor and Adjust: Keep a close eye on the nails and adjust your trimming frequency based on how quickly the quick is receding.
Patience is essential when waiting for an overgrown quick to recede. While it’s a gradual process, with consistent care, you can help ensure your dog’s nails return to a healthy length. Always prioritize your dog’s comfort and, if in doubt, consult with a professional groomer or vet for advice on the best nail care practices for your pet.
What if My Dog Is Afraid of the Nail Trimmers?
It’s not uncommon for dogs to be wary of nail trimmers. The sight, sound, and sensation can be unnerving for them. Add to that a past experience of accidentally cutting the quick, and it’s understandable why some dogs dread nail trimming sessions. If your dog is one of them, there are ways to make this essential grooming task less stressful for both of you.
1. Understand the Fear
Past Experiences: If your dog has had an unpleasant experience with nail trimmers in the past, such as a painful quick cut, they might associate the tool with pain.
Lack of Exposure: For some dogs, simply the unfamiliarity with the nail trimmers can cause anxiety. They might not understand what it is or what it does.
2. Gradual Desensitization
Start Slow: Introduce the nail trimmers without actually cutting the nails. Let your dog sniff and inspect the tool. Praise and reward them for calm behavior around it.
Short Sessions: Begin with short sessions, trimming only one nail or even just a part of one nail. Gradually increase the number of nails you trim in one session over time.
3. Positive Reinforcement
Treats and Praise: Every time you trim a nail or even bring out the trimmers, reward your dog with their favorite treat and shower them with praise.
Make it Fun: Turn nail trimming into a game or a bonding activity. For instance, trim a nail, then play a quick game or give belly rubs.
4. Consider Alternatives
Grinding Tools: Some dogs might find nail grinders (like Dremels) less intimidating than clippers. However, introduce them slowly as the sound can be off-putting for some pets.
Professional Help: If your dog remains fearful, it might be worth considering a professional groomer or veterinarian to handle nail trims. They have experience in calming nervous pets and can often complete the task swiftly and efficiently.
5. Create a Calm Environment
Choose the Right Spot: Pick a quiet, comfortable place for nail trimming. Avoid areas with lots of distractions or noises.
Stay Calm: Your dog can pick up on your emotions. If you’re anxious or stressed about trimming their nails, they will likely feel the same way. Breathe deeply, speak in soothing tones, and take breaks if needed.
6. Training and Familiarity
Touch Training: Spend time daily touching and handling your dog’s paws without the intent to trim. This can help desensitize them to having their paws handled.
Tool Familiarity: Leave the nail trimmers out in a common area where your dog can see and smell them regularly. This can help reduce the unfamiliarity and fear over time.
Building trust and creating a positive association with nail trimmers can take time, especially if your dog has had negative experiences in the past. Be patient, consistent, and always prioritize your dog’s comfort. Remember, the goal isn’t just to trim their nails but to ensure the process is as stress-free as possible for your furry friend.
Consider Working With a Veterinary Professional
When it comes to your dog’s health and well-being, sometimes the best course of action is to seek the expertise of a veterinary professional. Whether you’re facing challenges with nail trimming, identifying health issues, or simply seeking guidance for routine care, vets and their teams bring a wealth of knowledge and experience. Let’s discuss the advantages and scenarios when you might want to collaborate with these experts.
1. Expertise and Experience
Professional Training: Veterinary professionals undergo years of education and training to understand the intricacies of animal anatomy, behavior, and health.
Handling Skills: They have experience in managing various dog breeds, temperaments, and specific health concerns, ensuring that procedures are carried out safely and efficiently.
2. Addressing Nail Trimming Concerns
Overgrown Nails and Quick: If your dog’s nails are severely overgrown, a vet can guide you on safely trimming them back, possibly over multiple visits, while monitoring the quick’s recession.
Fear and Anxiety: For dogs that are extremely anxious or aggressive about nail trimming, a veterinary clinic can provide a controlled environment, potentially using mild sedatives if deemed necessary and safe.
3. Health Evaluations
Nail Disorders: Discolorations, thickened nails, or other abnormalities might indicate fungal infections, tumors, or other health issues that require professional attention.
Post-Traumatic Concerns: If you’ve accidentally cut the quick and it becomes infected or isn’t healing properly, a vet can provide appropriate treatment and care advice.
4. Tools and Technology
Advanced Equipment: Veterinary clinics are equipped with professional-grade tools that can address specific challenges, like high-speed nail grinders for thick nails or digital magnification for precision.
Immediate First Aid: In case of unexpected injuries or complications, a vet clinic has the necessary first aid and medication on hand to address the situation immediately.
5. Educational Opportunities
Guided Demonstrations: If you’re new to dog care or are unsure about nail trimming techniques, many veterinary professionals are happy to provide demonstrations and tips during your visit.
Workshops and Classes: Some clinics offer workshops on topics like basic grooming, understanding dog behavior, and other pet care essentials.
6. Building Trust
Consistent Visits: Regularly visiting the same vet helps in building trust. Your dog gets familiar with the environment, smells, and the people, which can reduce anxiety over time.
Positive Reinforcements: Many vets use treats, toys, and positive reinforcement techniques to make the experience more pleasant for your pet.
Working closely with a veterinary professional doesn’t just ensure your dog’s physical well-being; it also provides peace of mind. You’ll know that you’re making informed decisions, using the best techniques, and accessing expert advice whenever needed. Whether it’s for routine care, addressing specific challenges, or emergency situations, establishing a good relationship with a vet is invaluable for every responsible pet owner.
Utilizing Dog Groomers
While veterinary professionals are essential for health-related concerns, dog groomers are the go-to experts when it comes to keeping your dog looking and feeling their best. These trained professionals specialize in the aesthetic and hygiene aspects of dog care, ensuring your pet is both clean and comfortable. Let’s explore the benefits and scenarios when turning to a trusted groomer might be your best bet.
1. Expertise in Grooming
Skilled Techniques: Dog groomers are trained in the art of grooming, understanding the different coat types, breeds, and the best approaches for each.
Tailored Services: Whether your dog needs a simple bath, a detailed trim, or specific styling, groomers can provide a range of services tailored to your pet’s needs.
2. Nail Trimming and Beyond
Specialized Tools: Groomers are equipped with a variety of nail trimmers and grinders suitable for different nail types and sizes.
Quick Identification: Experienced groomers can easily identify and avoid the quick, ensuring a painless experience for your dog. They’re also adept at handling minor bleeding instances, should the quick accidentally get nicked.
3. Bathing and Skin Care
Correct Products: Groomers know which shampoos and conditioners are suitable for different coat types, and can address specific issues like dry skin, ticks, or fleas.
Thorough Cleaning: Areas that owners might find tricky to clean, such as the ears or under the tail, are all in a day’s work for groomers.
4. Styling and Haircuts
Breed-Specific Cuts: From Poodles to Shih Tzus, every breed has its specific look. A professional groomer knows how to trim and style your dog to match breed standards or your personal preferences.
Seasonal Styles: Whether it’s a summer shave to keep your dog cool or a winter trim that still offers some protection against the cold, groomers can adjust their techniques based on the season.
5. Safe and Comfortable Environment
Designed for Grooming: Grooming salons are designed with the safety and comfort of pets in mind. Slip-resistant surfaces, adjustable tubs, and specialized drying areas all contribute to a positive grooming experience.
Distraction Techniques: Many groomers are skilled at distracting anxious pets with treats, toys, or soothing sounds, making the process smoother.
6. Detecting Abnormalities
Observant Eye: While groomers aren’t a replacement for vets, their hands-on approach means they often spot issues like skin infections, lumps, or parasites early on. This can be invaluable for early intervention.
A reputable dog groomer is more than just a luxury; they’re a valuable resource in your pet care toolkit. Regular grooming sessions can improve your dog’s comfort, reduce health risks, and even strengthen the bond between you and your pet, as they return home looking and feeling refreshed. When choosing a groomer, always check reviews, ask for recommendations, and ensure they have the appropriate certifications or training. Your dog deserves the best!
Conclusion
Navigating the realm of dog nail care can seem overwhelming, with its unique set of challenges and a myriad of techniques to master. But at the heart of it all lies a simple truth: our dogs rely on us for their comfort and well-being. Whether you’re meticulously mastering the art of nail trimming at home, seeking the expert touch of professional groomers, or consulting with trusted veterinary professionals for those intricate concerns, each step you take is a testament to the love and care you hold for your furry friend.
Remember, every dog is unique, and what works for one might not work for another. It’s about finding the rhythm that suits both you and your pet, ensuring that their tails keep wagging and their paws stay prancing happily. With patience, consistency, and the right knowledge at your disposal, nail care can transition from a daunting chore to a rewarding routine.
As you journey through the ups and downs of pet ownership, always cherish the moments of joy, learning, and growth. After all, our dogs offer us unconditional love, loyalty, and a lifetime of memories. Ensuring their comfort, one nail at a time, is just one of the many ways we can give back.
Thank you for joining us on this comprehensive dive into dog nail care. We hope this guide empowers you to make the best decisions for your beloved pet. Happy grooming! 🐾
Frequently Asked Questions (FAQs)
How often should I trim my dog’s nails?
While the exact frequency can vary based on your dog’s activity level and the surfaces they walk on, most dogs will benefit from a nail trim every 3-4 weeks. Monitor your dog’s nails regularly to determine the best schedule for them.
I accidentally cut the quick. What should I do next?
First, don’t panic. It can be distressing for both you and your dog, but it’s a common mistake. Apply styptic powder or cornstarch to the bleeding nail to help stop the bleeding. If it continues to bleed heavily or shows signs of infection, consult your veterinarian.
My dog absolutely refuses to let me trim their nails. What are my options?
You can try desensitizing your dog to the process with positive reinforcement or consider alternative tools like nail grinders. If your dog remains extremely anxious, it might be best to consult a professional groomer or veterinarian who can safely trim their nails for you.
Can I use human nail clippers on my dog?
While it’s technically possible for very small dogs or puppies, it’s not recommended. Dog nail clippers are designed specifically for the thickness and shape of dog nails. Using human nail clippers can cause splintering or uneven cuts.
How can I tell if my dog’s nails are the right length?
A good rule of thumb is that if your dog’s nails touch the ground when they walk, they’re too long. Ideally, dog nails should have a slight clearance from the floor. Additionally, long nails can cause discomfort or lead to posture issues, so regular checks are essential.
A note about your dog’s health
This article provides general education and does not replace an examination, diagnosis, or individualized advice from your veterinarian. Contact a veterinary professional if you are concerned about your dog’s symptoms.
Dr. Candy Akers earned her Doctor of Veterinary Medicine degree from Oklahoma State University in 2009 after completing undergraduate studies at the University of Delaware. Her experience includes companion-animal nutrition, chronic disease, allergies, autoimmune conditions, cold laser therapy, wildlife rehabilitation, and emergency wildlife response. She combines conventional veterinary knowledge with a whole-animal perspective to help pet parents understand their options and recognize when individualized veterinary care is needed.
If your dog’s nail is curled but still sits completely outside the skin, you can often shorten it at home with a small clipper or grinder. Work from the free tip, remove tiny amounts, and check the nail after every cut. If the nail has pierced the paw pad, is bleeding, or is surrounded by swelling or discharge, stop. That is an ingrown nail and needs professional treatment rather than a routine home trim. [1]
The shape can look alarming, but the first decision is simple: find out whether you still have a clear, visible space between nail and skin.
First, Check How Far the Nail Has Curled
Situation
What You May See
Best Next Step
Curved but free
Nail bends under, but the tip is visible and does not touch skin
A careful home trim is often reasonable
Touching or pressing
Nail rests against the pad, but has not broken the skin
Use extreme care only if the free tip is easy to reach; otherwise get professional help
Embedded or wounded
Nail has entered skin, or you see blood, swelling, discharge, odor, or marked pain
Do not pull or dig at it; arrange veterinary treatment
Dewclaws deserve a separate look. They sit higher on the leg and usually receive little wear from walking, so they can curl into the nearby skin before the other nails look long. [2]
What Causes Dog Nails to Curl?
Most curled nails are simply overgrown. The nail keeps growing while normal wear or trimming falls behind. This is common in senior dogs, dogs who exercise less, small dogs whose weight creates little pavement wear, and dogs whose long coat hides the nails.
The quick grows inside the nail. When a nail stays long for months, the quick often extends farther toward the tip. That means an overgrown nail cannot always be returned to a short length in one session without pain and bleeding.
Dewclaws are frequent troublemakers because they do not usually touch the ground. A nail may also curve sideways because of toe shape, an old injury, or uneven wear. Check the whole paw rather than assuming every curled nail has the same cause.
How to Cut a Curled Dog Nail at Home
Only use this method when the nail is outside the skin, the free tip is visible, and your dog allows safe handling.
Gather the Right Tools
Choose the tool that gives you the clearest access without squeezing skin between the blades.
guillotine-style clippers can work when the curled tip fits easily through the opening.
scissor-style clippers give you a clear side view and handle thicker nails.
grinder tools remove small amounts and smooth an awkward edge, but they create noise, vibration, dust, and heat.
Use bright light, a non-slip mat, and small Treats for calm cooperation.
The original article also recommends a second pair of Dog Nail Clippers and a second Styptic Powder option. Both remain useful choices when their size and grip fit your hand and your dog’s nail.
Trim a Curved but Free Nail Step by Step
Let your dog stand naturally, then lift the paw just enough to see the full curve. Look from the side and underneath.
Confirm that the tip is not buried in skin. If you cannot see where nail ends and skin begins, do not cut blindly.
Move long fur away from the nail. Keep hair clear of any grinder shaft.
Support the toe without twisting the leg. Place the clipper around only the free tip.
Remove a very small piece. A deeply curved nail may need several tiny cuts instead of one large cut.
Look at the fresh surface after every cut. Stop before the center becomes soft, shiny, darker, or more clearly defined.
If you use a grinder, touch the nail for only a second or two, then lift it away so the nail can cool.
Smooth any sharp edge and finish the session while your dog is still coping well.
One nail is a perfectly good first session. Forcing the whole paw usually makes the next trim harder.
How to Read the Quick in Light and Dark Nails
In a light nail, the quick often appears pink from the side. Leave a small margin in front of it. In a dark nail, remove thin slices and study the cut surface. The outer nail is dry and chalky. As you approach the quick, the center often becomes darker, smoother, or more distinct.
Nails are not identical. Check each one rather than using the same cut depth across the whole paw.
What if the Nail Is Touching or Pressing on the Pad?
Look for a genuine gap between the nail tip and skin. If the tip is visible and easy to reach, a small clipper may release the curve with one careful cut. Protect the pad with your finger only when you can see exactly where the blade will close.
If the nail is tightly pressed against the pad, the blade will not fit, or your dog pulls away in pain, stop. A groomer may be able to handle a nail that has not entered tissue. A nail that has damaged the pad belongs with a veterinary team.
Do not substitute wire cutters or tin snips. Their blades and leverage are not designed for controlled trimming near a dog’s skin.
What if the Nail Has Grown Into the Paw Pad?
Once a nail has entered the skin, you are dealing with a wound. Ingrown nails can cause pain, inflammation, limping, bleeding, and infection. [3] The curled tip may also be trapped below the skin surface, so cutting the visible loop does not guarantee that the embedded piece will come away safely.
Do not pull, twist, or dig out the tip. Do not pour harsh disinfectant into the wound. Keep your dog from licking the paw, limit dirty outdoor activity, and arrange veterinary care. A veterinarian can remove the nail from the tissue, clean the wound, provide pain relief, and treat infection when needed.
Seek prompt help if you see swelling, pus, odor, ongoing bleeding, a deep puncture, marked limping, or pain when the foot is touched.
How to Cut a Curled Dewclaw
A dewclaw is the higher nail on the inside of the leg. Some dogs also have rear or double dewclaws. Because these nails rarely touch the ground, normal walking may not shorten them at all.
For a dewclaw that remains outside the skin, hold the toe gently and expose the free tip. Use a small, sharp clipper to take off tiny pieces until the hook no longer threatens the skin. Do not pull a loose dewclaw away from the leg or bend it into a new angle. Some dewclaws are firmly attached and functional, while others are connected more loosely.
If the dewclaw has entered skin, treat it as an ingrown nail. Skip the home trim and have the wound handled professionally.
Which Tool Works Best for Curled Nails?
Tool
Best Use
Main Limitation
Small guillotine clipper
Thin or medium nail with an accessible tip
Opening may not fit a tight hook or thick nail
Scissor clipper
Thick nails and clear side access
Needs steady hand placement and sharp blades
Small cat-style clipper
Tight spaces around a thin curled tip
Too light for many thick adult-dog nails
Grinder
Gradual shortening and smoothing
Noise, heat, dust, hair, and skin-contact risk
Clipper guards can limit blade travel, but they cannot locate the quick. Treat them as a convenience, not a guarantee. A dull clipper can crush or split the nail, so replace or sharpen worn tools.
If you choose a grinder, secure long hair first and use brief touches. Check the nail temperature with your finger between passes. A grinder still reaches the quick if you keep removing nail.
How to Shorten a Long Quick Gradually
An overgrown nail often needs a series of small trims. Remove a little, then repeat after roughly a week as the quick begins to recede. Dogs Trust recommends gradual shortening over several weeks when the quick has grown long. [1]
Aim first for comfort and better paw placement. Trying to create a very short nail in one sitting can cause bleeding and teach your dog that nail care hurts.
Walking on safe, firm ground supports natural wear for some dogs, but it will not reliably shorten dewclaws or every toe. It also should not replace regular checks.
Make Nail Care Easier Next Time
Check every nail about every two weeks until you understand your dog’s growth pattern. Lift the hair, count the toes, and find every dewclaw. Senior dogs deserve extra attention because reduced activity means less natural wear.
Practice paw handling when no trim is planned. Touch one toe, reward, and stop. On another day, bring out the tool without using it. This small-step approach helps your dog learn that paw care is predictable and safe. [2]
Use a non-slip mat and let your dog change position when needed. Pulling away, freezing, lip licking, growling, or snapping means the session has become too difficult. Pause and make the next attempt easier.
Frequently Asked Questions
Can I Cut a Curled Dog Nail at Home?
Yes, when the nail is fully outside the skin, the tip is visible, and your dog allows safe handling. Take small pieces and inspect after each cut. If the nail is embedded, bleeding, or very painful, it is no longer a routine home trim.
What Should I Do if I Cut the Quick?
Stay calm and press styptic powder against the end of the nail. Keep steady pressure until bleeding stops. Limit activity for the rest of the day. Seek help if the bleeding continues despite firm pressure or the nail is badly split.
Can I Use Human Nail Clippers?
Human clippers may work on a tiny puppy nail, but they are usually too flat and light for an adult dog’s curved nail. A small dog or cat clipper gives better control in a tight space, while a sturdy scissor clipper handles thick nails.
Why Do Dewclaws Curl So Easily?
Dewclaws sit higher on the leg and rarely contact the ground, so exercise does not wear them down. They can grow into a hook and touch or penetrate nearby skin if they are missed during routine checks.
How Often Should I Check My Dog’s Nails?
Check them about every two weeks. Some dogs need trimming every few weeks, while others get more natural wear. Dewclaws may follow a different schedule from the weight-bearing nails.
Dr. Candy Akers earned her Doctor of Veterinary Medicine degree from Oklahoma State University in 2009 after completing undergraduate studies at the University of Delaware. Her experience includes companion-animal nutrition, chronic disease, allergies, autoimmune conditions, cold laser therapy, wildlife rehabilitation, and emergency wildlife response. She combines conventional veterinary knowledge with a whole-animal perspective to help pet parents understand their options and recognize when individualized veterinary care is needed.
Trimming puppy nails is easiest when you make the first sessions tiny, calm, and rewarding. Start by touching one paw, showing the tool, and giving a treat. When your puppy stays relaxed, trim only the sharp tip of one nail. You do not have to finish every paw in one sitting. Good lighting, a non-slip surface, small dog nail clippers or a quiet grinder, and styptic powder nearby will help you work safely. Stop if your puppy struggles, freezes, growls, or repeatedly pulls away.
The real goal is not a perfect first trim. It is teaching your puppy that paw care is predictable and safe. That lesson will make nail care easier for years.
When Should You Start Trimming Puppy Nails?
Begin gentle paw handling as soon as your puppy is settled into your home. You can introduce the sight and sound of nail tools before the nails actually need trimming. There is no single age or calendar date that fits every puppy. Nail growth, exercise, body weight, and walking surfaces all affect how quickly nails wear.
Check the paws every one to two weeks. A nail may need attention if the pointed tip is beginning to curve, snag fabric, or push the toe out of its normal position. Clicking on a hard floor is a useful clue, but it is not a perfect test. Some properly maintained nails still make a little sound. Look at how the puppy stands and walks, not just what you hear. Dogs Trust gives the same practical advice: judge the nail while the dog is standing and consider how naturally worn the tip looks. [1]
Do not forget the dewclaws. They sit higher on the leg and usually do not touch the ground, so exercise will not wear them down.
What You Need Before You Begin
Set up before you bring your puppy into the trimming area. You will want:
Scissor-style dog nail clippers are usually easier to position on small nails than a large guillotine tool. A guillotine-style clipper can work, but the blade must be sharp and the nail must be placed correctly. Human nail clippers may be used only for the very thin tips of tiny puppy nails when they fit cleanly around the nail. Once the nail is thicker or curved, switch to a tool made for dogs. A human clipper that pinches, twists, or crushes the nail is not the right choice.
If clipping makes you nervous, a pet nail grinder may feel more controlled because it removes a little nail at a time. It still needs a slow introduction. Keep fur away from the rotating head and use brief touches so the nail does not heat up.
Teach Your Puppy to Accept Paw Handling First
Paw care goes much more smoothly when the puppy has learned each small part before a nail is cut. Dogs Trust recommends pairing paw handling and the tools with treats, moving at the dog’s pace, and backing up if the dog becomes worried. [1]
Try this progression over several short sessions:
Touch the shoulder, slide your hand down the leg, briefly touch a paw, and reward.
Hold the paw for one second, release, and reward.
Gently press one toe so the nail is visible, then reward.
Place the clippers on the floor and scatter treats around them.
Pick up the clippers, touch the handle to the paw, and reward.
Make the clipping sound away from the paw. Snipping a piece of dry pasta can help.
Touch the closed clipper or switched-off grinder to one nail.
Trim or grind only the thinnest tip of one nail, then finish the session.
If your puppy is happy to continue, you may do another nail. If not, stop on that small success. One comfortable nail is far more valuable than four paws completed through a struggle.
How to Trim Puppy Nails Step by Step
1. Choose a Stable, Comfortable Position
Place your puppy on a non-slip mat on the floor, in your lap, or beside you. Keep the body supported without pinning the puppy down. A helper can offer treats and gently steady the body while you focus on one paw.
2. Hold One Toe Without Squeezing
Support the paw in your non-dominant hand. Use your fingers to isolate one toe and move fur out of the way. Keep the leg in a natural position. Twisting the paw outward can make a puppy resist even when the nail itself is not painful.
3. Find the Quick
The quick is the living center of the nail that contains blood vessels and nerves. On a clear nail, it usually looks pink. Leave a small margin in front of it.
On a black nail, the quick is hidden. Remove only a very thin slice at a time. As you approach the center, the freshly cut surface changes from dry and pale to a darker, smoother center. Stop before that center becomes a distinct dark dot. If you are unsure, stop early and file the tip or ask a veterinary professional or experienced groomer to demonstrate.
4. Trim the Sharp Tip
Use a sharp tool and make a small, clean cut. Work from the end of the nail toward the paw in tiny increments. The Washington State University Veterinary Teaching Hospital demonstrates positioning the clipper perpendicular to the nail rather than crushing across it at an awkward angle. [2]
Your first goal is simply to remove the hook-like point. Do not chase the shortest possible nail. Each nail can have a slightly different quick length, so judge them one at a time.
5. Reward and Check Your Puppy
Give a treat immediately after the cut. Watch your puppy’s body language before moving on. A loose body, soft face, and willingness to take food mean the session can continue. Repeated paw pulling, tucked posture, panting that is not caused by heat, a hard stare, growling, or refusal of a favorite treat means it is time to pause.
6. Smooth the Edge if Needed
Use an emery board or a grinder for a second or two to round a rough edge. With a grinder, touch and lift rather than holding the tool against the nail. Short contacts help prevent heat buildup.
How to Use a Nail Grinder on a Puppy
A grinder can leave a smooth finish, but many puppies need time to accept the noise and vibration. Let your puppy investigate the switched-off tool first. Then turn it on across the room, reward calm behavior, and gradually move closer over several sessions.
When your puppy is comfortable, support one toe and touch the grinder to the nail tip for about a second. Lift it away, reward, and check for heat. Keep long fur away from the rotating head. Work around the edge of the nail rather than pressing straight into one spot.
The Fear Free approach emphasizes gradual exposure and preserving the pet’s sense of safety. [3] If the grinder worries your puppy more than clippers, it is not automatically the gentler choice. Use the tool your puppy can accept calmly.
What to Do if You Cut the Quick
A nicked quick can bleed more than you expect from such a tiny nail. Stay calm and keep your puppy still.
Press clean gauze against the nail.
Apply styptic powder to the bleeding tip, following the product directions.
Hold steady pressure without repeatedly lifting the gauze to check.
Keep the paw clean and avoid running on rough surfaces until bleeding has stopped.
Another styptic powder option can be kept in a first-aid kit so it is easy to reach before you start. Dogs Trust recommends having a styptic pencil or powder available for nail bleeding. [1]
Contact a veterinarian promptly if firm pressure and styptic powder do not stop the bleeding, the nail is split or torn near the base, your puppy seems very painful, or the toe becomes swollen, warm, foul-smelling, or produces discharge.
Do not apply household glue to the nail.
How Often Should Puppy Nails Be Trimmed?
Check the nails every couple of weeks, then trim only when needed. Some puppies need a small trim every one to three weeks. Others wear their nails naturally and need less frequent clipping. Dewclaws often need more attention because they do not contact the ground.
If nails are already long, do not remove all the extra length in one session. The quick may have extended with the nail. Take off a small amount, wait about a week, and repeat. Gradual shortening gives the quick time to recede and is safer than trying to reach an ideal length at once. [1]
When to Ask a Groomer or Veterinarian for Help
Home trimming is appropriate for a calm puppy with healthy nails when you can clearly control the tool. Professional help is the kinder choice when:
A nail curls toward or into the paw pad
The nail is cracked, torn, loose, or bleeding near its base
The toe is red, swollen, painful, or has discharge or odor
Your puppy limps or will not bear weight
Your puppy panics, snaps, or cannot be safely held
You cannot identify a safe amount to remove from very dark or overgrown nails
A veterinary team should examine an embedded nail or a painful, infected-looking toe. Sedation or pain relief may be needed for safe treatment. Trying to force a difficult trim at home can worsen both the injury and the puppy’s fear.
Common Puppy Nail Trimming Mistakes
Trying to Finish Every Nail
A full set is not required. Stop while your puppy is still successful, even if that means one nail today and another tomorrow.
Relying Only on the Clicking Sound
Clicking can alert you to check the paws, but it does not prove the nails are too long. Look at nail shape, toe position, snagging, and comfort while standing.
Trusting a Safety Guard Completely
A clipper guard cannot detect the quick. Nail shape and quick length vary. Treat the guard as a positioning aid, not a guarantee.
Holding Too Tightly
Firm restraint often creates more struggling. Support the body and paw, keep the session short, and pause when your puppy asks for a break.
Grinding Too Long in One Place
Friction creates heat. Use brief touches, move among nails, and check the temperature often.
Final Thoughts
The easiest puppy nail trim is the one built from small, calm steps. Prepare your tools, teach paw handling, remove only the sharp tip, and reward generously. A short session that protects your puppy’s trust is a success.
Check the nails and dewclaws every couple of weeks. With steady practice, most puppies learn that nail care is simply another normal part of being handled and cared for.
Frequently Asked Questions
Can I Cut My 8-Week-Old Puppy’s Nails?
Yes, you can trim an 8-week-old puppy’s nails if they need it. Use a tool that fits the tiny nail, remove only the sharp tip, and keep the session brief. Paw handling and one comfortable nail may be enough for the first session.
Can I Use Human Nail Clippers on a Puppy?
Human nail clippers may work on the very thin tips of tiny puppy nails if they fit cleanly and do not pinch. They are not a good choice for thicker or curved nails. Small dog nail clippers or a pet grinder give better control as the puppy grows.
How Do I Trim Black Puppy Nails Without Hitting the Quick?
Take off very thin slices and inspect the cut surface after each one. Stop before a dark center becomes clearly visible. If you cannot judge the safe stopping point, remove only the sharp hook or ask a groomer or veterinary professional to show you.
What if My Puppy Will Not Let Me Trim the Nails?
Return to short handling exercises without cutting. Pair paw touches and the sight or sound of the tool with treats. Stop before your puppy panics. If fear is intense or handling is unsafe, ask a Fear Free professional, groomer, or veterinary team for help.
How Short Should Puppy Nails Be?
The nails should not force the toes out of position or curl toward the pads. Many healthy nails sit just above the ground, though some lightly touch and are worn flat. The correct length depends on the puppy’s anatomy and quick length, so avoid using a single floor-clearance rule for every dog.
Dr. Candy Akers earned her Doctor of Veterinary Medicine degree from Oklahoma State University in 2009 after completing undergraduate studies at the University of Delaware. Her experience includes companion-animal nutrition, chronic disease, allergies, autoimmune conditions, cold laser therapy, wildlife rehabilitation, and emergency wildlife response. She combines conventional veterinary knowledge with a whole-animal perspective to help pet parents understand their options and recognize when individualized veterinary care is needed.
A healthy dog nail does not have one universal length. The best length is the shortest your dog can comfortably maintain without cutting into the quick. When your dog stands naturally, the nails should not carry weight, push the toes upward, splay the toes, or interfere with a comfortable stance and gait.
Light clicking can be a useful clue that the nails need attention, but it is not the whole test. Some dogs make occasional contact because of their paw shape, nail angle, or the surface underfoot. Look at the paws from the side and front, then watch your dog walk. Function matters more than a single measurement.
The Quick Answer: A Healthy Dog Nail Length Checklist
Use this checklist while your dog is relaxed and standing on a level, non-slip surface:
Floor check: The paw pads, not the nails, should carry your dog’s weight. A nail that presses firmly into the floor or lifts a toe is too long.
Side view: The nail tip should follow the natural curve of the toe without extending so far that it changes how the paw rests.
Front view: The toes should look relaxed rather than lifted, twisted, or spread by nail pressure.
Walking check: Watch for normal, confident steps. Repeated slipping, shortened steps, obvious discomfort, or a new limp deserves attention.
Nail shape: Look for excessive hooks, splits, snags, or a nail that is curling toward the pad.
Dewclaws: Check them separately. Because they sit above the floor, they do not receive the same natural wear.
Why Dog Nail Length Varies
If you have searched for a dog nail length chart, you have probably seen precise-looking numbers. Those numbers may be convenient, but they cannot account for every paw.
Paw Shape, Toe Angle, and Nail Angle
Dogs have different toe lengths, pad depth, nail curves, and nail angles. A short, upright nail on one dog may sit differently from a longer, flatter nail on another. Breed alone does not determine the right length. The individual paw does.
That is why I prefer a functional check. Ask whether the pads carry the weight, whether the toes rest naturally, and whether your dog moves comfortably. A tiny gap above the floor is common, but visible clearance is not the only sign of a good trim.
Activity, Flooring, Age, and Health
Walking on firm outdoor surfaces may wear some nails, while grass, carpet, and soft ground usually create less wear. Even active dogs can have nails that grow unevenly. Front and rear nails may not wear at the same rate, and dewclaws need their own schedule.
Older dogs and dogs with mobility changes may wear their nails differently because they shift weight or scuff a paw. If your dog’s nail wear suddenly becomes uneven, or you notice new dragging or limping, ask your veterinarian to look for the reason instead of trimming more aggressively.
How to Tell If Your Dog’s Nails Are Too Long
Long nails usually reveal themselves through a pattern of clues rather than one perfect test. Look for:
Nails that press into the floor while your dog is standing.
Toes that lift, twist, or spread under nail pressure.
A pronounced hook or a nail curling toward the paw pad.
Frequent snagging on blankets, rugs, or fabric.
A new change in stride, traction, or willingness to walk.
Tenderness when the paw or nail is handled.
A dewclaw that is nearly touching or entering the skin.
Clicking on a hard floor is worth checking, especially if it is louder or more frequent than usual. Still, do not judge by sound alone. A dog with healthy, angled nails may make light intermittent contact, while a dog standing on carpet may make no sound even when the nails are overgrown.
Long nails can change paw placement and reduce traction. They may also be more likely to snag or split. Shortening them to a comfortable functional length can make walking and standing easier, but dramatic promises about instantly correcting posture are not warranted.
How Short Is Too Short?
Inside each nail is the quick, which contains blood vessels and nerves. Cutting into it hurts and causes bleeding. The safe stopping point depends on the quick’s position, not on a universal nail length.
Light Nails
On a clear or pale nail, the quick often looks pink. Leave a small buffer in front of it. VCA Animal Hospitals advises staying roughly 2 to 3 millimeters from a visible quick and taking controlled cuts rather than one large cut (VCA Animal Hospitals, n.d.). Good lighting helps, but do not force your dog to hold still while you search for a perfect view.
Dark Nails
On a dark nail, the quick cannot be seen from the outside. Trim one tiny sliver at a time. The cut surface often changes as you approach living tissue. Depending on the nail, you may notice a softer center, a darker central area, or a small central dot. These are useful cues, not guarantees.
If you are unsure, stop. A slightly longer nail is safer than a painful guess. Washington State University Veterinary Teaching Hospital also recommends controlled cuts from below and attention to the quick rather than relying on length alone (Washington State University Veterinary Teaching Hospital, 2026).
No clipper sensor can guarantee that you will miss the quick. Your view, the size of each cut, your dog’s movement, and your comfort with the tool matter more.
How to Shorten Overgrown Nails Safely
When nails have been long for a while, the quick may extend farther toward the tip. Do not try to reach the final length in one session. That approach can cause pain and repeated bleeding.
Instead, remove a small amount or use a grinder for a brief session, then repeat at a comfortable interval. As the nail is maintained shorter, the quick may gradually recede. Progress can take several sessions.
Check every nail, including dewclaws, before you start.
Trim or grind a very small amount.
Stop before you are uncertain about the quick.
Reward your dog and end the session while your dog is still coping well.
Recheck in about a week and adjust the timing to the rate of growth.
If nails are severely curved, embedded, painful, or difficult to assess, let a veterinarian or experienced groomer plan the first shortening sessions.
Clippers or Grinder?
Both can work well. The best choice is the one that lets you make small, controlled reductions without frightening your dog.
Clippers are fast and quiet. Sharp, correctly sized dog nail clippers make a cleaner cut than dull tools. A guillotine or scissor-style clipper may suit different nail shapes, but neither style is automatically safer.
Grinders can smooth edges and make it easier to remove tiny amounts. They also create sound, vibration, and heat. Keep sessions brief, touch the grinder to the nail for only a moment at a time, and keep long fur away from the moving tool.
Some dogs prefer one method. Others do best with a clipper for the main length and a grinder for the edge. There is no need to force a favorite tool if your dog is calmer with another safe option.
How Often to Trim Dog Nails
Check nails every week or two, even if you do not trim each time. Many dogs settle into a maintenance interval somewhere between one and four weeks, but growth and wear vary.
Trim sooner when you see floor pressure, toe changes, a growing hook, or repeated snagging. Dogs whose nails grow quickly may need small, frequent sessions. Dogs that wear nails naturally may need less frequent work, but their dewclaws still need checks.
A schedule is working when you can maintain a comfortable length with small cuts, rather than waiting until the nails are clearly overgrown. Dogs Trust also recommends frequent checks and special attention to dewclaws because they do not contact the ground (Dogs Trust, n.d.).
Helping an Anxious Dog Cooperate
Nail care is easier when the dog feels safe enough to participate. Start below your dog’s fear threshold:
Touch a shoulder, move down the leg, briefly hold a paw, and reward.
Show the clipper or grinder without using it.
Pair the sound of a grinder with food at a comfortable distance.
Trim one nail, reward, and stop if that is today’s limit.
Use a non-slip mat so your dog feels steady.
Do not pin down a panicked dog or push through growling, snapping, or frantic struggling. Fear Free guidance supports short, rewarded steps that build comfort over time (Fear Free Happy Homes, n.d.). A groomer or veterinary team can help with handling plans when fear is intense.
What to Do If You Cut the Quick
Even careful people sometimes nick the quick. Stay calm. Apply styptic powder with steady pressure. If you do not have styptic powder, cornstarch or flour may help a minor bleed while you maintain pressure.
Keep your dog quiet and prevent licking or running until the bleeding has stopped. If steady pressure does not control it within about 10 to 15 minutes, or if the cut is large, painful, or keeps reopening, contact a veterinarian.
When to Call a Veterinarian or Groomer
Get professional help for:
A dewclaw or nail growing into the skin.
A split extending toward the nail base.
Swelling, heat, discharge, a bad odor, or marked tenderness.
Persistent bleeding after steady pressure and styptic material.
New limping, paw dragging, or obvious pain.
Nails so dark, thick, or overgrown that you cannot identify a safe plan.
Fear or aggression that makes home trimming unsafe.
A groomer can be a good choice for routine maintenance and tool handling. Pain, infection, an embedded nail, a deep split, abnormal wear, or a sudden gait change belongs with a veterinarian.
Frequently Asked Questions
Should Dog Nails Touch the Floor When Standing?
The pads should carry the dog’s weight. Nails should not press firmly into the floor, lift the toes, or change a comfortable stance. A small gap is common, but some healthy nails may make light contact because of paw shape or nail angle.
Does Clicking Always Mean Dog Nails Are Too Long?
No. Frequent or newly louder clicking is a useful reason to inspect the nails, but sound depends on flooring, gait, paw shape, and nail angle. Combine the sound check with side, front, and walking views.
How Do I Shorten a Long Quick?
Use tiny trims or brief grinding sessions at regular intervals. Do not force the nail to an ideal length in one day. As you maintain a shorter nail, the quick may gradually recede.
How Often Should I Trim My Dog’s Nails?
Check every week or two. Many dogs need trimming every one to four weeks, but the right interval is the one that prevents weight-bearing contact, toe changes, hooks, and snagging. Check dewclaws separately.
What Should I Do If I Cut the Quick?
Apply styptic powder and steady pressure. Cornstarch or flour can be a temporary fallback for a minor nick. Contact a veterinarian if bleeding continues after about 10 to 15 minutes of pressure or the injury appears deep or painful.
To hold a small dog for a nail trim, support the chest and body close to you while keeping the head pointed away from the paw you are trimming. Lift the paw only as far as the leg bends naturally, hold one toe gently, and release the hold if your dog starts to struggle.
The goal is not to make your dog unable to move. It is to create enough steady support that neither of you makes a sudden motion when the clipper or grinder touches the nail. For many little dogs, a lap hold, a standing lean, or a relaxed side-lying position is all you need.
Choose the Position Before You Pick Up the Clippers
Start with the least amount of holding that works for your dog.
A calm dog who likes being close to you may do well in a supported lap or football hold.
A dog who prefers standing may feel better leaning gently against your body on a non-slip mat.
A dog who already relaxes on one side may accept side-lying.
A wiggly dog may be easier with a helper, or with one nail trimmed at a time.
A dog who is painful, panicked, or likely to bite needs a different plan, not a tighter grip.
That last point matters. Sudden resistance can be fear, but it can also be pain from an injured nail, sore toe, arthritis, back discomfort, or a previous bad experience. If your normally cooperative dog suddenly cannot tolerate paw handling, pause and look for the reason.
Set Up the Space First
A good position will not feel secure if the dog’s feet are sliding. Work on the floor when possible, or use a steady table only if you can prevent a fall. A non-slip mat gives small feet traction and helps the dog feel more balanced.
Set out the tool, styptic powder, good lighting, and a few tiny treats before you begin. If a calming spray is already part of your dog’s familiar routine, you can use it, but do not expect a new scent to replace gradual training.
Let your dog investigate the clippers or grinder. Touch a shoulder, slide your hand down the leg, briefly hold the paw, reward, and let go. Dogs Trust recommends building paw handling gradually and stopping if the dog becomes worried [1]. This preparation may take a few minutes for an experienced dog or several short sessions for a beginner.
Three Gentle Ways to Hold a Small Dog
1. The Supported Lap or Football Hold
Sit on the floor or in a stable chair. Place your dog beside you or across your lap with the head facing away from the working paw. Wrap one forearm around the chest and body like a loose seat belt. Your arm should support, not squeeze.
Keep the dog close to your side so your body provides stability. Use that same-side hand to support the leg if needed, while your other hand trims. With a very tiny dog, it may be easier to cradle the body along your forearm and bring one paw forward.
Check that the neck is free, breathing is easy, and the spine is not twisted. If your dog keeps trying to turn, pause rather than tightening your arm across the throat or chest.
2. The Standing or Sitting Lean
This is often the simplest position for a dog who dislikes being picked up. Place your dog on a non-slip surface and stand or kneel beside or slightly behind the body. Let the dog lean lightly against your legs or torso.
Rest your forearm gently along the shoulder or side of the chest to reduce sideways movement. Pick up one paw in the direction it naturally folds. For a front paw, bend at the elbow and wrist. For a rear paw, let the knee and ankle flex normally. Never pull the leg straight backward just to improve your view.
Some dogs prefer to keep three feet on the ground. If yours does, this position may feel much safer than being held in the air.
3. Cooperative Side-Lying
Use side-lying only if your dog already relaxes in that position. Ask the dog to lie on one side with the feet facing away from you. Sit behind the back and use a forearm along the body for light stabilization. Keep your weight off the dog.
Reach for the upper paws first. If you need the lower paws, gently roll the body only as far as the dog remains comfortable, or ask the dog to change sides. Side-lying should look soft and voluntary. A dog who freezes, braces, or scrambles to get up is telling you this is not the right position today.
Dogs Trust describes relaxed handling as a dog choosing to remain, without tension in the face or body [2]. That is a much better goal than simply getting through all four paws.
How to Do a Two-Person Nail Trim
A helper can make the trim calmer, but only when both people have clear jobs.
One person supports the dog’s chest and body, keeps the dog balanced, and delivers small treats. The second person handles one paw and uses the clipper or grinder. The helper should not pull the head one way while the trimmer pulls a leg the other way.
Agree on a pause word before starting. When either person says it, everyone releases pressure and gives the dog a break. This simple teamwork prevents the hold from slowly becoming tighter as the dog becomes more uncomfortable.
For dogs who like food, a lick mat can help, but it should not distract you from the dog’s body language. A dog can eat and still feel worried.
How to Hold the Paw Without Straining the Leg
Follow the leg’s natural bend. Support close to the joint rather than pulling from the end of the paw. Once the paw is comfortable, place your thumb on the pad of one toe and your forefinger above the toe. Use gentle pressure to expose the nail.
Hold the toe steadily enough that a small twitch does not move the nail into the blade. Do not squeeze hard or spread the toes farther than they naturally move. If your dog repeatedly jerks the paw away, stop and return to handling practice without trimming.
Watch for the Quiet Signs That Mean Stop
Growling and snapping are clear messages, but dogs usually give quieter signals first. Watch for:
a stiff body or tightly closed mouth
turning the head away repeatedly
lip licking, yawning, or sudden panting
ears pinned back or whites of the eyes showing
freezing instead of actively cooperating
repeated paw pulling or attempts to leave
growling, air snapping, or trying to bite
A wagging tail does not automatically mean a dog is relaxed. Look at the whole body. If tension is building, put the paw down, release the hold, and take a break. Do not punish a growl. It is useful information that the dog needs more space.
If Your Small Dog Will Not Stay Still
More restraint is rarely the best long-term answer. Build the skill in pieces.
Start when you are not planning to trim. Touch the shoulder, reward, and stop. Over several sessions, work down the leg. Briefly hold the paw, then a toe. Introduce the sight and sound of the tool separately. Dogs Trust recommends short, frequent handling practice in a calm place and rewarding each small step [2].
When your dog is ready, trim one nail and celebrate. One nail today is better than a wrestling match that makes next week harder. Fear Free guidance also supports doing only a few nails or one paw before taking a break [3].
For front nails, a scratch board can reduce how much clipping is needed. It will not usually manage every nail or the dewclaws, but it can be a helpful part of the routine.
If your dog panics, has a bite history, or cannot tolerate even gentle paw handling, a groomer, trainer skilled in cooperative care, or veterinary team can help you make a safer plan. A sudden behavior change also deserves a pain check.
Tools That Make the Position Easier
Choose a tool that fits the nail and feels comfortable in your hand.
Scissor clippers give a clear view and work well for many small-dog nails.
Guillotine clippers can fit thin to medium nails, but some owners find it harder to see the cutting line.
A grinder removes nail gradually and smooths the edge. Use short touches so heat does not build, and keep long hair away from the rotating bit.
A non-slip mat improves footing whether the dog stands, sits, or lies down.
A familiar calming spray may be part of the setup, but calm handling and training still do the real work.
Grooming hammocks appear often in search results. A properly fitted hammock may help a calm, very small dog who already tolerates suspension, but it is not a safe way to overpower panic. Use a solid support, stay beside the dog, keep the face and airway clear, and stop immediately if the dog thrashes, twists, or struggles to breathe. Never leave a dog hanging unattended.
A Quick Nail-Trimming Safety Review
The quick inside each nail contains nerves and blood vessels. It is easy to see in many clear nails and difficult to see in black nails. Take tiny slices from dark nails rather than one large cut. The goal is a controlled trim, not the shortest possible nail in one session.
If the nails are very long, the quick may have extended farther toward the tip. Shorten them gradually over several sessions. Keep styptic powder within reach in case you nick the quick. Apply firm pressure with the powder and give your dog a calm break.
With a grinder, touch the nail for only a second or two at a time, then lift away and check the temperature. Healthy nail care should not require forcing a dog through heat, pain, or panic.
After the Trim
Put the paw down before releasing your body support. Let your dog step away, shake off, drink water, or enjoy a treat. Check each nail for a rough edge or bleeding, then end the session while things are still calm.
Small dogs may not wear their nails down much during walks because they put less weight on each foot. Check the nails and dewclaws every couple of weeks, then trim based on what you see rather than a rigid calendar. Regular, small sessions are usually easier than waiting until the nails are long.
Frequently Asked Questions
What Is the Best Device to Hold a Small Dog During a Nail Trim?
For most small dogs, the best “device” is a non-slip mat plus gentle body support from a person the dog trusts. A helper can be more useful than a complicated restraint. A grooming hammock is an optional tool for a calm dog when it fits correctly and is used under constant supervision.
What Should I Do if My Dog Will Not Let Me Cut the Nails?
Stop trying to finish the entire trim. Practice paw touches, brief holds, and tool sounds separately, rewarding each calm step. Start with one nail when your dog is ready. If the dog panics, bites, or suddenly becomes sensitive, get help and check for pain.
Can I Use a Grooming Hammock for a Nervous Dog?
Do not use a hammock to force a panicked dog through a trim. It may be suitable for a small dog who remains calm in a properly fitted device, but the support must be secure and the dog must be watched every second.
How Do Groomers Trim the Nails of Dogs That Struggle?
Good groomers match the handling plan to the dog. They may use a second handler, short sessions, cooperative-care training, a different position, or a referral for veterinary support when fear, pain, or bite risk makes an ordinary trim unsafe.
Can I Use Human Nail Clippers on a Very Small Dog?
Human clippers may fit the thinnest puppy nails, but dog nail clippers give better control for most small dogs because canine nails are curved and thicker. Use a sharp tool that fits the nail and lets you see the cutting line.
Dr. Candy Akers earned her Doctor of Veterinary Medicine degree from Oklahoma State University in 2009 after completing undergraduate studies at the University of Delaware. Her experience includes companion-animal nutrition, chronic disease, allergies, autoimmune conditions, cold laser therapy, wildlife rehabilitation, and emergency wildlife response. She combines conventional veterinary knowledge with a whole-animal perspective to help pet parents understand their options and recognize when individualized veterinary care is needed.
A dog may limp after a nail trim because the quick was nicked, a nail cracked or split, the paw pad was irritated, or the leg was strained while the dog shifted or pulled away. Sometimes the timing is a coincidence and the trim brings an older joint or back problem to your attention.
Start with a calm paw check. Look for blood, a ragged nail, swelling, a pad cut, or something caught between the toes. If your dog cannot put weight on the leg, seems very painful, has a dangling nail or obvious deformity, or the bleeding will not stop, contact a veterinarian promptly.
What to Check First
Do not force the sore leg into position. Sit your dog on a nonslip surface, use good lighting, and compare the affected paw with the matching paw on the other side. A frightened dog may bite when something hurts, even if that dog is normally gentle.
Look at Every Nail
Check the trimmed edge of each nail, including the dewclaw. You are looking for:
Fresh blood or a dark, moist spot at the center of the nail
A crack that runs up the nail
A loose flap or a nail that moves at the base
Redness, swelling, discharge, or an unusual odor
A nail that is suddenly shorter than the others
The quick contains the nail’s blood supply and sensitive tissue. A small nick can sting and bleed more than owners expect. A split nail can be much more painful because movement tugs on the attached tissue. Nail injuries can also happen without obvious bleeding. [1]
Check the Pads and Between the Toes
A nail trim may not be the true cause of the limp. Look for a pad nick, a small splinter, a grass awn, sticky debris, or a sore area between the toes. You may remove an object only if it is sitting loosely on the surface and comes away without digging. Stop if your dog resists, if the object is embedded, or if the area starts to bleed.
Watch How Your Dog Uses the Leg
Notice whether your dog touches the toes down, bears some weight, or holds the leg completely off the floor. Also watch for knuckling, dragging, trembling, a hunched back, or trouble rising. Limping can come from the paw, but it can also come from muscles, tendons, joints, bones, the spine, or nerves. [2]
A short video of your dog walking toward you, away from you, and from the side can help your veterinarian. Do not make your dog walk repeatedly just to capture a better clip.
Common Reasons a Dog Limps After Nail Trimming
The Quick Was Trimmed
This is the most common nail-specific reason. You may see bleeding right away, a small red or dark center at the cut edge, repeated licking, or hesitation when the nail touches the floor.
If the bleeding has stopped and your dog can bear weight, the area may simply be tender. Protect it from dirt and rough play while it settles. Ongoing bleeding, marked pain, swelling, or worsening lameness deserves veterinary attention.
The Nail Cracked or Split
A clipper can crush a brittle nail, or a tiny crack may extend after the trim. A split can be easy to miss when it is hidden by fur or dark pigment. Do not pull, twist, or cut away a piece that remains attached near the base. That can be painful and may cause heavy bleeding.
A loose or torn nail often needs veterinary trimming, pain control, and a close check of the nail bed. If the nail is dangling or the crack reaches toward the toe, arrange same-day care.
Very Long Nails Were Shortened
Dogs with overgrown nails may change how they place their feet. Shortening those nails is helpful, but a large change in one session can make the feet feel unfamiliar. Mild tenderness or an awkward gait can also reveal a joint or back problem that had been hidden by the dog’s old posture.
Do not keep trimming shorter in an attempt to correct the gait immediately. Give your dog secure footing and quiet activity. Long nails are safest to shorten in small, regular sessions so the quick can gradually recede.
The Paw Pad or Skin Was Irritated
Clippers, grinders, or grooming tools can nick a pad or rub the skin. A grinder held in one place too long may create heat and tenderness. Shampoo, cleaning products, or moisture trapped between the toes can also irritate the skin, although these are less likely when the only service was a nail trim.
Rinse visible surface debris with lukewarm water or sterile saline, then pat the paw dry. Do not apply essential oils, alcohol, hydrogen peroxide, or a human numbing cream to an open nail or pad injury.
The Leg Was Strained During Handling
Some dogs brace, twist, kick, or pull a leg away during nail care. That movement can strain a muscle or aggravate a sore joint, especially in senior dogs, dogs with arthritis, and dogs with neck or back pain. The sore spot may be higher up the leg rather than in the paw.
A handling strain should still improve, not worsen, with rest. Do not stretch or massage a newly painful leg before the cause is known. If the limp is pronounced, persists, or comes with swelling or pain when the limb is touched, schedule an examination.
An Unrelated Problem Became Noticeable
The timing may be coincidental. Arthritis, a sprain, a cruciate injury, a toe fracture, a back problem, or another condition can first become obvious after a grooming appointment. This is more likely when every nail looks normal, the dog is painful above the paw, or the limp returns after rest or activity.
A nail trim does not rule out a more important orthopedic or neurologic problem. Treat the limp as real information, not as a behavior problem.
Safe Home Care for a Mild Nail-Trim Injury
Home care is reasonable only when the injury appears minor, bleeding is controlled, your dog can bear weight, and there are no emergency signs.
Control Minor Bleeding
Apply firm, steady pressure with clean gauze or a clean cloth. Avoid lifting it every few seconds to check. If available, press styptic powder onto the nail tip. Cornstarch can be used as a temporary backup for a small quick nick. MedVet advises seeking veterinary help if bleeding continues after sustained pressure and a clotting aid. [1]
Keep the Paw Clean and Dry
Once bleeding has stopped, gently rinse away visible dirt with lukewarm water or sterile saline and pat the paw dry. Do not scrub the quick. Avoid wet grass, mud, and rough ground for the rest of the day.
Do not place a tight home bandage around the paw. Bandages can trap moisture, slip, or interfere with circulation. If the injury needs protection beyond a brief clean covering for transport, a veterinary team should show you how to bandage it safely.
Prevent Licking
A few licks are understandable, but constant licking can restart bleeding and irritate the tissue. Use a properly fitted recovery collar if needed. A sock is not a good unsupervised cover because it holds moisture and can become tight.
Use Quiet, Controlled Activity
For a mild limp, keep activity simple for the next day. Use short leash walks for bathroom breaks, block running and jumping, and offer a nonslip resting area. Let your dog choose a comfortable position.
Do not give ibuprofen, naproxen, acetaminophen, aspirin, or any other human pain medicine unless your veterinarian has specifically prescribed it for this dog. Several human pain relievers can be dangerous to dogs, and they may complicate treatment. [2]
When to Call a Veterinarian
Arrange same-day veterinary advice or an examination if you notice:
A nail that is split, loose, dangling, or cracked toward the base
Bleeding that continues after about 10 minutes of steady pressure
Swelling, heat, discharge, odor, or increasing redness
Pain when you touch the toe or leg
A pad cut or embedded object
A limp that is getting worse or is not clearly improving by the next day
Repeated limping after nail trims
A senior dog or a dog with known joint, spine, or nerve disease that is suddenly moving differently
Seek urgent or emergency care if your dog cannot bear any weight, cries out or cannot settle, has an obviously deformed limb, drags or knuckles the paw, has a deep wound, was injured in a fall or other accident, or seems weak or ill. These signs can point to more than a sore nail. [2]
How Long Should Limping Last?
There is no single safe timeline because the cause matters. A tiny quick nick may be sore for a short time and should trend steadily better once bleeding stops. A torn nail, pad injury, strain, fracture, or joint problem can last longer and may worsen without treatment.
Use direction of change as your guide. Mild lameness that is improving over several hours is different from a dog that becomes more reluctant to walk. If the limp is still obvious the next day, returns after seeming better, or comes with licking, swelling, or pain, call your veterinarian.
How to Make the Next Nail Trim Easier
Small, calm sessions are kinder to the whole dog than one long struggle.
Trim tiny amounts more often instead of waiting for nails to become very long.
Use sharp, dog-sized clippers or a grinder your dog already accepts.
Keep styptic powder open and within reach before you begin.
Work on a nonslip surface and support the limb in a natural position.
Stop before your dog becomes frantic. One or two nails can be enough for a training session.
Pair paw handling with a favorite treat and brief breaks.
Tell a groomer about arthritis, back pain, previous nail injuries, or handling fears.
Ask your veterinarian about cooperative-care training or pre-visit medication when fear makes safe handling difficult.
For senior dogs, comfort matters as much as the nail length. Avoid pulling the leg far out to the side or holding it high behind the body. A second person can offer steady support, but no one should wrestle a painful or panicked dog through the procedure.
Final Thoughts
Most dogs who limp after a nail trim have a sore quick, a cracked nail, a pad irritation, or a mild handling strain. A careful paw check and a few hours of quiet activity may be all a minor problem needs. The important part is watching the trend.
If you see a torn nail, ongoing bleeding, marked pain, swelling, or an inability to bear weight, do not wait for the limp to “wear off.” Prompt veterinary care can relieve pain and keep a small injury from becoming a bigger one.
Frequently Asked Questions
Can Cutting a Dog’s Nail Too Short Cause Limping?
Yes. Cutting into or very close to the quick can make the nail painful when it touches the ground. You may also see bleeding or repeated licking. Control minor bleeding, keep the paw clean, and contact your veterinarian if pain is marked or the limp does not improve.
Should I Use Styptic Powder on a Bleeding Nail?
Styptic powder is useful for a small quick nick. Apply steady pressure, then press the powder onto the nail tip. If bleeding continues after about 10 minutes, or the nail is torn rather than simply nicked, contact a veterinarian. [1]
Can Long Nails Cause a Dog to Limp?
They can. Very long nails may change foot placement, press into the paw, or break more easily. Shorten overgrown nails gradually. If your dog is already limping, check for a torn nail or pad injury and consider an examination instead of assuming nail length is the only cause.
Why Is My Dog Still Limping if None of the Nails Bled?
Not every nail injury bleeds. A small crack, pad irritation, foreign object, toe injury, or handling strain may be present. The limp could also come from a joint, muscle, back, or nerve problem that happened to become noticeable after the trim.
This article provides general education and does not replace an examination, diagnosis, or individualized advice from your veterinarian. Contact a veterinary professional if you are concerned about your dog’s symptoms.
Dr. Candy Akers earned her Doctor of Veterinary Medicine degree from Oklahoma State University in 2009 after completing undergraduate studies at the University of Delaware. Her experience includes companion-animal nutrition, chronic disease, allergies, autoimmune conditions, cold laser therapy, wildlife rehabilitation, and emergency wildlife response. She combines conventional veterinary knowledge with a whole-animal perspective to help pet parents understand their options and recognize when individualized veterinary care is needed.
To cut black dog nails without hitting the quick, take off one very thin sliver from the tip and look at the freshly cut surface. Repeat only while the center looks dry and uniform. Stop when the center becomes darker, softer, shinier, or more clearly defined, or anytime you are not sure.
Black pigment hides the quick, so you usually cannot choose the perfect stopping point before you begin. The safer approach is progressive: trim a little, look, and decide whether to stop. Good light, sharp tools, a calm dog, and an unhurried pace matter far more than taking a large piece off at once.
What You Need Before You Start
Set everything within reach before you pick up your dog’s paw:
Sharp dog nail clippers or a dog nail grinder
A bright light
A non-slip mat or stable floor
Small, high-value treats
Styptic powder and clean gauze or a paper towel
An optional nail file for rough edges
Choose the tool that gives you the best control. Scissor-style clippers make a quick, clean cut when the blades are sharp. Guillotine clippers can work well on thinner nails but may be awkward on very thick nails. A grinder removes nail gradually, which some people find easier, although the sound and vibration bother some dogs.
These tools can help you trim safely and stay prepared:
Sharp scissor-style clippers make a quick, clean cut and offer good control across many nail sizes. Keep the blades sharp so they slice rather than crush the nail.
Guillotine clippers can feel comfortable in the hand and work well on thinner nails. Make sure the nail sits cleanly in the opening before you squeeze.
A grinder removes nail gradually for fine control. Use short taps, keep long hair away from the spinning bit, and allow the nail to cool between touches.
A manual file smooths rough edges and removes very little nail at a time. It can also be a calm cooperative-care option for dogs that dislike clipping.
If you use a grinder, keep long coat hair away from the spinning bit and touch the grinder to the nail for only a second or two at a time. Grinding in one spot builds heat quickly.
Where Is the Quick in a Black Nail?
The quick is the living center of the nail. It contains blood vessels and nerves, which is why cutting it hurts and causes bleeding. In a clear nail, you can often see the pink quick through the shell. In a black nail, pigment blocks that view.
Sometimes a bright flashlight held behind the nail reveals a shadow, especially near a thinner tip. On dense black nails, it may show nothing useful. Treat the light as an extra clue, not permission to make a large cut.
Remember the dewclaws higher on the legs. They may not touch the ground, so they do not wear down the same way as the weight-bearing nails and can curl toward the skin.
How the Cut Surface Changes
The cross-section gives you more information than the outside of a black nail. The exact colors vary among dogs, so use changes rather than one universal “bullseye.”
Cut-Surface Cue
What It Usually Means
What to Do
Dry, pale, or chalky center that looks uniform
You are still in the outer nail
If your dog is comfortable, remove another tiny sliver
Darker or more defined central oval or dot
You may be approaching the quick
Stop, or switch to a file for the edge
Softer, shinier, pinkish, or moist-looking center
The sensitive center is very close
Stop trimming that nail
Pinpoint blood or active bleeding
The quick has been nicked
Apply styptic powder and steady pressure
Do not wait for every sign to appear. The first meaningful change is your cue to stop.
How to Cut Black Dog Nails Step by Step
1. Make the Setup Easy
Choose a quiet time and a surface where your dog will not slip. Let your dog investigate the tool, then reward calm attention. If clippers or the grinder are new, spend a few sessions pairing their sight, sound, and gentle contact with treats before you trim.
2. Hold One Toe Without Twisting It
Support the paw and isolate one toe between your fingers. Use gentle pressure on the pad to extend the nail. Keep the leg in a natural position. Pulling it too far sideways or backward can make an otherwise tolerant dog resist.
3. Remove a Tiny Sliver
Start at the very tip. With clippers, shave off about 1 to 2 millimeters, not a large chunk. With a grinder, use a brief touch and then pull the tool away. The goal of the first pass is information, not final length.
4. Check the Cross-Section
Turn the nail toward the light and look at the new cut face. If it is dry and uniform, you may take another small sliver. As soon as the center becomes darker, softer, shinier, or more defined, stop. When the visual cue is unclear, stopping early is the right choice.
5. Stop Early and Smooth the Edge
There is no prize for taking one more cut. A slightly longer nail is safer than a painful quick injury. Use a file or a very brief grinder touch to round a sharp edge without chasing additional length.
6. Keep the Session Short
Reward after each nail or each calm step. For a worried dog, one or two successful nails can be a complete session. Short, predictable practice builds more trust than holding a frightened dog down to finish all four paws.
Clippers, Grinder, or File?
No single tool is safest for every dog. Sharp scissor clippers are quick and give a clean result on many nail sizes. Guillotine clippers can be comfortable in the hand but are less forgiving if a thick nail does not sit cleanly in the opening.
A grinder gives you fine control because it removes nail gradually. It can also heat the nail, catch long hair, create dust, and frighten a noise-sensitive dog. Work in short taps, keep hair clear, and allow the nail to cool.
A manual file or scratch board removes less nail at a time. It is useful for smoothing edges and can be a cooperative option for dogs who willingly paw at a board. It may not address every nail evenly, especially dewclaws and rear nails.
The best tool is the one you can use precisely while your dog remains comfortable enough to cooperate.
What if the Nails and Quicks Are Overgrown?
When nails have stayed long, the quick may extend farther toward the tip. Trying to reach an ideal length in one sitting is how many quick injuries happen. Take a small amount, then repeat the process after about a week. Gradual trims can allow the sensitive tissue to recede over time, although the pace varies.
Look at how the paw functions, not just whether the nail clicks on a hard floor. Some normal nails make contact because of toe shape or posture. Nails that curl, push the toes sideways, affect walking, split deeply, or grow into the skin need professional attention rather than an aggressive home trim.
How to Help a Dog Who Hates Nail Trims
Begin below your dog’s fear threshold. Touch the shoulder, then the leg, then the paw, rewarding each relaxed response. On later sessions, touch a tool to the nail without cutting. Add the sound of one clip or a distant grinder, then reward again.
You do not have to move through every step in one day. If your dog pulls away, stiffens, growls, snaps, or panics, make the next session easier. A groomer or veterinary team can help when fear makes the task unsafe. The goal is not to “win” the trim. It is to create a routine your dog can tolerate again and again.
What to Do if You Cut the Quick
Even careful people sometimes nick a quick. Stay calm and end the trim for that nail.
Press styptic powder onto the tip and hold steady pressure with clean gauze or a paper towel.
Keep pressure on long enough to let a clot form instead of checking every few seconds.
If no styptic powder is available, cornstarch or flour can be a temporary backup while you apply pressure.
Once bleeding stops, keep the paw clean and dry and avoid rough activity for the rest of the day.
Contact a veterinarian if bleeding continues despite 10 to 15 minutes of firm pressure, the nail is split near its base, your dog seems severely painful, or you later see swelling or discharge.
How Often Should You Trim Black Nails?
Check the nails every one to two weeks so you notice changes before they become overgrown. Many dogs need trimming somewhere between every one and four weeks, but the right interval depends on growth rate, exercise surface, age, paw shape, and how much nail you remove at each session.
Clicking can be a useful clue, but it is not the only one. Watch for curling, altered paw placement, snagging, or nails that press into the ground when your dog stands. Check dewclaws separately because they may never touch the floor.
Frequently Asked Questions
Can I See the Quick in a Black Nail With a Flashlight?
Sometimes. A bright light may reveal a shadow in a thinner nail, but dense pigment can block the view. Always combine lighting with tiny cuts and cross-section checks.
What Angle Should I Use to Cut a Black Dog Nail?
Follow the natural shape of the tip rather than forcing one universal angle. Control, small increments, and inspection after every pass are more important than a precise degree.
How Short Should Black Dog Nails Be?
Short enough that they do not curl, snag, distort the toes, or interfere with comfortable movement, but not so short that you chase the quick. Individual paw shape matters, so floor contact alone is not a perfect rule.
Is a Grinder Safer Than Clippers for Black Nails?
A grinder can feel more controlled because it removes nail gradually, but it is not risk-free. Heat, hair entanglement, noise, and vibration require care. Use whichever tool you can control while your dog stays comfortable.
Can I Use Cornstarch if I Do Not Have Styptic Powder?
Yes, as a temporary backup. Apply it with steady pressure. Styptic powder is more dependable, so keep it in your nail-trim kit.
When Should a Professional Trim My Dog’s Nails?
Get help if nails are embedded, deeply split, severely overgrown, painful, or changing the way your dog stands or walks. Professional support is also wise when fear or aggression makes home trimming unsafe.
Dr. Candy Akers earned her Doctor of Veterinary Medicine degree from Oklahoma State University in 2009 after completing undergraduate studies at the University of Delaware. Her experience includes companion-animal nutrition, chronic disease, allergies, autoimmune conditions, cold laser therapy, wildlife rehabilitation, and emergency wildlife response. She combines conventional veterinary knowledge with a whole-animal perspective to help pet parents understand their options and recognize when individualized veterinary care is needed.
Neither a dog nail grinder nor a clipper is better for every dog. A grinder removes nail in small amounts, gives you more control, and leaves a smooth edge. It is especially useful when nails are dark or thick, but the sound and vibration bother some dogs. Clippers are fast, quiet, and affordable. They work well when you can identify a safe cut line and your dog will hold still for a quick trim.
Many dogs do best with a combination. You can clip a clearly safe amount, then use a grinder to round the edge. The best tool is the one you can use calmly, accurately, and often enough to keep the nails at a comfortable length.
Quick Comparison: Grinder vs. Clippers
Here is the short version.
Dog nail grinder
Best for: gradual shortening, dark nails, thick nails, rounded edges, and owners who prefer to remove tiny amounts at a time
Main advantages: more control over each pass and a smooth finish
Main drawbacks: noise, vibration, nail dust, heat from friction, and a slower session
Dog nail clippers
Best for: fast trims, dogs who dislike motor noise, and nails with a visible safe cut line
Main advantages: quick, quiet, inexpensive, and easy to carry
Main drawbacks: one cut removes more nail, dull blades can crush or split the edge, and poor placement can reach the quick
Clipper plus grinder
Best for: quickly removing safe length and then smoothing the edge
Main advantage: combines speed with a finished edge
Main drawback: the dog must tolerate two tools
The quick contains blood vessels and nerves. With clear nails, it is often visible as a pink center. With black nails, you usually have to work more slowly and use changes in the cut surface as your guide. A grinder does not make it impossible to reach the quick. It simply lets you approach it in smaller steps.
When a Nail Grinder Is Better
A grinder is a small rotary tool with an abrasive bit or sanding band. Instead of making one cut, it files the nail down little by little. That slow pace is the reason many owners feel more confident with it.
A practical choice for gradual shortening, dark or thick nails, and smoothing rough edges. Use short, controlled passes, pause often to prevent heat buildup, and keep long paw hair away from the spinning bit.
Dark Nails and Slow Control
Dark nails hide the quick, so the safest cut line is harder to judge. A grinder can help because you can remove a thin layer, stop, inspect the nail, and decide whether to continue. Work across the bottom and tip rather than holding the bit against one spot.
Look at the center of the nail after each pass. As you get closer to living tissue, the center often changes from dry and chalky to darker and smoother. Stop when you are unsure. A conservative trim that you repeat soon is better than trying to achieve the shortest possible nail in one session.
Thick Nails and a Smooth Finish
Grinders are helpful for thick nails that take more hand strength to clip. They also round sharp corners that can catch on fabric or scratch skin.
A smooth finish is valuable, but it is not worth overheating the nail. Grinding creates friction. Touch the bit to the nail for only a few seconds, then lift it away and move to another nail. The official Dremel nail-care guide also recommends short contact periods and breaks because friction creates heat.
Long coat and paw hair must stay away from the spinning bit. Hold hair back securely before the grinder turns on. If you cannot keep it clear, use clippers or ask a groomer for help.
When Noise or Vibration Is the Problem
A grinder may look gentle to you and still feel overwhelming to your dog. The motor sound travels through the room, and the vibration reaches the toe. Some dogs object to one sensation more than the other.
Do not hold a frightened dog down and grind through the struggle. That creates a bigger problem for the next session. Start with the tool turned off. Reward calm investigation. Turn it on at a distance, then closer, before you ever touch a nail. If your dog remains worried, quiet clippers may be the better choice.
When Dog Nail Clippers Are Better
Clippers remove a piece of nail in one squeeze. They are efficient, quiet, and simple. For a dog who will offer a paw briefly but dislikes a long grooming session, that speed can be a major advantage.
Fast, Quiet Trims
A confident clip takes less time than grinding the same amount of nail. There is no motor, charging cable, battery, or sanding band to manage. Clippers are also easy to pack for travel.
The tradeoff is that you need to decide exactly where the blade will close before you squeeze. Use bright light, hold the toe steady, and take a smaller amount than you think you need. This matters most with black nails and with dogs who may jerk the paw suddenly.
Which Clipper Style to Choose
Plier-style or scissor-style clippers are a practical choice for many dogs. They give you a clear view of the nail and enough leverage for medium or thick nails.
A quiet choice that gives you a clear view of the nail and useful leverage for medium or thick nails. Keep the blades sharp, hold the toe steady, and remove only a small amount with each cut.
Guillotine clippers guide the nail through a hole while a blade slides across it. Some owners like them for small or medium nails because the tool is compact. Others find the cutting angle harder to see.
A compact option for small or medium nails when you can see the cutting angle clearly. Guide the nail through the opening, keep the blade sharp, and stop if the nail does not fit comfortably.
Whichever style you choose, the blades must be sharp. A dull clipper can pinch, crush, or leave a ragged edge. Replace or sharpen the tool when the cut stops feeling clean.
Where Clippers Need More Care
Clippers work best when the dog stays still and you can see or confidently estimate a safe cut line. They are less forgiving of a sudden movement because the cut happens all at once.
Angle the cut to follow the natural shape of the nail. Avoid cutting from side to side through a wide section if the tool feels strained. For very thick, distorted, split, or painful nails, stop and have a groomer or veterinary professional assess the safest approach.
Best of Both: Clip Then Grind
You do not have to join one team forever. A hybrid routine is often the most practical choice.
First, clip only the length you can clearly identify as safe. Then use the grinder for a few short passes to round the edges. This shortens grinder time and avoids asking the clipper to create a perfect finish.
Skip the clipping step when you cannot judge a safe cut line. In that situation, use the grinder slowly or let a professional handle the initial shortening. Once the nails are at a manageable length, frequent small touch-ups are usually easier than occasional major trims.
How to Choose Based on Your Dog and You
The right tool depends on both ends of the paw. Your dog’s comfort matters, and so does your ability to control the tool.
Your dog’s response to sound and touch
Choose the tool your dog can tolerate without escalating fear. A dog who dislikes motor noise may accept clippers. A dog who reacts to the squeeze of a clipper may prefer the gradual contact of a grinder.
Nail color and thickness
A grinder can make black nails easier to approach in small steps. Clippers are efficient for clear nails when the quick is visible. Thick nails may be easier with a powerful grinder or a sharp, properly sized plier-style clipper.
Session tolerance
Some dogs can handle one or two quick clips but lose patience during grinding. Others need the slower pace of one nail at a time. There is no rule that says all four paws must be finished in one sitting.
Your hand control
Use the tool that feels stable in your hand. If you cannot control a grinder’s angle or keep hair away from the bit, clippers are the safer choice for that session. If squeezing clippers makes your hand shake or obscures the cut line, a grinder may give you more confidence.
Budget and upkeep
Clippers cost less and require little beyond cleaning and blade maintenance. Grinders need power, usable sanding bands or bits, and regular cleaning. A worn abrasive surface removes nail slowly and encourages longer contact, which can create more heat.
Safe Setup for Either Tool
A calm trim begins before you pick up the paw.
Use a bright, quiet area with a non-slip surface. Inspect each paw for swelling, broken nails, soreness, or debris. Gather the tool, rewards, and styptic powder before you begin. Check that clippers are sharp or the grinder is charged and fitted with a sound abrasive surface.
With a grinder, keep hair away from moving parts and use short touches. With clippers, make small cuts and keep the blade where you can see it. Stop if your dog is struggling hard enough to make precise work impossible.
Short, successful sessions build skill faster than a long battle. One nail followed by a break can be a complete session for a dog who is still learning.
How to Introduce the Tool Without a Battle
Start below your dog’s fear threshold. That means beginning at a level where your dog can notice the tool and still eat, move normally, and respond to you.
For clippers, let the tool appear near the paw before you touch a nail. Practice holding a toe, then touching the clipper to the nail without cutting. When your dog is relaxed, make one small clip and reward.
For a grinder, begin with the tool turned off. Let your dog sniff it if they choose. Next, turn it on across the room, then closer. Touch the handle to a paw before introducing the moving bit to a nail. The Dremel guide recommends this gradual introduction over several days.
Reward-based handling is more than a nice extra. Research comparing companion-dog training methods found poorer welfare outcomes with aversive-based methods, which supports using gradual, reward-based cooperation instead of force (Vieira de Castro et al., 2020).
Watch the whole dog. Lip licking, repeated paw pulling, freezing, panting outside a warm room, and refusal of normally valued food can tell you the session has become too difficult. Back up to an easier step.
If You Cut the Quick
Even careful owners sometimes nick the quick. Stay calm and stop trimming that paw.
Apply styptic powder to the nail and hold steady pressure. Cornstarch can help when styptic powder is not available. Keep your dog quiet while the clot forms, and prevent licking or running on the paw.
Get veterinary help if bleeding does not slow with firm pressure, the nail is torn near the base, your dog is in significant pain, or the toe looks swollen or damaged. Do not resume trimming the same nail that day.
Final Thoughts
The grinder-versus-clipper question has no single winner. A grinder offers gradual control and a smooth finish. Clippers offer speed, quiet operation, and a low cost. A combination can work beautifully when you can clip a safe amount and use the grinder only for finishing.
Choose the method that lets you stay accurate while your dog stays reasonably comfortable. Keep the sessions short, maintain the tool, and trim often enough that each session requires only a small adjustment. Good nail care is not about forcing perfect paws in one day. It is about building a routine you and your dog can repeat.
Frequently Asked Questions
How Often Should I Trim My Dog’s Nails?
Trim often enough that the nails do not interfere with normal paw placement or become long enough to catch and split. The schedule varies with growth rate, exercise surface, age, and nail condition. Many dogs need attention every few weeks, while dogs learning grinder touch-ups may do better with shorter weekly sessions.
Can I Start Using a Grinder if My Dog Is Used to Clippers?
Yes. Introduce the grinder as a new object rather than turning it on and starting immediately. Build comfort with the sight, sound, vibration, and brief nail contact over several sessions.
What Should I Do if I Cut the Quick?
Stop trimming, apply styptic powder, and hold steady pressure. Keep your dog quiet. Seek veterinary care if bleeding continues, the nail is torn near the base, or your dog appears very painful.
Do I Need to Clean and Maintain the Tools?
Yes. Wipe nail dust and debris from both tools after use. Follow the manufacturer’s cleaning directions. Keep clipper blades sharp and replace worn grinder bands or bits.
What if My Dog Is Terrified of Both Tools?
Break the task into much smaller steps and work below the level that causes panic. A groomer or veterinary team can help with overdue nails while you build cooperative handling skills at home.
Which Tool Is Better for Black Nails?
A grinder often makes black nails easier because it removes a small amount at a time. Clippers can still work well when you take thin slices and inspect the cut surface after each one. Choose the method you can control best.
Can I Use Clippers and a Grinder Together?
Yes. Clip only a clearly safe amount, then use the grinder briefly to smooth the edge. This reduces total grinding time while preserving a rounded finish.
Vieira de Castro, A. C., Fuchs, D., Morello, G. M., Pastur, S., de Sousa, L., & Olsson, I. A. S. (2020). Does training method matter? Evidence for the negative impact of aversive-based methods on companion dog welfare. PLOS ONE, 15(12), e0225023. https://doi.org/10.1371/journal.pone.0225023
A note about your dog’s health
This article provides general education and does not replace an examination, diagnosis, or individualized advice from your veterinarian. Contact a veterinary professional if you are concerned about your dog’s symptoms.
Dr. Candy Akers earned her Doctor of Veterinary Medicine degree from Oklahoma State University in 2009 after completing undergraduate studies at the University of Delaware. Her experience includes companion-animal nutrition, chronic disease, allergies, autoimmune conditions, cold laser therapy, wildlife rehabilitation, and emergency wildlife response. She combines conventional veterinary knowledge with a whole-animal perspective to help pet parents understand their options and recognize when individualized veterinary care is needed.
You can file your dog’s nails naturally with a scratch board, nail grinder, sturdy hand file, regular pavement walks, or ordinary activity on firm surfaces. Scratch boards and grinders give you the most control. Walking and everyday activity help some dogs, but they do not replace regular nail checks.
“Natural” does not mean every method is right for every dog. A dog who loves to scratch may do beautifully with a board, while a dog who dislikes paw handling may accept a grinder only after slow practice. The best plan is the one that shortens all the necessary nails without creating fear, heat, pad soreness, or uneven wear.
Quick Comparison of Natural Nail-Filing Methods
Method
Control
Best Use
Common Limitation
Scratch board
High once trained
Dogs who dislike paw handling; front nails
May miss rear nails and dewclaws
Nail grinder
High
Gradual shortening and smooth edges
Noise, vibration, heat, hair, and dust
Hand file
Very gradual
Thin nails and finishing rough edges
Slow on thick nails
Pavement walks
Low
Supplemental wear during normal exercise
Wear varies by gait, surface, and nail
Everyday activity
Low
General maintenance on firm terrain
Soft ground may provide little filing
You can combine methods. A scratch board may maintain the front nails while a hand file or grinder handles dewclaws and nails that wear unevenly.
1. Teach Your Dog to Use a Scratch Board
A scratch board is a stable board covered with an abrasive surface. Your dog learns to drag a paw across it, filing the nail tips without having each toe held. This can be a wonderful cooperative-care option for dogs who become tense when clippers appear.
A stable abrasive board can let a dog file its own front nail tips through a voluntary scratching behavior. Reward short, comfortable sessions and inspect each nail afterward.
What You Need
A stable board, clipboard, or purpose-made scratch pad
Abrasive paper secured flat with no lifted corners or exposed adhesive
Small treats
A non-slip floor
A towel, washcloth, or target your dog already likes to paw
Choose a surface coarse enough to file the nail but not so rough that it scrapes the pads. Check the abrasive frequently and replace it when it becomes torn, loose, or clogged.
Step-by-Step Scratch-Board Training
Place the board flat on the floor and reward your dog for looking at or approaching it.
Reward a voluntary paw touch. Do not pick up the paw and rub it across the board.
Place a treat under a folded washcloth or use a familiar paw target to encourage a short scratching motion.
Mark and reward each scratch. Stop after a few good repetitions.
When the behavior is easy, slowly raise the board to a comfortable angle. A mild tilt often helps the front nails contact the surface more evenly.
Inspect every nail after the session. Stop before the tips become tender, thin, or uneven.
Short sessions are enough. The goal is a confident, repeatable behavior, not rapid removal on the first day.
What a Scratch Board May Miss
Most dogs lead with one front paw, so one side can wear faster. Change your position or cue the opposite paw separately. Rear nails usually need a different setup and more advanced training, and dewclaws may never touch the board at all.
Check every toe rather than assuming the board has finished the job.
2. Use a Dog Nail Grinder
A grinder removes nail in small amounts and leaves a smooth edge. It is not exactly “natural,” but it is one of the best clipper-free choices when you want direct control.
A grinder offers controlled, gradual shortening and a smooth edge. Introduce its sound slowly, keep hair clear, and use brief touches with cooling breaks.
Start with the grinder turned off. Let your dog investigate it, reward calm behavior, then introduce the sound from a comfortable distance. Build toward a brief touch on one nail. One or two successful nails can be a complete first session.
Keep long hair away from the rotating bit. Touch the grinder to the nail for only a second or two, then lift it away and let the nail cool. Recheck the nail often. A grinder can still reach the quick, and holding it in one place creates heat quickly. It can also catch hair, scrape skin, and create irritating dust, so good light and ventilation help.
3. File by Hand
A hard metal, glass, ceramic, or sturdy emery file can smooth sharp edges and shorten thin nails gradually. It is quiet and gives you excellent tactile control, which suits dogs who tolerate gentle paw handling but dislike motor noise.
A sturdy hand file is quiet and useful for small changes or smoothing rough edges. Support one toe gently and pause often to check progress.
Support one toe without twisting the leg. File the very tip with controlled strokes, pause often, and look at the nail from the side and the cut end. There is no universal 45-degree rule because nail shape varies. Follow the natural curve and stop whenever the center changes color or texture, or your dog becomes uncomfortable.
A lightweight human emery board may work for a puppy or very thin nail, but thick dog nails wear it out quickly. A dog-specific file is sturdier and easier to control.
4. Let Pavement Add Natural Wear
Regular walks on pavement or another firm, safe surface may help file the nails that contact the ground. Some dogs need fewer trims when they walk on hard surfaces often. Others still grow long front nails, outer nails, or dewclaws despite plenty of exercise.
Keep the walk appropriate for your dog’s age, conditioning, joints, and paws. Do not add long trots or extra mileage only to grind down nails. Check the surface temperature with your hand, avoid sharp or chemically treated ground, and inspect the pads after the walk. If the pads look pink, scuffed, cracked, or sore, choose a gentler surface and another nail-care method.
5. Use Everyday Activity as Maintenance
Running and playing on firm natural ground can contribute to nail wear, but the effect is unpredictable. Grass, loose sand, soft soil, and forest trails may provide very little abrasion. Gait also matters. One paw or one set of nails may wear while another barely changes.
Let normal activity support nail care rather than turning digging or rough-surface play into a treatment. Deliberately encouraging hard digging can scrape pads, crack nails, or over-wear a few toes. Keep checking the whole paw and use a board, file, or grinder for the nails that activity misses.
How to Know Whether the Nails Are the Right Length
Look at function instead of relying on one rule. Nails need attention when they curl, snag, press the toes sideways, change paw placement, or interfere with comfortable movement. Clicking on a hard floor can be a useful clue, but some healthy nails contact the ground because of toe shape or posture.
Check dewclaws separately. Because they sit higher on the leg, they usually receive no natural wear and can curve toward the skin.
What if the Nails or Quicks Are Overgrown?
If a nail has stayed long, the quick may extend closer to the tip. Trying to reach an ideal length in one session can cause pain and bleeding. Remove a small amount, then repeat after about a week. Gradual filing may allow the quick to recede over time, but the pace differs from dog to dog.
Get professional help for a nail that curls into the skin, splits near the base, looks infected, causes significant pain, or changes the way your dog stands or walks. Severe fear or aggression is also a good reason to ask a groomer or veterinary team for support while you build cooperative skills at home.
How to Keep Nail Filing Low Stress
Start well before the nails are urgent. Touch your dog’s shoulder, then leg, then paw, rewarding relaxed responses. On later days, introduce the file or board. Add sound and vibration only after the earlier step feels easy.
Watch your dog’s body language. Pulling away, freezing, lip licking, hiding, growling, or snapping means the session is too difficult. Make the next step smaller. Ending after one calm nail is better than forcing all four paws and making the next session harder.
Frequently Asked Questions
Can a Scratch Board Replace Nail Trimming?
Sometimes for the front nails, but rarely for every nail. Many dogs favor one paw, and the board may not reach rear nails or dewclaws. Inspect all toes and use another method where needed.
Can I Use a Human Emery Board on Dog Nails?
It may work for a puppy or very thin nail, but it is usually too flimsy for thick adult dog nails. A sturdy dog nail file, metal file, glass file, or grinder is more efficient.
Does Walking on Concrete File Dog Nails Enough?
It helps some dogs, but the result depends on gait, activity, surface, and nail hardness. Keep checking every nail instead of assuming walks are enough.
How Do I File Black Dog Nails Safely?
Remove very small amounts and inspect the fresh surface after each pass. Stop when the center becomes darker, softer, shinier, or more defined, or anytime you are unsure.
How Often Should I Check or File My Dog’s Nails?
Check every one to two weeks. Filing frequency may range from weekly touch-ups to every few weeks depending on growth and natural wear. Dewclaws often need their own schedule.
Dr. Candy Akers earned her Doctor of Veterinary Medicine degree from Oklahoma State University in 2009 after completing undergraduate studies at the University of Delaware. Her experience includes companion-animal nutrition, chronic disease, allergies, autoimmune conditions, cold laser therapy, wildlife rehabilitation, and emergency wildlife response. She combines conventional veterinary knowledge with a whole-animal perspective to help pet parents understand their options and recognize when individualized veterinary care is needed.
When I see a dog chewing their nails repeatedly, I do not assume it is simply a quirky habit. Most often, the dog is trying to relieve itching, soreness, pressure, or another uncomfortable feeling around the nail or paw. A torn nail, overgrown nail, grass awn, cracked pad, allergy, infection, parasite, or stress can all drive the behavior.
Start by checking every paw, not just the one you first noticed. A problem limited to one paw points more toward a local injury or irritant, while several itchy paws make me think more about allergies, infection, parasites, or another broader cause. The quickest way to stop the chewing is to identify what is bothering your dog and address that cause. A cone or toy can protect the skin for a short time, but it will not fix pain or itch.
Why Dogs Chew Their Nails
A little paw grooming after a walk is normal. Repeated, focused chewing is different. Your dog may be trying to remove something, soothe an itch, ease pressure from an overgrown nail, or respond to pain. Some dogs also chew when they are worried or bored, but I never label the problem behavioral until I have checked the paw itself.
Chewing only tells us where the dog feels bothered. It does not tell us why. Inflammation of the feet, called pododermatitis, can involve allergies, infection, parasites, foreign material, trauma, and other underlying problems. More than one factor is often present, so treating only the surface irritation can leave the real trigger behind. [1]
The chewing can also keep the cycle going. Saliva and friction leave the skin damp and tender. Once that tissue is irritated, even a small problem can feel much bigger to your dog.
Check the Paw Before You Treat It
Choose a bright spot and check all four feet. A calm, paw-by-paw look usually tells you more than watching the chewing from across the room.
Look at every nail, including the dewclaws, for a split, crack, sharp edge, discoloration, or nail that is growing at an odd angle.
Check the nail bed for redness, swelling, bleeding, crust, discharge, or an unusual odor.
Spread the toes gently and inspect the webbing for moisture, small bumps, grass awns, burrs, splinters, or matted hair.
Examine each pad for peeling, a horizontal split, raw skin, or a worn area.
Compare the paws for warmth, tenderness, and swelling. Stop if your dog pulls away sharply or seems painful.
Note whether the chewing affects one paw or several, and whether it follows walks, wet grass, lawn treatments, meals, grooming, or stressful events.
One sore paw makes a local problem more likely. Think about a torn nail, foreign object, pad injury, insect sting, or painful toe. Chewing on several paws, especially when it comes and goes with the seasons or appears with itchy ears or skin, makes a wider pattern more likely. Allergy, parasites, contact irritation, and infection move higher on my list.
Common Medical Causes of Nail Biting
Nail Injury, Overgrowth, and Paw Pad Damage
A cracked or partly torn nail can be surprisingly painful. So can a nail that has grown long enough to change the way the toe meets the ground. Dogs may focus on one nail, lick between attempts to chew it, or pull the foot away when you touch the sore area.
Do not forget the pads. A split, peeling surface, or tiny puncture can make a dog work at the whole foot even when the nail looks normal. A 2025 study of dogs with split paw pad dermatosis reported pain, limping, itching, and licking as common signs. Most dogs developed changes in all four paws during the course of the condition, which is a good reminder to inspect every foot and consider more than one possible cause. [2]
Allergies, Infection, and Inflammation
Allergies often show up at the paws because dogs walk through pollen, grass, dust, and other materials, then lick the area. The pattern may involve several feet and may be seasonal. Some dogs also have itchy ears, face rubbing, or irritation elsewhere on the body.
Bacteria and yeast can take advantage of inflamed, damp skin. You may notice redness between the toes, a musty odor, greasy debris, small bumps, or brown saliva staining. Infection can be the primary problem or a secondary problem layered over allergy, injury, or another cause. That is why recurring paw trouble deserves an underlying-cause plan instead of repeated surface treatment alone. [1]
Parasites and Contact Irritation
Fleas and mites can contribute to itching, although the rest of the skin often gives us clues too. Contact irritation can come from wet grass, road salt, cleaners, lawn products, grooming residue, or rough walking surfaces. Heat, moisture, and friction can make an already sensitive paw feel worse.
If the chewing began suddenly after a walk or a change in the home or yard, retrace the previous day. That simple timeline can reveal an exposure you would otherwise miss.
Can Anxiety Cause Dog Nail Biting?
Yes, stress can contribute to nail biting and paw chewing. A behavioral pattern often appears during predictable moments, such as being left alone, hearing storms, settling at night, or after an exciting event. The paw may look normal at first, although repeated chewing can eventually create irritation.
Even when the timing looks behavioral, check for pain and itch first. A sore toe can bother a dog most when the house gets quiet and there is nothing else to focus on. If the feet are healthy, use your notes to identify the trigger, then add exercise, sniffing time, food puzzles, a calmer routine, or gradual behavior work that matches the situation.
How to Stop Dog Nail Chewing at Home
The safest home care starts with observation and gentle cleaning. The goal is to protect the paw while you work out why your dog is chewing it.
Inspect all four paws and remove only loose surface debris that comes away easily. Do not dig into the skin or pull on a damaged nail.
If the paw is dirty, rinse it with lukewarm water or plain sterile saline, then pat it completely dry.
Use a properly fitted cone for short-term protection if your dog will not leave the area alone. A clean sock can be used briefly while supervised, but remove it if it becomes damp, tight, or warm.
Keep healthy nails at a comfortable length. If a nail is split, bleeding, very tender, or loose, leave the repair to a veterinary professional.
Write down when the chewing happens, which paws are involved, what the paws look and smell like, and what changed before the problem started.
Do not give human pain medicine or apply alcohol, hydrogen peroxide, or undiluted essential oils. Strong products can irritate damaged skin, and a dog is likely to lick whatever you put on the foot.
For recurring itchy paws, I look beyond the toes. I review nutrition, seasonal exposure, skin barrier health, parasite pressure, household and lawn products, walking surfaces, and stress. A cone, bitter spray, or distraction toy can interrupt chewing, but it cannot resolve an allergy, infection, painful nail, or foreign object.
When to Call the Veterinarian
Arrange an exam promptly when home inspection shows a problem that needs more than gentle cleaning or when the chewing keeps returning. A closer look is especially useful for:
A torn, loose, bleeding, or badly split nail
Marked swelling, heat, pain, or limping
Pus, a strong odor, greasy debris, or spreading redness
A foreign object that is embedded or difficult to remove
A pad that is deeply cracked, peeling, or raw
Chewing that affects several paws, returns seasonally, or continues despite simple home care
These clues do not all mean the same thing. A focused paw exam, skin testing when needed, and a review of the full pattern help separate injury, infection, allergy, parasites, and behavior so treatment can address the right cause.
Final Thoughts
Dog nail biting tells us that something around the paw needs attention. Start with the paw, compare all four feet, and pay attention to the pattern. When we find the source of the itch or pain, the chewing usually becomes much easier to manage.
If your dog’s nail chewing keeps returning and you want help looking at nutrition, environment, skin health, and stress together, an online consultation can help you build a practical next-step plan.
Is It Normal for Dogs to Chew Their Nails?
Brief grooming can be normal. Repeated chewing, redness, staining, tenderness, odor, limping, or damage to the nail or skin deserves a closer look.
Why Is My Dog Chewing Only One Paw?
One-paw chewing often points toward a local problem such as a torn nail, splinter, grass awn, pad crack, sting, or painful toe. Compare that paw with the others and inspect the nail bed, webbing, pads, and dewclaw.
Can Allergies Make a Dog Bite Their Nails?
Yes. Allergies can make the paws itchy, and chewing can worsen the irritation. Several affected paws, a seasonal pattern, or itching elsewhere on the body makes allergy more likely, although infection or another cause can be present at the same time.
How Can I Stop My Dog From Chewing Their Paws?
Inspect every paw, rinse away surface irritants, dry the feet well, and use a cone briefly if you need to prevent more damage. Then address the underlying cause. Distraction alone will not treat pain, infection, allergy, or a damaged nail.
When Is Nail Chewing a Red Flag?
Seek prompt help for bleeding, a torn or loose nail, marked swelling, discharge, odor, limping, severe tenderness, an embedded object, or chewing that continues or keeps coming back.
[2] Utzmann, M., Bettenay, S., Mueller, R. S., & Mayer, U. (2025). Clinical signs and treatment responses of 14 dogs with split paw pad dermatosis. Veterinary Dermatology, 36(6), 903-913. https://pubmed.ncbi.nlm.nih.gov/40767111/
A note about your dog’s health
This article provides general education and does not replace an examination, diagnosis, or individualized advice from your veterinarian. Contact a veterinary professional if you are concerned about your dog’s symptoms.
Dr. Candy Akers earned her Doctor of Veterinary Medicine degree from Oklahoma State University in 2009 after completing undergraduate studies at the University of Delaware. Her experience includes companion-animal nutrition, chronic disease, allergies, autoimmune conditions, cold laser therapy, wildlife rehabilitation, and emergency wildlife response. She combines conventional veterinary knowledge with a whole-animal perspective to help pet parents understand their options and recognize when individualized veterinary care is needed.
Hello, fellow dog lovers and curious minds! If you’re anything like me, you’ve spent a good amount of time studying every unique feature of your beloved furry friend – from the patterns on their coat to the color of their nails. And yes, just like you, I too once puzzled over the peculiar combination of black and white nails on my dog’s paws. It’s like a manicure mystery waiting to be solved!
You might have wondered, “Is it a genetic trait? A health concern? Or just one of those doggy quirks?” Well, you’re in the right place! Today, we’re diving deep into the world of canine nails to uncover the story behind this fascinating blend of colors. By the end of this blog, not only will you have the answers to your questions, but you’ll also gain a new appreciation for the intricacies of dog anatomy and genetics.
So, grab a cup of your favorite beverage, snuggle up with your pup (if they’re into that), and let’s unravel this mystery together!
Why Does My Dog Have Some Black Nails And Some White?
Every dog owner loves observing their pet, and sometimes, those observations bring up questions. One such query that’s stumped many of us is the mixed color of our dog’s nails. So, why does this happen? Let’s dive in!
Natural Nail Pigmentation Facts
When you look at your dog’s nails, the colors you observe come from the pigments present in the keratin of the nail. Keratin is the protein that makes up nails, both in humans and dogs.
Genetics Rule: Just like the coat color, eye color, and skin color in dogs, nail color is also inherited. If both parent dogs have a mix of white and black nails, there’s a good chance their offspring will too.
Melanin Matters: The color of your dog’s nails, whether black or white, is determined by melanin. Black nails have melanin, while white or clear nails lack it. This is similar to the way our hair or skin color is determined by the presence or absence of melanin.
Breed Specifics: Some breeds are more prone to having mixed nail colors. For example, Beagles and Boxers might sport both colors, while Dalmatians tend to have predominantly white nails.
Fungal Infections & Weird Toe Nail Colors
It’s essential to note that while genetics play a significant role in nail color, other factors can cause changes or irregularities.
Fungal Infections: If you notice an odd color, texture, or smell from your dog’s nails, it might be due to a fungal infection. This can lead to nails becoming discolored, brittle, or having an unusual growth pattern. While black or white nails can be entirely natural, any sudden change in nail color should be a sign to consult your vet.
Bacterial Infections: Just like fungal infections, bacterial infections can also cause discoloration. If your dog’s nails turn green, yellow, or another unusual color, it’s essential to get it checked out.
Trauma or Nail Damage
Accidents happen, and sometimes our dogs might hurt their paws or nails while playing, running, or just being their clumsy selves.
Bruising: If a dog injures its nail, it might develop a dark color due to bruising beneath the nail. This usually looks like a dark spot or streak.
Broken Nails: If a nail breaks, the exposed nail bed can be sensitive and might appear reddish or pink. This is due to the blood vessels and sensitive tissue exposed due to the break.
Healing and Regrowth: After an injury, as the nail starts to heal, you might notice a variation in its color. This is temporary, and as the nail grows out, it should return to its natural color.
While genetics is a leading factor in the color of your dog’s nails, various health issues or injuries can cause color changes. Always keep an eye out for sudden or drastic changes and consult with your veterinarian if something seems amiss. Remember, being informed is the first step to ensuring our furry friends stay happy and healthy! 🐾
When to Be Worried About Your Dog’s White Nails
Just when you thought you’ve figured out the mystery behind their mixed nail colors, another question pops up – should I be concerned about those white nails? While it’s common for dogs to have white or clear nails naturally, sometimes, the appearance or changes in these nails can be a cause for concern. Here’s a human-friendly rundown on when those white nails might warrant a vet visit.
Sudden Color Change
If your dog has always had black nails and suddenly you notice a shift to white or clear, this could be a cause for concern. A sudden change in nail color might be due to a number of reasons, including:
Nutritional Deficiencies: Just like in humans, dogs’ nail health can reflect their overall health. A deficiency in certain vitamins or minerals might manifest as a change in nail color.
Systemic Illnesses: Some diseases affect multiple organs and systems in the body and can lead to changes in nail color.
Texture and Structural Changes
White nails aren’t just about color. It’s also important to consider their texture and structure.
Brittleness: If your dog’s white nails suddenly become brittle and start chipping or breaking easily, it’s time to pay attention. This could be due to a fungal infection, nutritional issues, or even an underlying health concern.
Thickening or Overgrowth: While some dogs naturally have faster-growing nails, a sudden or unusual thickening might indicate a health problem. It’s especially concerning if only one or two nails are affected.
Behavioral Signs
Dogs, being the expressive creatures they are, often show discomfort or pain through their behavior.
Licking or Biting: If your dog starts excessively licking or biting at their white nails, it might be feeling some discomfort. This could be due to an infection, an injury, or an ingrown nail.
Limping or Favoring a Paw: Should you notice your dog limping or avoiding putting weight on a paw with white nails, it could indicate pain or an injury related to the nail.
Odor or Discharge
A bad smell coming from your dog’s nails or any kind of discharge (pus or otherwise) is a red flag.
Fungal or Bacterial Infections: An unpleasant odor, coupled with discoloration or brittle texture, could indicate a fungal or bacterial infection.
Trauma: If there’s been an injury, an infection might set in, leading to discharge and a bad smell. This needs immediate attention.
While many dogs naturally sport lovely white nails without any issues, it’s crucial for pet owners to be observant. Any change in the appearance, texture, or behavior related to those nails might be your dog’s way of signaling that something’s amiss. When in doubt, always consult with your vet. After all, our four-legged friends rely on us to ensure they’re in tip-top shape!
What Should Healthy Dogs Nails Look Like?
If you’re anything like me, you’ve probably given those little doggy toes more than just a passing glance. Nails, often overlooked, play a significant role in our pup’s well-being. And just as we’d fret over a broken nail or an unexpected change in nail health, it’s just as crucial to know what’s normal and what’s not for our four-legged buddies. So, what should a healthy dog’s nails look like? Let’s dig in, shall we?
Color Consistency
Natural Hues: Healthy nails can be black, white, brown, or any shade in between. What’s essential is consistency. If your dog has always had black nails, they should typically remain that color, and the same goes for other hues.
No Sudden Changes: While it’s okay for a dog to have a combination of colored nails (like a mix of black and white), be on the lookout for any sudden changes in color that aren’t related to the natural growth of the nail.
Texture and Strength
Smooth to the Touch: Run your fingers over your dog’s nails. They should feel relatively smooth without any rough edges or noticeable ridges.
Not Too Brittle or Too Soft: Healthy nails shouldn’t break at the slightest pressure, nor should they bend easily. They need to have a certain firmness to them, signifying good health and proper nutrition.
Length and Shape
Not Touching the Ground: Ideally, when your dog is standing still on a flat surface, their nails shouldn’t touch the ground. Overly long nails can affect their gait and even cause pain or injury.
Tapered End: A healthy nail should taper to a point, although the sharpness of that point can vary depending on the breed and individual dog.
Quick Health
The quick is the inner part of the nail that contains blood vessels and nerves.
Visible in Light-Colored Nails: If your dog has clear or white nails, you should be able to see the pinkish quick inside. It should appear uniform and not discolored or spotted.
Not Exposed: For dogs with dark nails where the quick isn’t visible, ensure it hasn’t been exposed due to any trauma or excessive trimming.
No Signs of Pain or Discomfort
Comfortable Pawing: Your dog should be able to paw at toys, dig, or scratch without showing signs of pain or discomfort.
No Excessive Licking or Biting: If your dog is persistently licking or biting at its nails, it might be an indication of a problem.
Remember, while this is a handy guide to understanding what healthy nails should look like, every dog is unique. Regular check-ups with your vet and routine grooming can ensure those paws stay in prime condition. After all, those nails are meant for happy digging, playful scratching, and enthusiastic tapping when dinner’s on its way!
What Does An Infected Dog Nail Look Like?
We’ve all been there – one moment you’re playing fetch, and the next, you’re squinting down at your dog’s nail thinking, “Is that normal?” An infected nail can be a source of significant discomfort for our furry friends, and knowing what to look for is half the battle. Let’s dive into the world of dog nail health and unpack the signs of an infected nail, shall we?
Color Changes
Discoloration: Healthy nails should maintain their natural hue, be it black, white, or anything in between. An infected nail might show odd discolorations like yellow, green, or even a murky brown.
Dark Spots or Streaks: If you spot dark or unusual streaks, especially on lighter-colored nails, it could be a sign of a brewing infection.
Swelling and Redness
Around the Nail Bed: The skin around the nail might become red, swollen, or tender to touch. This is often a tell-tale sign of an infection.
Extended Quick: If the quick (the inner sensitive part of the nail) appears swollen or extended, it’s cause for concern.
Odor and Discharge
Unpleasant Smell: An infected nail might emit a foul or unusual odor. Trust your nose – if it smells off, it probably is.
Pus or Other Discharge: Notice any oozing around your dog’s nail? A discharge, especially if it’s pus-filled, is a red flag indicating an infection.
Behavioral Clues
Licking and Biting: Dogs instinctively try to soothe discomfort. If your pup is constantly licking or biting at its nail, it’s trying to tell you something’s wrong.
Limping or Favoring a Paw: Any sign of pain, like limping or hesitating to put weight on a paw, especially after a recent injury, should prompt a closer look at those nails.
Brittleness or Breakage
Easy to Break: Infected nails might become brittle, breaking or chipping easily.
Unusual Growth Patterns: An infected nail might grow oddly or might even halt in growth.
If you’ve done your doggy detective work and suspect an infected nail, don’t panic! While it’s essential to address any infection promptly to prevent it from worsening or spreading, many infections are entirely treatable with the right care and attention. Always consult with your vet, as they’ll provide guidance on treatment options and care.
Remember, our dogs rely on us to keep them healthy and happy. Observing and understanding the signs of potential issues is our way of giving back for all the joy they bring into our lives. Here’s to healthy paws and wagging tails!
How To Keep Your Dog’s Nails Healthy
Paws up if you want your dog to have the healthiest nails on the block! 🐾 Keeping our furry companions in tiptop shape is not just about their glossy coats or sparkling eyes; their nails play a pivotal role too. Nails that are cared for can prevent injuries, infections, and other complications. So, how do you ensure that those little (or big) claws remain in pristine condition? Let’s dive in!
Regular Trimming
Importance of Routine: Just like how we need regular manicures or trims, our dogs benefit from a consistent nail-clipping schedule. Overgrown nails can lead to various issues, from discomfort while walking to a higher risk of breakage.
Choosing the Right Tools: Invest in a good pair of dog nail clippers or grinders. Whether you opt for the scissor-type or guillotine-style, ensure they’re sharp and suited for your dog’s nail size.
Pace and Technique: If you’re new to nail trimming or if your dog is anxious, start slow. Trim a small bit at a time, always being cautious of the quick. If your dog has clear nails, the quick will appear pink. For darker nails, the process is a tad trickier, so always err on the side of caution.
Make it a Positive Experience: Associate nail trimming with treats and praises. Over time, your pup might just wag its tail at the sight of those clippers!
Balanced Nutrition
Role of Diet: Just like humans, dogs’ nail health is a reflection of their overall nutrition. A balanced diet can ensure strong and healthy nails.
Essential Nutrients: Omega fatty acids, biotin, and proteins play a crucial role in nail health. Ensure your dog’s diet includes these, either through their regular food or supplements (after consulting with a vet, of course!).
Hydration: Yes, even hydration plays a role! A well-hydrated dog is likely to have healthier nails.
Regular Vet Check-ups
Professional Insight: Regular vet visits ensure that any potential issues, not just with the nails but overall health, are caught early. Your vet can provide guidance on nail care tailored to your dog.
Addressing Concerns: If you ever notice abnormalities or changes in your dog’s nails, your vet is the best person to consult. They can offer treatments, solutions, and advice on preventing future problems.
Recommendations on Products: From suggesting dietary supplements to recommending specific nail care products, your vet can guide you in making the best choices for your pup.
Maintaining your dog’s nail health is a combination of routine care, a balanced diet, and regular professional check-ups. With the right attention and love, those paws will remain ready for countless walks, playful digs, and excited doorbell dances. Here’s to a journey filled with the ‘clip-clip’ of healthy nails on the floor and the unconditional love of our four-legged friends!
Conclusion
And there we have it, dear dog parents—a comprehensive guide to unraveling the mysteries and nuances of our furry companions’ nails. From understanding the subtle signs of infections to the joy of hearing the gentle tap-tap of healthy nails on the floor, we’ve journeyed through it all. Taking care of our dogs extends far beyond belly rubs and fetching games; it’s in the small details, like nail health, that we truly ensure their well-being.
Every wag, woof, and playful bark reminds us of the boundless joy our dogs bring into our lives. And in return, it’s our job to offer them the best care possible. By prioritizing their nail health, we’re not just looking after a part of their anatomy; we’re ensuring that every step they take is comfortable and happy.
So, the next time you cuddle up with your pup, give those nails a gentle glance. Remember, they’re not just keratin structures but markers of your dog’s overall health. Armed with knowledge, awareness, and love, let’s commit to giving our four-legged family members the healthy and spirited life they so richly deserve.
To all the paw-rents out there, here’s raising a toast (or perhaps a chew toy?) to many more years of wagging tails, excited barks, and, yes, healthy nails!
Frequently Asked Questions (FAQS)
Q: How often should I trim my dog’s nails?
A: The frequency of nail trims can vary depending on your dog’s activity level and where they spend most of their time. Typically, most dogs will need their nails trimmed every 3-4 weeks. However, if your dog spends a lot of time on rough surfaces that naturally wear down their nails, you might not need to trim them as often.
Q: My dog has a split nail. What should I do?
A: A split nail can be painful for your dog and can potentially lead to infections. Clean the area gently and prevent your dog from licking it. It’s best to consult your vet promptly for proper care and treatment recommendations.
Q: What’s the best way to calm my anxious dog during nail trims?
A: Positive reinforcement works wonders. Begin by showing your dog the nail clippers and rewarding them with a treat. Gradually, over time, touch their paws with the clippers, again rewarding with treats. This slow introduction can make the actual trimming process less stressful. Additionally, consider using a grinder instead of clippers, as it can be less intimidating and more forgiving.
Q: How can I tell if my dog’s nail is infected?
A: Symptoms of an infected nail include redness, swelling, an unpleasant odor, pus or discharge, and your dog excessively licking or biting at the nail. If you notice any of these signs, it’s best to consult your vet for a proper diagnosis and treatment.
Q: My dog’s nails are really long, and I can see the quick has grown out. How should I trim them?
A: When the quick has grown out with the nail, you should be extra cautious. Trim a small bit of the nail every week, which will encourage the quick to recede gradually. If you’re unsure or nervous about the process, consider seeking a professional groomer or your vet’s assistance to avoid any injuries.
A note about your dog’s health
This article provides general education and does not replace an examination, diagnosis, or individualized advice from your veterinarian. Contact a veterinary professional if you are concerned about your dog’s symptoms.
Dr. Candy Akers earned her Doctor of Veterinary Medicine degree from Oklahoma State University in 2009 after completing undergraduate studies at the University of Delaware. Her experience includes companion-animal nutrition, chronic disease, allergies, autoimmune conditions, cold laser therapy, wildlife rehabilitation, and emergency wildlife response. She combines conventional veterinary knowledge with a whole-animal perspective to help pet parents understand their options and recognize when individualized veterinary care is needed.

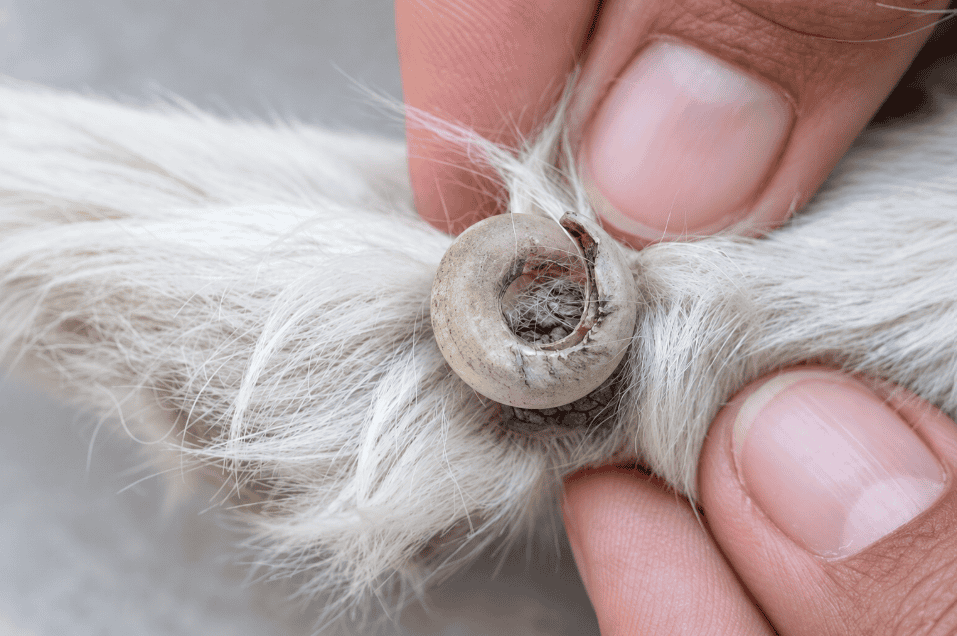
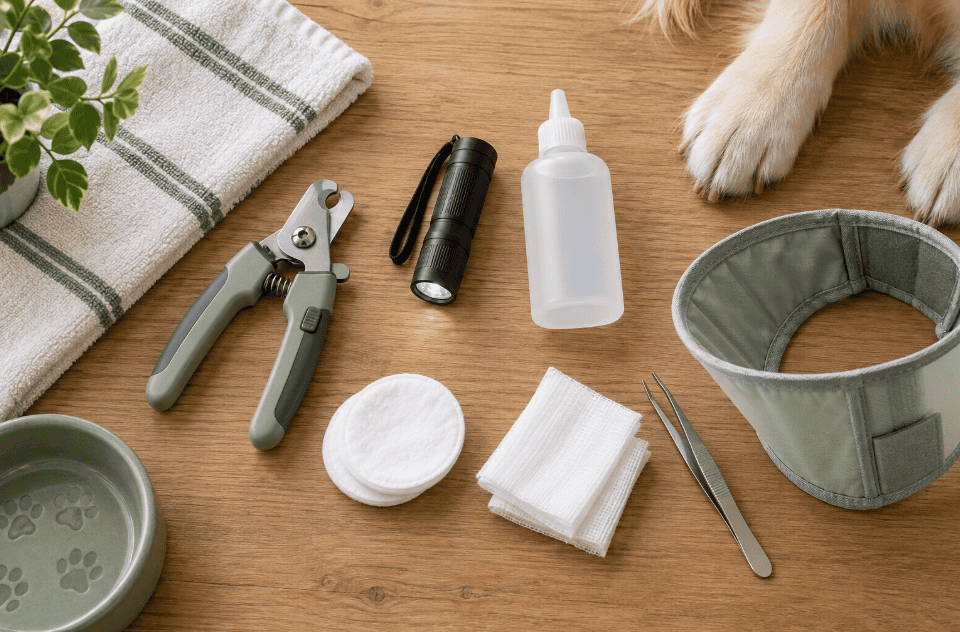
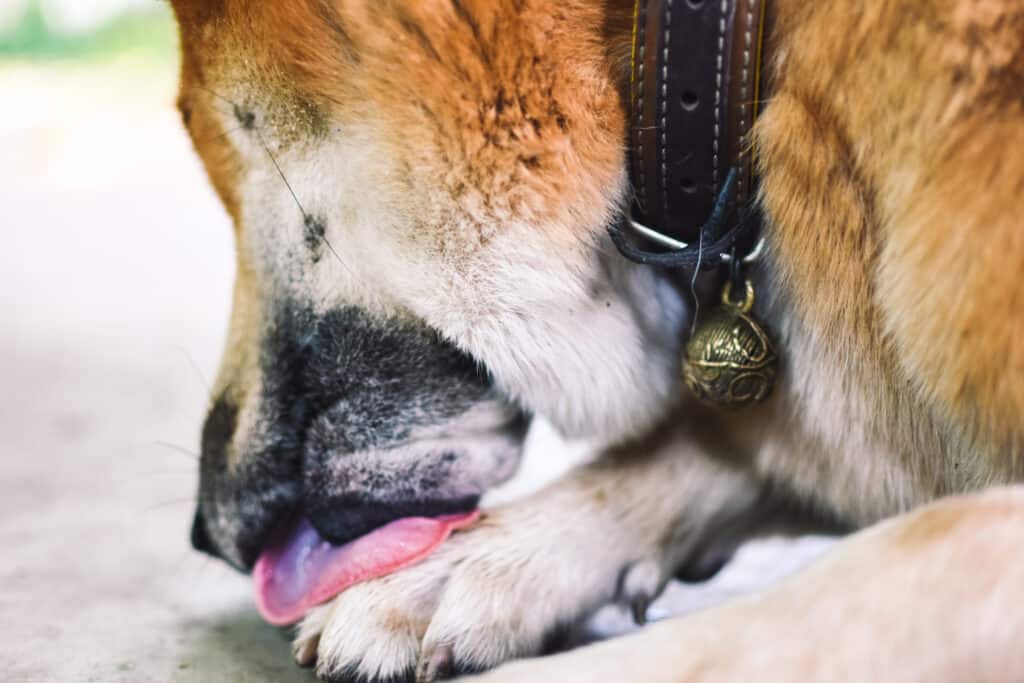
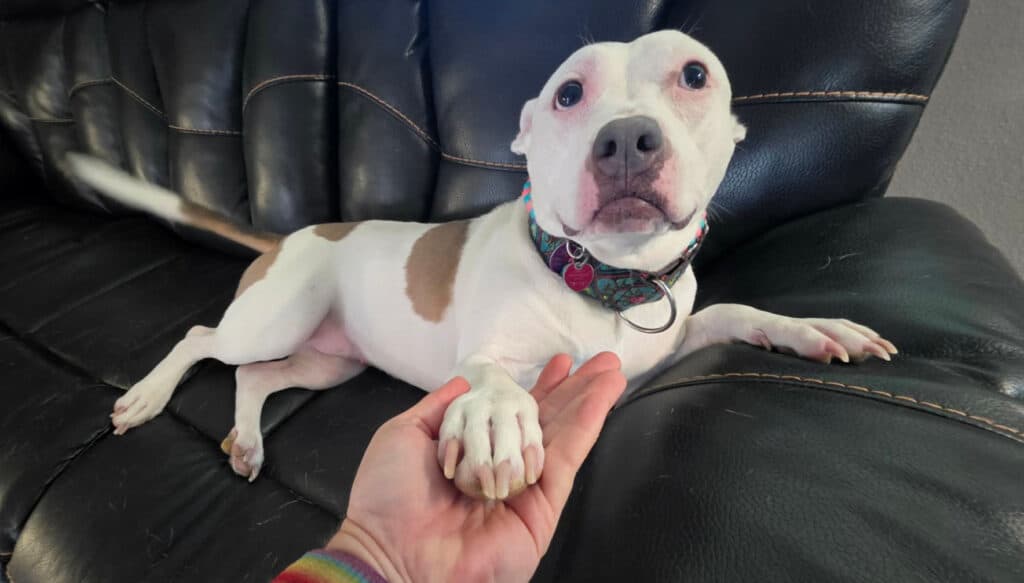
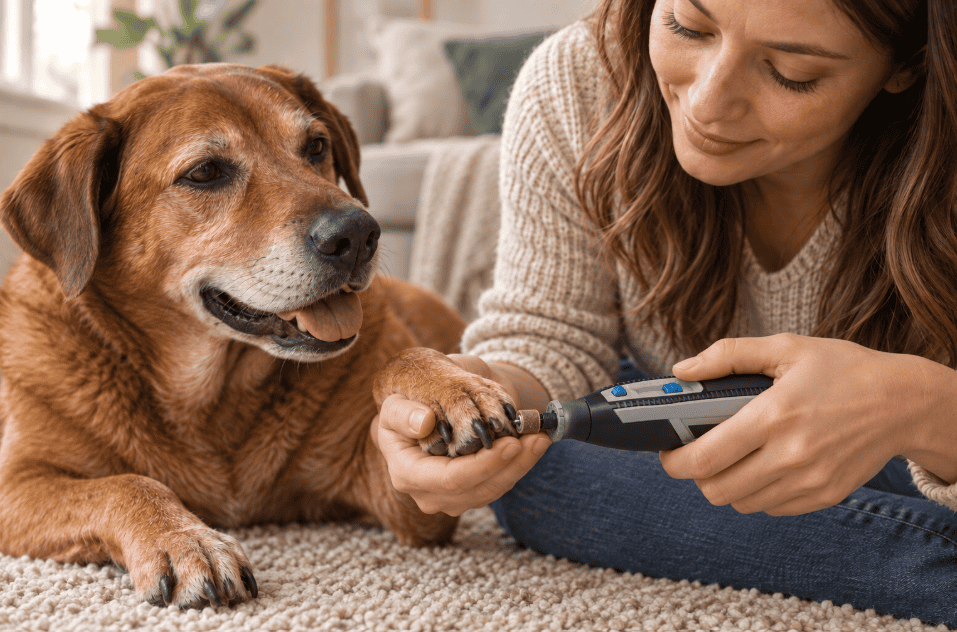
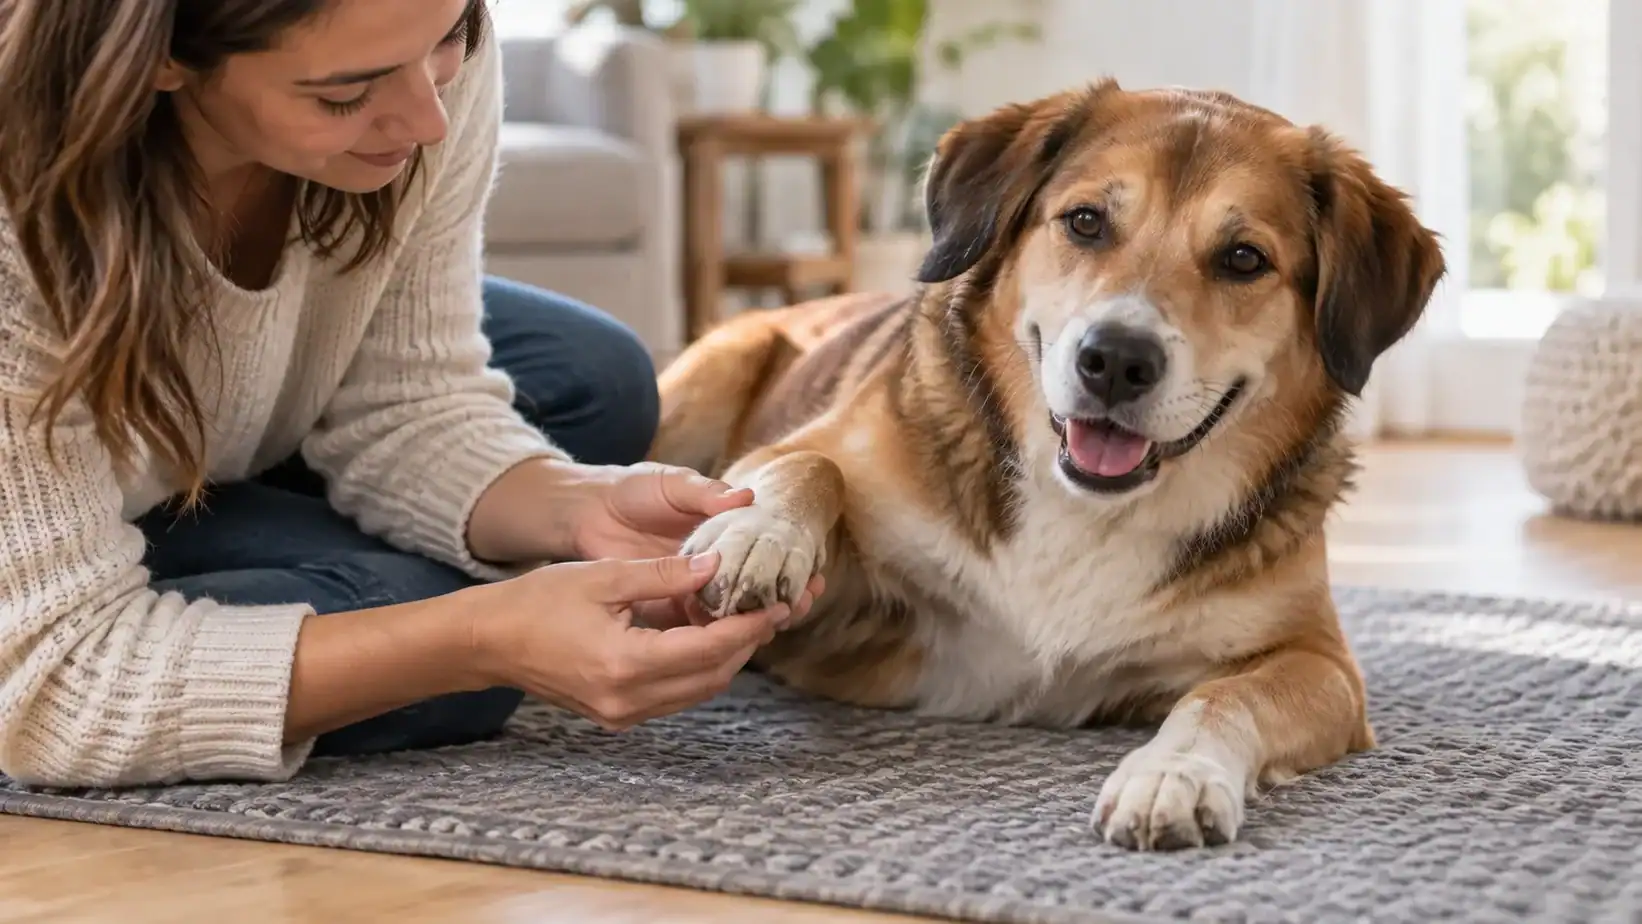
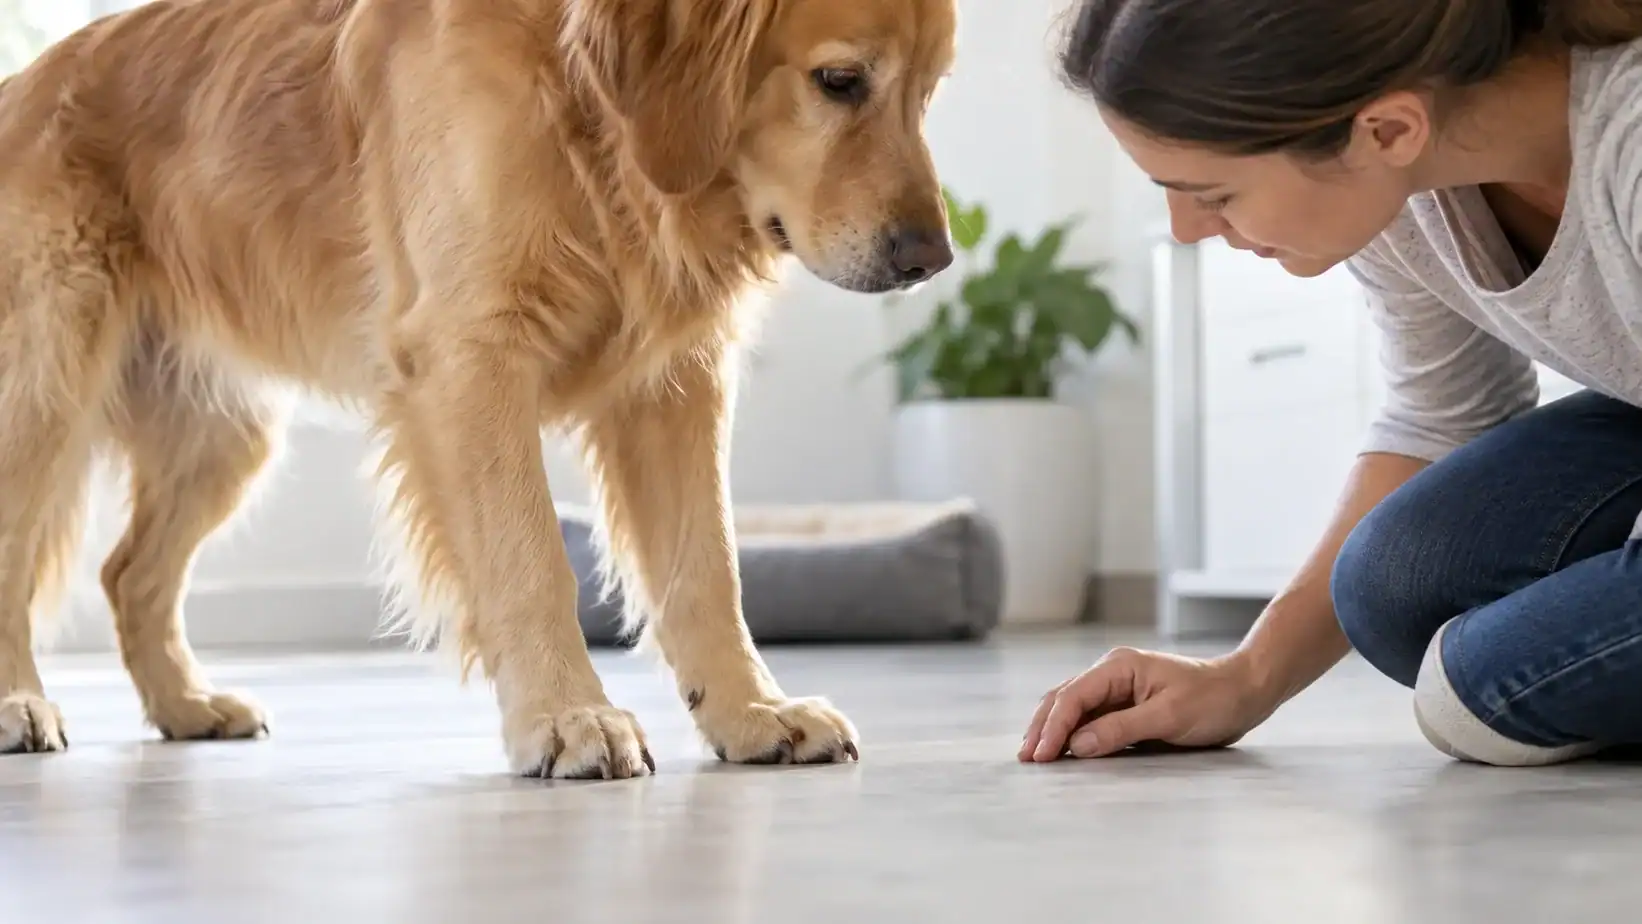
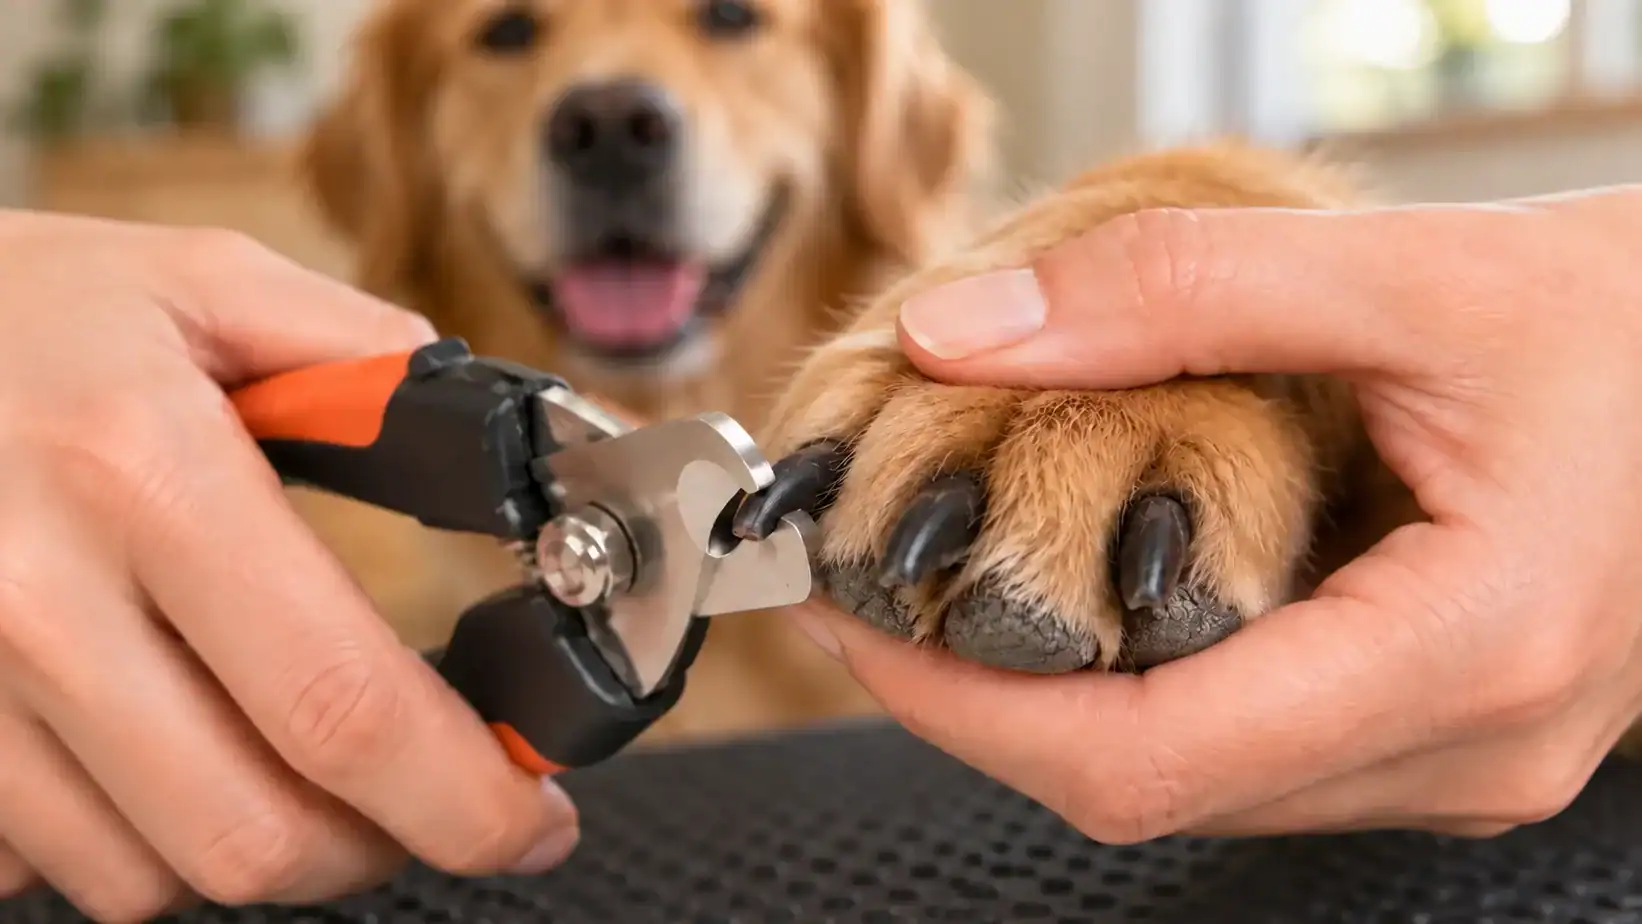
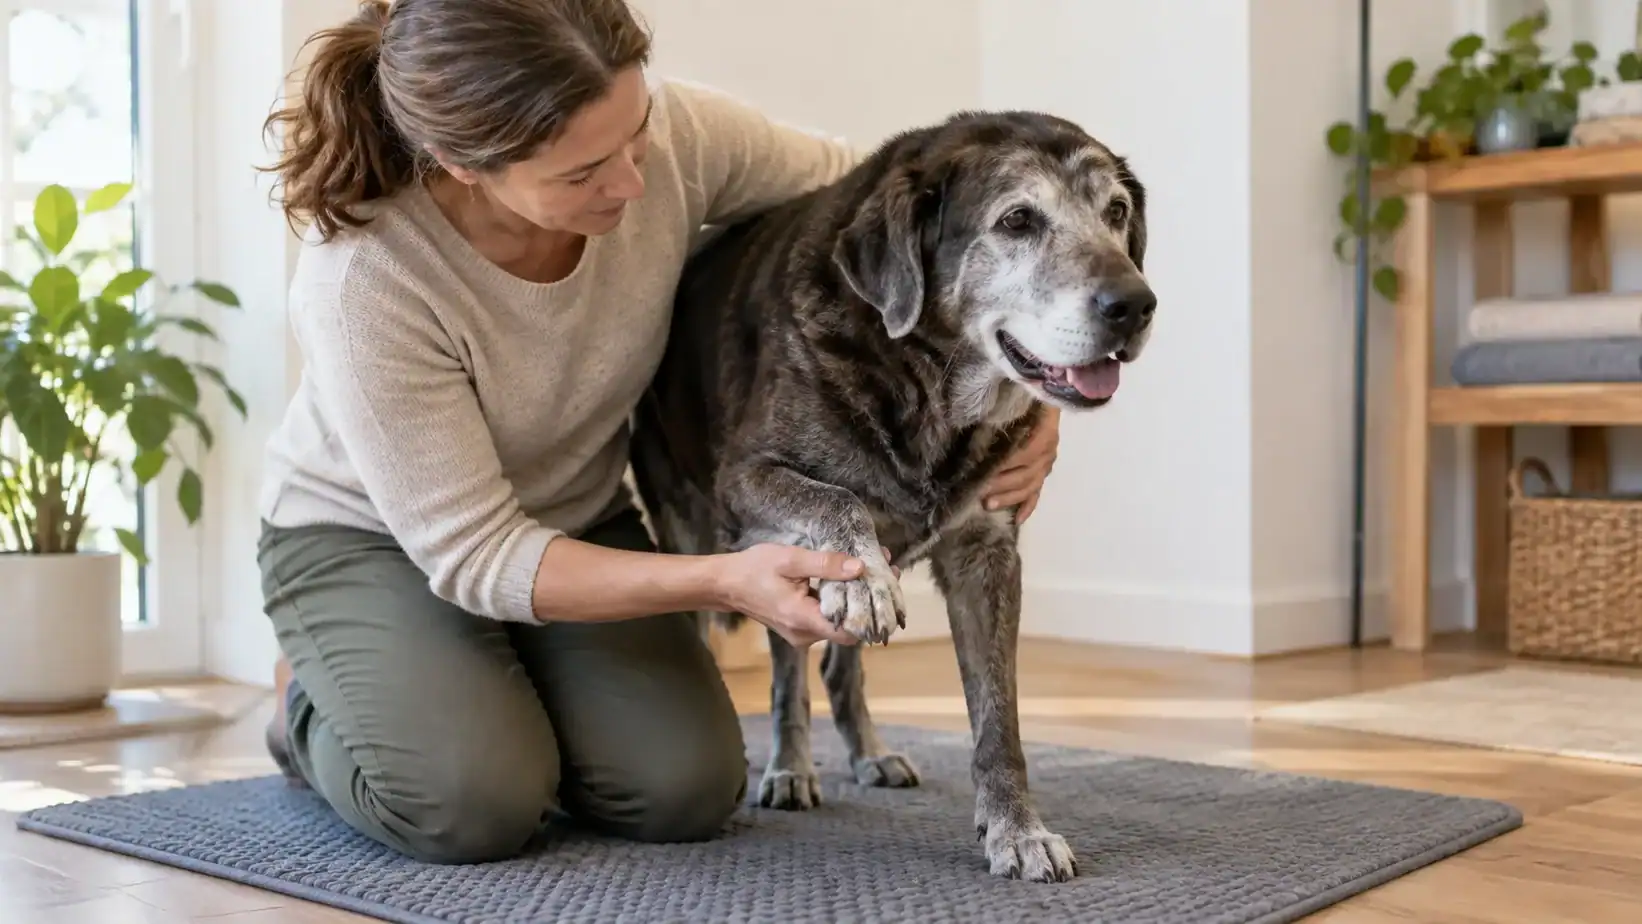
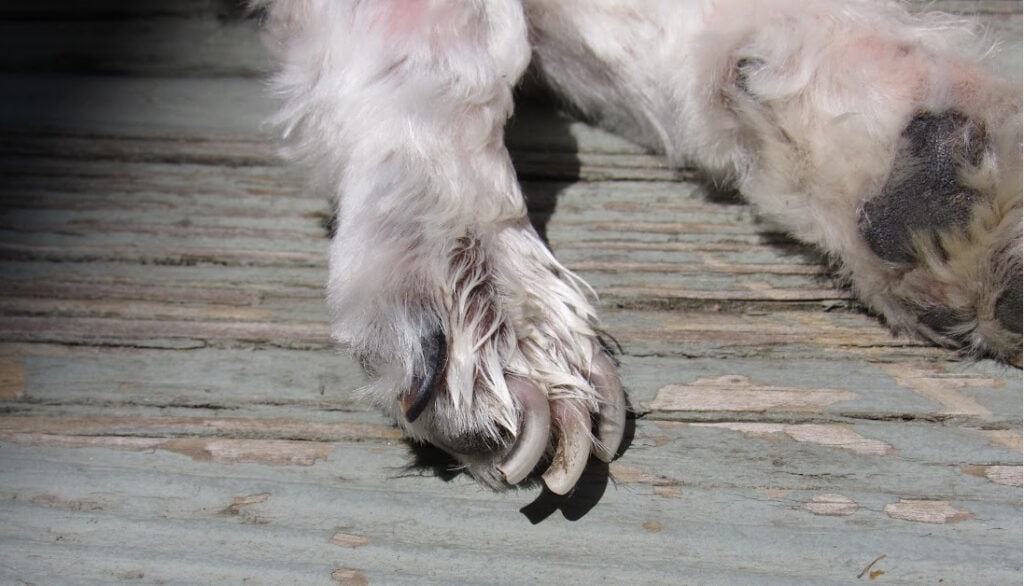

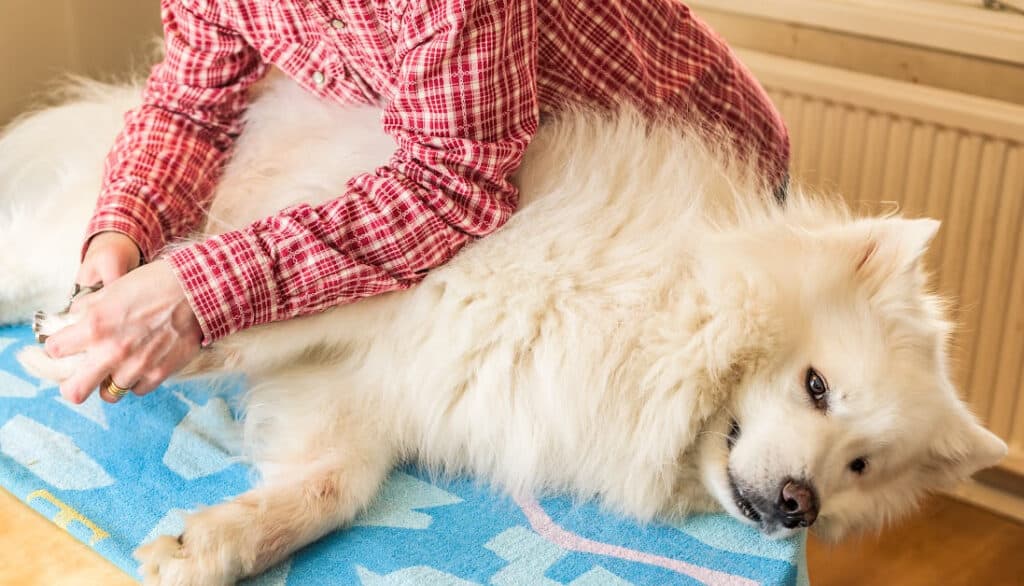
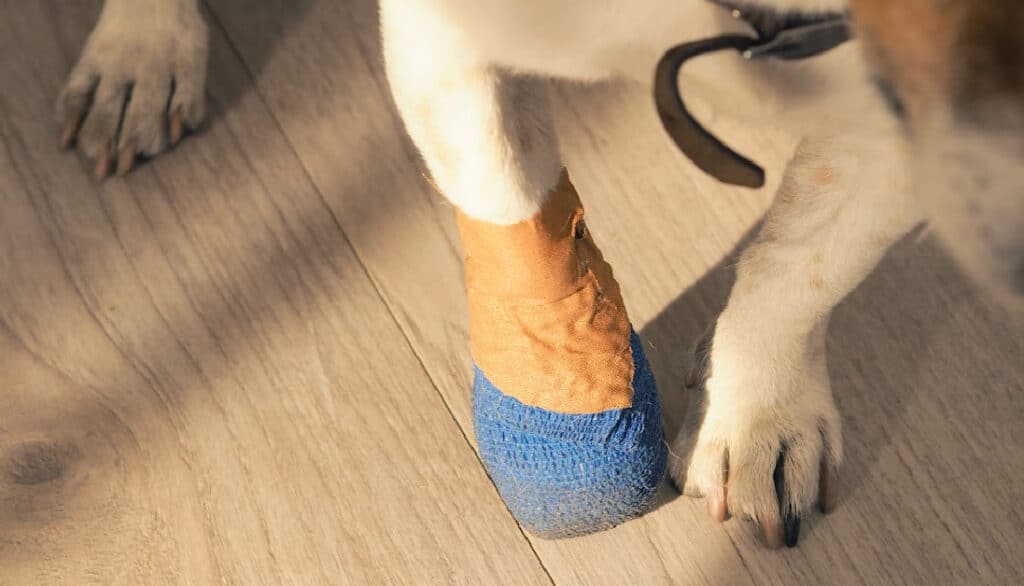
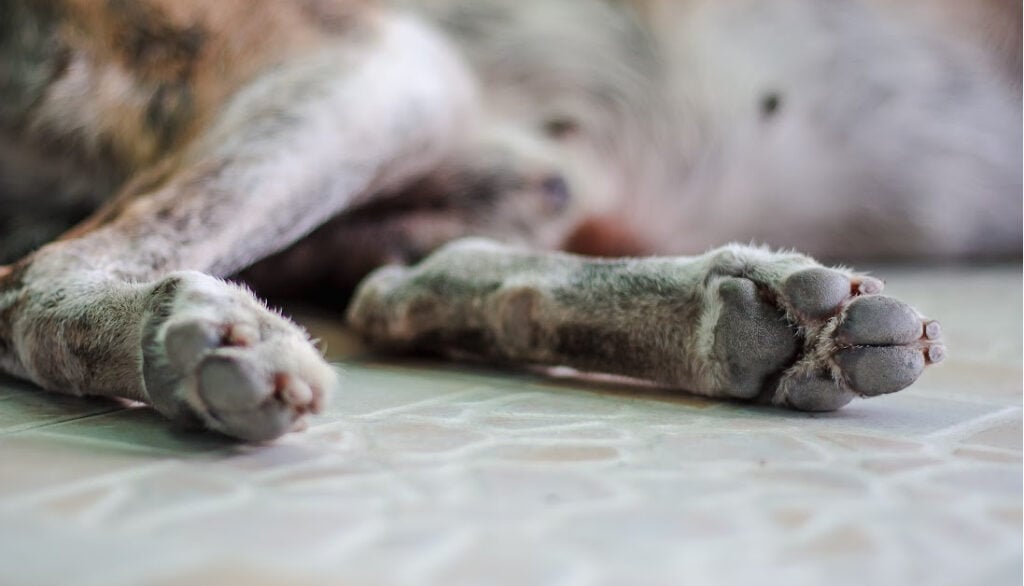

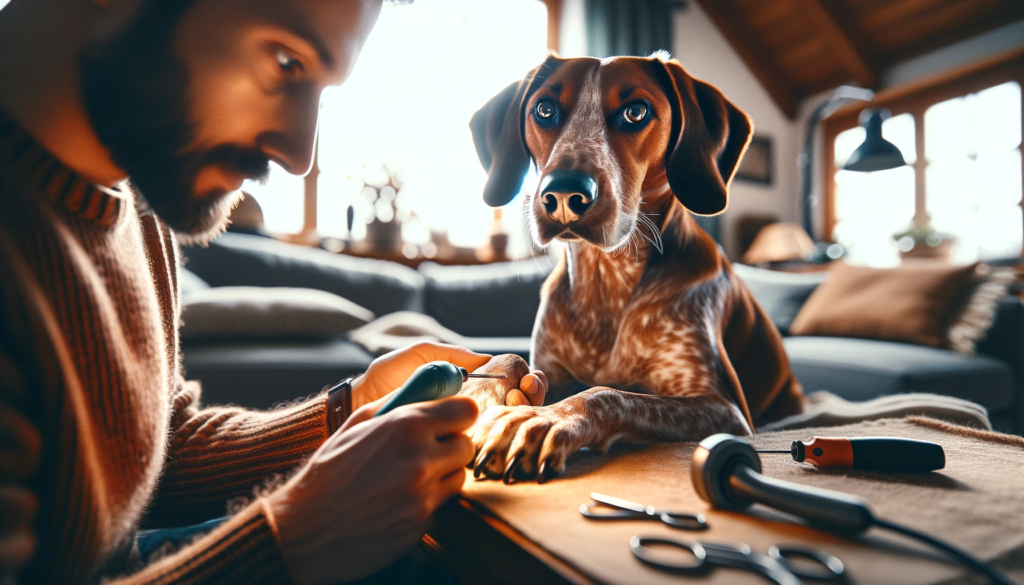
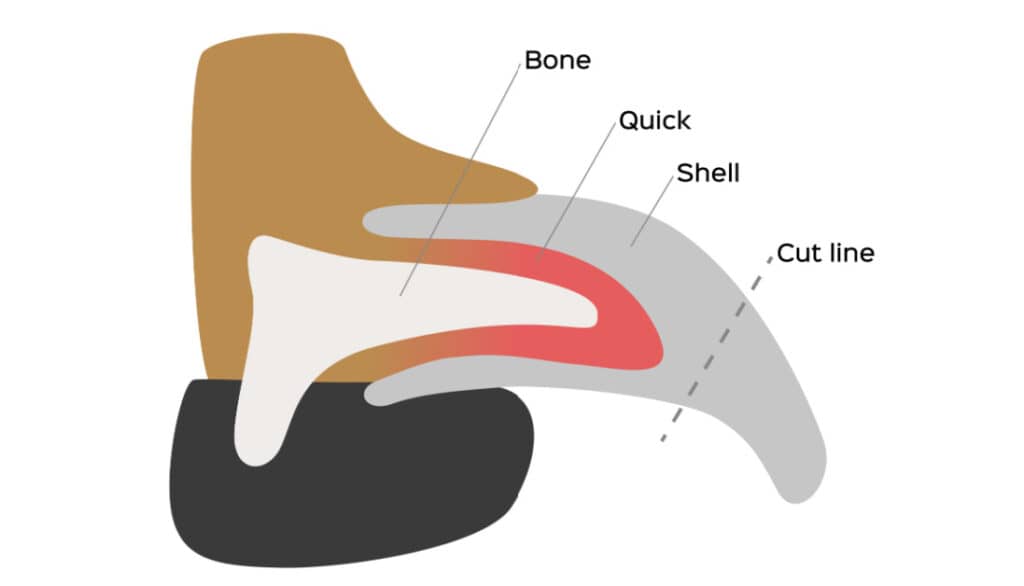
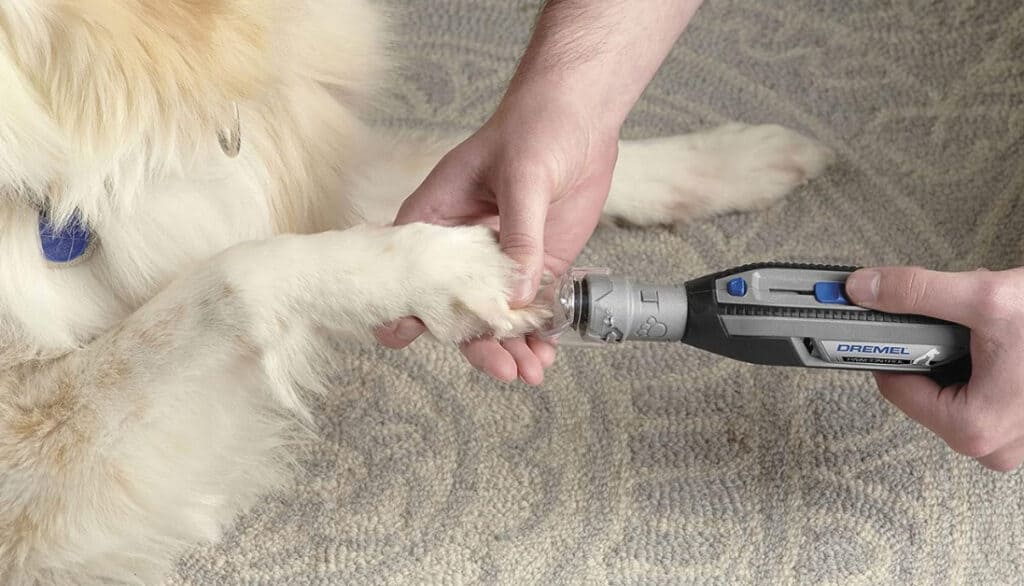
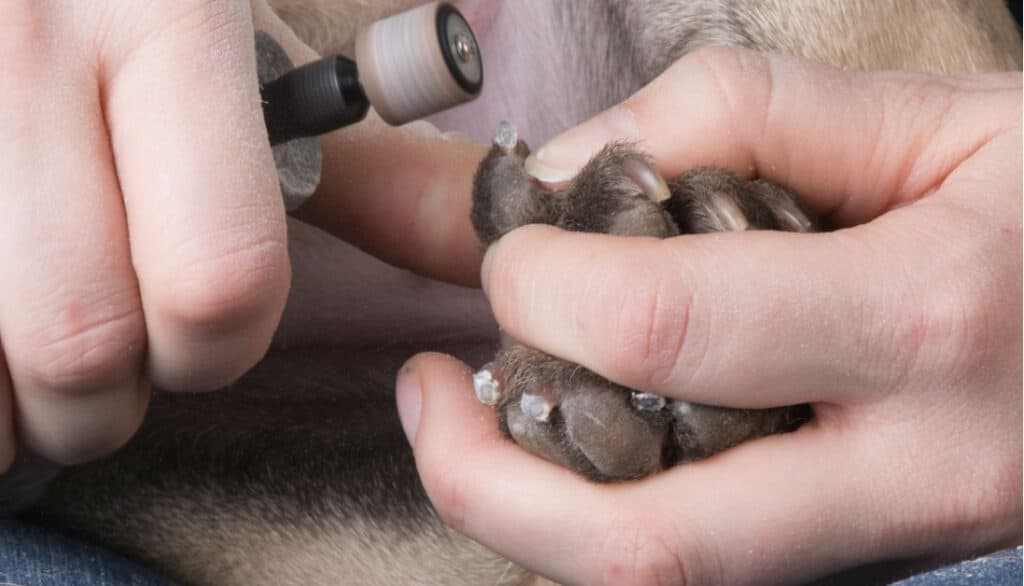
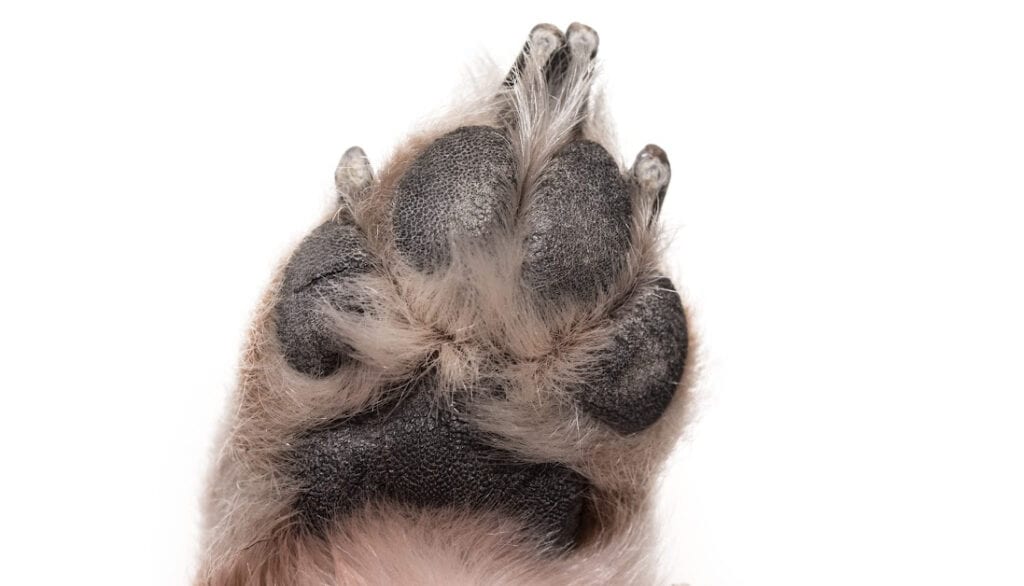
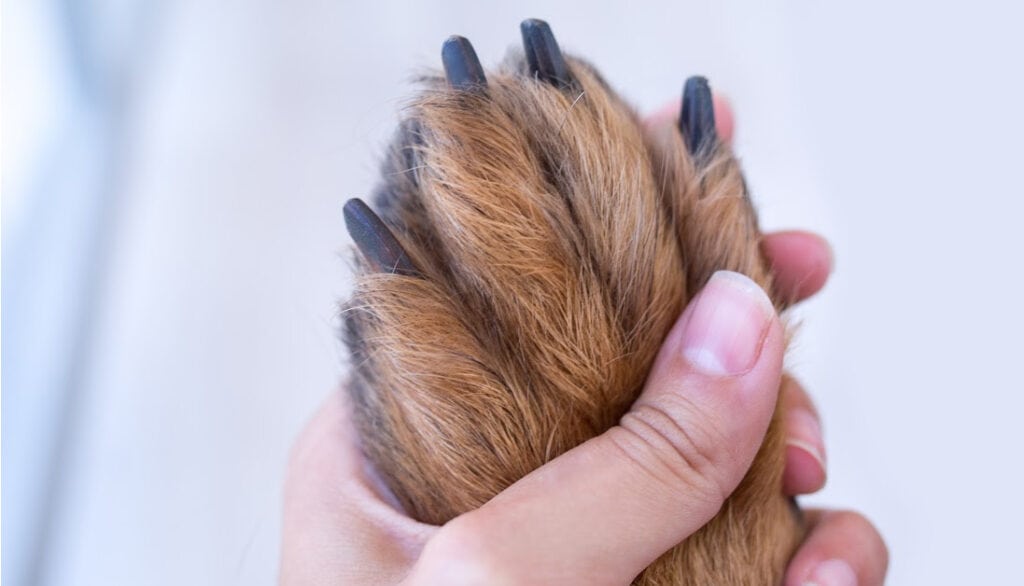
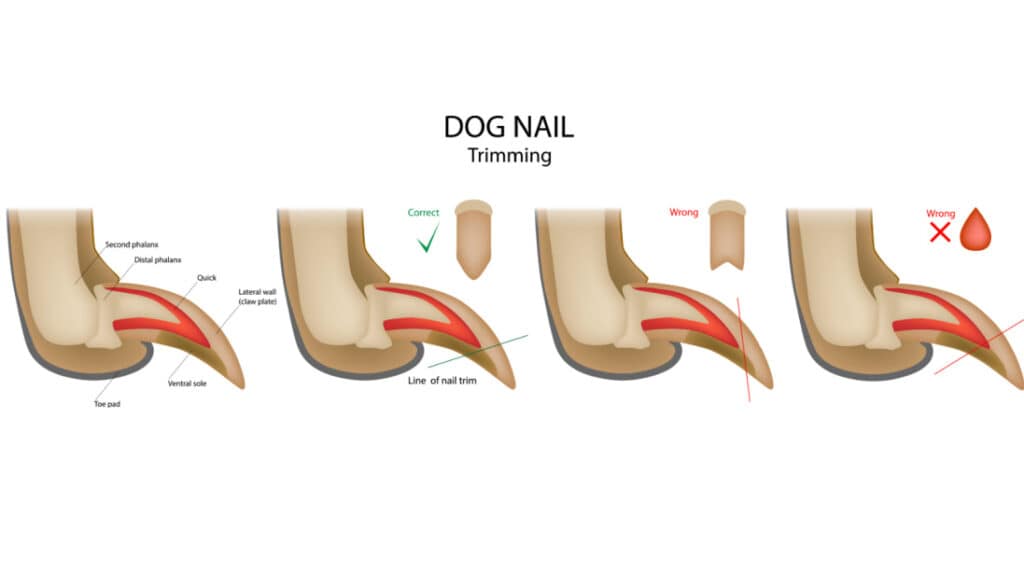
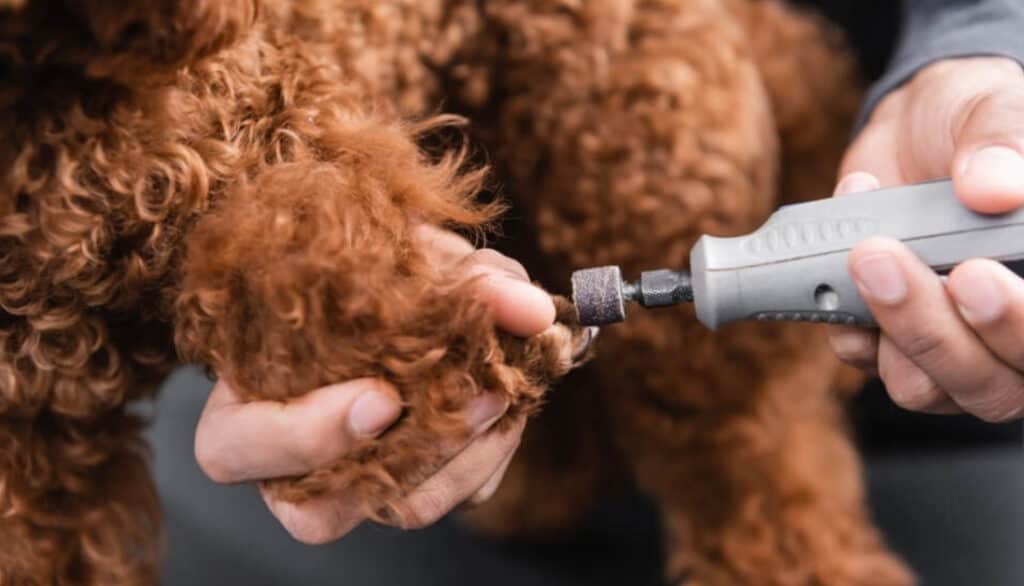
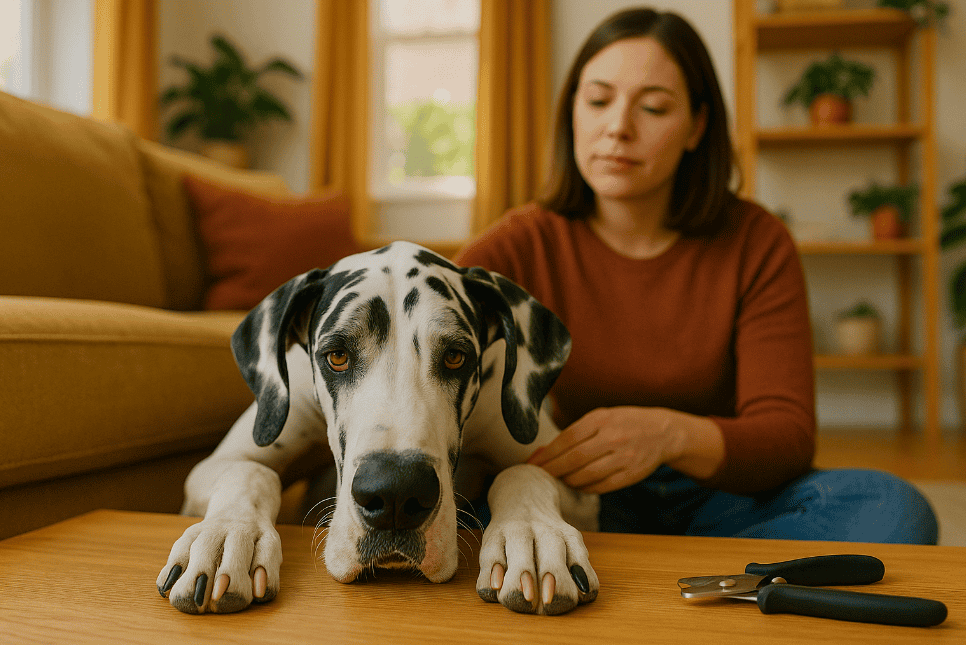
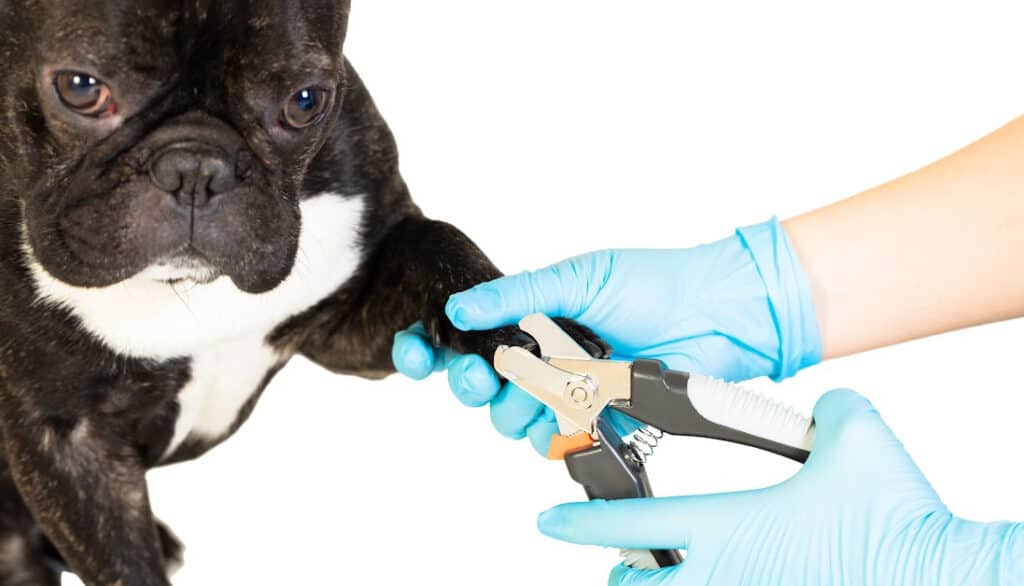
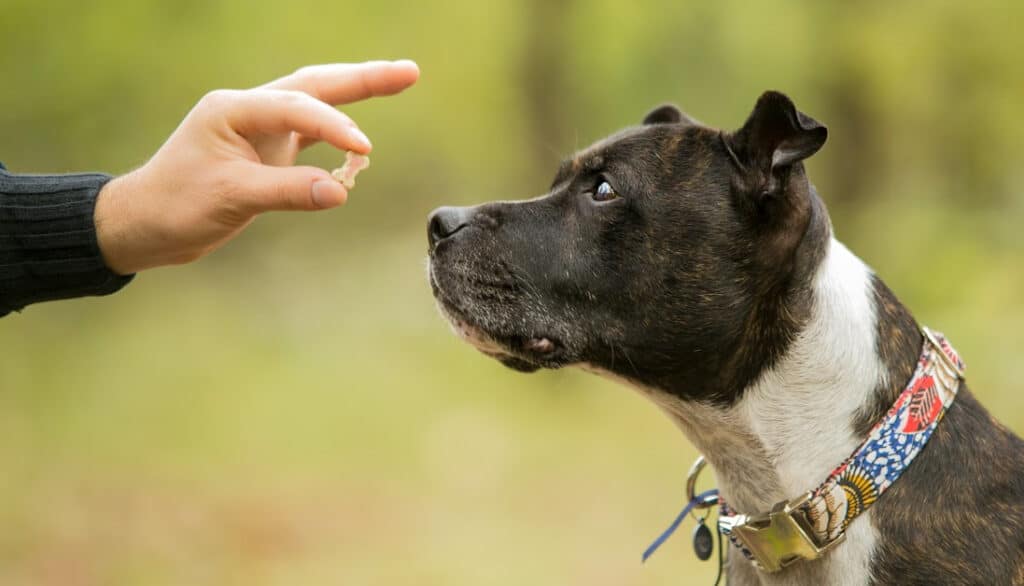

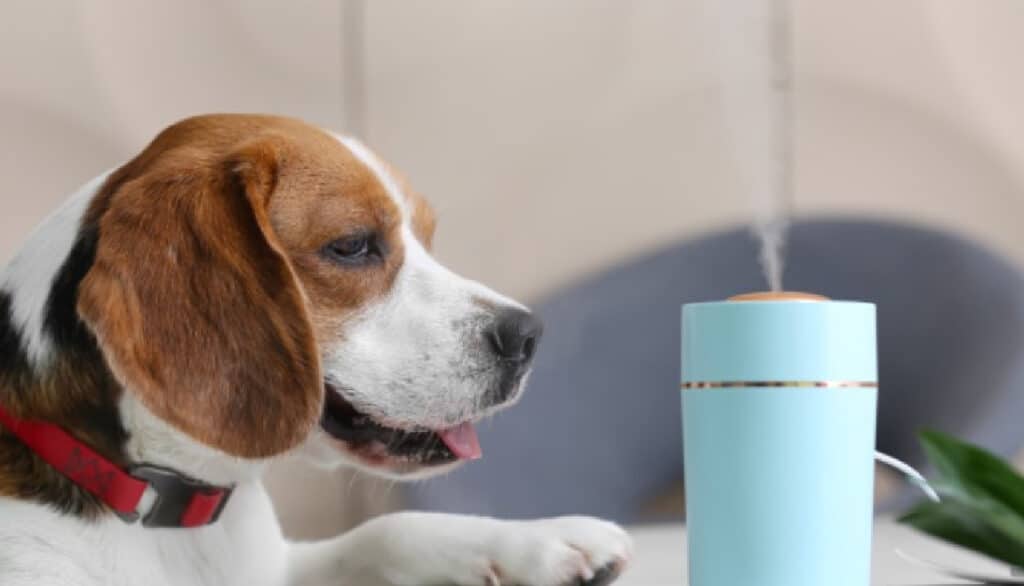
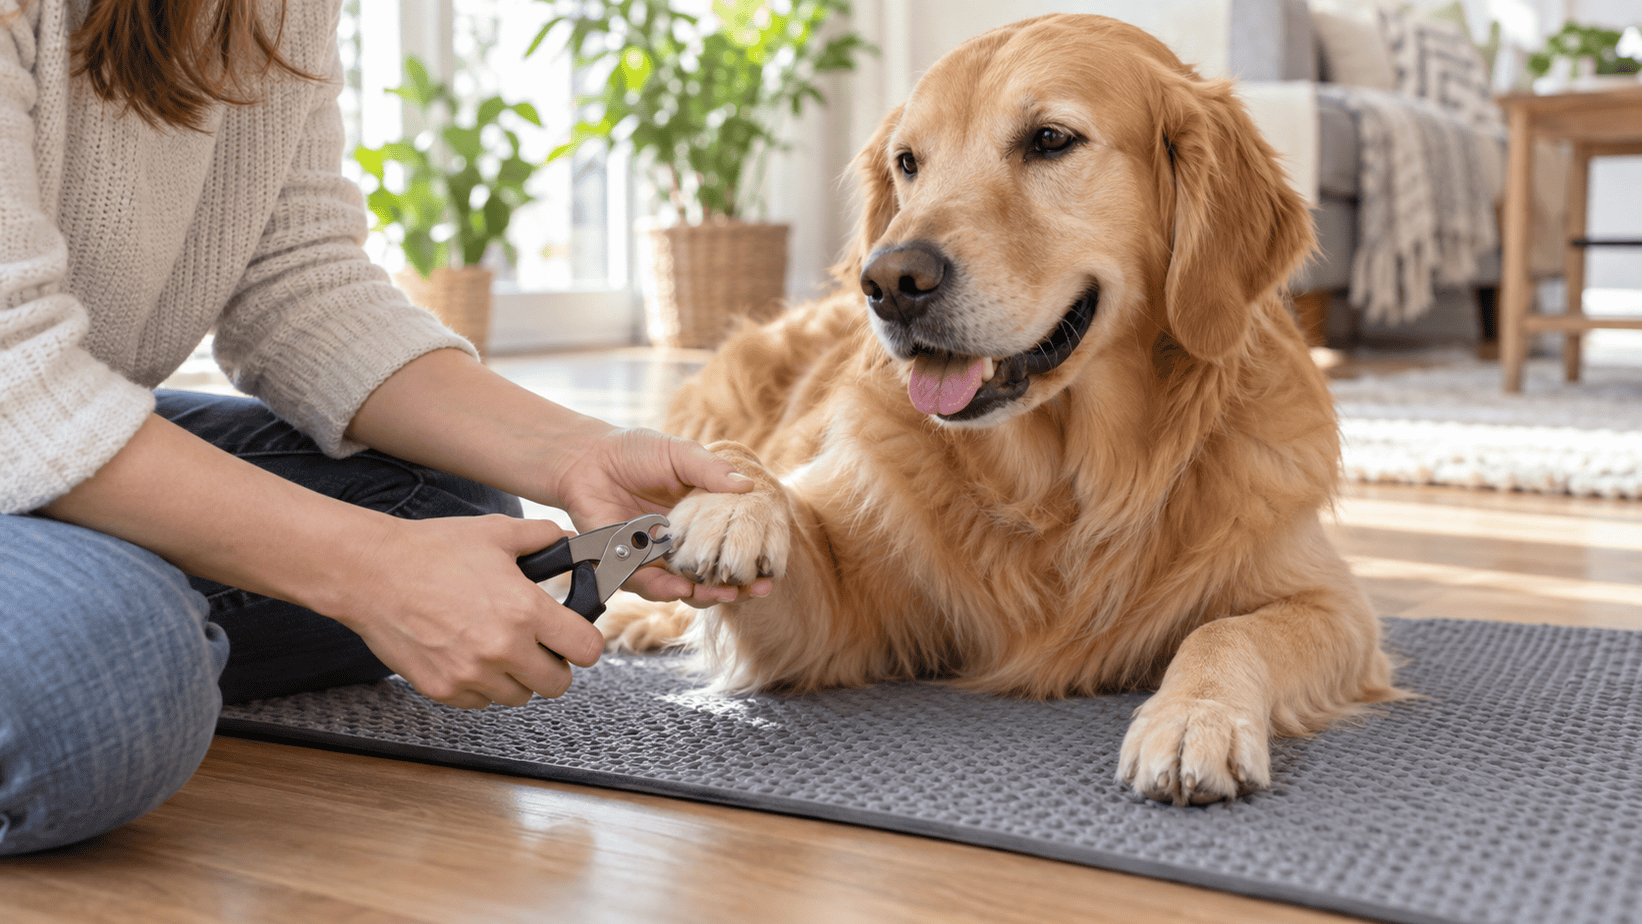
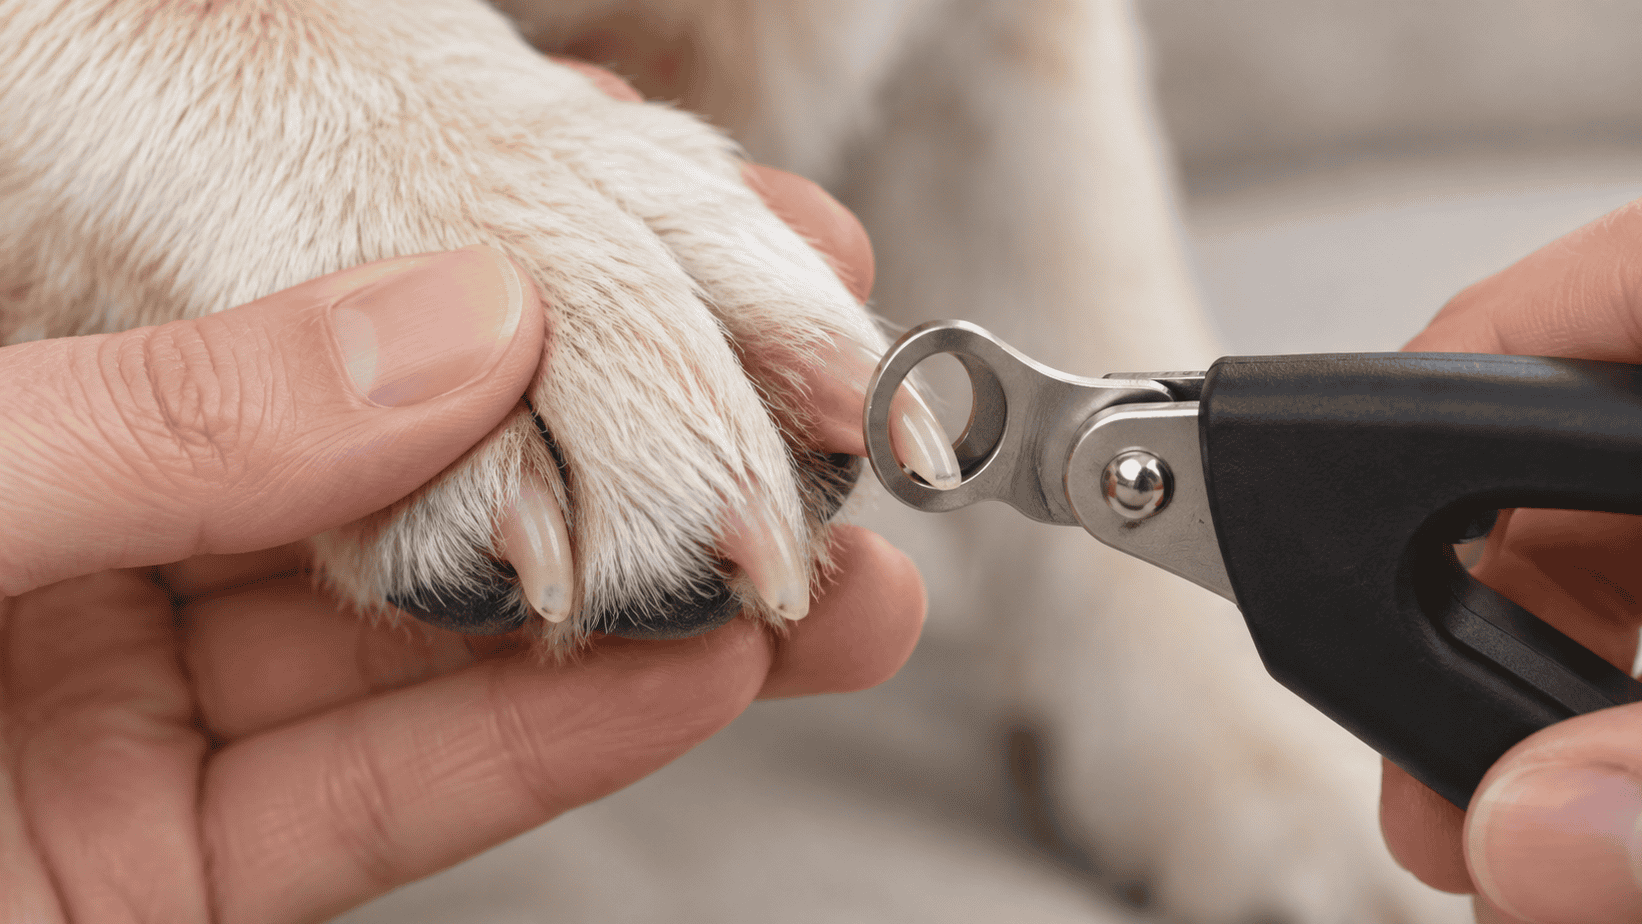
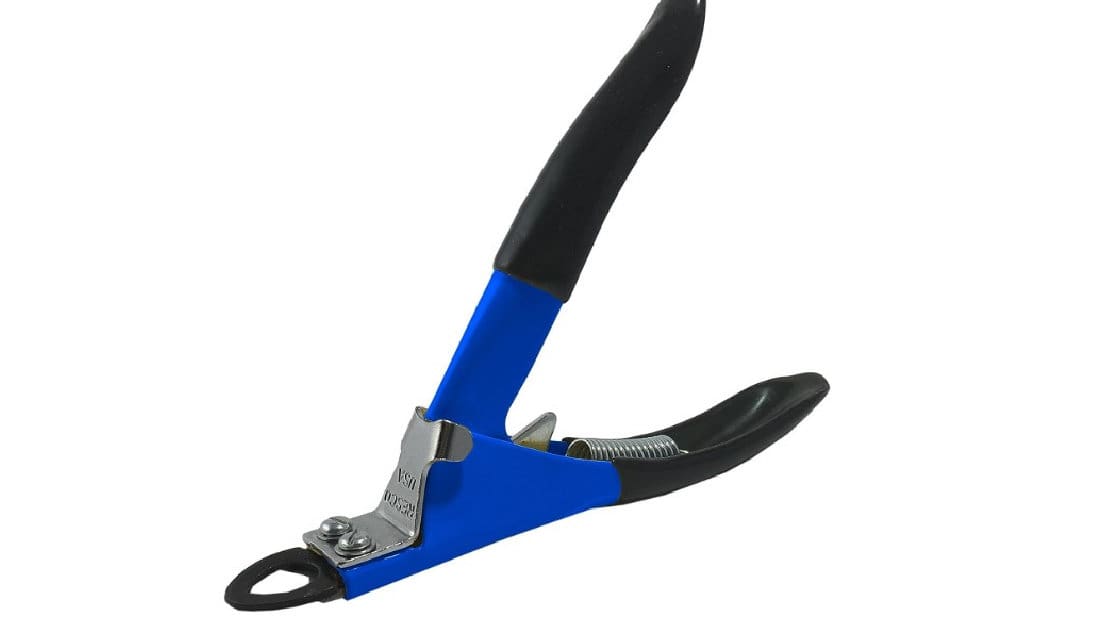
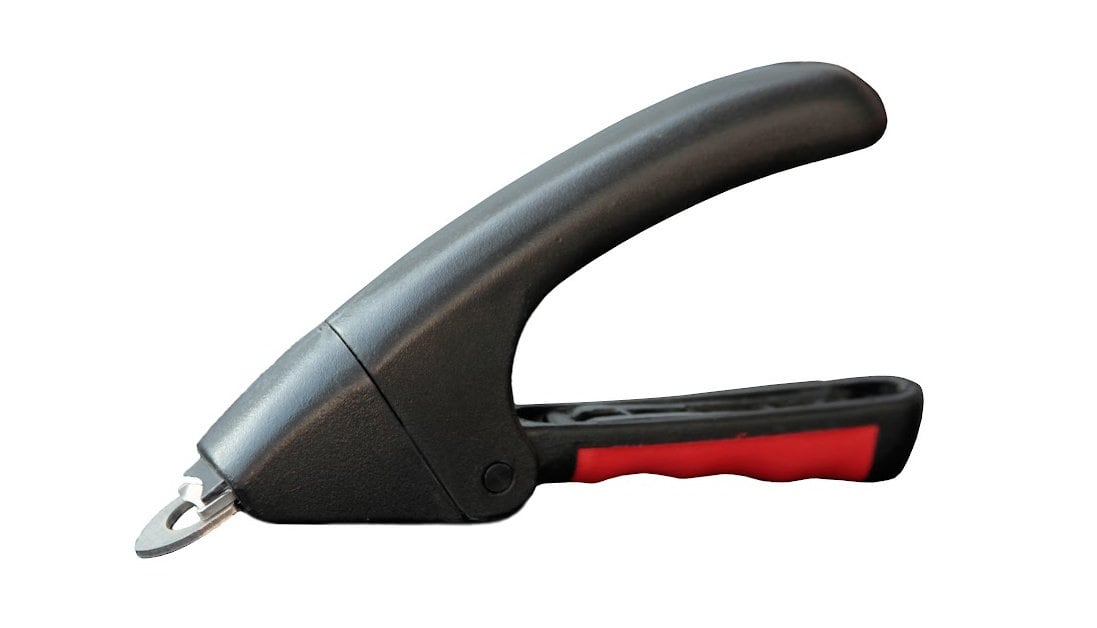
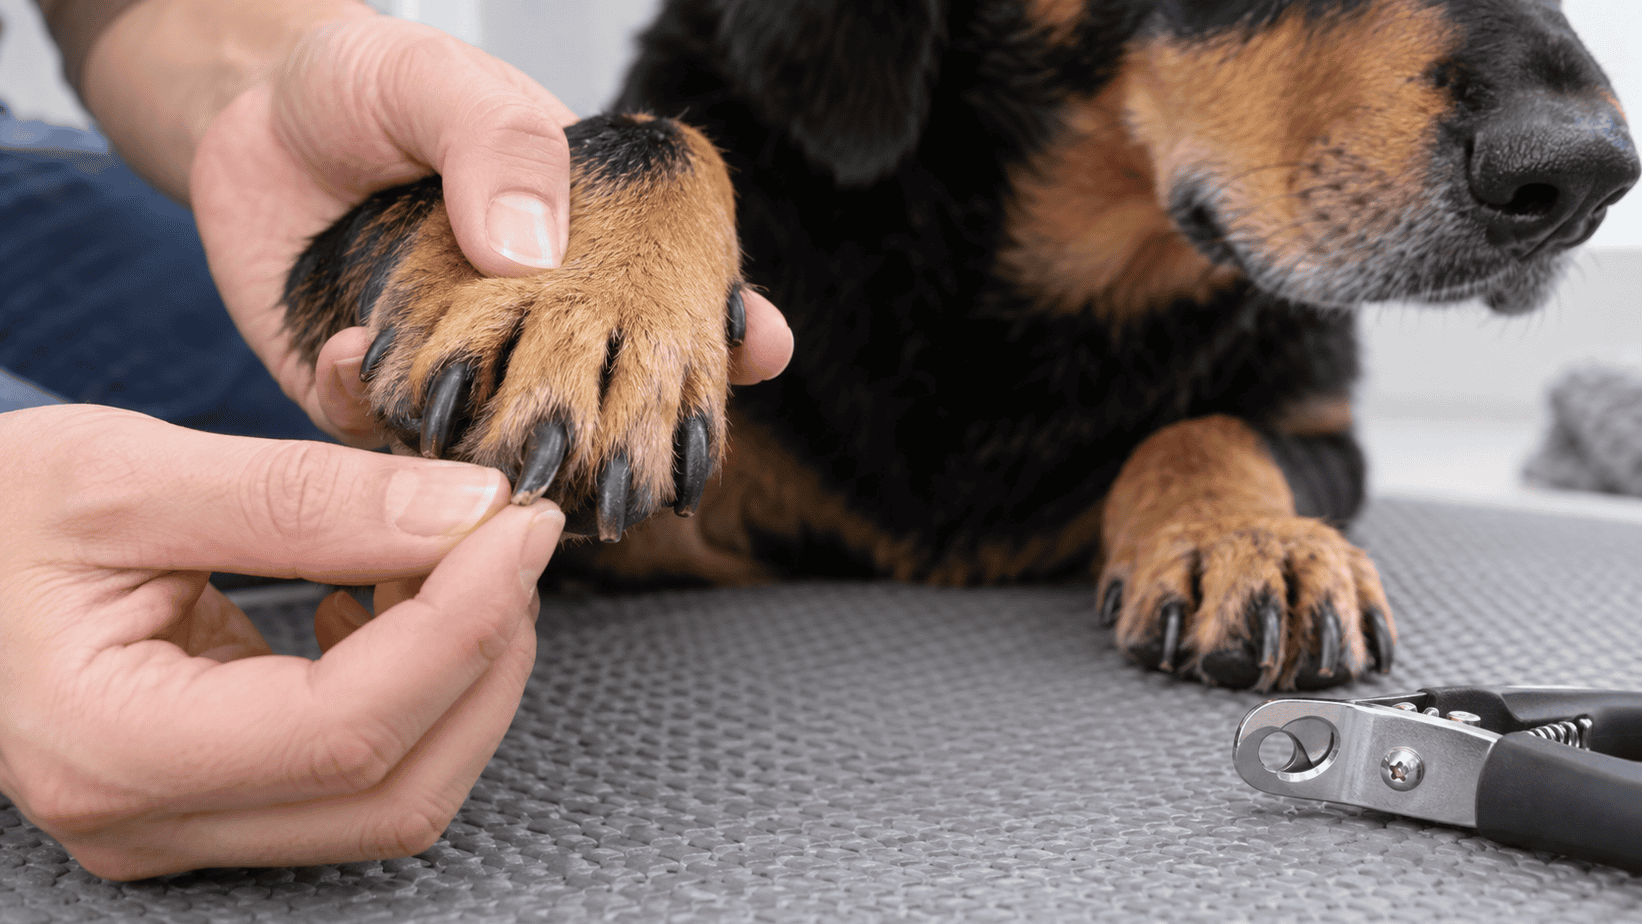
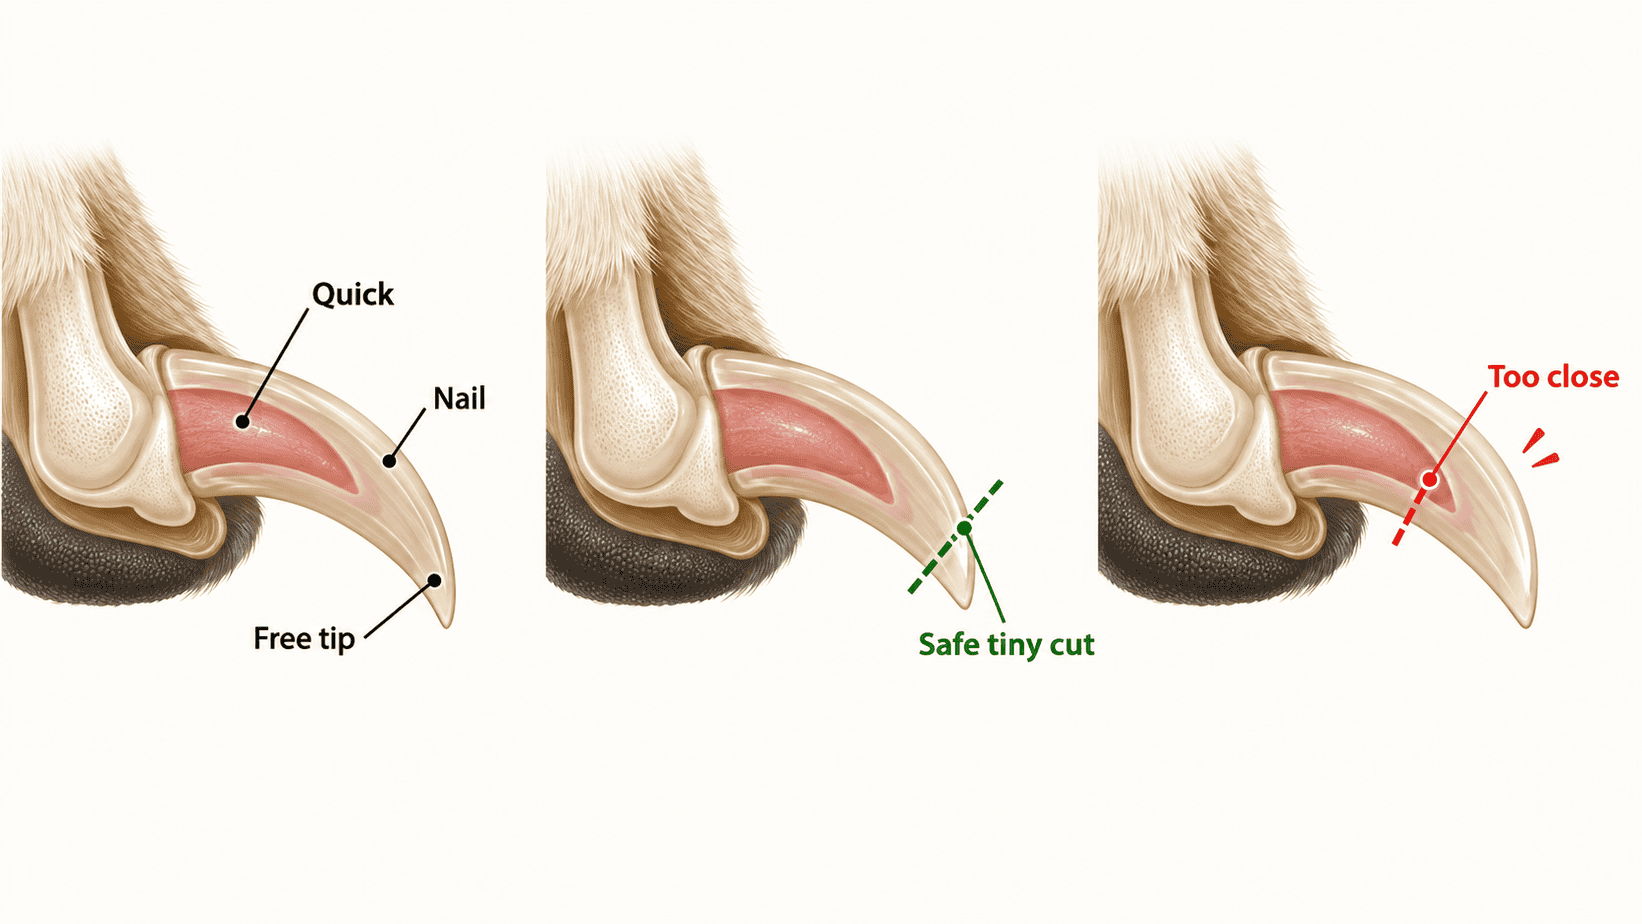

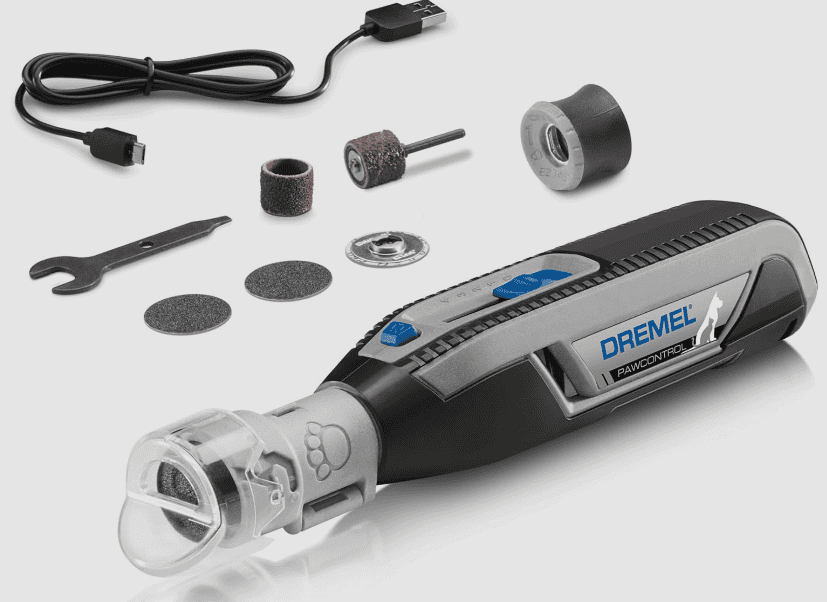
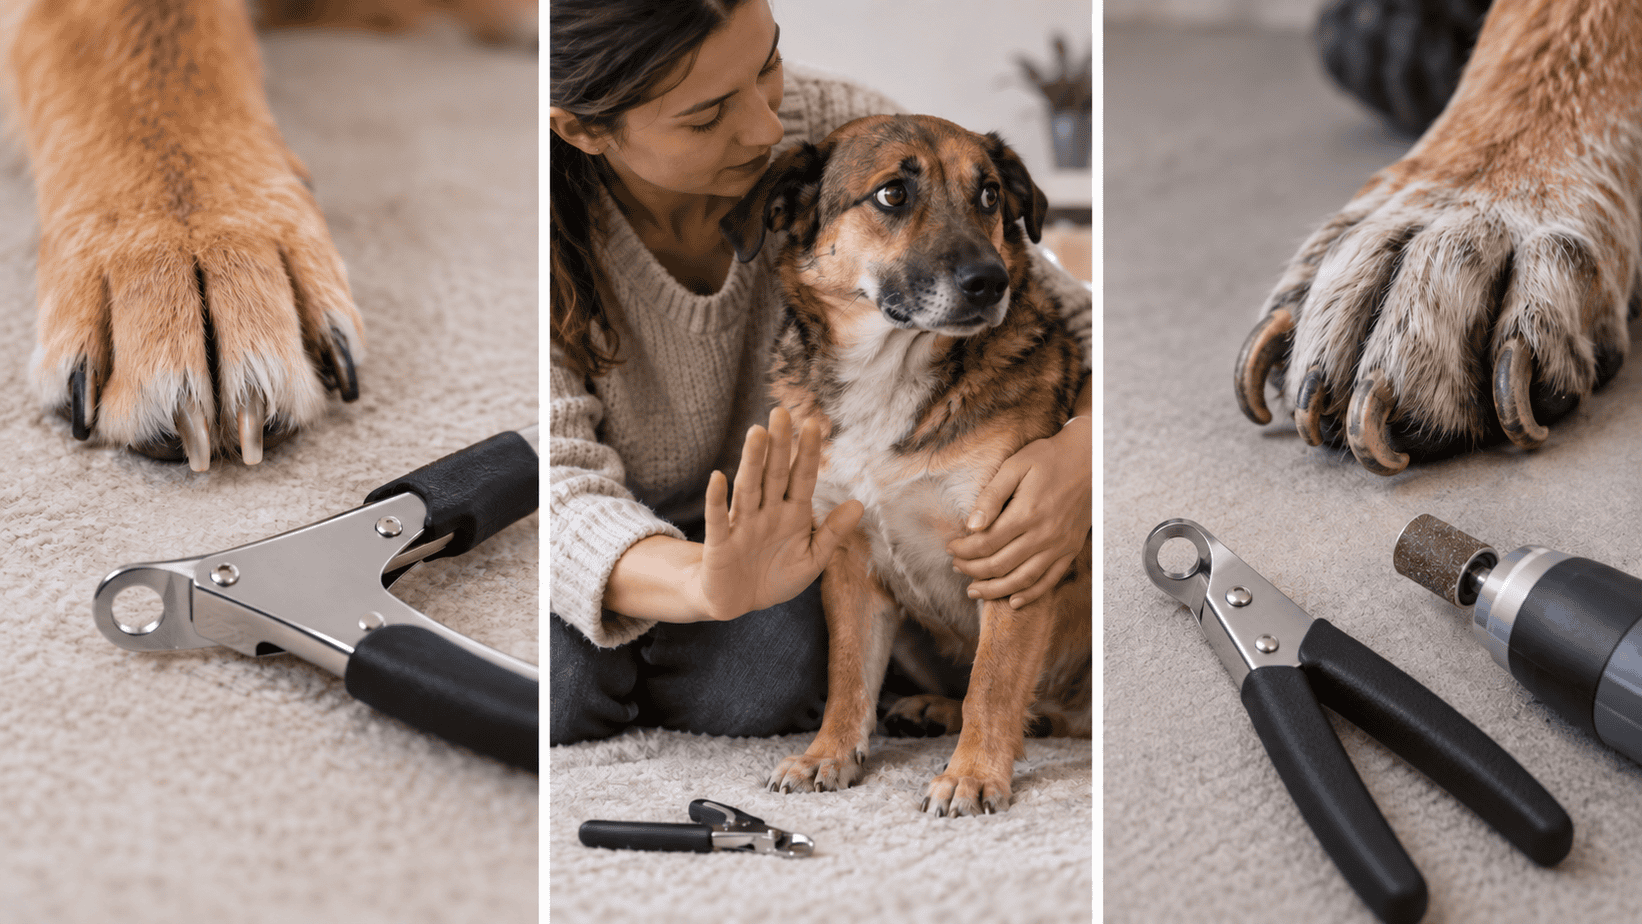
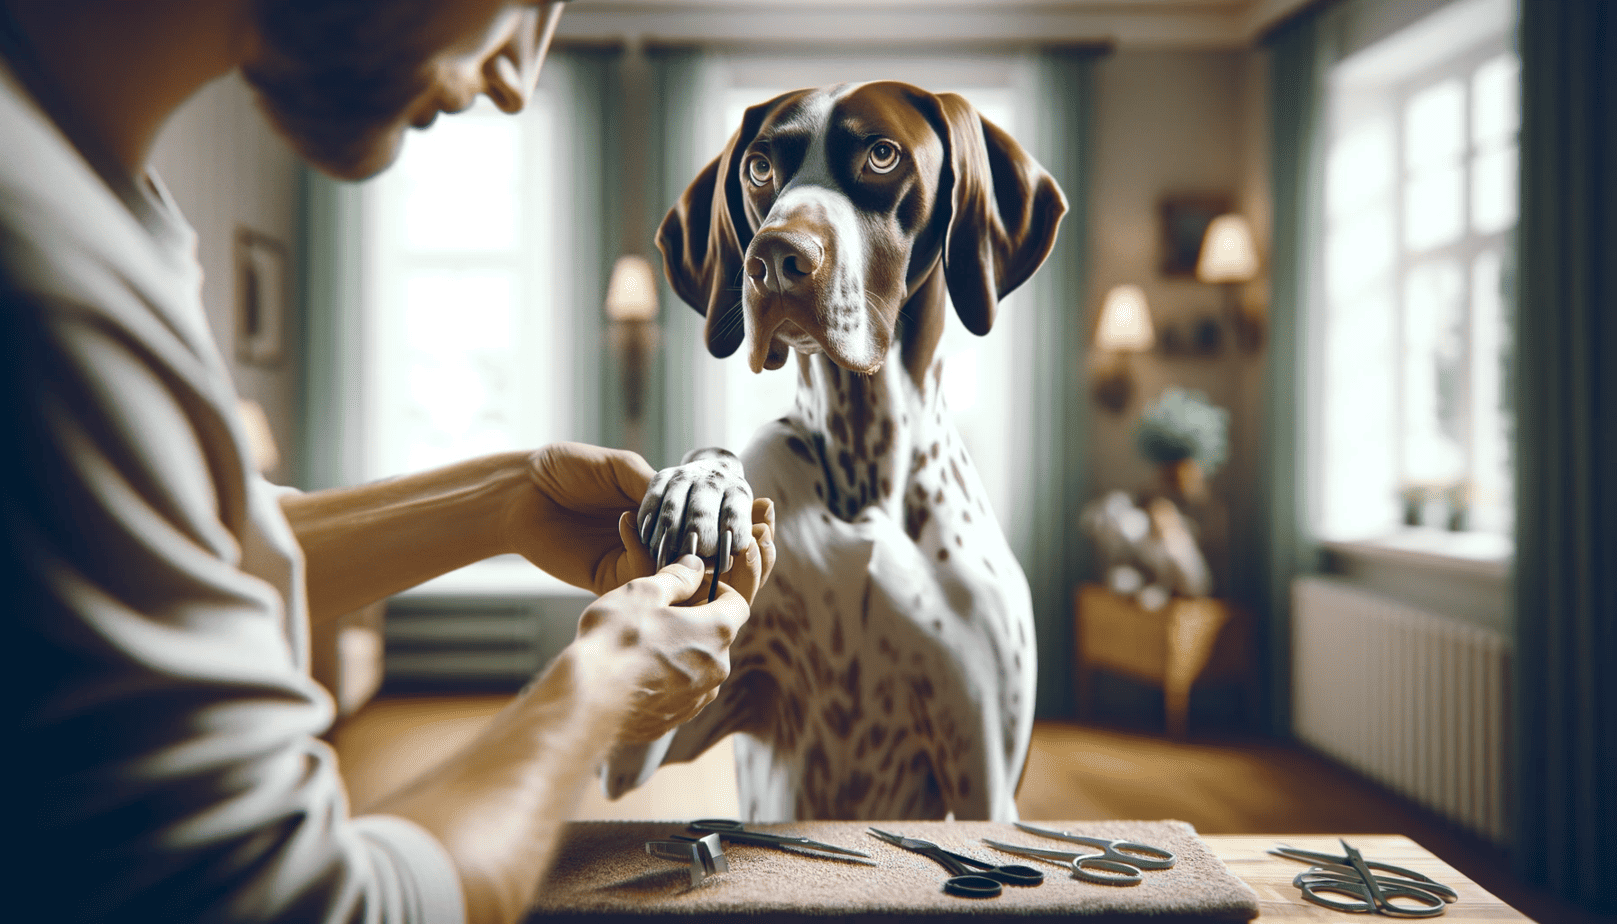
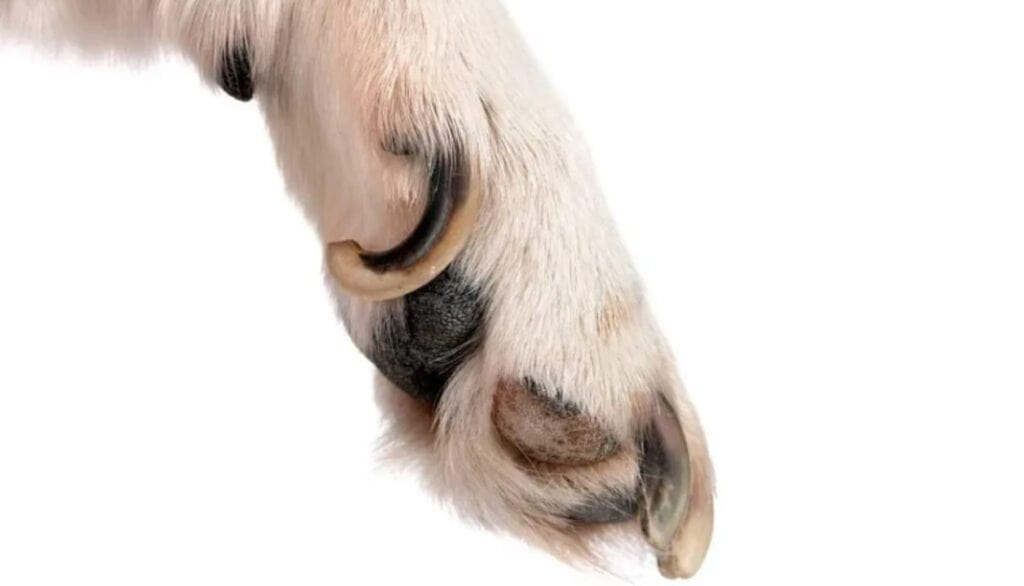
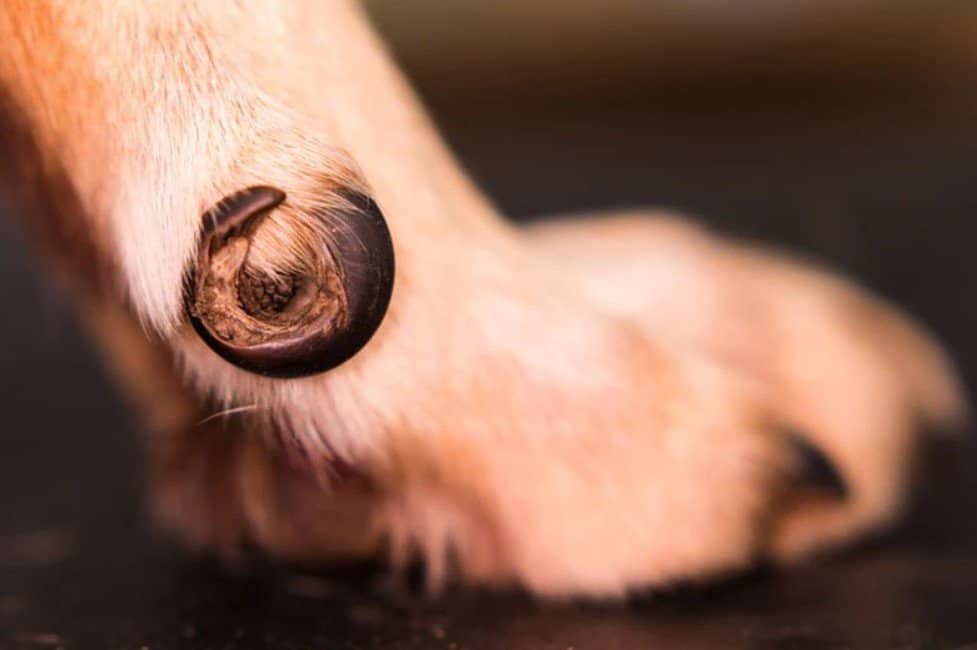
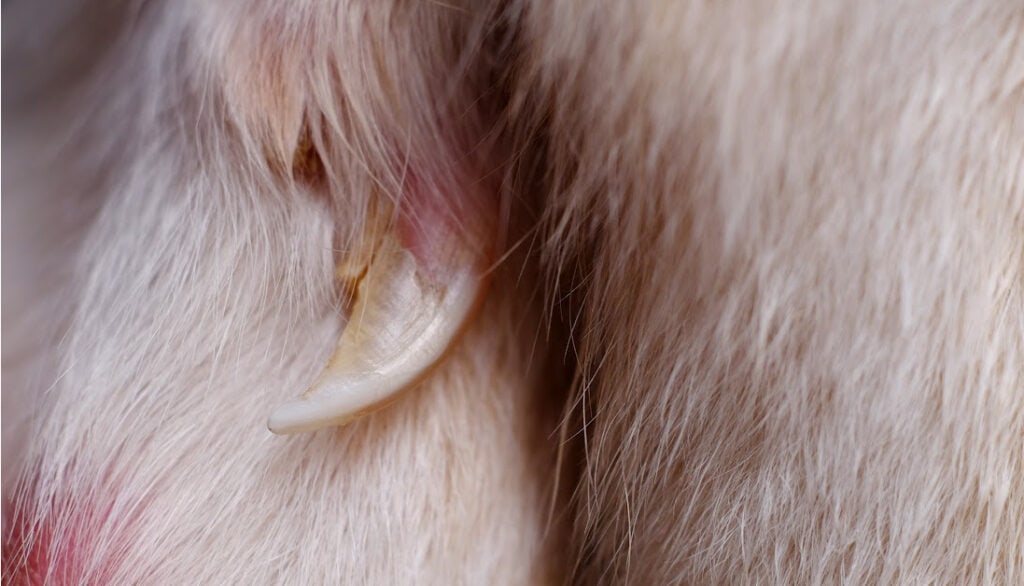

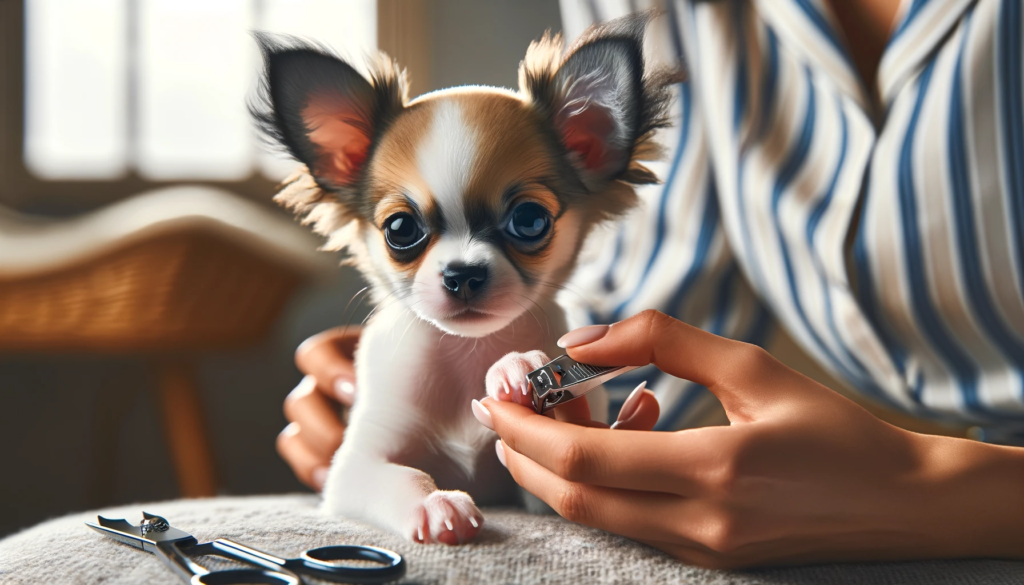
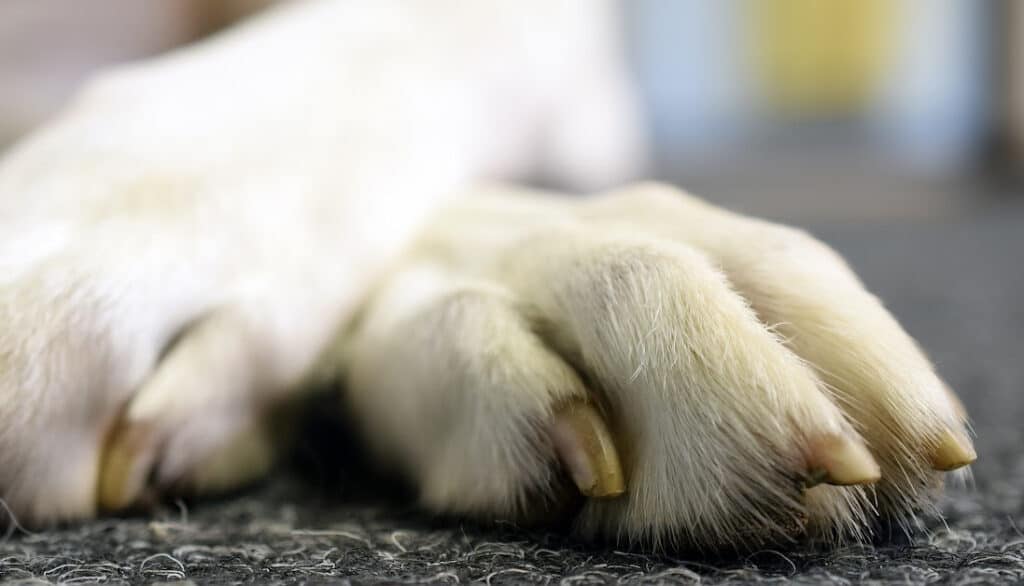
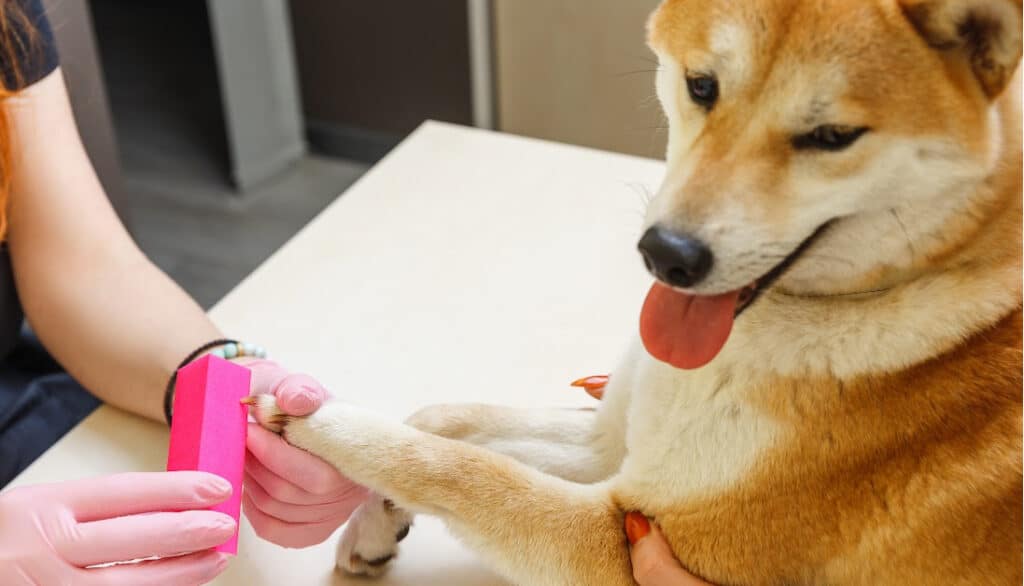
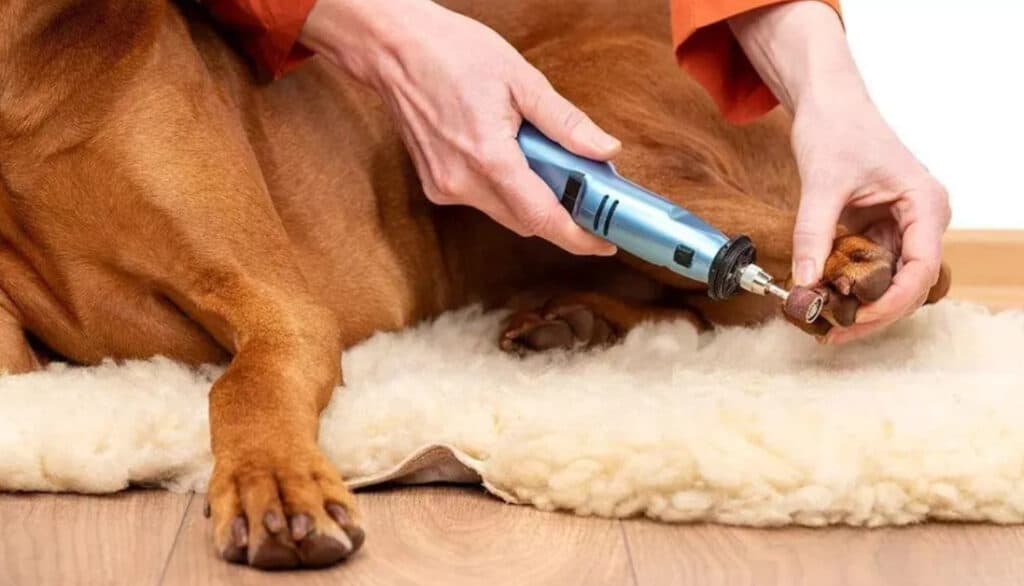
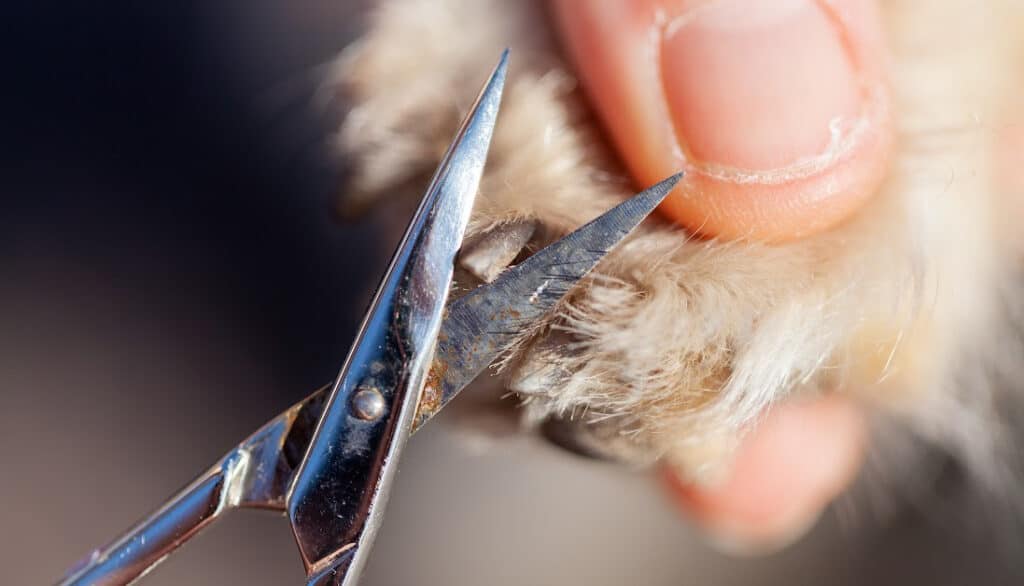
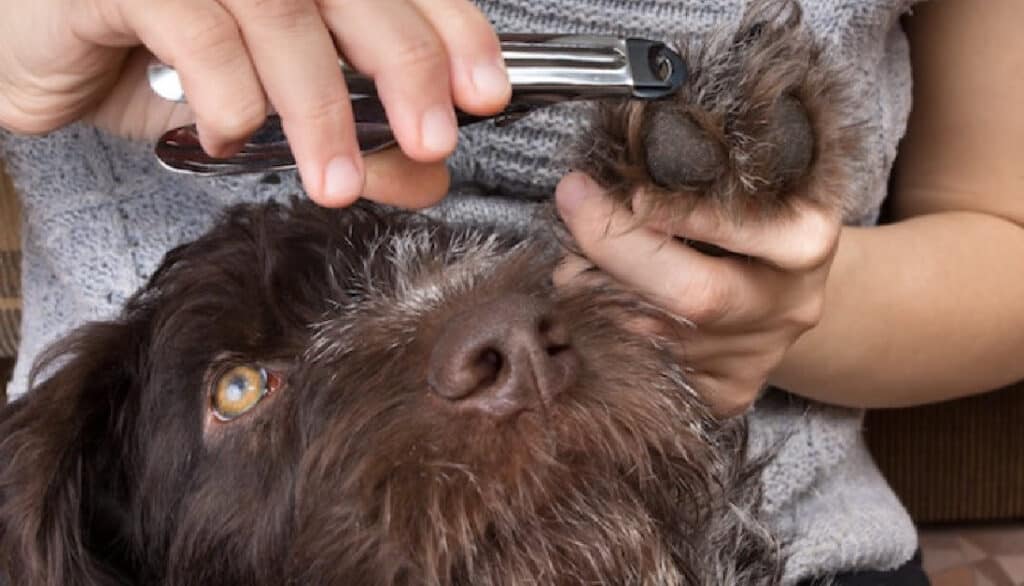
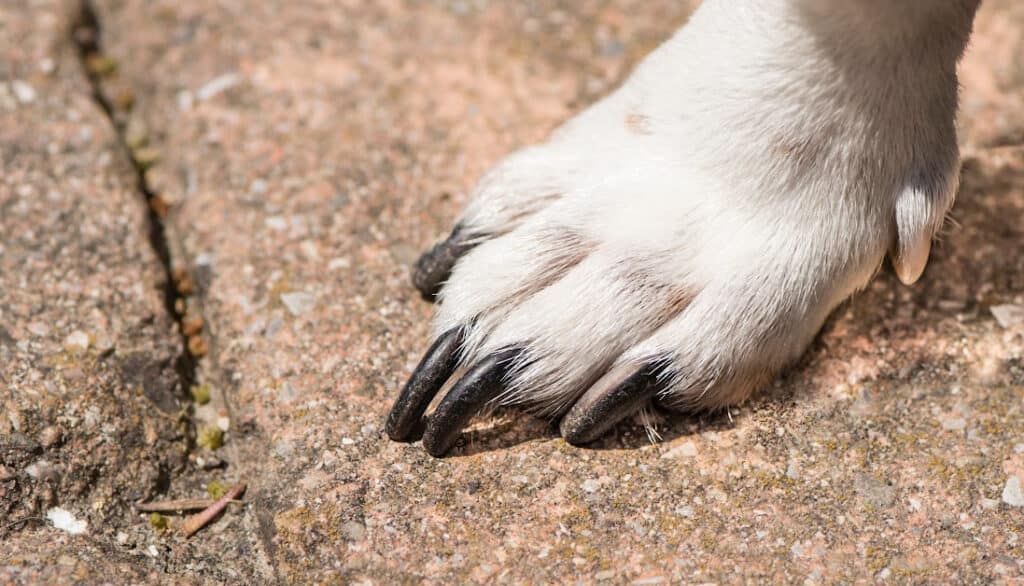
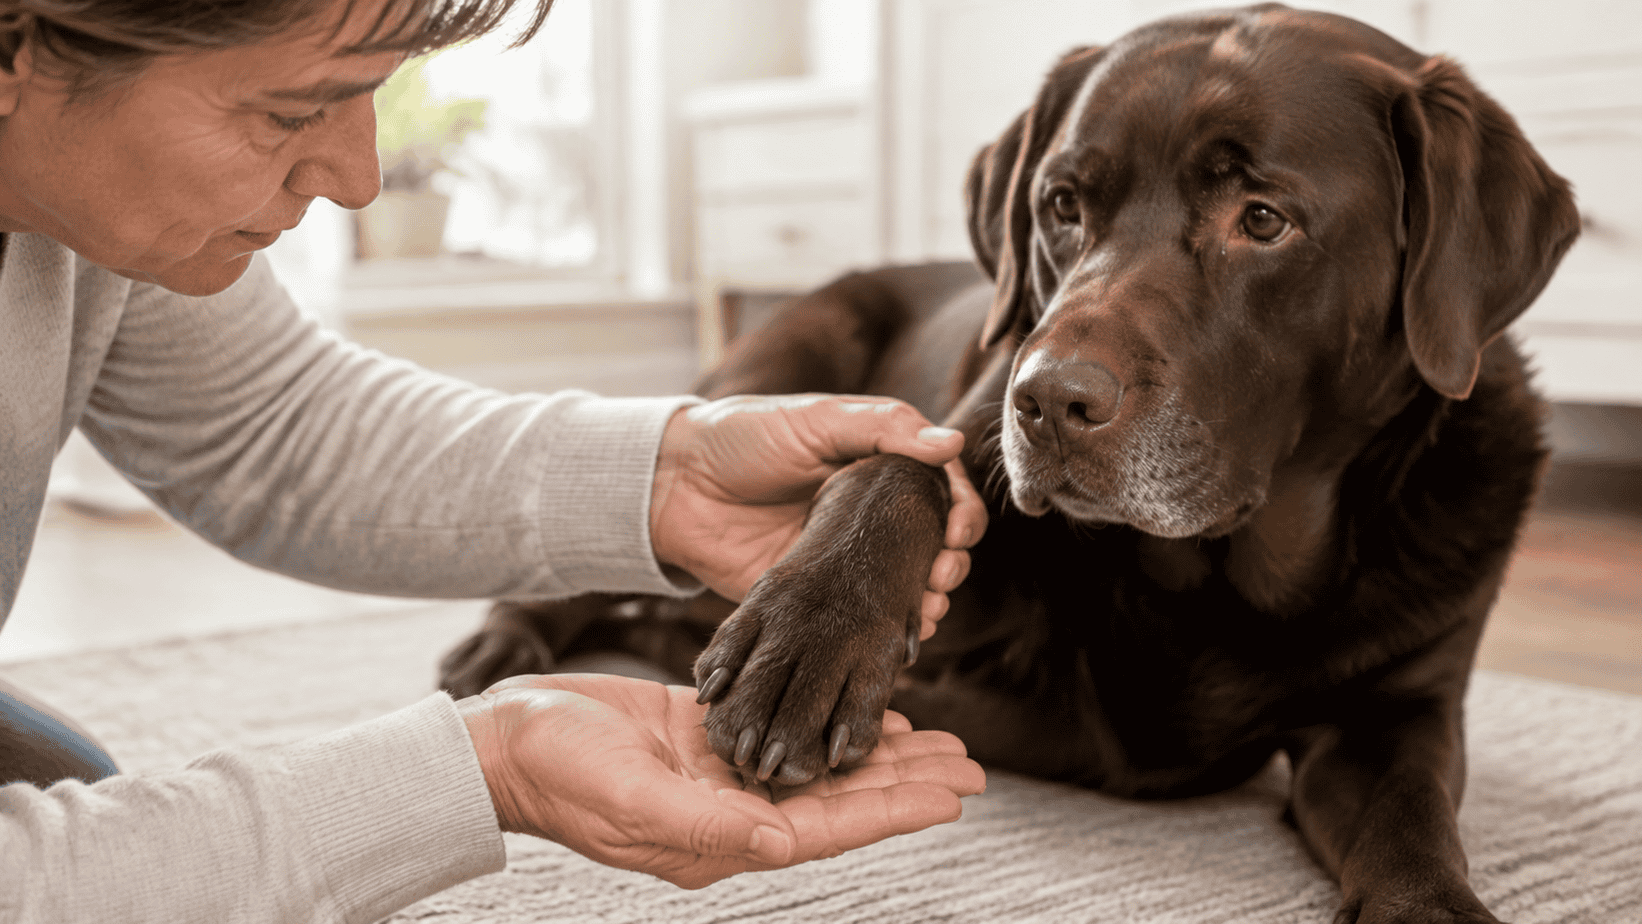
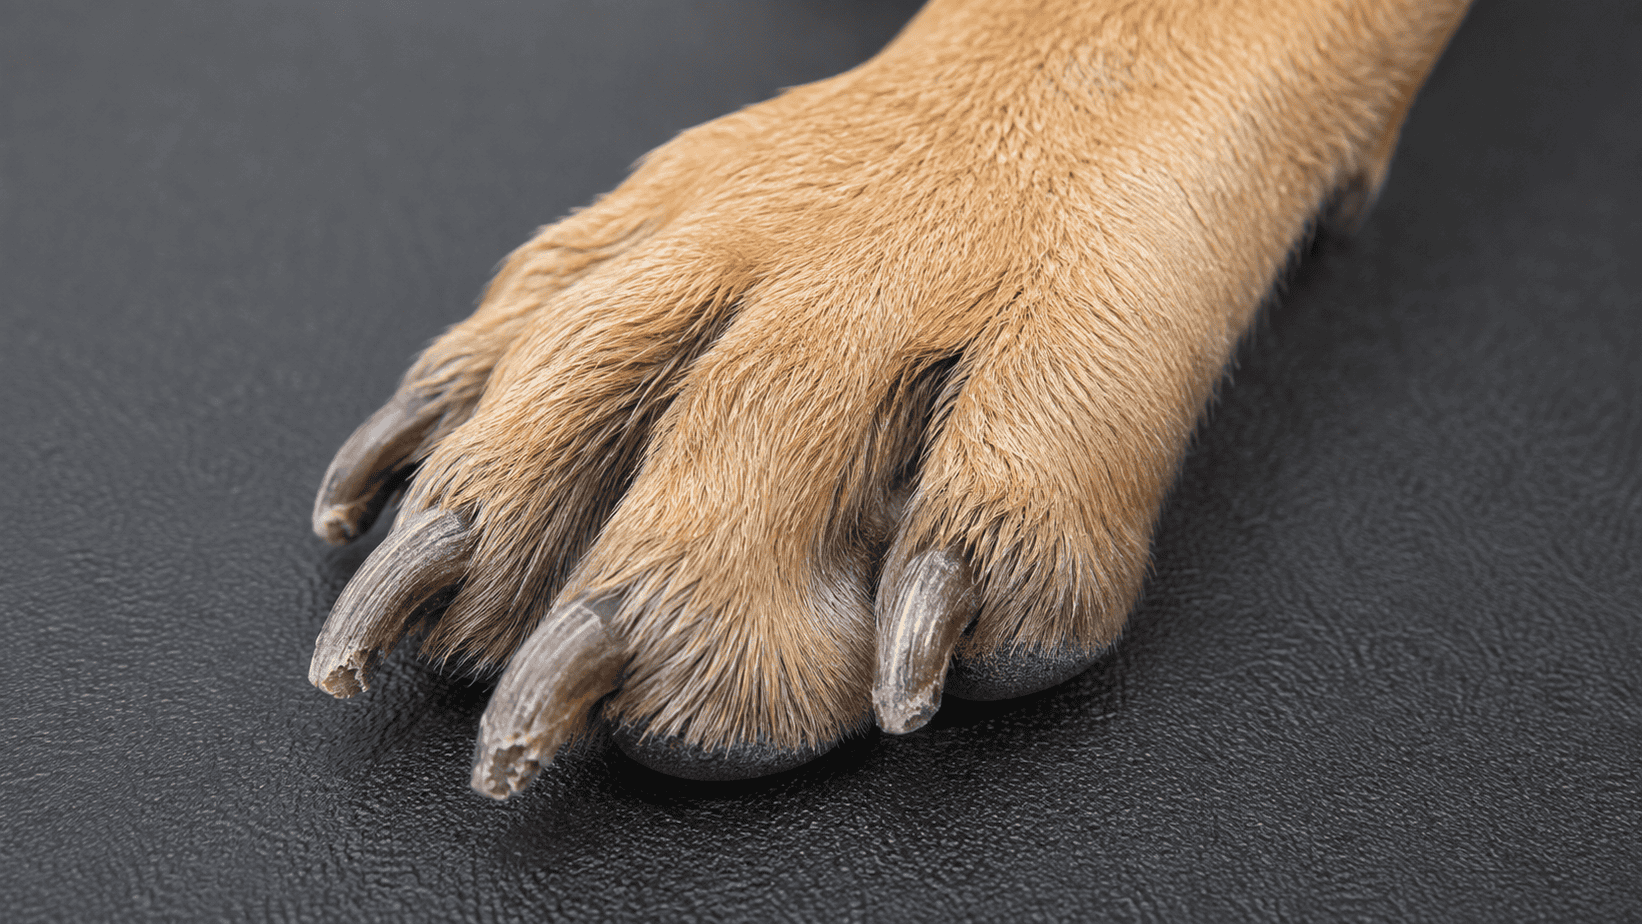

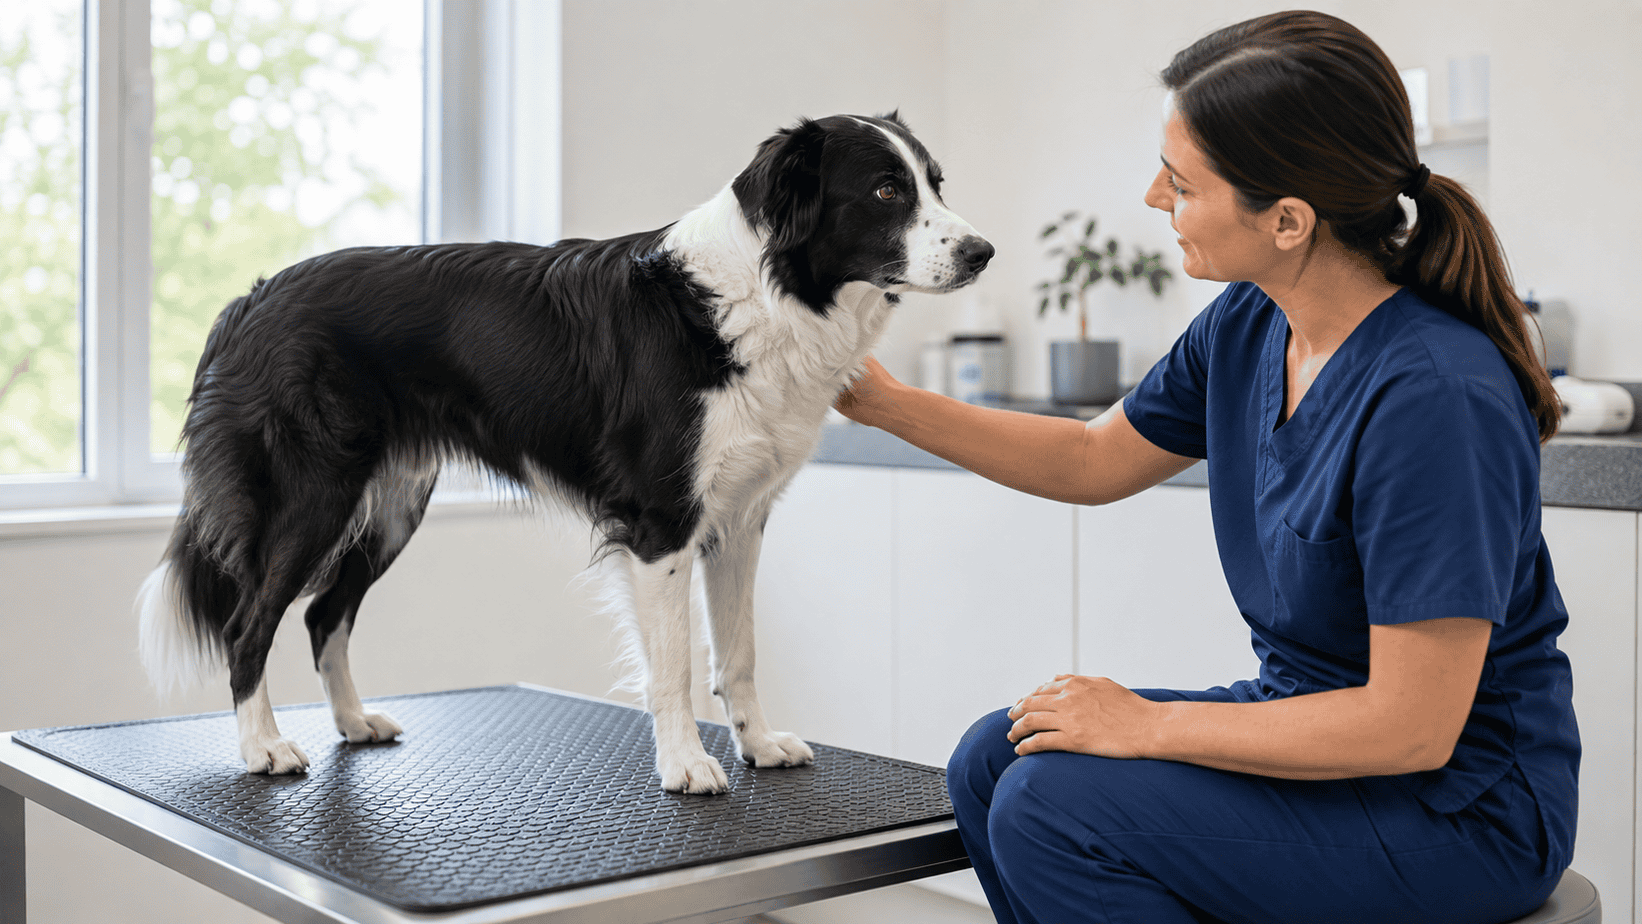


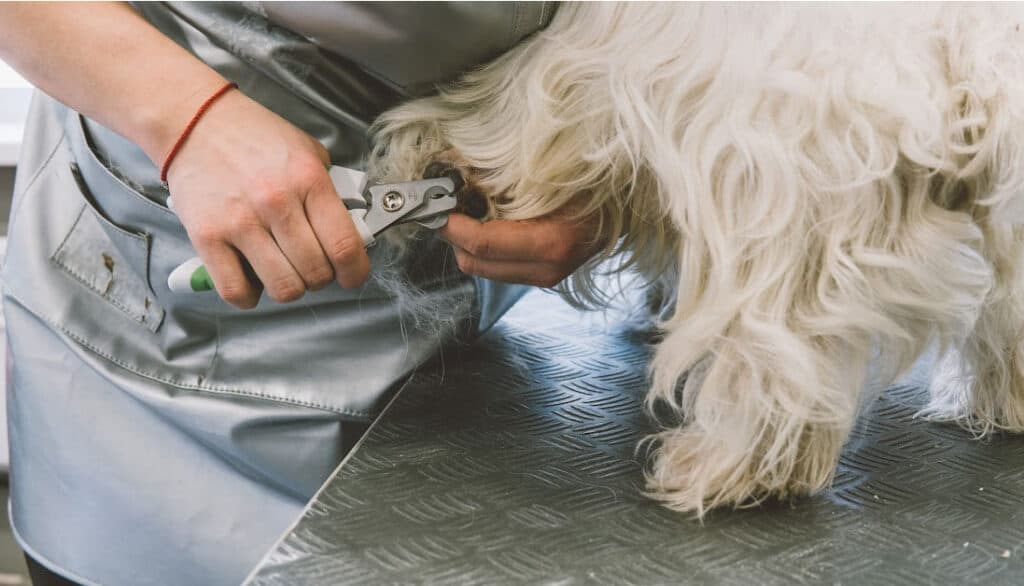
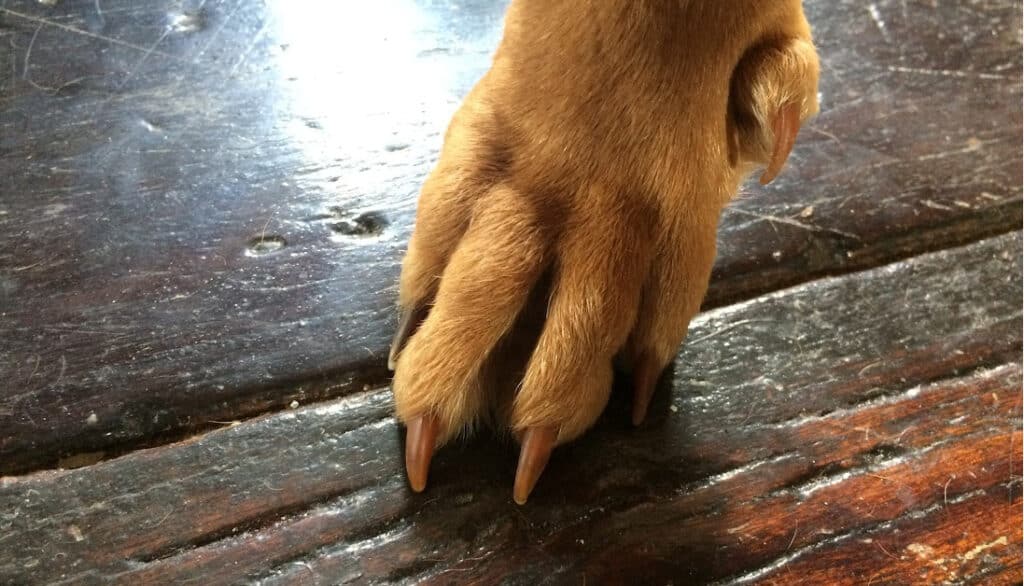
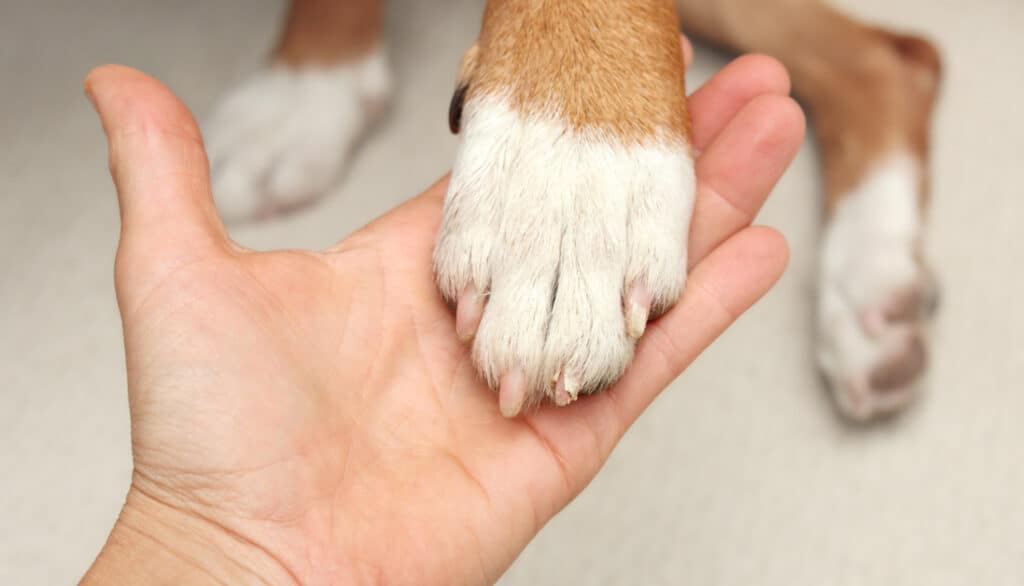
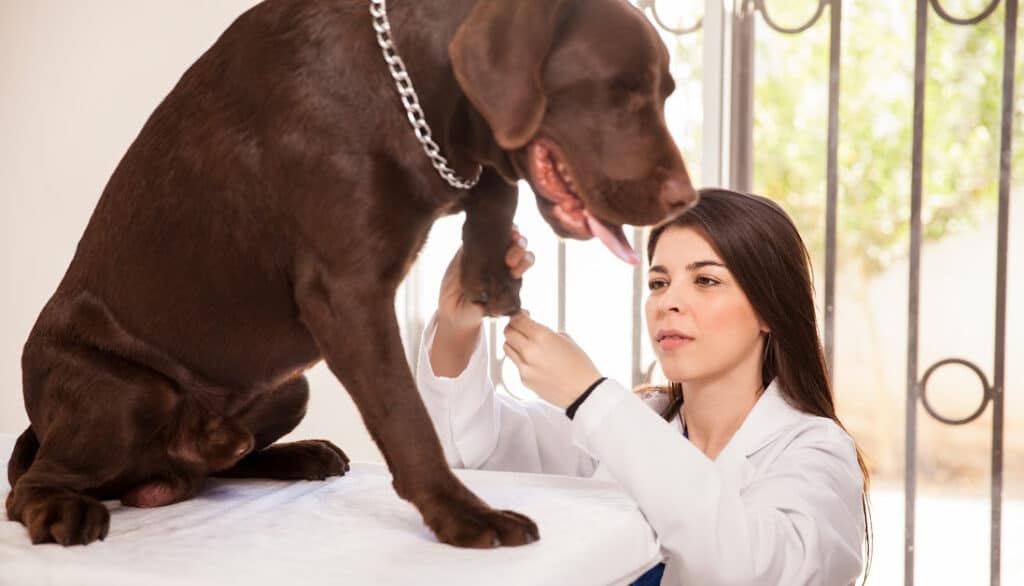
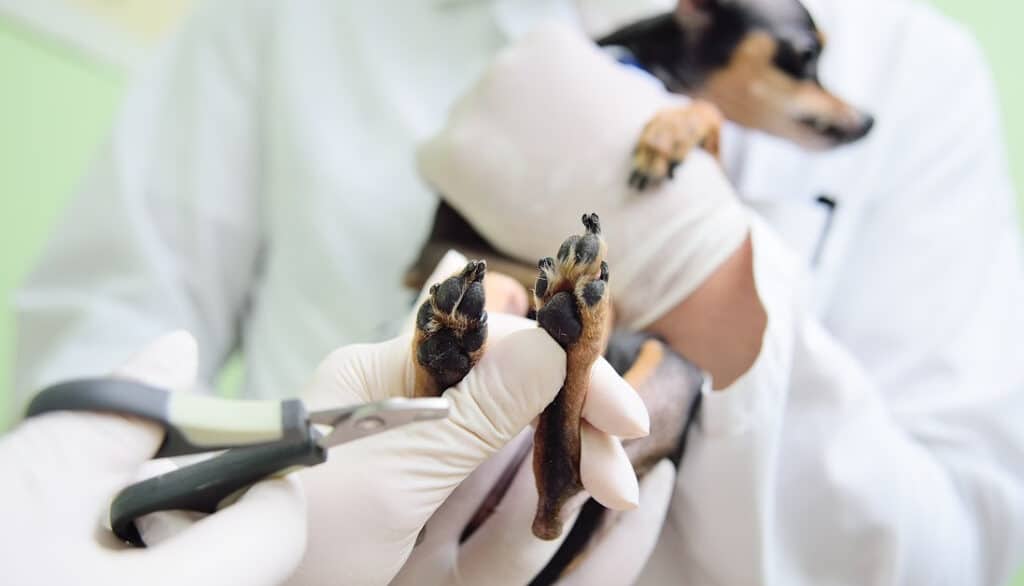
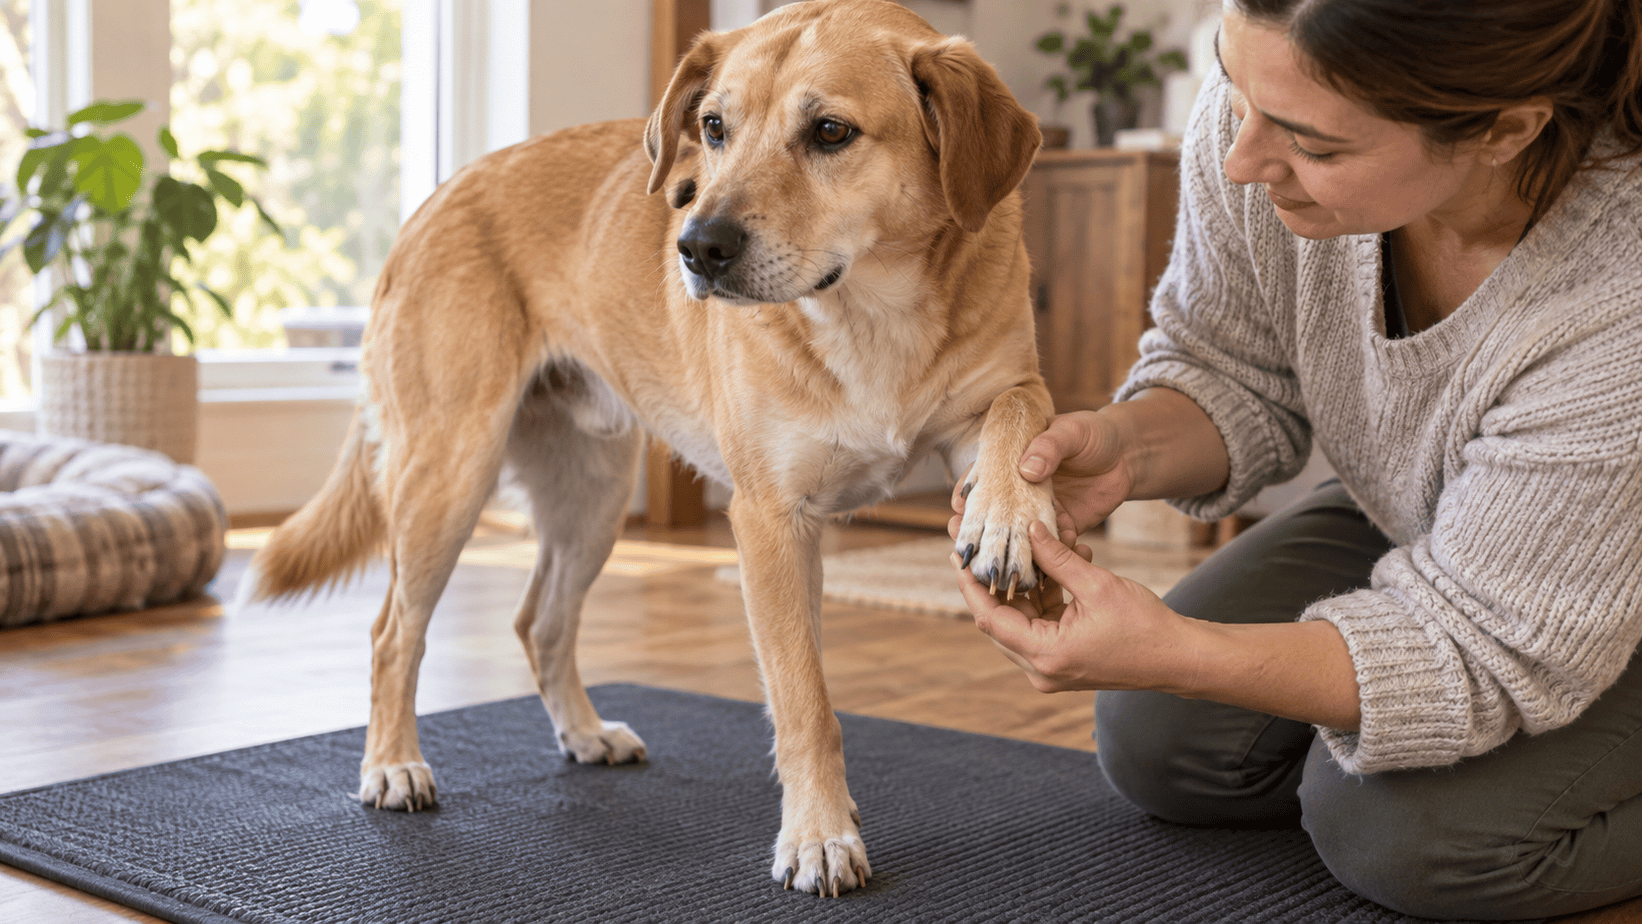
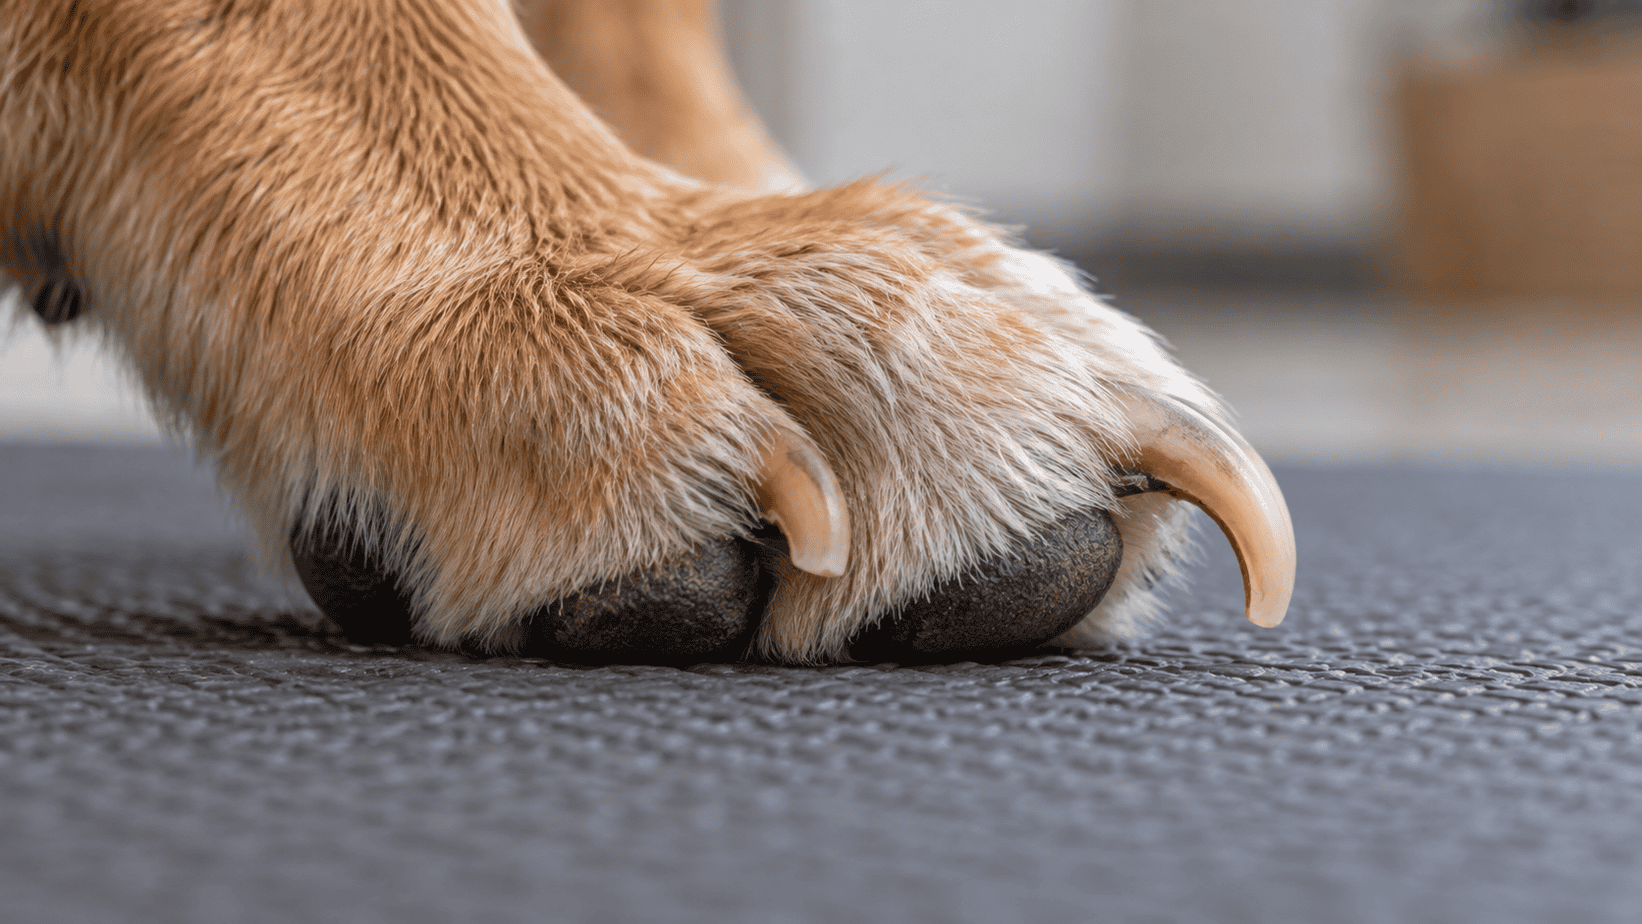
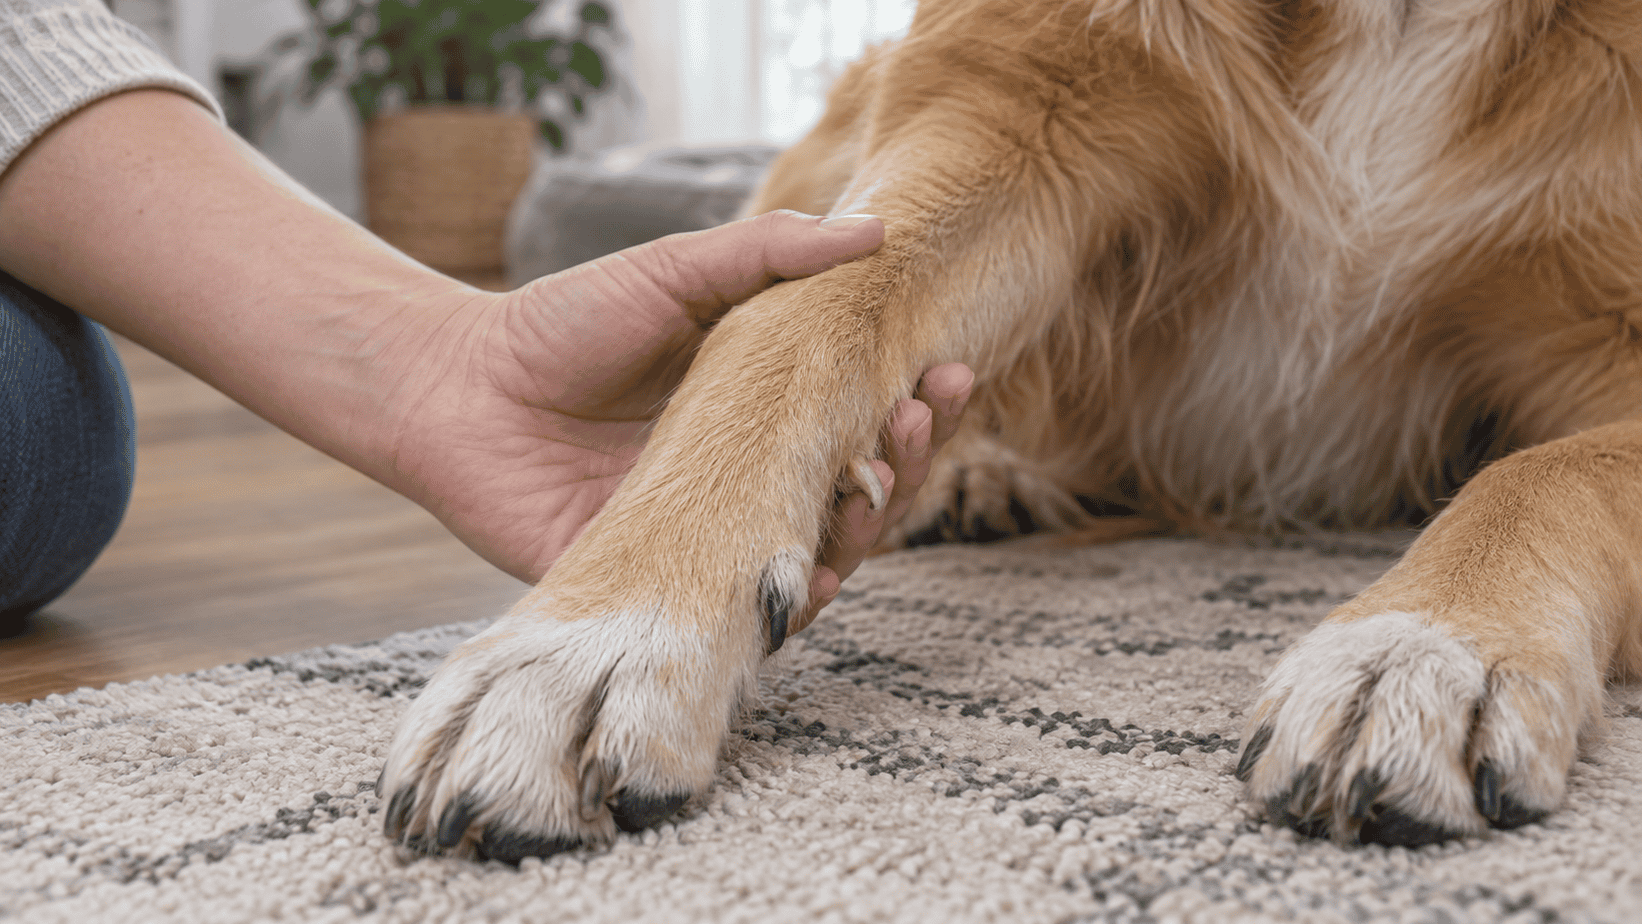
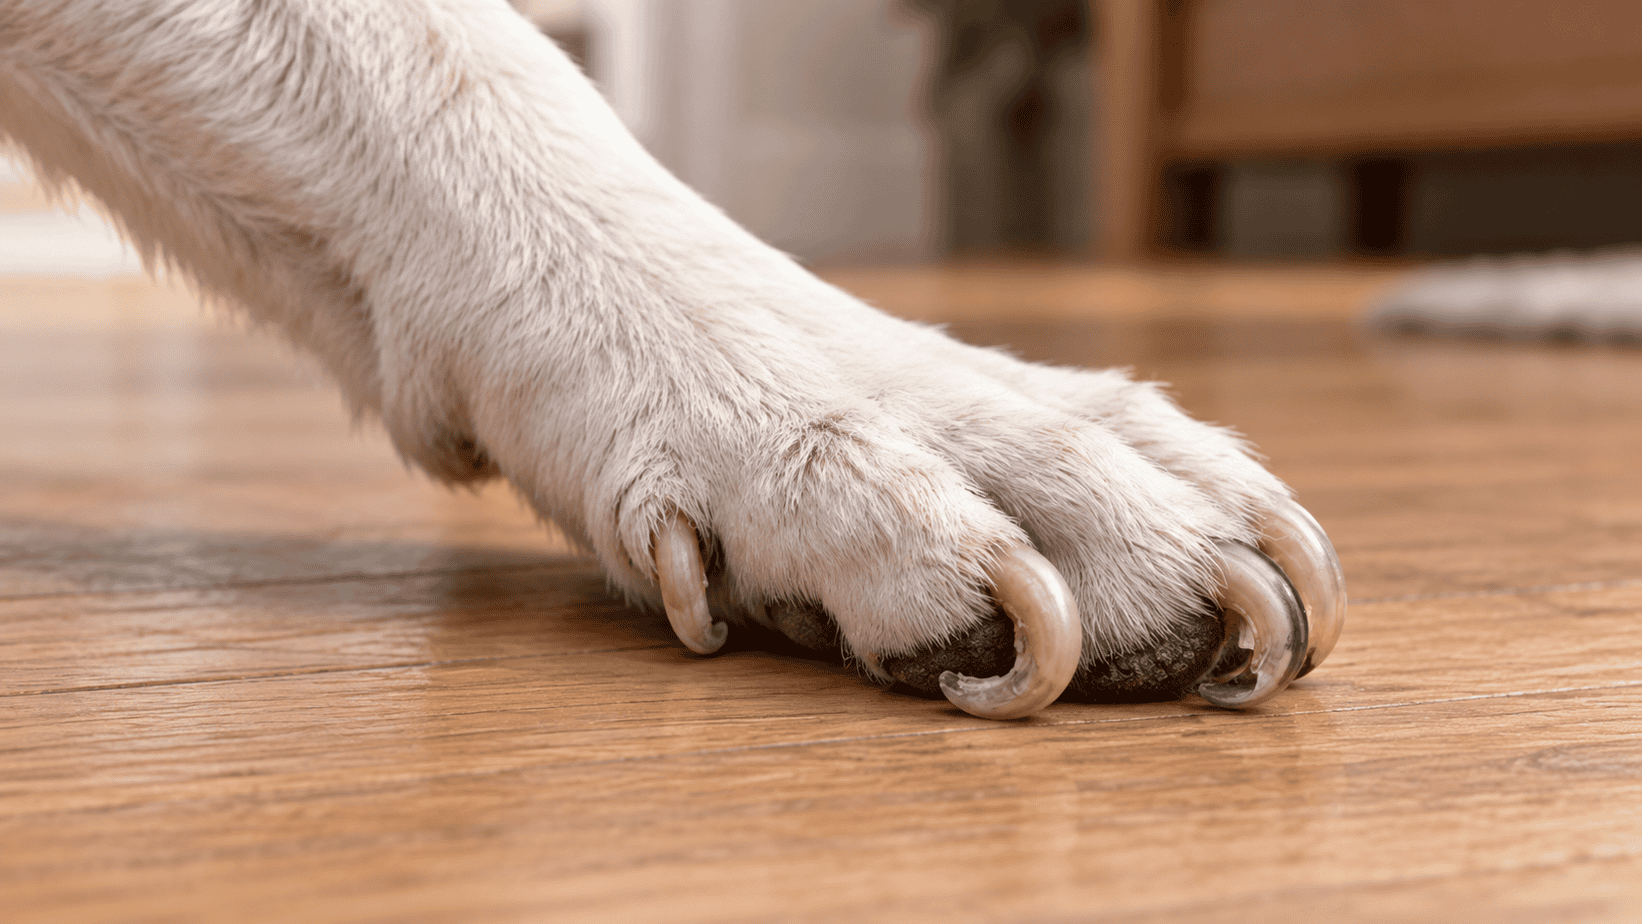
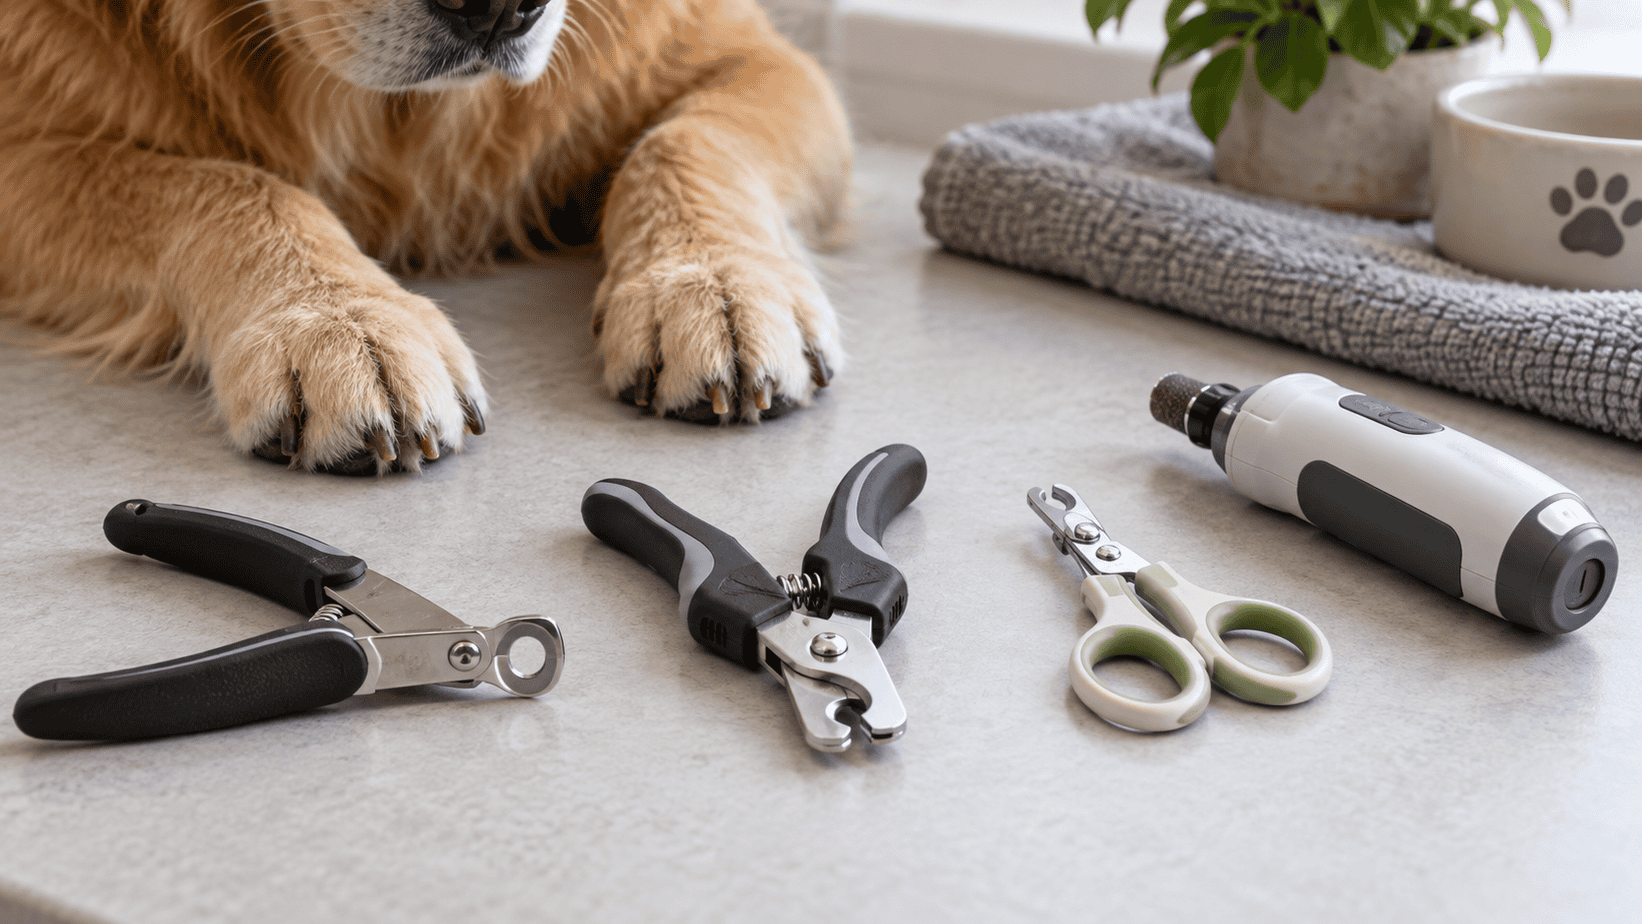
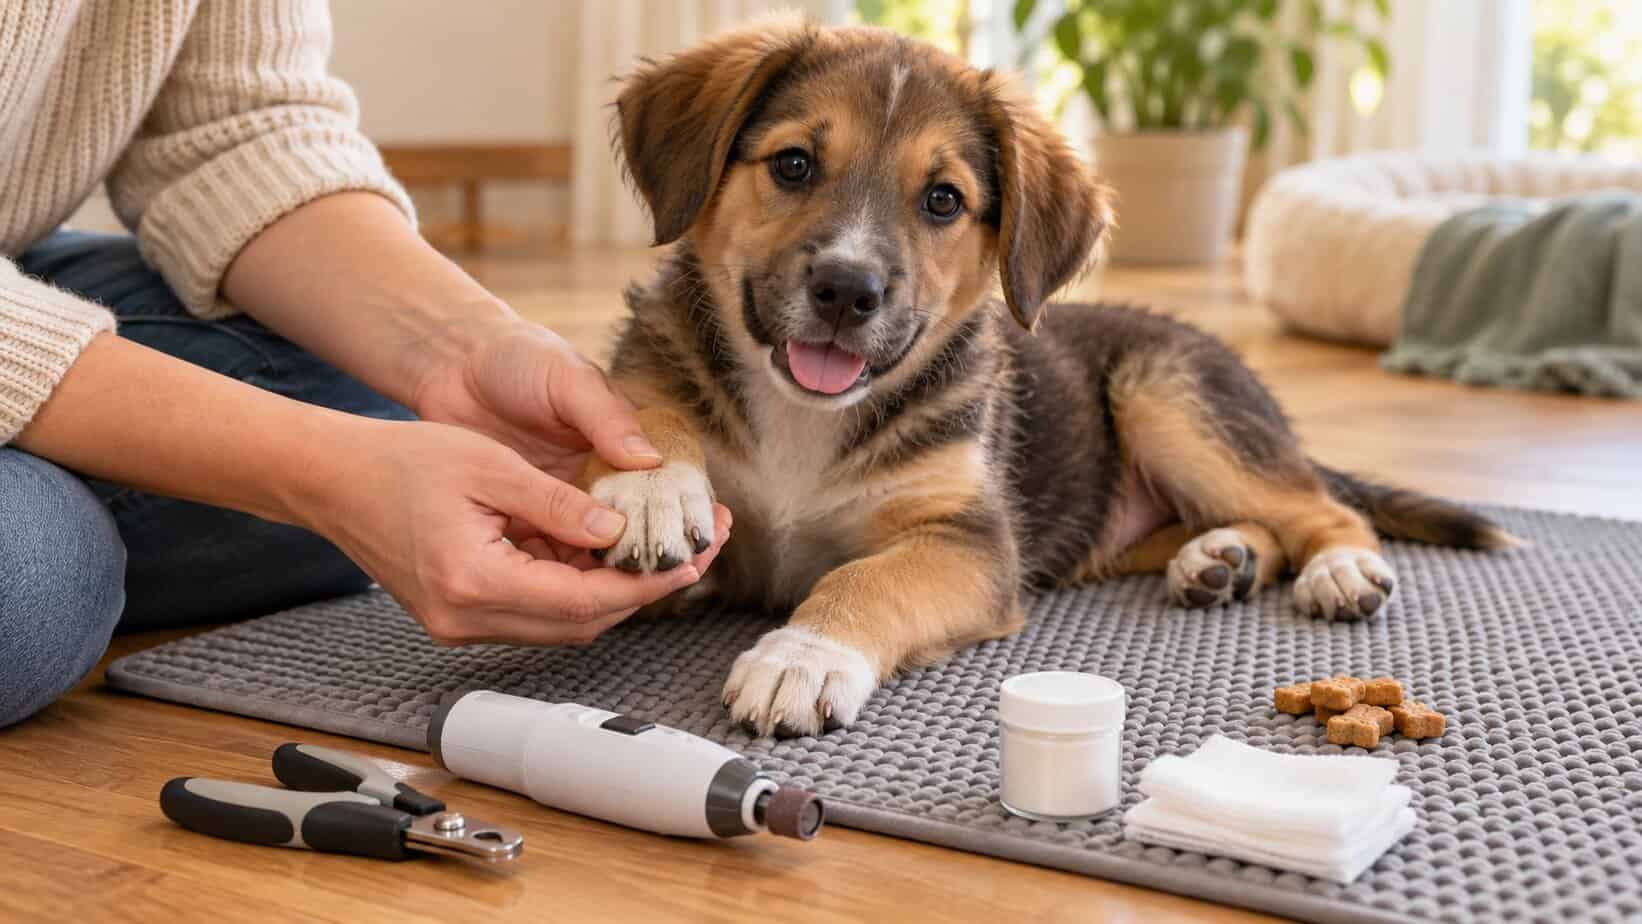
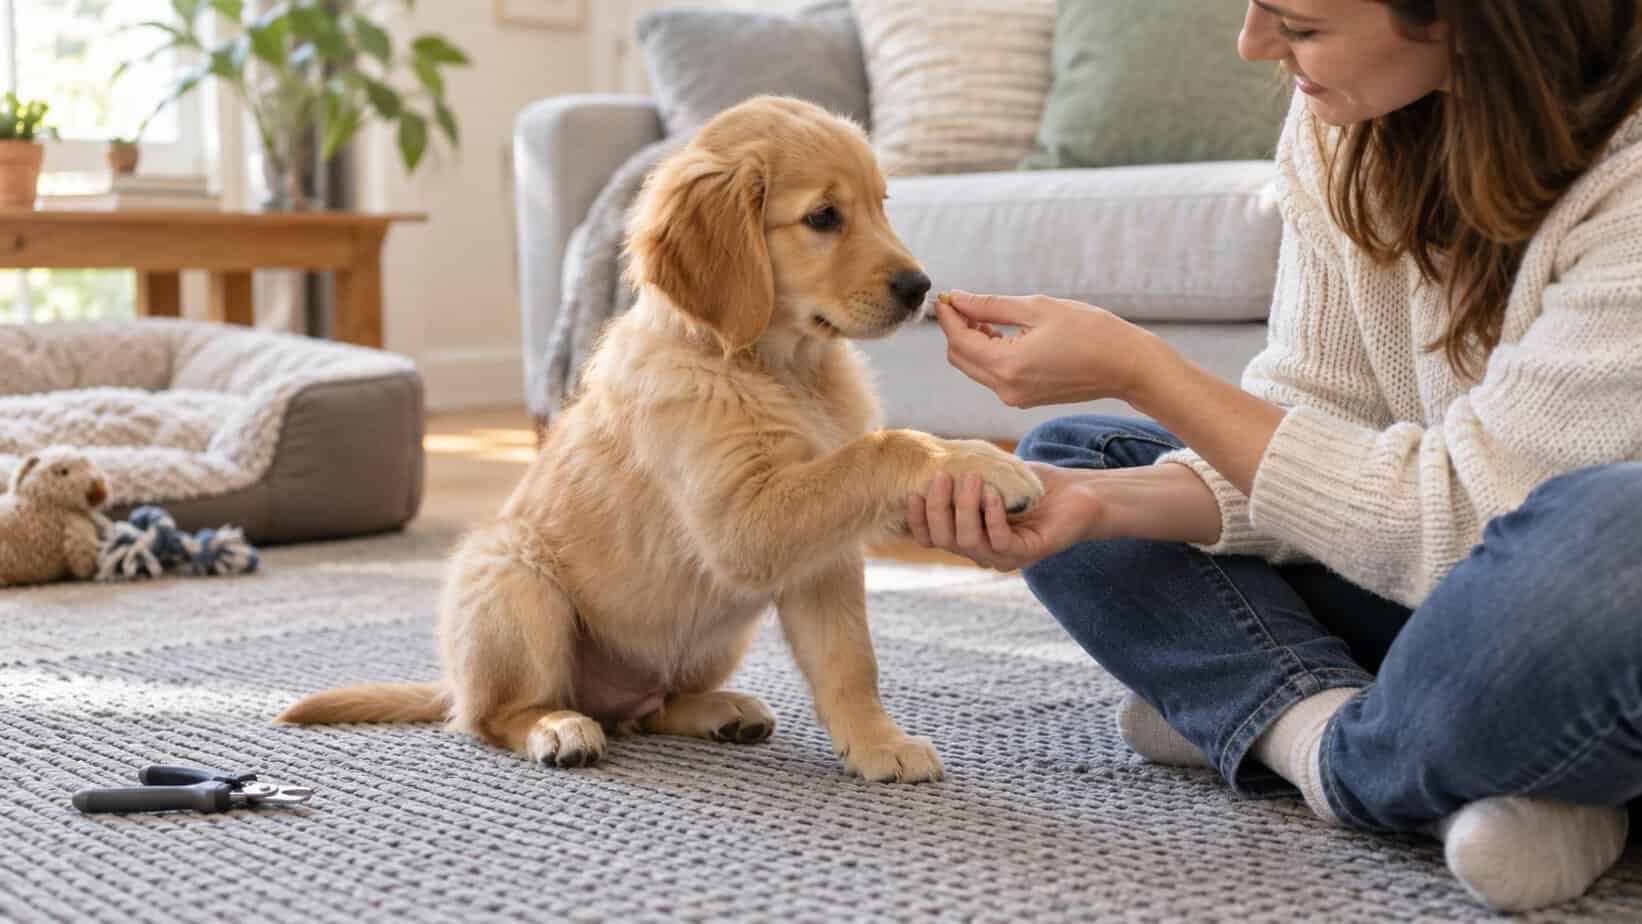
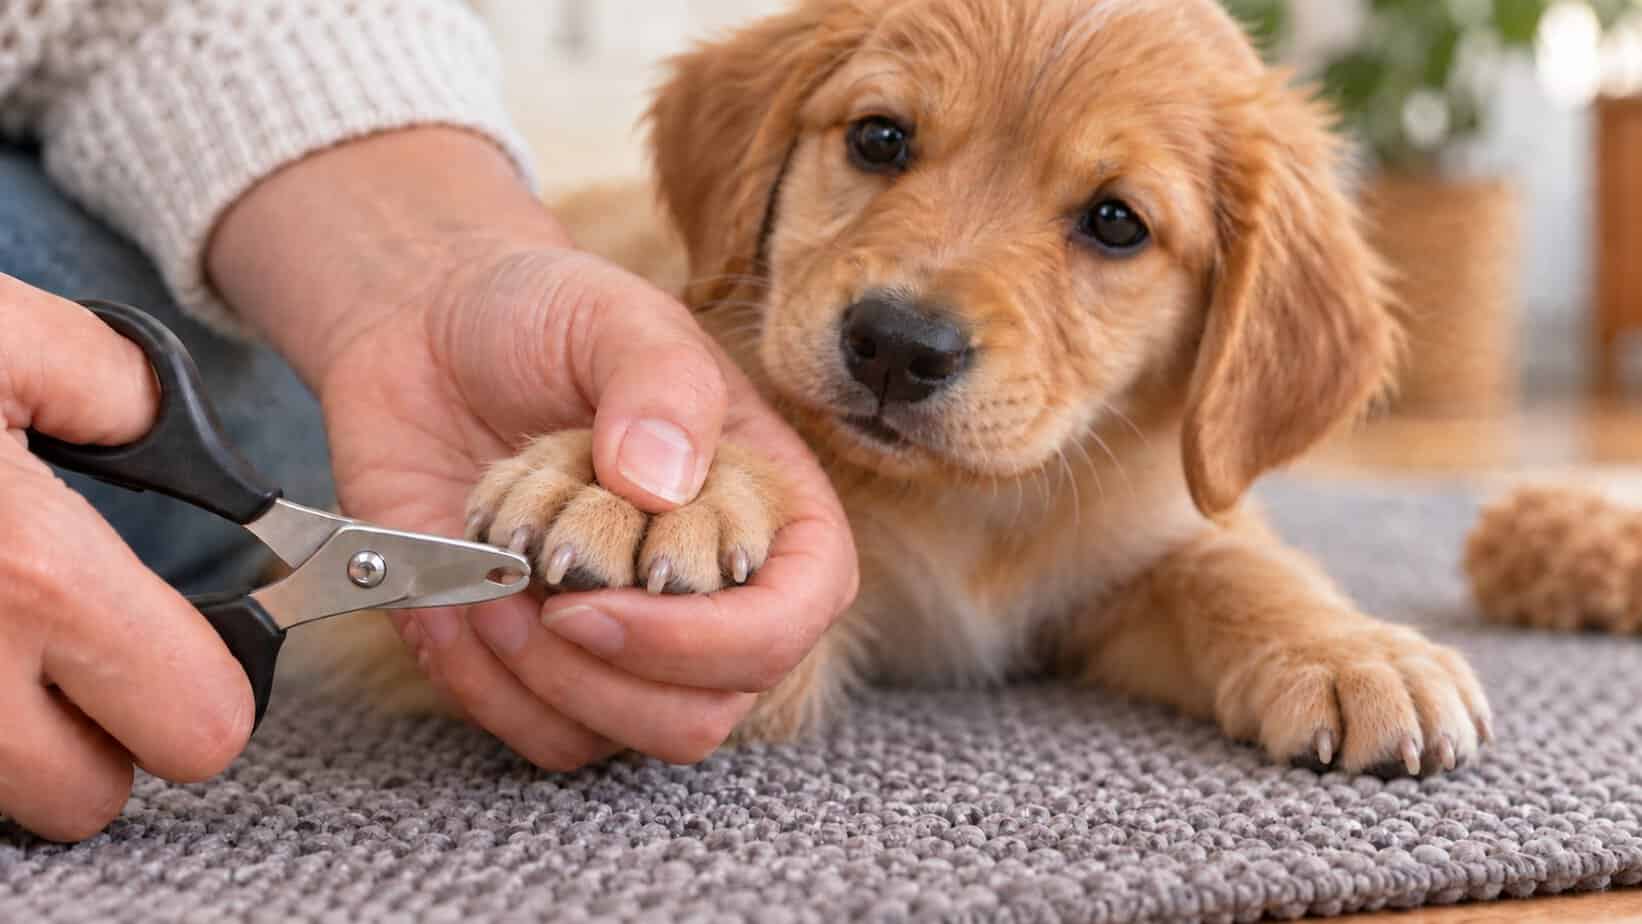
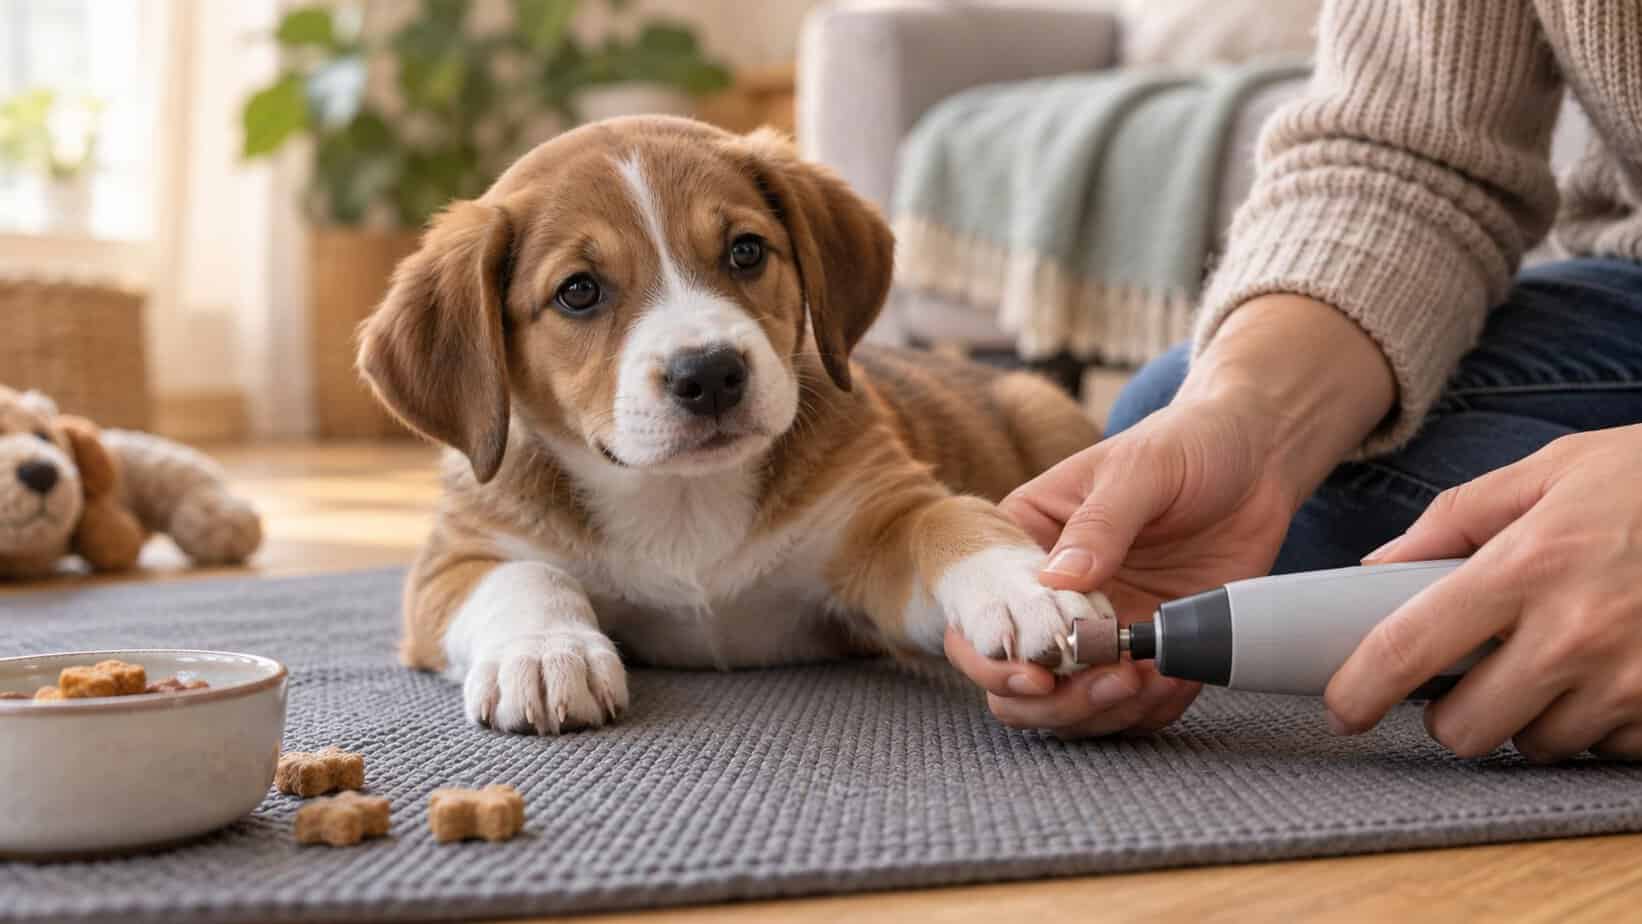
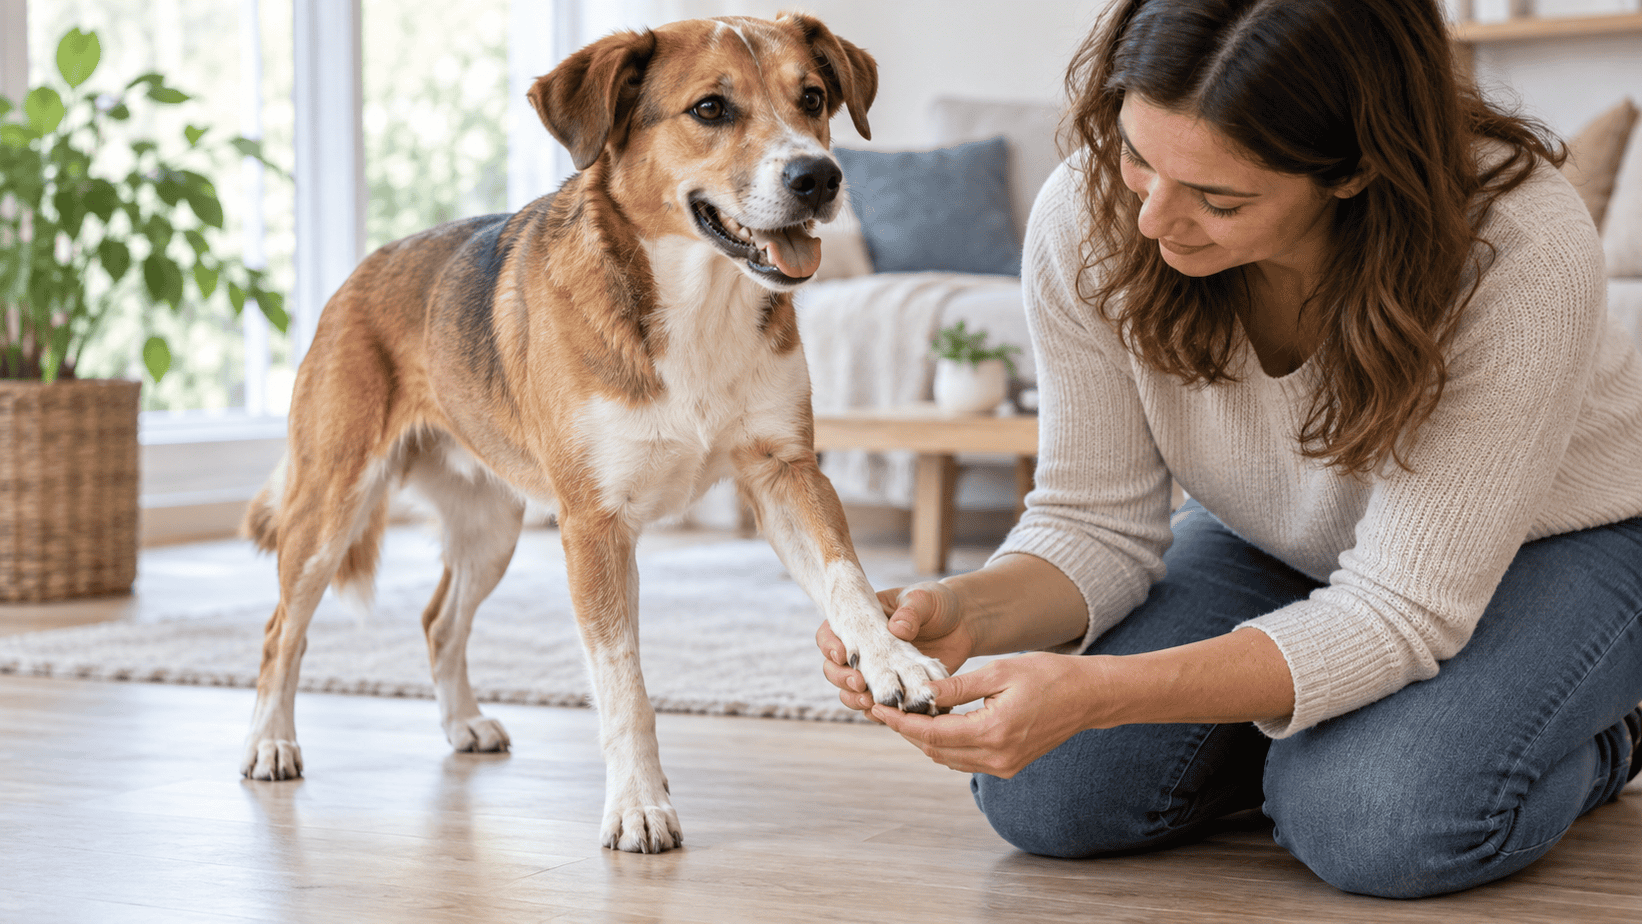
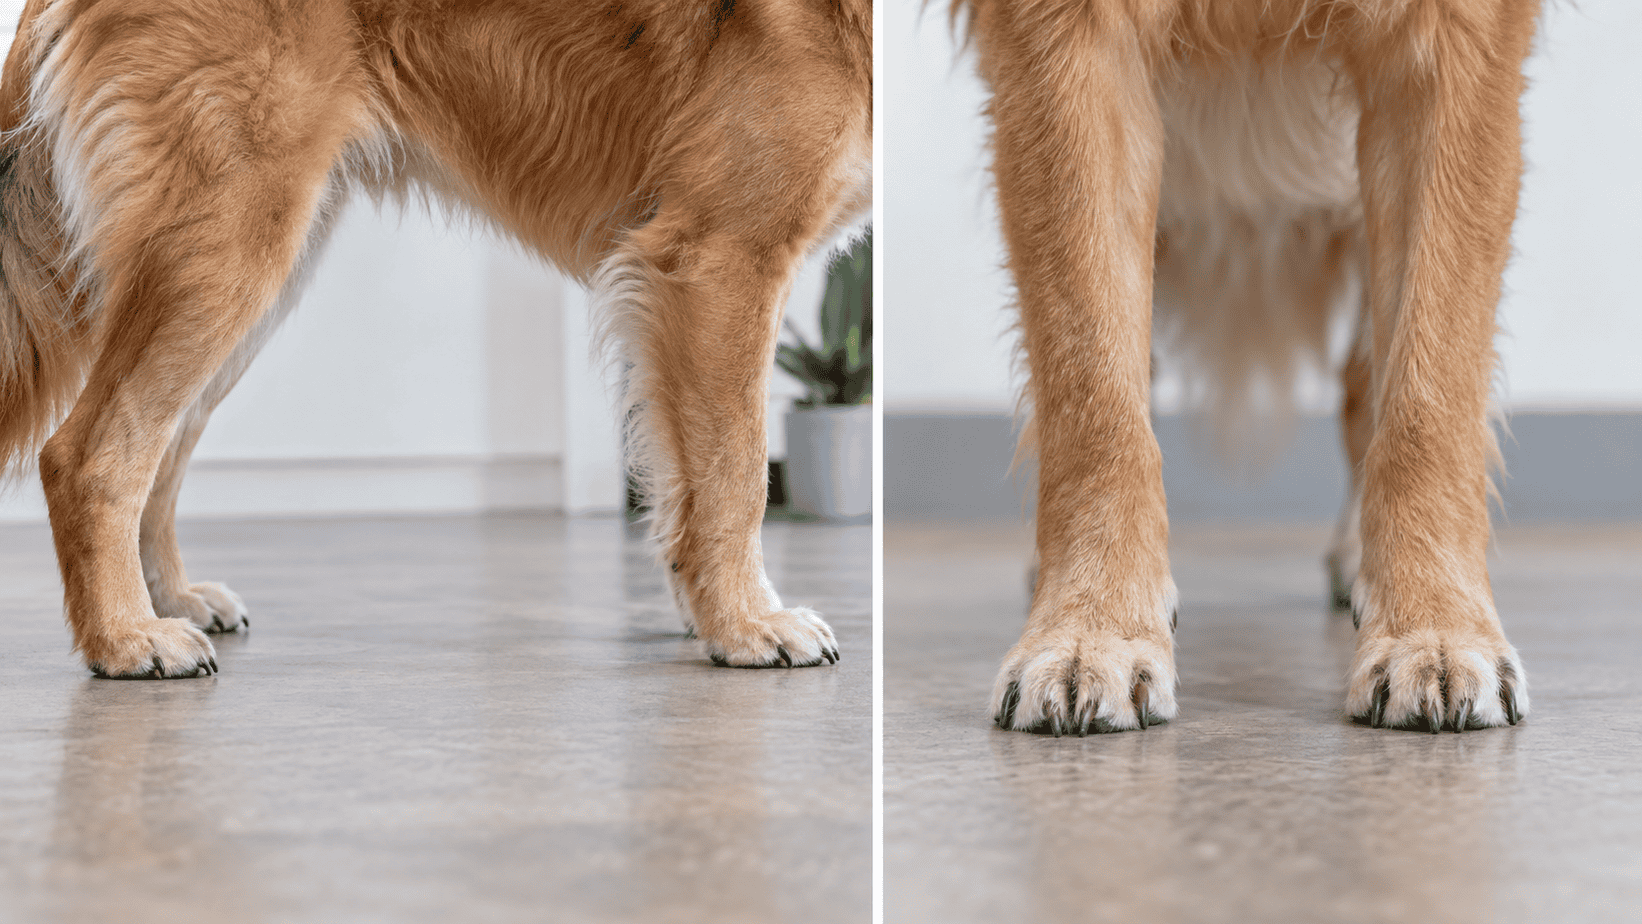
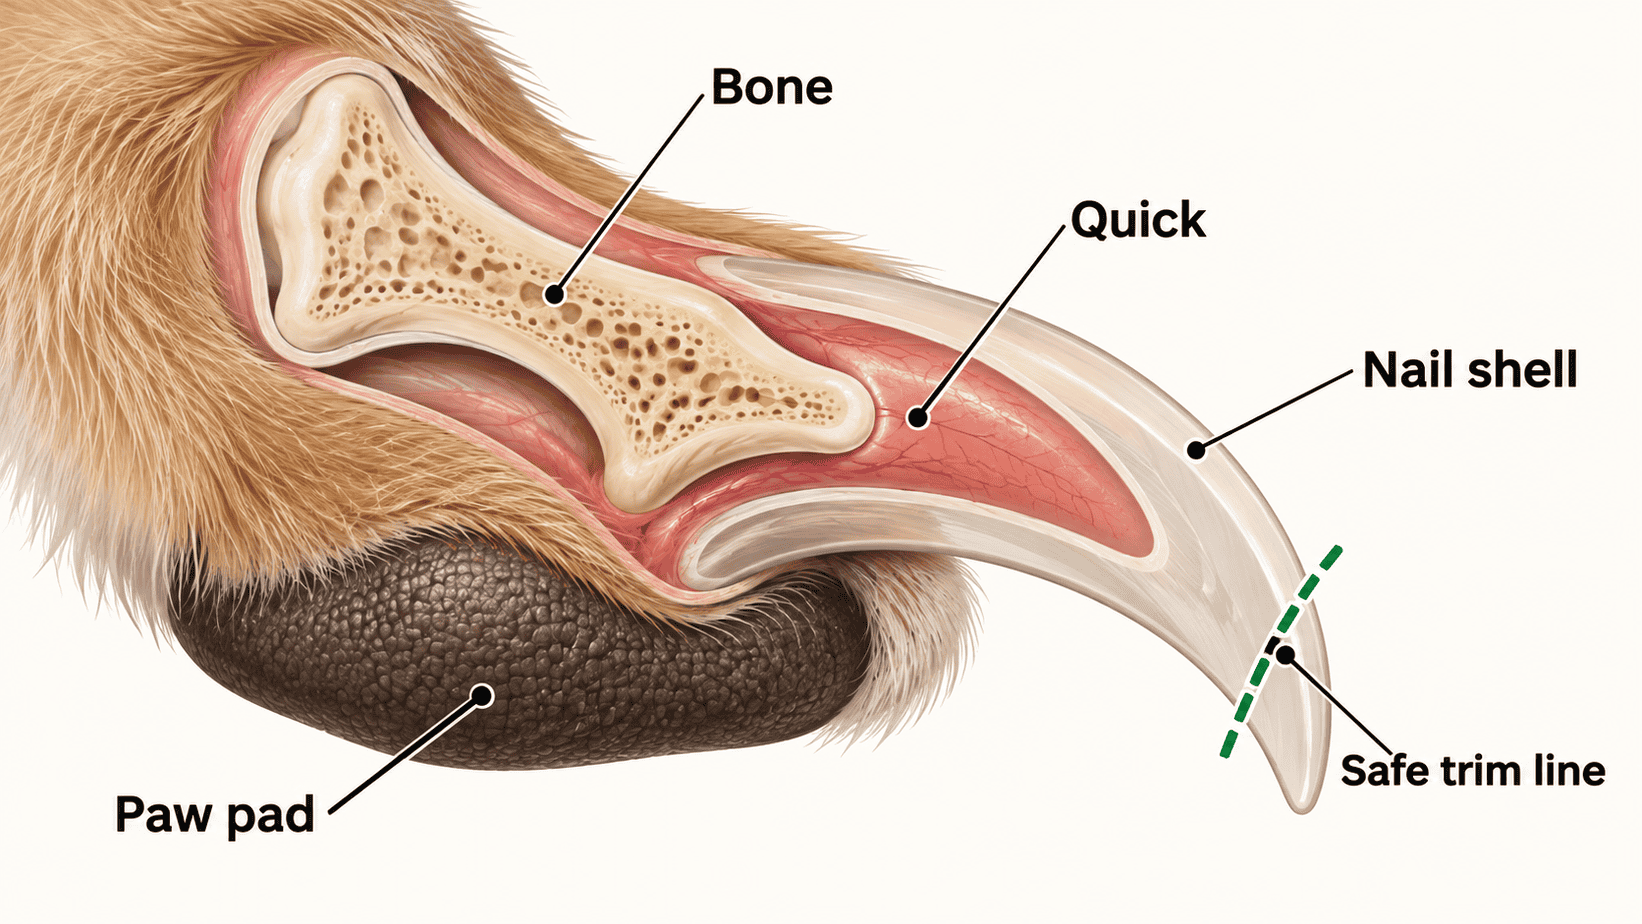
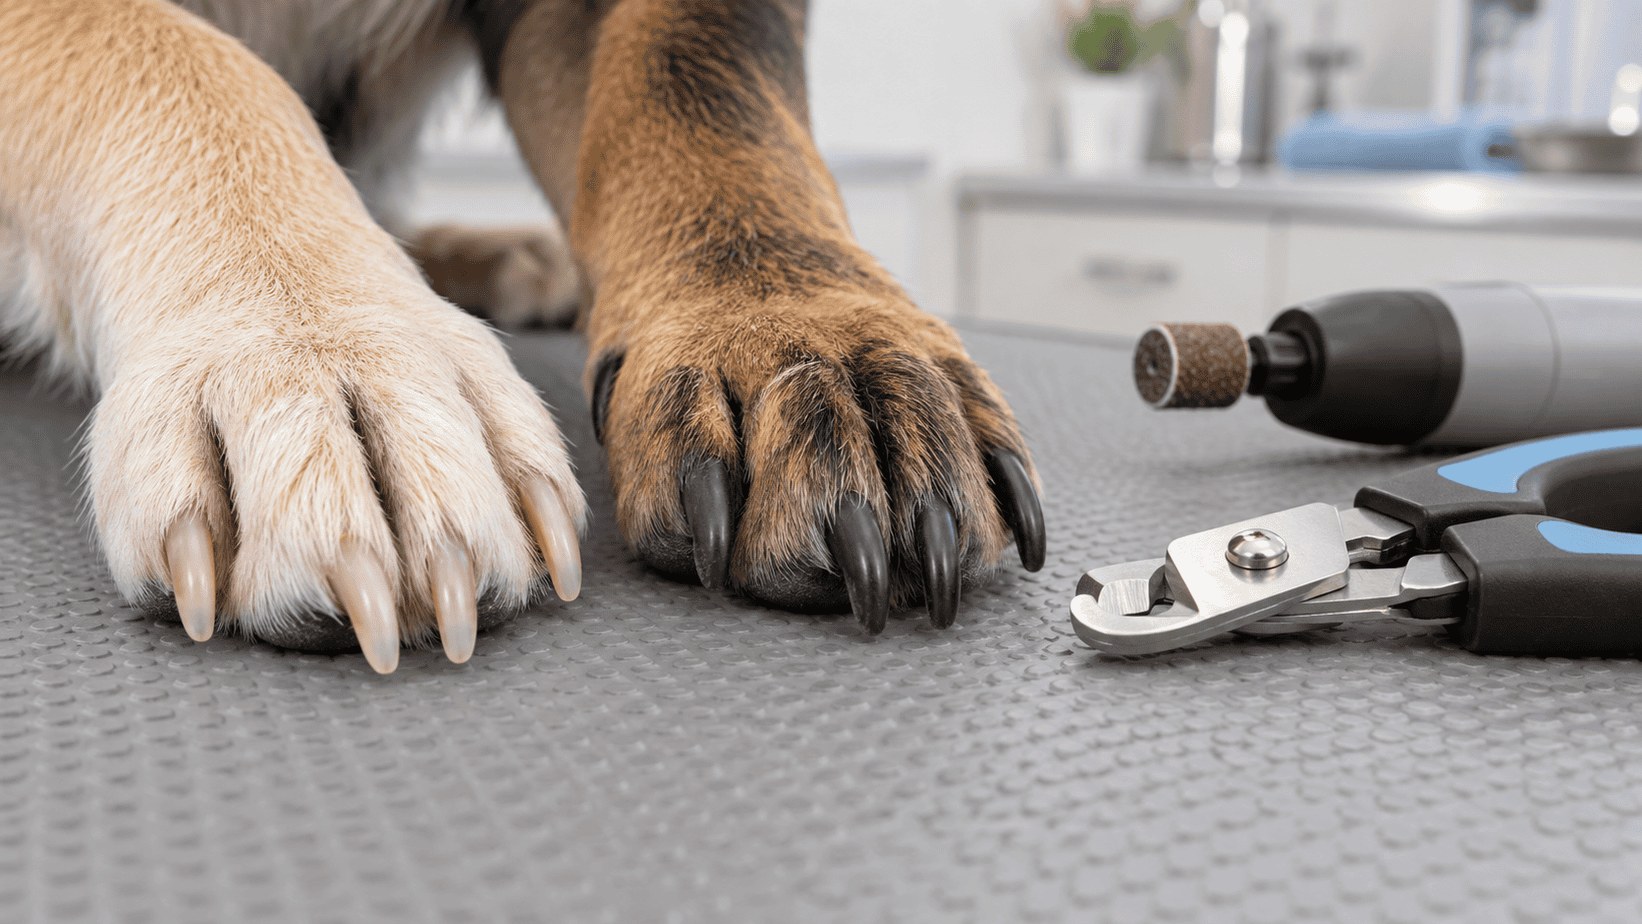
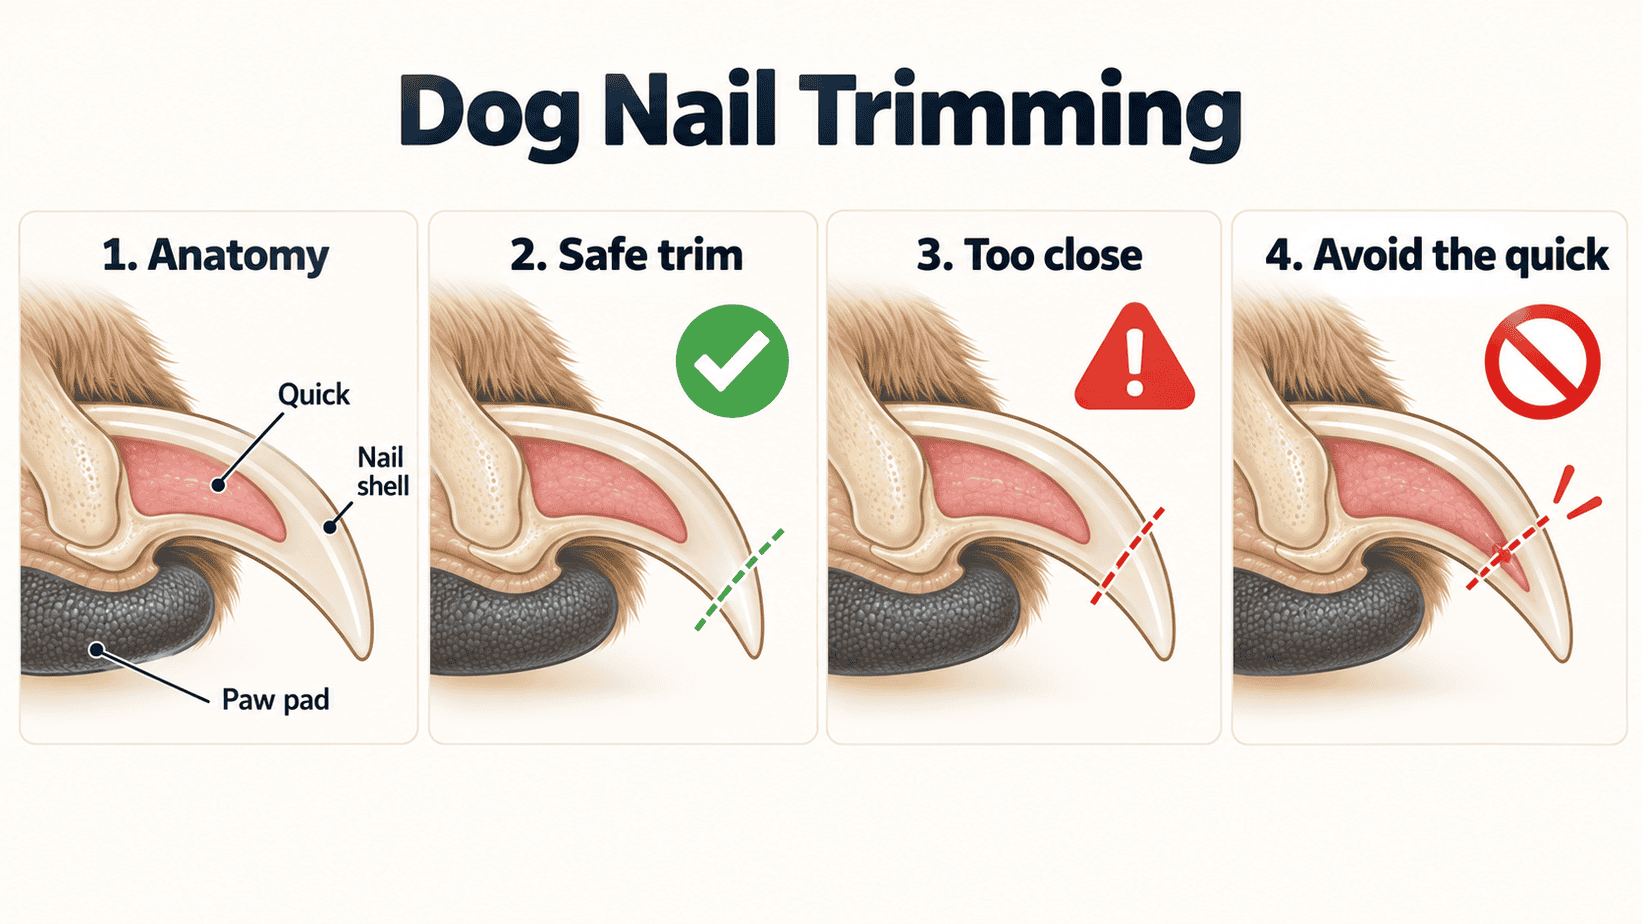
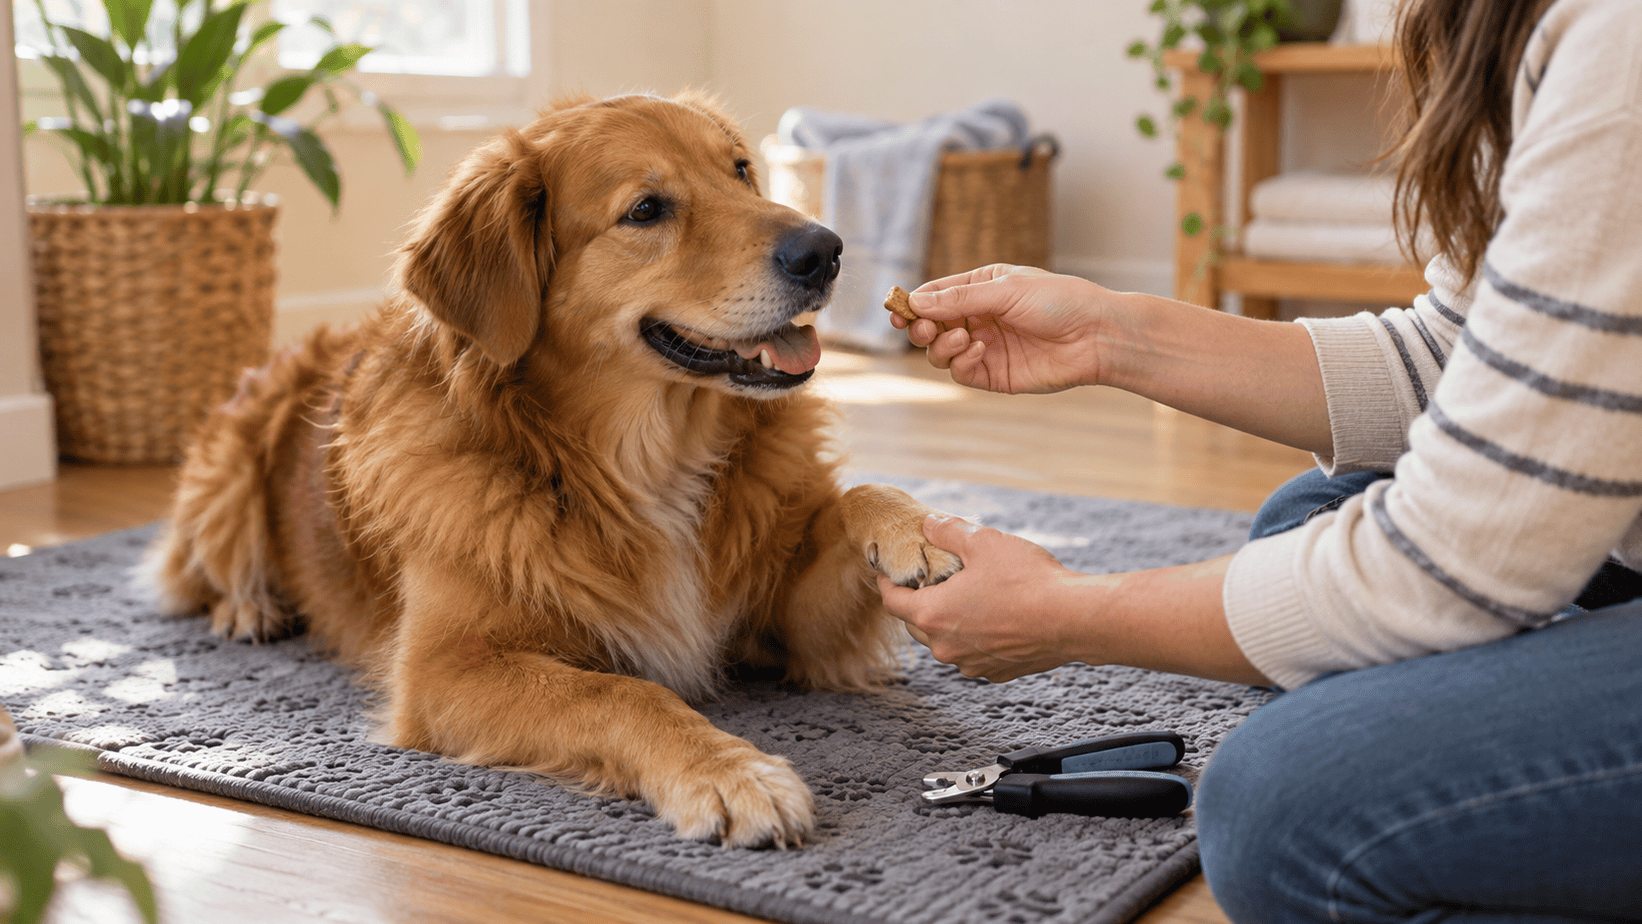
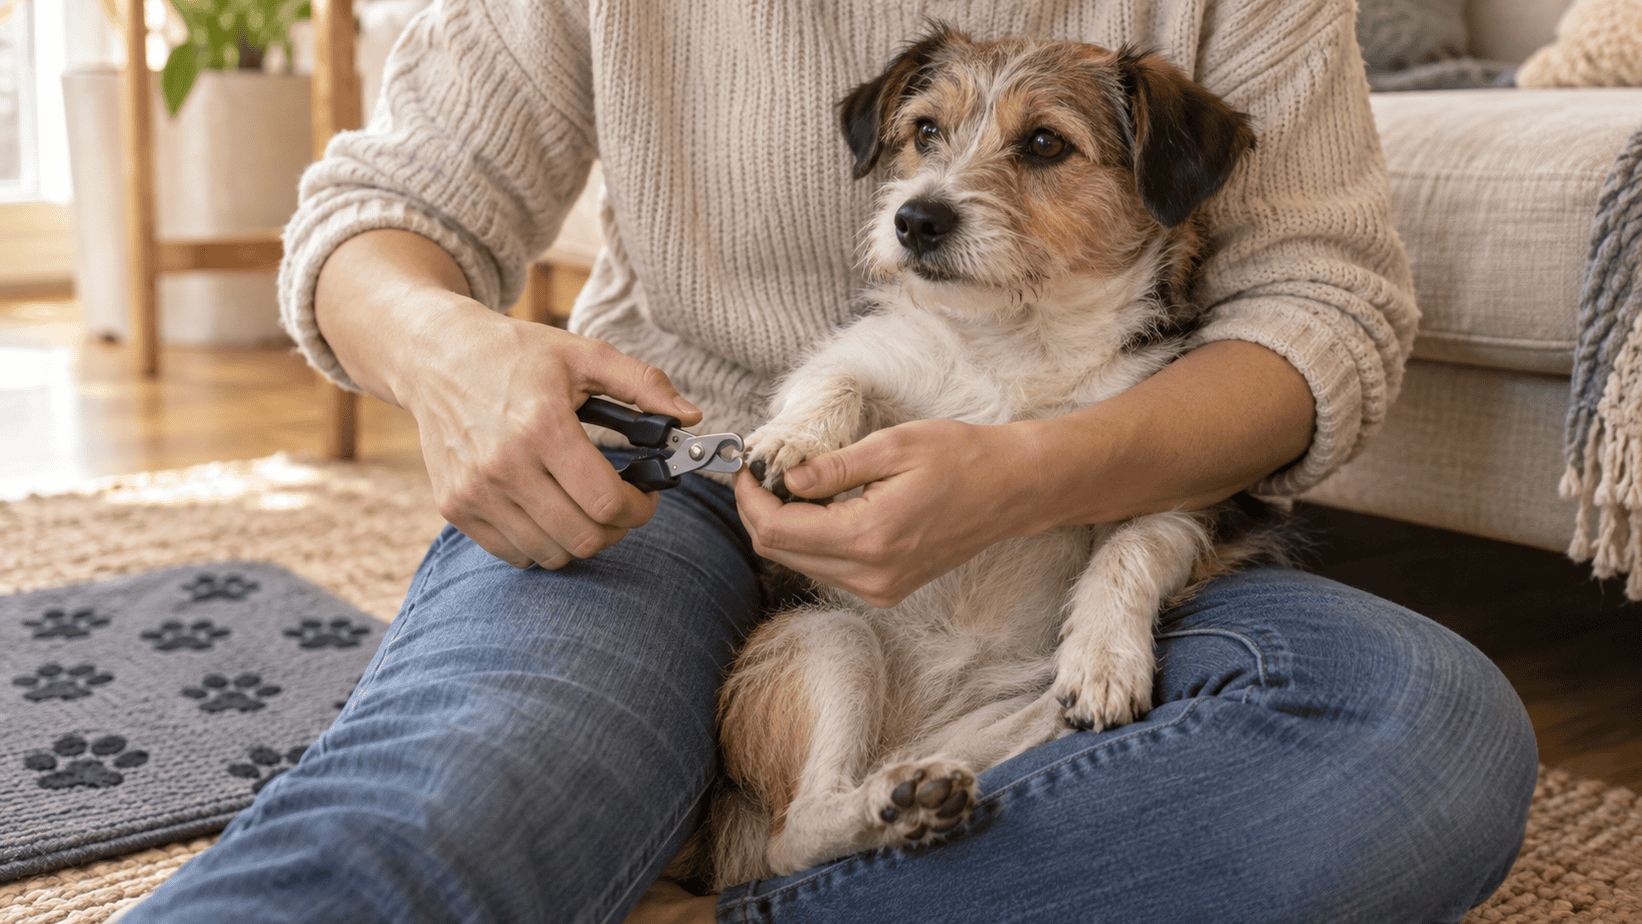
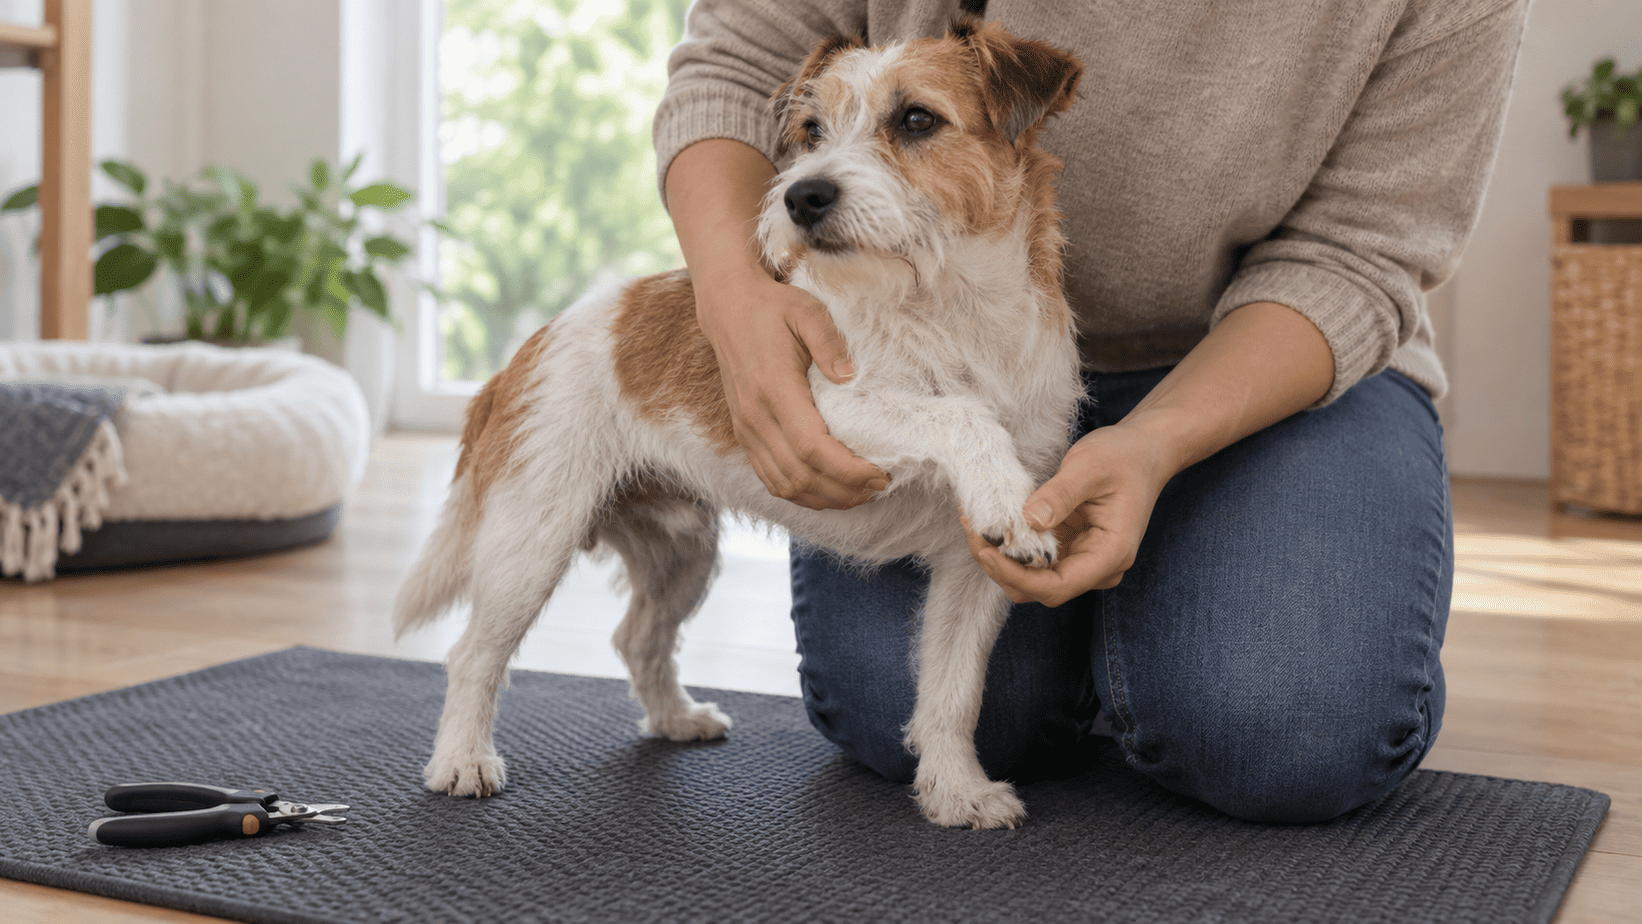
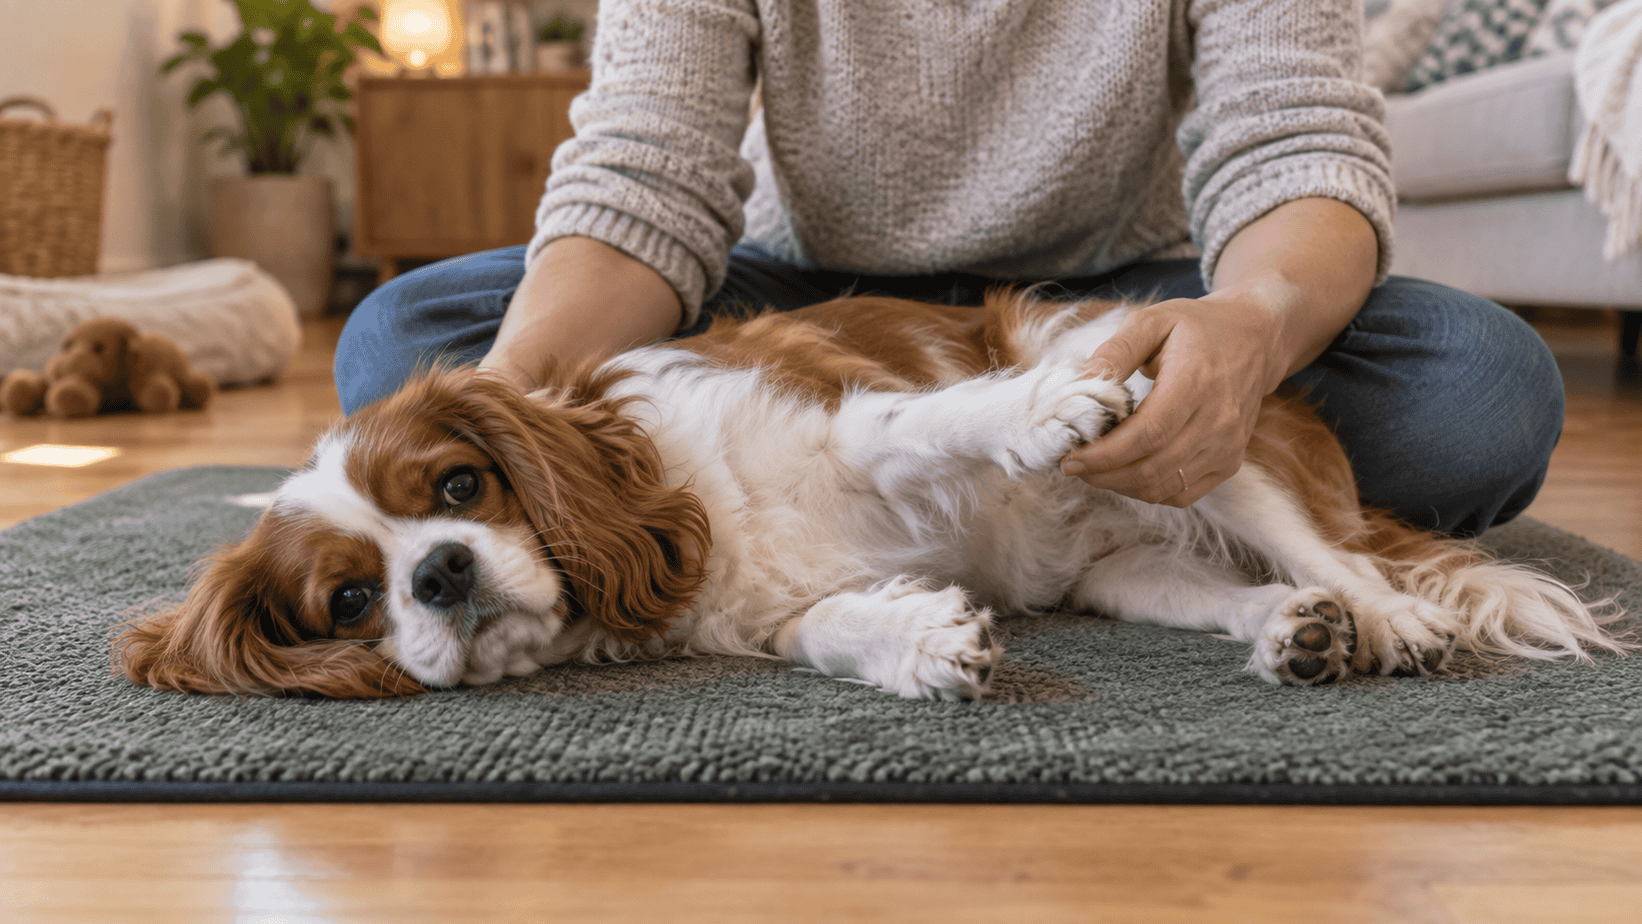
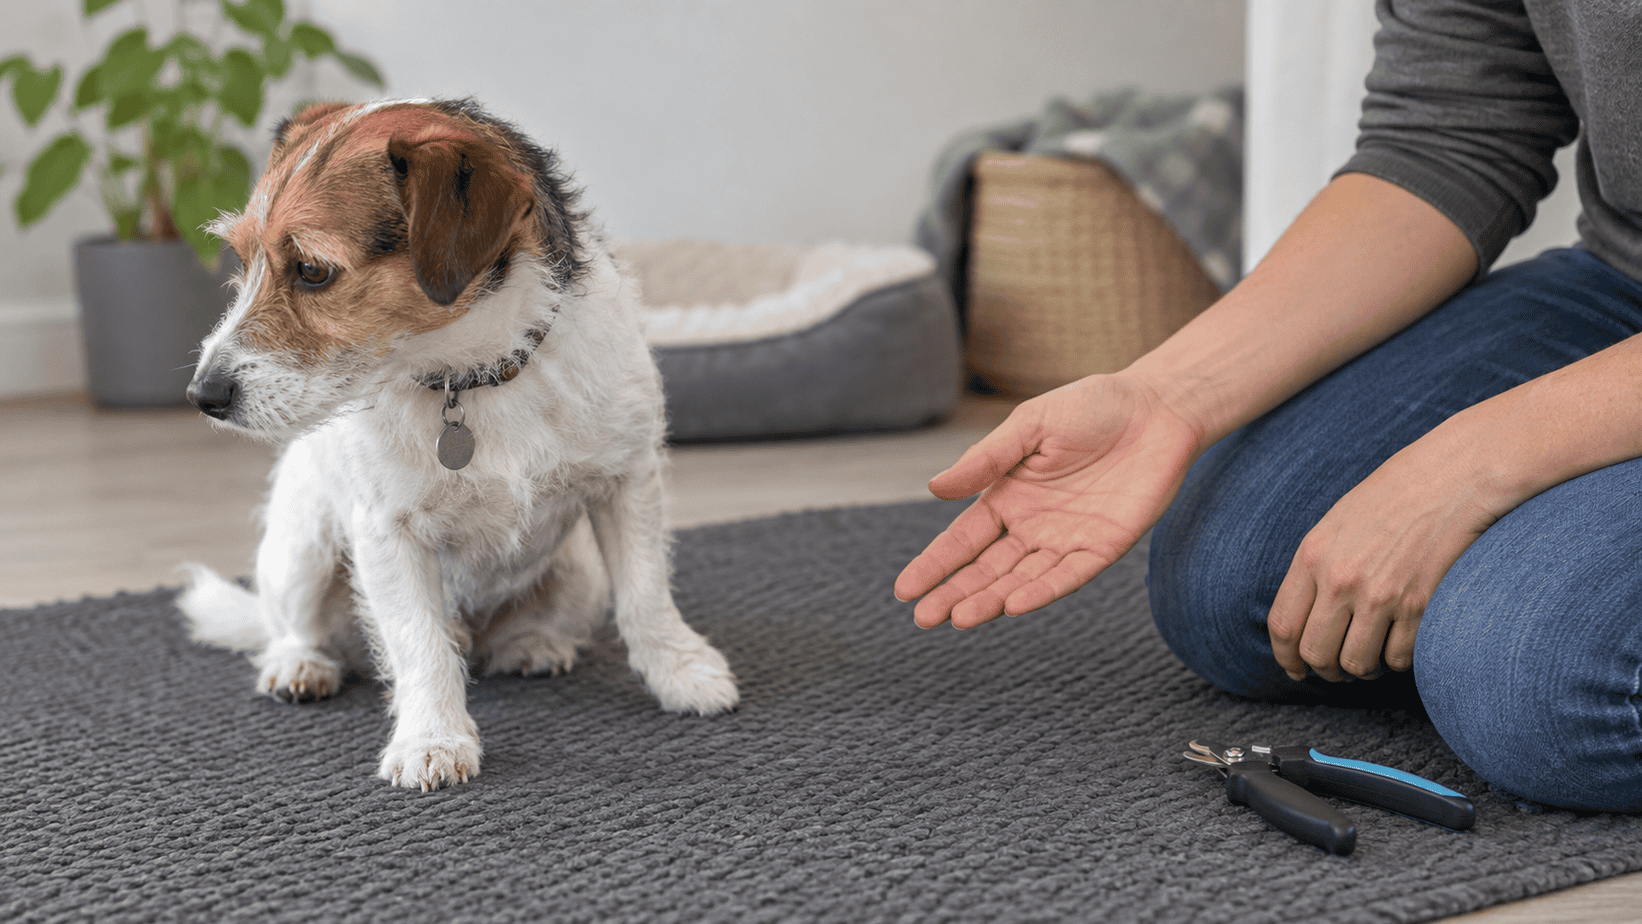
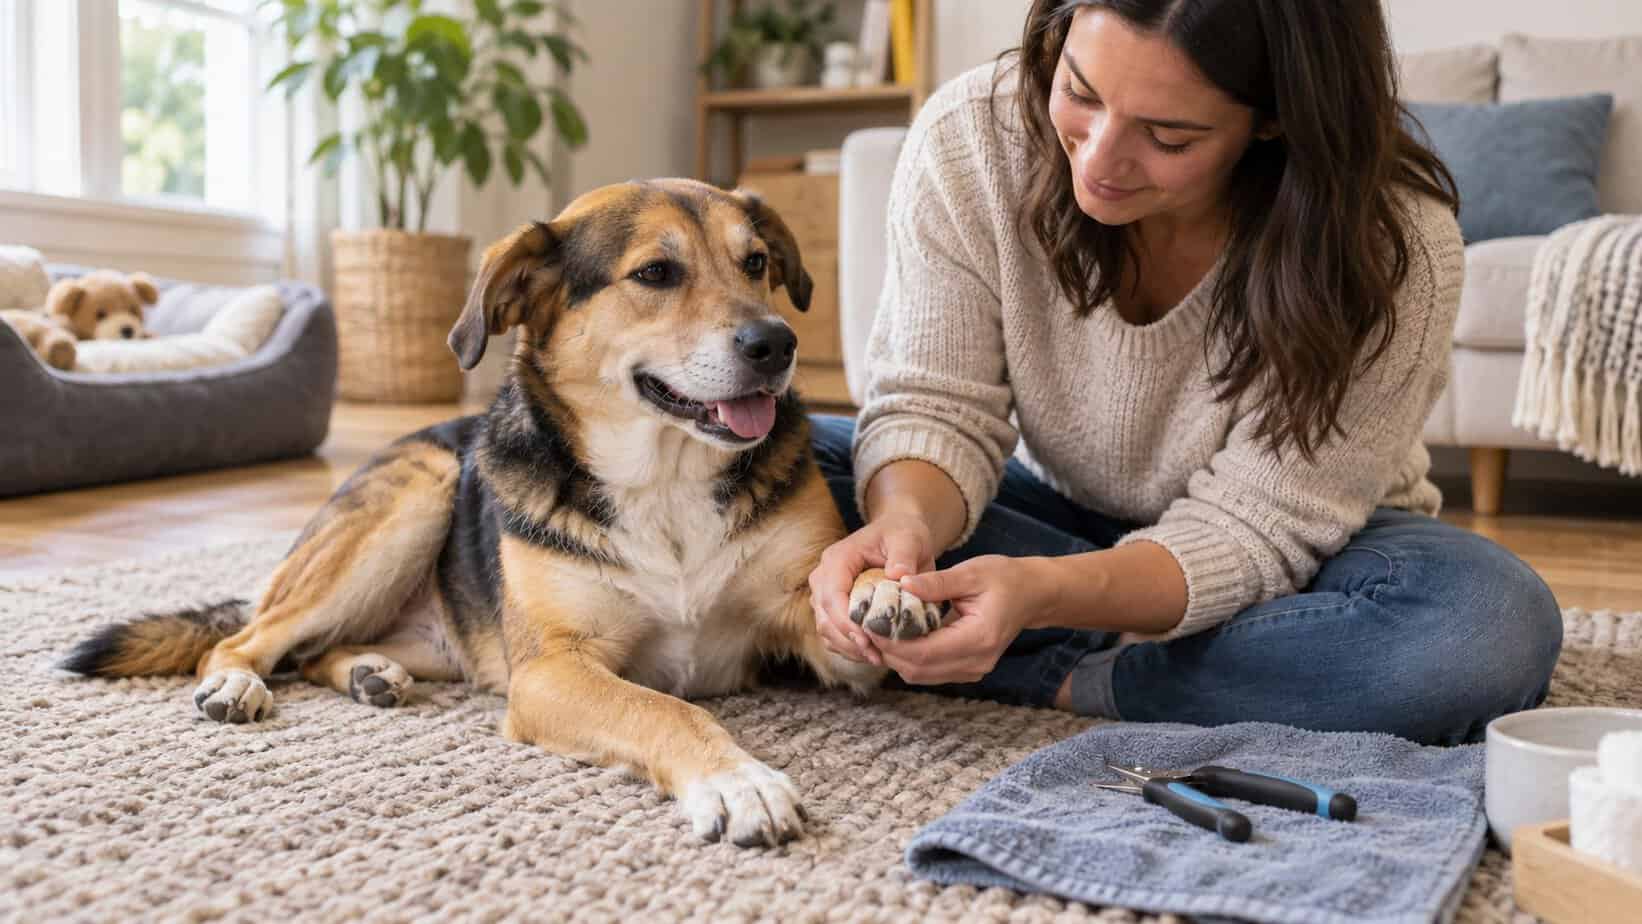
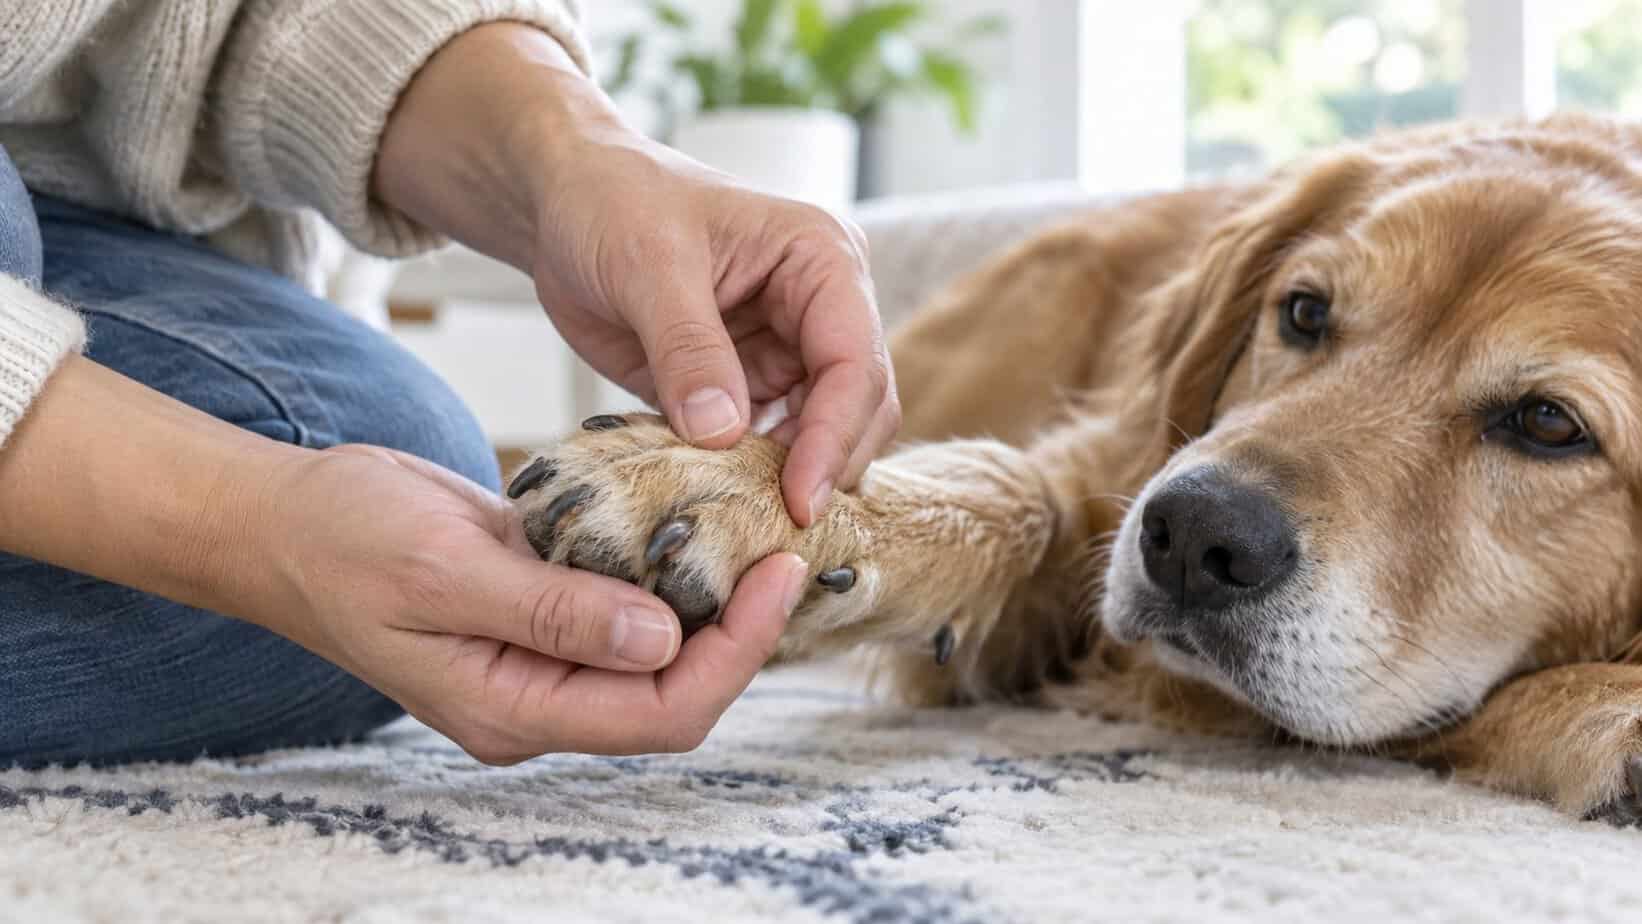
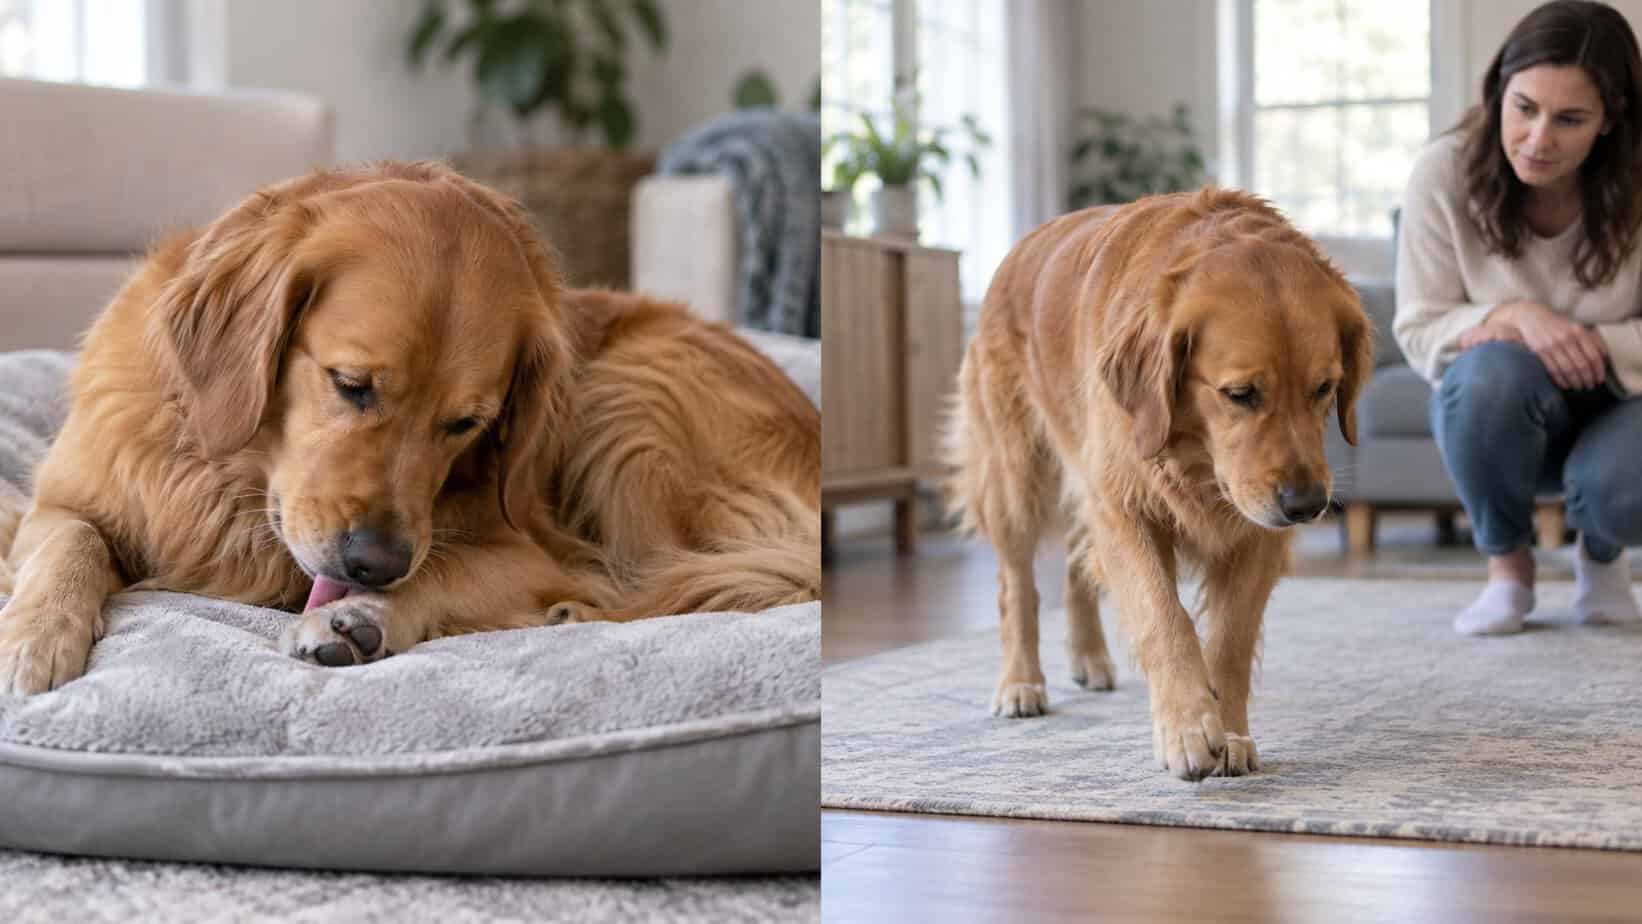
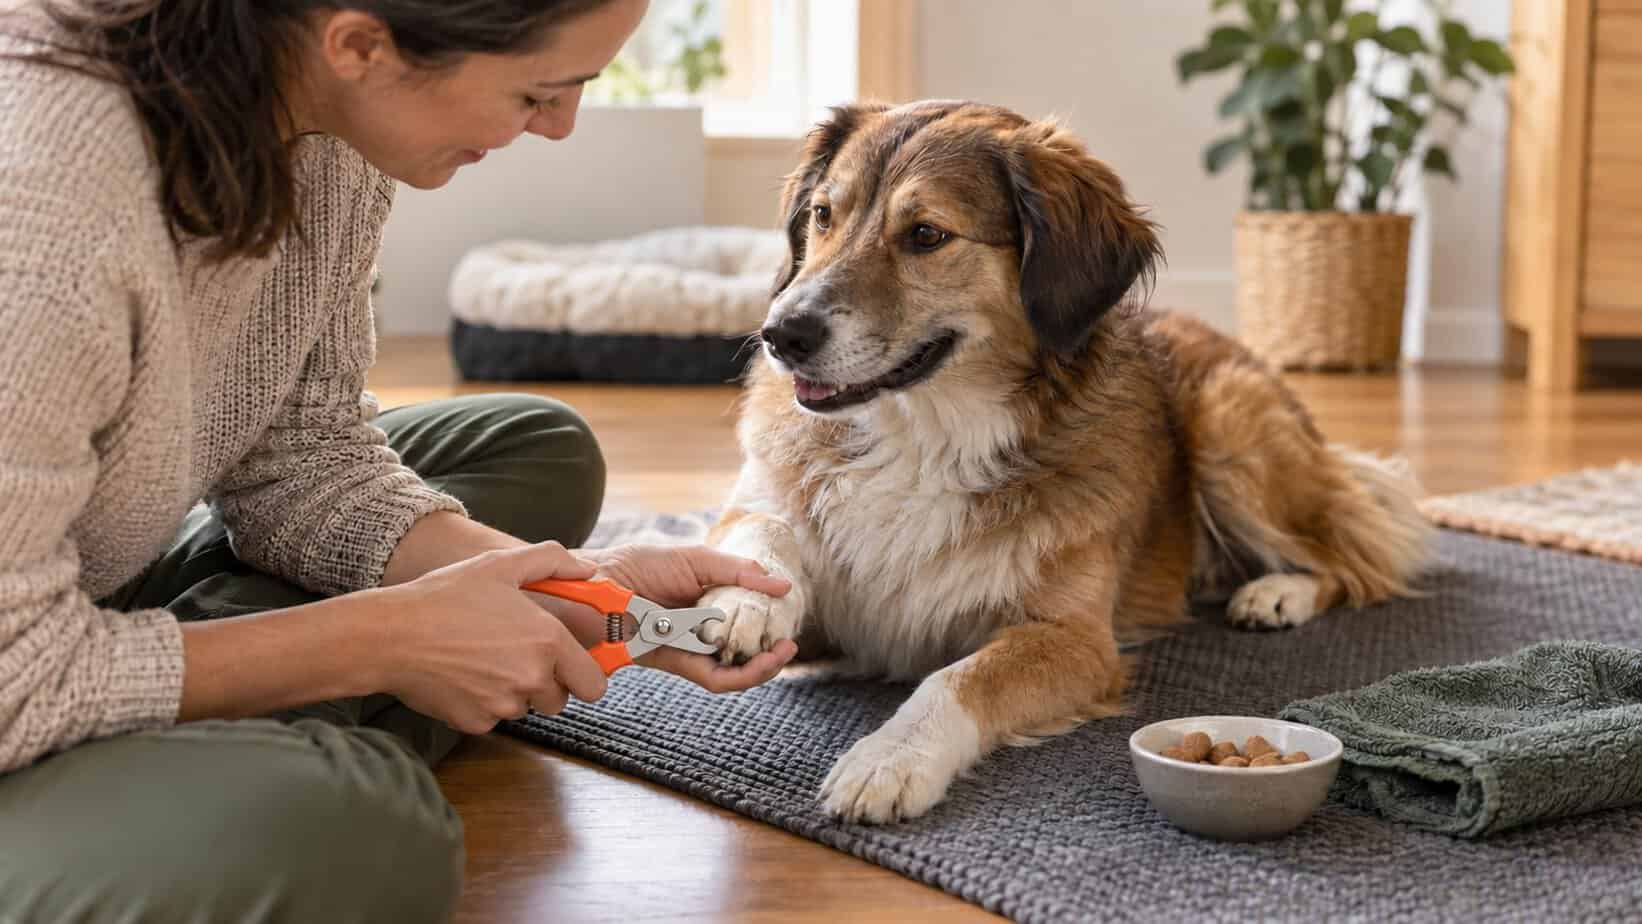
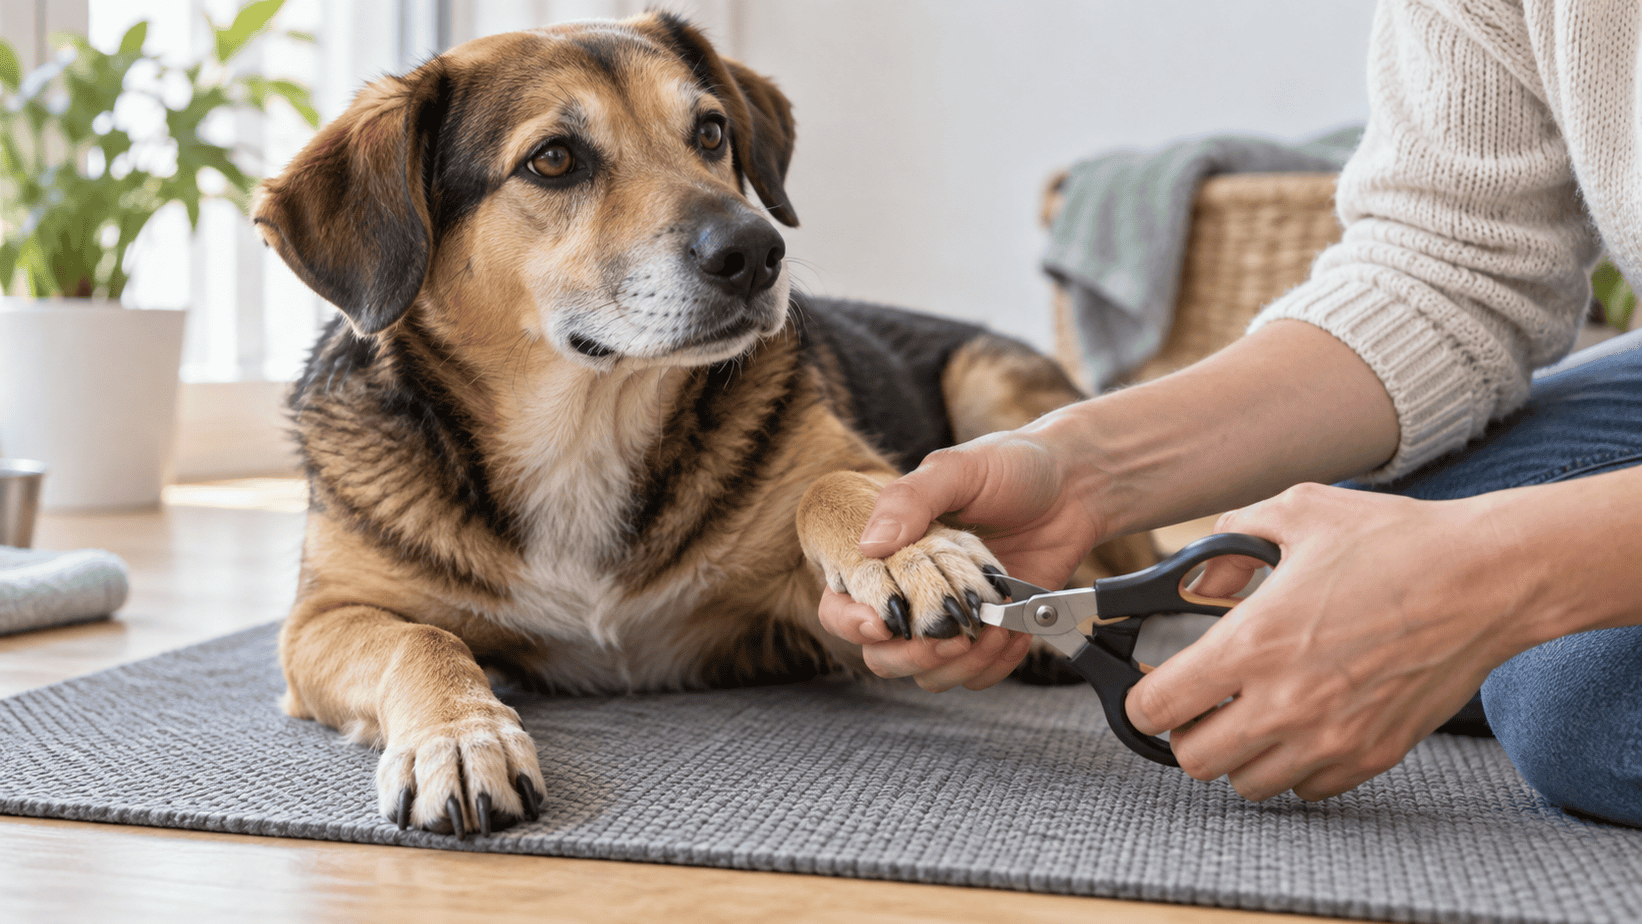
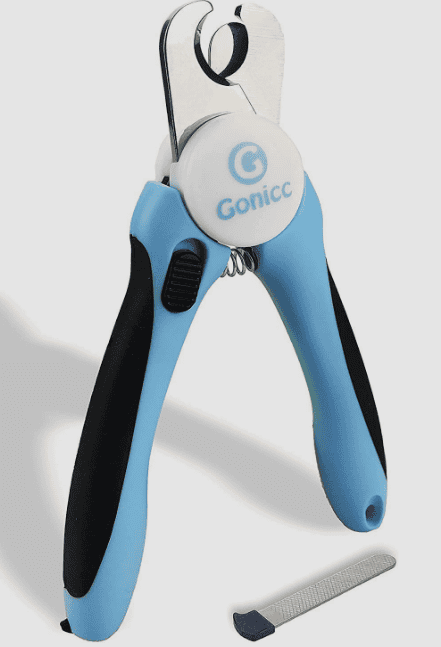 Scissor Clippers
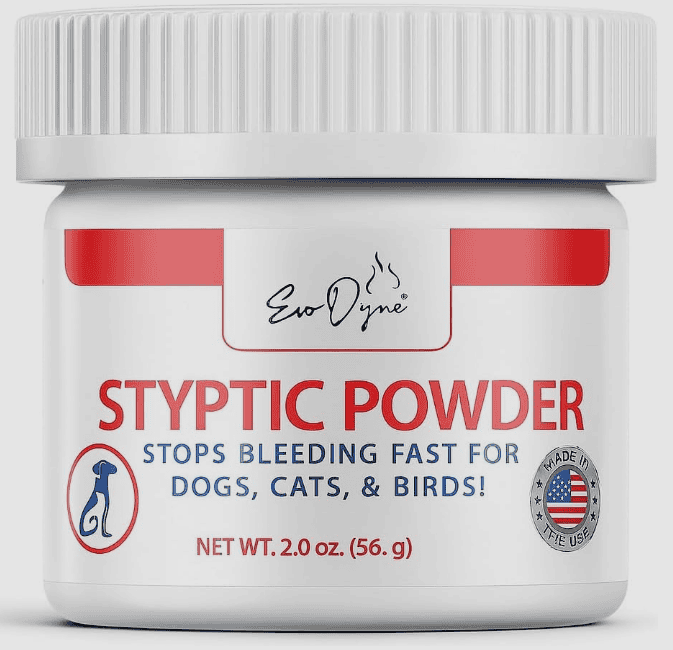 Styptic Powder
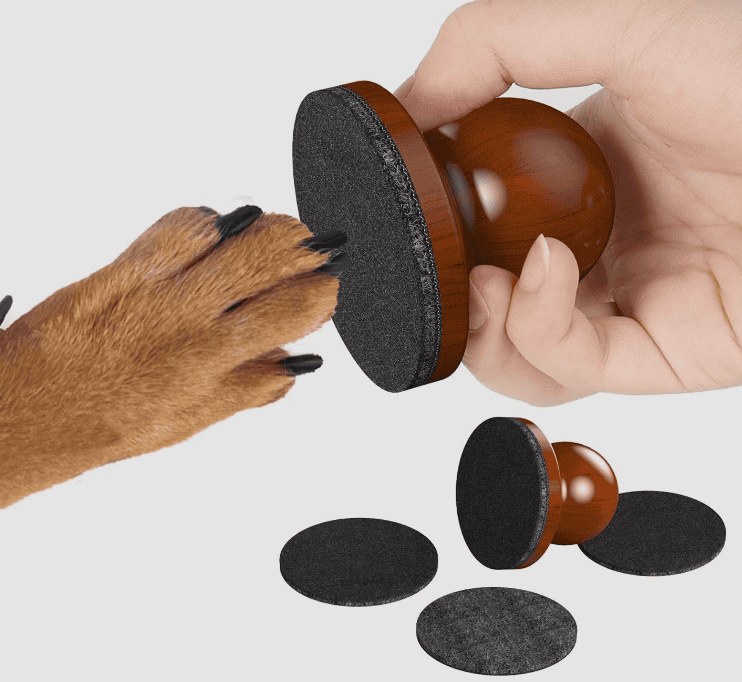 Nail File