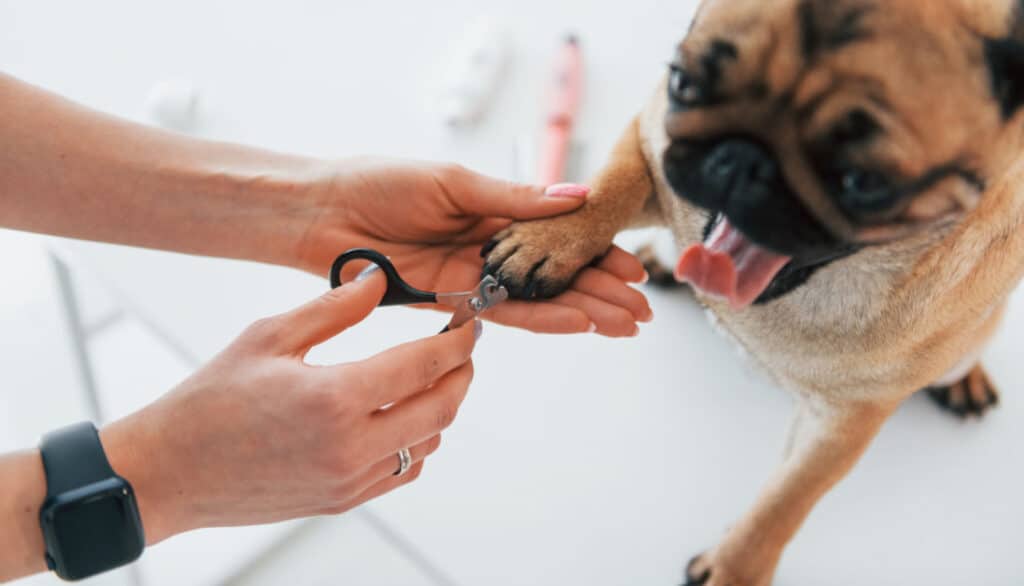
For many dog owners, trimming their furry friend’s black nails can be a daunting task. The fear of accidentally cutting into the ‘quick’—the sensitive inner part of the nail that contains blood vessels and nerves—often makes the process anxiety-inducing. But with the right knowledge, tools, and techniques, it doesn’t have to be a challenging chore. Welcome to our comprehensive guide on how to cut your dog’s black nails safely and effectively. Whether you’re a first-timer or looking to refine your skills, we’re here to provide you with expert advice, tips, and step-by-step instructions to ensure a painless experience for both you and your beloved pet. Let’s embark on this journey to paw-fect nail care together!

Understanding Dog nail anatomy
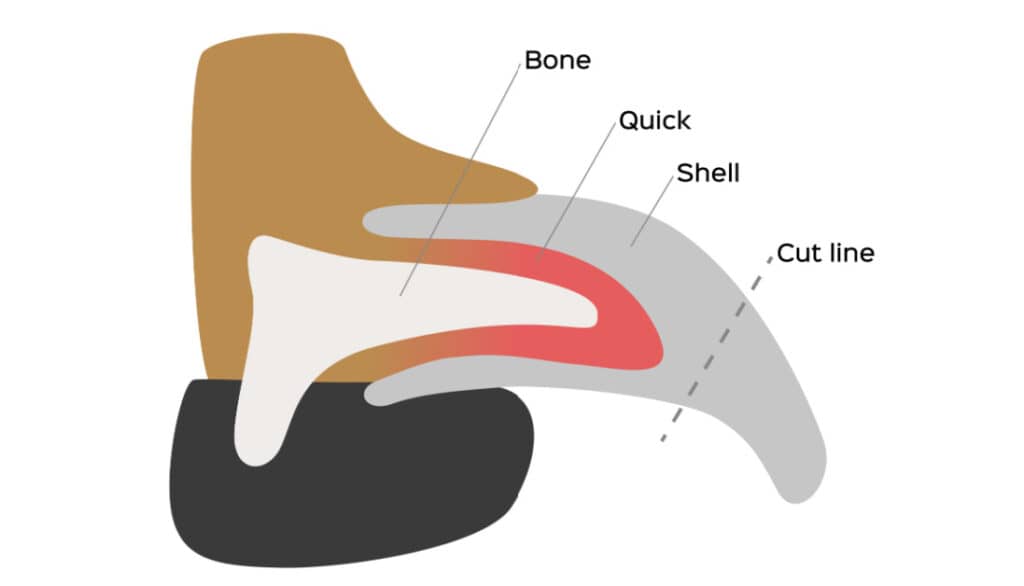
When it comes to grooming our pets, a little knowledge about their anatomy goes a long way. Before diving into the process of trimming your dog’s black nails, it’s essential to get familiar with the basic structure of a dog’s nail. Here’s a breakdown:
The Outer Shell
- Keratin: This is the tough, external part of the nail that we see and trim. Made of a protein called keratin, it’s designed to protect the inner structures of the nail and offer traction.
- Color: Dog nails can be transparent, white, black, or a mix. Black nails are often perceived as tricky because the ‘quick’ isn’t easily visible. However, with practice and attention to detail, trimming them becomes manageable.
The Quick
- Purpose: The quick is the living tissue inside the nail. It supplies blood to the nail and supports growth.
- Appearance: On lighter nails, the quick appears pinkish. But on black nails, it’s challenging to differentiate from the outer keratin shell.
- Sensitivity: The quick is sensitive. Accidentally cutting or nicking it can cause pain and bleeding. It’s the primary reason why pet owners are cautious when trimming darker nails.
The Nail Bed
- Location: Beneath the hard outer shell of the nail lies the nail bed.
- Function: It’s the tissue responsible for the production of the nail. A healthy nail bed ensures healthy nail growth.
- Protection: The nail bed is a vulnerable area. Injuries or infections can lead to complications in nail growth or even more serious issues.
The Dewclaw
- Position: Often referred to as the “thumb” of the dog, the dewclaw is a bit higher up on the leg, away from the main paw. Not all dogs have them, and some might even have them on their back legs too.
- Trimming: Since the dewclaw doesn’t touch the ground, it doesn’t wear down naturally. Therefore, it’s crucial to keep an eye on it and trim when necessary to prevent it from growing into the dog’s skin.
In understanding the anatomy of a dog’s nail, we can approach the trimming process with confidence and care. Now that you’re familiar with the various parts and their functions, you’re better equipped to give your dog a safe and comfortable nail trim.
Nail trimming tools
When it comes to nail trimming, using the right tools can make all the difference between a smooth, stress-free experience and a challenging one. Here’s a breakdown of the most common tools available and how to decide which is best for your furry friend.
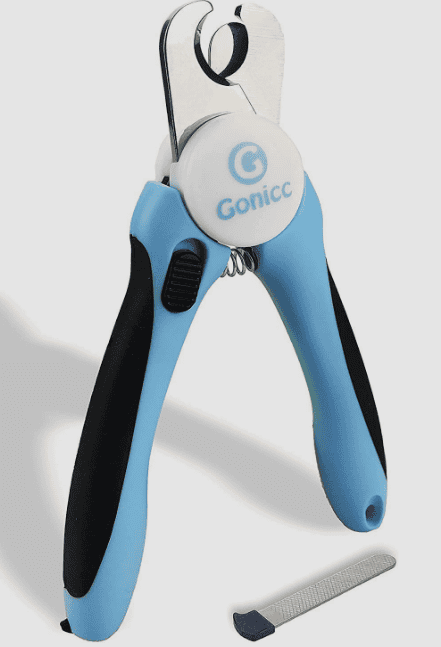
Scissor Clippers (also known as Miller’s Forge trimmers)
- Appearance: They look like scissors but have semicircular notches to hold the nail in place.
- Best For: Small to medium-sized dogs with softer nails. They provide a good amount of control during the trimming process.
- Usage Tip: Ensure the blades are sharp to avoid crushing the nail, which can be uncomfortable for your pet.
Guillotine Clippers
- Appearance: These have a hole where you insert the dog’s nail. As you squeeze the handle, a blade slides across and trims the nail.
- Best For: Smaller dogs with thinner nails. Not recommended for larger dogs or those with very hard nails, as they might crush rather than cut.
- Usage Tip: Like the scissor clippers, keep the blade sharp for efficient and painless cuts.

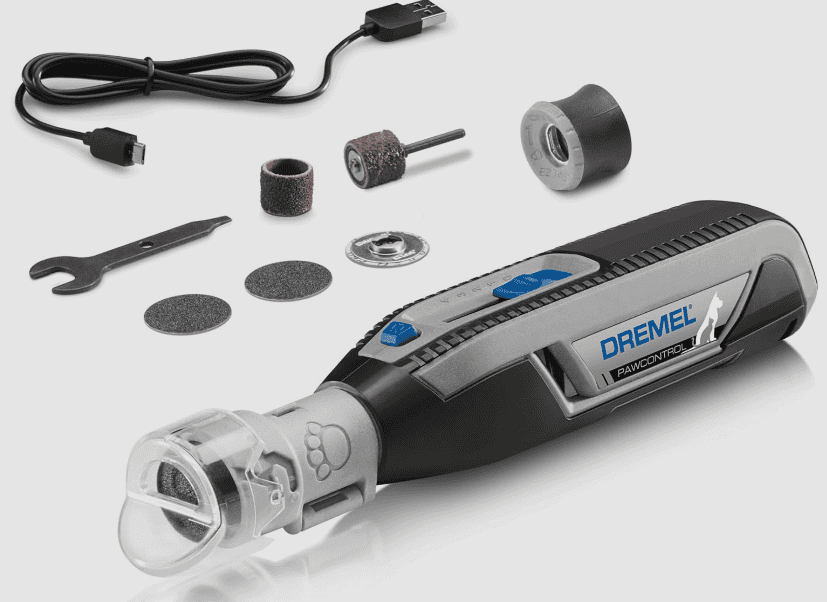
Grinder Tools (often referred to as Dremels)
- Function: Instead of cutting the nail, these tools grind it down with a rotating material.
- Best For: Dogs that are afraid of clippers or for owners who want more control over the trimming process. Suitable for dogs of all sizes and nail types.
- Usage Tip: Introduce the tool slowly to your dog, as the vibration and noise can be startling. Start by grinding a small amount at a time, checking frequently to ensure you don’t get too close to the quick.
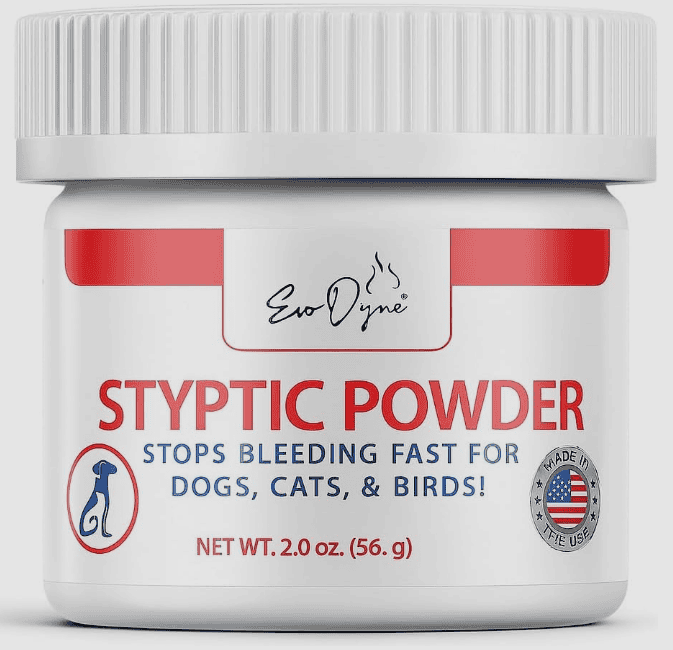
Styptic Powder
- Purpose: While not a trimming tool, styptic powder is essential in the nail-cutting process. If you accidentally cut the quick, applying this powder will help stop the bleeding quickly.
- Usage Tip: Always have styptic powder on hand when trimming your dog’s nails. In case you don’t have any, cornstarch or flour can work as a temporary alternative.
Nail File
- Purpose: To smooth out any rough edges after trimming.
- Usage Tip: Regular filing can reduce the frequency of required trims. It’s also a gentler way to keep your dog’s nails in check, especially for those who are nervous about the process.

When selecting nail trimming tools, consider your dog’s size, nail thickness, and your comfort level with the tool. Whatever tool you choose, remember that patience, positive reinforcement, and regular practice will make the process smoother for both you and your canine companion.
Trimming black nails – A Step-By-Step Guide
Taking the plunge to trim your dog’s black nails might seem daunting, but with a systematic approach and a calm demeanor, you can make it a hassle-free experience for both you and your pup. Here’s a step-by-step guide to help you through the process:
Make Your Pooch Comfortable
- Familiarize With Tools: Before you start trimming, let your dog sniff and get used to the tools. This can make them less anxious when the actual trimming begins.
- Positive Reinforcement: Use treats, praises, or their favorite toy to associate nail trimming with positive experiences. The goal is to reduce anxiety and make them look forward to the process.
- Pick a Calm Time: It’s best to trim when your dog is calm, perhaps after a long walk or play session, when they’re naturally tired.
Get into Nail Trimming Position
- Positioning: If your dog is small, placing them on a table might make it easier. For larger breeds, having them lie down on their side can work well. Ensure the area has good lighting to help you see better.
- Hold the Paw: Gently but firmly grasp the dog’s paw. Push lightly on each toe pad to extend the nail for a clearer view and easier cutting.
Locate the Quick
- Using a Flashlight: For black nails, shining a flashlight beneath the nail can help in spotting the quick. It will appear as a dark shadow inside the nail.
- Start From the Tip: If you’re uncertain about the location of the quick, start trimming a small bit from the tip and work your way in gradually.
Trim or Grind the Nail Quickly, Safely, and Confidently
- Trim in Small Increments: Especially for black nails, take off small bits at a time to avoid cutting into the quick.
- Look for the ‘Bullseye’: As you trim closer to the quick, you’ll notice a small, whitish circle with a black dot in the center. This is an indicator that the quick is near, and you should stop cutting.
- Use Grinders with Care: If using a grinding tool, ensure you don’t hold it on the nail for too long, as it can generate heat and cause discomfort.
Take Your Time, and Repeat Regularly
- Regular Trims: Regular trimming ensures the quick doesn’t grow too long, making the process easier over time. Aim to trim every 3-4 weeks, depending on your dog’s nail growth rate.
- Stay Calm: Your dog will pick up on your emotions. If you’re calm and confident, they’re more likely to be at ease. If you do nick the quick, don’t panic. Apply styptic powder, reassure your dog, and try again later.
With consistency and patience, nail trimming will eventually become a routine and seamless part of your pet care activities.

When to get help with dog nail trimming
Trimming your dog’s nails can be a challenging endeavor for both novice and experienced pet owners alike. While it’s certainly possible to master the technique with patience and practice, there are instances when seeking professional assistance is the best course of action. Here are some scenarios when it might be time to call in the experts:
- Aggressive Behavior: If your dog becomes aggressive or overly anxious during the nail trimming process, it can pose a risk to both you and your pet. Professionals are trained to handle such behavior and can ensure the procedure is done safely.
- Frequent Nicks: If you find that you’re consistently cutting into the quick, causing pain and bleeding for your dog, it might be time to consult a professional. They can offer guidance, demonstrate proper technique, or take over the task altogether.
- Thick or Overgrown Nails: Sometimes, due to neglect or other health issues, a dog’s nails can become extremely thick or overgrown. In such cases, the expertise of a groomer or vet can ensure the nails are trimmed without causing injury.
- Health Concerns: If your dog has a health condition or an injury that makes nail trimming more complex, it’s wise to consult with your veterinarian. They can provide specialized care and recommendations tailored to your dog’s specific needs.
- Lack of Proper Tools: If you don’t have the right tools for the job or aren’t confident in their quality, it’s better to get assistance rather than risking injury to your pet.
- Initial Guidance: If you’re a new dog owner or unfamiliar with the nail trimming process, visiting a groomer or vet for the first few times can be beneficial. They can provide a hands-on demonstration, giving you more confidence to handle the task at home in the future.
- Routine Check-Ups: Even if you trim your dog’s nails at home, having a professional look over your work periodically ensures you’re doing it correctly and maintaining your dog’s paw health.
In conclusion, while many dog owners successfully trim their pets’ nails at home, it’s essential to recognize when professional assistance is warranted. Always prioritize your dog’s well-being and comfort. If you’re ever in doubt, seeking help from a groomer or veterinarian is a responsible and caring choice.
What to do if you cut the quick
Accidentally cutting into the quick of your dog’s nail can be a distressing experience for both you and your pet. The quick is the sensitive, vascular portion within the nail, and cutting into it can cause pain and bleeding. However, while it’s an incident that most pet owners want to avoid, it’s also a common mishap. If you find yourself in this situation, here’s what you should do:
- Stay Calm: Your initial reaction might be to panic, especially if your dog yelps or there’s significant bleeding. However, it’s crucial to remain calm. Your pet will pick up on your emotions, and if you’re agitated, it can further stress them out.
- Stop the Bleeding: Use styptic powder or styptic pencils, which are specifically designed to quickly clot blood. Gently press the powder onto the bleeding nail tip until the bleeding stops. If you don’t have styptic powder, cornstarch or flour can act as temporary alternatives. Simply dip the nail into the powder or apply with a bit of pressure.
- Comfort Your Dog: Once the bleeding has stopped, comfort your dog. They may be feeling anxious or in pain, so some gentle petting, soft words of comfort, or even their favorite treat can help divert their attention and soothe them.
- Clean the Area: Ensure the paw is clean to prevent any potential infections. Rinse the foot gently with some warm water and pat dry. Keep an eye on it for a few days to ensure it doesn’t become red or swollen.
- Take a Break: If you’ve cut the quick, consider ending the nail trimming session for the day. It’s likely that your dog is stressed, and pushing to trim more nails might not be productive.
- Evaluate Your Technique: If you’re consistently cutting into the quick, you might need to re-evaluate your trimming technique. Consider trimming smaller portions of the nail at a time or consulting with a professional for guidance.
- Seek Veterinary Assistance: If the bleeding doesn’t stop after several minutes, or if you notice any signs of infection in the days following, contact your veterinarian. They can provide further care and advice.
Remember, accidents happen. While cutting the quick is unpleasant, with the right steps, it’s a manageable situation. Over time, with practice and care, you’ll become more confident in your nail-trimming abilities, reducing the chances of such incidents.
More grooming tips
Grooming is an integral aspect of dog care. It doesn’t just keep them looking their best; regular grooming ensures their health and comfort. If you’re keen on elevating your pet care game, here are some more grooming tips to consider:
- Brushing Regularly: Depending on your dog’s coat type, regular brushing can help prevent matting, reduce shedding, and distribute natural oils, keeping their fur glossy. Invest in a quality brush suitable for your dog’s coat.
- Bathing: While dogs don’t need frequent baths, knowing when and how to bathe them is essential. Use dog-specific shampoos and ensure you rinse thoroughly. Always dry your dog completely, especially in cooler weather.
- Eye Care: Wipe away any discharge from your dog’s eyes using a soft, damp cloth. For breeds prone to tear staining, consider using dog-specific wipes or solutions.
- Ear Cleaning: Check your dog’s ears regularly for signs of dirt, wax, or infection. Clean them using a vet-recommended solution and a cotton ball, but avoid using cotton swabs deep inside the ear.
- Dental Care: Oral hygiene is crucial. Brush your dog’s teeth regularly with dog-specific toothpaste. Dental chews and toys can also help in reducing tartar buildup.
- Paw Care: Beyond nail trimming, check your dog’s paws for any signs of injury, cracks, or pebbles lodged between the pads. In winters, consider using paw balms to protect against salt and ice.
- Regular Check-ups: While grooming, it’s a good opportunity to check for any abnormalities, like lumps, bumps, or skin infections. If you notice anything unusual, consult your vet.
- Use Quality Products: Invest in high-quality, dog-specific grooming products. They might be a tad more expensive, but they’re designed for your dog’s unique needs.
- Stay Calm and Positive: Just as with nail trimming, your dog will respond to your emotions during grooming. Keep the experience positive using treats, praise, and gentle reassurances.
- Seek Professional Help: If you’re unsure about any aspect of grooming or if your dog has specific needs, don’t hesitate to seek out a professional groomer. They can provide guidance, tips, and even regular grooming services.
Remember, grooming isn’t just about maintaining your dog’s appearance; it’s a bonding experience that ensures your pet’s well-being and comfort. With regular care and the right techniques, you’ll ensure your furry friend stays happy, healthy, and looking their best!
Conclusion
Caring for our furry companions extends beyond walks in the park and the occasional treat. Regular grooming, particularly nail maintenance, plays a pivotal role in ensuring their health, comfort, and happiness. While the prospect of trimming black nails or tackling matted fur may seem daunting, armed with the right knowledge, tools, and a dash of patience, these tasks become more manageable and even rewarding.
Remember, every stroke of the brush, every careful nail trim, and every gentle wash not only contributes to their physical well-being but also strengthens the bond you share with your pet. Whether you choose to handle grooming tasks at home or lean on the expertise of professionals, the underlying goal remains the same: to provide the best for our loyal companions who offer us unconditional love.
So, the next time you approach a grooming session, see it as an opportunity—an opportunity to learn, bond, and ensure that your dog not only looks their best but feels their best too. Happy grooming!
Frequently Asked Questions (FAQs)
A: The frequency varies based on your dog’s activity level and the surfaces they walk on. Generally, most dogs need their nails trimmed every 3-4 weeks. However, if you hear their nails clicking on the floor, it’s a sign they might need a trim sooner.
A: If you accidentally cut the quick and don’t have styptic powder on hand, you can use cornstarch or flour as a temporary solution. Apply it to the bleeding nail with gentle pressure. However, it’s beneficial to keep styptic powder in your dog grooming kit for such situations.