Category: Paws & Nails

  • How To Keep Dog Nails Short Without Clipping – Stress-Free Solutions!

    How To Keep Dog Nails Short Without Clipping – Stress-Free Solutions!

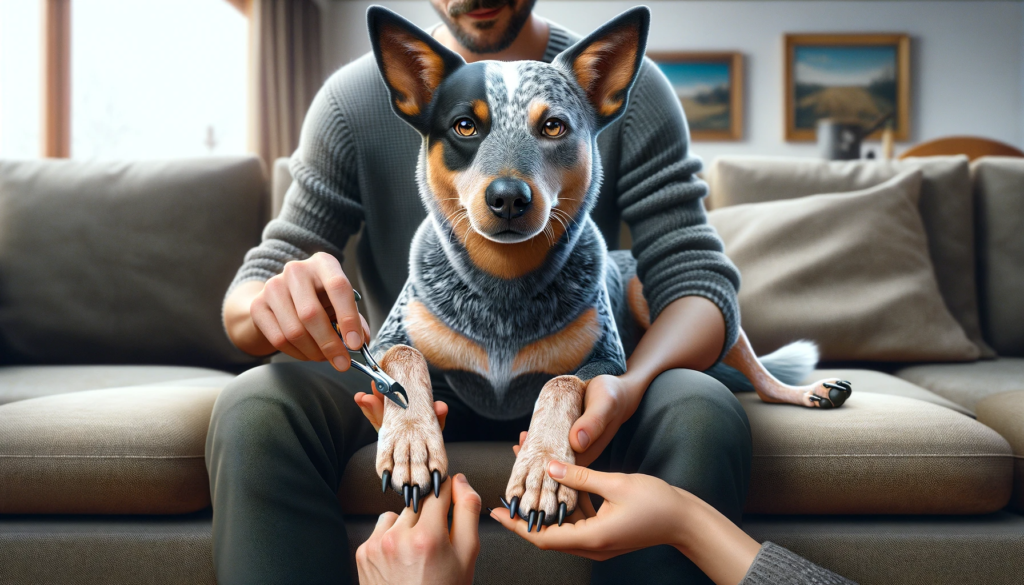
    As a devoted dog parent, you understand the importance of keeping your furry friend’s nails in check. But for many dogs, nail clipping can be a nerve-wracking experience, causing anxiety for both the pet and owner. You’re not alone in your search for a less stressful approach! Welcome to our comprehensive guide on “How To Keep Dog Nails Short Without Clipping.” Here, we dig into stress-free solutions that are not only gentle on your dog’s paws but also effective in maintaining their nail health. Whether you’re a new dog owner or a seasoned pet lover looking for alternative methods, this blog promises to offer insightful and practical tips for a happier, healthier pup. Dive in and discover a world where nail care becomes a breeze!
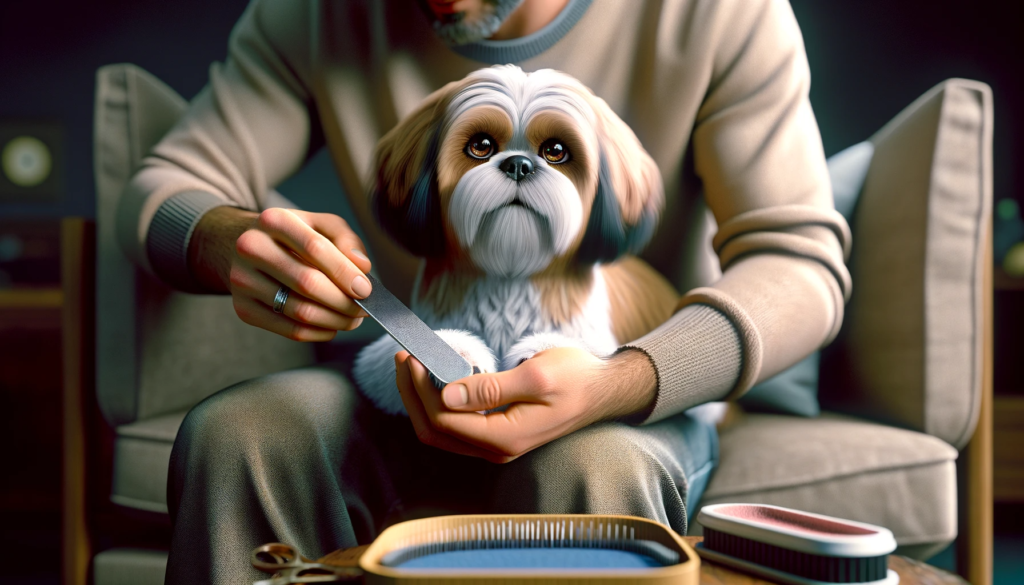
    alternatives to nail clippers

    Long vs. Short Dog Nails – Which Is Better?

    The length of your dog’s nails can significantly influence their comfort, health, and overall well-being. But is shorter always better? Or is there a reason some dogs might have longer nails? Let’s dive deep into the pros and cons of long vs. short dog nails.

    Long Dog Nails

    ProsCons
    Natural Protection: In certain terrains, longer nails can offer an added layer of protection against rough surfaces.Discomfort and Pain: Long nails can cause a dog’s toes to splay or twist when they walk, leading to discomfort or even pain.
    Less Frequent Maintenance: If your dog is terrified of nail trims, having slightly longer nails means less frequent nail-cutting sessions.Increased Risk of Injury: Longer nails are more prone to splitting, breaking, or being torn off, especially during play or when caught in materials like carpets.
    Posture and Joint Stress: Extended nails can affect a dog’s posture, leading to potential joint stress or issues over time.
    Noise: Longer nails can be noisy, especially on tile or hardwood floors.

    Short Dog Nails

    ProsCons
    Comfort: Shorter nails ensure that your dog’s paws rest flat on the ground, providing more comfort when walking or running.Over-trimming Risk: Cutting nails too short can lead to painful injuries or infections.
    Reduced Risk of Injury: Short nails are less likely to get caught in things or break.Frequent Maintenance: Keeping nails short means more regular trimming, which can be stressful for some dogs and their owners.
    Better Posture: Proper nail length promotes better posture and reduces the risk of joint problems.
    Easier Play and Exploration: Short nails make it easier for dogs to play, explore, and dig without the risk of nail damage.

    While short dog nails tend to be better for the health and comfort of most dogs, it’s essential to strike a balance. Over-trimming can lead to its own set of problems. The key is to keep an eye on your dog’s nails, understand their specific needs, and aim for a length that ensures their comfort and safety. Always consult with your vet or a professional groomer if you’re unsure about the right nail length for your pup.

    keeping dog nails short naturally

    4 Ways To File Dog Nails Naturally

    Every dog owner knows that regular nail maintenance is essential for their pet’s health and well-being. However, not all pups are fans of the traditional clippers or grinders. If you’ve been seeking a more natural approach that aligns with your dog’s instincts and minimizes stress, you’re in the right place! In this section, we’ll introduce you to four natural methods to help keep your dog’s nails filed and smooth. These techniques prioritize your dog’s comfort while ensuring their paws remain in tip-top shape. So, let’s explore these gentler alternatives together and find the best fit for your furry friend!

    1. Walk Your Dog Regularly On Rough Surfaces

    As dog owners, our daily walks are more than just a chance for our pups to stretch their legs and get some fresh air; they can also serve a dual purpose for natural nail care. Have you ever noticed how wild animals don’t seem to need nail trims? Nature has its own way of keeping things in check, and we can borrow a leaf from that book!

    The Natural Pedicure

    Walking your dog on rough surfaces, such as concrete or asphalt, can act as a natural file for their nails. Each step they take gently grinds down the nail, preventing it from getting too long. It’s nature’s pedicure, if you will!

    Benefits of Rough Surfaces:

    • Gradual Filing: Unlike clippers that might take off too much at once, the natural wear and tear from walking ensures a gradual and even filing. This reduces the risk of cutting into the quick.
    • Less Stress: Many dogs dread the nail-clipping session. The mere sight of nail clippers can send them hiding. With regular walks on rough surfaces, the need for manual nail trims diminishes, ensuring a stress-free experience for both you and your pet.
    • Promotes Healthy Joints and Muscles: Apart from nail care, walking on different terrains can also be great for your dog’s overall physical health. It helps in muscle development, joint flexibility, and even mental stimulation.
    • No Extra Equipment Needed: No need to invest in grinders, clippers, or other tools. Your regular walk routine becomes a two-in-one activity: exercise and nail care.

    A Few Points to Consider:

    While walking on rough surfaces offers numerous benefits, it’s essential to strike a balance. Excessive walking on very abrasive terrains can lead to sore paws or even injuries. Always check your dog’s paw pads after walks to ensure they’re not cracked or injured. And, during the hotter months, be cautious of hot pavements which can burn your dog’s feet.

    Incorporating rough surfaces into your regular walking routine is a natural and efficient way to maintain your dog’s nail length. It’s a simple change with noticeable benefits. However, always remember to keep your dog’s overall comfort in mind and adapt your walking routine to their specific needs. A happy dog is, after all, the ultimate goal!

    2. Use a scratching post or pad

    Most people associate scratching posts with cats, but guess what? Dogs can benefit from them too! While our feline friends primarily use scratching posts for marking territory and stretching, we can introduce similar tools to our canine companions for a different purpose: nail care. Let’s dive into how scratching posts and pads can be a game-changer for maintaining your dog’s nails.

    Why Scratching Posts and Pads?

    • Natural Behavior: Dogs often scratch at the ground, whether they’re trying to get comfortable before lying down or they’re engaging in instinctual behaviors. A scratching post or pad provides them with a designated place to indulge this instinct and, in the process, file their nails.
    • Controlled Environment: Scratching pads are designed to be abrasive enough to file down nails without causing harm to the paw pads. It’s a controlled environment that ensures safety and effectiveness.
    • Stress Reduction: Just as walking on rough surfaces reduces the need for manual nail trims, scratching pads can do the same. For dogs that get anxious with nail clippers, this can be a more relaxed and organic approach.
    • Mental Stimulation: Figuring out how to use a new tool or toy can be a great mental exercise for dogs. The act of scratching can also be a stress reliever and a fun activity!

    Setting It Up:

    1. Choose the Right Material: Make sure the post or pad is made of a material that’s rough enough to file down nails but not so abrasive that it could harm your dog. Sisal fabric is a popular choice.
    2. Placement is Key: Place the scratching post or pad in an area where your dog frequently spends time. You can also introduce it to them by placing their paws on it or using treats to guide their behavior.
    3. Encourage Use: Initially, your dog might be unsure about the new addition to their environment. Encourage them to use the post or pad by sprinkling some treats around it or using toys to guide their play towards the scratcher.

    Points to Remember:

    While scratching posts and pads can be an excellent tool for nail maintenance, they shouldn’t completely replace regular nail checks. Ensure you’re still monitoring your dog’s nail length and condition to ensure they’re at a healthy length and free from splits or injuries.

    Scratching posts and pads are more than just cat accessories. With the right introduction and placement, they can be an invaluable addition to your dog’s nail care routine. They offer a natural, stress-free method that many dogs might find preferable to traditional nail-trimming tools. So, why not give it a try? Your dog might just thank you with happy, well-maintained paws!
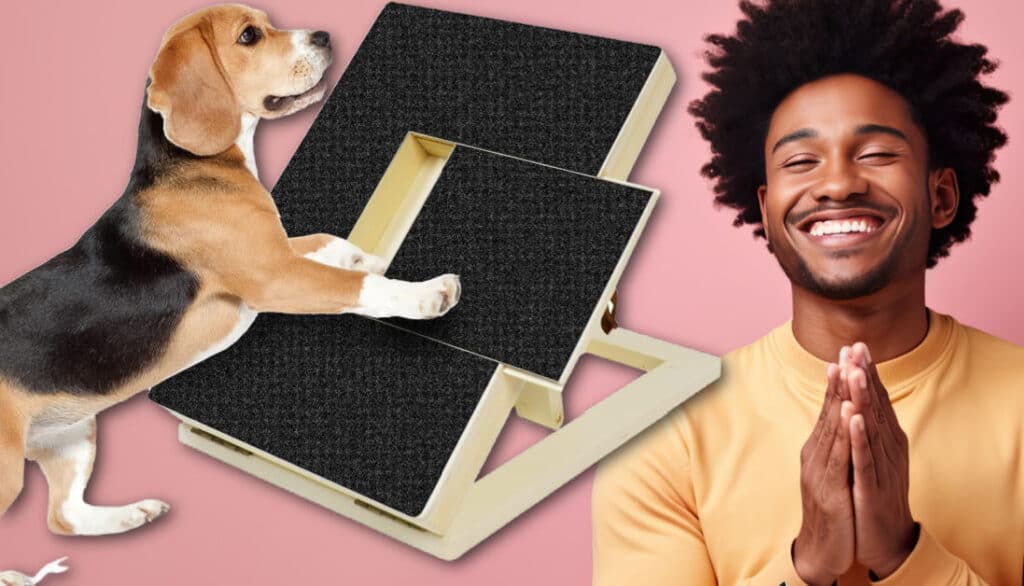
    scratch pad for dogs

    3. Use an emery board

    If you’ve ever filed your nails to achieve a smooth edge, you’re familiar with the wonders of an emery board. But have you considered using one for your furry friend? While it might sound unconventional, an emery board can be an excellent tool for gently maintaining your dog’s nails. Let’s explore how this common beauty tool can make its way into your dog’s grooming kit.

    The Emery Board Advantage:

    • Gentle and Precise: Unlike nail clippers, which can sometimes take off more than intended, an emery board offers precision. It gently files the nail, allowing you to achieve the desired length and shape without risking cutting into the quick.
    • Perfect for Finishing Touches: Even if you use clippers or other tools for the bulk of the nail trimming, an emery board is perfect for smoothing out any rough edges.
    • Reduced Anxiety: The quiet, gradual nature of the emery board can be less intimidating for dogs that are anxious about louder tools like grinders or the sudden pressure of clippers.
    • Affordable and Easy to Replace: Emery boards are relatively inexpensive and can be easily replaced when they wear out.

    How to Use:

    1. Get Your Dog Comfortable: Before diving in, ensure your dog is relaxed. Start by showing them the emery board and letting them sniff it. Reward them with treats to create a positive association.
    2. Gentle Strokes: Hold your dog’s paw firmly but gently. Using the emery board, file in one direction towards the tip of the nail. Avoid going back and forth too aggressively, as it can cause heat and discomfort.
    3. Take Breaks: Especially if it’s your first time, keep sessions short and give your dog plenty of breaks. Over time, as they become more accustomed, you can gradually increase the duration.

    Things to Keep in Mind:

    • Choose the Right Grit: Just like with human nails, you’ll want to pick the appropriate grit for your dog. Medium grit is typically suitable for most dogs.
    • Keep It Clean: Regularly clean or replace your emery board to avoid bacterial buildup.
    • Monitor Their Comfort: Always watch for signs of discomfort in your dog. If they seem stressed or agitated, take a break or try again another day.

    An emery board might seem like an unlikely tool for dog nail care, but it can be incredibly effective when used correctly. It offers a gentle and precise method that many dogs and their owners might find preferable to other grooming tools. If you’re searching for a softer approach to nail maintenance, give the humble emery board a shot – both you and your pup might be pleasantly surprised!
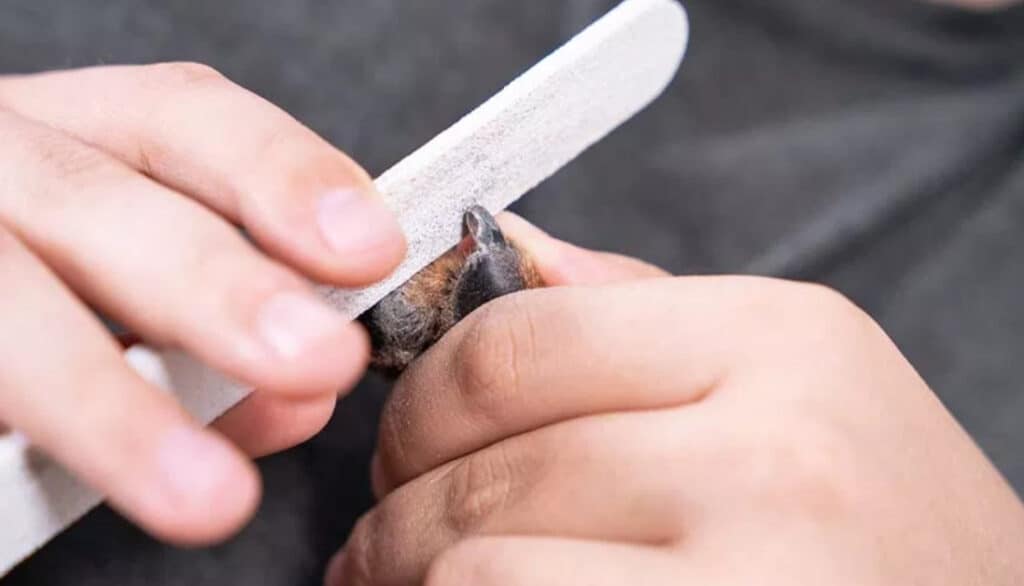
    emery board to file dog nails

    Encourage Digging

    If you’ve ever found yourself scolding your dog for digging up your garden, it might be time to see things from a different perspective. While unsightly holes in your flowerbed can be frustrating, digging is a natural canine behavior that, with the right guidance, can be beneficial for nail maintenance. Before you shake your head, let’s delve into how channeling this inherent behavior can help keep those paws prim and proper.

    The Upside of Digging:

    • Natural Nail Filing: As your dog digs, the dirt and grit naturally file their nails down. It’s a bit like nature’s manicure station, working wonders without the need for human intervention.
    • Mental and Physical Stimulation: Digging can be both mentally and physically engaging for dogs. It provides them with a constructive outlet for pent-up energy and can help reduce unwanted behaviors born out of boredom or anxiety.
    • Instinctual Behavior: Many dogs dig due to their ancestral instincts. By allowing and encouraging controlled digging, you’re helping them express this instinct in a safe and constructive manner.

    Setting Up a Digging Zone:

    1. Pick the Spot: Instead of letting your dog choose the digging spot (and risk your prized roses), select a designated area in your garden or yard. This could be a sandbox or a specific patch of dirt.
    2. Make it Appealing: Bury some toys or treats to pique their interest. Over time, your dog will learn that this is their special digging spot.
    3. Positive Reinforcement: When your dog digs in the designated zone, reward them with praise, treats, or playtime. If they start digging elsewhere, gently redirect them back to their spot.

    Considerations:

    • Paw Health: While digging can be excellent for nail maintenance, ensure you’re checking your dog’s paws regularly. Ensure they’re not sore or injured, especially if they’ve been digging in harder, rocky soil.
    • Clean Up: After a digging session, it’s a good idea to clean your dog’s paws. This will remove any dirt or debris and reduce the risk of them tracking dirt into your home.

    While digging might have its downsides when done indiscriminately, it can be a fantastic, natural method for nail maintenance when channeled correctly. By setting boundaries and establishing a designated digging zone, you not only keep your pup’s nails in check but also give them an outlet for expression and exercise. It’s all about striking the right balance and understanding your furry friend’s innate needs and behaviors. Happy digging!
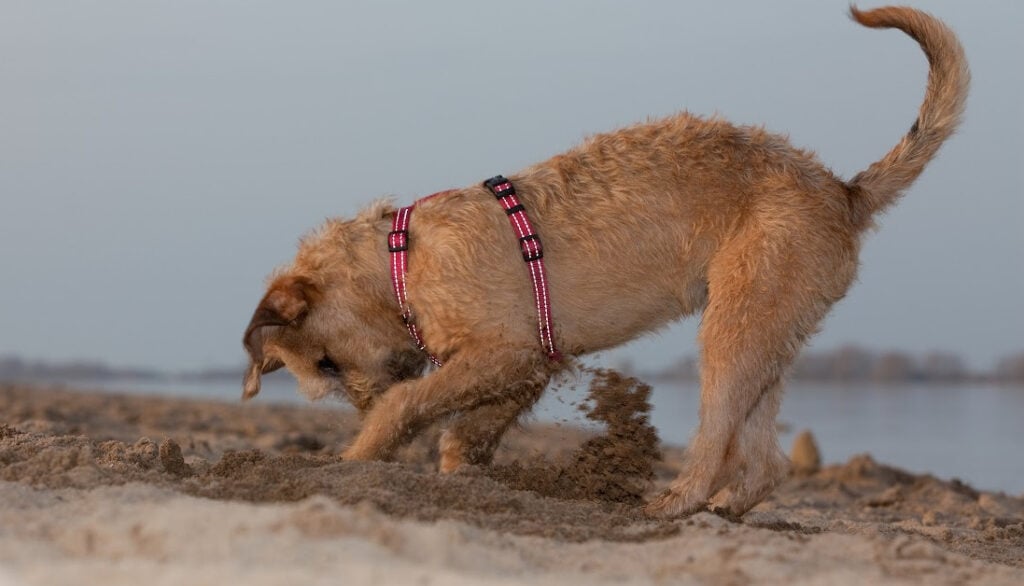
    digging for nail health

    Conclusion

    Maintaining our dogs’ nails isn’t merely an aesthetic choice; it’s a testament to their overall well-being and comfort. While traditional tools and methods have their place, it’s refreshing to know that nature offers us an array of gentle, instinctual methods for nail care. From regular walks on rugged terrains to encouraging our dogs to embrace their inner landscaper through digging, these methods are both beneficial and enjoyable.

    Remember, it’s not about completely replacing one method with another but finding the right balance that suits both you and your furry friend. Experiment, observe, and adjust. By offering multiple avenues for nail maintenance, we’re not just catering to our pets’ physical needs but also acknowledging and respecting their natural behaviors.

    So, the next time you see your dog happily digging away or eagerly walking on a rough path, you’ll know they’re not just indulging their instincts but also getting a natural ‘pawdicure.’ Here’s to happy paws and even happier tails!

    Frequently Asked Questions (FAQs)

    Is it really necessary to maintain my dog’s nail length?

    Absolutely! Long nails can cause discomfort, affect your dog’s walking posture, and even lead to joint problems. Regular maintenance ensures that your dog remains comfortable and healthy.

    How often should I check my dog’s nails?

    It largely depends on your dog’s activities and the methods you’re using for nail care. If you’re using natural methods like walking on rough surfaces or encouraging digging, a bi-weekly check should suffice. However, if you’re relying on traditional trimming, it’s advisable to check weekly or as needed.

    Can I use both natural and traditional methods of nail maintenance?

    Of course! Many dog owners find a balance between the two. For instance, regular walks on concrete can reduce the frequency of manual nail trims. It’s all about finding what works best for your pet.

    My dog hates nail clippers and even the sight of an emery board. What should I do?

    Patience is key. Start by introducing any new tool or method gradually. Let your dog sniff and get accustomed to it without any pressure to use it immediately. Associating the tool with positive reinforcements like treats can help. Alternatively, focusing more on natural methods like digging or walking on abrasive surfaces might be less stressful for your pet.

    If my dog digs frequently, does it mean I can skip all other forms of nail maintenance?

    While digging is an excellent natural way to wear down nails, it might not be uniform for all nails. Some nails, like the dewclaw, might not get the same wear and tear from digging. It’s essential to regularly check all the nails and ensure they’re at a comfortable and healthy length.

    A note about your dog’s health

    This article provides general education and does not replace an examination, diagnosis, or individualized advice from your veterinarian. Contact a veterinary professional if you are concerned about your dog’s symptoms.

    Dr. Candy Akers, DVM Avatar

    ABOUT THE AUTHOR
  • How to Trim Overgrown Dog Nails Safely

    How to Trim Overgrown Dog Nails Safely

    If your dog’s nails are badly overgrown, do not try to return them to normal length in one sitting. The quick, which contains blood vessels and nerves, may have grown forward with the nail. Remove only a tiny amount, stop before the quick, and repeat conservative trims as your dog tolerates them.

    Get professional help for a nail that is entering the paw pad, split, bleeding before you start, surrounded by swelling or discharge, or causing marked pain or limping. Those nails need more than a routine trim.

    The safest goal is steady progress, not a perfect paw today.

    Before You Trim: Is This Safe at Home?

    Start by looking at every nail while your dog is standing on a non-slip surface. Do not judge by clicking alone. Some dogs’ nails make noise even when their length is reasonable, while active dogs may wear their nails down without frequent clipping. Check whether the nails touch the floor, change the way the toes sit, curve toward the pads, or catch on fabric. Remember the dewclaws, which do not touch the ground and can keep growing in a curve. [1]

    Use this quick guide:

    • Long but free of the pad: A careful home trim may be reasonable if your dog is comfortable and cooperative.
    • Curved and touching or pressing into the pad: Arrange prompt help from a veterinarian or experienced groomer. Do not force clippers into a tight space.
    • Embedded, split, bleeding, swollen, draining, or very painful: Contact your veterinarian. Infection, tissue injury, or nail-bed damage may need treatment.

    If you cannot clearly see or safely reach the nail, that is enough reason to stop.

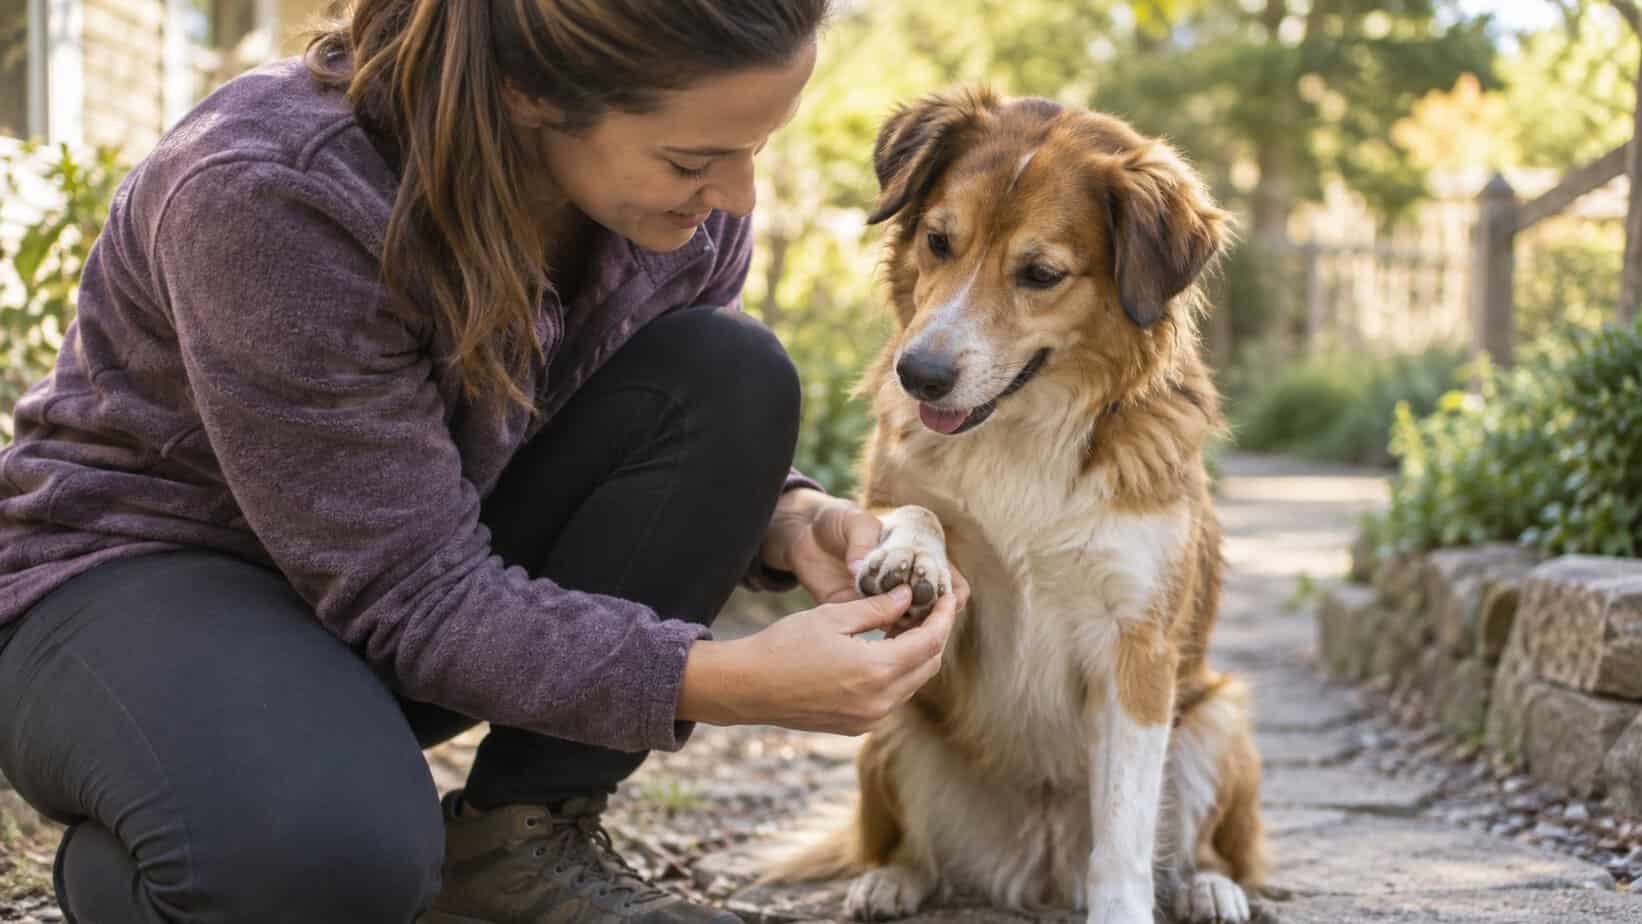
    Person gently inspecting a dog’s curved nails while the tips remain free of the paw pad.

    What You Need

    Gather your supplies before you bring your dog into position:

    • Dog nail clippers that fit the nail size, or a pet nail grinder
    • Styptic powder
    • Bright, steady light
    • A non-slip mat or rug
    • Small, high-value treats
    • A helper, only if that person can keep the dog relaxed without pinning or wrestling

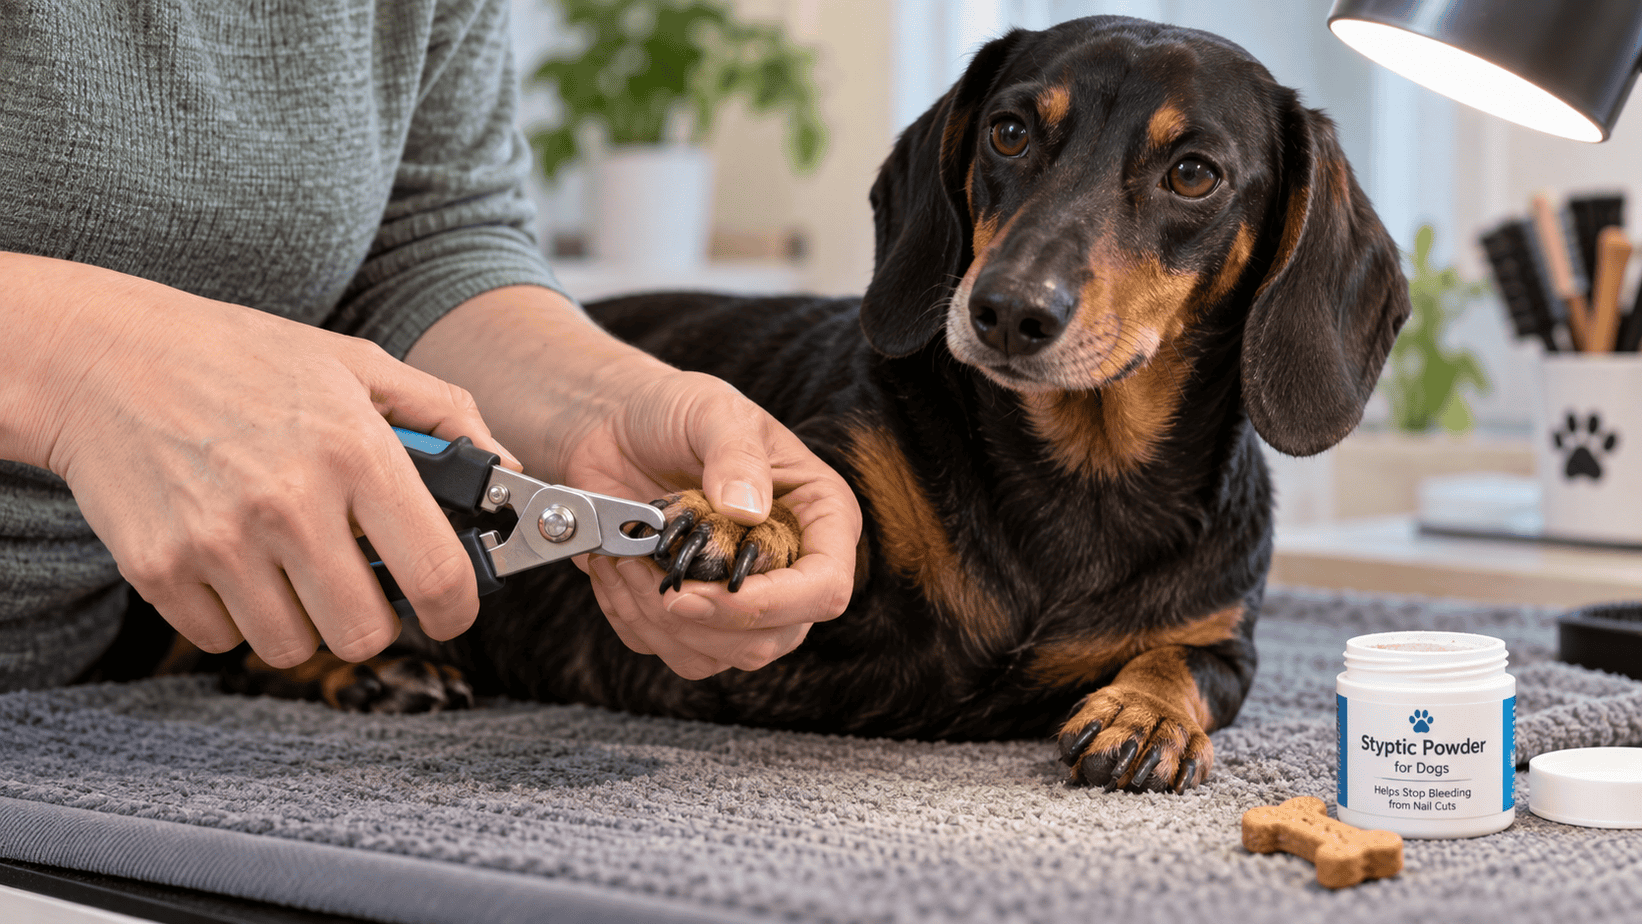
    Scissor-style clippers often give good control on thick nails. Guillotine-style clippers may work for smaller nails if you can position them cleanly. A grinder removes less at a time, but its sound and vibration can worry some dogs. VCA advises taking very small cuts, about one to two millimeters at a time, especially when the quick is long. [2]

    The First Trim: Step by Step

    Set Up for a Calm, Short Session

    Choose a quiet, well-lit spot. Let your dog sniff the tool, then reward calm interest. Touch a paw, give a treat, and release it. If your dog pulls away, pants hard, freezes, growls, or tries to escape, pause. A trim is not worth turning future paw handling into a fight.

    Position small dogs on your lap or beside you with their body supported. Larger dogs can stand or lie on a non-slip surface. Hold the paw gently near the toe you are working on. Do not twist the leg backward or pull it far from its natural position.

    Check the Nail and Find Your Stop Point

    On a clear nail, the quick usually appears as a pink center. Stay well in front of it. On a black nail, you may not see the quick from the outside. Plan to remove only thin slivers and inspect the cut surface after each one.

    Move hair away from the nail. Check for cracks, swelling, odor, discharge, or a nail that bends into the pad. If anything looks unhealthy or the dog reacts as if the toe is painful before you cut, stop and call your veterinarian.

    Dog nail clipper positioned at the very tip of a pale nail while the paw is gently supported.

    Remove a Tiny Amount

    With clippers, follow the general shape of the nail and take off only the sharp tip or a very thin slice. Do not depend on one universal angle for every paw. Recheck the nail after each cut.

    With a grinder, use brief touches and move between nails. Friction creates heat, so do not hold the grinder in one place. Keep fur away from the spinning part.

    On a black nail, the center of the cut surface may change from dry and pale to darker, softer, or shinier as you approach living tissue. Treat any change as a reason to become more conservative. These clues vary, so stop if you are uncertain.

    Stop Before Your Dog Is Done

    One nail can be a successful session. So can one paw. Fear Free guidance supports breaking care into small, rewarded steps rather than pushing through the entire job. [3]

    End while your dog is still coping well. Offer a treat, praise calm behavior, and write down which nails you finished. That small record prevents repeated handling of the same toe and helps you see progress.

    A Staged Plan for a Long Quick

    A long quick may gradually move back as the nail is kept shorter, but the pace is different for every dog. Nail growth, starting length, natural wear, age, health, and how much trimming the dog can comfortably tolerate all matter. Think in weeks or months, not one dramatic session.

    Try this flexible plan:

    1. First session: Remove only the safe tip from each nail your dog comfortably allows. Take a photo or note the date and nail condition.
    2. Recheck in 7 to 14 days: Look at the nail while your dog is standing. If new growth leaves a safe margin, remove another tiny amount. If you are unsure, wait or ask a professional.
    3. Repeat conservatively: Continue short sessions on a schedule based on visible growth and your dog’s comfort. Some dogs need more time between sessions.
    4. Shift to maintenance: Once the nails are no longer pressing on the ground or curving toward the pads, choose a routine that matches that dog’s growth and wear.

    Do not intentionally cut the quick to “make it recede.” That causes pain and bleeding and can make your dog more afraid of nail care. Progress comes from staying just ahead of growth while protecting living tissue.

    Calm black dog having its dark nails checked beside a grinder and a progress photo.

    How to Read Black Nails

    Black nails require patience more than special tricks. A flashlight may help on some thin nails, but it often does not reveal the quick in thick, dark nails.

    Use a repeatable routine:

    • Begin at the narrow tip.
    • Take a paper-thin slice.
    • Look at the center of the cut surface under bright light.
    • Stop before the center becomes darker, softer, or shiny.
    • Stop immediately if your dog suddenly reacts.

    Do not chase a perfect length. If the nail still seems long after the safe stopping point, record it and return later. A groomer or veterinary team can demonstrate the cut-surface changes on your own dog’s nails.

    Clippers or Grinder?

    Both tools can work. The better choice is the one that gives you control and does not overwhelm your dog.

    Clippers are quick and quiet. They are useful when the nail is thick or the dog dislikes vibration. Their main drawback is that one squeeze can remove more nail than intended if your hand slips or the dog moves.

    A grinder removes nail gradually and smooths sharp edges. It can be helpful for black nails because you can pause after each brief touch. Its drawbacks are noise, vibration, heat, and the risk of catching long fur.

    You can also combine them: clip only the hooked tip, then smooth the edge with a grinder. Introduce either tool in stages before using it on an overgrown nail.

    When Your Dog Is Afraid

    Fear is a reason to slow down, not hold tighter. Start on a day when you do not need to finish the trim. Reward your dog for seeing the tool, hearing the grinder from a distance, allowing a paw touch, and briefly holding one toe.

    Use a lick mat or small treats if your dog can eat safely while handled. Keep sessions short. If your dog refuses food, stiffens, repeatedly pulls away, growls, snaps, or tries to flee, stop.

    A second person can feed treats and watch body language, but that person should not pin the dog down. Grooming hammocks and firm restraint can increase panic or strain joints if used poorly. Dogs with severe fear, pain, or a history of biting may need a veterinary plan, professional handling, or prescribed pre-visit medication. VCA notes that some highly distressed dogs need professional care and, in select cases, sedation for safe nail work. [2]

    If You Nick the Quick

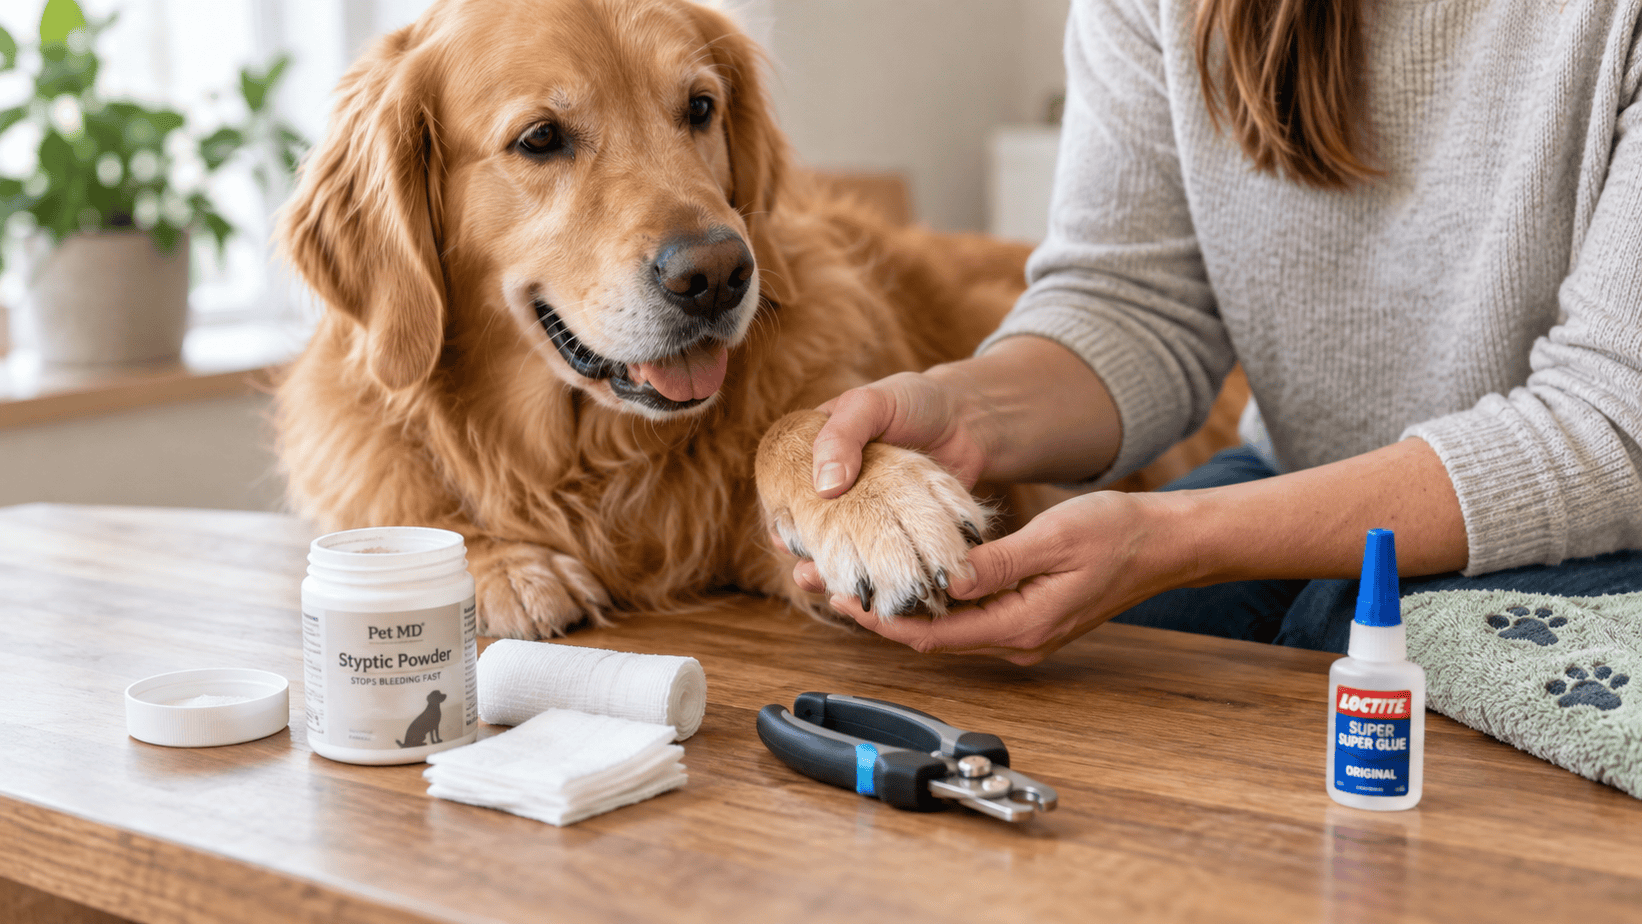
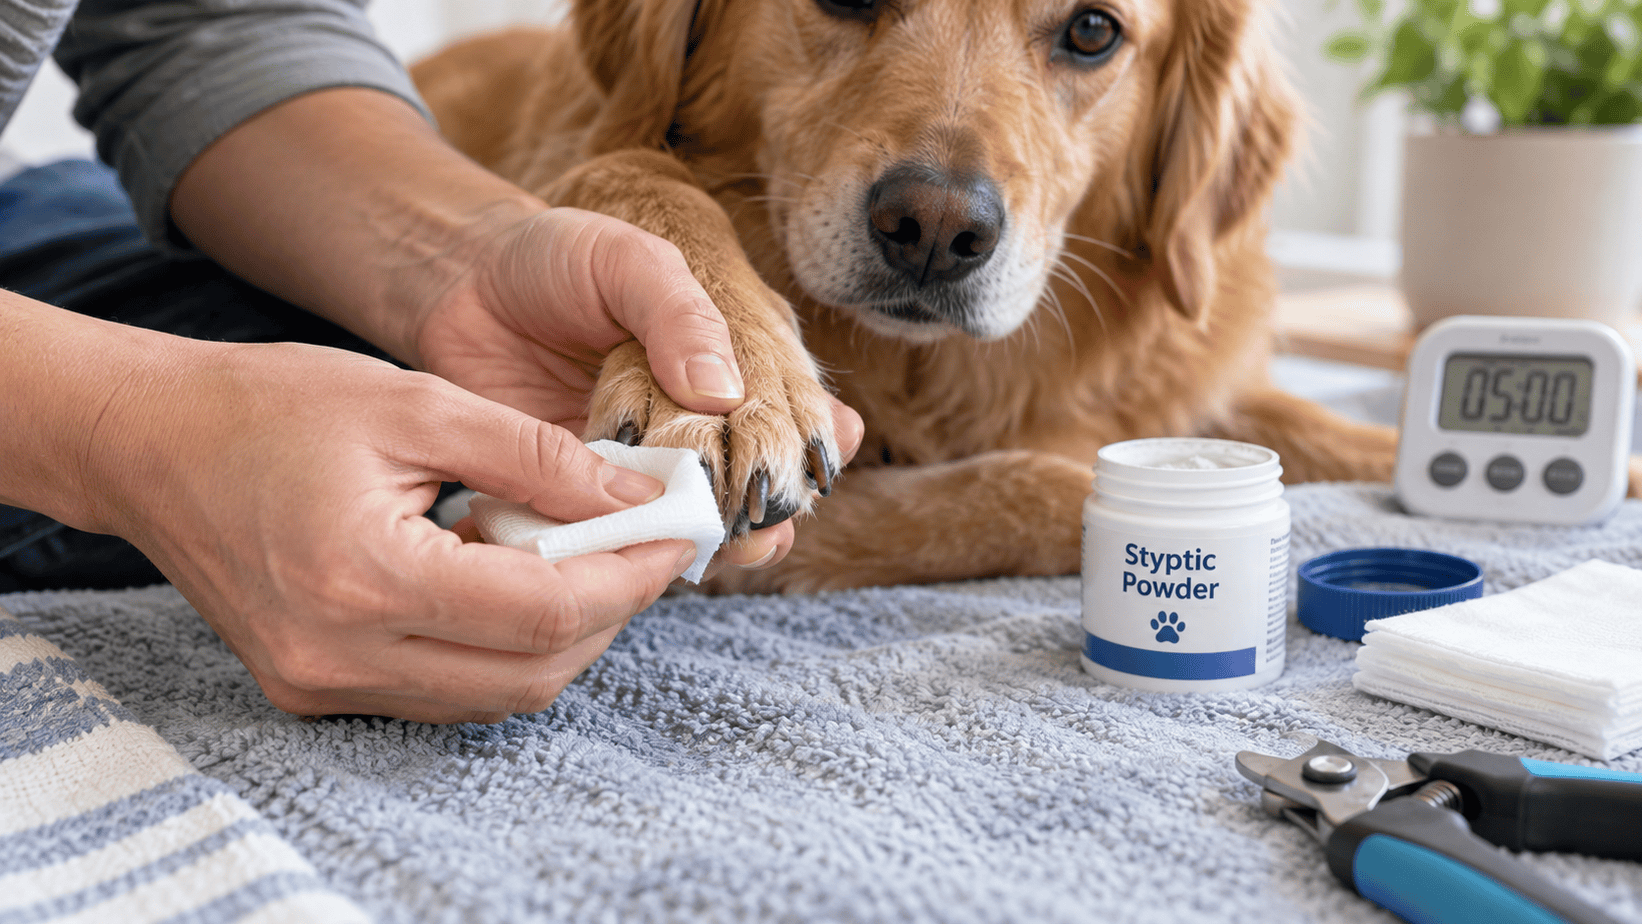
    Stay calm. Apply styptic powder directly to the nail tip, then hold steady pressure with clean gauze for several minutes without repeatedly lifting it to check. Keep your dog quiet so the clot can form.

    If styptic powder is not available, pressure is still important. Cornstarch is sometimes used as a temporary backup, but it is not a substitute for a prepared nail-care kit or veterinary help.

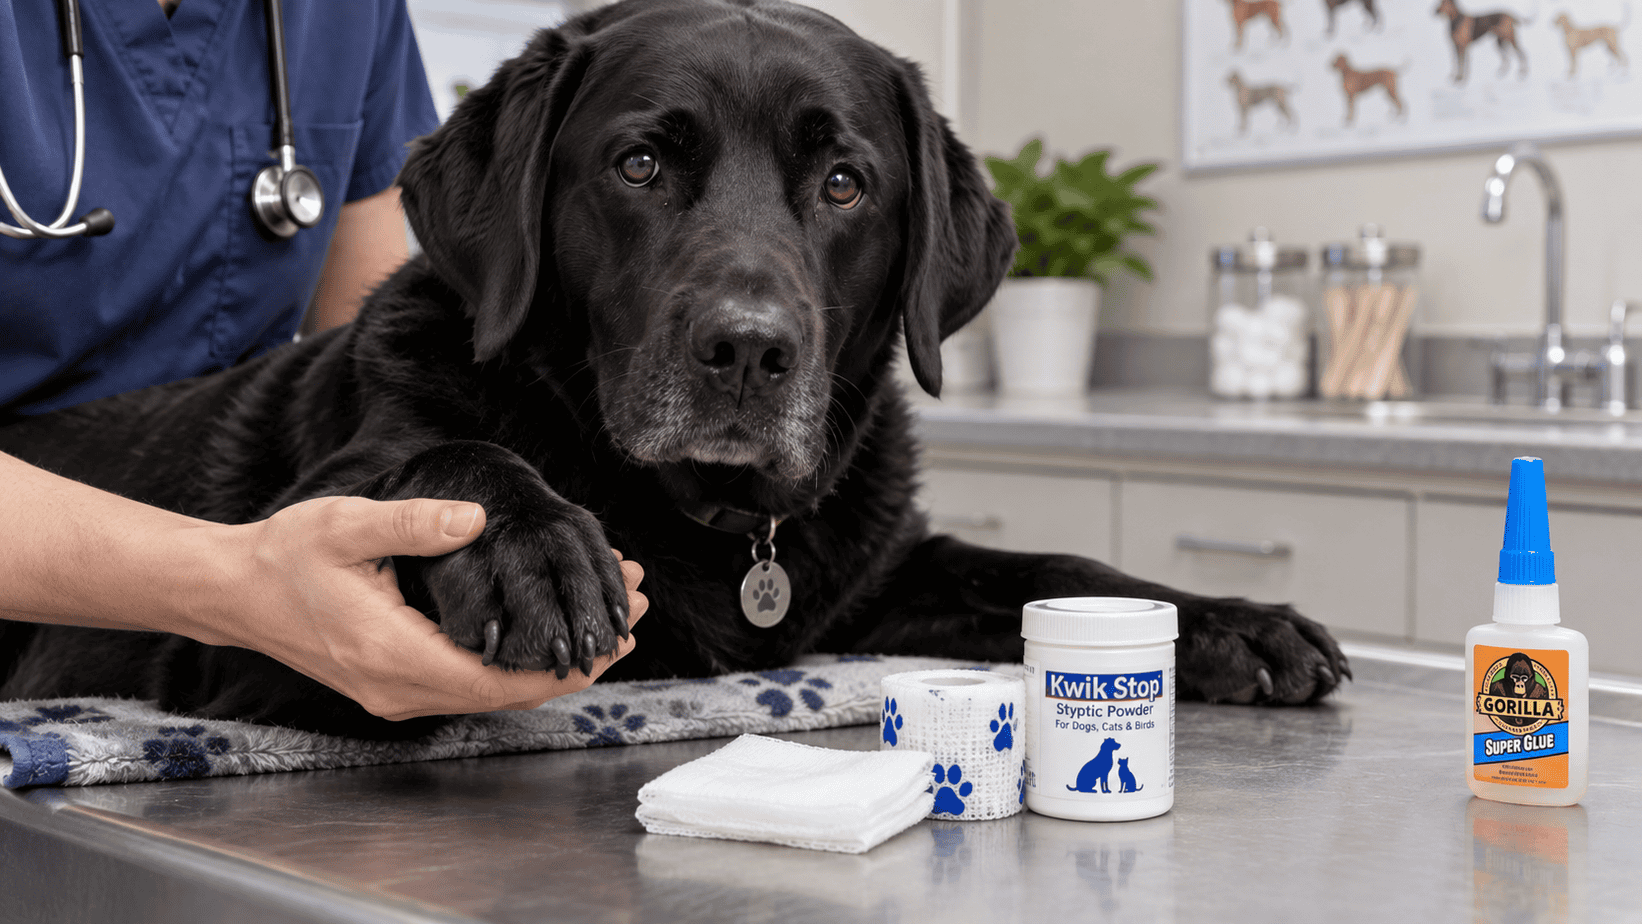
    Call your veterinarian if bleeding is heavy, continues despite firm pressure, restarts repeatedly, or the nail is split or torn. Also call if your dog seems weak, has a known bleeding disorder, or takes medication that can affect clotting.

    How Overgrown Nails Affect Comfort and Movement

    When long nails contact the ground, they can push back on the toes and change how a dog places the paw. The toes may spread, the dog may shorten a stride, or the dog may avoid a painful foot. Long nails also catch more easily and can split or tear. Dewclaws deserve special attention because they do not wear down against the ground and may curve toward the skin. [1][3]

    These problems do not prove that every dog with long nails has arthritis or permanent joint damage. They do mean the paws deserve a careful check. Sudden limping, one abnormal nail, swelling, or pain should not be blamed on length alone.

    Keeping Nails Short After Recovery

    Once the nails are at a comfortable length, inspect them every week even if you do not trim them every week. Look at the paws while your dog stands. Check all toes and dewclaws for length, cracks, discoloration, swelling, and tenderness.

    There is no perfect schedule for every dog. Growth rate, exercise surface, age, health, and nail shape all matter. Some dogs need frequent small trims, while others wear their nails down naturally. Choose a maintenance rhythm based on what you see and how your dog moves, not only the calendar. [1][2]

    Keep a simple log with the date, tool used, nails completed, and your dog’s comfort. A photo from the same angle can show gradual improvement better than memory.

    Frequently Asked Questions

    How Far Back Can I Cut an Overgrown Dog Nail?

    Only cut to the point where you still have a clear safety margin before the quick. On clear nails, stay well in front of the pink center. On black nails, remove tiny slices and stop when the center of the cut surface begins to change or whenever you are unsure.

    How Often Should I Trim Nails With a Long Quick?

    Many dogs can be rechecked in about 7 to 14 days during staged shortening, but that is not a promise or a rule. Trim again only when there is a safe amount of new growth and your dog is comfortable. Ask your veterinarian or groomer for a dog-specific plan if progress is unclear.

    Can I Fix Severely Overgrown Nails in One Session?

    Usually not if the quick has grown forward. Removing too much at once can cause pain and bleeding. The safer plan is a series of small trims over time.

    What Should I Do if a Nail Has Curled Into the Paw Pad?

    Do not pull, pry, or cut blindly between the nail and pad. Contact your veterinarian promptly. The nail may have injured the skin, and the toe may need cleaning, pain relief, or treatment for infection.

    Is a Grinder Safer Than Clippers for Black Nails?

    A grinder can offer more gradual control, but it is not automatically safer. It can create heat, catch hair, and frighten some dogs. Use short touches, keep hair clear, and choose the tool your dog tolerates best.

    References

    [1] Dogs Trust. (n.d.). How to cut your dog’s nails. https://www.dogstrust.org.uk/dog-advice/health-wellbeing/at-home/nails

    [2] VCA Animal Hospitals. (n.d.). How to trim a dog’s nails. https://vcahospitals.com/know-your-pet/how-to-trim-a-dogs-nails

    [3] Fear Free Happy Homes. (n.d.). Nail anatomy 101: Keep trims safe, not scary. https://www.fearfreehappyhomes.com/nail-anatomy-101-keep-trims-safe-not-scary/

    Dr. Candy Akers, DVM Avatar

    ABOUT THE AUTHOR
  • 5 Tips To Reduce Stress When Clipping Your Dog’s Nails- Vet Advice

    5 Tips To Reduce Stress When Clipping Your Dog’s Nails- Vet Advice

    For countless dog owners, nail trimming is akin to entering a battlefield. The anticipation, the apprehension, and those pleading puppy eyes – it’s enough to send anyone’s stress levels skyrocketing. If you’re nodding your head in agreement, you’re not alone. But here’s the good news: it doesn’t have to be that way! Nail clipping can be a calm, even bonding experience when done right. Drawing from years of veterinary expertise and countless pawdicures, we’ve compiled a list of 5 indispensable tips to help reduce stress when clipping your dog’s nails. Because your pet deserves nothing but the best care – minus the anxiety. Dive in and discover how to make nail-trimming a walk in the park. 🐾

    trimming dog nails at home

    Understand the Anatomy of Your Dog’s Nail

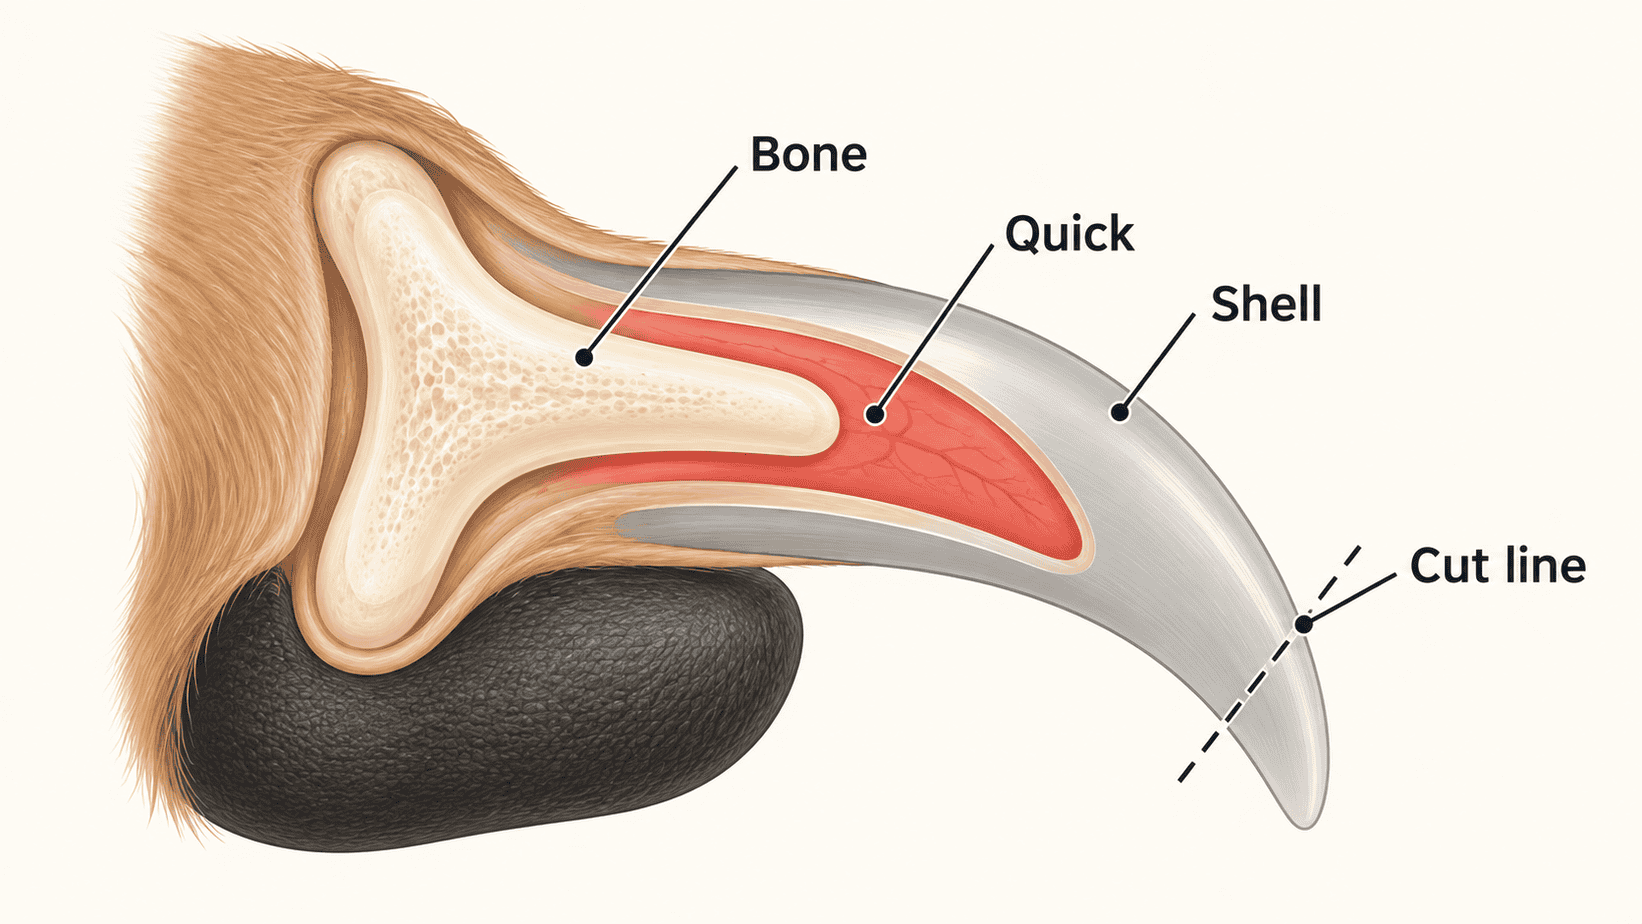
    Taking care of our canine companions goes beyond ensuring they’re fed and walked regularly. One essential aspect, often overlooked, is understanding the intricacies of their nails. Before you even consider picking up those clippers, it’s crucial to understand what’s beneath the surface. Here’s a quick deep-dive into the anatomy of your dog’s nail.

    The Keratin Shell

    Just like human nails, the outermost layer of a dog’s nail consists of a hard, protective keratin shell. This is the part you’ll trim. It’s sturdy and protects the more sensitive structures inside.

    The Quick

    Delving a bit deeper, you’ll encounter the ‘quick.’ This part of the nail is living tissue, filled with blood vessels and nerves. Accidentally cutting into the quick is a common fear, and for a reason – it’s painful for your pup and can lead to bleeding. In dogs with lighter-colored nails, the quick is visible as a pinkish core. However, for those with darker nails, it becomes trickier to identify.

    The Pulp

    Surrounding the quick and lying beneath the keratin shell is the pulp. This layer is dense and fibrous, providing strength to the nail. While it doesn’t house as many nerve endings as the quick, it’s still essential to be cautious when trimming near this area.

    The Nail Bed

    The nail bed is the skin beneath the nail plate. If you ever hear of a dog suffering from a nail bed infection, it’s this area that’s affected. Keeping nails trimmed and clean can help prevent such complications.

    Understanding these different parts of your dog’s nail anatomy is not just about becoming a pet care guru. It’s about ensuring that when you do take up the task of nail clipping, you do so with confidence, precision, and utmost care. After all, knowledge is the best tool in any dog owner’s arsenal.

    Choose the Right Nail Clipper

    Ah, the age-old dilemma of every dog parent – which nail clipper is the best for my furry friend? Much like shopping for our own essentials, there’s no one-size-fits-all when it comes to selecting the right nail clipper for dogs. It’s not just about finding a sharp pair, but also about ensuring comfort, safety, and precision. Let’s paw through the options and uncover how to choose the best one for your canine companion.

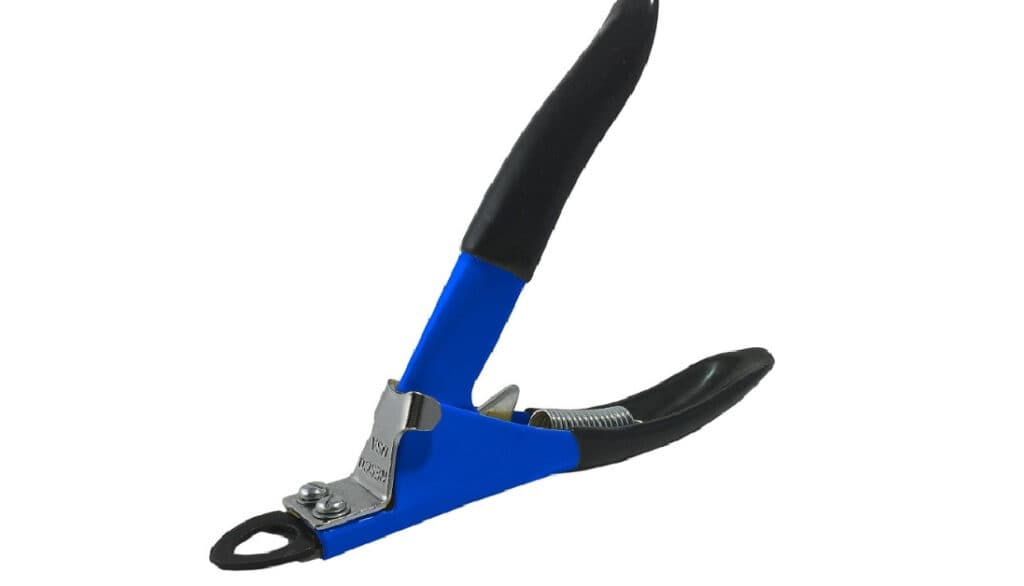
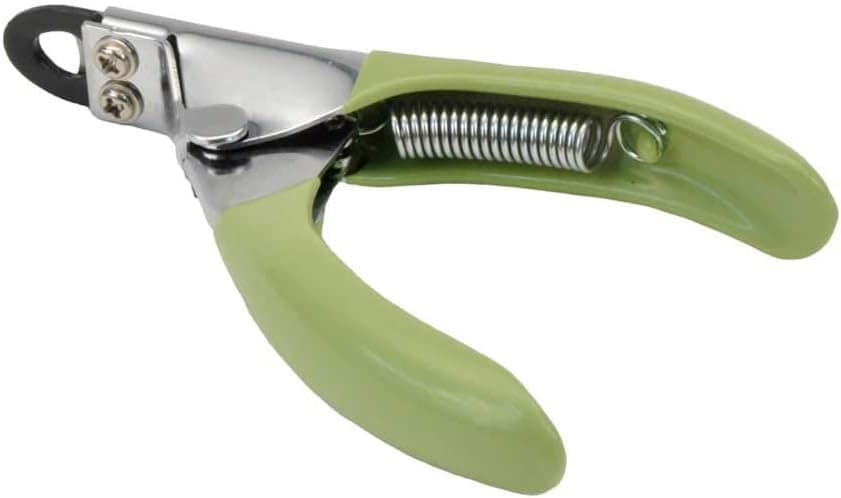
    The Guillotine Style

    This may sound a bit medieval, but fret not! The guillotine-style clipper has a hole where you insert the tip of your dog’s nail. As you squeeze the handles, a blade slides across and slices the nail. These are great for smaller breeds with softer nails but might struggle with the thick nails of larger dogs.

    guillotine style dog nail clippers

    The Scissor Style

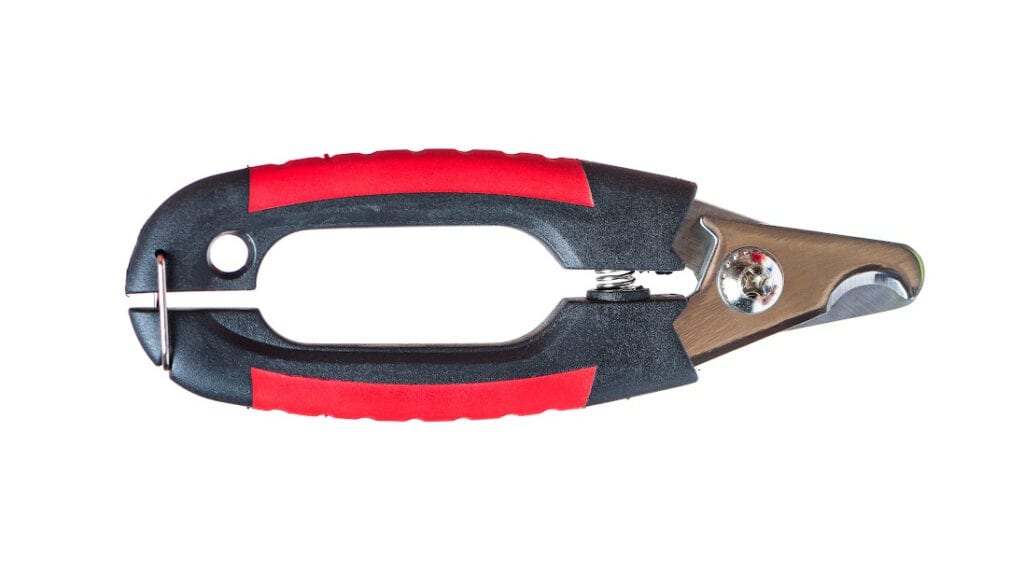
    Resembling a pair of scissors, this style of nail clipper is often preferred for bigger breeds with harder nails. The scissor action provides the strength needed to trim tougher nails cleanly and quickly.

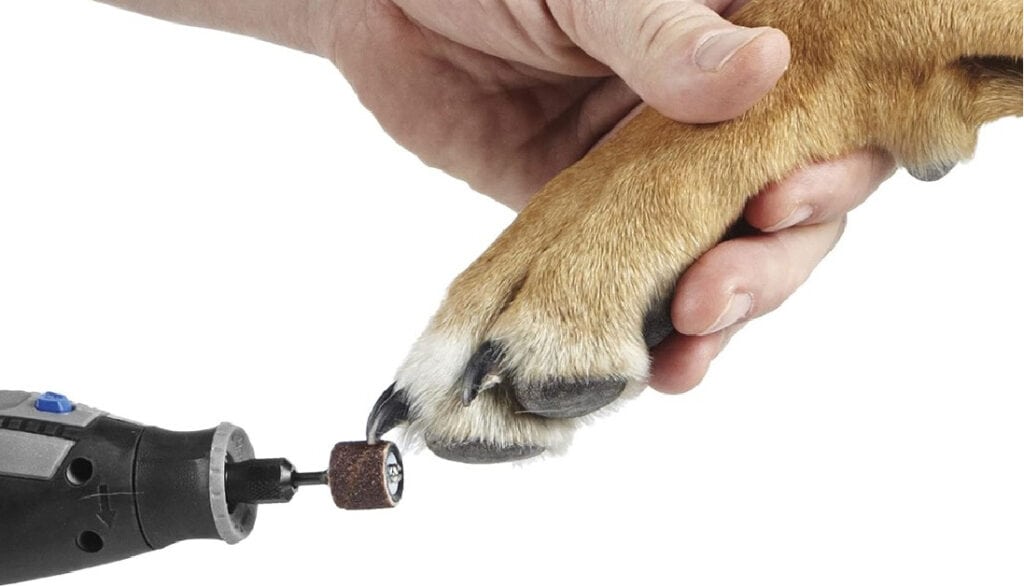
    Grinder Tools

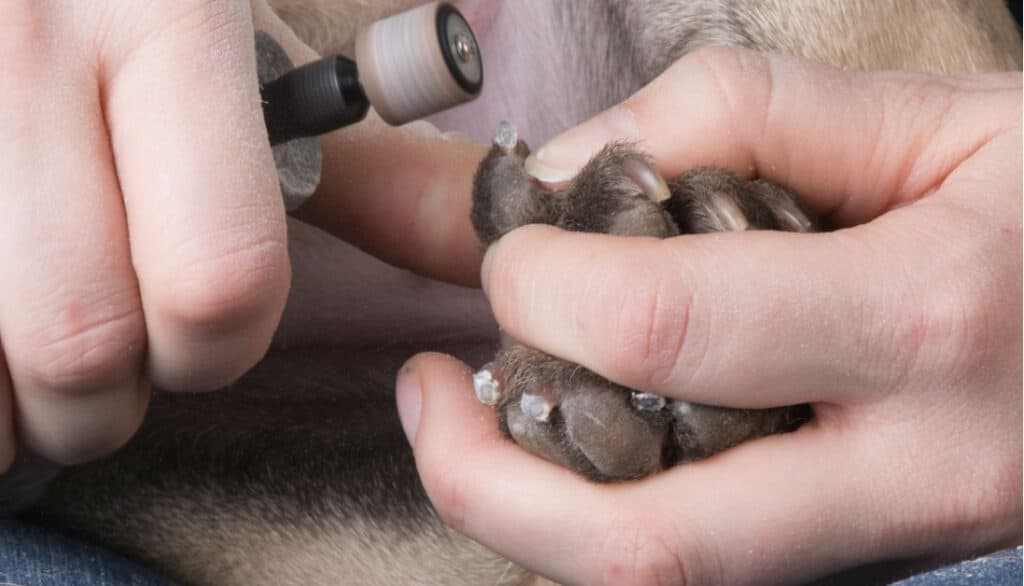
    These are electric devices designed to grind down a dog’s nail rather than cutting it. They can be an excellent choice for those who fear cutting into the quick, as they offer more control. However, some dogs might be spooked by the noise and vibration. It’s essential to introduce grinder tools slowly and with lots of positive reinforcement.

    dremel grinder tool for dog nails is easy and stress free

    Size Matters

    Regardless of the type, always choose a clipper size that matches your dog’s size. A too-large clipper can cause injury, while a too-small one might not do the job effectively.

    Sharpness is Key

    Always ensure your clippers are sharp. Dull clippers can crush the nail instead of creating a clean cut, causing discomfort or even pain to your pet.

    Finally, remember to trust your instincts and prioritize your dog’s comfort. If you’re unsure about which tool to choose, seeking advice from your vet or a professional groomer can provide valuable insights tailored to your dog’s needs. After all, nail clipping shouldn’t be a dreaded chore – with the right tools and knowledge, it can be a breeze!

    Create a Calm Environment

    Setting the right mood is not just essential for spa days or romantic dinners, but also for trimming your dog’s nails. Believe it or not, our furry friends can pick up on our energy, and if we’re anxious, they’ll likely be too. The environment plays a significant role in determining how smooth or chaotic the nail-trimming process will be. Here’s how to create a zen zone for your dog to make nail clipping as stress-free as possible.

    Choose the Right Time

    It’s best to approach nail trimming when your dog is naturally calm. Perhaps after a long walk or play session when they’re tired. If you try to trim an energetic pup’s nails, you’re setting yourself up for a game of chase!

    Pick a Comfortable Spot

    Find a quiet, well-lit place in your home. Avoid areas with a lot of foot traffic or loud noises. A familiar spot where your dog often relaxes can be a good choice.

    Play Soothing Music

    Sounds a bit out there? Well, several studies have shown that certain types of music, especially classical, can have a calming effect on dogs. Playing soft tunes in the background can help drown out the noise of the clippers or grinder and create a serene atmosphere.

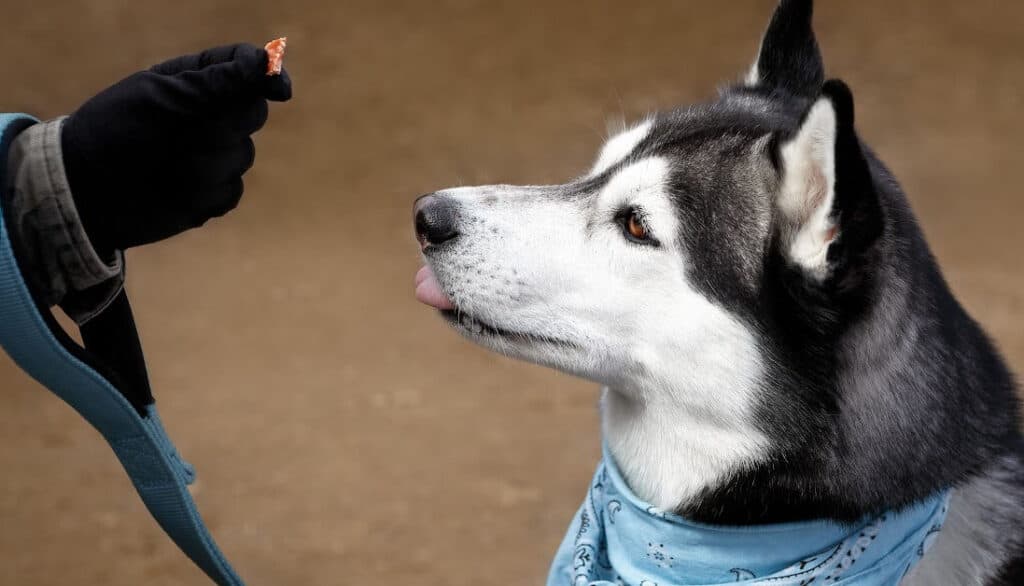
    keeping dog calm during nail trim with treats

    Use Positive Reinforcement

    Have treats at the ready! Reward your dog with their favorite snack after clipping each nail. This not only distracts them from the process but also associates nail trimming with positive experiences.

    Stay Calm and Relaxed

    Your dog is incredibly attuned to your emotions. Take deep breaths, maintain a calm demeanor, and use gentle, reassuring words. If you’re anxious, consider practicing a few times with the clippers without actually cutting to get both you and your dog used to the process.

    Consider Aromatherapy

    Just as certain scents can relax humans, they can have a similar effect on dogs. Consider using a dog-safe calming spray or diffusing essential oils like lavender (always ensure they’re pet-safe and used in moderation).

    Remember, the goal is to make nail trimming a routine and non-threatening experience. While it might take some time and patience, creating a calm environment will pay off in the long run, transforming what was once a dreaded task into a peaceful bonding moment with your four-legged friend.

    Get Your Dog Accustomed to Handling

    If you’ve ever tried to give a toddler their first haircut or coax a cat into a carrier, you know that introducing someone (or somepup) to a new experience requires patience and tact. Getting your dog accustomed to handling, especially when it comes to their paws, is no different. Many dogs are naturally sensitive about their feet being touched. Yet, this step is pivotal not only for nail trimming but also for overall grooming and health check-ups. Let’s walk through how you can help your dog become more comfortable with handling.

    Start Early

    If you have a puppy, now’s the perfect time to start. But remember, it’s never really too late. The key is consistency. Begin by gently touching your pup’s paws, without any intention of clipping. Make it a part of your daily cuddle sessions.

    Short and Sweet

    Initially, keep the sessions brief. A mere few seconds of paw handling followed by lots of praise and perhaps a treat can go a long way. Gradually increase the time as your dog becomes more comfortable.

    Associate with Positive Experiences

    While touching or holding their paws, give your dog a treat, or play with them using their favorite toy. The goal is to make them associate paw handling with good times!

    Practice with the Clippers

    Once your dog is okay with you handling their paws, introduce them to the nail clippers. Let them sniff and inspect them. Touch the clippers to their paws without actually cutting. This desensitization can make the real trimming session much smoother.

    Stay Calm and Be Patient

    If your dog pulls away or shows signs of discomfort, don’t force it. End the session, give them a treat, and try again another day. Remember, this is a marathon, not a sprint. Your patience will be rewarded.

    In the grand scheme of things, getting your dog accustomed to handling is about more than just nail trimming. It’s about building trust and ensuring your dog feels safe and secure, whether you’re giving them a belly rub, a bath, or tending to their paws. With time, patience, and love, handling can transform from a challenging task into a cherished bonding activity.

    what to do when your dog freaks out during nail trims

    Start Slow and Take Breaks

    Let’s be real; very few dogs sprint towards their owners with joy at the mere sight of nail clippers. For many pets (and their parents!), nail trimming is a gradual process, kind of like learning to dance. You wouldn’t try to whirl into a waltz without first mastering the basic steps, would you? Similarly, when it comes to clipping those claws, the rhythm of “starting slow and taking breaks” is your go-to groove. Here’s how to strike the right pace and ensure both you and your pup remain stress-free.

    Less is More

    When starting, you might be tempted to trim all the nails in one go, especially if they look particularly long. Resist that urge. Instead, try clipping just one or two nails in the first session, rewarding your dog generously. This can make the experience less overwhelming.

    Paws and Reflect

    Watch your dog’s body language closely. If they seem uneasy or anxious after a nail or two, it’s a sign to pause. Take a moment, offer some cuddles or playtime, and only resume once they’re more relaxed. Remember, there’s no rule that all nails need to be trimmed in one sitting.

    Create a Routine, Not a Marathon

    Instead of one long session, consider multiple short sessions spread over a few days. This approach can help your dog get accustomed to the process without associating it with extended periods of discomfort.

    Celebrate the Small Wins

    Every single nail you manage to trim without stress is a victory. Celebrate these moments with treats, praises, or a short play session. Let your dog know they’re doing a great job, and soon enough, they might just start seeing the nail clippers as a precursor to treat time.

    Know When to Stop

    If, on any day, your dog seems exceptionally agitated or scared, it’s okay to skip nail trimming. Forcing it can lead to negative associations, making future sessions even more challenging. Always prioritize your dog’s comfort and well-being.

    Nail trimming is as much about understanding your dog’s emotions as it is about the act itself. By starting slow and taking breaks, you’re not only taking care of their physical well-being but also nurturing trust and understanding. Over time, this patient approach will lay the groundwork for easier, quicker, and more stress-free nail trimming sessions in the future. Remember, every dance begins with a single step.

    easy way to clip and trim your dogs nails

    Seek Professional Guidance if Necessary

    Alright, let’s paint a picture: You’ve done your research, got the best clippers, set the mood with soft lighting and soothing music, but every time you bring out those nail clippers, your dog looks at you like you’ve just proposed a trip to the moon. What now? It’s essential to recognize when it’s time to call in the pros. There’s absolutely no shame in admitting that sometimes, our furry friends might need an expert hand. Let’s talk about when and why seeking professional guidance might be the best route for you and your pup.

    Reading the Signs

    Your dog’s behavior speaks volumes. Excessive trembling, growling, hiding, or even signs of aggression are indicators that they’re not just nervous, but genuinely scared. Consistently encountering this level of anxiety despite your best efforts means it might be time to seek external help.

    The Benefits of a Professional Touch

    Veterinarians and professional groomers have experience dealing with a myriad of dog personalities and nail-trimming temperaments. They have techniques, tools, and tricks up their sleeves that can make the process smoother. Plus, they can often get the job done quickly, reducing the stress duration for your pet.

    A Learning Experience for You

    Watching a professional handle your dog can be immensely educational. Observing their techniques, from how they hold the paw to how they soothe an anxious pup, can provide insights and tips that you can use in the future.

    Avoiding Accidents

    If you’re worried about cutting into the quick, especially if your dog has darker nails, a professional can ensure a safe trim. An accidental cut can be painful for your dog and might create a long-lasting aversion to nail clipping.

    Consultations and Training

    If your dog’s anxiety runs deep, a session with a canine behaviorist or trainer can be beneficial. They can offer tailored strategies, training routines, and sometimes even recommend calming aids to make nail trimming and other grooming tasks more manageable.

    In the grand journey of dog parenthood, seeking help doesn’t imply defeat. It’s an act of love, a testament to your commitment to your dog’s well-being. Whether you opt for regular professional trims or just need a session or two before taking the reins yourself, remember that at the heart of it all is the desire to provide the best care for your four-legged family member. Sometimes, that means recognizing when it’s time to tag in an expert.

    Conclusion

    Navigating the world of dog nail trimming can feel like tiptoeing on a tightrope. On one side, there’s the fear of causing discomfort to your beloved pet, and on the other, the knowledge that regular nail care is vital for their well-being. But remember, every dog owner has been where you are now, pondering the best approach, and perhaps nursing a scratch or two from a less-than-perfect attempt.

    The journey to stress-free nail trimming is paved with patience, understanding, and a pinch of perseverance. Whether you become a pro at home grooming or decide to trust the steady hands of professionals, what matters most is the love and care you shower on your furry companion.

    So, the next time those claws start clicking on your floor, take a deep breath, recall the tips and tricks from this guide, and step forward confidently. With each snip and clip, you’re not just ensuring your dog’s physical health but also deepening the bond of trust between you two. After all, at the heart of every grooming session is a tale (or tail!) of love, care, and the unspoken promise to always look out for one another. Happy trimming!

    Frequently Asked Questions (FAQs)

    How often should I clip my dog’s nails?

    The frequency can vary based on your dog’s activity level and where they spend most of their time. Dogs that walk on concrete or hard surfaces might naturally wear down their nails and require less frequent trimming. On average, most dogs need their nails trimmed every 3-4 weeks. However, always keep an eye on the nail length and listen for that tell-tale clicking sound on hard floors.

    What should I do if I accidentally cut the quick?

    First, don’t panic! Accidentally cutting the quick can be a bit painful for your dog and might cause bleeding. Have styptic powder or cornstarch on hand; applying it to the bleeding nail can help stop the bleeding quickly. Gently soothe and reassure your dog, and give them a treat for being patient. If bleeding doesn’t stop within a few minutes or seems excessive, consult your vet.

    Can I use human nail clippers on my dog?

    It’s recommended to use tools specifically designed for dogs. Human nail clippers might not be strong enough, especially for larger breeds, and can potentially split or crush the dog’s nail. Dog nail clippers come in various types, like guillotine-style or scissor-style, and are designed to cut the nail efficiently and safely.

    My dog has black nails. How can I find the quick without cutting it?

    Black or dark nails can indeed make it challenging to spot the quick. When trimming, make tiny cuts and look at the nail head-on after each snip. When you start to see a dark circle with a lighter center, you’re getting close to the quick and should stop.

    Can I just use a nail grinder instead of clippers?

    Absolutely! Many dog owners prefer grinders because they slowly sand down the nail, reducing the risk of hitting the quick. They can be especially useful for dogs with thick, hard nails. However, some dogs might be scared of the vibration or noise, so introduce it gradually and positively associate it with treats and praise.


    A note about your dog’s health

    This article provides general education and does not replace an examination, diagnosis, or individualized advice from your veterinarian. Contact a veterinary professional if you are concerned about your dog’s symptoms.

    Dr. Candy Akers, DVM Avatar

    ABOUT THE AUTHOR
  • Splinter in Dog Paw: How to Remove It Safely

    Splinter in Dog Paw: How to Remove It Safely

    A shallow splinter in a dog’s paw can sometimes be removed at home if you can see the whole object, grasp an exposed end without digging, and your dog will let you handle the paw calmly. Clean the paw, use clean tweezers, and pull in the same direction the splinter entered. Stop if the object is deep, hidden, barbed, fragile, near a nail or joint, painful to touch, or resistant to gentle traction.

    If your dog will not bear weight, has uncontrolled bleeding, or has marked swelling, pus, fever, or severe pain, skip home removal and contact a veterinarian. Grass awns and foxtails deserve special caution because their backward-facing barbs can carry them deeper into tissue.[1][2]

    Quick Decision: Home Removal or Veterinarian?

    I only recommend a home attempt when every item in the safe column is true. One red flag is enough to stop.

    Safe to try at home

    • The splinter is shallow and clearly visible.
    • An end sticks out far enough to grasp without touching the skin with a needle or blade.
    • It looks like one firm piece of wood or a simple thorn, not glass or a grass awn.
    • It is not beside a nail, deep between the toes, over a joint, or close to a blood vessel.
    • There is no spreading redness, major swelling, discharge, bad odor, or ongoing bleeding.
    • Your dog can stay relaxed with gentle support and treats.

    Call your veterinarian instead

    • You can see a puncture but cannot see or grasp the object.
    • The material is glass, metal, brittle wood, a locust thorn, a grass awn, or an unknown fragment.
    • The piece is deep, has broken, or meets resistance when you pull.
    • The paw is hot, swollen, draining, very tender, or repeatedly develops a bump.
    • Limping is marked, worsening, or still present after the object is removed.
    • Your dog jerks, growls, snaps, or cannot be safely restrained. Pain can make even a gentle dog react.

    Get urgent veterinary care for bleeding that does not stop with steady pressure, a large or gaping wound, pale gums, collapse, severe pain, or an inability to use the leg.

    Signs Your Dog May Have a Splinter

    The classic pattern is sudden attention to one paw after a walk, yard play, or time on a wood deck. You may notice:

    • Limping or holding one paw up
    • Focused licking or chewing
    • A tiny puncture, dark line, or visible tip
    • Redness, warmth, or swelling in one spot
    • A small bump between the toes
    • Blood, clear fluid, pus, or an unpleasant odor

    Move to a bright area and compare the sore paw with the matching paw on the other side. Look across every pad, along the pad edges, around each nail, and between the toes. Part long fur gently. Check the other paws too, since the same patch of brush or broken wood may have left more than one splinter.

    Do not squeeze a swollen spot to make an object appear. Squeezing can hurt, break a fragile object, or push it farther into the tissue. A draining bump that closes and returns is especially suspicious for a retained foreign body.

    Splinter, Thorn, Glass, or Grass Awn?

    Material matters. A short, firm wood splinter with a clean exposed end behaves very differently from a barbed seed or shard of glass.

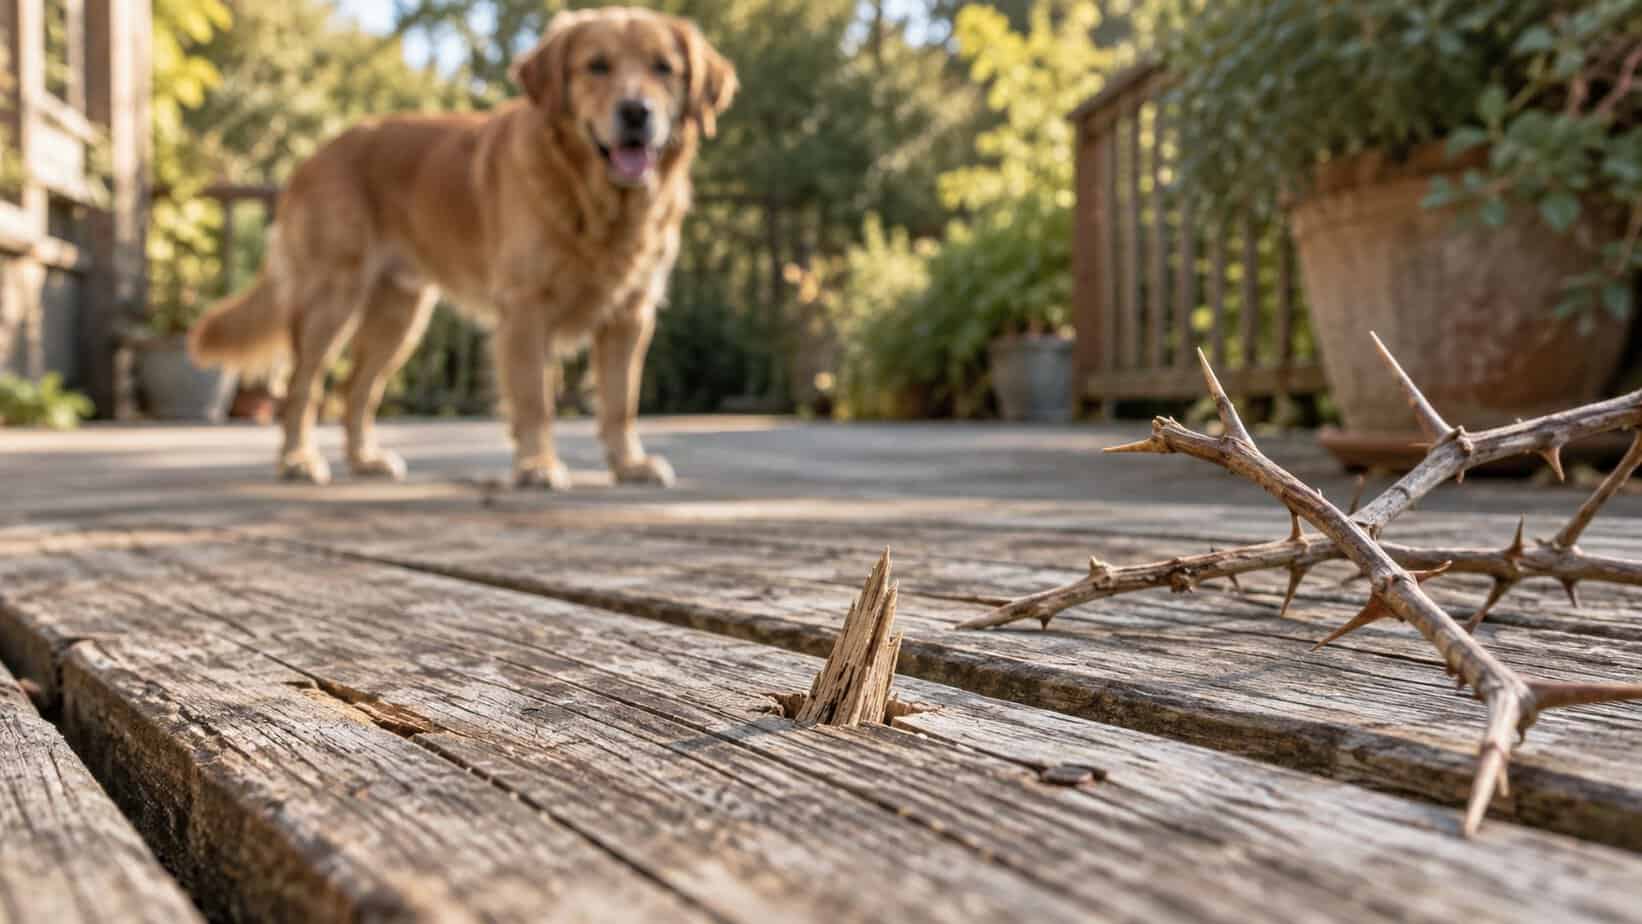
    Protruding wood splinter and thorny twigs on an outdoor deck, with a dog in the background.

    Wood splinters and simple thorns

    A superficial wood sliver or straight thorn may be suitable for one careful attempt. Wood can still break, so inspect the piece after removal. If the tip looks incomplete or the entry site still contains a dark point, stop and call your veterinarian.

    Locust thorns and other long plant spines can penetrate farther than the visible portion suggests. If the thorn is long, deeply seated, very painful, or close to a joint, let a veterinarian remove it.

    Glass or metal

    Glass may have sharp edges, fragment under pressure, and be difficult to see. Metal can also break or leave contamination. Do not probe for either material at home. Keep your dog from walking on the paw and arrange veterinary care.

    Grass awns and foxtails

    A grass awn is not an ordinary splinter. Its backward-facing barbs can encourage one-way movement through tissue. UC Davis notes that foxtails can penetrate skin, cause wounds and abscesses, and migrate; complete removal is the treatment.[1] A systematic review also found that ultrasound can help veterinarians locate and guide removal of migrating grass awns, although deeper or difficult cases may need other imaging.[2]

    If you see a loose grass seed sitting on the coat, remove it before it enters the skin. If it is embedded, the paw is swollen, or any part may remain, contact your veterinarian promptly.

    What You Need

    Gather supplies before you handle the paw:

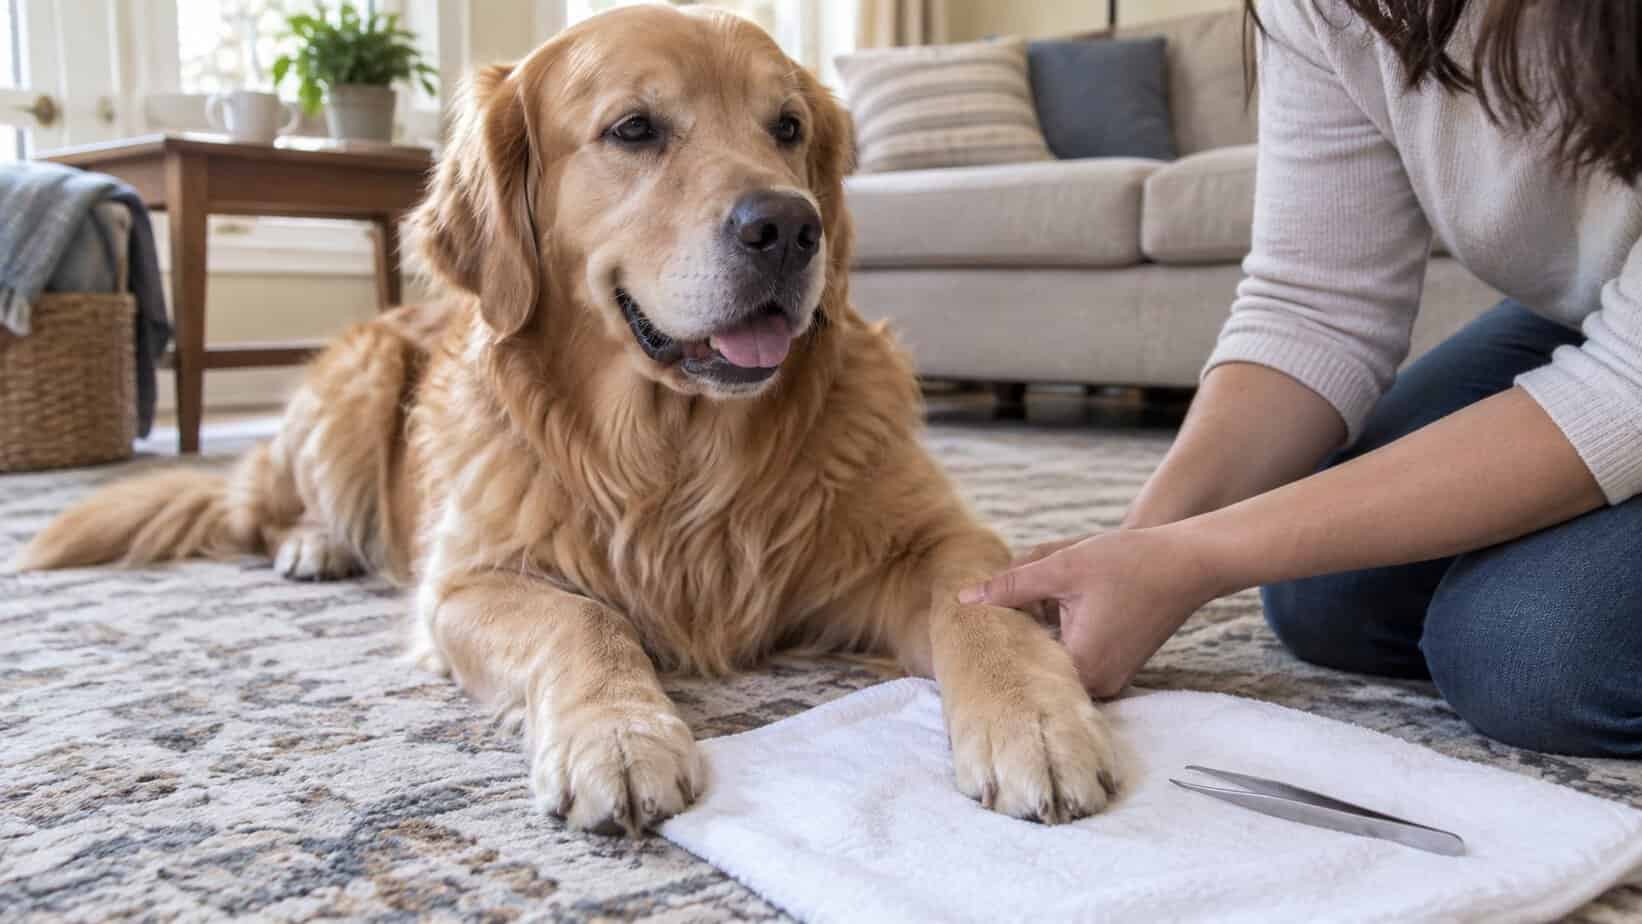
    Wash your hands. Clean the tweezers according to the manufacturer’s directions and let them dry. Do not pour rubbing alcohol or hydrogen peroxide into the puncture. For a small open wound, gentle rinsing with saline or clean water is a safer first-aid approach.[3]

    How to Remove a Superficial Splinter From a Dog’s Paw

    1. Settle your dog

    Choose a quiet room with good light and a nonslip surface. Have a helper offer treats while supporting your dog’s body. Hold the paw gently without twisting a toe or bending a joint. If your dog becomes frightened or painful, stop.

    2. Rinse and inspect

    Rinse away surface dirt with saline or clean lukewarm water, then pat the area dry. A short soak in plain warm water may soften debris on the surface, but it will not reliably draw out a deep splinter. Avoid baking-soda pastes, essential oils, caustic cleaners, and attempts to squeeze the object out.

    Find the entry point and the exposed end. Decide which direction the splinter entered. If you cannot see enough to understand its path, the home attempt ends here.

    3. Grasp the exposed end

    Place the tweezer tips as close to the skin as you can without pinching the paw. Grip the exposed end once. Do not dig with the tweezers, open the skin with a needle, or cut the pad. Paw pads bear weight and can be painful and difficult to bandage when injured.

    4. Pull along the entry path

    Use slow, steady traction in the same direction the splinter entered. Do not twist or yank. The piece should slide out with little resistance. If it bends, crumbles, breaks, or does not move easily, release it and call your veterinarian.

    One careful attempt is enough. Repeated attempts increase swelling and make later removal harder.

    5. Check the object and paw

    Lay the removed piece on a light surface and look for a complete tip. Compare its shape with what you saw before removal. Then inspect the puncture in bright light. Do not probe the hole to prove it is empty.

    If the object looks incomplete, you still see a fragment, or your dog remains sharply painful at the same point, assume something may remain.

    6. Rinse again

    Gently rinse the site with saline or clean water and pat it dry. Keep your dog indoors or on short leash walks while the spot settles. Prevent licking with supervision or an e-collar if needed.

    Aftercare and Bandaging

    Most tiny punctures left by an easily removed superficial splinter do not need a bulky home bandage. Clean, dry, protected skin is the goal.

    For the first 24 to 48 hours:

    • Check the paw morning and evening.
    • Keep the area clean and dry.
    • Limit running, rough play, and long walks if your dog is sore.
    • Prevent licking and chewing.
    • Watch the puncture, the space between the toes, and the toes beyond any wrap.

    Ask your veterinarian before applying antibiotic, pain-relief, or numbing ointments. Products made for people may be unsafe when licked or may hide a worsening problem. Never give human pain medication unless your veterinarian specifically prescribes it for your dog.

    If the site needs brief protection for a trip outside, a clean non-stick pad held lightly in place may help. Paw wraps are easy to apply too tightly and easy to get wet. Veterinary bandages need even padding and careful placement, and a wet, slipped, or tight wrap can injure tissue.[4] Remove a temporary cover if it becomes wet, dirty, twisted, or tight. Swollen or cold toes, color change, odor, new pain, or chewing at the wrap mean it should come off and the paw should be checked.

    When to Call Your Veterinarian

    Contact your veterinarian the same day if:

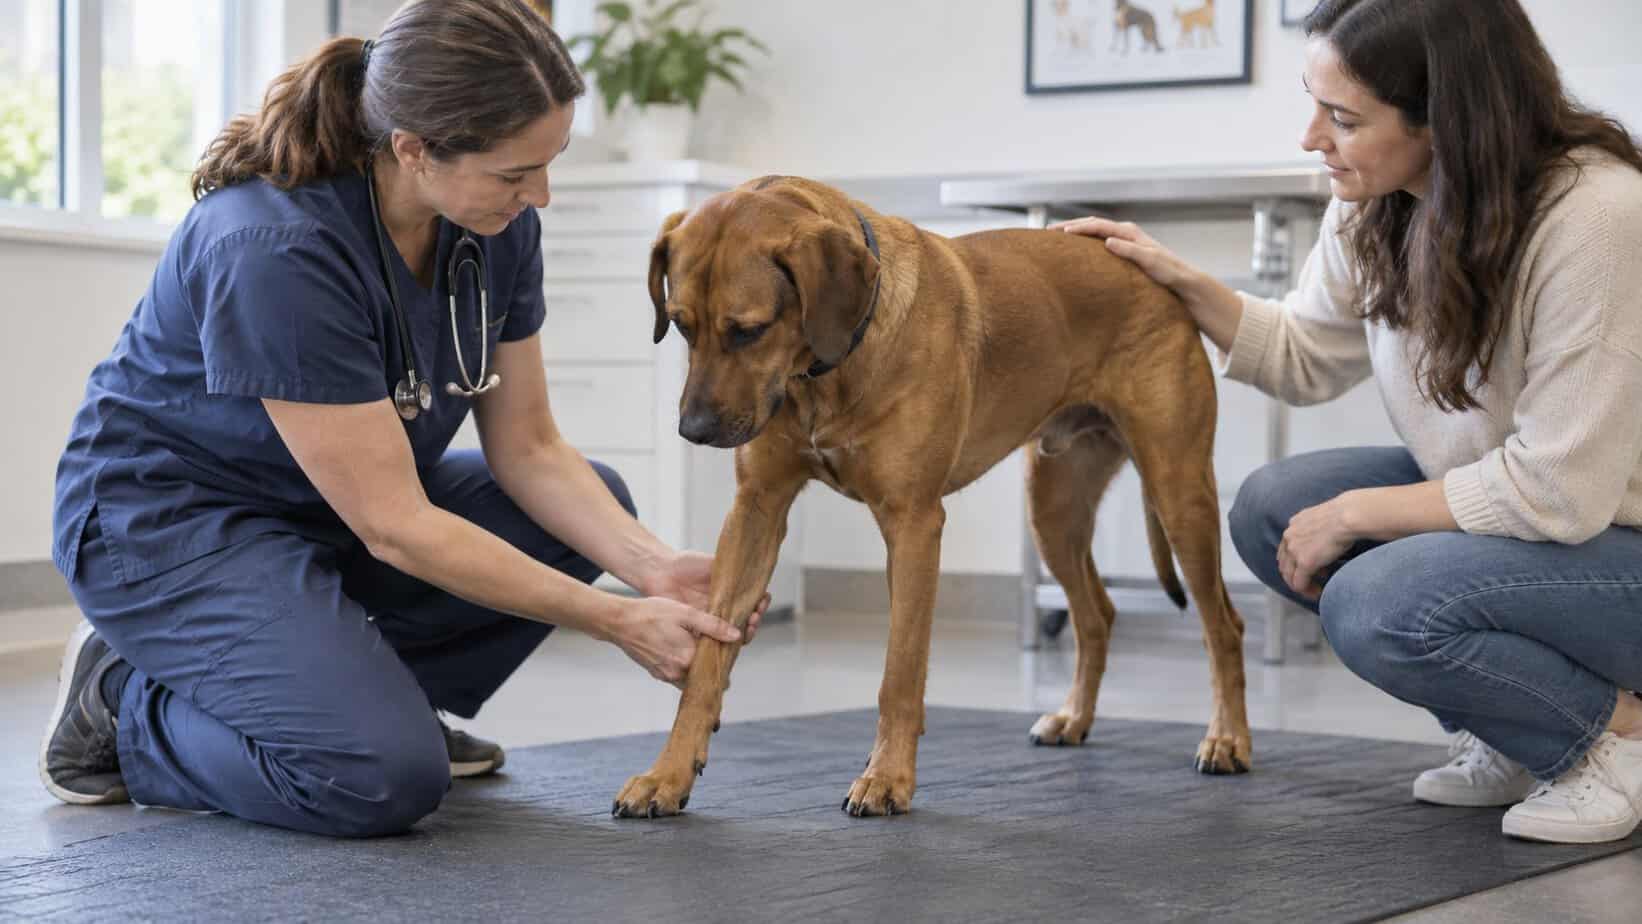
    Veterinarian gently examines a dog’s front leg while the owner reassures the dog.
    • The object is hidden, deep, fragile, barbed, or close to a nail or joint.
    • A splinter breaks or you cannot confirm that it came out whole.
    • You suspect glass, metal, a long thorn, a grass awn, or a foxtail.
    • Your dog will not let you examine the paw safely.
    • Limping is significant or does not clearly improve after removal and rest.
    • Redness, heat, swelling, discharge, odor, or pain is increasing.
    • A bump or draining tract appears between the toes.
    • Your dog seems lethargic, has a fever, or does not want to eat.

    A veterinarian may clip and examine the area, provide pain control or sedation, flush the wound, and use imaging when an object is hidden. Plant material may not show well on a standard X-ray, so ultrasound or other imaging can be useful in selected cases.[2]

    How to Prevent Paw Splinters

    You cannot prevent every sharp surprise, but a 30-second paw check after walks can catch trouble early.

    Handler gently checks a dog’s paw after an outdoor walk.
    • Scan decks, yards, and play areas for broken wood, thorny branches, glass, and construction debris.
    • Avoid dry foxtail patches, especially in late spring and summer.
    • After trail walks, check between the toes, around the pads, in the ears, and through the coat.
    • Keep excess hair between the toes tidy if it traps burrs and seeds.
    • Consider well-fitted dog boots in high-risk areas, then remove them after the walk and inspect the paws.
    • Teach your dog that brief paw handling predicts treats, not a struggle.

    UC Davis recommends avoiding foxtail areas, grooming after exposure, checking between the toes, and removing foxtail plants from the yard.[1]

    Final Thoughts

    The safest home splinter removal is the easy one: shallow, visible, firmly graspable, and painless enough for calm handling. Clean the paw, pull gently along the entry path, make sure the piece looks complete, rinse, and monitor.

    If you have to dig, squeeze, cut, chase a fragment, or hold a struggling dog down, it is no longer a simple home procedure. That is the moment to protect the paw and let your veterinary team take over.

    Frequently Asked Questions

    Can a splinter in a dog’s paw come out on its own?

    Some tiny surface debris may work loose, but you should not count on a true embedded splinter coming out. Wood can break, and grass awns can migrate farther into tissue. If you cannot easily see and grasp the object, have your veterinarian assess it.

    What if my dog is limping but I cannot see a splinter?

    Do not dig into the paw. Check the pads, nails, and spaces between the toes in bright light, then rest your dog and contact your veterinarian. A hidden foreign body, torn nail, pad injury, sting, burn, or orthopedic problem can look similar.

    What should I do if the splinter breaks during removal?

    Stop immediately. Do not probe for the fragment or squeeze the paw. Prevent licking, limit walking, and call your veterinarian. The entry site and the original object’s shape can help the veterinarian plan the next step.

    Should I soak or bandage my dog’s paw?

    A brief plain warm-water rinse or soak may loosen surface dirt, but it does not make a deep object safe to remove. A tiny clean puncture often does not need a bandage. If protection is needed, use a light temporary non-stick cover and keep it dry. Ask your veterinarian to bandage deeper or painful wounds.

    How long should my dog limp after a splinter is removed?

    Mild tenderness should begin improving after an uncomplicated superficial removal. Call your veterinarian if the limp is marked, worsens, lasts beyond the next day, or comes with swelling, heat, discharge, or continued focused licking. A retained piece is one possibility.

    References

    1. Young, A., & Olstad, E. (2023, May 8). Foxtails and dogs. University of California, Davis, School of Veterinary Medicine. https://healthtopics.vetmed.ucdavis.edu/health-topics/foxtails

    2. Caivano, D., Corda, F., Corda, A., Moretti, G., & Bufalari, A. (2023). Application of ultrasound in detecting and removing migrating grass awns in dogs and cats: A systematic review. Animals, 13(13), 2071. https://pubmed.ncbi.nlm.nih.gov/37443870/

    3. Texas A&M School of Veterinary Medicine & Biomedical Sciences. (2026, August 20). Basic first aid for pets: What to know as a pet owner. https://vetmed.tamu.edu/news/pet-talk/basic-first-aid-for-pets/

    4. MSD Veterinary Manual. (n.d.). Wound bandages and dressings for small animals. https://www.msdvetmanual.com/emergency-medicine-and-critical-care/wound-management/wound-bandages-and-dressings-for-small-animals

    Dr. Candy Akers, DVM Avatar

    ABOUT THE AUTHOR
  • What Dog Nail Clippers Do Vets Use The Most? Clinic Answers

    What Dog Nail Clippers Do Vets Use The Most? Clinic Answers

    Over the years, my team and I have garnered extensive experience working across various veterinary landscapes. Collectively, we have been a part of over 25 different vet clinics and had the privilege to visit hundreds more. This has provided us with a unique vantage point when it comes to understanding the tools of the trade. One common query that dog owners often present to us is about the best nail clippers for their furry friends.

    Today, I’m thrilled to share with you our findings on the top 3 nail clippers that are a favorite among MOST veterinarians. These aren’t your average nail clippers. The reasons these particular models stand out from the rest are because they:

    • Cut nails with precision and ease.
    • Can withstand the daily wear and tear, holding up to abuse.
    • Are designed to be easily maintained and sanitized.
    • Remain sharp for an impressive duration, making them a worthy investment.
    • And importantly, they’re robust enough to handle the thick nails of larger dog breeds.

    Traditionally, most of these top-notch clippers were accessible only through veterinary clinic suppliers and grooming specialists. However, the digital age has bridged this gap. Now, you too can equip yourself with the very same nail trimmers that professionals swear by, all available for purchase online. So why settle for less when you can give your beloved pet the best?

    Join me as we delve deeper into the world of dog nail clippers and unravel the tools that veterinary professionals hold in high regard!

    vet recommended nail clippers

    What to Look For in Dog Nail Clippers

    Choosing the right nail clippers for your furry friend can feel a tad overwhelming, especially with so many options out there. But fear not, I’m here to guide you through this maze. Drawing from years of experience and countless hands-on encounters with these tools, here’s a distilled list of what to look out for when making your choice:

    Types of Nail Clippers

    There are primarily three types to choose from. Understanding their features can help determine what’s best for your pup:

    1. Scissor Clippers:
      • Best for: Larger breeds with thicker nails.
      • Features: Looks like scissors and operates in a similar fashion.
      • Advantages: Powerful and can cut thick nails cleanly.
      • Caution: Might require more hand strength.
    2. Guillotine Clippers:
      • Best for: Smaller breeds with delicate nails.
      • Features: Has a hole where you insert the nail, and a blade slices it off when you press the handle.
      • Advantages: Easier to maneuver for small nails.
      • Caution: Might not work effectively for thick nails.
    3. Grinders:
      • Best for: Dogs scared of clipping sounds or for fine-tuning after a cut.
      • Features: Sands the nail down instead of cutting. Often battery-operated.
      • Advantages: Reduces chances of cutting the quick and provides a smooth finish.
      • Caution: Can produce a sound and vibration that might require some getting used to for your pet.

    Size and Blade Sharpness

    The right size and sharpness matter for precision and safety:

    • Size Matters: Ensure the clippers are appropriate for your dog’s breed and size. Using oversized or undersized clippers can lead to improper cuts.
    • Sharp Blades: A clean cut reduces the risk of splintering or cracking. Sharp blades also make the process quicker and less stressful for your dog.

    Safety Features

    Safety first! Keep an eye out for these:

    • quick Guards: These are barriers that prevent you from cutting too far into the nail and accidentally injuring the quick.
    • Safety Stops: Prevents the blade from over-cutting.
    • Ergonomic Handles and Grips: A comfortable grip ensures you can hold the clippers steadily, reducing chances of a mishap.

    Boshel Dog Nail Clippers with Safety Guard

    Material and Durability

    Quality tools are a smart long-term investment:

    • Stainless Steel vs. Plastic: Stainless steel blades remain sharp longer and are more durable. Look for handles that are sturdy yet comfortable.
    • Long-lasting Products: Check reviews or ask for recommendations. It’s better to invest in a slightly pricier tool that stands the test of time than to keep replacing cheaper ones.

    Ease of Maintenance

    Your clippers should be easy to clean and maintain:

    • Sanitization: Check if the clippers can be easily cleaned. This is crucial to prevent potential nail infections.
    • Replaceable Blades: Some premium clippers allow for blade replacements, ensuring longevity and consistent performance.

    In summary, picking the right nail clippers boils down to understanding your dog’s specific needs and prioritizing safety and quality. With the right tools, nail trimming can be a breeze for both you and your pet. Happy clipping!

    Best Dog Nail Clippers: Vet Recommendations

    Ah, the crux of the matter! Given the myriad of nail clippers available, we’ve often been asked, “Which ones do the pros actually use?” Well, based on our collective experience and insights gathered from various vet clinics, we’ve rounded up the top picks that veterinarians vouch for. Let’s dive right in!

    Scissor Clippers

    Recommended Brand: Millers Forge

    Millers Forge Dog Nail Clip, Large. Premium Pack

    • Number 1 choice of veterinarians and groomers
    • Strong stainless steel outlasts other nail clippers
    • Stays sharp for easy cutting

    Guillotine Clippers

    Recommended Brand: Coastal Pet Safari Guillotine

    Coastal Pet Safari Guillotine Dog Trimmer

    • Designed to give a clean and precise cut, minimizing the risk of splitting or fraying the nail.
    • Simple mechanism is user-friendly, making the nail-trimming process more efficient.
    • Ensures a comfortable hold, reducing the chance of slips or mishaps during nail clipping.

    Grinders

    Recommended Brand: Dremel PawControl Dog Nail Grinder

    Dremel PawControl Dog Nail Grinder

    • Reduces the risk of cutting into the quick, ensuring a safer trimming experience for the pet.
    • Produces smoother edges than traditional clippers, which can be less stressful for both pets and owners.
    • Suitable for pets of various sizes and nail thicknesses.

    It’s essential to remember that while these are top vet recommendations, the best tool for your dog is the one that both you and your pet are most comfortable with. If you’re ever in doubt, consider visiting a local vet or groomer for a live demonstration. Not only can this be educational, but it can also instill confidence in your own nail-trimming abilities. Happy grooming!

    Dog Nail Grinder vs. Clipper: What’s the Difference?

    Ah, the age-old debate in the dog grooming world: Should you go with the classic clipper or the modern grinder? Both tools aim to achieve the same result—keeping your dog’s nails at a safe and comfortable length. However, their methodologies differ, and each has its own set of advantages and challenges. Let’s delve deeper into the characteristics of each tool and help you determine which might be best suited for your furry friend.

    Dog Nail Clippers

    Overview: Clippers come in various types, including the scissor and guillotine styles. They function by cutting off the nail in chunks.

    Advantages:

    1. Speed: For experienced users, clipping is often faster than grinding.
    2. No Noise: Clippers are generally silent, which can be less stressful for dogs sensitive to noise.
    3. Cost: Typically, clippers are less expensive than grinders.

    Challenges:

    1. Risk of Overcutting: If not used carefully, it’s easy to cut into the quick, causing pain and bleeding.
    2. Splintering: Clippers can occasionally cause the nail to splinter, especially if not sharp.

    Dog Nail Grinders

    Overview: Grinders, often electric or battery-powered, use a rotating component to sand down the dog’s nail gradually.

    Advantages:

    1. Precision: Grinders allow for a more gradual and controlled reduction of the nail, reducing the risk of cutting into the quick.
    2. Smooth Finish: They leave the nails with a rounded, smooth edge, which can be gentler on floors and human skin.
    3. Less Risk of Splintering: Unlike clippers, grinders don’t pose the risk of causing the nail to split or crack.

    Challenges:

    1. Noise and Vibration: Grinders produce a sound and vibration, which might require acclimation for some dogs.
    2. Time-Consuming: Especially for thick nails, grinding can take longer than clipping.
    3. Maintenance: Grinders may require periodic replacement of the grinding tip or band.

    Whether to choose a grinder or clipper often boils down to personal preference, your dog’s temperament, and the specific needs of their nails. Some pet owners use both: a clipper for a quick trim followed by a grinder to smooth out the edges. Remember, no matter the tool, patience and positive reinforcement go a long way in making the nail-trimming experience pleasant for both you and your pup.

    Grinding dog toe nails is easy to do close up

    Why Nail Care is Important

    Caring for your pet extends beyond feeding them and providing them with love and shelter. Just like regular vet check-ups and a balanced diet are crucial, so is maintaining their nails. But why exactly is nail care so significant for dogs? Let’s dive into the reasons and the repercussions of neglecting this aspect of their grooming.

    1. Comfort and Mobility

    Overgrown nails can be tremendously uncomfortable for dogs. When nails become too long:

    • Pressure: Each time your dog sets their paw down, overgrown nails can force their toes to splay or twist awkwardly, causing discomfort or pain.
    • Walking Difficulties: This can even alter their natural posture and gait, which might lead to skeletal problems in the long run.

    2. Protection from Injuries

    Long nails are prone to:

    • Splitting or Breaking: Overly long nails can get caught on surfaces, potentially tearing, splitting, or even breaking. Such injuries are painful and can become infected.
    • Quick Growth: The ‘quick’ in the nail (the blood vessel and nerve inside) tends to grow along with the nail. This means that the longer you leave your dog’s nails, the longer the quick becomes, making future trims more challenging and riskier.

    3. Reduced Risk of Health Issues

    Neglecting nail care can lead to:

    • Joint and Bone Issues: Continuous pressure from long nails can cause joint pain and even contribute to issues like arthritis.
    • Infections: Nails that curl can grow into the foot pad. This not only is painful but can also lead to infections.

    4. Enhanced Interaction

    Short, well-maintained nails:

    • Safer Play: Ensure that your dog doesn’t inadvertently scratch or harm other pets or people while playing.
    • Protection for Your Home: Long nails can cause damage to furniture, carpets, and even scratch wooden floors.

    5. Routine Health Check

    Regular nail trims also give you a chance to:

    • Examine Their Paws: Check for any issues like fungal infections, cuts, or sores.
    • Bonding Time: While not all dogs love getting their nails trimmed, the routine, when paired with positive reinforcement, can become a bonding ritual between you and your pet.

    In essence, while nail trims might seem like a cosmetic concern, they play a pivotal role in your dog’s overall health and well-being. Establishing and maintaining a regular nail care routine ensures your dog stays comfortable, healthy, and happy

    vets and nail trims

    How Often Should You Trim Your Dog’s Nails?

    It’s a question that many dog owners grapple with: How frequently should those claws get a clip? The answer isn’t a straightforward “every X weeks,” because several factors come into play. Let’s walk through them to help you determine the right nail-trimming schedule for your pooch.

    1. Growth Rate Varies

    Much like human nails, the rate at which dog nails grow can differ:

    • Breed Differences: Some breeds naturally have faster-growing nails.
    • Age Factor: Puppies might require more frequent trims as their nails grow swiftly, while older dogs might see a slowdown in nail growth.

    2. Activity Level

    • Active Outdoors: Dogs that spend more time outdoors, especially on harder surfaces like concrete or asphalt, will naturally wear down their nails. These dogs might require less frequent trimming.
    • Indoor or Soft Terrains: Conversely, dogs that spend most of their time indoors or playing on grass won’t have the same natural wear, necessitating more regular trims.

    3. Nail Type

    • Dark vs. Clear Nails: Dogs with clear or white nails make it easier for owners to spot the quick, allowing for more confident, frequent trims. Those with darker nails might be trimmed less often due to uncertainty about where the quick is.

    General Guidelines

    While individual circumstances will dictate the exact frequency, here’s a general guideline:

    • Active Dogs: Every 3-4 weeks.
    • Less Active or Indoor Dogs: Every 2-3 weeks.
    • Puppies: Consider checking every week due to rapid growth.

    Signs It’s Time for a Trim

    Regardless of these general guidelines, keep an eye out for these tell-tale signs:

    1. Hearing the ‘Click’: If you hear your dog’s nails clicking on the floor, it’s a good indication that a trim is overdue.
    2. Examination: Check your dog’s nails. If they’re touching the ground when your dog is standing still, it’s time for a cut.
    3. Behavioral Signs: Dogs might start chewing at overly long nails, or you might notice changes in their walking pattern.

    In conclusion, the frequency of nail trims will vary based on individual dog needs. If you’re ever uncertain, a good rule of thumb is to do regular checks and listen for the telltale “clicking” sound. And remember, when in doubt, consult with your vet or a professional groomer to establish the best routine for your furry friend.

    How To Trim Your Dog’s Nails: Step By Step

    Trimming your dog’s nails might seem daunting, especially if you’ve never done it before or if your dog is apprehensive. But with patience, the right tools, and a systematic approach, it can become a hassle-free routine for both you and your canine companion. Here’s a step-by-step guide to help you confidently and safely trim those claws.

    1. Gather Your Supplies

    Before you begin, ensure you have:

    • Suitable dog nail clippers or grinder
    • A styptic powder or pencil (in case of any bleeding)
    • Dog treats (for positive reinforcement)
    • Good lighting
    • A towel or mat for your dog to sit or stand on

    2. Choose the Right Time

    • Post-Exercise: It’s best to trim your dog’s nails after they’ve had some exercise when they’re more relaxed and tired.
    • Quiet Environment: Minimize distractions and choose a calm environment.

    3. Get Your Dog Acclimated

    If it’s your dog’s first time:

    • Let them sniff and explore the clippers.
    • Gently handle their paws regularly to get them used to the sensation.
    • Give them treats and use positive reinforcement to create a positive association.

    4. Positioning

    • Have your dog sit or stand in a comfortable position.
    • If your dog is small, you might prefer to place them on a table or counter (with supervision).
    • For larger breeds, sitting beside them or having them stand is often easiest.

    5. Start Clipping

    • Hold the paw firmly but gently.
    • If your dog has clear nails, you’ll see a darker area, which is the quick. Avoid cutting into this to prevent pain and bleeding.
    • For dark nails, trim a little at a time, looking for a solid black dot in the center of the nail. This is an indication that you’re getting close to the quick.
    • Make smooth, confident cuts perpendicular to the nail.

    6. In Case of Bleeding

    If you accidentally cut into the quick:

    • Don’t panic; stay calm to keep your dog at ease.
    • Apply styptic powder or press the pencil onto the bleeding area.
    • Wait a minute or two for the bleeding to stop.

    7. Reward and Reinforce

    After each paw or even after each nail:

    • Give your dog a treat and praise them for being good.
    • This positive reinforcement will make future trims easier.

    8. Post-Trimming

    Check for any sharp edges, especially if using clippers. You can use a grinder or a nail file to smooth any rough spots.

    Remember, if you’re uncertain or nervous, consider doing just one nail a day or seek assistance from a vet or professional groomer. With practice and patience, nail trimming can become a straightforward and stress-free task.

    how to trim your dog's nails

    Should You Get a Professional to Trim Your Dog’s Nails?

    Many dog owners wrestle with the decision of whether to trim their pet’s nails themselves or seek the assistance of a professional. Both choices have their advantages and potential drawbacks. Let’s unpack the factors you might consider when deciding the best route for you and your furry friend.

    The Case for Professional Grooming

    1. Expertise and Experience: Professionals have handled countless paws and nails. Their experience means they can swiftly and safely trim nails, reducing the risk of cutting the quick.

    2. Equipment: Groomers have top-of-the-line equipment that’s regularly maintained and sanitized.

    3. Less Stress: If you’re anxious about trimming your dog’s nails, your pet can pick up on that anxiety. A groomer’s confidence can make the process smoother.

    4. Additional Services: Many grooming sessions include other perks like bathing, brushing, and ear cleaning.

    5. Ideal for Difficult Dogs: Some dogs are particularly squirmy or fearful. Professionals are trained to handle such challenges.

    The Case for DIY (Do It Yourself)

    1. Cost-Effective: Over time, trimming your dog’s nails at home can save you a significant amount.

    2. Bonding Time: With the right approach, nail trimming can become a bonding ritual between you and your pet.

    3. Flexibility: You can trim your dog’s nails whenever needed, rather than waiting for an appointment.

    4. Familiar Environment: Your dog might feel more at ease getting their nails trimmed at home rather than a new, unfamiliar place.

    5. Gradual Approach: If your dog has anxiety, you can take it one nail at a time, spreading the process over several days.

    Factors to Consider

    1. Dog’s Temperament: Is your dog generally calm or do they have grooming anxiety?

    2. Your Confidence Level: Are you comfortable handling your dog’s paws and using nail clippers or grinders?

    3. Equipment: Are you willing to invest in good quality nail trimmers and possibly grinders?

    4. Frequency: How often does your dog’s nails need trimming, and can you keep up with the routine?

    In conclusion, the decision to trim your dog’s nails yourself or opt for a professional boils down to personal preference, your dog’s temperament, and your comfort level. Whichever route you choose, the primary goal is to ensure your dog’s nails are kept at a healthy length, contributing to their overall well-being.

    Conclusion

    Your dog’s nails, while a small part of their body, play a significant role in their overall health and comfort. Whether you decide to take the DIY route or entrust a professional, the key lies in regular care and understanding the importance of nail maintenance. Throughout our time in various vet clinics and our interactions with hundreds more, we’ve realized that while there are several paths to achieving well-kept dog nails, the destination remains consistent: a happier, more comfortable pet. So, armed with knowledge and the best tools, let’s ensure our four-legged friends trot comfortably, with well-groomed paws hitting the pavement. Remember, every step you take in caring for your dog’s nails is a step towards a healthier, happier pup!

    Frequently Asked Questions (FAQs)

    How do I know if I’ve cut my dog’s nails too short?

    If you’ve cut into the quick, your dog might yelp in pain, and you’ll notice some bleeding. The quick is the sensitive part of the nail that contains blood vessels and nerves. Always have styptic powder on hand to stop any bleeding.

    What should I do if my dog is scared of nail clippers or the grinding tool?

    It’s essential to introduce the tools gradually. Start by letting your dog sniff and familiarize themselves with the clippers or grinder. You can also touch their paws without cutting to get them used to the sensation. Pair these actions with treats and positive reinforcement.

    Can I use human nail clippers on my dog?

    While it’s technically possible for very small breeds or puppies, human nail clippers aren’t designed for the thickness and shape of dog nails. It’s best to invest in clippers specifically made for dogs to ensure a safe and efficient trim.

    How can I tell where the quick is if my dog has dark nails?

    Trim a little at a time, looking at the cut end of the nail. As you approach the quick in darker nails, you’ll start to see a grey or whitish circle with a black dot in the center. When you see this, stop cutting.

    If I’m not comfortable trimming my dog’s nails, are there other alternatives apart from professional groomers?

    Absolutely! Many vet clinics offer nail trimming services. Some pet stores also host regular grooming events where professionals trim nails for a fee.

    A note about your dog’s health

    This article provides general education and does not replace an examination, diagnosis, or individualized advice from your veterinarian. Contact a veterinary professional if you are concerned about your dog’s symptoms.

    Dr. Candy Akers, DVM Avatar

    ABOUT THE AUTHOR
  • Is Nail Polish Safe for Dogs? Safer Paw Care Explained

    Is Nail Polish Safe for Dogs? Safer Paw Care Explained

    Human nail polish is not my first choice for dogs. A tiny, fully dried spot is unlikely to create the same risk as swallowing liquid polish, but human formulas are not made for dogs that lick their paws, chew their nails, or react to strong odors. If you want colorful paws, choose a product labeled for dogs, read its ingredient list, use it in fresh air, and prevent licking until it is completely dry.

    The bigger concern is exposure, not the color itself. Wet polish can be licked or spilled. Vapors can bother a sensitive dog. Remover adds another chemical exposure. I would rather skip the human manicure and use a simple, pet-specific option only when the dog is relaxed and comfortable.

    Why Human Nail Polish Is a Poor Choice for Dogs

    Nail polish formulas vary. That matters because broad claims such as “every human polish is toxic” are not accurate. The U.S. Food and Drug Administration explains that nail products may contain different solvents, resins, plasticizers, colorants, and other ingredients. Some can irritate the skin or cause harm if swallowed, even though the products are intended for normal human nail use [1].

    Dogs use their paws differently from people. They lick between their toes, chew at an itchy nail, walk on freshly painted surfaces, and sometimes investigate a dropped bottle before we can pick it up. Those habits create exposure routes that a human cosmetic label does not account for.

    The practical answer is simple: do not use a human product just because it says “free from” one or two ingredients. A “3-free,” “5-free,” or “non-toxic” marketing claim does not automatically make a polish appropriate for dogs. Read the full label and use only a formula specifically labeled for canine use.

    What About Formaldehyde, Toluene, and DBP?

    You may see warnings about a “toxic trio” of formaldehyde, toluene, and dibutyl phthalate, or DBP. Those ingredients have appeared in some nail products, but not every bottle contains all three. The FDA notes that formaldehyde can be present in some hardeners and polishes, that toluene use has declined, and that DBP was found in only a small number of products in an older agency survey [1].

    That nuance should not be mistaken for a green light. We do not have to prove that every human polish is dangerous before choosing the lower-risk option. The product was designed for human nails, while your dog may lick it, chew it, or inhale concentrated fumes close to the floor.

    Are Nail Polish Fumes Harmful to Dogs?

    Strong polish or remover odors can irritate the eyes, nose, and airways. The safest setup is a well-ventilated room with the bottle capped between coats. If the odor seems strong to you, move your dog away and air out the space.

    Stop the session if your dog coughs, sneezes repeatedly, drools, paws at the face, seems unsteady, or acts distressed. Move to fresh air and call your veterinarian or a pet poison service for guidance. A dog with trouble breathing, collapse, seizures, or rapidly worsening signs needs urgent veterinary care.

    Person closing a nail polish bottle near an open window while a dog rests at a safe distance

    What If My Dog Licked or Swallowed Nail Polish?

    Do not panic, but do not guess. The right response depends on the product, amount, timing, and your dog’s size and symptoms.

    1. Move your dog away from the spill and close the container.
    2. Wipe fresh product from the mouth or fur with a damp cloth if you can do so safely. Do not scrub the eyes or force water into the mouth.
    3. Save the bottle or take clear photos of the front label, ingredient list, and product number.
    4. Call your veterinarian, Pet Poison Helpline at 855-764-7661 [3], or ASPCA Animal Poison Control Center at 888-426-4435.
    5. Do not induce vomiting and do not give milk, oil, salt, or another home antidote unless a veterinary professional tells you to do so.

    Cornell’s veterinary first-aid guidance recommends having the brand, ingredients, estimated amount, exposure time, and your dog’s weight ready when you call. A poison expert can help decide whether home monitoring is reasonable or an examination is needed [2].

    Watch for vomiting, repeated drooling, coughing, breathing changes, weakness, wobbliness, unusual sleepiness, tremors, or seizures. These signs are not specific to nail polish, but they warrant prompt professional advice after a known exposure.

    When the Polish Is on Fur or Skin

    Keep your dog from licking the wet area. Blot gently with a damp cloth and mild dog shampoo, then rinse well. Avoid acetone, paint thinner, or other harsh solvents on the coat or skin. If polish is stuck near the eye, mouth, an open wound, or deeply between the toes, call your veterinary clinic before trying to remove it.

    Is Dog Nail Polish Safer?

    A product made and labeled for dogs is the better choice, but “pet-safe” does not mean risk-free. Look for a water-based, low-odor formula with a complete ingredient list and clear directions. Avoid products with missing labels, vague ingredients, or instructions that depend on acetone for removal.

    Check the label each time you buy. Formulas can change, and two products with similar names may have different ingredients. If your dog has allergies, irritated paws, cracked nails, or a history of licking, skip the polish and let the paws heal first.

    Dog nail polish pens can be easier to control than an open bottle because they reduce drips and drying time. The existing Healthy Happy Dogs recommendation for painting your dog’s nails can still be useful when the specific product is labeled for dogs and used exactly as directed.

    A Quick Product Checklist

    Look forSkip or question
    Labeled specifically for dogsHuman-only cosmetic directions
    Complete ingredient listMissing or vague ingredients
    Water-based, low-odor formulaStrong solvent odor
    Fast-drying directionsLong wet time that invites licking
    Clear removal instructionsAcetone required for removal
    Intact seal and current labelOld, separated, or unlabeled product
    Two labeled water-based dog nail polish bottles with a relaxed dog in the background

    How to Apply Dog Nail Polish Safely

    Pretty paws are optional. Comfort is not. If your dog dislikes paw handling, pulls away, pants, freezes, growls, or repeatedly licks the lips, stop. A color is never worth forcing a fearful dog through the process.

    For a dog who is comfortable with paw care, use this gentle routine:

    1. Read the product label from start to finish.
    2. Choose a ventilated room and protect the floor with a washable towel.
    3. Inspect each paw. Do not paint cracked, bleeding, inflamed, or infected nails.
    4. Clean and dry the nails. Trim only if your dog is already comfortable with nail care.
    5. Test one nail first, especially if your dog has sensitive skin.
    6. Apply one thin coat to the nail only. Keep polish off the cuticle, skin, paw pads, and fur.
    7. Keep the paw still with calm handling and food rewards until the coat is fully dry.
    8. Prevent licking and watch for redness, swelling, itching, or discomfort.

    Short sessions work best. You can paint one paw, take a break, and decide whether your dog wants to continue. That slower pace often looks less glamorous in the moment, but it protects trust and makes future paw care easier.

    Person gently painting one healthy dog nail with a brush from a dog nail polish bottle

    How to Remove Polish From a Dog’s Nails

    Follow the pet-product label. Water-based polish may soften with warm water or come off with the manufacturer’s remover. Use the smallest amount needed, keep it off the skin, and work in a ventilated area.

    Do not reach for human acetone remover by default. It can be irritating, has strong fumes, and gives your dog another substance to lick. Never peel or scrape hard polish from a damaged nail. If the polish will not come off without force, contact the manufacturer or ask your veterinarian or groomer for a safer plan.

    After removal, wash and dry the paws. Look for redness, cracking, swelling, odor, discharge, or pain. Those signs may reflect irritation, infection, or a nail injury rather than a cosmetic problem.

    When to Skip the Pawdicure

    Leave the nails bare if your dog has:

    • A cracked, split, bleeding, or loose nail
    • Red or swollen nail folds
    • An open sore between the toes
    • Frequent paw licking or chewing
    • A known contact allergy
    • Breathing disease that makes strong odors hard to tolerate
    • Fear or distress during paw handling

    If the paw is painful or infected, polish can hide changes you need to see. Treat the health issue first. Color can wait.

    Final Thoughts

    Human nail polish is not the safest choice for dogs because its ingredients, fumes, and removal process were not designed around canine behavior. If you want to add color, use a clearly labeled dog nail product, keep the room ventilated, apply a thin coat only to healthy nails, and prevent licking until everything is dry.

    When a spill or ingestion happens, save the label and call for advice instead of trying a home remedy. Most cosmetic plans can be postponed. A calm dog, healthy paws, and a clear view of the nails matter much more than a perfect finish.

    Frequently Asked Questions

    Can I put regular nail polish on my dog for one day?

    I do not recommend it. Even short wear time includes wet polish, fumes, licking risk, and removal. A product labeled for dogs is the better option.

    Is one lick of nail polish an emergency?

    Not every small lick causes poisoning, but the formula and amount matter. Save the bottle and call your veterinarian or a pet poison service for product-specific advice. Seek urgent care for breathing trouble, collapse, seizures, or rapidly worsening signs.

    Can I use acetone to remove polish from my dog’s nails?

    Avoid human acetone remover unless a veterinary professional or the dog-product manufacturer specifically directs you to use it. Follow the pet polish label and keep any remover off the skin, eyes, mouth, and paw pads.

    Is water-based dog nail polish safe if my dog licks it?

    Water-based and dog-labeled is a better starting point, but no cosmetic should be treated as food. Prevent licking until the polish is fully dry, and call for advice if your dog swallows wet product.

    Can I paint a dog’s black nails?

    Yes, if the nails and surrounding skin are healthy and your dog accepts paw handling. Some colors may need a dog-labeled base coat to show clearly. Keep every layer thin and allow it to dry fully.

    References

    1. U.S. Food and Drug Administration. (2023, November 15). Nail care products.
    2. Cornell University College of Veterinary Medicine. (n.d.). First aid for poisonous substances.
    3. Pet Poison Helpline. (n.d.). Pet poison control.

    A note about your dog’s health

    This article provides general education and does not replace an examination, diagnosis, or individualized advice from your veterinarian. Contact a veterinary professional if you are concerned about your dog’s symptoms.

    Dr. Candy Akers, DVM Avatar

    ABOUT THE AUTHOR
  • Can You Use Super Glue to Stop Dog Nail Bleeding?

    Can You Use Super Glue to Stop Dog Nail Bleeding?

    No, I do not recommend putting household super glue on a dog’s bleeding nail. If you clipped the quick, the safer first response is to apply Styptic Powder and hold steady pressure. If you do not have styptic powder, cornstarch can be a temporary backup while you watch the bleeding closely.

    A nicked quick often looks dramatic because that living center of the nail contains blood vessels and nerves. Most small trimming accidents can be managed at home, but a split, torn, or partly detached nail is a different problem. Those injuries can be painful, keep reopening, and need veterinary care.

    Dog nail cross-section showing the bone, quick, shell, and cut line near the nail tip

    What To Do Right Now

    Take a breath before you reach for anything. Your dog will notice if you are frightened or rushing, and a wiggling paw makes the situation harder for both of you.

    1. Move to a quiet, well-lit area. Ask someone to help if your dog is comfortable with a second person. Support the paw gently without twisting the leg.
    2. Blot away enough blood to see which nail is affected. Do not scrub the nail bed or keep wiping it every few seconds.
    3. Press styptic powder onto the cut surface. Then hold clean gauze or a folded paper towel firmly against the nail for two to three minutes without lifting it to check.
    4. Recheck once. If bleeding has stopped, keep your dog calm and off rough ground for the rest of the evening. If it is still active, repeat the powder and pressure once.

    Washington State University’s nail-trimming guidance recommends having styptic powder available in case a nail is cut too short. [1] I like keeping it with the grooming tools so it is within reach before a trim begins.

    Styptic powder and gauze held with steady pressure against a dog's clipped nail

    If You Have Styptic Powder

    Powder is usually easier to press onto a cut quick than to sprinkle from above. Put a small amount in the lid or on a clean surface, dip the bleeding nail into it, then apply pressure. Avoid packing product far under a lifted or broken nail.

    Styptic pencils can also help with a small quick nick, although some dogs dislike the sting. Wet the tip only as directed on the product label and touch it to the cut surface. If your dog is struggling or the nail is structurally damaged, stop and get help instead of forcing the paw still.

    If You Do Not Have Styptic Powder

    Cornstarch can provide a temporary physical barrier for a minor quick nick. Press it onto the nail and follow with steady pressure. It is less reliable than a purpose-made styptic product, so watch closely for renewed bleeding.

    I would not cycle through baking soda, flour, soap, glue, and multiple gels. Every new product means more handling and more material on an open surface. One simple backup, patient pressure, and a clear decision about when to call the clinic is a safer plan.

    Why Household Super Glue Is Not the Best Choice

    Household cyanoacrylate sets quickly by bonding surfaces together. On a paw, that means it can bond fur, skin, pads, the nail, your fingers, or debris around the injury. It may also generate heat as it cures, especially when it contacts absorbent material such as cotton.

    Black Labrador with styptic powder and gauze separated from a closed Gorilla Super Glue bottle

    The ASPCA explains that cyanoacrylate super glues can irritate skin and mucous membranes but are relatively low in systemic toxicity. It separately warns that expandable construction and wood glues can swell in the stomach and cause a dangerous blockage. [2] These are different glue problems. The fact that ordinary cyanoacrylate is usually not highly poisonous does not make it a good wound-care product.

    For clarity, this household super glue is the type I do not recommend putting on an actively bleeding dog nail. A quick nick is contaminated easily, and sealing the surface can trap blood, moisture, powder, fur, or dirt where you cannot assess it.

    Veterinary Tissue Adhesive Is Different

    Veterinarians sometimes use medical-grade tissue adhesive in controlled situations. That does not make a bottle from the junk drawer interchangeable with a veterinary product. For example, 3M describes Vetbond as a veterinary tissue adhesive intended for procedures such as closing minor lacerations. [3] Product formulation, sterility, application site, tissue preparation, and professional judgment all matter.

    Even veterinary tissue adhesive is not a substitute for examining a nail that is split through the quick, dangling, or injured at the nail bed. The first question is not simply how to cover the bleeding. It is whether the nail is stable and whether damaged tissue needs treatment.

    If You Already Used Super Glue

    Do not panic, and do not pull bonded tissue apart. Forceful separation can tear skin or worsen the nail injury.

    Prevent licking while you look at the paw. If the glue is only on the hard nail shell and the toe looks comfortable, keep the area dry and monitor it. If skin, pads, fur, or your fingers are bonded, call your veterinarian for instructions. Do not use acetone on an open nail, irritated skin, or near the eyes or mouth.

    Get prompt professional help if glue entered the eye or mouth, the toe feels hot, your dog is very painful, swelling develops, or the nail is stuck to surrounding tissue. If your dog chewed a bottle of expandable polyurethane construction glue, treat that as a different and more urgent exposure. Call your veterinarian or a pet poison service immediately.

    A Clipped Quick vs. a Split or Torn Nail

    This distinction changes what you should do next.

    A clipped quick usually follows a nail trim. The nail remains solid and attached, but a small round surface at the tip bleeds. Once the bleeding stops, many dogs are comfortable with brief rest and monitoring.

    A split or torn nail may show a crack running up the nail, a loose shell, a hanging fragment, exposed tissue, bleeding near the base, limping, or repeated bleeding when the dog walks. Do not twist, cut, or pull a loose piece at home. The nail bed can be very sensitive, and your veterinarian may need to trim damaged material safely, control pain, and decide whether infection prevention is needed.

    When a Bleeding Nail Needs Veterinary Care

    Call your veterinary clinic promptly if:

    • Bleeding remains active after about 10 minutes of uninterrupted firm pressure and styptic powder.
    • Blood is spurting, pooling quickly, or soaking through repeated gauze.
    • The nail is split, partly detached, broken near the base, or pushed at an odd angle.
    • Your dog will not bear weight, cries when the toe is touched, or cannot settle.
    • The toe becomes swollen, warm, red, or produces discharge or odor.
    • Bleeding restarts repeatedly or more than one nail is bleeding without a clear trimming accident.
    • Your dog seems weak, unusually quiet, or has pale gums.

    If your dog takes medication that affects clotting or has a known bleeding disorder, call sooner. A simple quick nick should improve, not become progressively more painful or swollen.

    Aftercare for a Clipped Quick

    Once bleeding has stopped, the best aftercare is usually quiet and simple. Keep the paw clean and dry. Choose leash walks on clean, smooth ground for the next day, and skip running, digging, rough play, and muddy trails until the nail stays dry and comfortable.

    Check the nail later that day and again the next morning. A little dried blood at the tip is not unusual. Renewed bleeding, constant licking, limping, swelling, warmth, discharge, or a bad smell deserves a call to the clinic.

    A wrapped Cold Compress may help with comfort around an intact toe after bleeding has stopped, but it will not seal a cut quick. Keep it outside a thin towel and use it briefly. Do not hold a frightened dog down to apply it.

    An Over-the-Counter Gel should only be used if its label specifically says it is safe for pets and appropriate for nail bleeding. Human liquid bandage products are not automatically safe for a dog to lick, and they should not be used to hide a split or contaminated nail.

    Avoid tight home bandages unless your veterinary team has shown you how to place one. Paw wraps can slip, trap moisture, or restrict circulation. If you need a temporary cover for transport, use a loose clean gauze layer and remove it as directed by the clinic.

    Preventing Future Nail Bleeding

    Most nail-trim accidents happen because the quick is difficult to see, the tool crushes instead of cuts cleanly, or the dog moves at the wrong moment. A slower setup prevents more problems than any rescue product.

    Use the Right Tools

    Choose sharp nail clippers that fit your dog’s nail size, or use a grinder if your dog prefers it. Dull blades squeeze the nail and make control harder. Keep your styptic product open and ready before you start.

    Trim tiny amounts at a time. On pale nails, stop before the pink quick. On dark nails, examine the cut surface after each small trim. A dry, pale center gives way to a darker, softer-looking center as you approach the quick. Stop before that center becomes glossy or shows a small dark dot.

    Calm dachshund having a dark nail trimmed in tiny increments under a bright task light

    Tips for Dark Nails

    Bright light helps, but do not rely on shining a flashlight through every dark nail. Many black nails are too opaque for that to work. Instead, use repeated thin slices, steady paw support, and the changing texture of the cut surface.

    If the nails are very overgrown, do not try to restore ideal length in one session. The quick may have grown forward with the nail. Small trims at regular intervals are safer and more comfortable.

    Build Cooperative Handling

    Practice touching the shoulder, sliding your hand down the leg, holding the paw for one second, and releasing. Reward each calm step. On another day, touch the tool to one nail without trimming. Short sessions teach your dog that paw handling ends quickly and predictably.

    If your dog freezes, repeatedly pulls away, growls, snaps, or panics, stop. A professional groomer or veterinary team can help you build a lower-stress plan. Forcing a frightened dog through a full trim increases the chance of injury to everyone.

    Protective Paw Choices

    For dogs whose nails crack on rough terrain, well-fitted protective footwear may help during hiking or winter walks. Boots must fit correctly, stay dry inside, and be removed after activity so you can inspect the toes. They do not replace routine nail care.

    Final Thoughts

    A bleeding quick is upsetting, but household glue adds problems that pressure and styptic powder usually avoid. My practical rule is simple: control the bleeding, decide whether the nail is structurally intact, and do not cover damage you cannot assess.

    Keep a small nail-care kit with styptic powder, gauze, good lighting, and your dog’s preferred rewards. If the nail is split, the bleeding will not stop, or your dog is very painful, let your veterinary team take over.

    Frequently Asked Questions

    Can cornstarch stop a dog’s nail from bleeding?

    Cornstarch can help a minor quick nick by creating a temporary barrier when styptic powder is unavailable. Press it onto the cut surface and hold steady pressure. If bleeding stays active or the nail is damaged, contact your veterinarian.

    How long should a dog’s nail bleed after cutting the quick?

    A minor nick should begin slowing within a few minutes with powder and uninterrupted pressure. If bleeding remains active after about 10 minutes, or it is heavy at any point, call a veterinary clinic for guidance.

    What should I do if super glue is already on my dog’s paw?

    Prevent licking and do not pull bonded tissue apart. If skin, pads, fur, eyes, mouth, or people are bonded, call your veterinarian. Avoid acetone on the open nail or irritated tissue.

    Should I bandage a bleeding dog nail?

    Usually, pressure and styptic powder are safer first steps for a simple quick nick. Home paw bandages can become too tight or trap moisture. Use a wrap only when a veterinary professional recommends it and explains how long it should stay on.

    How can I trim black dog nails more safely?

    Use bright light, sharp tools, and very small cuts. Check the cut surface after each slice and stop as the center becomes darker, softer, or glossy. Frequent small trims are safer than trying to remove a large amount at once.

    References

    1. Washington State University Veterinary Teaching Hospital. (2026, February 25). How to clip a dog’s nails.
    2. American Society for the Prevention of Cruelty to Animals. (2019, August 2). These popular hobbies could pose a threat to pets!
    3. 3M. (n.d.). 3M Vetbond Tissue Adhesive, 1469SB, 0.1 oz (3 mL).
    Dr. Candy Akers, DVM Avatar

    ABOUT THE AUTHOR