Every dog parent knows that maintaining their furry friend’s health isn’t just about a balanced diet and regular check-ups—it’s also about the little things, like nail care. If you’re a proud owner of a petite pup, you might’ve noticed how challenging it can be to trim their tiny nails. The mere sight of nail clippers can send them scurrying under the bed! But, just like our nails, a dog’s nails left unchecked can cause discomfort or even health issues.
So, how do you keep those petite paws in tip-top shape without causing distress to your four-legged companion? Fear not, because this comprehensive guide is tailored just for you. From understanding the unique anatomy of small dog nails to mastering the art of easy and safe home restraint, we’ve got you covered. Let’s embark on this journey together, ensuring your little furball has neat nails without the fuss or the stress!

Understanding Small Dog Anatomy and Behavior
Why Small Dogs May Be Anxious During Nail Trimming
Small dogs, with their heightened sensitivity and often more cautious nature, can be especially apprehensive when it comes to nail trimming:
- Perceived Threat: From a dog’s perspective, a looming object (like clippers) approaching their paws can be intimidating.
- Past Experiences: If they’ve had a painful nail-trimming experience before, such as cutting into the quick, they might remember and become fearful of a repeat incident.
- General Discomfort: Just as some people are ticklish or sensitive about their feet being touched, some dogs are wary about their paws being handled.
The Structure of a Dog’s Nail
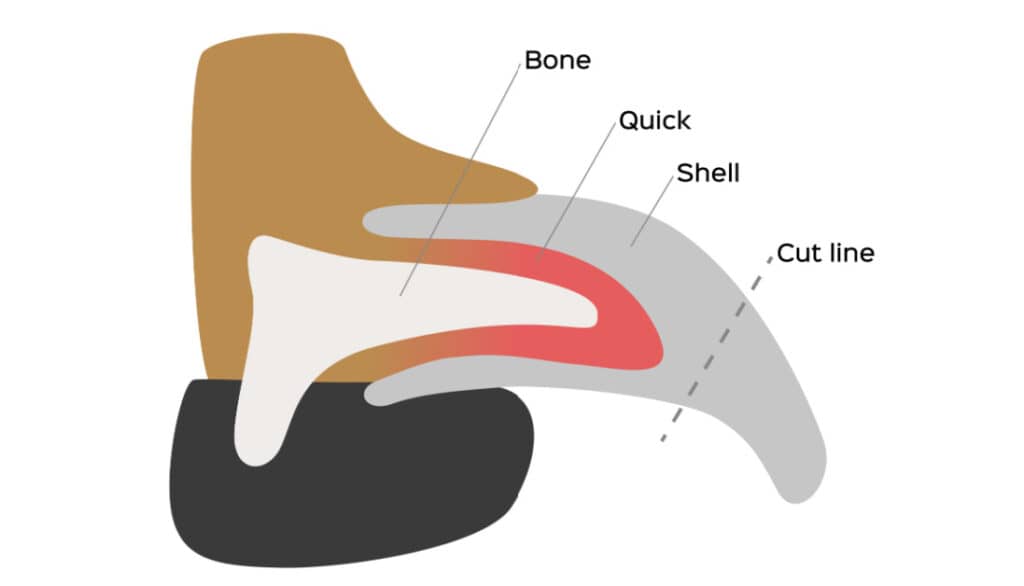
Knowing the anatomy of your dog’s nail is crucial for a safe trimming experience:
- Nail Shell: This is the hard, outermost layer that we see and typically trim.
- Quick: This part supplies blood to the nail. It’s sensitive and can bleed if nicked. In clear nails, it appears as a pinkish area, but it can be harder to spot in darker nails.
- Nail Bed: Just like in humans, this is the skin beneath the nail. It’s sensitive and should be avoided during trimming.
- Paw Pads: These are the cushioned parts of a dog’s foot and are not directly involved in trimming but are essential to be aware of during the process to avoid any accidental nips or discomfort.
Recognizing and Addressing Small Dog Behavior
Understanding your dog’s body language can make the trimming process smoother:
- Tail Position: A tail tucked between the legs can indicate fear, while a wagging tail might suggest they’re at ease.
- Ear Posture: Ears laid flat back can be a sign of distress or nervousness.
- Vocal Cues: Growling, whining, or whimpering can indicate discomfort or stress. If these cues are noticed, it’s essential to take a break or reassess your approach.
- Tips for Calming Anxious Dogs:
- Positive Reinforcement: Always reward your dog for good behavior during trimming, be it through treats, praise, or play.
- Frequent Breaks: If your dog seems agitated, take breaks and return to trimming later.
- Desensitization: Gradually introduce your dog to the trimming process, starting with simply touching their paws, then introducing the clippers without actually cutting.
When you take the time to understand your small dog’s anatomy and behavior, you’re not only ensuring a safer nail trimming experience but also strengthening the bond between you and your pet. After all, every interaction is an opportunity to build trust and make your pup feel loved and cared for!
Preparing Your Small Dog for Nail Trimming
Creating a Calm Environment
The atmosphere in which you trim your dog’s nails can play a significant role in their comfort level. Here’s how to set the mood right:
- Choosing the Right Space: Opt for a quiet room with good lighting. This ensures you can see the nail structure clearly and minimizes distractions for your dog.
- Calming Aids: Consider using calming sprays, diffusers, or even dog-specific calming music to create a relaxed ambiance.
- Comfortable Surface: Whether it’s a non-slip mat on a table or a soft blanket on the floor, ensure the surface is secure and comfy for your pet.
Familiarizing Your Dog with the Tools
Introduce the tools gently, turning them into a non-threatening part of the routine:
- Show and Tell: Allow your dog to sniff and inspect the clippers or grinder. Pair this introduction with treats, so they associate the tool with positive rewards.
- Sound Acclimation: If you’re using a grinder, turn it on a few times before the actual trim to let your dog get used to its sound.
- Practice Runs: Touch your dog’s paws with the tool without actually trimming. This helps them get used to the sensation.
Reward-based Positive Reinforcement
Building positive associations is key to a stress-free nail-trimming experience:
- Treats: Every time your dog allows you to touch their paw, or after a successful nail trim, reward them with their favorite treat.
- Praise: Dogs love to be told they’re doing a good job. Use a cheerful voice to praise them often during the process.
- Playtime: After the session, engage in a short play session. This reinforces the idea that nail trimming leads to fun times.
Remember, patience is your best friend here. Some dogs may take longer to adapt to the process than others, and that’s okay. Preparing your dog for nail trimming isn’t just about the act itself—it’s about fostering trust and ensuring your furry friend feels safe and loved every step of the way

Essential Tools for Safe Nail Trimming
Choosing the Right Tools for Small Dogs
Every tool isn’t suitable for every dog, especially when it comes to petite paws. Here’s a guide to picking the right one:
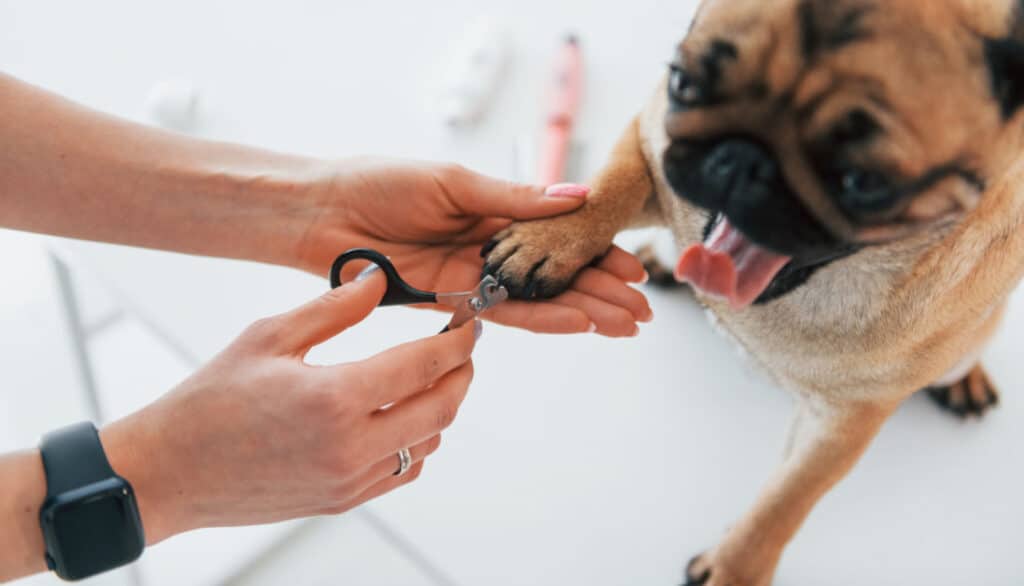
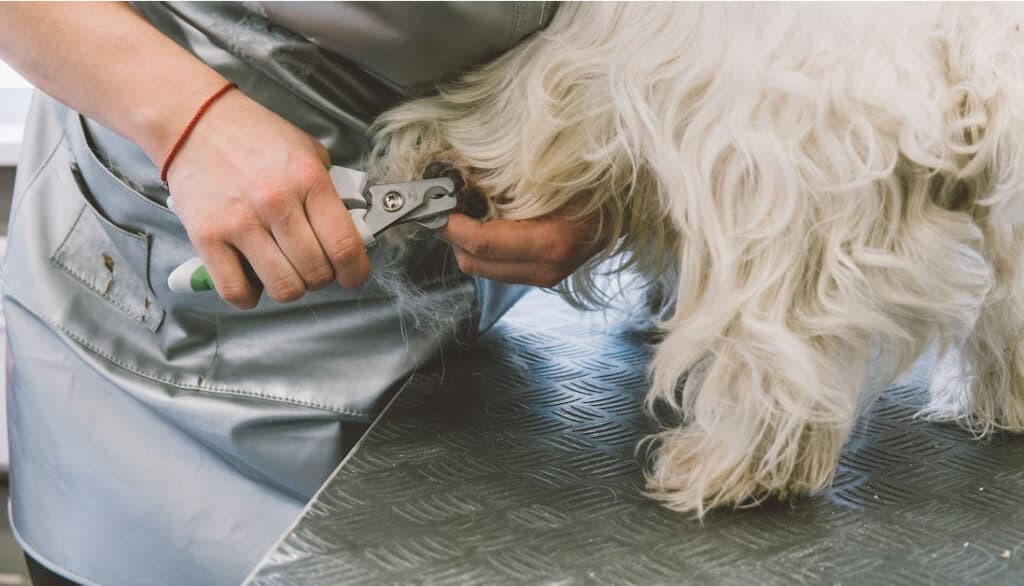
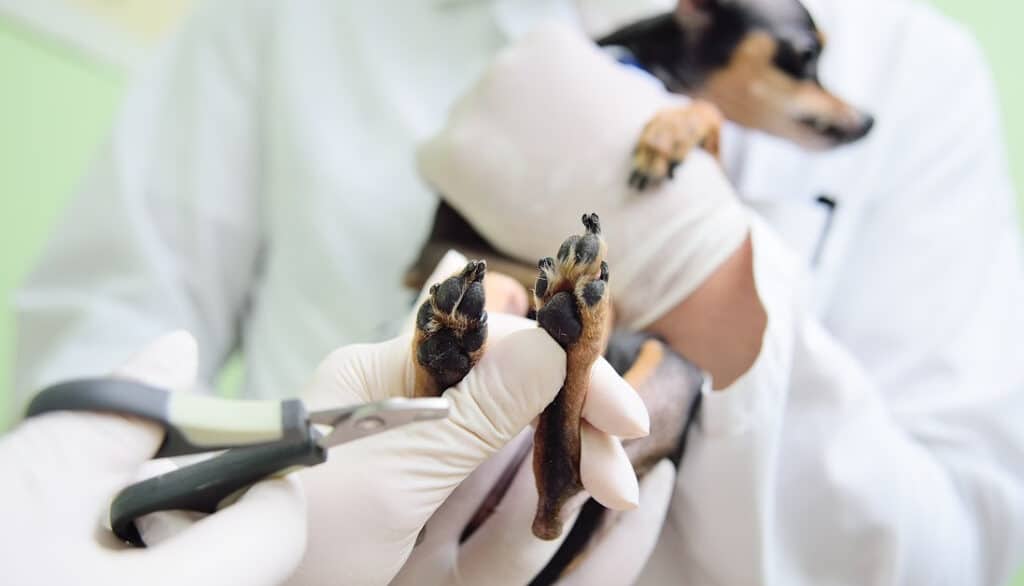
- Scissor Clippers: Ideal for dogs with thinner nails, they offer precision, especially in tight spaces.
- Guillotine Clippers: Best for dogs with medium-thickness nails. The nail is inserted into a hole and a blade slices it off.
- Grinders: Electric tools that wear down the nail. They’re great for dogs with thicker nails and for smoothing out rough edges after clipping.
Importance of Sharp Instruments
Dull tools aren’t just ineffective; they can be dangerous:
- Clean Cuts: Sharp tools provide a clean cut without splitting or fraying the nail.
- Quick Trimming: They allow for quick trims, which means less stress for both you and your dog.
- Safety: Dull clippers can crush the nail instead of cutting it, potentially causing injury.
Caring for Your Tools
To ensure longevity and safety:
- Regular Checks: Inspect your tools before each session to make sure they’re in good condition.
- Cleaning: After every use, clean them to prevent bacterial buildup. Warm soapy water and a soft brush can do the trick for most tools.
- Sharpening and Replacing: Keep blades sharp. If they’ve become too dull or damaged, it might be time to replace them.
Every artist needs their set of tools, and when it comes to grooming your small dog, having the right tools in prime condition is half the battle. Whether you’re a seasoned dog parent or just starting out, ensuring you’re equipped with the best tools for the job will make the nail trimming process smoother and safer for your beloved pet.
The Step-by-Step Guide: How to Hold Your Small Dog
Positioning: Finding the Right Hold for Your Pup
Depending on your dog’s size and comfort, there are a few methods you can employ:
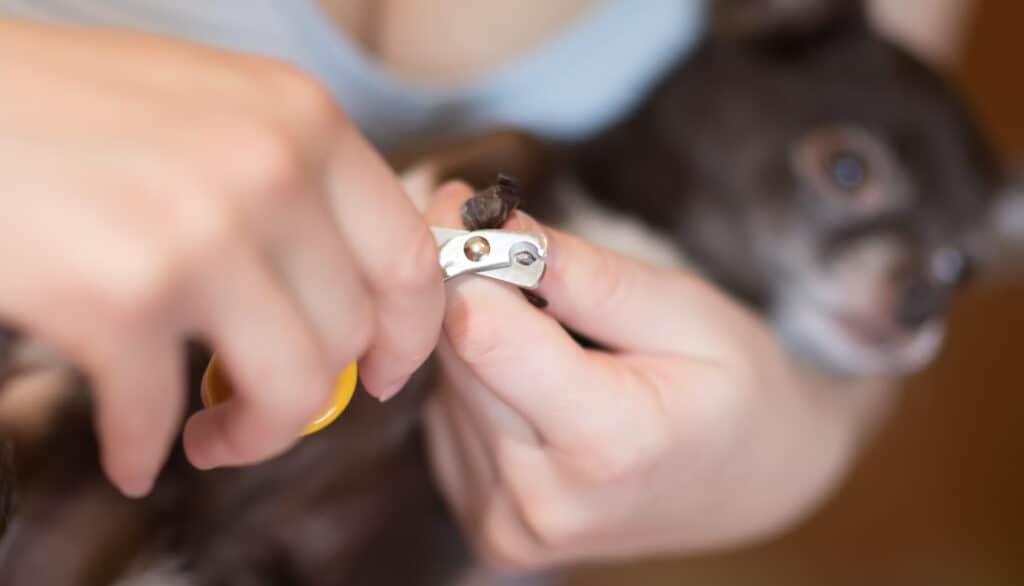
- Lap Method: For very small dogs, place them on your lap, with their head facing away from you. This method offers comfort as they can feel your body warmth and heartbeat.
- Table Method: Place a non-slip mat on a table and have your dog stand or lie on it. This method gives you a better view and angle to work from.
- Floor Method: For slightly bigger small dogs or those who feel more secure on the ground, you can have them lie on the floor while you trim.
Safe Restraint Techniques: Ensuring Comfort and Security
Handling your dog the right way can make the whole process go smoothly:
- Holding the Paw: Gently hold the paw you’re working on. If your dog pulls away, give them a moment and try again.
- Positioning the Head: If you have someone to assist you, they can gently hold the dog’s head to distract and comfort them. If you’re alone, position your dog’s head away from the paw you’re working on to prevent sudden nips.
- Stabilizing the Body: Use your free arm to gently hug or stabilize your dog, offering them a sense of security.
Recognizing Signs of Distress and Taking a Break
Just like us, dogs have their limits. Here’s how to know when your pup needs a pause:
- Pulling Away: If your dog consistently pulls their paw away, they might need a short break.
- Vocalizing: Whining, growling, or yipping can be signs of discomfort or fear.
- Avoidance: If your dog keeps trying to get away or hide, consider taking a more extended break or even trying again another day.
In the world of dog grooming, patience truly is a virtue. As you guide your pup through the process, always prioritize their comfort and well-being. Remember, it’s not a race; it’s about ensuring your little one’s nails are neat, all while cementing the trust between the two of you.
Trimming Techniques for Small Dog Nails
Finding the Quick: The First Step to Safe Trimming
Locating the quick is crucial to prevent discomfort and potential bleeding:
- For Clear Nails: Look for a pinkish area inside the nail – that’s the quick. Always trim a bit in front of it to avoid any injuries.
- For Dark Nails: The process is trickier. Start by making small cuts and look for a change in the nail’s color and texture. When you see a small dark dot surrounded by a lighter circle, you’re close to the quick.
The Right Angle: Cutting with Care
The way you approach the nail matters:
- Angle of Approach: Hold the clipper at a 45-degree angle towards the tip of the nail to ensure a clean and safe cut.
- Small Snips: Especially for dark nails, make several smaller cuts rather than one large one. This will reduce the risk of cutting into the quick.
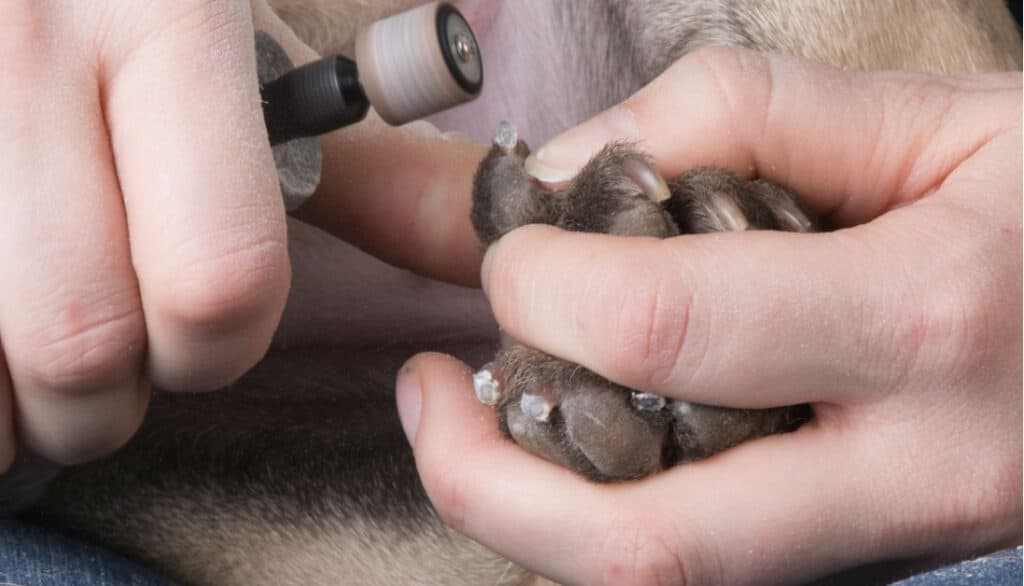
Using a Grinder: Smooth and Safe
Grinding can be a great alternative or supplement to clipping:
- Short Intervals: Instead of continuous grinding, use short bursts to prevent overheating the nail.
- Check Progress: Pause frequently to check how close you are to the quick. The nail will start to become softer as you approach it.
- Smoothing Edges: Grinders excel at eliminating any rough edges, making it comfortable for your dog and preventing snags.
What to Do If You Cut the Quick
Mistakes can happen, even to the best of us. Here’s what to do if you accidentally nick the quick:
- Stay Calm: Dogs can pick up on our stress. Remain calm, and your dog is more likely to stay calm too.
- Stop the Bleeding: Use a styptic powder or pencil to stop the bleeding. If you don’t have one, cornstarch or flour can work in a pinch.
- Comfort Your Dog: They might be in a bit of pain or shock. Comfort them with gentle words, petting, or their favorite treat.
Nail trimming is as much an art as it is a science. With practice, patience, and the right techniques, you’ll master the skill, ensuring your petite pooch’s paws are always in pristine condition. And remember, it’s not just about nail care—it’s a bonding experience that deepens the trust and love between you and your furry companion.
Aftercare and Rewards
Post-trim Paw Inspection
Once you’ve finished trimming, it’s crucial to ensure everything looks good and your dog is comfortable:
- Check for Rough Edges: Feel each nail to ensure no rough or sharp edges can cause discomfort or get snagged. If you find any, smooth them out with a grinder or nail file.
- Examine for Redness or Swelling: This could indicate some irritation or minor injury during the process. Keep an eye on it, and if it doesn’t subside within a day or two, consider consulting your vet.
- Paw Massage: Give your dog’s paws a gentle massage. This not only feels good for them but also helps increase circulation after the trim.
Rewarding Your Furry Friend
Positive reinforcement can make future nail trimming sessions easier:
- Treat Time: Offer your dog their favorite treat as a reward for their patience and cooperation.
- Play Session: Engage in a short play session with their favorite toy. It’s a great way to burn off any pent-up energy from the nail-trimming session.
- Cuddle and Praise: A good old cuddle and some loving words can do wonders. It reaffirms your bond and comforts your dog after the grooming session.
Routine Check-ins
Consistent care can make nail trimming less frequent:
- Regular Paw Checks: Between trims, regularly check your dog’s nails to monitor their growth and condition.
- Schedule Reminders: Keeping a consistent schedule, like trimming nails every couple of weeks, can prevent overgrowth and make the process quicker each time.
Aftercare isn’t just about ensuring your dog’s paws are in great shape; it’s about solidifying the positive experience around nail trimming. Your dog’s comfort, happiness, and health are paramount. By following these aftercare and reward tips, you’re not only taking care of their nails but also nurturing the loving relationship you share with your furry companion.
Troubleshooting Common Challenges
Overcoming Fear and Anxiety
Many dogs have negative associations with nail trimming, which can make the process a challenge:
- Gradual Exposure: Introduce the tools slowly over days or even weeks, allowing your dog to sniff and get used to them. Pair this introduction with treats to build positive associations.
- Distractions: Using toys, treats, or even a lick mat smeared with peanut butter can divert your dog’s attention while you work on their nails.
- Training Sessions: Train your dog to offer their paw, using positive reinforcement. This way, they’ll associate giving their paw with treats, making the nail trimming process smoother.
Dealing with Wiggly Dogs
Some dogs can’t sit still, which can pose a challenge:
- Wrap Technique: A large towel or blanket can be gently wrapped around your dog, exposing only one paw at a time. This not only restricts movement but can also provide a comforting swaddle.
- Short Sessions: Instead of trying to trim all the nails in one go, focus on one or two nails at a time, spreading the process over several days.
- Enlist Help: Having a family member or friend to hold and comfort your dog can make a world of difference.
Addressing Overgrown Nails
Neglected nails can sometimes become too long:
- Incremental Trimming: Instead of trying to get the nail to the desired length in one session, trim a little bit every week. This allows the quick (the sensitive part of the nail) to recede gradually.
- Regular Maintenance: Once you’ve achieved the desired nail length, maintain it with regular trims to prevent recurrence.
Handling Past Negative Experiences
A previous painful experience can make dogs wary of nail trims:
- Rebuilding Trust: Start fresh, taking baby steps. Even if it’s just touching their paws without trimming, always use positive reinforcement.
- Professional Help: Consider seeking the assistance of a professional dog trainer or behaviorist to help recondition your dog’s response to nail trimming.
Facing challenges when trimming your dog’s nails is perfectly normal, and you’re not alone. The key is to be patient, gentle, and consistent. Remember, every dog is unique, so what works for one might not work for another. The goal is to ensure that the nail trimming experience is as positive and stress-free as possible for your furry friend.
Regular Nail Maintenance: Creating a Routine
The Importance of Routine Nail Care
Consistent nail care is vital for your dog’s overall health and comfort:
- Prevent Pain: Overgrown nails can curve and dig into the paw pads, causing discomfort or even injury.
- Healthy Posture: Long nails can alter your dog’s stance and gait, potentially leading to joint issues or other musculoskeletal problems.
- Avoid Snags: Properly maintained nails reduce the risk of them getting caught in carpets, clothes, or other materials.
Setting a Schedule: How Often to Trim
The frequency of trims depends on your dog’s lifestyle and the rate of nail growth:
- Active Outdoor Dogs: Dogs that frequently walk on concrete or hard surfaces might naturally wear down their nails and require less frequent trims.
- Indoor and Less Active Dogs: These dogs usually need more regular trims, often every 2-4 weeks.
- Monitor Growth: Regularly check the nails to gauge the trimming frequency that works best for your dog.
Making Nail Trims an Enjoyable Routine
A positive experience ensures easy and frequent nail maintenance:
- Consistent Environment: Always trim in the same quiet, calm environment, so your dog knows what to expect.
- Routine Time: Try to trim at the same time of day when your dog is naturally calmer, like after a walk or play session.
- Positive Reinforcement: Reward your dog after each session, reinforcing the idea that nail trims lead to good things.
Keeping Track: Record Keeping
Maintaining a record can be beneficial, especially if more than one person is involved in pet care:
- Calendar Notes: Mark the dates you’ve trimmed your dog’s nails on a calendar. This visual aid can help you establish and adhere to a consistent schedule.
- Progress Journal: Especially if you’re working on building trust or handling challenges, jotting down observations can help you notice patterns and make necessary adjustments.
By establishing a regular nail maintenance routine, you’re ensuring that your dog remains comfortable, healthy, and happy. It’s a small gesture, but it speaks volumes about the care and love you have for your four-legged companion. Over time, with consistency and patience, nail trims can become just another pleasant routine you both look forward to.
Conclusion
Navigating the world of canine nail care can seem daunting at first glance. Those tiny nails hold a lot of responsibility – from ensuring your furry friend’s comfortable walks to preventing potential health issues. But, as we’ve journeyed through this guide, it’s clear that with the right knowledge, tools, and a sprinkle of patience, nail trimming can transform from a dreaded chore into a bonding experience.
Every snip, every gentle hold, and every treat given post-trim is a testament to the love and care we have for our four-legged companions. Over time, with consistent routines and positive reinforcement, even the most nail-trim-wary dog can come to view the process as just another form of pampering.
As you embark or continue on this nail-trimming journey, remember that it’s more than just about maintenance – it’s a dance of trust, understanding, and love between you and your pet. And just like any dance, with practice and time, it becomes a harmonious routine that both dancer and partner look forward to. Here’s to many more happy and safe nail trims with your beloved pup! 🐾
Frequently Asked Questions
Answer: The quick is the sensitive part of the nail that supplies blood. For dogs with clear nails, it’s visible as a pinkish area. Always trim in front of it. For darker nails, you’ll need to make small cuts and look for a small dark dot surrounded by a lighter circle, indicating you’re nearing the quick.
Answer: Gradual exposure and positive reinforcement are key. Start by letting your dog get familiar with the tools, rewarding them for calm behavior. Over time, progress to touching their paws, then to trimming a nail or two, always pairing the experience with treats or praise. If anxiety persists, consulting a professional dog trainer or behaviorist may be beneficial.
Answer: If nails are significantly overgrown, the quick has likely extended as well. It’s safer to trim a little bit of the nail every week, allowing the quick to gradually recede. Over several sessions, you’ll be able to get the nails to the desired length.
Answer: While it’s technically possible to use human nail clippers for tiny breeds, it’s not recommended. Dog nail clippers are designed to handle the thickness and shape of dog nails. Using the right tool ensures a cleaner cut and reduces the risk of nail splitting or other injuries.
Answer: First, remain calm to prevent further stressing your dog. Apply styptic powder or pencil to the bleeding nail to help it coagulate and stop bleeding. If you don’t have styptic products on hand, cornstarch or flour can be used in a pinch. If bleeding persists for more than a few minutes, contact your veterinarian.
