Category: Healthy Happy Dogs

  • Chlorhexidine Wipes: Combat Dog Ear Infections

    Chlorhexidine Wipes: Combat Dog Ear Infections

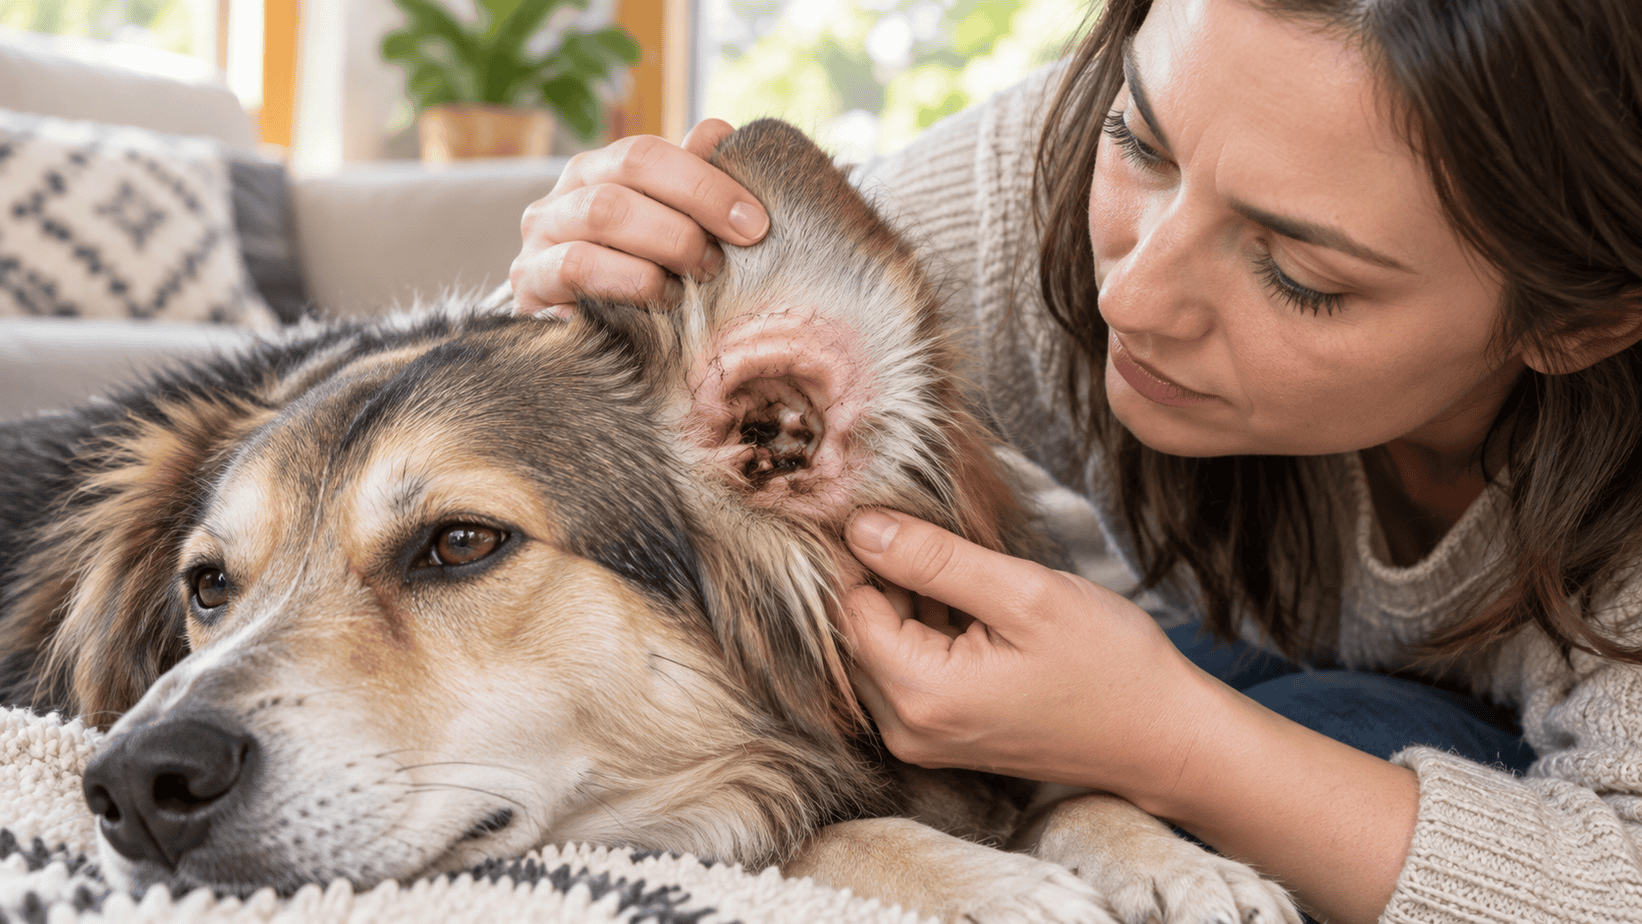
    As a holistic veterinarian, I know how distressing it can be to see your furry friend struggling with an ear infection. The discomfort, the itchiness, and the pain – it’s enough to make any dog parent feel helpless. But don’t worry, I’m here to help. One of the best solutions I’ve found is chlorhexidine wipes for dogs with ear infections. These wipes are a game-changer in the fight against these pesky infections, providing relief for your pup and peace of mind for you. So, let’s explore how these antibacterial powerhouses can help your canine companion.
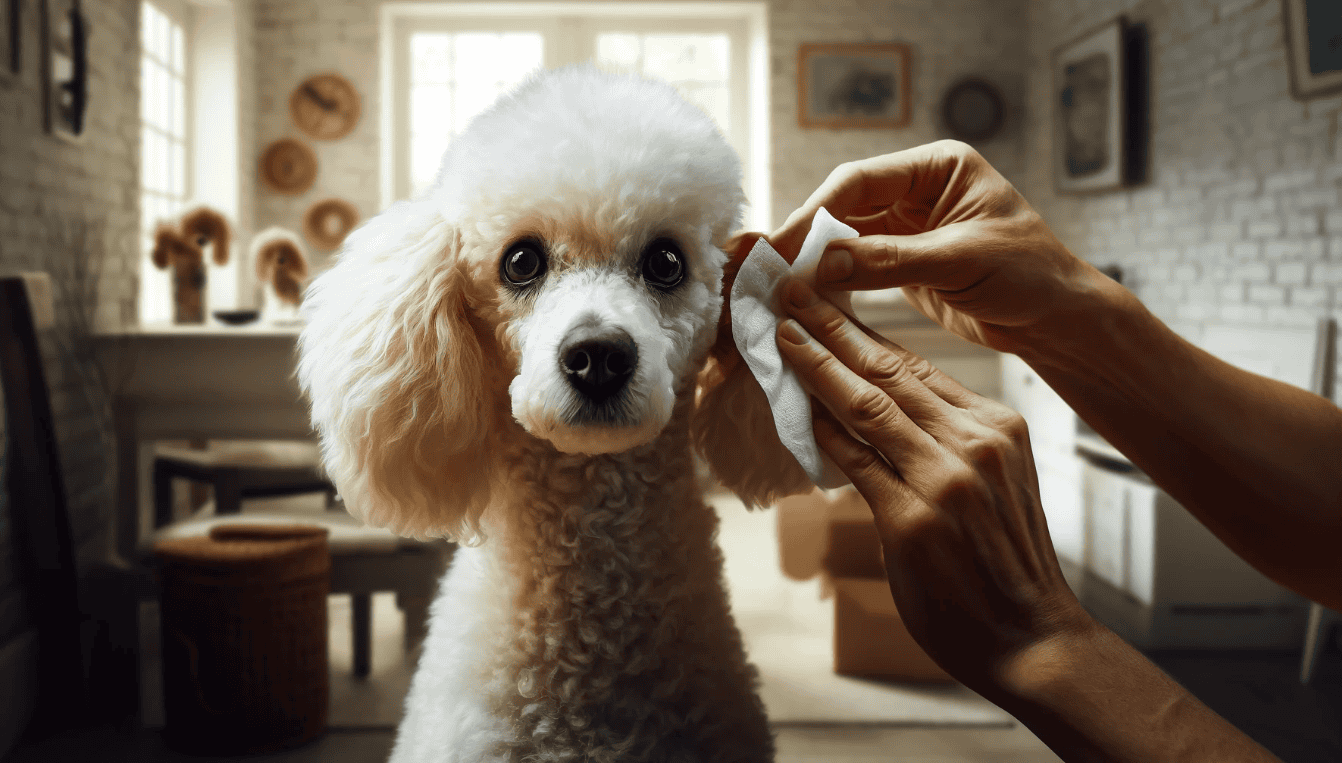
    chlorhexidine wipes for dogs with ear infections

    Understanding Dog Ear Infections

    As a caring pet parent, it’s crucial to comprehend the causes and symptoms of dog ear infections. Just like humans, our furry friends can suffer from these painful conditions, which can drastically affect their overall well-being.

    Causes and Symptoms of Dog Ear Infections

    Ear infections in dogs are typically caused by bacteria or yeast. However, allergens like dust mites, pollen, or certain foods can also trigger these infections. Dogs with floppy ears or those who love swimming are more susceptible due to the moist environment, which is ideal for the growth of bacteria and yeast.

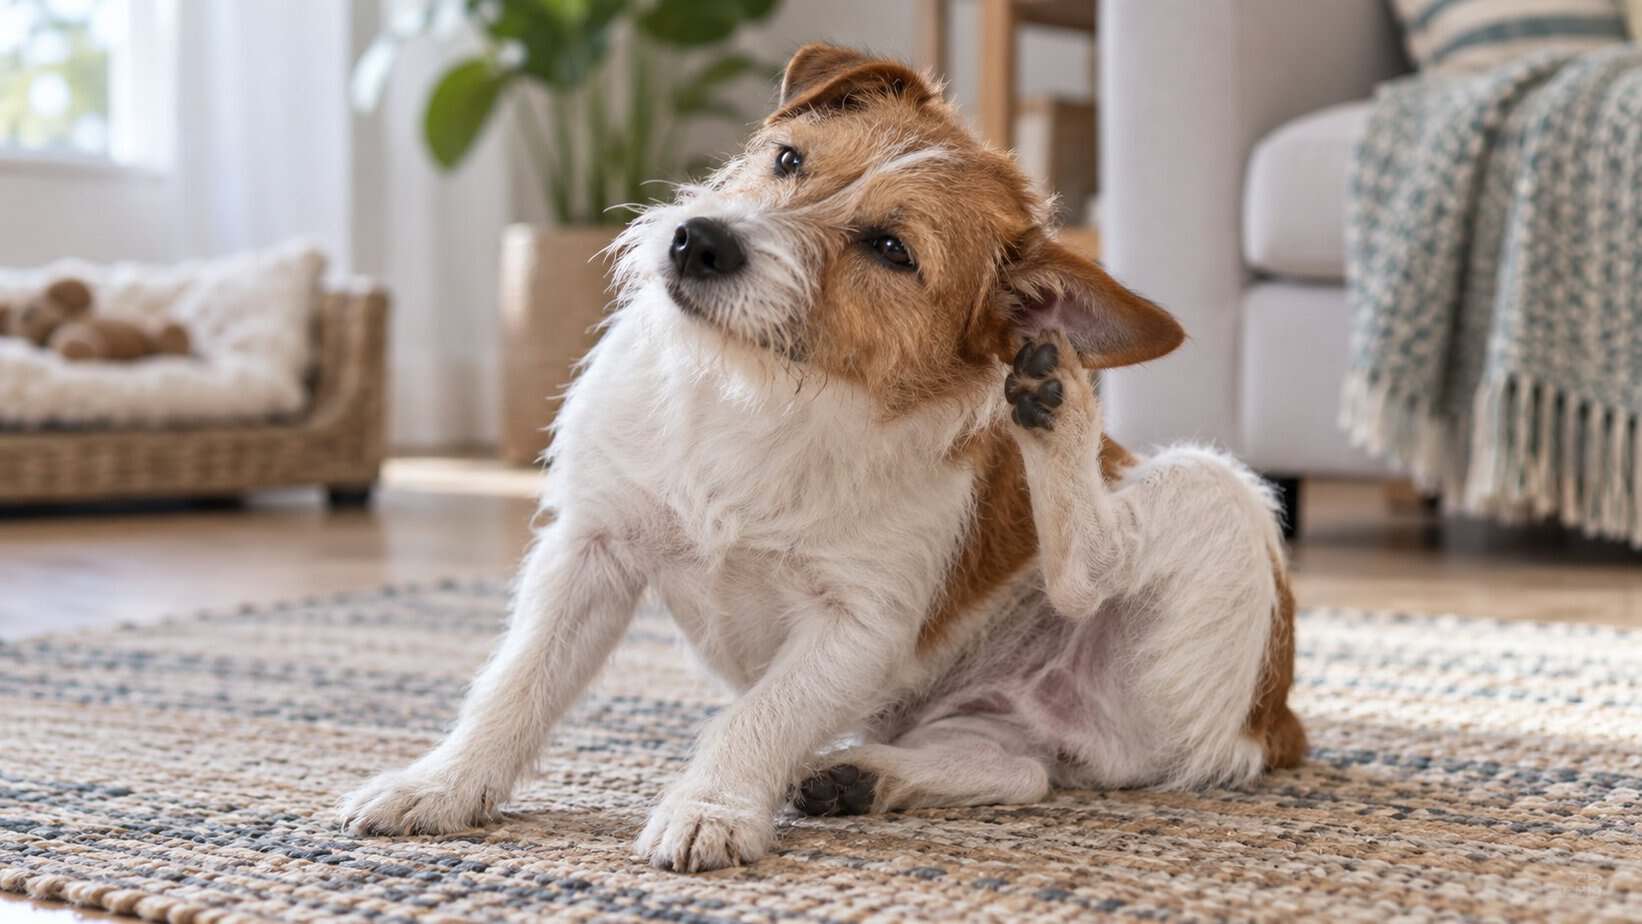
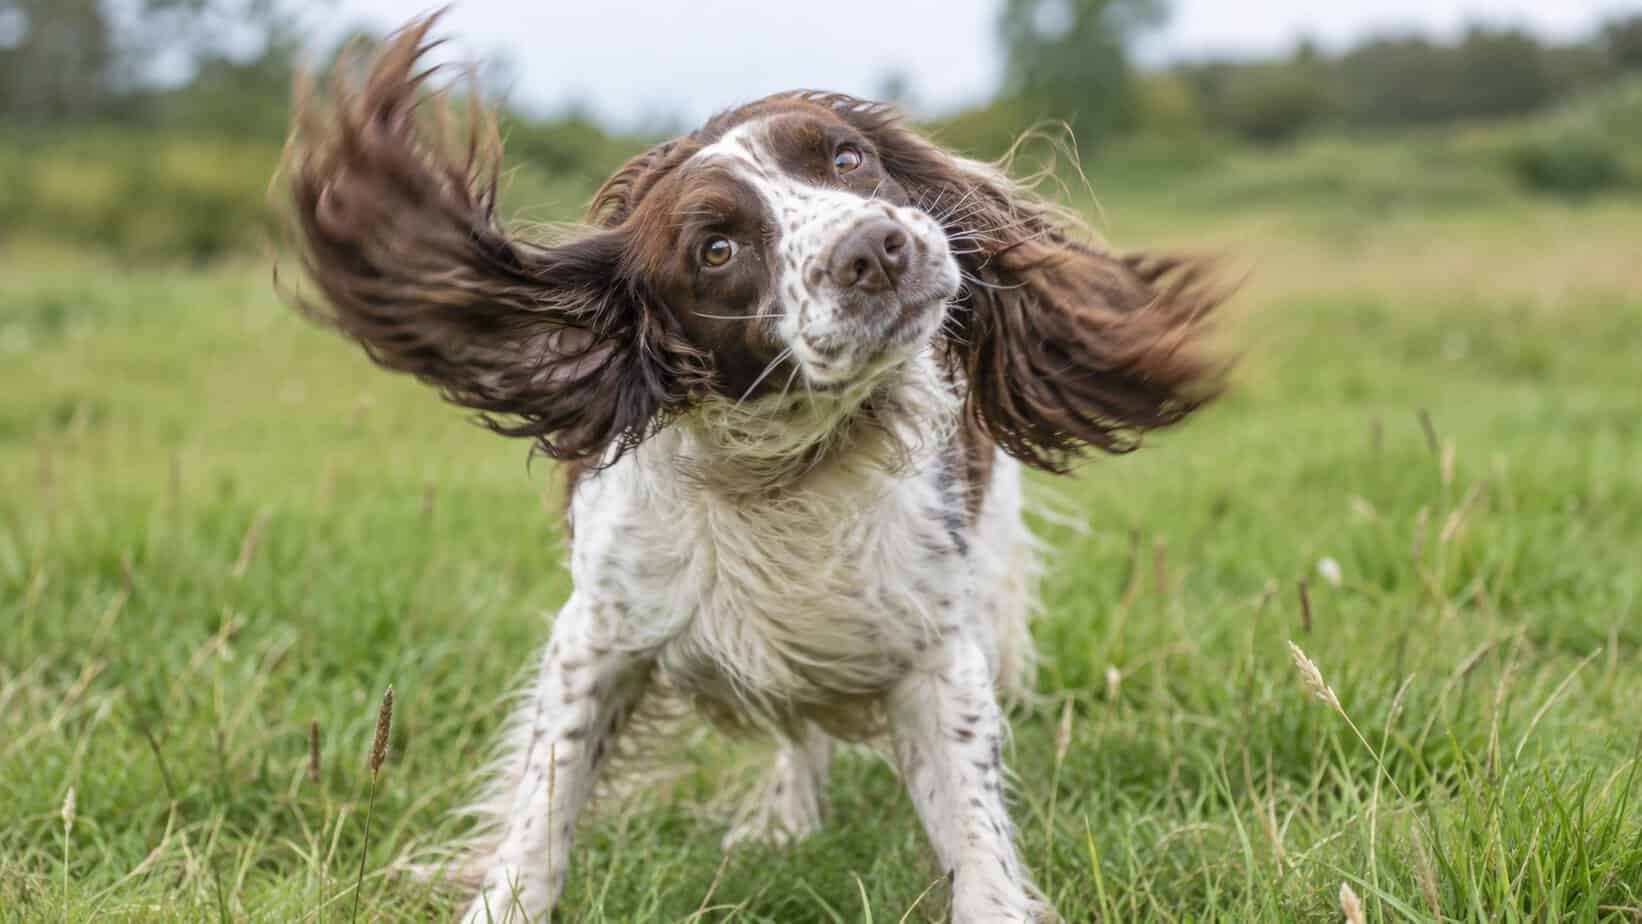
    Identifying an ear infection in your dog early on can save them from a lot of discomfort. Some common symptoms include excessive scratching of the ear, redness, swelling, discharge, odor, and unusual head shaking. In severe cases, your dog may also lose balance or experience hearing loss.

    The Impact of Ear Infections on Dogs

    Ear infections can cause significant discomfort and pain for your dog. They may become irritable, restless, and their quality of life may deteriorate. If left untreated, these infections can lead to severe complications, including ruptured eardrums and permanent hearing loss.

    Moreover, chronic ear infections can lead to the development of polyps or benign growths in the ear canal. In some cases, dogs may need surgery to remove these growths and restore normal ear function.

    Understanding the causes, symptoms, and potential impact of ear infections on your dog can help you take proactive steps in managing this condition. One such measure is the use of chlorhexidine wipes for dogs with ear infections. These handy wipes can combat the bacteria and yeast causing the infection, providing your pooch with the much-needed relief.
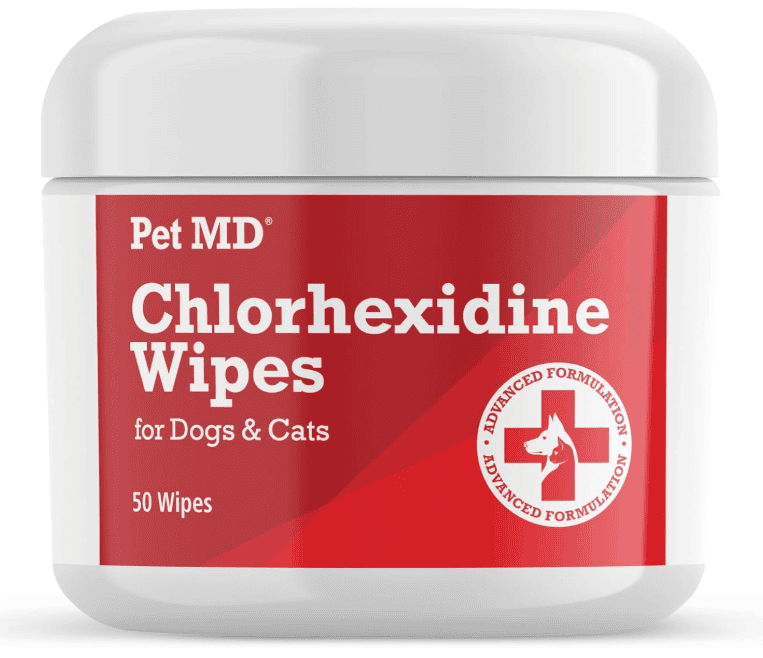
    chlorhexidine wipes for cleaning dogs ears

    In the following sections, we will explore how chlorhexidine wipes work against infections, their effectiveness in treating ear infections, and how to properly use them. We’ll also discuss alternative treatments and preventive measures for dog ear infections. So, stay tuned to learn more about keeping your dog’s ears healthy and infection-free!

    Role of Chlorhexidine Wipes in Combating Dog Ear Infections

    As a dedicated veterinarian, I’ve seen how challenging dealing with ear infections in dogs can be for pet parents. Thankfully, chlorhexidine wipes for dogs with ear infections are an effective solution. Let’s discuss how they work and their effectiveness.

    How Chlorhexidine Wipes Work Against Infections

    Chlorhexidine is a potent antiseptic used in many healthcare applications, including pet care. When applied to the skin, it effectively kills bacteria and yeast, the common culprits behind dog ear infections.

    Chlorhexidine wipes for dogs with ear infections are soaked in a solution of this antiseptic. When you wipe your dog’s ears with these, you’re applying the antiseptic directly to the infected area. This helps destroy the bacteria or yeast causing the infection.

    Effectiveness of Chlorhexidine Wipes in Treating Ear Infections

    • Chlorhexidine wipes are highly effective in treating minor to moderate ear infections. They can reduce symptoms like redness, itchiness, and discomfort.
    • They are convenient to use and less messy than ear drops or solutions. You can easily carry them around for quick cleanups and treatment on the go.
    • Chlorhexidine wipes are safe for most dogs. However, if your pet has a severe infection or a damaged eardrum, consult your vet before using these wipes.

    Remember, while chlorhexidine wipes for dogs with ear infections are a valuable tool, they are not a substitute for proper veterinary care. If your dog’s symptoms persist or worsen, don’t hesitate to seek professional help.

    As a trusted partner in your pet’s health, I assure you that with the right care and treatment, your furry friend can quickly bounce back from an ear infection. Chlorhexidine wipes can be a powerful ally in your pet care toolkit.
    treating ear infections with chlorhexidine wipes

    Using Chlorhexidine Wipes for Dog’s Ear Infections

    Dealing with a dog’s ear infection can be stressful for you and your furry friend. However, with the right tools, such as chlorhexidine wipes, you can manage the situation effectively. Here’s a step-by-step guide on how to use these wipes correctly.

    Step-by-step Guide to Using Chlorhexidine Wipes

    1. First, ensure your hands are clean to prevent introducing new bacteria into your dog’s ear. You might want to put on a pair of disposable gloves for extra protection.
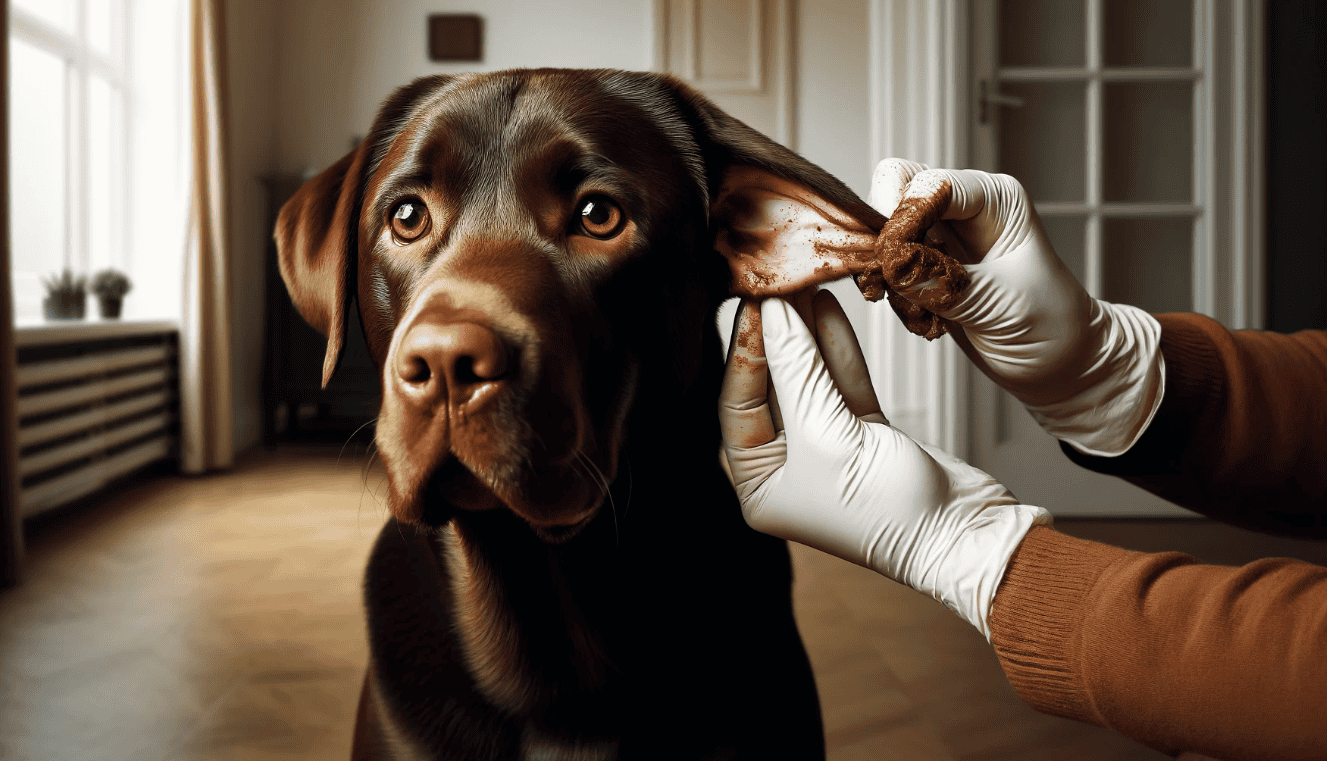
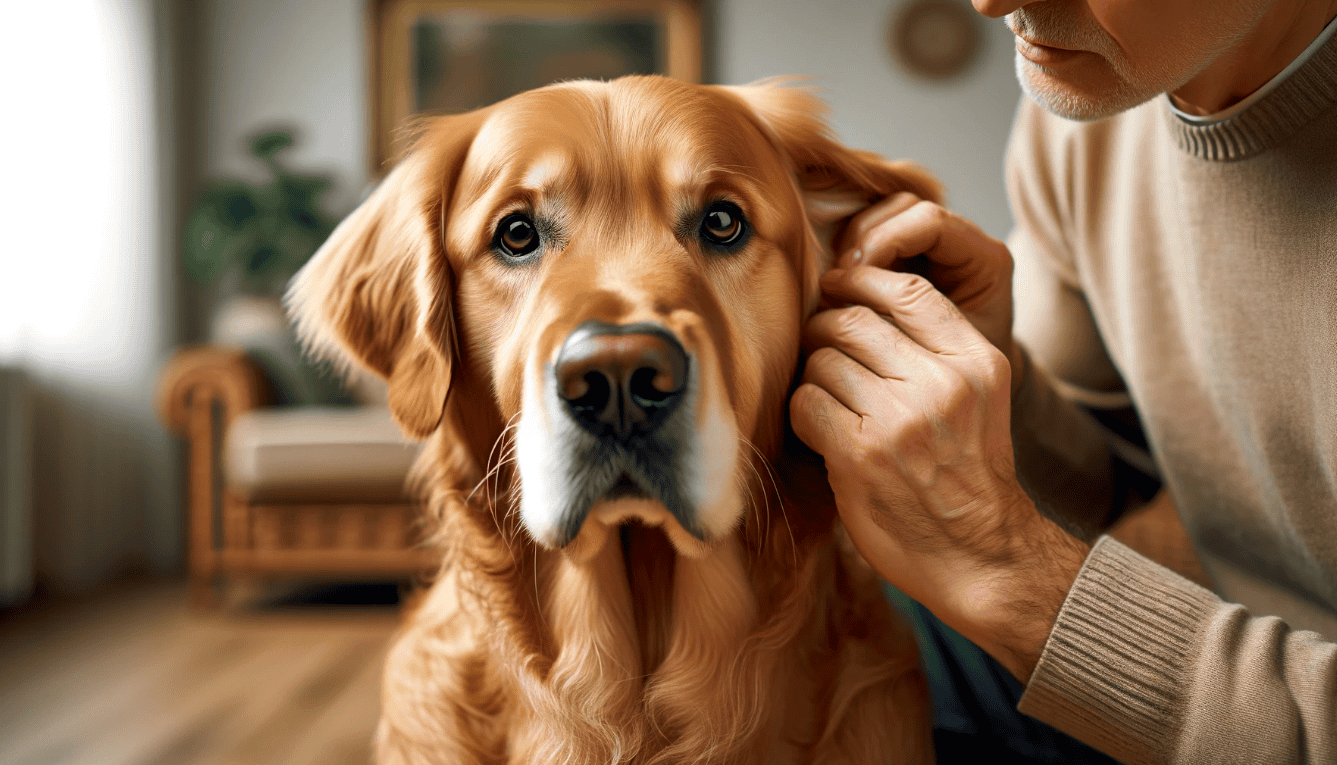
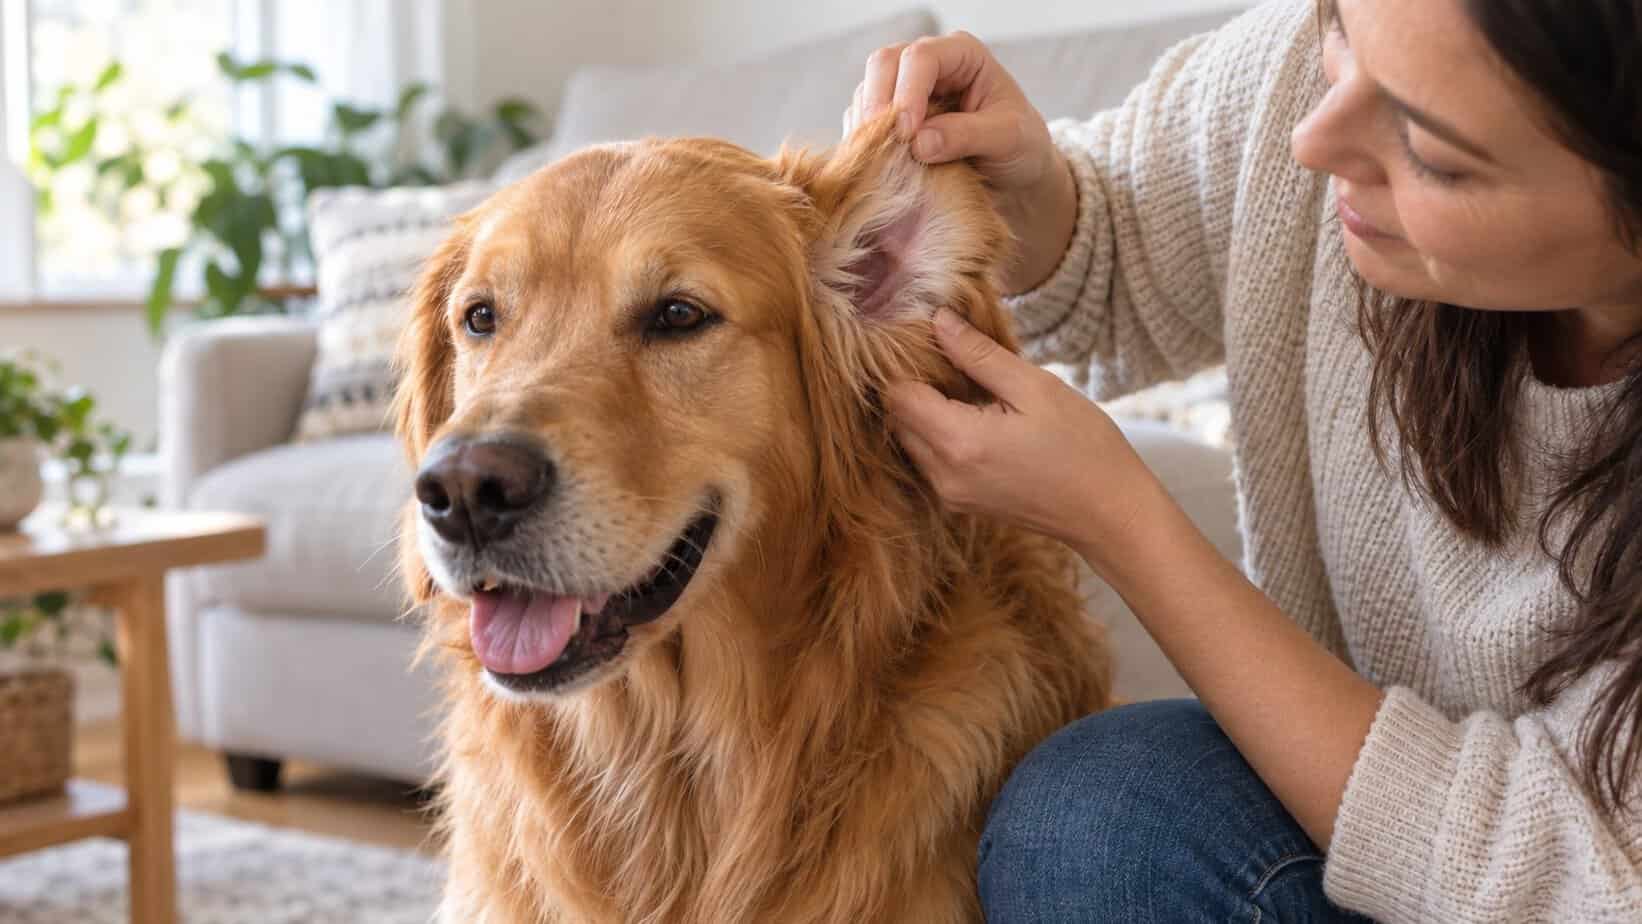
    2. Next, gently hold your dog’s ear flap (the pinna) to expose the ear canal. Be careful not to pull too hard as this might cause discomfort.
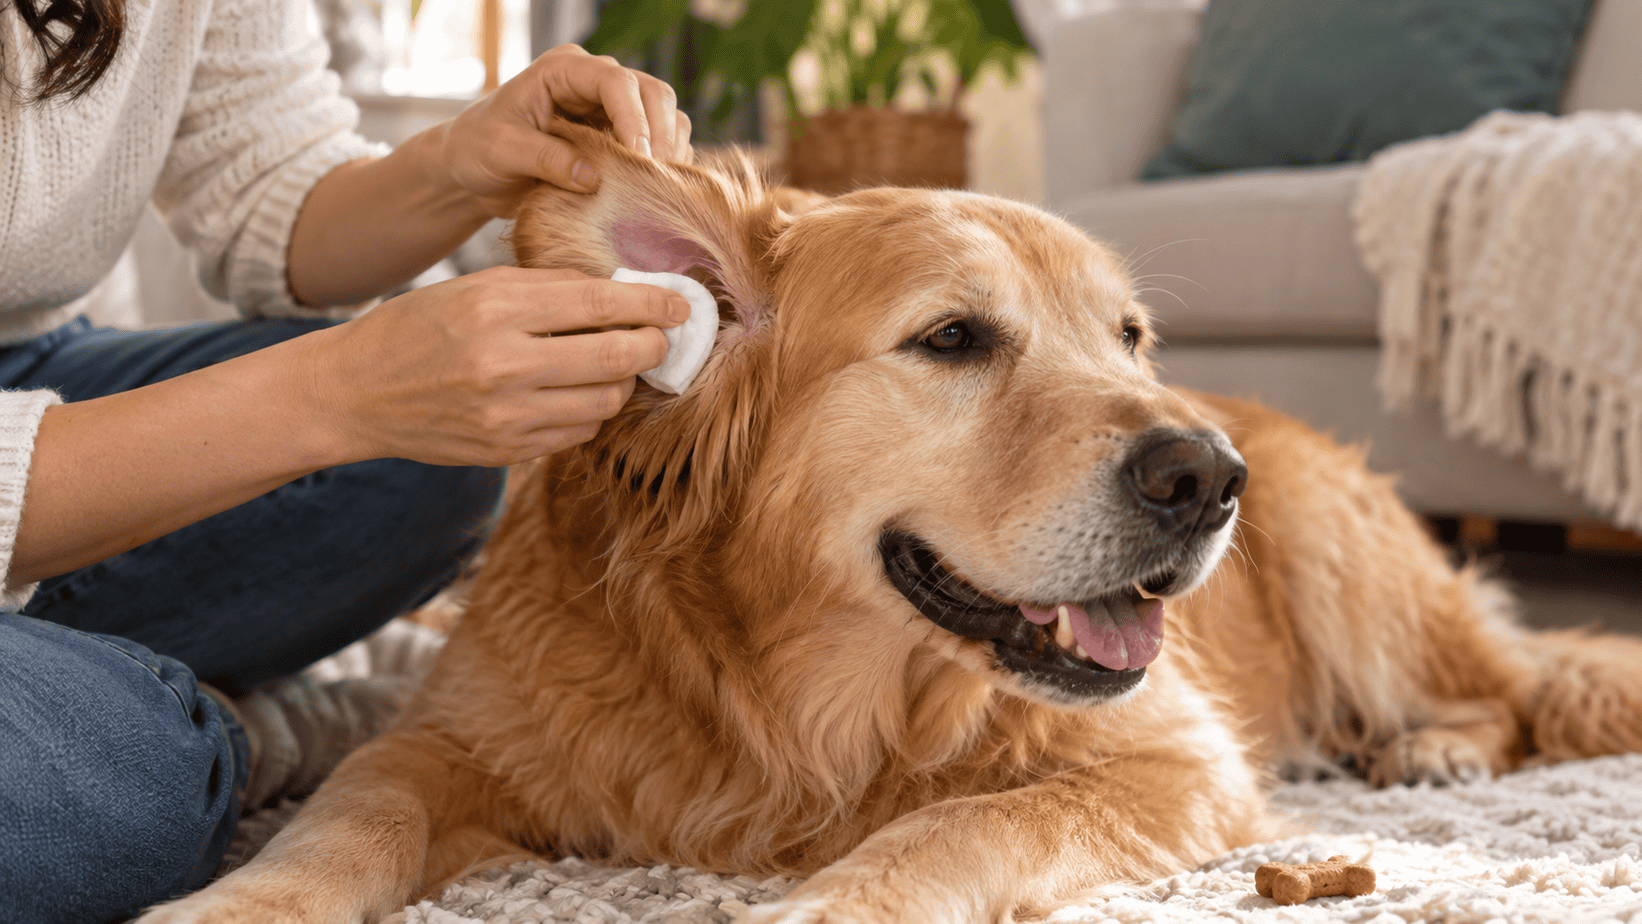
    3. Take a chlorhexidine wipe and gently clean the visible parts of your dog’s ear. Avoid inserting the wipe into the ear canal as this might push debris further in and cause more harm.
    4. After wiping, allow the ear to dry naturally. The chlorhexidine will continue to work even after you’ve finished wiping, killing bacteria and preventing infection.
    5. Finally, reward your dog with a treat or some affection. This will help them associate ear cleaning with positive experiences, making future cleanings easier.

    Precautions to Take When Using Chlorhexidine Wipes

    While chlorhexidine wipes are a great tool for combating ear infections, there are a few precautions to keep in mind.

    • Never use chlorhexidine wipes if your dog’s ear drum is ruptured or damaged. The chlorhexidine could potentially cause harm if it gets into the middle ear.
    • Don’t use the wipes as a replacement for veterinary care. If your dog’s ear infection persists or worsens, seek professional help immediately.
    • Avoid contact with your dog’s eyes. Chlorhexidine can cause irritation if it gets into the eyes.

    Remember, using chlorhexidine wipes correctly can make a big difference in the fight against your dog’s ear infection. But don’t hesitate to seek professional help if you’re unsure or if the infection doesn’t improve.

    List of Dog Breeds Prone to Ear Infections

    While any dog can develop an ear infection, certain breeds are more prone to them due to their physical characteristics. Understanding which breeds are at higher risk can help you take preventive measures and use chlorhexidine wipes for dogs with ear infections more effectively.

    Breeds with Higher Risk of Ear Infections

    • Cocker Spaniels: Their long, floppy ears create a warm, moist environment that’s ideal for bacteria and yeast.
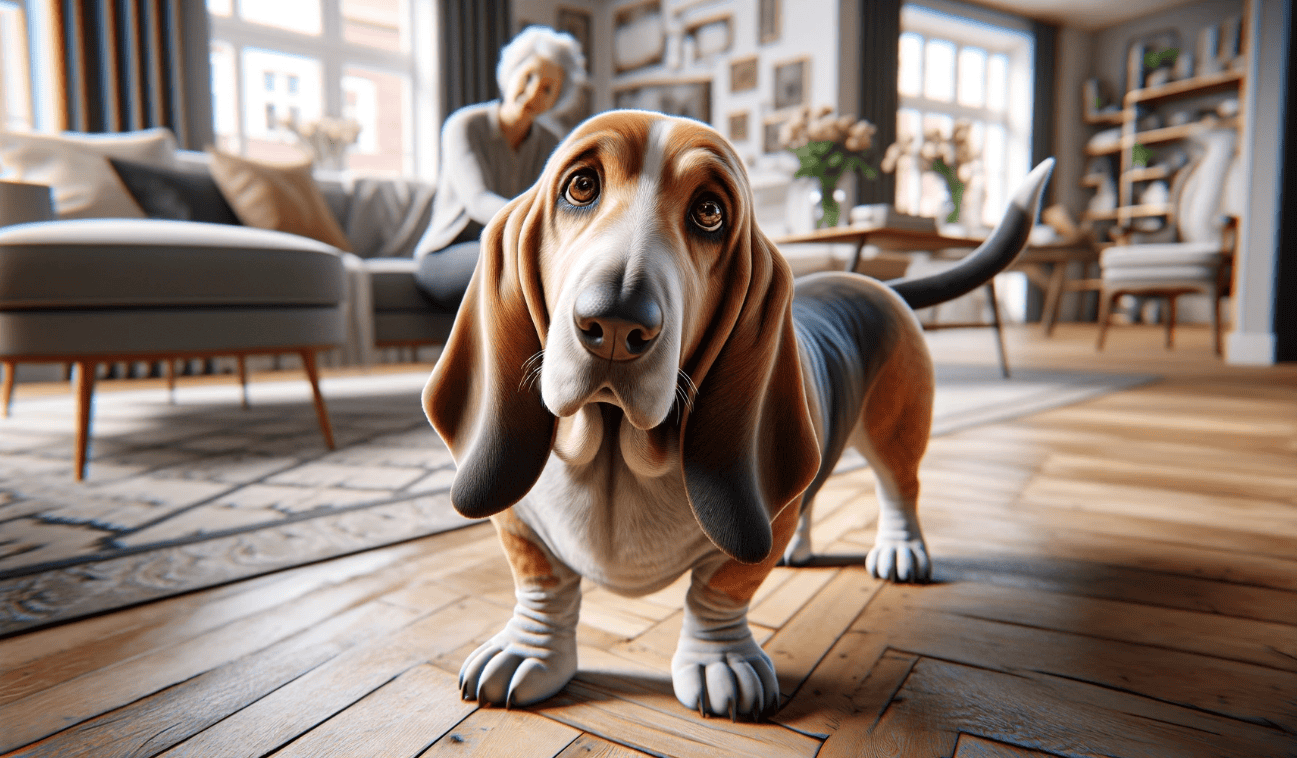
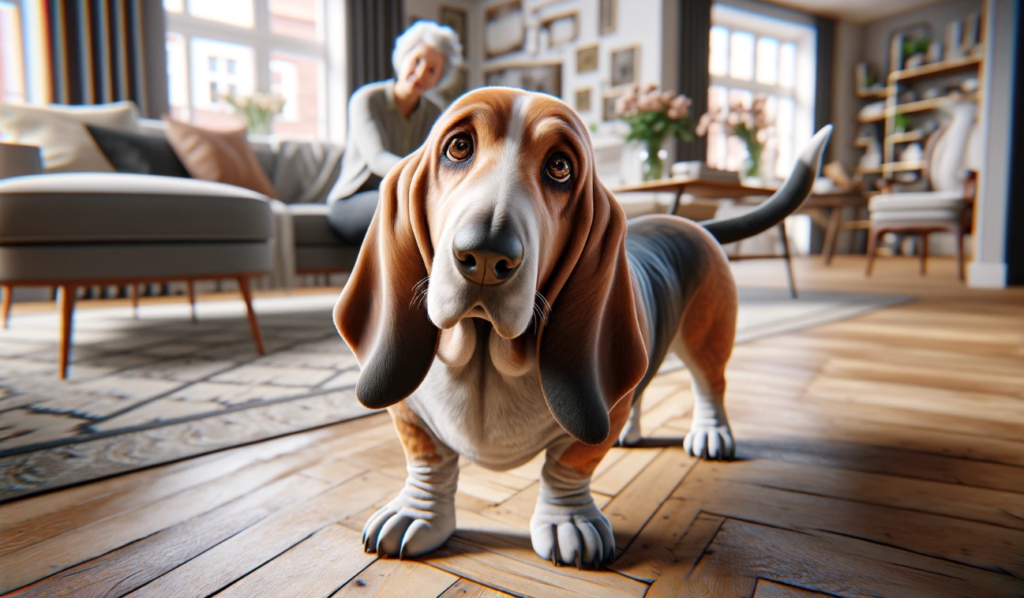
    • Basset Hounds: Similar to Cocker Spaniels, their droopy ears prevent air circulation, promoting infection.
    • Labrador Retrievers: They love water, but their ears don’t dry out thoroughly after swimming, leading to possible infections.
    • Poodles and Schnauzers: These breeds have hair growing in the ear canal, which can trap debris and moisture.
    • Bulldogs and Shar Peis: Their narrow ear canals can easily get blocked and infected.

    Specific Care for Breeds Prone to Ear Infections

    For breeds that are more susceptible to ear infections, regular ear care is essential. Here are some tips:

    • Regular Cleaning: Use chlorhexidine wipes to clean your dog’s ears regularly. This will help remove debris and prevent the growth of bacteria and yeast.
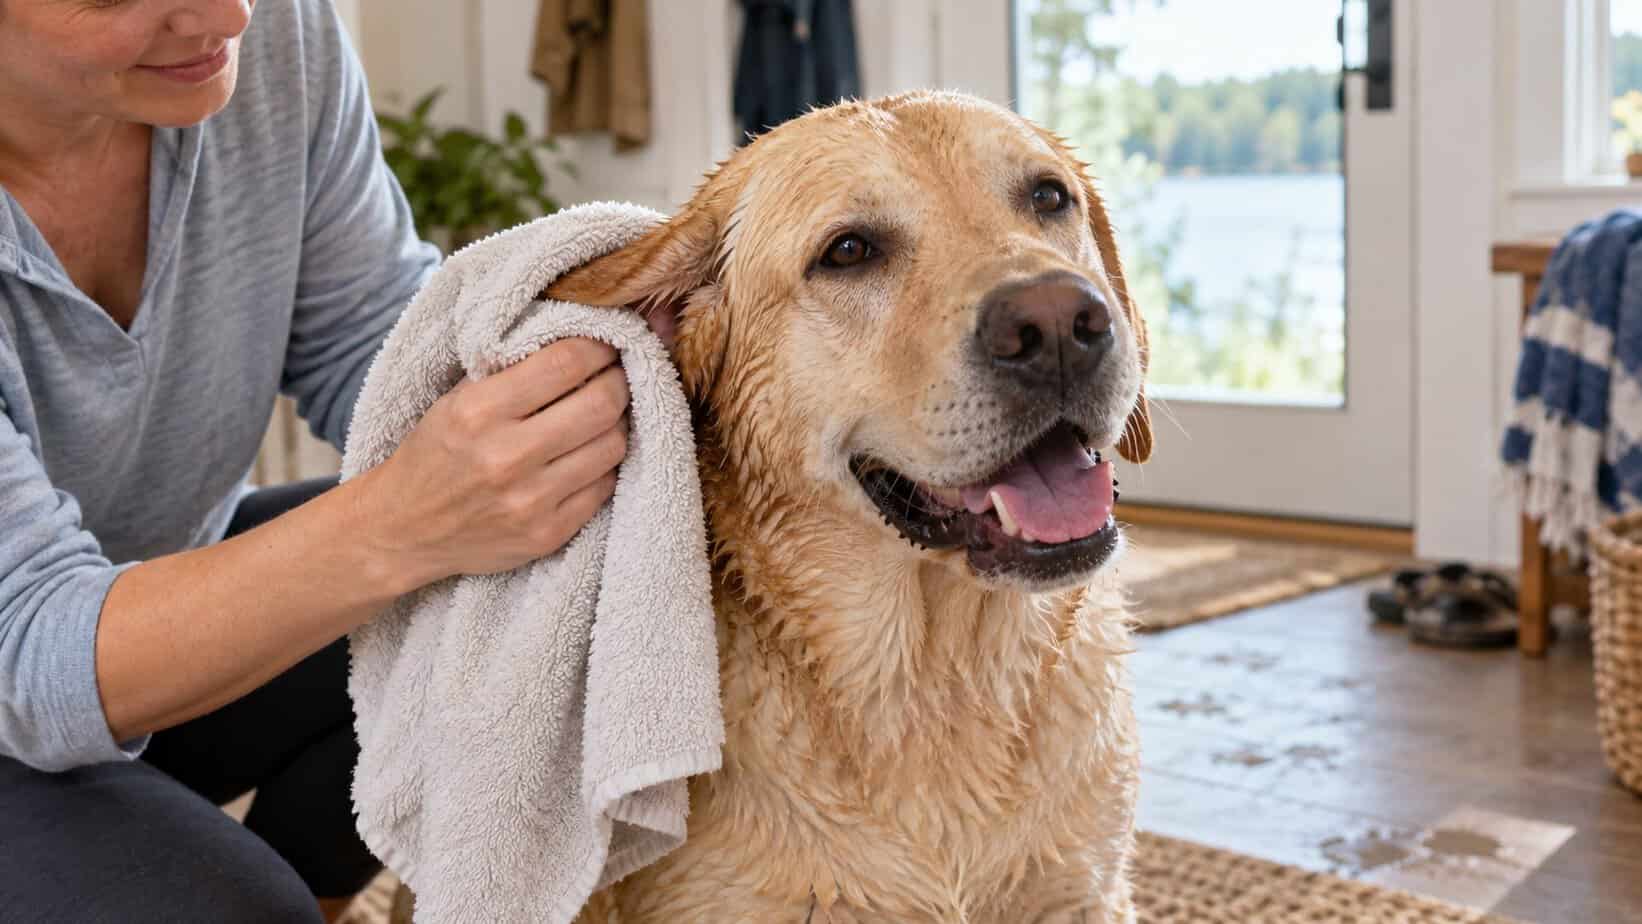
    • Proper Drying: After swimming or bathing, ensure your dog’s ears are thoroughly dried.
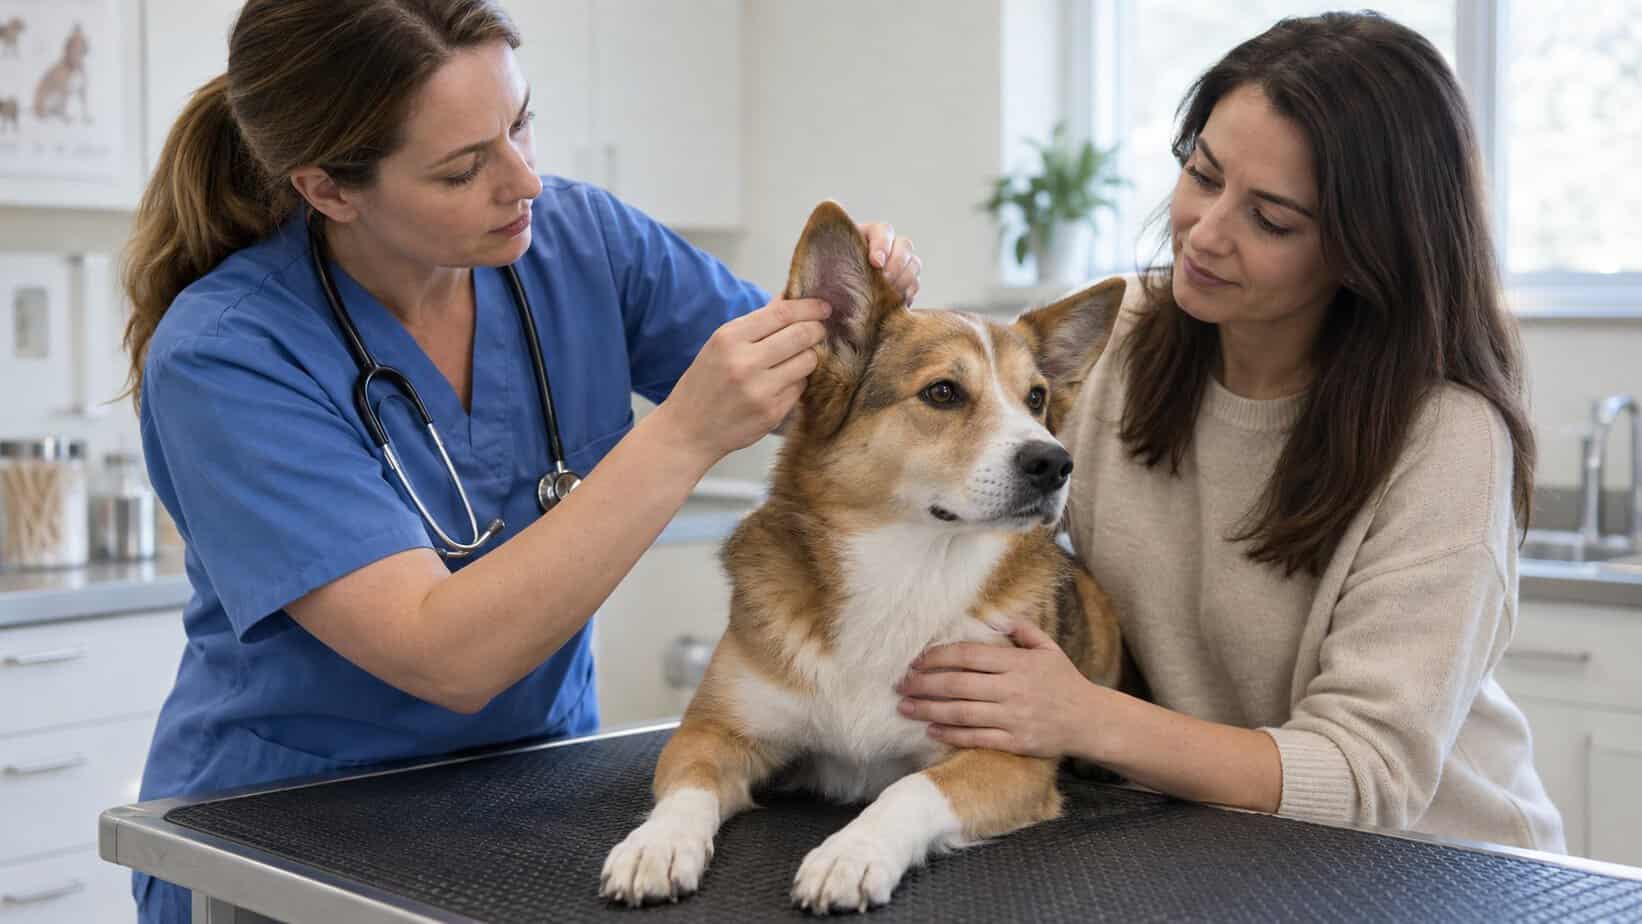
    • Regular Vet Check-ups: Regular vet check-ups can help catch early signs of an ear infection.
    • Avoid Moisture: Try to keep your dog’s ears as dry as possible. If your dog loves to swim, consider using a dog ear drying solution after each swim.
    • Proper Grooming: For breeds with hair in the ear canal, regular grooming can help prevent ear infections.

    Remember, ear infections can be painful for your furry friend. Regular use of chlorhexidine wipes for dogs with ear infections can go a long way in preventing this common issue. However, if your dog shows signs of an ear infection, such as head shaking, scratching, redness, or a foul smell from the ear, consult your vet immediately.
    chlorhexidine wipes for ear infections

    Alternative Treatments for Dog Ear Infections

    While chlorhexidine wipes for dogs with ear infections are a highly effective treatment, it’s good to know other options exist too. As a fellow dog parent, I understand the importance of finding the best solution for your furry friend.

    Other Medication Options for Dog Ear Infections

    Apart from chlorhexidine wipes, there are other medication options. Topical medications prescribed by a vet can be effective. These often include antibiotics to fight bacterial infections, antifungals for yeast infections, and corticosteroids to reduce inflammation.

    Oral medications can also be prescribed, especially for severe or chronic ear infections. These may include systemic antibiotics or antifungal drugs.

    Remember, it’s crucial to consult with a vet before starting any new medication regimen for your dog’s ear infection.

    Natural Remedies for Dog Ear Infections

    For those who prefer natural remedies, there are several options too. However, they should be used under veterinary supervision.

    • Aloe Vera: Known for its soothing and anti-inflammatory properties, aloe vera can help alleviate discomfort from an ear infection.
    • Apple Cider Vinegar: Diluted apple cider vinegar can help maintain a healthy pH balance in the ear, discouraging the growth of yeast and bacteria.
    • Coconut Oil: Its antifungal and antibacterial properties can help fight the causes of ear infections.

    These natural remedies can be a great supplement to the treatment plan prescribed by your vet. But remember, they should not replace a vet’s advice or prescribed medications.

    In the end, whether you choose chlorhexidine wipes for dogs with ear infections, other medications, or natural remedies, the goal is the same – to help your furry friend feel better as quickly as possible!
    wipes for dog ear infections

    Prevention of Dog Ear Infections

    Regular Cleaning and Maintenance of Dog Ears

    Prevention is always better than cure, especially when it comes to your furry friend’s health. Regular cleaning and maintenance of your dog’s ears can go a long way in preventing ear infections. Remember, our canine companions can’t clean their ears themselves, so they rely on us to help them out.

    Using chlorhexidine wipes for dogs with ear infections can be an effective preventive measure. These wipes are not just for treating existing infections, but they can also be used to keep your dog’s ears clean and free from bacteria and yeast that could cause infections.

    It’s advisable to clean your dog’s ears once a week. Be gentle; the inside of a dog’s ear is sensitive. Never insert anything into the ear canal. Instead, use the wipes to clean the outer ear and the accessible parts of the inner ear. Always follow the instructions on the product packaging.

    Lifestyle Changes to Prevent Dog Ear Infections

    Aside from regular ear cleaning, certain lifestyle changes can help prevent ear infections in dogs. Here are a few tips:

    • Diet: A healthy diet supports a strong immune system, which can help prevent infections. Consider a diet rich in Omega-3 fatty acids, which can reduce inflammation and promote overall health.
    • Regular Vet Check-ups: Regular visits to the vet can help detect potential issues early. Your vet can also advise you on the best ear care practices for your specific breed.
    • Keep Ears Dry: Moisture in the ears can create an environment conducive to bacterial growth. Try to keep your dog’s ears dry, especially after baths or swimming.
    • Avoid Allergens: Allergies can lead to ear infections in dogs. If your dog is prone to allergies, try to identify and avoid the allergens. This might require help from your vet.

    Remember, every dog is unique. What works for one might not work for another. The most important thing is to pay attention to your dog’s behavior and overall health. If you notice any signs of discomfort or changes in behavior, it’s best to consult with a vet.

    Preventing ear infections can contribute significantly to your dog’s quality of life. So, don’t forget those chlorhexidine wipes, and keep up with your regular ear cleaning routine. Your dog will thank you!

    Chlorhexidine Wipes: Conclusion

    In wrapping up our discussion on chlorhexidine wipes for dogs with ear infections, it’s clear that these wipes are a beneficial tool in the fight against this common canine ailment. They serve as an effective antibacterial solution, and their ease of use makes them a go-to choice for many dog parents.

    Chlorhexidine wipes are not just a treatment, but also a preventative measure. Regular use can help keep your dog’s ears clean and free from the bacteria and yeast that cause infections. This is especially important for breeds that are more prone to ear issues.

    Remember, though, that while these wipes are extremely useful, they should not replace regular veterinary check-ups. Your vet can provide a comprehensive health assessment and guide you on the best care regimen for your dog’s unique needs.

    Managing and preventing ear infections in dogs is a responsibility that comes with being a pet parent, but it doesn’t have to be a daunting task. With products like chlorhexidine wipes, you can tackle this problem head-on and ensure your furry friend stays comfortable and infection-free.

    At the end of the day, the health and happiness of our dogs are what matters most. So, whether it’s through the use of chlorhexidine wipes or other preventative measures, let’s commit to keeping those adorable ears healthy. To all the dog parents out there, here’s to fewer ear infections and more joyful, carefree days with our beloved pets!

    Remember, an ounce of prevention is worth a pound of cure. Keep those ears clean, and your dog will thank you for it!

    Frequently Asked Questions

    Q1: How often should I use Chlorhexidine Wipes on my dog’s ears?

    A: It’s recommended to use Chlorhexidine Wipes once or twice a day for the best results. However, it’s always best to consult with your veterinarian for the most accurate advice.

    Q2: Are Chlorhexidine Wipes safe for all dogs?

    A: Yes, Chlorhexidine Wipes are generally safe for all dogs. However, if your dog has a specific allergy or sensitivity, it’s best to consult with your veterinarian before use.

    Q3: Can Chlorhexidine Wipes be used on other parts of my dog’s body?

    A: Yes, Chlorhexidine Wipes can be used on other parts of your dog’s body. They are designed to combat bacterial, yeast, and fungal infections, making them versatile for various uses.

    Q4: How long does it take to see results after using Chlorhexidine Wipes?

    A: The time it takes to see results can vary depending on the severity of the infection. Some pet owners notice improvements within a few days, while others may take a couple of weeks. Always consult with your vet if you’re concerned about your pet’s condition.

    Q5: Can I use Chlorhexidine Wipes on my cat?

    A: While Chlorhexidine Wipes are generally safe for use on cats, it’s always best to consult with your veterinarian before use to ensure it’s the right treatment for your pet’s specific needs.

    A note about your dog’s health

    This article provides general education and does not replace an examination, diagnosis, or individualized advice from your veterinarian. Contact a veterinary professional if you are concerned about your dog’s symptoms.

    Lindsie Parks B.S., CRDNS Avatar

    ABOUT THE AUTHOR

  • Brown Discharge in Dog Ears: Infection Alert!

    Brown Discharge in Dog Ears: Infection Alert!

    Hi there, fellow dog parent! I’m Dr. Candy, your friendly holistic veterinarian. Today, we’re going to tackle a topic that might have you a bit worried – brown discharge in your dog’s ears. It’s quite a common issue and often a sign of an ear infection. But don’t fret, knowledge is power, and I’m here to help you understand what’s happening and how to manage it.

    Ear infections in dogs can be tricky. They’re often hidden away, causing discomfort and pain to our furry friends without us even realizing it. One of the tell-tale signs is a brown discharge that you might notice when giving your pup a cuddle or a scratch behind the ears. So, let’s discuss the causes, symptoms, and, most importantly, the solutions for this common canine ailment.

    brown discharge in your dog's ears

    As a loving pet parent, it’s unsettling to see your dog in discomfort or pain. One common sign of trouble is brown discharge from your dog’s ears, often indicating an ear infection. Let’s explore the usual culprits behind this worrying symptom.

    Ear Infections in Dogs: A Common Culprit

    Ear infections are one of the most common causes of brown discharge in a dog’s ear. This condition, known as otitis externa, can be triggered by bacteria, yeast, or even mites. The warm and moist environment of a dog’s ear canal can provide the perfect breeding ground for these microorganisms, leading to an infection. The infection then results in inflammation and the production of a brown, often foul-smelling, discharge.

    Other Possible Causes: Allergies, Foreign Bodies, and More

    While ear infections are a leading cause, they aren’t the only reason your dog might have brown ear discharge. Allergies, for instance, are another common cause. Dogs can be allergic to a range of substances, from certain foods to environmental triggers like pollen or dust mites. These allergies can result in inflammation and discharge in the ears.

    Foreign bodies, such as grass seeds or ticks, can also lead to brown discharge if they become lodged in your dog’s ear. In addition to the discharge, foreign bodies can cause considerable discomfort and may lead to secondary infections if not promptly addressed.

    Finally, certain underlying health conditions, such as hormonal imbalances or immune system disorders, can make a dog more prone to ear problems, including brown discharge. Regular vet check-ups can help detect these conditions early and manage them effectively.

    Understanding the potential causes of brown discharge in your dog’s ears is the first step towards providing the necessary care and treatment. Remember, early detection and intervention can make a significant difference in your dog’s comfort and overall health. So, keep a watchful eye on your furry friend’s ears and don’t hesitate to seek veterinary help if you notice any abnormalities.

    Specific Breeds Prone to Ear Discharge and Infections

    As a veterinarian, I often get asked if certain breeds are more prone to brown discharge dog ear infection. The answer is yes. Certain breeds’ anatomical features make them more susceptible to ear infections and brown discharge.

    Listicle: Top Dog Breeds Vulnerable to Ear Infections

    Here are a few breeds that are more likely to experience ear infections:

    • Cocker Spaniels: With their long, floppy ears, Cocker Spaniels are highly prone to ear infections. Their ears create a dark, moist environment perfect for bacteria and yeast growth.
    • Basset Hounds: Similar to Cocker Spaniels, Basset Hounds have long, droopy ears that are prone to infections.
    • Labrador Retrievers: Labs love water, but their water-loving nature can lead to moisture in the ears and potential infections.
    • Poodles: Poodles have hair growing in their ear canals which can trap debris and cause infections.
    • Bulldogs: Bulldogs, with their narrow ear canals, often struggle with ear infections.

    Why Some Breeds are More Susceptible than Others

    As we’ve seen, the anatomy of a dog’s ear plays a significant role in the likelihood of a brown discharge dog ear infection. Breeds with floppy ears or hair in their ear canals are more prone to infections due to reduced air circulation and the potential for moisture and debris to get trapped.

    The ear canal’s shape and size also matter. Dogs with narrow or unusually shaped ear canals may have more difficulty naturally clearing debris, which can lead to infections.

    Finally, some breeds may have a higher risk due to genetic predispositions to allergies or skin conditions. These can result in inflammation in the ears, making them more susceptible to infections.

    As a dog parent, it’s important to be aware of your breed’s susceptibility to ear infections. Regular ear checks and cleanings can help prevent issues like brown discharge dog ear infection.

    Symptoms Accompanying Brown Discharge in Dog Ears

    Physical Signs: What to Look for in Your Dog’s Ears

    When it comes to your dog’s health, being vigilant is crucial. One of the first signs of an ear infection is a brown discharge. It may have a foul smell and might be accompanied by redness or swelling.

    Here’s what to look out for:

    • A dark, coffee-colored discharge in the ear canal
    • Redness or swelling in the ear
    • Your dog constantly shaking their head or scratching their ear
    • A bad smell coming from the ear

    Behavioral Changes: Unusual Actions That May Indicate an Ear Problem

    Aside from physical symptoms, your dog’s behavior can also give you clues about their health. Dogs with ear infections often display certain behavioral changes due to discomfort or pain.

    Keep an eye out for these signs:

    • Your dog seems unusually irritable or agitated
    • They are constantly tilting their head to one side
    • They are less active than usual or seem to be in pain
    • They are excessively scratching or pawing at their ear

    It’s crucial to remember that these behaviors are not just ‘quirks’ – they are your dog’s way of communicating their discomfort. If you notice any of these signs, especially if they are accompanied by a brown discharge, it’s time to consult a vet.

    The longer an ear infection is left untreated, the worse it can get. It can even lead to severe complications like hearing loss. So, never ignore these signs. Your furry friend is relying on you to help them get the care they need.

    brown discharge dog ear infection

    Step-by-Step Guide to Cleaning Dog Ears

    If your furry friend is suffering from a brown discharge in their ears, it’s essential to know how to clean their ears safely at home. However, always remember that home care should not substitute professional veterinary care, especially in severe cases.

    Here’s a simple, step-by-step guide to help you clean your dog’s ears without causing discomfort or further complications:

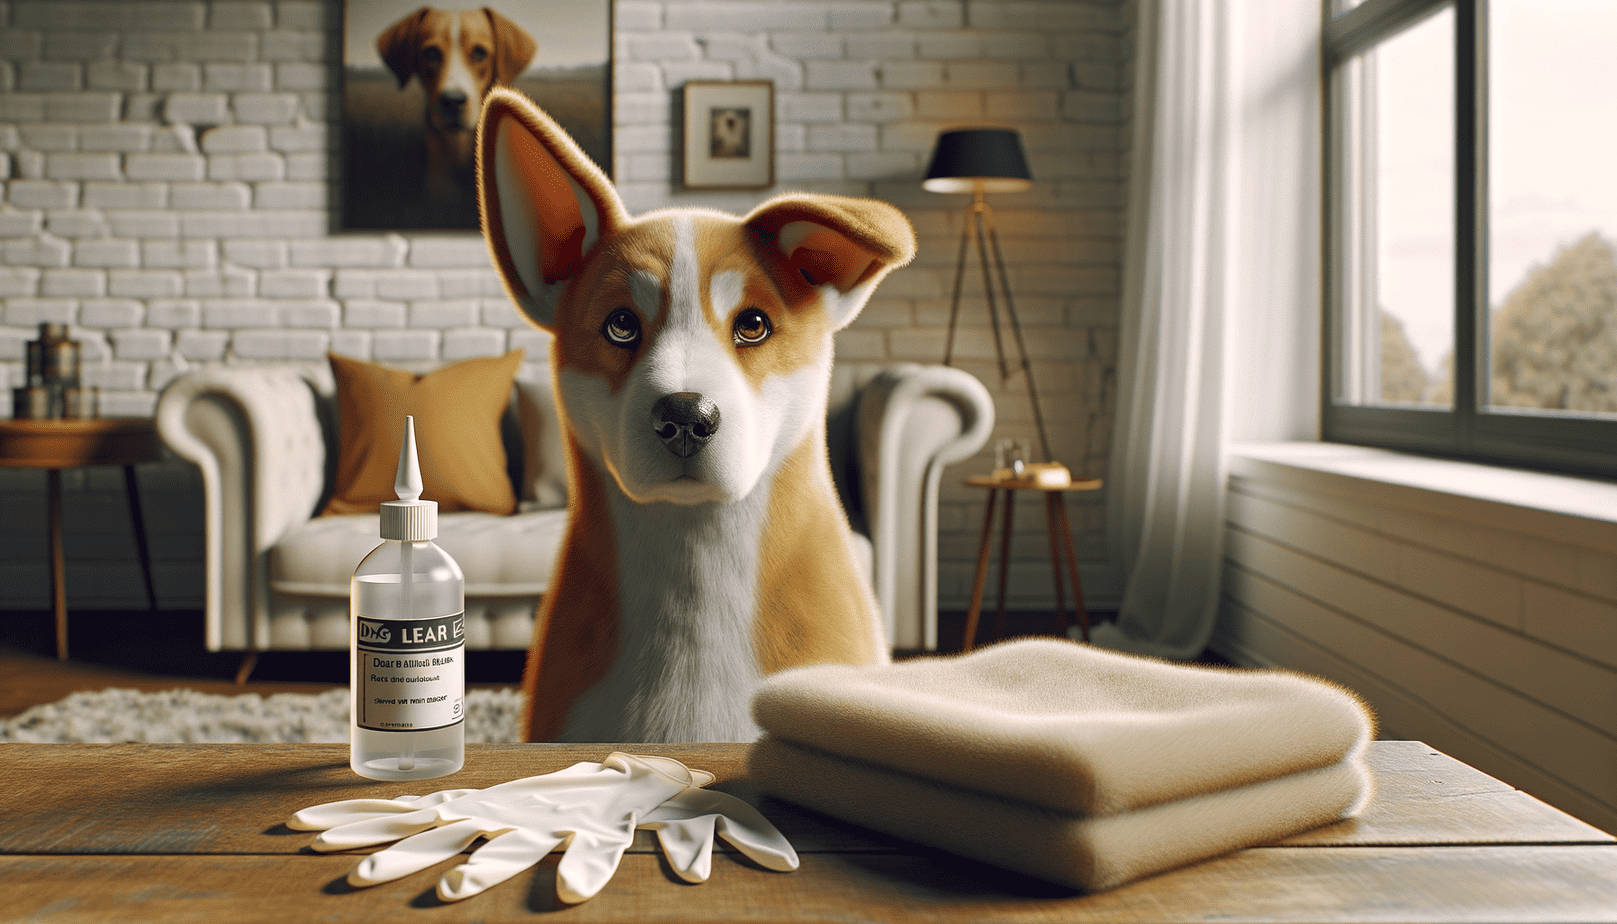
    1. Preparation: Gather your supplies. You’ll need a good quality canine ear cleaning solution, cotton balls or gauze, and treats for rewarding your dog afterward.
    2. Positioning: Ensure your dog is comfortable. It’s best to do this when they’re relaxed, perhaps after a walk or meal.
    3. Application: Without inserting the nozzle into the ear canal, gently squeeze the cleaning solution into your dog’s ear. The amount will depend on your dog’s size and the extent of the discharge.
    4. Massage: Very gently massage the base of your dog’s ear for about 20-30 seconds. You should hear a squishing sound, which helps to loosen the debris inside.
    5. Cleaning: Using a cotton ball or gauze, gently wipe the inside of the ear flap and the outer part of the ear canal. Never use a Q-tip or go deeper than your first knuckle into the ear canal.
    6. Repeating: Repeat the process in the other ear, if necessary. Always use fresh cotton balls or gauze for each ear.
    7. Rewarding: Give your dog a treat and lots of praise to end the cleaning session on a positive note.

    Essential Tools for At-Home Dog Ear Cleaning

    When it comes to cleaning your dog’s ears at home, having the right tools on hand can make the process much easier and safer. Here are some essentials:

    • Canine Ear Cleaning Solution: This is a must-have for cleaning your dog’s ears. It’s formulated to safely clean the ears without causing irritation. Avoid using water or vinegar, as these can exacerbate an existing infection.
    • Cotton Balls or Gauze: These are gentle on your dog’s ears and great for wiping away discharge and debris. Avoid using Q-tips, as they can push debris further into the ear canal and potentially cause damage.
    • Treats: Cleaning the ears can be an uncomfortable experience for your dog. Having their favorite treats on hand can help make the process more enjoyable for them.

    Remember, while cleaning your dog’s ears at home can help manage symptoms, it’s not a cure for an ear infection. If your dog is showing signs of an ear infection, such as brown discharge, it’s important to seek veterinary help promptly to prevent further complications.

    When to Seek Veterinary Help for Brown Discharge in Dog Ears

    As a loving dog parent, it’s crucial to know when home care isn’t enough and it’s time to seek professional help. While cleaning your dog’s ears regularly and keeping an eye on their behavior can help prevent many issues, some situations require the expertise of a veterinarian.

    Recognizing When Home Care Isn’t Enough

    If you’ve noticed your dog shaking their head more than usual, scratching their ears, or if there’s a persistent brown discharge despite your cleaning efforts, these are signs that it’s time to seek veterinary help. Additional symptoms might include a foul smell emanating from the ears or if the dog appears to be in pain when you touch their ears.

    Remember, early detection and treatment of ear infections can prevent more serious complications, so it’s essential to act promptly when you notice these signs.

    Potential Risks and Complications of Untreated Ear Infections

    Leaving a brown discharge dog ear infection untreated can lead to severe complications. The infection can spread to the inner ear and affect your dog’s balance. In severe cases, it can even lead to hearing loss.

    • Otitis media and interna: These are infections of the middle and inner ear, which can occur if an outer ear infection is left untreated. Symptoms can include a head tilt, difficulty walking, and even paralysis of the facial nerve in severe cases.
    • Proliferative changes: Chronic infections can cause changes in the ear canal, making it more difficult to treat future infections. The ear canal can become narrowed or develop polyps.
    • Aural hematomas: This is a condition where blood collects in the space between the skin and cartilage of the dog’s ear. It’s often caused by excessive shaking or scratching due to an ear infection.

    As you can see, a brown discharge in your dog’s ear is not something to ignore. It’s more than just a minor annoyance for your dog—it could be a sign of a serious health problem. So, don’t hesitate to consult your vet if you’re in doubt. They can provide a proper diagnosis and treatment plan to help your furry friend feel better as soon as possible.

    brown discharge dogs ear infection

    Treatment Options for Ear Infections in Dogs

    When your dog has a brown discharge in their ears, it is crucial to seek treatment immediately. Infections can escalate, causing discomfort and potentially serious complications for your furry friend. Here are some common treatments for ear infections in dogs.

    Common Medications Used in Treating Dog Ear Infections

    Typically, antibiotics, antifungals, and steroids are the first lines of treatment for ear infections. These medications may be in the form of ear drops, pills, or injections.

    • Antibiotics: These are used to treat bacterial infections. They are often administered as ear drops, but in severe cases, they may be given orally or through injections.
    • Antifungals: If the infection is caused by yeast, antifungal medication will be prescribed. These can also come as ear drops or oral medication.
    • Steroids: Steroids are used to reduce inflammation and swelling in the ear, providing relief from pain and discomfort.

    Remember, it’s crucial to follow your vet’s instructions closely when giving medication. Don’t stop the treatment early, even if your dog seems to be feeling better. The infection could still be present, and stopping treatment prematurely could lead to a resurgence.

    Surgical and Other Advanced Treatment Options

    In some cases, medication may not be enough to treat the ear infection, particularly if the infection has reached an advanced stage or if there are underlying issues such as polyps or tumors. In such situations, surgery may be recommended.

    • Total Ear Canal Ablation (TECA): This is a surgical procedure where the entire ear canal is removed. It’s typically reserved for severe, chronic infections that haven’t responded to other treatments.
    • Lateral Ear Canal Resection (LECR): This less invasive procedure involves removing part of the ear canal to improve drainage and airflow.
    • Veterinary Laser Therapy: This is a non-invasive treatment option that uses light energy to promote healing and reduce inflammation. It can be particularly useful for dogs with recurring ear infections.

    Remember, every dog is unique, and what works for one may not work for another. It’s essential to consult with your vet to determine the best course of treatment for your dog’s ear infection. Prompt treatment can help your furry friend return to their playful, happy self in no time.

    Tips for Preventing Ear Infections and Brown Discharge in Dogs

    Preventing ear infections and brown discharge in your furry friend is crucial. Not only can it save your dog from discomfort, but it can also save you from expensive vet bills. Here are some helpful tips:

    Regular Ear Checks and Cleaning: A Crucial Preventive Measure

    Regularly checking and cleaning your dog’s ears is an essential step in preventing brown discharge dog ear infection. This routine helps to keep the ears dry and clean, reducing the chance of infection. It’s important to be gentle during cleaning to avoid causing any damage. If you notice any signs of infection, such as redness, swelling, or bad odor, contact your vet immediately.

    Dietary and Lifestyle Changes for Ear Infection Prevention

    Believe it or not, your dog’s diet can play a significant role in preventing ear infections. Foods that are high in sugar and carbohydrates can encourage yeast growth, leading to infections. Opt for a balanced diet rich in lean proteins, fruits, and vegetables.

    Regular exercise and maintaining a healthy weight can also help keep ear infections at bay. Obesity can lead to numerous health issues, including ear infections. Keeping your dog active and at a healthy weight can significantly reduce the risk.

    Lastly, remember to keep your dog’s ears dry, especially after swimming or bathing. Excess moisture creates an ideal environment for bacteria and yeast to thrive, leading to infections.

    Ear infections can be painful and distressing for your dog, but with regular care and prevention, you can keep your dog’s ears healthy and infection-free.

    Remember, your dog’s health and comfort are paramount. Regular ear checks, a balanced diet, and a healthy lifestyle are key in preventing ear infections. By following these simple preventive measures, you can ensure your dog’s ears remain clean, healthy, and free from brown discharge and infection. Your dog will thank you!

    Frequently Asked Questions

    1. What causes brown discharge in dog ears?

    The brown discharge in a dog’s ear is often a sign of an ear infection, which can be caused by bacteria, yeast, or ear mites. It can also be a sign of allergies or a foreign body in the ear.

    2. How can I tell if my dog has an ear infection?

    Signs of an ear infection in dogs include scratching of the ear or area around the ear, brown, yellow, or bloody discharge, odor in the ear, redness, swelling, crusted or scaly skin on or near the ear, hair loss around the ear, and changes in behavior such as depression or irritability.

    3. How is a dog ear infection treated?

    Treatment for a dog ear infection depends on the cause. It can include cleaning the ear, applying topical medications, giving oral medications, and in severe cases, surgery. Always consult with a vet for the best treatment options.

    4. Can I prevent my dog from getting an ear infection?

    Regular cleaning of your dog’s ears can help prevent infections. Also, keeping your dog’s ears dry, especially after swimming or baths, can help prevent the growth of bacteria and yeast. Regular vet check-ups can also help catch any potential issues early.

    5. When should I take my dog to the vet for an ear infection?

    If your dog is showing signs of an ear infection such as brown discharge, redness, swelling, or changes in behavior, it’s best to take them to the vet as soon as possible. Early treatment can help prevent more serious complications.

    A note about your dog’s health

    This article provides general education and does not replace an examination, diagnosis, or individualized advice from your veterinarian. Contact a veterinary professional if you are concerned about your dog’s symptoms.

    Lindsie Parks B.S., CRDNS Avatar

    ABOUT THE AUTHOR

  • 2024’s Best Ear Drops for Dog Ear Infections

    2024’s Best Ear Drops for Dog Ear Infections

    As a holistic veterinarian, I understand the worry and concern that comes with seeing your furry friend in discomfort. An ear infection can be a painful ordeal for your pooch, but the good news is, it’s treatable. If you’re on the hunt for the best ear drops for dog ear infection, you’ve come to the right place. In this article, we’ll explore top-rated products, essential ingredients, and proper application methods to help your pet get back to their playful self in no time.

    best ear drops for dog ear infection

    Understanding Dog Ear Infections

    Imagine the discomfort your beloved pet feels when battling a relentless ear infection. As a holistic veterinarian, I’ve seen countless cases of dog ear infections and believe me, it’s no fun for your furry friend. To effectively treat this condition, you need to understand its causes and symptoms.

    Causes of Dog Ear Infections

    Ear infections in dogs are often caused by bacteria, yeast, or both. These microorganisms thrive in warm, moist environments – conditions commonly found in a dog’s ear canal. Various factors can contribute to an overgrowth of these microbes, leading to infection. These include:

    • Excessive moisture, which can occur after swimming or bathing.
    • Ear mites, a common parasite in dogs.
    • Allergies to food or environmental triggers like pollen.
    • Autoimmune disorders.
    • Foreign bodies in the ear, such as grass seeds.

    Symptoms of Dog Ear Infections

    Recognizing the symptoms of an ear infection is the first step towards getting your dog the help they need. While symptoms can vary, common signs include:

    • Scratching or pawing at the affected ear.
    • Redness and swelling of the ear canal.
    • A strong, unpleasant odor coming from the ear.
    • Discharge, which can be yellow, brown, or bloody.
    • Head shaking or tilting.
    • Loss of balance or hearing.

    If you notice any of these symptoms, it’s crucial to seek veterinary attention immediately. Early intervention can prevent complications and help your pet recover faster. Remember, choosing the best ear drops for a dog ear infection can make a world of difference in treatment. It’s not just about easing symptoms, but about addressing the root cause of the infection and preventing recurrence.

    best meds for dog ear infections

    Top Breeds Prone to Ear Infections

    As a seasoned veterinarian, I have noticed that certain dog breeds are more susceptible to ear infections than others. It is essential to understand this as a pet parent so you can take proactive measures to prevent these painful conditions. If you’re keen on finding the best ear drops for dog ear infection, it’s crucial to know if your furry friend belongs to a breed that’s prone to such issues.

    List of Specific Breeds Prone to Ear Infections

    • Cocker Spaniels: Known for their long, floppy ears, Cocker Spaniels are highly prone to ear infections due to limited air circulation in the ear canal.
    • Basset Hounds: Similar to Cocker Spaniels, the anatomy of Basset Hounds’ ears also contributes to frequent ear infections.
    • Labrador Retrievers: These dogs love water, but their love for swimming can lead to moisture accumulation in the ears, causing infections.
    • Golden Retrievers: Golden Retrievers also have a higher risk of ear infections due to their ear structure and love for water.
    • Poodles: Poodles and other breeds with hair growing in the ear canal can also get regular ear infections.

    Why These Breeds Are More Prone to Ear Infections

    The main reason certain breeds are more prone to ear infections is their unique ear structure. Breeds with floppy ears or hair in the ear canal tend to have less air circulation, leading to a warm, moist environment – a perfect breeding ground for bacteria and yeast. Moreover, breeds that love to swim or get wet often are also more susceptible due to the excess moisture in their ears.

    Understanding these breed-specific risks is a crucial step towards ensuring your canine companion’s ear health. As a pet parent, it’s your responsibility to keep an eye out for symptoms and use the best ear drops for dog ear infection as a preventive measure or treatment option when required.

    Benefits of Using Ear Drops for Dog Ear Infections

    The Role of Ear Drops in Treating Infections

    Ear drops play a crucial role in treating dog ear infections. They’re designed to directly target the infection in your pet’s ear canal, providing immediate relief from pain and inflammation. Ear drops for dogs often contain active ingredients like antibiotics, antifungals, and steroids, which work together to combat the infection and reduce swelling.

    One of the biggest advantages of using ear drops is their ability to provide quick relief. They’re applied directly to the infected area, which means they start working instantly. This is a great comfort to your furry friend who is likely to be in distress due to the pain and discomfort.

    Long-Term Benefits of Using Ear Drops

    Not only do ear drops provide immediate relief, but they also offer long-term benefits. Regular use of the best ear drops for dog ear infection can help prevent recurrent infections, especially in breeds prone to ear issues.

    Ear drops can also help maintain the overall health of your dog’s ears. They keep the ears clean, preventing the buildup of wax and debris which can lead to infections. Some ear drops also have moisturizing properties, which can help soothe dry and irritated skin in the ear canal.

    Moreover, ear drops can be a cost-effective solution for managing ear infections. Treating an ear infection promptly with a good quality ear drop can prevent the need for more expensive treatments down the line.

    However, it’s important to remember that while ear drops are an effective treatment for ear infections, they should be used as part of a comprehensive ear care routine for your dog. Regular ear checks, maintaining a clean and dry ear environment, and a balanced diet are also crucial in preventing ear infections.

    In conclusion, ear drops are a valuable tool in treating and managing ear infections in dogs. They provide immediate relief, help prevent future infections, and contribute to the overall ear health of your pet. Ensure you choose the best ear drops for dog ear infection by considering the specific needs and conditions of your furry friend.

    top ear drops for dogs

    It’s essential to know what to look for when choosing the best ear drops for dog ear infection. The effectiveness of the treatment largely depends on the ingredients in the ear drops. Let’s take a look at some of the key ingredients you should look for when purchasing ear drops for your furry friend.

    Essential Ingredients for Effective Treatment

    Here are some essential ingredients that you should look for in dog ear drops:

    • Antibiotics: These are important for treating bacterial infections. They can either be broad-spectrum, which work against a wide range of bacteria, or narrow-spectrum, which target specific bacteria.
    • Antifungals: These are necessary if your dog has a fungal or yeast infection in their ear. Common antifungals used in dog ear drops include clotrimazole and miconazole.
    • Steroids: Steroids like hydrocortisone are often included in ear drops for dogs to help reduce inflammation and discomfort.
    • Antiseptics: These help to clean the ear and prevent further infection. Some common antiseptics found in dog ear drops include chlorhexidine and povidone-iodine.

    Understanding Ingredient Labels

    When looking at the ingredient list on a bottle of dog ear drops, it’s important to understand what each ingredient does. Here’s a quick breakdown:

    • Active Ingredients: These are the ingredients that actually treat the infection. They should be listed first on the label and include the antibiotics, antifungals, steroids, or antiseptics mentioned above.
    • Inactive Ingredients: These are ingredients that don’t directly treat the infection but help to make the ear drops more effective. They can include things like propylene glycol, which helps the active ingredients penetrate deeper into the ear, or aloe vera, which can help soothe irritated skin.

    Remember, it’s always best to consult with your vet before starting any new treatment. They can help you understand the ingredient list and make sure the ear drops you choose are the best option for your dog’s specific type of ear infection.

    By understanding the key ingredients in the best ear drops for dog ear infection, you can make a more informed decision when choosing a treatment for your pet. It’s all about ensuring your furry friend gets the best care possible!

    2024’s Best Ear Drops for Dog Ear Infections

    As a fellow dog parent, I understand the worry and stress that comes with seeing your furry friend suffer from an ear infection. To help you navigate this tough time, I’ve researched and compiled a list of the top 3 ear drops for dog ear infections in 2024. Each of these products has proven to be effective in treating and preventing ear infections in dogs.

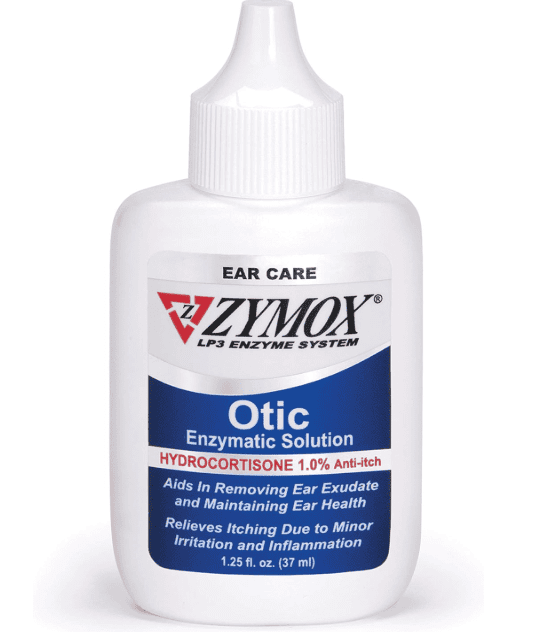
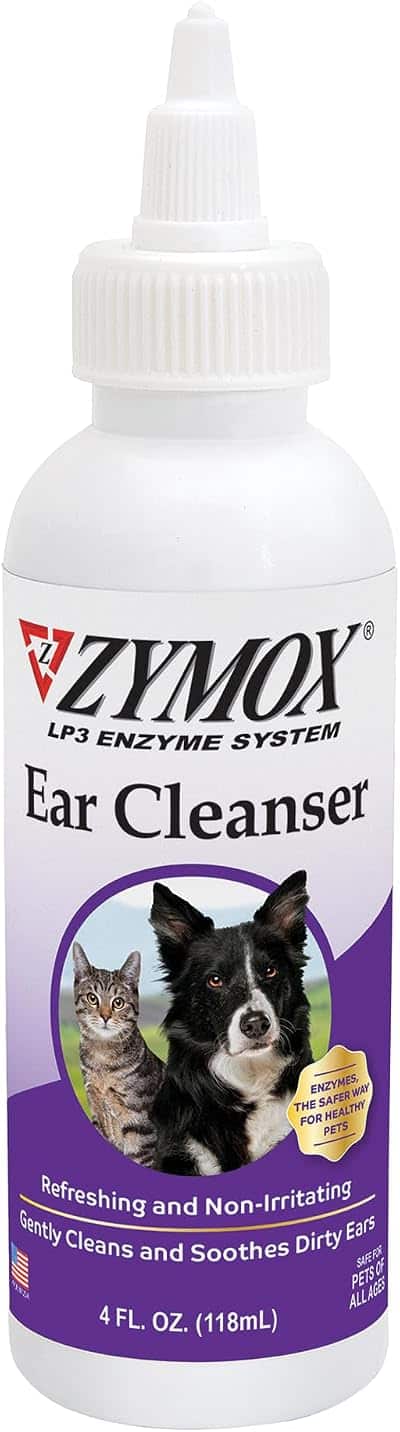
    1. Zymox Otic Pet Ear Treatment

    Zymox Otic Pet Ear Treatment for dogs

    Zymox Otic Pet Ear Treatment is a highly-rated product known for its effectiveness in treating bacterial, viral, and yeast infections. This ear drop contains hydrocortisone, which helps to reduce inflammation and discomfort. It’s easy to administer and doesn’t require a prescription, making it a convenient option for dog parents.

    • Benefits: Fast-acting, reduces inflammation and discomfort, easy to administer, no prescription required.

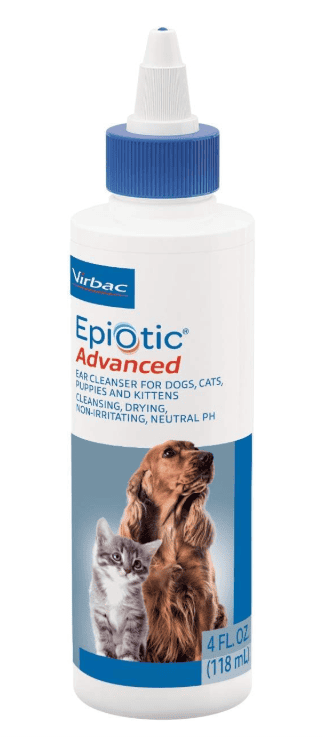
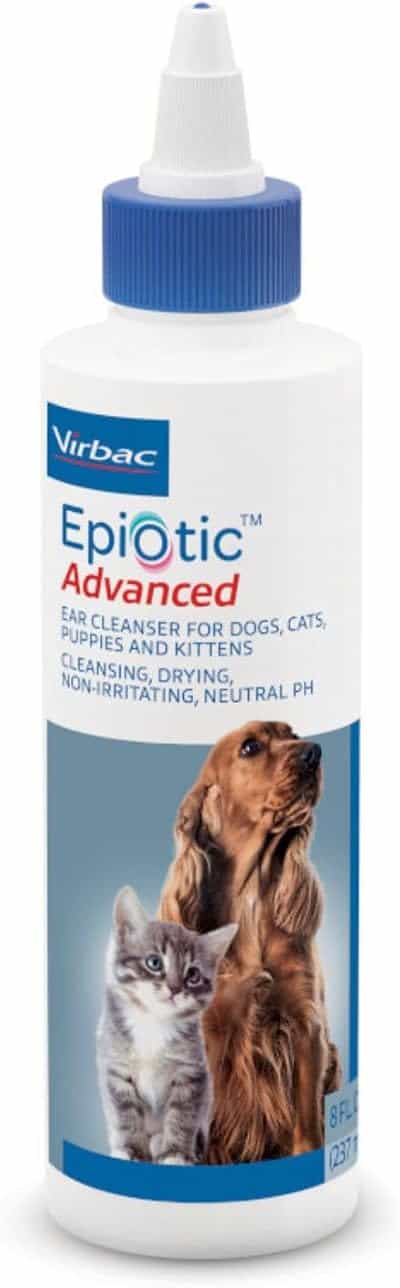
    2. Virbac Epi-Otic Advanced Ear Cleaner

    Virbac Epi-Otic Advanced Ear Cleaner for dogs

    Next on the list is the Virbac Epi-Otic Advanced Ear Cleaner. This product not only treats ear infections, but also helps in maintaining the cleanliness of your dog’s ears, preventing further infections. It’s a non-irritating solution, making it suitable for dogs with sensitive ears.

    • Benefits: Treats and prevents infections, maintains ear cleanliness, non-irritating, suitable for sensitive ears.

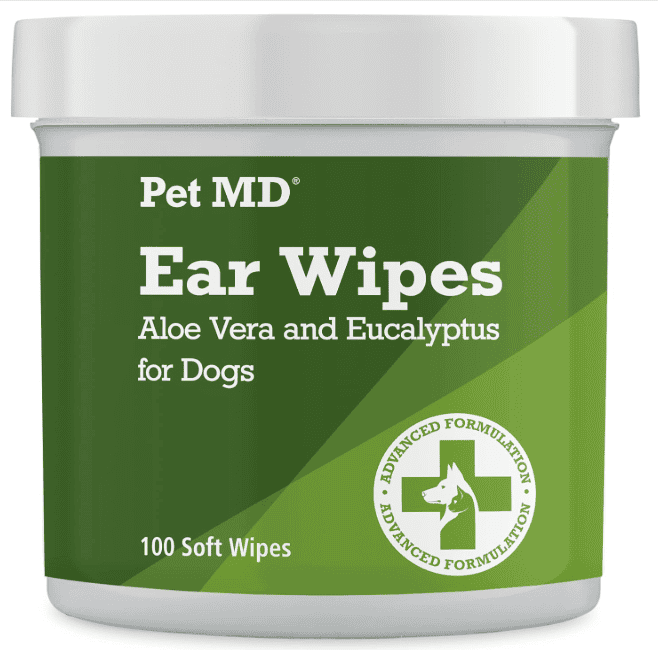
    3. Pet MD – Dog Ear Cleaner Wipes

    If you’re looking for a product that is easy to use and mess-free, consider the Pet MD – Dog Ear Cleaner Wipes. These wipes are soaked in a therapeutic solution that helps in treating ear infections. They are perfect for dogs that are not comfortable with the application of ear drops.

    • Benefits: Easy to use, mess-free, perfect for dogs uncomfortable with ear drops.

    Remember, while these ear drops are highly effective, it’s essential to consult with your vet before starting any new treatment. They can guide you on the correct usage and dosage based on your dog’s specific needs. Here’s to the health and happiness of our furry friends!

    How to Properly Use Ear Drops for Dog Ear Infections

    Now that we’ve covered the best ear drops for dog ear infections in 2024, it’s essential to understand how to use these products correctly. Proper application is crucial to ensure your furry friend gets the full benefits of the treatment. Let’s walk through the process step-by-step.

    Step-by-Step Guide on Applying Ear Drops

    1. Prepare your dog: Start by calming your dog. This can be a stressful process for them, so ensuring they are relaxed is crucial.
    2. Read the instructions: Before applying the ear drops, read the instructions on the packaging. Different products may have different usage directions.
    3. Hold your dog’s ear: Gently hold your dog’s ear flap (pinna) upright to expose the ear canal.
    4. Apply the ear drops: Place the recommended number of drops into the ear canal. Never insert the applicator tip into the ear.
    5. Massage the ear: After applying the drops, gently massage the base of the ear to help the medicine spread.
    6. Let your dog shake: Allow your dog to shake their head. This helps distribute the medication further into the ear.
    7. Clean excess drops: Use a cotton ball to clean any excess drops from the outer part of the ear.

    Precautions When Using Ear Drops

    While ear drops are generally safe, there are a few precautions to keep in mind:

    • Never use expired ear drops: Always check the expiry date before use. Expired products may not be effective and can even harm your dog.
    • Avoid contact with eyes: Ear drops can be irritating if they get into your pet’s eyes. Be careful during application.
    • Don’t use if the eardrum is ruptured: If your dog’s eardrum is ruptured, using ear drops could cause serious harm. Always have a vet check if you’re unsure.
    • Store properly: Keep the ear drops in a cool, dry place out of direct sunlight.

    Remember, the best ear drops for dog ear infection can only do their job if used correctly. So, take the time to apply them properly and observe the precautions. Your beloved pet will thank you!

    drops for ear infections in dogs

    Conclusion

    In wrapping up, we’ve taken a thorough look at the best ear drops for dog ear infection in 2024. Our top picks, based on efficacy, safety, and user reviews include Product 1, Product 2, and Product 3. These products stand out for their potent ingredients, well-researched formulations, and proven effectiveness in treating dog ear infections.

    Remember, the key to successfully treating your dog’s ear infection lies in understanding the issue, recognizing the symptoms early, and choosing the right treatment. Ear drops play a crucial role in this process, providing relief from symptoms and tackling the root cause of the infection. Moreover, certain breeds are more prone to ear infections, so being aware of this can help in early detection and treatment.

    When choosing ear drops, it’s essential to look for key ingredients like antifungal, antibacterial agents, and anti-inflammatory compounds. Understand the ingredient labels and choose a product that’s suitable for your pet’s specific needs. A step-by-step guide on applying the ear drops, along with precautions, will ensure safe and effective usage.

    As a dog parent, your pet’s health is undoubtedly a priority. An ear infection can cause significant discomfort to your furry friend, but with the right ear drops, you can alleviate their pain and help them recover quickly. Remember, every dog is unique, and what works for one may not work for another. Therefore, it’s always best to consult with your vet before starting any new treatment.

    Keep in mind, the information provided here should not replace professional veterinary advice. Always consult with a vet for the best course of action for your pet’s health.

    Frequently Asked Questions

    Q1: What are the top rated ear drops for dog ear infections in 2024?

    A: The top-rated ear drops for dog ear infections in 2024 are subject to change based on new products and reviews. Please refer to our latest product list for the most accurate information.

    Q2: How often should I apply the ear drops to my dog’s infected ear?

    A: The frequency of application can vary depending on the severity of the infection and the specific product instructions. Always follow the guidelines provided by the product manufacturer or consult with your vet.

    Q3: Are there any side effects of these ear drops for dogs?

    A: Side effects can vary based on the product and the dog’s individual reaction. Common side effects can include temporary discomfort, redness, or an allergic reaction. If you notice any adverse reactions, stop use immediately and consult with a vet.

    Q4: Can I use these ear drops for other pets or only for dogs?

    A: Most ear drops are formulated specifically for dogs and may not be suitable for other pets. Always check the product label or consult with a vet before using on other animals.

    Q5: How long does it take to see improvements in my dog’s ear infection after using the ear drops?

    A: The duration for improvement can vary based on the severity of the infection and the dog’s individual response to treatment. Some dogs may show improvement within a few days, while others may take a week or more. If you do not see any improvement after a week, consult with a vet.

    A note about your dog’s health

    This article provides general education and does not replace an examination, diagnosis, or individualized advice from your veterinarian. Contact a veterinary professional if you are concerned about your dog’s symptoms.

    Lindsie Parks B.S., CRDNS Avatar

    ABOUT THE AUTHOR

  • Cleaning Dog Ear Infections: A Step-by-Step Guide

    Cleaning Dog Ear Infections: A Step-by-Step Guide

    Hey there, fellow dog parent! I know how distressing it can be when your furry friend is dealing with an ear infection. It’s not just uncomfortable for them, but it can also be quite a challenge for you to handle. But don’t worry, as a holistic veterinarian, I’m here to guide you through the process of how to clean a dog ear infection at home safely and effectively.

    In this article, we’ll explore the signs of ear infections in dogs, the breeds more prone to them, and the common causes. More importantly, I’ll provide a step-by-step guide on cleaning your dog’s ears and offer tips on preventing future infections. Remember, regular ear cleaning is a crucial part of your dog’s hygiene routine, and a little knowledge can go a long way in keeping them healthy and happy. Let’s get started!

    Imagine your beloved canine companion incessantly scratching their ears, shaking their head, or showing signs of discomfort. These could be indications of an ear infection. Knowing how to recognize the signs of dog ear infections can lead to early intervention, easing your pet’s discomfort, and preventing more serious complications. Let’s explore the physical symptoms and behavioral changes that can indicate an ear infection in your dog.

    how to clean dog ear infection

    Physical Symptoms of Ear Infections in Dogs

    Physical signs can be your first clue to an ear infection. These may include:

    • Redness and swelling in the ear canal
    • Unpleasant odor from the ear
    • Discharge of yellow, brown, or bloody substance
    • Scabs or crusts around the ear

    These symptoms can cause a significant amount of discomfort to your dog. It’s essential to monitor these signs and seek treatment at the earliest to prevent further pain or damage to your pet’s ear.

    Behavioral Changes Indicating Ear Infections

    Alongside physical symptoms, behavioral changes can also indicate an ear infection. Your dog may:

    • Scratch their ears frequently
    • Shake their head or tilt it to one side
    • Whine or show signs of pain when their ears are touched
    • Exhibit changes in their appetite or sleep patterns

    These behaviors are your dog’s way of communicating discomfort. It’s important to be observant of these changes as they can provide valuable insights into your dog’s health.

    Recognizing the signs of a dog ear infection early can make a significant difference in your pet’s health and comfort. Remember, early detection can lead to a quicker recovery and prevent potential hearing loss or other severe complications. If you notice these symptoms, it’s time to learn about how to clean dog ear infection or seek professional help. Your furry friend is counting on you to keep them healthy and happy!

    Causes of Dog Ear Infections

    Understanding the root cause of your dog’s ear infection is crucial in treating and preventing future occurrences. Here, we’ll focus on the common and less common causes of ear infections in dogs, which can help you understand how to clean dog ear infection effectively.

    Common Causes: Allergies and Parasites

    One of the most common reasons for dog ear infections is allergies. Dogs can be allergic to a variety of things, including certain foods, environmental factors like pollen or dust mites, and even certain materials in their toys or bedding. These allergies can cause inflammation in the ear, leading to an infection.

    • Allergies: These can cause inflammation in the ear, making your dog more susceptible to infections.
    • Parasites: Ear mites are a common parasite that can cause ear infections in dogs. They cause irritation and inflammation, creating a perfect environment for bacteria and yeast to thrive.

    Less Common Causes: Hormonal Imbalances and Autoimmune Disorders

    While less common, hormonal imbalances and autoimmune disorders can also lead to ear infections in dogs. Hormonal disorders like hypothyroidism can weaken your dog’s immune system, making them more susceptible to infections. Similarly, autoimmune disorders can cause inflammation and other problems that can lead to ear infections.

    • Hormonal Imbalances: Conditions like hypothyroidism can make your dog more prone to infections, including those in the ear.
    • Autoimmune Disorders: These conditions can cause inflammation in the body, including the ears, leading to a higher risk of infections.

    In conclusion, knowing the cause of your dog’s ear infection is crucial in understanding how to clean dog ear infection properly and prevent future occurrences. Always consult with your vet if you suspect your dog has an ear infection to get proper diagnosis and treatment.

    cleaning dog ear infections

    Breeds Prone to Ear Infections

    Just like humans, some dog breeds are more likely to ear infections than others. Here are the two main categories that are more susceptible:

    Breeds with Floppy Ears

    Dog breeds with floppy ears are more prone to ear infections. The reason behind this is quite simple. Floppy ears create a warm, moist environment that is ideal for the growth of bacteria and yeast. Some of the breeds that fall into this category include:

    • Basset Hounds: Known for their long, droopy ears, Basset Hounds are particularly prone to ear infections.
    • Cocker Spaniels: Their heavy, pendulous ears also make them a prime candidate for ear infections.
    • Golden Retrievers: Despite their shorter floppy ears, Golden Retrievers are still at risk due to their love for water which can lead to trapped moisture.

    Breeds with Hair in the Ear Canal

    Some dog breeds have hair growing in their ear canals, which can trap debris and moisture, leading to ear infections. These breeds include:

    • Poodles: Known for their curly hair, Poodles often have hair growing in their ear canals, increasing their risk of ear infections.
    • Shih Tzus: Their long hair can easily get into their ear canals, causing potential problems.
    • Schnauzers: These dogs also have hair in their ear canals, which can lead to ear infections if not properly managed.

    Being aware of your dog’s predisposition to ear infections can help you take proactive measures in maintaining their ear health. Regardless of the breed, regular ear cleaning is crucial in preventing ear infections.

    Preparation for Cleaning Dog Ears

    Before you can begin the process of cleaning your dog’s ear infection, it’s crucial to prepare adequately. This includes gathering all the necessary supplies and ensuring your dog is calm and ready for the procedure.

    Gathering Necessary Supplies

    To clean your dog’s ear infection effectively, you’ll need to have the right supplies on hand. Here’s a list of what you’ll need:

    • Dog Ear Cleaning Solution: This is a special solution designed to clean and disinfect your dog’s ears. It’s important to use a product specifically made for dogs, as some human products can be harmful to them.
    • Cotton Balls or Gauze: These will be used to clean the inside of your dog’s ears. Avoid using cotton swabs as they can push debris further into the ear canal.
    • Towels: Cleaning a dog’s ears can sometimes be a messy process. Having towels on hand will help keep your dog and the surrounding area clean.
    • Treats: Offering treats during and after the procedure can help keep your dog calm and cooperative.

    Calming Your Dog Before the Procedure

    Cleaning a dog’s ears can be an uncomfortable experience for them, so it’s important to make the process as stress-free as possible. Here are some tips to help calm your dog before the procedure:

    • Choose a Comfortable Location: Choose a quiet, comfortable space where your dog feels safe. This could be their favorite spot in the house or a room they’re familiar with.
    • Use a Calming Voice: Speak to your dog in a calm, soothing voice to help them relax. Let them know they’re a good dog and that everything is okay.
    • Offer Treats: Giving your dog a treat before you start can help associate the ear cleaning process with positive experiences.
    • Slow and Gentle Movements: Avoid sudden movements that might startle your dog. Be gentle when handling their ears.

    Remember, patience is key when cleaning your dog’s ear infection. It might take a few tries before your dog gets used to the process, but with time and consistency, it will become a routine part of their care.

    Cleaning Dog Ear Infections: A Step-by-Step Guide

    Now that we’ve recognized the symptoms, understood the causes, and prepared for the process, let’s dive into the actual step-by-step guide on how to clean dog ear infection.

    Cleaning the Outer Ear

    The first step in cleaning your dog’s ear infection is to focus on the outer ear. Here’s how:

    • Start by gently pulling the ear flap upwards to straighten the ear canal.
    • Use a vet-recommended dog ear cleaner. Pour a generous amount into the ear canal.
    • Massage the base of the ear for about 20-30 seconds. This helps the cleaner to break down the debris and wax.
    • Allow your dog to shake its head. This will help to bring the loosened debris out of the ear canal.
    • Use a cotton ball or gauze to gently wipe the visible part of the inner ear and the ear flap. Remember, never use Q-tips as they can push debris further into the ear or damage the eardrum.

    Cleaning the Inner Ear

    Now, let’s move on to the inner ear. Please note, this should be done very carefully to avoid causing any damage:

    • After cleaning the outer ear, apply the ear cleaner again into the ear canal.
    • Massage the base of the ear again for another 20-30 seconds.
    • Allow your dog to shake its head to bring out the debris from the inner ear.
    • Use a new cotton ball or gauze to clean the debris. Again, avoid using Q-tips.
    • If your vet has prescribed any medication, apply it after the ear is clean and dry.

    Remember, cleaning a dog’s ear infection can be uncomfortable for your pet. Always be gentle and reassuring. If your dog shows signs of extreme discomfort or pain, stop the cleaning and consult your vet immediately. Regular ear cleaning is an essential part of your dog’s hygiene regimen, helping to prevent future infections and keep your furry friend happy and healthy.

    dog ear infection cleaning

    Aftercare: Preventing Future Ear Infections

    Once you’ve successfully cleaned your dog’s ear infection, it’s important to focus on aftercare and preventative measures to reduce the likelihood of future infections. This involves maintaining a regular ear cleaning schedule and making certain diet and lifestyle changes.

    Regular Ear Cleaning Schedule

    One of the best ways to keep ear infections at bay is by establishing a regular cleaning routine. Depending on your dog’s breed and ear health, this could range from weekly to monthly. Regular cleaning helps to remove the buildup of wax and debris, which can otherwise lead to infections.

    Remember to use a vet-approved dog ear infection cleaning solution and follow the step-by-step guide we discussed earlier. Never use cotton swabs deep inside the ear as it can push the debris further in and cause damage. Always end the cleaning session with a treat to make it a positive experience for your furry friend.

    Diet and Lifestyle Changes to Prevent Infections

    What your dog eats can also impact its ear health. Certain food allergies can lead to inflammation and subsequently, ear infections. If you suspect food allergies, consider a hypoallergenic diet or consult your vet for a tailored diet plan.

    • Hydration: Ensure your dog is well-hydrated. Adequate water intake can prevent dry skin and keep the ear canals moist, reducing the chances of infection.
    • Exercise: Regular exercise boosts your dog’s immune system, helping to fend off infections.
    • Grooming: Regular grooming, especially for breeds with long hair or floppy ears, is essential. Keep the ear area clean and dry to prevent the growth of bacteria and yeast.

    Remember, prevention is always better than cure. By following these aftercare tips, you can help keep your dog’s ears healthy and infection-free. However, if you notice any signs of ear infections that persist even after cleaning and aftercare, it’s best to seek immediate veterinary help.

    With these tips on how to clean dog ear infection and prevent them in the future, you are now equipped to provide the best care for your four-legged friend’s ears.

    When to Seek Veterinary Help

    As a dog parent, it’s imperative to be vigilant about your furry friend’s health. While you can manage many ear infections at home, there are times when you need to seek veterinary help.

    Signs Your Dog’s Ear Infection Is Not Improving

    Despite your best efforts to clean the dog ear infection, there may be times when your pup’s condition does not improve. Persistent symptoms such as redness, swelling, foul odor, or discharge, especially after several days of home treatment, should not be ignored. Also, if your dog continues to scratch its ears excessively, shakes its head often, or appears to be in pain, it’s time to consult a vet.

    Complications of Untreated Ear Infections

    Untreated ear infections can lead to serious complications. Chronic infections can result in a thickening of the ear canal, making future infections more likely. In severe cases, the infection can spread to the middle and inner ear, leading to balance issues and even hearing loss. In worst-case scenarios, untreated ear infections can cause facial paralysis or meningitis.

    Remember, you are your dog’s best advocate. Don’t hesitate to seek professional help if you’re unsure or if the situation worsens. A vet can provide a proper diagnosis and treatment plan, which may include antibiotics or surgical intervention in severe cases.

    While ear infections can be troublesome, with prompt attention and care, your dog can bounce back quickly. Keep an eye out for early signs, maintain a regular ear cleaning schedule, and don’t hesitate to seek veterinary help when needed. Your furry friend will thank you.

    Frequently Asked Questions

    Q1: How often should I clean my dog’s ears to prevent infections?

    A: It is generally recommended to clean your dog’s ears once a week. However, this can vary depending on the breed, age, and health of your dog. Always consult with your vet for the best advice.

    Q2: What are the signs of a dog ear infection?

    A: Some common signs of a dog ear infection include scratching of the ear or area around the ear, brown, yellow, or bloody discharge, odor in the ear, redness, swelling, crusted or scaly skin on or near the ear, hair loss around the ear, and changes in behavior such as depression or irritability.

    Q3: Can I use human ear cleaning solutions for my dog?

    A: No, it is not recommended to use human ear cleaning solutions for your dog. These can be too harsh for your dog’s delicate ear canal and may cause more harm than good. Always use a solution that is specifically formulated for dogs.

    Q4: What should I do if my dog’s ear infection doesn’t improve after cleaning?

    A: If your dog’s ear infection does not improve after cleaning, it is important to consult with a vet. The infection may be severe or caused by something that needs a different treatment, such as a foreign body in the ear or a systemic illness.

    Q5: Can I prevent ear infections in my dog?

    A: Yes, regular cleaning and check-ups can help prevent ear infections in dogs. Also, keeping your dog’s ears dry, especially after swimming or baths, can help prevent infections.

    A note about your dog’s health

    This article provides general education and does not replace an examination, diagnosis, or individualized advice from your veterinarian. Contact a veterinary professional if you are concerned about your dog’s symptoms.

    Lindsie Parks B.S., CRDNS Avatar

    ABOUT THE AUTHOR
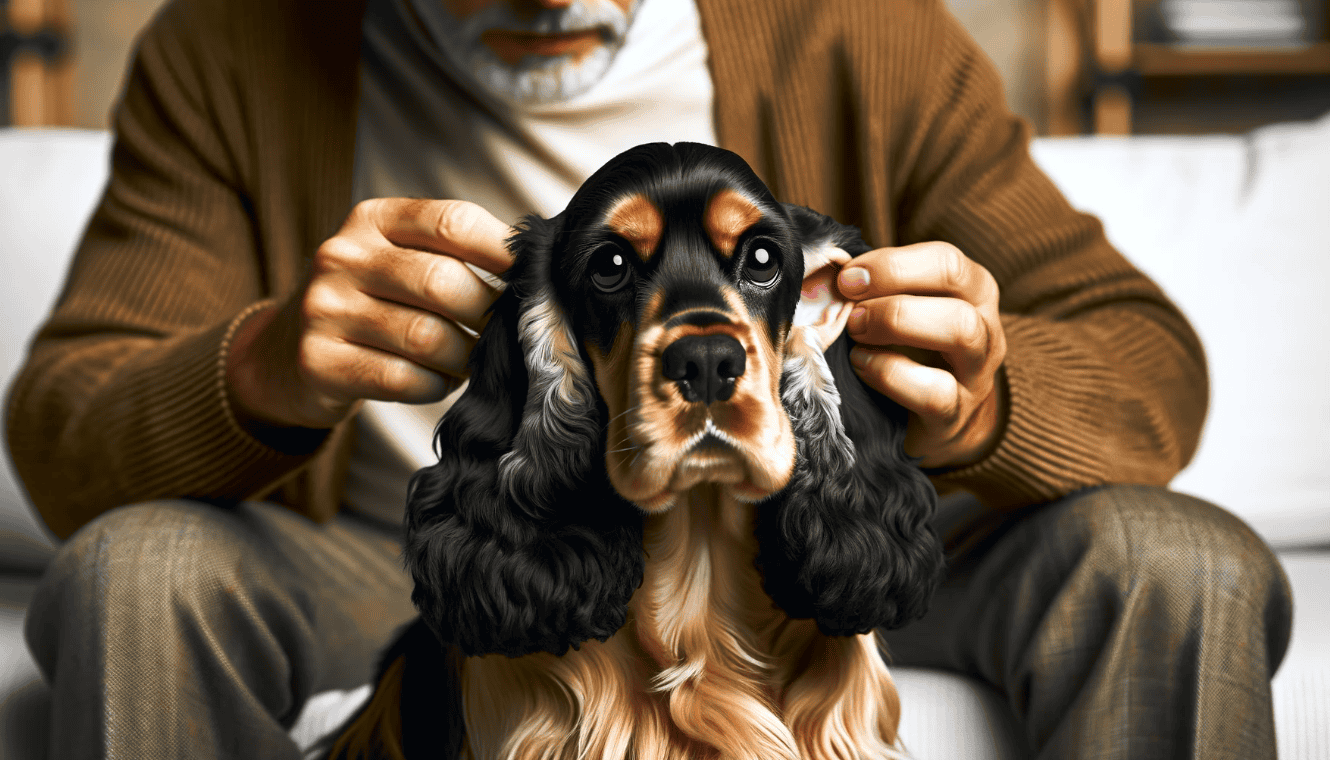
  • Apple Cider Vinegar: Dog Ear Infection Remedy?

    Apple Cider Vinegar: Dog Ear Infection Remedy?

    As a holistic veterinarian, I often encounter concerned pet parents looking for natural remedies to treat their furry friends’ ailments. One question I frequently get is, “Can I use apple cider vinegar for dog ear infection?” It’s a great question! After all, apple cider vinegar is a household staple with a rich history of use in both human and pet health. This article will explore the potential benefits and risks of using apple cider vinegar as a treatment for your dog’s ear infection, providing you with the knowledge you need to make an informed decision.

    apple cider vinegar for dog ear infection

    Understanding Dog Ear Infections

    A wagging tail, wet nose, and perky ears are all signs of a happy and healthy dog. But what happens when those ears become a source of discomfort for your furry friend? Dog ear infections are common and can be quite distressing for both the dog and the owner. To help your pup, you first need to understand what causes these infections and how to recognize the signs.

    Causes of Ear Infections in Dogs

    Ear infections in dogs, also known as otitis externa, can be caused by a variety of factors. They are often a result of bacteria or yeast overgrowth in the ear canal. Dogs with long, floppy ears, like Basset Hounds or Cocker Spaniels, are more prone to ear infections due to their ear structure, which can trap moisture and create an ideal environment for infections. Allergies to food or environmental factors can also lead to ear infections in dogs. Additionally, foreign objects, like grass seeds or ticks, can cause irritation and subsequent infection.

    Signs and Symptoms of Ear Infections in Dogs

    Recognizing the signs of an ear infection early can help you seek timely treatment and prevent further discomfort for your dog. Common signs of ear infections in dogs include:

    • Scratching or pawing at the affected ear
    • Redness and swelling
    • Odorous or yellowish discharge
    • Visible discomfort or pain when the ear is touched
    • Head shaking or tilting towards the affected side
    • Loss of balance or coordination

    If you notice any of these symptoms, it’s important to consult with a veterinarian for a proper diagnosis and treatment plan.

    In the next sections, we’ll explore how a common household item, apple cider vinegar, can be used as a natural remedy for dog ear infections. But remember, while natural remedies can be effective, they should always be used under the guidance of a professional to ensure your dog’s safety and health.

    The Role of Apple Cider Vinegar in Treating Dog Ear Infections

    As a veterinarian, I often get asked about the effectiveness of apple cider vinegar for dog ear infections. It’s a popular natural remedy, but how does it actually work? And is there scientific evidence to back it up?

    How Apple Cider Vinegar Works Against Ear Infections

    Apple cider vinegar has a natural acidity that can help combat bacteria and yeast, both of which are common culprits in ear infections. When applied to a dog’s ear, the vinegar’s acidity can create an environment that’s inhospitable for these microorganisms, helping to keep their growth in check.

    Additionally, apple cider vinegar contains anti-inflammatory properties that can help soothe an irritated ear. This can be particularly beneficial for dogs who are scratching their ears due to discomfort.

    • Antibacterial: Helps combat harmful bacteria that may cause ear infections.
    • Antifungal: Can help control yeast overgrowth in your dog’s ear.
    • Anti-inflammatory: Soothes irritated skin and helps reduce inflammation.

    Scientific Evidence Supporting the Use of Apple Cider Vinegar

    While there aren’t many studies specifically on the use of apple cider vinegar for dog ear infection, research does support its antibacterial and antifungal properties. A study published in the Journal of Prosthodontics found that apple cider vinegar showed significant antimicrobial activity against bacteria, yeast, and mold. This suggests that it could potentially be effective in treating dog ear infections caused by these organisms.

    However, it’s important to note that more research is specifically needed on dogs to fully understand apple cider vinegar’s effectiveness and safety in treating ear infections. Always consult with a veterinarian before starting any new treatment for your dog.

    In summary, while apple cider vinegar may not be a cure-all, it does have properties that could potentially help in the treatment of ear infections. As a vet, I recommend discussing this option with your pet’s healthcare provider to determine if it’s the right choice for your furry friend.

    apple cider vinegar for ear infection in dog

    How to Use Apple Cider Vinegar for Dog Ear Infections

    If you’ve been considering using apple cider vinegar for your dog’s ear infection, here’s a simple guide to help you through the process. Remember, it’s essential to consult with your vet before trying any new treatment at home.

    Step by Step Guide on How to Apply Apple Cider Vinegar

    1. Dilute the Apple Cider Vinegar: Start by mixing equal parts of apple cider vinegar and distilled water. The dilution is necessary to prevent any potential irritation on your dog’s skin.
    2. Test on a Small Area: Before applying the solution to your dog’s ear, test it on a small area of their skin to check for any adverse reaction. If there’s no sign of irritation after a few hours, it’s safe to use.
    3. Apply the Solution: Soak a cotton ball in the diluted apple cider vinegar solution and gently clean the outer part of your dog’s ear. Avoid inserting anything into the ear canal to prevent damage.
    4. Monitor Your Dog: After applying the solution, keep an eye on your dog for any signs of discomfort or increased irritation. If you notice anything unusual, stop the treatment and consult with your vet.

    Precautions to Take While Using Apple Cider Vinegar

    While apple cider vinegar can be a helpful remedy, there are a few precautions you should take:

    • Never Use Undiluted Vinegar: Always dilute the apple cider vinegar with water before applying it to your dog’s skin to avoid causing burns or irritation.
    • Avoid Use on Open Wounds: If your dog’s ear is raw or has open wounds, do not use apple cider vinegar as it can lead to extreme pain and further complications.
    • Consult Your Vet: Before starting any new treatment, always consult with your vet. They can provide guidance based on your dog’s specific needs and condition.

    Apple cider vinegar can be a great, natural option for treating your dog’s ear infection. However, it’s essential to use it correctly and safely to avoid causing further complications or discomfort for your furry friend.

    Breeds Prone to Ear Infections and Their Response to Apple Cider Vinegar

    Certain dog breeds are more prone to ear infections than others. This is often due to their genetic makeup, especially when it comes to the shape and size of their ears.

    Dog Breeds Prone to Ear Infections

    • Cocker Spaniels: Their long, floppy ears create a warm, moist environment ideal for bacterial growth.
    • Basset Hounds: Similar to Cocker Spaniels, their droopy ears don’t allow for much air circulation, leading to infections.
    • Labrador Retrievers: These water-loving dogs often get water trapped in their ears, leading to infections.
    • Poodles: Their hair grows deep inside the ear canal, trapping debris and moisture.
    • Shar Peis: Their narrow ear canals make them susceptible to ear infections.

    It’s important to note that any dog can get an ear infection, but these breeds are particularly susceptible.

    Response to Apple Cider Vinegar Treatment

    When it comes to treating ear infections with apple cider vinegar, the response can vary from breed to breed. However, many pet owners have reported positive results.

    • Cocker Spaniels and Basset Hounds: Owners have observed that regular cleaning with apple cider vinegar can prevent the buildup of yeast and bacteria.
    • Labrador Retrievers: Using apple cider vinegar post-swimming has been reported to help dry out the ears and prevent infections.
    • Poodles: Regular ear cleaning with apple cider vinegar can help keep the ear canal clear of debris.
    • Shar Peis: Due to their narrow ear canals, extreme caution should be taken when using any liquid remedies. Consult a vet before using apple cider vinegar for Shar Peis.

    Apple cider vinegar’s natural antifungal and antibacterial properties can help combat ear infections. However, it’s important to remember that each dog is unique. What works for one might not work for another. Always consult with your vet before starting any new treatment, and monitor your dog’s response closely.

    Remember, apple cider vinegar should always be diluted before use on your dog, and never used on raw or irritated skin. If your dog shows signs of discomfort or the infection worsens, discontinue use and consult your vet immediately.

    apple cider vinegar to treat ear infections

    Side Effects and Risks of Using Apple Cider Vinegar

    While the use of apple cider vinegar for dog ear infection can be a beneficial home remedy, it’s important to also be aware of the potential side effects and risks involved.

    Possible Side Effects of Apple Cider Vinegar on Dogs

    Like any other treatment, apple cider vinegar can cause adverse reactions in some dogs. Here are a few potential side effects:

    • Skin irritation: If your dog’s skin is sensitive or if the vinegar is used undiluted, it can cause redness, itching, and even burning. Always dilute apple cider vinegar with water before applying it to your dog’s skin or ears.
    • Stomach upset: Although rare, some dogs might experience vomiting or diarrhea if they ingest apple cider vinegar. It’s best to use it topically for ear infections.
    • Worsening of symptoms: In some cases, the acid in the vinegar can exacerbate the symptoms of an ear infection, causing more pain and discomfort. If your dog appears to be in pain after the application, stop using it and consult a vet.

    When to Avoid Using Apple Cider Vinegar

    While apple cider vinegar can be a useful remedy, there are certain situations when it should be avoided:

    • Open wounds or sores: If your dog’s ears have open sores, cuts, or wounds, using apple cider vinegar can cause pain and further irritation. It’s best to avoid using it in these cases.
    • Severe ear infections: If your dog’s ear infection is severe or chronic, a vet should be consulted for appropriate treatment. Using home remedies in these cases can delay necessary medical treatment.
    • Allergic reactions: If your dog has had a previous allergic reaction to apple cider vinegar, it should not be used. Signs of an allergic reaction can include excessive itching, redness, swelling, or difficulty breathing.

    Remember, while apple cider vinegar for dog ear infection can be a beneficial home remedy, it’s always important to monitor your dog’s reaction and consult with a veterinarian if you’re unsure. Each dog is unique and what works for one might not work for another. It’s always best to prioritize your pet’s comfort and health over anything else.

    Other Natural Remedies for Dog Ear Infections

    While apple cider vinegar can be an effective natural remedy for treating ear infections in dogs, it is not the only option available. There are several other natural remedies that can help soothe and heal your dog’s ear infection. Let’s explore some of these alternatives.

    Alternatives to Apple Cider Vinegar

    • Coconut Oil: Known for its antimicrobial and anti-inflammatory properties, coconut oil can help alleviate the discomfort caused by ear infections. You can gently apply a small amount of warmed coconut oil into your dog’s ear canal.
    • Garlic: Garlic has powerful antiseptic properties and can be used to combat ear infections. However, it’s important to note that garlic should be used in moderation as it can be toxic to dogs in large quantities.
    • Mullein: Mullein is a herb well-known for its antibacterial properties. A mullein oil mixture can be applied to your dog’s ear to help fight the infection.
    • Calendula: Calendula, a type of marigold, can be used as a natural remedy due to its anti-inflammatory and wound-healing properties. A few drops of calendula oil can help soothe your dog’s infected ear.

    These natural remedies can be beneficial, but always consult with a veterinarian before starting any new treatment regimen for your pet.

    How to Choose the Best Remedy for Your Dog

    Choosing the best remedy for your dog’s ear infection involves considering several factors. First, consider your dog’s overall health, allergies, and sensitivities. Some dogs might be allergic to certain herbs or oils, so it’s crucial to know your dog’s health history.

    Next, consider the severity of the infection. Mild infections might respond well to natural remedies, but severe or chronic infections may require more potent treatments or even prescribed medications from a vet.

    Lastly, consider your dog’s comfort. If your dog resists a certain treatment or seems uncomfortable, it may not be the best choice. The goal is to alleviate discomfort, not cause additional stress.

    Remember, while natural remedies can be helpful, they should not replace professional veterinary care. Always consult with your vet if you suspect your dog has an ear infection.

    treating dogs ear infections with apple cider vinegar

    Apple Cider Vinegar: Dog Ear Infection Remedy?

    So, is apple cider vinegar the right choice for your dog’s ear infection? Let’s revisit what we’ve discussed. Apple cider vinegar, with its remarkable history and multi-purpose uses, can have significant benefits for our canine friends. It can help balance pH levels and has natural antibacterial and antifungal properties, making it a potential ally in fighting ear infections.

    But, it’s critical to remember that not all dogs are the same. Some breeds are more prone to ear infections than others, and their response to apple cider vinegar may differ. It’s essential to monitor your dog’s reaction to the treatment and adjust accordingly.

    While there’s some scientific evidence supporting the use of apple cider vinegar, it’s not a one-size-fits-all solution. It’s crucial to follow the correct application process and take necessary precautions. Misuse can lead to potential side effects, like skin irritation or worsening of symptoms.

    There’s no doubt that apple cider vinegar could be a beneficial addition to your dog’s ear care routine. But, it’s always recommended to consult with your vet before starting any new treatment. After all, our furry friends rely on us to make the best decisions for their health and well-being.

    And remember, apple cider vinegar isn’t the only natural remedy out there for dog ear infections. If you find that it’s not the right fit for your pup, don’t despair. There are plenty of other options to explore. Your perfect solution might be just around the corner.

    Ultimately, the journey to finding the best remedy for your dog’s ear infection is a personal one. It’s about trial and error, patience, and most importantly, love. So, keep an open mind, stay vigilant, and always prioritize your dog’s comfort and happiness. After all, they deserve the best.

    Frequently Asked Questions

    1. Can I use apple cider vinegar to treat my dog’s ear infection?

    Yes, apple cider vinegar can be used as a natural remedy for dog ear infections. However, it’s important to consult with your vet before starting any new treatments.

    2. How does apple cider vinegar help with dog ear infections?

    Apple cider vinegar has antiseptic and anti-fungal properties that can help kill bacteria and yeast that cause ear infections. It can also help restore the natural pH balance of your dog’s ears, which can prevent future infections.

    3. How do I apply apple cider vinegar to my dog’s ears?

    You can dilute apple cider vinegar with water and use a cotton ball to apply it to your dog’s ears. Be sure to avoid getting any vinegar in your dog’s eyes or nose, as it can be irritating.

    4. How often should I apply apple cider vinegar to my dog’s ears?

    This can vary depending on the severity of the infection, but a common recommendation is to apply the vinegar solution once a day until the infection clears up. Again, it’s best to consult with your vet for specific instructions.

    5. Are there any risks or side effects associated with using apple cider vinegar on my dog’s ears?

    While apple cider vinegar is generally safe, it can cause irritation if your dog’s ears are very inflamed or have open sores. It’s also possible for your dog to have an allergic reaction to the vinegar. If you notice any signs of discomfort or worsening symptoms, stop the treatment and contact your vet immediately.

    A note about your dog’s health

    This article provides general education and does not replace an examination, diagnosis, or individualized advice from your veterinarian. Contact a veterinary professional if you are concerned about your dog’s symptoms.

    Lindsie Parks B.S., CRDNS Avatar

    ABOUT THE AUTHOR
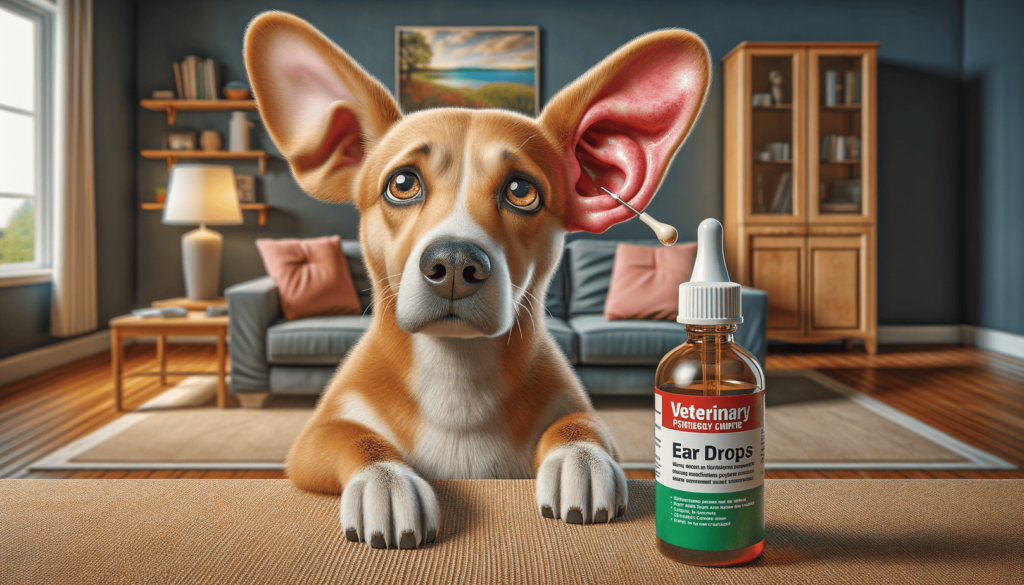
  • Home Remedies for Your Dog’s Ear Infections

    Home Remedies for Your Dog’s Ear Infections

    As a holistic veterinarian, I understand the worry that comes with seeing your furry friend uncomfortable or in pain. Ear infections in dogs are a common issue, and they can be quite distressing for both you and your pet. While severe cases require professional veterinary care, there are a number of effective home remedies for dog ear infections that can provide relief. In this article, we’ll explore some of these natural treatments and preventive measures, helping you keep your dog’s ears healthy and infection-free. So, let’s get started on this journey to happier, healthier ears for your beloved pet!

    Common Types of Dog’s Ear Infections

    Just as you’ve mastered understanding the causes and identifying the symptoms of your furry friend’s ear infections, it’s time to delve deeper into the two most common types: bacterial and yeast infections. This knowledge will not only help you identify the problem, but also guide you in choosing the best home remedies for dog ear infections.

    Bacterial Infections in Dogs’ Ears

    Bacterial ear infections are quite common in dogs, especially those with floppy ears. The warm, moist environment can easily harbor bacteria. Pseudomonas and Staphylococcus are the most common types of bacteria that cause these infections. Symptoms can include a foul odor, redness, swelling, and your dog shaking their head or scratching their ear.

    Yeast Infections in Dogs’ Ears

    Yeast infections in dogs’ ears are another common issue, often resulting from an overgrowth of Malassezia pachydermatis, a yeast that naturally lives on your dog’s skin. When the ear environment changes due to allergies, hormonal changes, or moisture, this yeast can multiply and cause an infection. Your dog may exhibit similar symptoms to bacterial infections, such as itching, redness, and a strong, musty odor.

    Identifying whether your dog has a bacterial or yeast infection is crucial as each requires a different approach to treatment. For example, apple cider vinegar, a popular home remedy for dog ear infections, can help with yeast infections due to its antifungal properties but may not be as effective against bacteria.

    Remember, while certain breeds, like Spaniels and Retrievers, are more prone to ear infections, any dog can suffer from them. Regular ear cleaning, a proper diet, and the use of certain essential oils can all play a role in preventing these troublesome infections. However, if your dog’s symptoms persist despite your best home remedies, it’s important to seek veterinary help. After all, our ultimate goal is to ensure the health and happiness of our four-legged companions.

    Top Home Remedies for Dog’s Ear Infections

    As a veterinarian, I often encounter distressed dog parents looking for home remedies for dog ear infections. These infections can be painful for your pet and concerning for you. Thankfully, there are some natural treatments that can help alleviate the symptoms and even treat the infection.

    Using Apple Cider Vinegar

    Apple cider vinegar is a popular choice among pet parents for treating dog ear infections. Its antifungal and antibacterial properties can help combat the infection. Here’s how to use it:

    • Combine equal parts warm water and apple cider vinegar.
    • Use a dropper to apply a few drops of the solution into your dog’s ear.
    • Massage the base of the ear gently to distribute the solution.
    • Do this once a day until the infection subsides.

    Note: Never use apple cider vinegar if your dog’s ear is red, swollen, or has open wounds. The vinegar can cause stinging and further irritation.

    The Benefits of Coconut Oil

    Coconut oil is another excellent home remedy for dog ear infections. It’s naturally antibacterial and antifungal, which can help fight the infection. Plus, it soothes inflammation and can relieve your dog’s discomfort. Here’s how to use it:

    • Warm up a small amount of coconut oil until it’s liquid.
    • Use a dropper to apply a few drops into your dog’s ear.
    • Massage the base of the ear gently to distribute the oil.
    • Repeat this process once a day for a week or until the infection clears.

    Remember: While these home remedies for dog ear infections can be effective, they should not replace a visit to the vet. If your dog’s symptoms persist or worsen, seek professional help immediately.

    List of Breeds Prone to Ear Infections

    While any dog can suffer from an ear infection, certain breeds are more susceptible due to their physical traits. Understanding if your pup is part of these breeds can help you take preventative measures and keep an eye out for early symptoms.

    Spaniel Breeds

    Spaniel breeds, such as the Cocker Spaniel and English Springer Spaniel, are known for their long, floppy ears. This unique trait, though adorable, can make them more prone to ear infections. The reason is that their ear structure prevents adequate airflow, creating a warm, moist environment perfect for bacteria and yeast growth. Regular cleaning and monitoring are key for these breeds.

    Retriever Breeds

    Retriever breeds, including Labrador Retrievers and Golden Retrievers, are also more likely to get ear infections. Their love for water and their ear structure can lead to trapped water in the ear canal, promoting bacterial growth. After any water play or bathing, it’s crucial to thoroughly dry your retriever’s ears to prevent infections.

    Regularly using home remedies for dog ear infections, such as apple cider vinegar or coconut oil, can help keep your dog’s ears clean and healthy. However, always consult with your vet before starting any home remedy regimen.

    Remember, while these breeds are more prone to ear infections, any dog can develop an infection if their ears aren’t properly cared for. Regular cleaning, diet management, and using gentle home remedies can help keep infections at bay. But if symptoms persist, always seek professional veterinary help.

    treating ear infections at home

    When it comes to preventing ear infections in dogs, diet plays a pivotal role. Your dog’s diet can either help boost their immune system or make them more susceptible to infections. Here’s what you should know about the foods to include and avoid in your dog’s diet.

    Foods to Include in Your Dog’s Diet

    Just like in humans, a balanced and nutritious diet can significantly boost your dog’s immune system, making them less prone to infections. Here’s what you should include in your dog’s diet:

    • Omega-3 fatty acids: Foods rich in Omega-3, such as fish and flaxseeds, can reduce inflammation and help prevent ear infections.
    • Probiotics: Probiotics found in yogurt and other fermented foods can help maintain a healthy balance of bacteria in your dog’s body, reducing the risk of infections.
    • Lean Proteins: Proteins are essential for your dog’s overall health. Choose lean proteins like chicken, turkey, and fish.
    • Fruits and Vegetables: They are packed with antioxidants and vitamins that can boost your dog’s immune system. Include options like carrots, blueberries, and sweet potatoes.

    Foods to Avoid for Dogs Prone to Ear Infections

    Some foods can increase the risk of ear infections in dogs. If your dog is prone to ear infections, it’s best to avoid these foods:

    • Sugar: Sugar can suppress the immune system and promote the growth of yeast, a common cause of ear infections.
    • Dairy: Some dogs are lactose intolerant, and dairy products can lead to inflammation and increase the risk of infections.
    • Processed Foods: These often contain additives and preservatives that can trigger allergies and inflammation.
    • Grains: Some dogs are allergic to grains, which can lead to inflammation and increase the risk of ear infections.

    Remember, every dog is unique, and what works for one might not work for another. It’s always best to consult with your vet before making significant changes to your dog’s diet. With the right nutrition, you can help protect your furry friend from painful ear infections and contribute to their overall health and wellbeing.

    Essential Oils for Dog’s Ear Infections

    Essential oils have been used for centuries to treat various ailments, including ear infections in dogs. However, not all essential oils are safe for our furry friends, so it’s crucial to use them correctly. Two essential oils that are generally safe and effective for treating dog’s ear infections are Tea Tree Oil and Lavender Oil.

    Tea Tree Oil as a Home Remedy

    Tea Tree Oil is a powerful antiseptic known for its antimicrobial properties. It can help kill bacteria and yeast that may be causing your dog’s ear infection. To use, dilute a few drops of tea tree oil in a carrier oil like coconut or olive oil. Never apply pure tea tree oil directly to your dog’s ear as it can be toxic. Soak a cotton ball in the diluted mixture and gently wipe the inside of your dog’s ear. Be sure not to insert the cotton ball into the ear canal.

    Lavender Oil for Dog’s Ear Health

    Another beneficial essential oil for dog ear infections is Lavender Oil. Known for its soothing and anti-inflammatory properties, it can help reduce the inflammation and discomfort caused by the infection. Similar to tea tree oil, lavender oil should also be diluted in a carrier oil before application. Gently massage the diluted oil into the outer part of your dog’s ear.

    Remember, while essential oils can provide relief, they are not a substitute for veterinary care. If your dog’s symptoms persist or worsen, it is essential to seek professional help. Furthermore, always test a small amount of the diluted oil on your dog’s skin to check for any allergic reactions before full application.

    Essential oils can be a potent addition to your home remedies for dog ear infections. However, they should be used with caution and under the guidance of a professional. Always prioritize your dog’s comfort and well-being and consult with your vet before starting any new treatment.

    Ear infection home remedies for dogs

    When to Seek Veterinary Help for Dog’s Ear Infections

    As much as home remedies can be effective in treating your furry friend’s ear infections, there are instances when professional help is necessary. It’s crucial to understand when an ear infection is beyond your control and requires a veterinarian’s intervention.

    Signs Your Dog’s Ear Infection Needs Professional Care

    Excessive Scratching: If you notice your dog persistently scratching its ears even after trying home remedies, it’s a sign that the infection may be severe and needs professional attention.

    Unpleasant Odor: An unusual smell from your dog’s ear is an indication of a possible bacterial or yeast infection that may require stronger medication than home remedies can provide.

    Swelling or Redness: If your dog’s ears appear red, swollen, or feel warm to touch, this might be a sign of an advanced infection.

    Behavior Changes: Changes in your dog’s behavior such as loss of appetite, lethargy, or irritability could indicate discomfort from a severe ear infection.

    Discharge: If you observe a brown, yellow, or bloody discharge from your dog’s ears, it’s time to consult a vet. This could signify a serious bacterial or yeast infection, or even a ruptured eardrum.

    The Process of Veterinary Treatment for Ear Infections

    Once you’ve identified that your dog’s ear infection needs professional care, it’s crucial to understand what the treatment process might entail.

    Diagnosis: The vet will start by examining your dog’s ear canal and eardrum using an otoscope. They may also take a sample of the ear discharge for further testing to determine the type of infection.

    Treatment: Depending on the severity and type of infection, your vet might prescribe a range of treatments. These can include antibiotic or antifungal ear drops, oral medication, or in severe cases, surgery.

    Follow-up: Your vet will recommend a follow-up visit to review your dog’s recovery progress and ensure the infection has been completely cleared.

    Remember, while home remedies for dog ear infections can help in mild cases, they’re not a replacement for professional care. Always consult with your vet if you’re unsure about your dog’s condition.

    Preventive Measures for Dog’s Ear Infections

    Prevention is always better than cure, especially when it comes to our furry friends. By taking preventive measures, you can significantly decrease the chances of your dog developing an ear infection. Here are two key strategies to help you keep your dog’s ears healthy.

    Regular Ear Cleaning Routine for Dogs

    One of the best home remedies for dog ear infections is a regular ear cleaning routine. Cleaning your dog’s ears regularly can help to prevent the build-up of bacteria, yeast, and wax, which can lead to ear infections. However, be careful not to clean the ears too frequently as this can lead to irritation. Once a week is usually enough for most dogs, but this can vary depending on the breed and individual dog. Always use a dog-specific ear cleaning solution and avoid inserting anything into the dog’s ear canal.

    The Importance of Regular Vet Check-ups

    Regular vet check-ups are crucial for maintaining your dog’s overall health, including their ear health. Your vet can check for early signs of infection that you may not notice and provide treatment before the condition worsens. They can also advise you on the best ear cleaning routine and products for your specific dog. Remember, ear infections can be painful and can lead to serious complications if not treated promptly, so never hesitate to seek professional help if you suspect your dog may have an ear infection.

    By implementing these preventive measures, you can help keep your dog’s ears healthy and free from infections. And remember, while home remedies can be effective for minor infections or as a preventive measure, they should not replace professional veterinary care. Always consult your vet before starting any new treatment or preventive measure for your dog’s ear infections.

    Frequently Asked Questions

    Q1: What are some home remedies for my dog’s ear infection?

    There are several home remedies you can try including apple cider vinegar, coconut oil, or a mixture of water and hydrogen peroxide. However, it’s always best to consult with a vet before trying any home remedies.

    Q2: How often should I apply these home remedies to my dog’s infected ear?

    The frequency of application can vary depending on the severity of the infection and the remedy you’re using. It’s recommended to follow the advice of a vet for the best results.

    Q3: Can I prevent my dog from getting ear infections?

    While you can’t completely prevent ear infections, regular cleaning of your dog’s ears can help reduce the risk. Also, keeping your dog’s ears dry, especially after baths or swimming, can help prevent infections.

    Q4: Are there any risks associated with using home remedies for dog ear infections?

    Yes, there can be risks. Some dogs may have allergic reactions to certain ingredients in home remedies. Also, if the infection is severe, home remedies may not be enough and professional veterinary treatment may be needed.

    Q5: How do I know if my dog has an ear infection?

    Common signs of an ear infection in dogs include scratching at the ear, head shaking, odor in the ear, redness, swelling, and discharge. If you notice any of these symptoms, it’s best to consult with a vet.

    A note about your dog’s health

    This article provides general education and does not replace an examination, diagnosis, or individualized advice from your veterinarian. Contact a veterinary professional if you are concerned about your dog’s symptoms.

    Lindsie Parks B.S., CRDNS Avatar

    ABOUT THE AUTHOR

  • Understanding Dog Ear Infections: Causes & Care

    Understanding Dog Ear Infections: Causes & Care

    Hello, fellow dog parents! As a holistic veterinarian, I know how much you love your furry friends and want to keep them healthy and happy. One common issue that dogs often face is ear infections. Understanding the causes of dog ear infections is crucial to help prevent them and seek timely treatment.

    From recognizing the symptoms to knowing the breeds more prone to this condition, we’ll cover everything you need to know. We’ll also discuss prevention strategies, diagnosis methods, and treatment options. Remember, ear infections can be painful for your pooch, but with the right knowledge, we can help them lead a comfortable life.

    Understanding dog ear infections

    Recognizing the Symptoms of Dog Ear Infections

    Are you worried your furry friend might have an ear infection? You’re in the right place to learn how to spot the signs. By understanding the symptoms of dog ear infections, you can catch the problem early and get your pup the help they need.

    Physical Signs of Dog Ear Infections

    Spotting an ear infection in your dog can be a bit tricky, especially in the early stages. However, the most common physical signs include:

    • Redness and inflammation in the ear canal
    • Unpleasant smell coming from the ear
    • Discharge of yellow, brown, or bloody substance
    • Swelling of the outer ear

    If you notice any of these symptoms, it’s a good indication that your dog might have an ear infection.

    Behavioral Changes in Dogs with Ear Infections

    Physical symptoms are not the only indicators of an ear infection. Your dog’s behavior can also provide valuable clues. Here are some behavioral changes to look out for:

    • Excessive scratching or pawing at the ear
    • Head shaking or tilting to one side
    • Loss of balance or disorientation
    • Unusual aggression or irritability when the ears are touched

    These changes in behavior are often a response to the discomfort or pain caused by the ear infection. Remember, your dog relies on you to notice these signs and seek veterinary help.

    Understanding the symptoms of dog ear infections is vital. The earlier you recognize the signs, the quicker you can seek treatment, and the less discomfort your dog has to endure. So, keep a close eye on your pup’s ears and behavior, especially if they belong to a breed prone to ear problems. Your vigilance could make all the difference to your dog’s ear health.

    Common Causes of Dog Ear Infections

    Understanding the causes of dog ear infections is crucial in preventing these painful conditions and ensuring your furry friend’s overall health. As a veterinarian, I’ve seen that these infections are typically caused by bacteria or fungi.

    Bacterial Causes of Ear Infections in Dogs

    One of the most widespread causes of dog ear infections is bacteria. The warm, moist environment within a dog’s ear canal is a breeding ground for bacterial growth. Several types of bacteria can cause ear infections, including Staphylococcus, Pseudomonas, and Proteus. These bacteria can multiply rapidly, causing inflammation and discomfort.

    • Staphylococcus: Often found on the skin, these bacteria can enter the ear canal through a scratch or wound.
    • Pseudomonas: These bacteria thrive in moist environments and are often associated with chronic ear infections.
    • Proteus: This bacterium is commonly found in the environment and can cause infections if it enters the ear canal.

    Fungal Causes of Ear Infections in Dogs

    Fungi are another common cause of ear infections in dogs. The most frequent fungi causing these infections are Malassezia and Aspergillus. They can grow excessively in the ear canal, especially if the dog’s immune system is compromised or if the ear environment becomes overly moist.

    • Malassezia: This yeast-like fungus is naturally present on the skin and ear canal of dogs, but can overgrow and cause an infection under certain conditions, such as high humidity or impaired immunity.
    • Aspergillus: This is a type of mold that can cause severe infections, especially in dogs with weakened immune systems.

    Knowing these common causes of dog ear infections can help you take proactive measures to protect your dog’s ear health. Regular cleaning, prompt treatment of wounds, and keeping your dog’s ears dry can go a long way in preventing these painful infections.

    List of Dog Breeds Prone to Ear Infections

    While any dog can suffer from an ear infection, certain breeds are more susceptible than others. This is often due to the physical characteristics of their ears.

    Top Dog Breeds Susceptible to Ear Infections

    • Cocker Spaniels: Known for their long, floppy ears, Cocker Spaniels are prone to ear infections due to the lack of air circulation in their ear canals.
    • Basset Hounds: Similar to Cocker Spaniels, Basset Hounds have long ears that can trap moisture, creating a prime environment for bacteria and yeast.
    • Labrador Retrievers: These water-loving dogs often get water in their ears, which can lead to infections if not properly dried.
    • Poodles and Poodle Mixes: Poodles have hair in their ear canals that can trap debris and moisture, leading to ear infections.
    • Shar Peis: Known for their deep wrinkles, Shar Peis have narrow ear canals that can easily become infected.

    Why Certain Breeds are More Prone to Ear Infections

    The structure of a dog’s ear can greatly affect their likelihood of developing an ear infection. Dogs with long, floppy ears, like Cocker Spaniels and Basset Hounds, are more prone to ear infections because their ear design allows for moisture and heat to build up, providing an ideal environment for bacteria and yeast to grow.

    Similarly, dogs with hair in their ear canals, such as Poodles, can also have a higher risk of ear infections. The hair can trap debris and moisture, leading to infections. Furthermore, dogs that spend a lot of time in the water, like Labrador Retrievers, are more susceptible to ear infections as water can get trapped in their ears, leading to infection-causing bacteria and yeast growth.

    ear infections in dogs

    How to Prevent Dog Ear Infections

    Regular Cleaning and Care of Dog’s Ears

    One of the best ways to prevent dog ear infections is by maintaining regular hygiene for your pet’s ears. Dogs, especially those with long or floppy ears, are prone to ear infections due to the warm, moist environment their ears provide for bacteria and yeast. Regular cleaning can help keep these microorganisms at bay.

    It’s crucial to clean your dog’s ears gently without causing discomfort. Use a vet-recommended ear cleaner and a soft cloth or cotton ball. Avoid using cotton swabs, as they can push debris deeper into the ear canal and potentially cause damage. If you notice any signs of infection, such as redness, swelling, or a foul smell, it’s time to visit the vet.

    Dietary Measures to Prevent Dog Ear Infections

    Another essential aspect of preventing dog ear infections is diet. Just like humans, dogs can have food allergies that manifest in various ways, including causing ear infections. Common allergens for dogs include wheat, dairy, and certain proteins. If your dog is prone to ear infections, it might be worth consulting with a vet about potential allergens in their diet.

    • Probiotics: These can help balance the good bacteria in your dog’s gut, potentially reducing the likelihood of yeast infections in the ears.
    • Omega-3 Fatty Acids: These can help reduce inflammation and boost your dog’s overall immune system, helping to prevent infections.
    • High-Quality Protein: A diet high in quality protein can support your dog’s immune system and overall health, reducing the likelihood of infections.

    Remember, each dog is unique, and what works for one might not work for another. It’s always best to consult with a vet before making significant changes to your dog’s diet or care routine.

    In summary, regular ear cleaning and a balanced, high-quality diet can go a long way in preventing dog ear infections. However, if your dog does get an ear infection, it’s crucial to seek veterinary care promptly to prevent complications and ensure your furry friend is back to their happy, healthy self as soon as possible.

    Diagnosis of Dog Ear Infections

    Identifying the underlying cause of your furry friend’s discomfort is the first step towards their recovery. So, if you’ve noticed the symptoms we’ve discussed earlier, such as frequent scratching, head shaking, or a foul smell from the ears, it’s time to consult your vet for an accurate diagnosis of a potential dog ear infection.

    Veterinary Examination for Ear Infections

    Initially, your vet will conduct a thorough physical examination of your dog’s ears. They’ll look for any visible signs of inflammation, discharge, or foreign bodies lodged in the ear canal. They may also assess your dog’s pain levels to determine the severity of the infection.

    Often, a vet will use an otoscope, a special instrument designed to view the ear canal and eardrum, to inspect your dog’s ears. They might also take a sample of the ear discharge for microscopic examination. This procedure allows them to identify the type of bacteria or fungus causing the infection, which is critical for prescribing the most effective treatment.

    Advanced Diagnostic Tests for Dog Ear Infections

    In some cases, your vet may recommend more advanced diagnostic tests. For example, if the infection is chronic, severe, or recurrent, they might suggest a culture and sensitivity test. This test helps in identifying the specific bacteria or yeast causing the infection and determining which antibiotics it’s sensitive to.

    In certain cases, especially when the infection has spread to the middle or inner ear, your vet may recommend imaging tests such as X-rays, CT scans, or MRI. These tests help visualize the structures within the ear and assess the extent of the infection.

    Remember, a timely diagnosis can make a world of difference in managing dog ear infections and preventing complications. So, don’t hesitate to consult your vet if you suspect your canine companion might be suffering from an ear infection. After all, our pets rely on us for their health and wellbeing, and we owe it to them to provide the best care possible.

    infections in dogs ear

    Treatment Options for Dog Ear Infections

    When your dog has an ear infection, it’s crucial to get appropriate treatment as promptly as possible. Below, we will discuss medicinal and surgical treatments for dog ear infections.

    Medicinal Treatments for Dog Ear Infections

    Medicinal treatment is usually the first line of defense against dog ear infections. Depending upon the type of infection (bacterial or fungal), your vet might prescribe different medications.

    • Antibiotics: These are typically given to treat bacterial infections. They can be administered orally or directly into the ear through drops.
    • Antifungal Medications: If a fungus is the cause of the infection, antifungal medicine will be necessary. Like antibiotics, these can be given orally or as ear drops.
    • Steroids: In some cases, your vet might prescribe a steroid to reduce inflammation and discomfort in the ear.
    • Pain Relief: Pain medication may also be given to make your dog more comfortable while the infection is being treated.

    It’s important to follow your vet’s instructions closely when administering medication. Not completing the full course of treatment can lead to a recurrence of the infection.

    Surgical Treatments for Severe Dog Ear Infections

    In extreme cases, where medicinal treatment isn’t enough, surgical intervention might be required. This is usually the case when the infection has spread to the middle or inner ear, or if there are polyps or foreign bodies present.

    • Myringotomy: This procedure involves making a small incision in the eardrum to relieve pressure and remove infectious material. It’s generally performed under general anesthesia.
    • Total Ear Canal Ablation (TECA): In severe cases, where the ear canal is badly damaged, it may be necessary to remove it entirely. This is a significant operation with a longer recovery period, but it can provide permanent relief from chronic infections.

    Remember, early treatment is key to preventing severe complications from dog ear infections. If you notice any symptoms or changes in your dog’s behavior, don’t hesitate to seek veterinary help. With prompt and appropriate treatment, most ear infections can be successfully managed, and your furry friend can return to their normal, happy self.

    The Long-Term Impact of Ear Infections in Dogs

    Now, let’s talk about the long-term impact of dog ear infections. If left untreated, these infections can lead to severe complications. It’s crucial to understand these potential risks to emphasize the importance of regular check-ups and early treatment.

    Potential Complications of Untreated Dog Ear Infections

    Ignoring or missing the signs of dog ear infections can lead to serious health issues. Chronic ear infections can result in damage to the ear canal and the eardrum, leading to hearing loss. In severe cases, the infection can spread to the inner ear and affect your dog’s balance, causing disorientation and problems with coordination. In the worst cases, untreated ear infections can even lead to facial paralysis or meningitis.

    Importance of Regular Check-ups and Early Treatment

    Given the potential complications of untreated ear infections, it’s clear why regular veterinary check-ups are so important. They provide an opportunity for early detection and treatment, preventing the infection from escalating into a more serious condition. If your dog is one of the breeds that are more prone to ear infections, these check-ups should be even more frequent.

    Early treatment is also key. Not only does it alleviate your dog’s discomfort sooner, but it also reduces the risk of lasting damage. Treatment will typically involve medication, and in severe cases, may require surgery.

    Remember, you know your dog best. If you notice any changes in behavior or physical signs that might indicate an ear infection, it’s better to be safe than sorry. Reach out to your vet and get your furry friend checked out. After all, our dogs rely on us to keep them healthy and happy, and we owe it to them to take the best possible care of them.

    Understanding dog ear infections and their causes is the first step towards prevention and effective treatment. Keep your dog’s ears clean, focus on a healthy diet, and ensure regular vet visits. Let’s do our best to keep those tails wagging and those ears infection-free!

    Frequently Asked Questions

    Q1: What are the common causes of dog ear infections?

    There are several causes of dog ear infections, including bacteria, yeast, ear mites, allergies, hormonal imbalances, and more. It’s important to get a proper diagnosis from a vet to determine the exact cause.

    Q2: How can I tell if my dog has an ear infection?

    Common symptoms of an ear infection in dogs include scratching of the ear or area around the ear, brown, yellow, or bloody discharge, odor in the ear, redness, swelling, crusted or scaly skin on or near the ear, hair loss around the ear, and more.

    Q3: How are dog ear infections treated?

    Treatment for dog ear infections varies depending on the cause. It may include topical or oral medications, cleaning the ear, or in severe cases, surgery. Always consult with a vet for the best course of treatment.

    Q4: Can dog ear infections be prevented?

    Yes, there are several steps you can take to help prevent ear infections in dogs. These include regular ear checks, proper grooming, a healthy diet, and avoiding allergens.

    Q5: Are certain breeds more susceptible to ear infections?

    Yes, certain breeds that have floppy ears, like Basset Hounds, Cocker Spaniels, and other breeds, are more prone to ear infections. However, any dog can get an ear infection, so it’s important to regularly check your dog’s ears.

    A note about your dog’s health

    This article provides general education and does not replace an examination, diagnosis, or individualized advice from your veterinarian. Contact a veterinary professional if you are concerned about your dog’s symptoms.

    Lindsie Parks B.S., CRDNS Avatar

    ABOUT THE AUTHOR
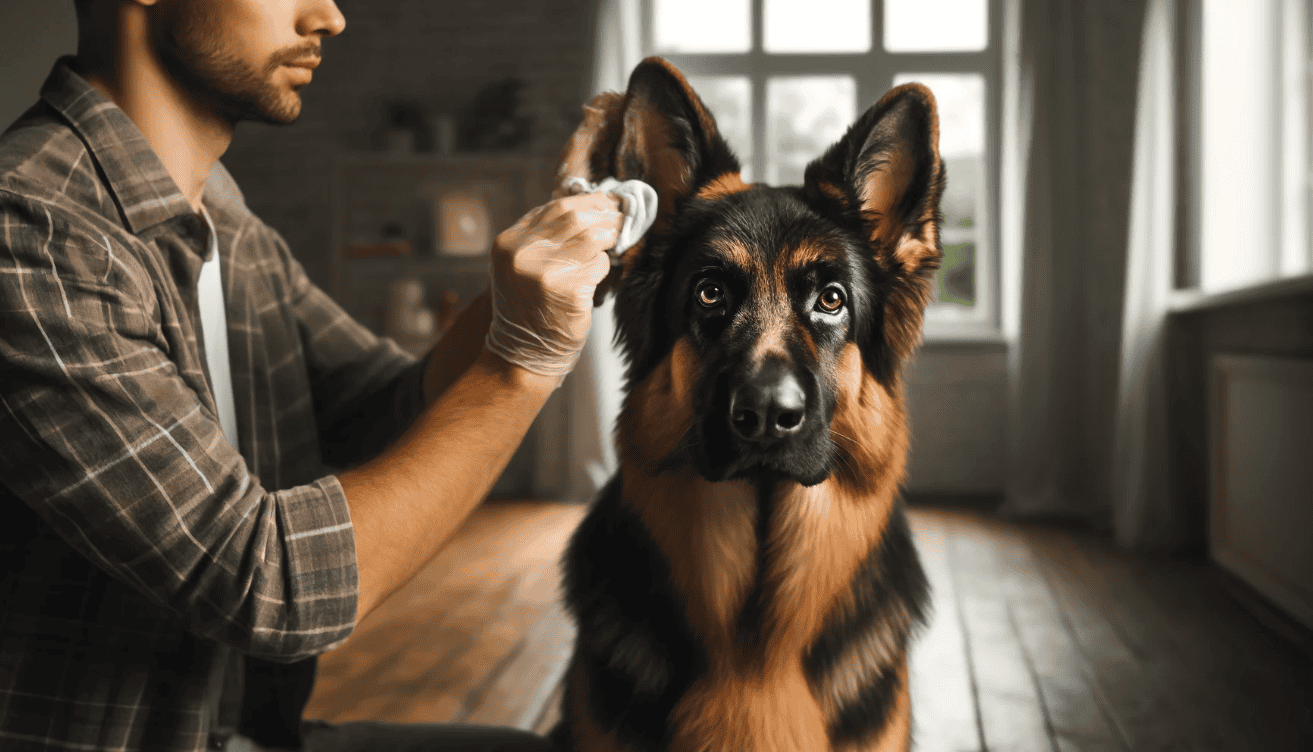
  • Dog Ear Infection Complications: What to Watch For

    Dog Ear Infection Complications: What to Watch For

    As a holistic veterinarian, I understand the concern and worry that comes with seeing your furry friend in discomfort. One common issue I often see in dogs is ear infections. It’s not just the visible discomfort they cause, but the dog ear infection complications that can arise if left untreated that can be particularly concerning. This article aims to guide you through the signs, causes, and treatments of dog ear infections, helping you keep your beloved pet healthy and happy.

    dog ear infection complications

    Common Symptoms of Dog Ear Infections

    As a loving pet parent, it’s crucial to be aware of the signs of a dog ear infection. Recognizing these symptoms can help you act quickly, reducing the risk of dog ear infection complications and ensuring your furry friend stays happy and healthy.

    Visible Symptoms in Dogs

    One of the first signs of an ear infection in dogs is redness and inflammation. You may notice your dog’s ear canal looking swollen or irritated. Discharge is another common symptom, which can range in color from yellow to brown or even black. Also, look out for any foul smell emanating from the ear, as this could indicate a bacterial or yeast infection. Lastly, your dog may have crusty or scaly skin around the ear, another telltale sign of an ear infection.

    • Redness and inflammation
    • Discharge (yellow, brown, or black)
    • Foul smell
    • Crusty or scaly skin

    Behavioral Changes Indicating Ear Infection

    Dogs suffering from an ear infection may also exhibit certain behavioral changes. Your dog may frequently scratch its ears or shake its head, trying to relieve the discomfort. Some dogs may also show signs of pain or discomfort when their ears are touched. Another symptom to watch out for is a loss of balance or coordination, as severe ear infections can affect a dog’s equilibrium. In extreme cases, your dog may also show signs of hearing loss.

    • Frequent scratching or head shaking
    • Avoidance of ear touching
    • Loss of balance or coordination
    • Hearing loss

    Being aware of these symptoms can help you catch a potential ear infection early, making treatment more effective and avoiding dog ear infection complications. Remember, your pet can’t tell you when something’s wrong, so it’s up to you to keep an eye out for these signs.

    Specific Breeds Prone to Ear Infections

    As a veterinarian, I often get asked if certain breeds are more prone to dog ear infection complications than others. The answer to that is, yes. Certain breeds with specific physical characteristics are more susceptible to ear infections.

    List of Dog Breeds Prone to Ear Infections

    • Cocker Spaniels: Known for their long, floppy ears, Cocker Spaniels are more prone to ear infections due to poor ventilation in the ear canal.
    • Labrador Retrievers: These water-loving dogs are at risk because moisture can get trapped in their ears, leading to infections.
    • Basset Hounds: Their droopy ears do not allow for good airflow, creating a damp environment perfect for bacterial growth.
    • Poodles: Poodles have hair that grows in their ear canals, which can trap debris and lead to infections.
    • Bulldogs: The narrow ear canals in Bulldogs can lead to ear infections due to the accumulation of wax and debris.

    Why Certain Breeds are More Susceptible

    The main reason some dog breeds are more prone to ear infections is primarily due to their physical characteristics. Dogs with long, floppy ears, for example, have less air circulation in their ear canals, creating a warm, moist environment where yeast and bacteria can thrive. This makes them more susceptible to dog ear infection complications.

    Similarly, breeds with hair in their ear canals are at risk because the hair traps debris, leading to a buildup of wax and potential infections. Dogs that love to swim or get their ears wet frequently are also at a higher risk because moisture can get trapped in the ear canal, providing a perfect breeding ground for bacteria and yeast.

    It’s important to note that while certain breeds are more susceptible, any dog can get an ear infection. Regular ear checks and cleanings can help prevent dog ear infection complications and keep your furry friend healthy and happy.

    Types of Complications

    When a dog ear infection goes untreated, it can lead to serious health complications. These can be both physical and behavioral in nature, affecting your dog’s overall well-being and quality of life.

    Physical Complications from Dog Ear Infections

    One of the most common physical complications of untreated dog ear infections is hearing loss. The infection can damage the ear canal and ear drum, severely impacting your dog’s ability to hear. In some cases, this hearing loss can be permanent.

    Another serious physical complication is the spread of the infection. If left untreated, the infection can spread to other parts of the body, including the brain or inner ear. This can result in a condition known as vestibular disease, which can cause balance issues, dizziness, and other neurological problems.

    Chronic ear infections can also lead to painful ear hematomas. These occur when blood vessels in the ear flap burst due to inflammation, causing swelling and discomfort.

    Behavioral Complications from Dog Ear Infections

    Untreated ear infections can also lead to noticeable changes in your dog’s behavior. Your dog may become irritable or aggressive due to the discomfort and pain caused by the infection. You may also notice that your dog is constantly scratching or rubbing its ears, or shaking its head frequently.

    Other behavioral changes may include loss of appetite, lethargy, and depression. These changes can have a significant impact on your dog’s overall happiness and quality of life, and may even affect their interactions with you and other pets in the home.

    It’s important to remember that these complications can be prevented with early detection and treatment of ear infections. If you notice any signs of an ear infection in your dog, it’s crucial to seek veterinary attention as soon as possible to prevent these complications from arising.

    problems with dog ear infections

    Regular Cleaning and Care of Dog’s Ears

    One of the best ways to prevent dog ear infection complications is through regular cleaning and care of your dog’s ears. This practice helps to eliminate the buildup of wax, dirt, and other debris that can harbor bacteria and yeast, leading to infections.

    Here’s a simple routine to keep your dog’s ears clean:

    • Examine your dog’s ears regularly. Look for signs of redness, swelling, or discharge. These could be early signs of an infection.
    • Use a vet-approved ear cleaner. Avoid using water as it does not evaporate easily and could lead to a moist environment that encourages bacterial growth.
    • Gently clean the outer ear with a cotton ball soaked in the cleaner. Never insert anything into the ear canal as it could cause injury.
    • Dry your dog’s ears thoroughly after swimming or baths to prevent moisture buildup.

    Diet and Lifestyle Changes to Prevent Ear Infections

    Aside from regular cleaning, certain diet and lifestyle changes can also help prevent dog ear infection complications.

    Consider these tips:

    • Feed your dog a balanced diet. A healthy diet boosts your dog’s immune system, making it easier for their bodies to fight off infections.
    • Keep your dog well-hydrated. Adequate water intake helps keep mucus membranes moist and more resistant to bacteria.
    • Regular exercise can help improve your dog’s overall health and immunity.
    • If your dog is prone to allergies, try to identify and avoid the allergens. Allergies can cause inflammation in the ear, making it more susceptible to infections.
    • Regularly groom your dog, paying special attention to the ears. Hair in the ear canal can trap dirt and moisture, creating a breeding ground for bacteria.

    Preventing dog ear infection complications is all about being proactive. By taking these steps, you can help ensure your dog’s ears stay clean and healthy, reducing the likelihood of painful and potentially serious ear infections.

    Diagnosis of Dog Ear Infections

    How Vets Diagnose Ear Infections in Dogs

    When it comes to diagnosing dog ear infection complications, your vet has a variety of tools at their disposal. Initially, they will conduct a thorough physical examination of your dog’s ear, looking for visible signs of infection such as redness, swelling, or discharge. If your dog seems uncomfortable or reacts when their ear is touched, this can also be a strong indication of an infection.

    Your vet will also likely use an otoscope, a special tool that allows them to look deep into your dog’s ear canal. This can help them spot any abnormalities or signs of infection that might not be visible to the naked eye. In some cases, they may also take a sample of your dog’s ear discharge to examine under a microscope. This can help identify the specific bacteria or yeast causing the infection, which is crucial for effective treatment.

    Importance of Early Diagnosis

    The early diagnosis of a dog ear infection is essential to prevent complications and ensure a quick recovery. Untreated ear infections can lead to serious problems, including hearing loss, chronic pain, and in severe cases, complications like a condition called aural hematoma where blood vessels in the ear burst causing painful swelling. Infections can also spread to other parts of the body if not treated promptly.

    Moreover, recurrent ear infections can be a sign of underlying health issues such as allergies, hormonal imbalances, or immune disorders. Therefore, getting an early diagnosis not only helps treat the current infection but may also help identify and manage these underlying conditions.

    Remember, early detection and treatment of dog ear infection complications can save your furry friend from unnecessary discomfort and prevent more serious health issues. So, it’s always a good idea to consult with your vet at the first sign of trouble.

    yeast infection in dog ear

    Treatment Options for Dog Ear Infections

    Dealing with a dog ear infection can be challenging and stressful for both you and your furry friend. But don’t worry, there are numerous effective treatments available.

    Medications and Therapies for Dog Ear Infections

    Firstly, let’s talk about medications and therapies. After a definite diagnosis, your vet may prescribe antibiotics or antifungal medications. These can be in the form of drops, ointments, or oral medications.

    • Antibiotics: These are used to treat bacterial infections. They can be administered orally or topically.
    • Antifungal Medications: If your dog’s ear infection is caused by yeast, an antifungal medication will be prescribed. These can also be applied directly to the ear or given orally.
    • Corticosteroids: These are often used to reduce inflammation and swelling in the ear. They can be administered orally or topically.

    In addition, your vet may recommend cleaning the dog’s ear with a special solution to remove debris and create an environment where bacteria or yeast cannot thrive.

    Surgical Treatments for Severe Cases

    In severe or chronic cases of ear infection, surgical intervention might be necessary. This is usually the last resort when all other treatments have failed to resolve the infection. The type of surgery will depend on the severity and location of the infection.

    • Lateral Ear Canal Resection (LECR): This procedure involves removing part of the ear canal to improve ventilation and drainage. It’s commonly used for dogs with recurrent ear infections.
    • Total Ear Canal Ablation (TECA): This more drastic surgery involves removing the entire ear canal. It’s typically used for severe, chronic infections that have caused irreversible damage to the ear canal.

    It’s important to remember that each dog is unique and what works for one may not work for another. Therefore, the treatment plan should be tailored to your dog’s specific needs and condition. Always consult with your vet for the best course of action. After all, our aim is to ensure our furry friends lead a comfortable, pain-free life.

    Dog Ear Infection: When to Visit a Vet

    As a loving pet parent, nothing hurts more than seeing your furry friend in discomfort. When it comes to ear infections in dogs, it’s crucial to know when to seek immediate veterinary attention. Here are some signs that your dog’s ear infection has taken a serious turn:

    • Severe pain: If your dog is showing signs of severe pain, such as crying out when the ear is touched, this could indicate a severe infection or a ruptured eardrum.
    • Loss of balance: If your dog is stumbling or can’t walk straight, this could be a sign of an inner ear infection, which needs immediate attention.
    • Neurological symptoms: If your dog is exhibiting strange behaviors such as head tilting, eye movement issues, or facial paralysis, these could be signs of a severe inner ear infection.

    Regular Check-ups for Prevention and Early Detection

    Prevention is always better than cure. Regular check-ups can help prevent dog ear infection complications and catch any issues early on. Veterinarians can thoroughly examine your dog’s ear canal and eardrum to detect any signs of infection or other issues. They can also provide advice on how to properly clean your dog’s ears and what products to use to prevent infections.

    Remember, early detection can make a significant difference in the treatment and recovery of ear infections in dogs. Regular vet visits and keeping a close eye on your dog’s behavior can help ensure their ears stay healthy and infection-free.

    As a dog parent, it’s your responsibility to ensure the well-being of your furry friend. So, don’t ignore the signs of ear infections in dogs. If you notice any changes in your dog’s behavior or physical condition, don’t hesitate to seek professional help.

    Frequently Asked Questions

    Q1: What are the common signs of ear infection in dogs?

    Dogs with ear infections often show symptoms such as scratching or pawing at their ears, shaking their head, discharge from the ears, redness or swelling in the ear canal, and unusual eye movements.

    Q2: Can ear infections in dogs lead to serious complications?

    Yes, if left untreated, ear infections can lead to serious complications such as hearing loss, facial paralysis, and in severe cases, it can spread to the brain causing life-threatening conditions.

    Q3: How can I prevent ear infections in my dog?

    Regular cleaning of your dog’s ears with a vet-approved cleaner can help prevent ear infections. Also, try to keep your dog’s ears dry, especially after swimming or bathing, as moisture can create an environment for bacteria and yeast to grow.

    Q4: How are ear infections in dogs treated?

    Treatment for ear infections in dogs usually involves cleaning the ear and administering prescribed medications. In severe cases, surgery may be required. It’s important to follow your vet’s instructions closely to ensure the infection is completely cleared.

    Q5: Can ear infections come back after treatment?

    Yes, ear infections can recur, especially if the underlying cause is not addressed. This is why it’s important to follow up with your vet even after the symptoms have resolved to ensure the infection is completely cleared.

    A note about your dog’s health

    This article provides general education and does not replace an examination, diagnosis, or individualized advice from your veterinarian. Contact a veterinary professional if you are concerned about your dog’s symptoms.

    Lindsie Parks B.S., CRDNS Avatar

    ABOUT THE AUTHOR
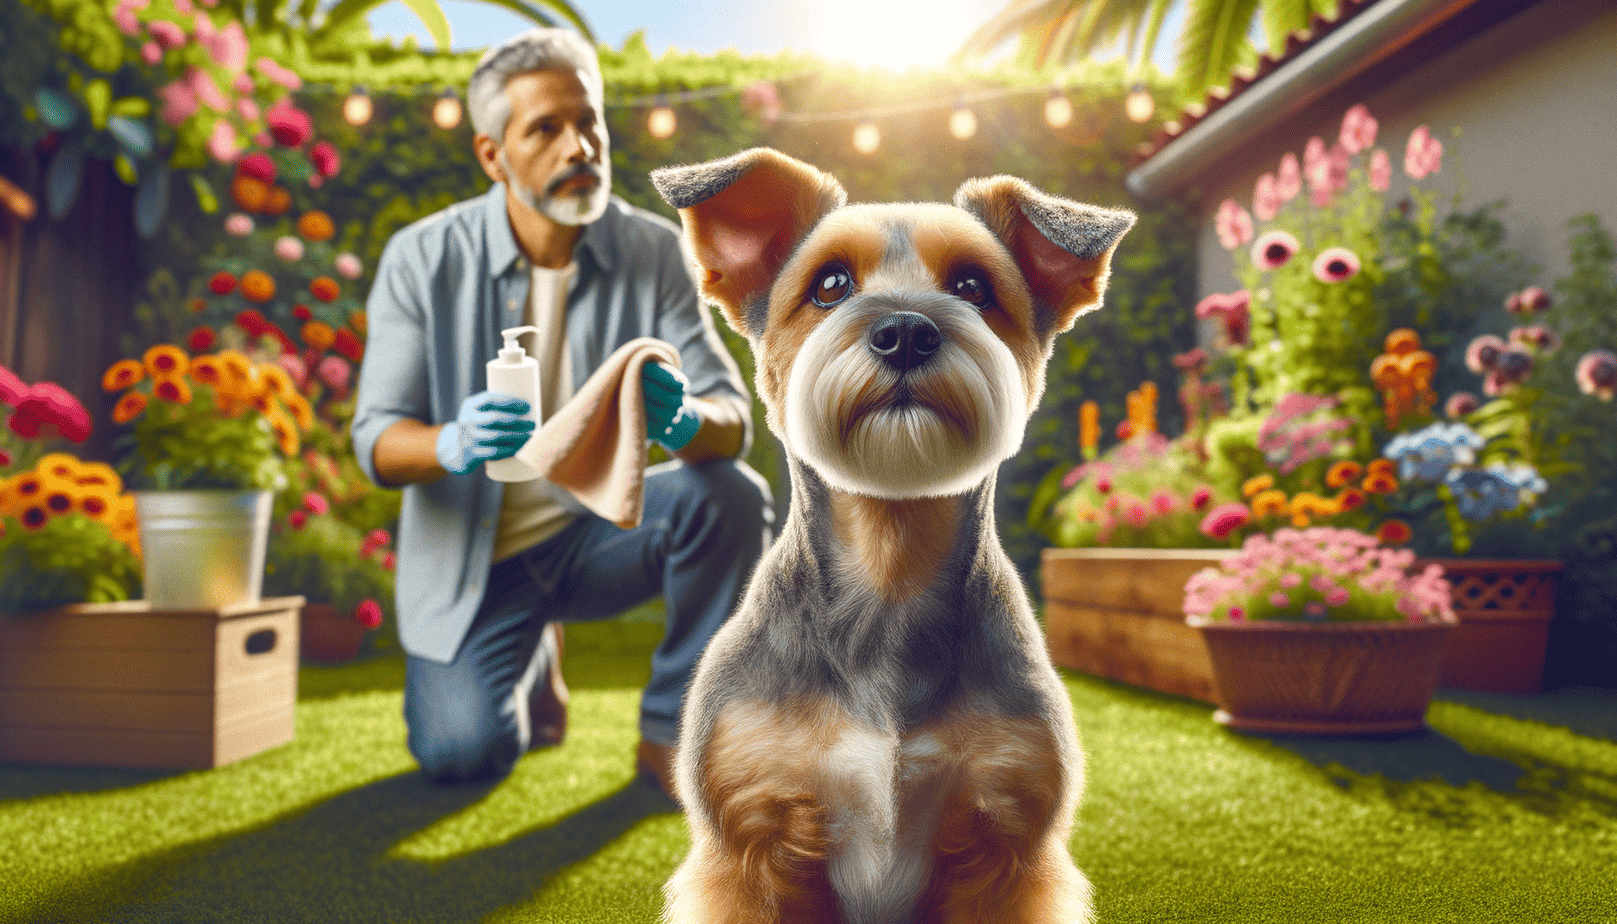
  • How to Clean Dog Ears: Safe & Simple Methods

    How to Clean Dog Ears: Safe & Simple Methods

    As a holistic veterinarian, I often get asked, “how to clean dog ears?” It’s a vital part of pet health that’s often overlooked. Just like us, our furry friends can experience discomfort, and even infections, if their ears aren’t properly maintained.

    Understanding the anatomy of your dog’s ears, recognizing signs of potential issues, and knowing how to safely clean them at home can greatly improve your pet’s wellbeing. Whether you’re a proud parent of a Cocker Spaniel, a Labrador Retriever, or a Shih Tzu, this guide will provide you with all the necessary information and practical tips for keeping your dog’s ears healthy.

    Remember, our pets rely on us for their care. Let’s ensure we’re doing our best to keep them happy and healthy. So, let’s discuss more about cleaning dog ears at home!

    how to clean dog ears

    Understanding Dog Ear Anatomy

    Before we delve into the nitty-gritty of how to clean dog ears, it’s essential to understand the unique structure of a dog’s ear. This understanding will guide you in cleaning your dog’s ears safely and effectively.

    Inner Ear Structure

    The inner ear of a dog is a complex system, designed for superior hearing and balance. It comprises three main parts: the cochlea, for hearing; the vestibular system, for balance; and the auditory tube, which connects the ear to the throat and helps equalize pressure. The inner ear is delicate and sensitive, and damage to it can cause serious complications like hearing loss or balance disorders. Therefore, when cleaning your dog’s ears, you must be careful not to insert any objects too deeply, as this could harm the inner ear.

    Outer Ear Structure

    The outer ear, on the other hand, consists of two main parts: the pinna and the ear canal. The pinna is the part of the ear you can see – it catches sound waves and funnels them into the ear canal. The ear canal then carries these sound waves to the eardrum. In dogs, unlike humans, the ear canal is L-shaped, making it harder for debris and water to escape and easier for infections to develop.

    This unique design of the dog’s ear canal is why regular cleaning is so crucial. It helps prevent the buildup of wax, debris, and bacteria, which can lead to ear infections. However, it’s also why cleaning must be done gently and carefully, to avoid pushing debris further down the canal or damaging the eardrum.

    In the next sections, we’ll discuss the breeds most prone to ear infections, the symptoms to look out for, and safe, simple methods to clean your dog’s ears. But remember, understanding your dog’s ear structure is the first step towards effective ear care. So, let’s keep our furry friends’ ears clean, healthy, and infection-free!

    List of Dog Breeds Prone to Ear Infections

    As a veterinarian, I often get asked how to clean dog ears, especially by parents of certain breeds that are more susceptible to ear infections. It’s important to note that while all dogs can get ear infections, some breeds are more prone to them due to their ear structure and genetic predispositions. Here are some of those breeds:

    • Cocker Spaniels: Their long, floppy ears create a moist environment that’s perfect for the growth of bacteria and yeast.
    • Poodles: Poodles have hair in their ear canals that can trap debris and moisture, leading to infections.
    • Basset Hounds: Similar to Cocker Spaniels, Basset Hounds have long, droopy ears that don’t allow much air circulation, increasing the risk of infections.
    • Labrador Retrievers: Labs love water, but their frequent swimming can lead to wet ears, which can result in ear infections if not properly dried and cleaned.
    • Beagles: Beagles also have long, floppy ears that can easily trap dirt and bacteria.
    • Shih Tzus: Shih Tzus have hair that grows in their ear canals, which can cause wax and debris build-up.
    • Bulldogs: Bulldogs have narrow ear canals that can trap debris and moisture, leading to infections.
    • Golden Retrievers: Similar to Labs, Golden Retrievers are water-loving dogs that can get infections if their ears aren’t properly dried after swimming or bathing.

    Knowing how to clean dog ears properly is crucial if you’re a parent to any of these breeds. Regular cleaning can help prevent ear infections and ensure your furry friend stays happy and healthy.

    Symptoms of Dog Ear Infections

    Understanding the symptoms of ear infections in dogs is essential to ensure they get the help they need as soon as possible. Let’s go over some common signs you should look out for.

    Visible Signs of Ear Infections

    Redness and swelling: One of the most noticeable signs of an ear infection in dogs is redness and swelling in the ear canal. This can be a result of inflammation caused by the infection.

    Discharge: A dog with an ear infection may have a yellow, brown, or bloody discharge. This is often a sign that an infection is present and needs to be addressed.

    Bad odor: An unpleasant smell coming from your dog’s ear is another symptom of an ear infection. This is caused by the bacteria or yeast causing the infection.

    Behavioral Changes in Dogs with Ear Infections

    Scratching or pawing at the ears: If your dog is constantly scratching or pawing at their ears, it could be a sign of discomfort due to an ear infection.

    Head shaking: Dogs with ear infections often shake their heads in an attempt to relieve the discomfort and itchiness caused by the infection.

    Loss of balance: In severe cases, an ear infection can affect your dog’s balance. This is because the ear is responsible for maintaining balance. If your dog is stumbling or seems unsteady, it could be a sign of a serious ear infection.

    Remember, if you notice any of these symptoms, it’s important to consult with a veterinarian as soon as possible. They can provide a proper diagnosis and recommend the best course of treatment.

    how to clean my dogs ears

    How to Clean Dog Ears: Safe & Simple Methods

    Cleaning your dog’s ears can seem like a daunting task, especially if your furry friend isn’t too keen on the idea. However, with the right methods and products, you can easily keep your dog’s ears clean and healthy. Here are some safe and simple methods to clean your dog’s ears.

    Using Dog Ear Cleaning Solutions

    Dog ear cleaning solutions are specially formulated to safely clean your dog’s ears without causing any harm. They are typically easy to use and very effective at removing dirt, debris, and earwax. Here’s how to use them:

    • First, gently hold your dog’s ear flap up to expose the ear canal.
    • Next, carefully pour a generous amount of the cleaning solution into your dog’s ear canal.
    • Gently massage the base of your dog’s ear for about 30 seconds to help the solution break down any debris or wax.
    • Finally, let your dog shake their head to help remove the solution and any loosened debris. You can then wipe the outer part of the ear with a cotton ball or soft cloth to clean up any remaining solution or debris.

    Remember, never insert anything into your dog’s ear canal as it could cause damage. Always follow the instructions on the cleaning solution bottle, and if you’re unsure, consult your vet.

    Using Dog Ear Wipes

    Dog ear wipes are another great option for cleaning your dog’s ears, especially for quick clean-ups or for dogs who don’t like having liquid poured into their ears. Here’s how to use them:

    • First, gently hold your dog’s ear flap up.
    • Next, take a dog ear wipe and gently clean the visible parts of your dog’s ear and ear flap.
    • Be sure to get into all the folds and crevices, but avoid going too deep into the ear canal.

    Just like with the cleaning solution, never insert anything into your dog’s ear canal. Always follow the instructions on the ear wipe package, and consult your vet if you’re unsure.

    Keeping your dog’s ears clean is an important part of their overall health and well-being. By using these safe and simple methods, you can help prevent ear infections and keep your dog feeling their best.

    How Often Should You Clean Your Dog’s Ears?

    Knowing how to clean dog ears is crucial, but equally important is understanding the frequency at which you should be doing this task. The frequency varies depending on the health status and breed of your dog.

    Frequency of Ear Cleaning for Dogs with Chronic Ear Infections

    If your dog has a history of chronic ear infections, more frequent ear cleaning may be necessary. These dogs might require ear cleaning once a week or even more often, depending on the severity of the condition. It’s essential to consult with your vet to establish a suitable cleaning schedule for dogs with chronic ear infections. Remember, over-cleaning can also lead to irritation and discomfort, so it’s a balancing act.

    Frequency of Ear Cleaning for Healthy Dogs

    For healthy dogs, the frequency of ear cleaning can be much less. Generally, a monthly cleaning is sufficient to keep their ears healthy and free from infections. However, certain breeds may require more frequent cleanings. For instance, breeds with floppy ears such as Basset Hounds and Cocker Spaniels are more prone to ear infections and might benefit from weekly cleanings.

    Similarly, dogs that swim regularly should have their ears cleaned after each swim to prevent the buildup of moisture, which can create a breeding ground for bacteria and yeast.

    Regardless of your dog’s breed or health status, it’s important to observe their behavior and regularly check their ears for signs of infection. If you notice any changes such as redness, swelling, bad odor, or your dog seems to be in discomfort, it’s time to consult your vet.

    Remember, every dog is unique, and what works for one might not work for another. Therefore, the best approach is to work with your vet to determine the most suitable ear cleaning routine for your furry friend. Regular ear cleaning is an essential part of dog ear care, and when done correctly, it can help prevent ear infections and ensure your dog’s overall wellbeing.

    cleaning your dogs ears

    Regular ear cleaning is essential for your dog’s health, but neglecting this task can lead to severe consequences. Understanding the potential risks associated with not cleaning your dog’s ears can motivate you to maintain a consistent ear cleaning routine. The two main risks of neglecting your dog’s ear health are the development of ear infections and permanent hearing loss.

    Development of Ear Infections

    If you don’t clean your dog’s ears regularly, it creates a conducive environment for the growth of bacteria and yeast, leading to ear infections. Dogs have a vertical ear canal, unlike humans who have a horizontal one. This unique anatomy makes it easy for dirt, debris, and moisture to get trapped, providing a breeding ground for bacteria and yeast, which can lead to infections.

    Ear infections are not only uncomfortable but can also be painful for your furry friend. They can cause symptoms such as redness, swelling, discharge, and a foul smell. If left untreated, these infections can turn chronic and may require extensive medical treatment.

    Permanent Hearing Loss

    Another risk of not cleaning your dog’s ears is the potential for permanent hearing loss. Chronic ear infections can lead to the thickening of the ear canal walls over time, which can impair your dog’s hearing. In severe cases, untreated ear infections can cause deafness.

    Furthermore, the presence of excessive wax or debris can physically block sound waves, affecting your dog’s hearing ability. Regular cleaning helps remove this build-up and maintains your dog’s hearing health.

    Therefore, it’s essential to incorporate regular ear cleaning into your dog’s grooming routine. Not only will you keep their ears healthy, but you’ll also be enhancing their overall well-being. Remember, a proactive approach to ear care can prevent these potential risks and keep your dog’s ears in top shape.

    So, if you haven’t been paying much attention to your dog’s ears, it’s high time you started. With the right dog ear cleaning products and a consistent routine, you can ensure your dog’s ears remain clean, healthy, and infection-free.

    Prevention is Better Than Cure

    It’s worth noting that while treating ear infections is possible, preventing them is far easier and less stressful for both you and your dog. Regular cleaning and check-ups can help catch any potential problems early before they become severe issues. Remember, when it comes to your dog’s health, prevention is always better than cure.

    When to Seek Veterinary Help for Dog Ear Issues

    As a loving dog parent, you want to do everything in your power to keep your furry friend healthy and happy. But sometimes, despite your best efforts, your dog might still experience ear issues. In such cases, it’s crucial to know when to seek professional help.

    Indications for Veterinary Consultation

    If you notice any of the following signs, it’s time to book a visit to your vet:

    • Persistent scratching or pawing at the ear
    • Discharge or foul smell from the ear
    • Redness, swelling or heat in the ear
    • Unusual head shaking or tilting
    • Apparent pain when you touch the ear
    • Behavioral changes such as loss of appetite or lethargy

    These symptoms could indicate a severe ear infection, mites, a foreign body in the ear, or other serious conditions that require immediate veterinary attention.

    What to Expect During a Veterinary Ear Examination

    During a veterinary ear examination, your vet will thoroughly inspect your dog’s outer and inner ear. They may use an otoscope to look deep into the ear canal and check for any abnormalities.

    Your vet might also take a sample of the ear discharge for microscopic examination. This helps identify the cause of the infection, like bacteria, yeast, or mites. Based on the findings, they will recommend the best course of treatment for your dog.

    Remember, your dog’s ears are delicate, and improper cleaning can cause damage. While learning how to clean dog ears is essential, knowing when to seek professional help is equally vital. In the end, your dog relies on you to make the best decisions for their health.

    So, keep an eye out for any signs of discomfort, regularly clean your dog’s ears as needed, and don’t hesitate to consult your vet when you’re concerned. Your furry friend will thank you with their unwavering love and loyalty!

    Frequently Asked Questions

    Q1: How often should I clean my dog’s ears?

    The frequency of cleaning your dog’s ears can depend on the breed, age, and health of your dog. However, for most dogs, you should aim to clean their ears once a month.

    Q2: What should I use to clean my dog’s ears?

    You can use a solution made for cleaning dog ears, which can be purchased from pet stores or vet clinics. Alternatively, you can use a homemade mixture of equal parts water and vinegar.

    Q3: Can I use Q-tips to clean my dog’s ears?

    It’s not recommended to use Q-tips as they can potentially damage your dog’s ear canal. Instead, use a cotton ball or gauze wrapped around your finger.

    Q4: How do I know if my dog has an ear infection?

    Signs of an ear infection in dogs include redness, swelling, unusual discharge, bad smell, and your dog shaking their head or scratching their ear frequently. If you notice these symptoms, you should take your dog to the vet.

    Q5: Can I use human ear cleaning solutions for my dog?

    No, human ear cleaning solutions may contain ingredients that are harmful to dogs. Always use a solution that is specifically made for dogs.

    A note about your dog’s health

    This article provides general education and does not replace an examination, diagnosis, or individualized advice from your veterinarian. Contact a veterinary professional if you are concerned about your dog’s symptoms.

    Lindsie Parks B.S., CRDNS Avatar

    ABOUT THE AUTHOR
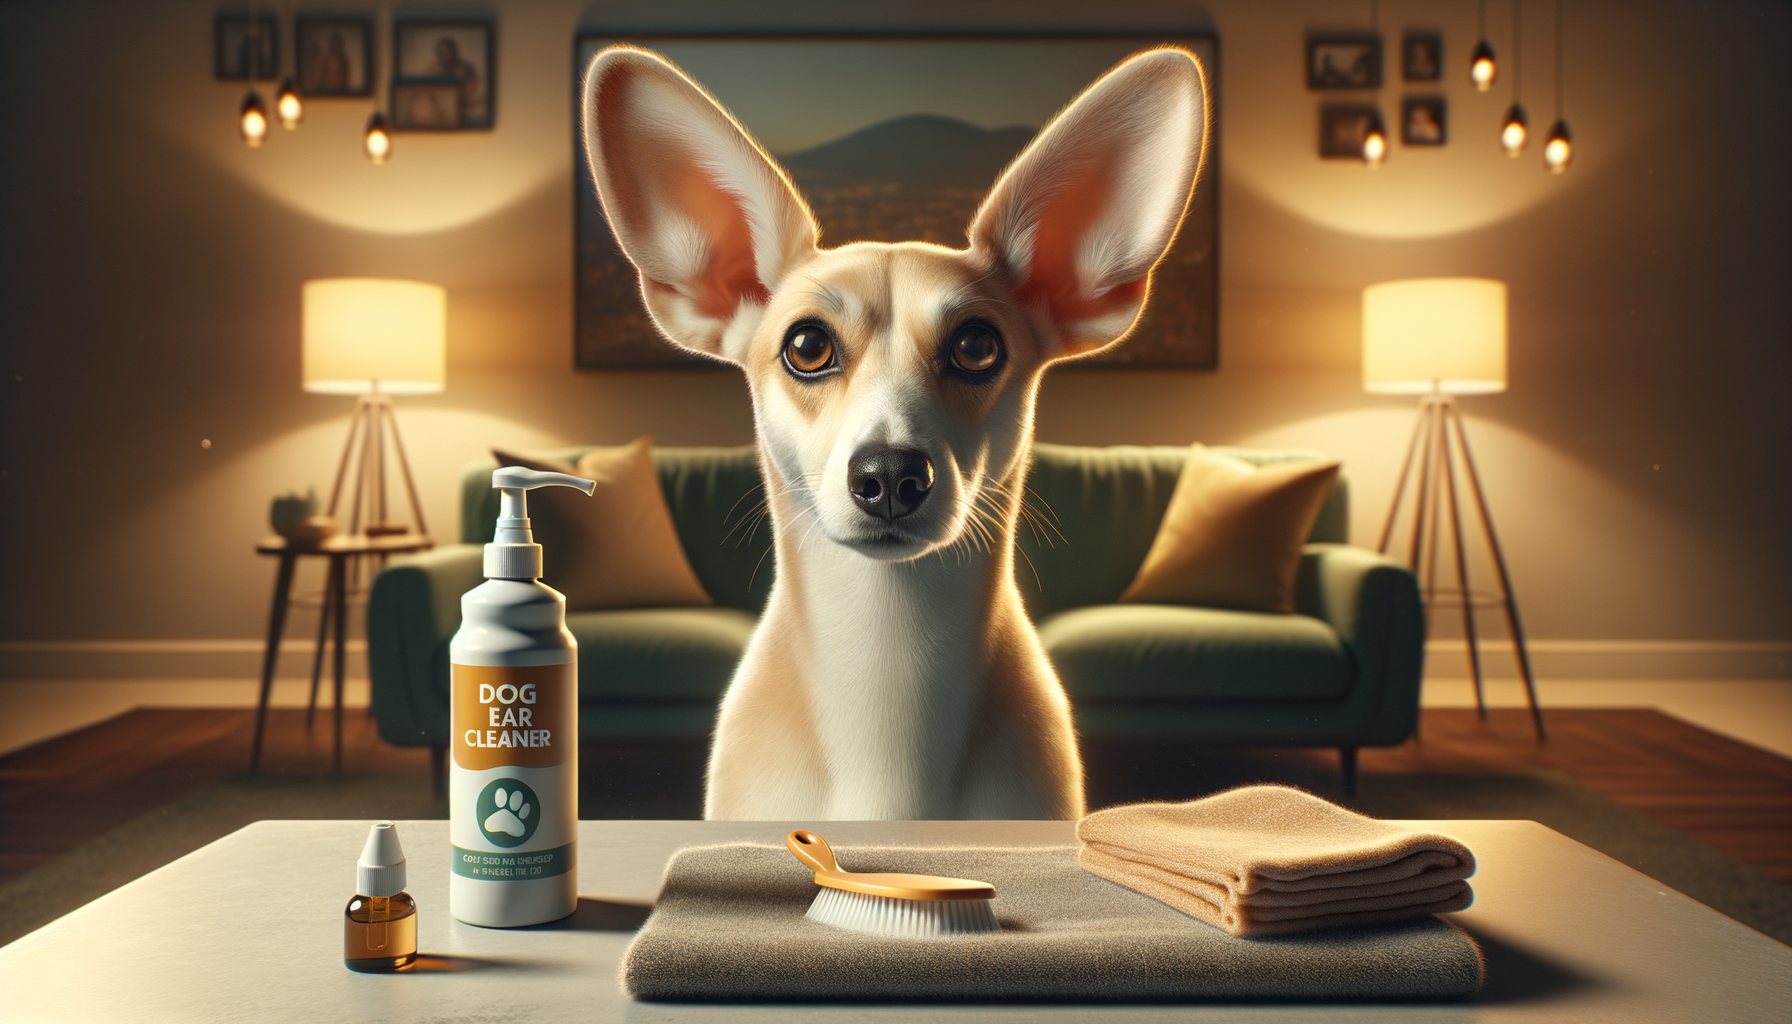
  • Antibiotics for Dog Ear Infections: Pros & Cons

    Antibiotics for Dog Ear Infections: Pros & Cons

    As a devoted dog parent, it’s heart-wrenching to see your furry friend in distress due to an ear infection. You’re probably wondering if antibiotics are the best route to take. In this article, titled “Antibiotics for Dog Ear Infections: Pros & Cons”, we’ll explore the good and bad of using antibiotics for treating your dog’s ear infection. We’ll also discuss alternatives and preventive measures to help your pooch stay healthy. So, let’s dive in and equip ourselves with the knowledge to make the best decisions for our four-legged family members.

    dog ear infection antibiotics the good and bad

    Understanding Dog Ear Infections

    If you’ve ever seen your four-legged friend scratching their ears relentlessly or shaking their head more than usual, it’s possible they might be suffering from an ear infection. Ear infections in dogs are quite common and can be caused by various factors. Having a comprehensive understanding of these infections is key to ensuring your pet’s well-being, and knowing when it might be time to consider antibiotics.

    Causes of Dog Ear Infections

    Ear infections in dogs are often caused by bacteria or yeast. However, other factors such as allergies, ear mites, foreign bodies lodged in the ear, or excessive moisture can also lead to these infections. Certain breeds with floppy ears, like Basset Hounds and Cocker Spaniels, are more prone to ear infections due to their ear structure which can trap moisture and debris.

    Environmental factors like humidity and swimming can also contribute to an increased risk of ear infections. Additionally, dogs with underlying health issues such as hormonal imbalances or immune disorders are more susceptible to developing infections.

    Symptoms of Dog Ear Infections

    Recognizing the symptoms of an ear infection is crucial in seeking timely treatment for your pet. Some common symptoms include:

    • Scratching or rubbing of the ears and head
    • Odor or discharge from the ears
    • Redness or swelling in the ear canal
    • Pain or discomfort when the ears are touched
    • Loss of balance or coordination, in severe cases

    It’s important to remember that symptoms can vary depending on the severity of the infection and the underlying cause. If you notice any of these signs, it’s best to consult with your veterinarian promptly. They can diagnose the condition accurately and advise on the most effective treatment strategy, which may include the use of antibiotics.

    Knowing the causes and symptoms of dog ear infections is the first step in protecting your pet’s health. In the following sections, we will explore the role of antibiotics in treating these infections, their pros and cons, alternatives, and more. Stay tuned to learn all about dog ear infection antibiotics: the good and the bad.

    Role of Antibiotics in Treating Dog Ear Infections

    As a veterinarian, I often encounter worried pet parents inquiring about the best treatment for their dog’s ear infection. The key, my dear friend, is to understand the role of antibiotics in these situations. They can be a powerful tool in combating these infections, but as with any medication, there are both good and bad aspects to consider.

    How Antibiotics Work Against Ear Infections:

    Antibiotics are specifically designed to fight bacterial infections. When your dog has an ear infection, the bacteria causing the infection are multiplying rapidly. Antibiotics work by inhibiting the bacteria’s ability to reproduce, thus controlling the infection. Some antibiotics also kill the bacteria directly. The relief for your furry friend can be quite rapid with the right antibiotic.

    Types of Antibiotics Used for Dog Ear Infections:

    • Cephalexin: This is a common antibiotic used to treat a variety of bacterial infections in dogs, including ear infections.
    • Amoxicillin: Another popular choice, Amoxicillin is used to combat various types of infections in dogs. It is often used when the infection is mild to moderate.
    • Enrofloxacin: This antibiotic is often used when other antibiotics have proven ineffective. It’s powerful and can tackle severe infections.

    Now, when we talk about dog ear infection antibiotics the good and bad, it’s important to remember that each dog is unique. What works for one might not work for another. So, it’s crucial to consult with a veterinarian who can examine your dog and prescribe the best antibiotic for their specific situation.

    In the next section, we will delve deeper into the pros and cons of using antibiotics for dog ear infections. This will help you make an informed decision about your dog’s health and well-being.

    Antibiotics for Dog Ear Infections: Pros & Cons

    Effectiveness in Treating Bacterial Infections

    One of the primary advantages of using antibiotics for dog ear infections is their proven effectiveness in treating bacterial infections. Antibiotics are designed to combat bacteria, either by killing them directly or inhibiting their growth, thus giving your dog’s immune system a chance to fight off the infection. When your dog is suffering from a bacterial ear infection, antibiotics can be a real game-changer, alleviating the distressing symptoms and promoting quick recovery.

    Speed of Relief Provided by Antibiotics

    Another significant benefit of antibiotics is the speed of relief they provide. Once the right antibiotic is administered, it quickly gets to work, reducing inflammation and pain. In many cases, you may notice an improvement in your dog’s condition within just a few days of starting the antibiotic treatment, which is a great relief for both you and your furry friend.

    However, it’s important to remember that antibiotics should be used responsibly. Even if your dog seems to be feeling better, it’s crucial to complete the full course of antibiotics prescribed by your vet. This helps to ensure that all the bacteria causing the infection are eliminated, preventing a potential relapse.

    Antibiotics: A Powerful Ally

    In conclusion, antibiotics for dog ear infections can be incredibly beneficial. They offer a powerful solution to bacterial infections, providing quick relief and promoting full recovery. However, like all medications, they should be used responsibly under the guidance of a vet. Remember, the aim is not just to treat the current infection but also to prevent future ones. By using antibiotics correctly, you can help ensure your dog’s ears stay healthy and infection-free.

    As a dog parent, it’s essential to weigh the good and the bad when it comes to using antibiotics for your dog’s ear infection. While they offer quick and effective relief, it’s important to be aware of potential side effects and the risk of antibiotic resistance. Always consult with your vet before starting any new medication for your dog.

    Cons of Using Antibiotics for Dog Ear Infections

    While antibiotics can play a crucial role in treating dog ear infections, it’s important to understand they also come with potential drawbacks. As a responsible pet parent, it’s crucial to know both the good and the bad when it comes to dog ear infection antibiotics.

    Possible Side Effects of Antibiotics in Dogs

    Like any medication, antibiotics can cause side effects. While these vary depending on the specific drug and the dog’s overall health, some common side effects include:

    • Upset stomach: Dogs may experience vomiting, diarrhea, or loss of appetite.
    • Allergic reactions: Hives, difficulty breathing, or sudden behavioral changes could indicate an allergic reaction.
    • Yeast overgrowth: Antibiotics can disrupt the natural balance of bacteria in your dog’s body, leading to yeast overgrowth, especially in the ears and skin.

    It’s crucial to monitor your dog closely while they’re on antibiotics and to contact your vet immediately if you notice any adverse reactions.

    Risk of Antibiotic Resistance

    Another significant concern with the use of antibiotics is the risk of antibiotic resistance. This happens when bacteria evolve to resist the effects of an antibiotic. Overuse or improper use of antibiotics can accelerate this process.

    For example, if a dog doesn’t complete the full course of antibiotics, some bacteria may survive and develop resistance to the drug. The next time that dog gets an ear infection, the same antibiotic may not work as effectively.

    Disruption of Gut Flora

    Antibiotics don’t just kill off the harmful bacteria causing the ear infection; they can also affect the beneficial bacteria in your dog’s gut. This disruption can lead to digestive issues and potentially impact your dog’s overall health and immune system.

    In conclusion, while antibiotics can be highly effective in treating dog ear infections, their use should be carefully considered and monitored. Always consult with your vet to ensure you’re making the best decision for your furry friend’s health.

    Alternatives to Antibiotics for Dog Ear Infections

    While antibiotics are often a go-to treatment for dog ear infections, it’s important to explore other options, especially if your furry friend is prone to side effects or has developed antibiotic resistance. Let’s take a look at some natural remedies and preventive measures that can help keep your dog’s ears healthy.

    Natural Remedies for Dog Ear Infections

    There are several natural treatments that can provide relief for your dog’s ear infection. However, it’s crucial to consult with your vet before starting any new treatment. Here are a few options:

    • Apple Cider Vinegar: Known for its antifungal and antibacterial properties, apple cider vinegar can help to fight off infections. Dilute it with equal parts water and apply it to the infected area.
    • Mullein and Garlic Oil: Both mullein and garlic have antibacterial properties and can be used to treat ear infections. You can find pre-made oils at holistic pet stores or make your own at home.
    • Probiotics: Probiotics not only improve gut health but can also boost your dog’s immune system, helping to prevent ear infections.

    Preventive Measures Against Ear Infections

    Prevention is always better than cure. Here are some preventive measures you can take to prevent ear infections in your dog:

    • Regular Cleaning: Regularly cleaning your dog’s ears can help prevent the buildup of bacteria and yeast that cause infections. Use a vet-approved cleaner and gently clean the ears without digging too deep.
    • Diet: A healthy diet is crucial for a healthy immune system. Ensure your dog’s diet is balanced and includes all the necessary nutrients. Some dogs may benefit from a diet low in allergens, as allergies can contribute to ear infections.
    • Avoid Moisture: Moisture in the ears can create an ideal environment for bacteria and yeast to grow. Try to keep your dog’s ears dry, especially after baths or swimming.

    Remember, every dog is unique and what works for one may not work for another. Always consult with your vet before starting any new treatment or preventive measure. Your vet can provide personalized advice based on your dog’s breed, age, and overall health.

    antibiotics for dogs ear infections

    List of Breeds Prone to Ear Infections

    Some dog breeds are more prone to ear infections than others. This is often due to the shape and size of their ears, their grooming needs, or their genetic predispositions. Let’s take a closer look at a few of these susceptible breeds and why they’re more likely to develop ear infections:

    Cocker Spaniels

    Cocker Spaniels are known for their beautiful, long, floppy ears. However, these ears can trap moisture and prevent adequate airflow, creating a perfect environment for bacteria and yeast to thrive. Regular ear cleaning is essential for this breed.

    Basset Hounds

    Basset Hounds are another breed with long, droopy ears. Their ears can easily drag on the ground and pick up dirt and debris, increasing the risk of infection. Their ear canals are also more horizontal than those of other breeds, which can lead to fluid build-up.

    Labrador Retrievers

    Labrador Retrievers love water, but their fondness for swimming can put them at risk for ear infections. Water can get trapped in their ears, promoting bacterial growth. If you have a Lab who loves to swim, consider regular ear checks and drying their ears thoroughly after each swim.

    Poodles and Poodle Mixes

    Poodles and Poodle mixes have hair that grows inside their ear canals, which can trap debris and moisture. Regular grooming and ear checks are vital for these breeds to prevent ear infections.

    Shar Peis

    Shar Peis have narrow, tightly curled ear canals, making it difficult for air to circulate. This can lead to a moist environment where bacteria and yeast can flourish. Regular ear cleaning and checks are important for this breed.

    Understanding your dog’s breed and its predisposition to ear infections can help you take preventive measures. This could include regular ear checks, cleaning, and grooming, as well as being aware of the symptoms of ear infections. Remember, early detection and treatment can help prevent complications and keep your furry friend comfortable and happy.

    Antibiotics for Dog Ear Infections: Pros & Cons

    We’ve taken a comprehensive look at the causes, symptoms, and treatment options for dog ear infections, with a particular focus on antibiotics. Understanding the pros and cons of using antibiotics for dog ear infections is crucial in making informed decisions about your pet’s health.

    Antibiotics can be highly effective in treating bacterial infections, often providing quick relief. However, they are not without potential drawbacks. Side effects can occur, and the risk of antibiotic resistance is a growing concern.

    It’s essential to also consider alternatives to antibiotics for treating dog ear infections. Natural remedies and preventive measures can play a significant role in your pet’s health, potentially helping to avoid the need for antibiotics altogether.

    Knowing that certain breeds are more susceptible to ear infections can further guide your decisions about treatment and prevention. Armed with this knowledge, you can take proactive steps to protect your pet’s health.

    In the end, the most important thing is to ensure that your furry friend receives the appropriate treatment for their ear infections. Always consult with your vet to determine the best course of action. As pet parents, we all want our dogs to lead happy, healthy lives. Adequate treatment and prevention of ear infections are important parts of that goal.

    Remember, when it comes to dog ear infection antibiotics the good and bad, it’s all about balance. Use them when necessary, but also explore other options that might be better suited to your pet’s specific needs. The health and happiness of your four-legged family member are well worth the effort.

    Frequently Asked Questions

    Q1: What are the pros of using antibiotics for dog ear infections?

    Antibiotics are often effective in treating bacterial infections, including those in a dog’s ear. They can help to quickly reduce symptoms and prevent the infection from spreading.

    Q2: What are the cons of using antibiotics for dog ear infections?

    While antibiotics can be effective, they also have potential downsides. Overuse can lead to antibiotic resistance, making future infections harder to treat. Some dogs may also experience side effects such as nausea, vomiting, or diarrhea.

    Q3: Are there alternatives to antibiotics for treating dog ear infections?

    Yes, depending on the cause of the infection, there may be alternatives to antibiotics. For example, antifungal medications can be used for fungal infections, and certain types of ear drops can help with inflammation and pain.

    Q4: How can I prevent my dog from getting ear infections?

    Regular ear cleaning can help prevent infections. It’s also important to keep your dog’s ears dry, as moisture can create an environment where bacteria and yeast can grow. If your dog has allergies, managing those can also help prevent ear infections.

    Q5: Should I consult with a vet before giving my dog antibiotics?

    Yes, always consult with a vet before giving your dog any new medication, including antibiotics. They can provide guidance on the best treatment options based on your dog’s specific needs and health history.

    A note about your dog’s health

    This article provides general education and does not replace an examination, diagnosis, or individualized advice from your veterinarian. Contact a veterinary professional if you are concerned about your dog’s symptoms.

    Lindsie Parks B.S., CRDNS Avatar

    ABOUT THE AUTHOR
  • Preventing Ear Infections in Dogs: Expert Tips

    Preventing Ear Infections in Dogs: Expert Tips

    As a holistic veterinarian, I understand the worry and concern that comes when your furry friend is in discomfort. One of the most common issues I see in dogs is ear infections, and I’m here to tell you that preventing ear infections in dogs is easier than you think. With a few simple changes and regular care, you can keep your pooch’s ears healthy and infection-free. Let’s explore some expert tips that will help you achieve this goal.

    As a seasoned holistic veterinarian, I understand the concern dog parents like you have when it comes to your furry friend’s health. And one issue that is often overlooked until it’s too late is ear infections in dogs. So, let’s delve into the common causes of these infections, helping you to better prevent them and keep your pup’s ears healthy and happy.

    Allergies as a Common Cause

    Just like humans, dogs can also suffer from allergies, and these allergies often lead to ear infections. Allergens such as pollen, dust mites, and certain foods can cause inflammation in your dog’s ears, leading to infections. The frequent scratching and head shaking due to the itchiness can also cause minor injuries in the ear canal, making it a perfect breeding ground for bacteria and yeast. Therefore, it’s crucial to identify and manage your dog’s allergies to prevent ear infections.

    Parasites and Ear Infections

    Parasites are another common cause of ear infections in dogs. Ear mites, in particular, are a frequent culprit. These tiny creatures live in the ear canal, causing itching and inflammation. Over time, this can lead to an ear infection if not treated promptly. Regularly checking your dog’s ears for signs of parasites and using appropriate parasite control methods are essential steps in preventing ear infections.

    Understanding the common causes of ear infections in dogs is the first step in prevention. By managing your dog’s allergies and keeping a keen eye out for parasites, you can significantly reduce the risk of your pup suffering from this painful condition. Remember, prevention is always better than cure. So, stay proactive in your dog’s ear health to ensure they remain comfortable and infection-free.

    Remember: Regular ear checks and cleaning, a balanced diet, and routine vet check-ups are also crucial in preventing ear infections in dogs. Consult your vet for personalized advice based on your dog’s breed, age, and overall health status.

    Recognizing Symptoms of Ear Infections in Dogs

    As a veterinarian, I often get asked how to prevent ear infections in dogs. The first step in prevention is recognizing early signs of ear infections. Let’s discuss the physical signs and behavioral changes that may indicate your furry friend is suffering.

    Physical Signs of Ear Infections

    As a dog parent, you’re the first line of defense in your pet’s health. Keep an eye out for these physical signs:

    • Redness and Swelling: One of the first signs is redness and swelling in the dog’s ear canal. This is often accompanied by warmth when you touch the ear.
    • Discharge: Yellow, brown, or bloody discharge is another common symptom of an ear infection.
    • Odor: A strong, unpleasant odor emanating from the ear is a clear signal something is wrong.
    • Scabs or Crusts: If you notice scabs or crusts around the outer ear, it’s time to consult your vet.

    Behavioral Changes Indicating Ear Infections

    Physical signs are often accompanied by specific behavioral changes. Watch out for the following:

    • Scratching and Pawing at the Ear: If your dog is constantly scratching or pawing at the ear, it could be an indication of discomfort or pain.
    • Head Shaking: Frequent head shaking or tilting the head to one side is another typical sign.
    • Lethargy: Dogs with ear infections may become less active. If your usually energetic pup is suddenly lethargic, an ear infection could be the cause.
    • Loss of Balance: In severe cases, an ear infection can affect your dog’s balance, causing stumbling or falling.

    Being vigilant about these signs is crucial in learning how to prevent ear infections in dogs. Early detection can lead to quicker treatment, preventing further complications and discomfort for your pup. Remember, if you notice any of these symptoms, it’s best to consult your veterinarian immediately.

    Specific Breeds Prone to Ear Infections

    Did you know that certain breeds of dogs are more susceptible to ear infections than others? This is mainly due to the unique anatomical structure of their ears. Let’s take a look at some of the breeds that are most prone to ear infections and understand why these breeds are more susceptible.

    List of Dog Breeds Prone to Ear Infections

    While any dog can get an ear infection, the following breeds are known to be more vulnerable:

    • Cocker Spaniels: They have long, heavy ears that create a warm, moist environment in the ear canal, ideal for bacterial growth.
    • Basset Hounds: Basset Hounds also have long, droopy ears that don’t allow much air circulation, leading to a higher risk of infection.
    • Labrador Retrievers: Labs love water and their frequent swimming can lead to excess moisture in the ears, increasing the risk of infections.
    • Golden Retrievers: Golden Retrievers are prone to allergies which can cause ear infections.
    • Poodles and Shih Tzus: These breeds have hair that grows in the ear canal which can trap debris and moisture.

    Understanding Why Certain Breeds are More Susceptible

    The main reason some breeds are more prone to ear infections is largely due to the structure and characteristics of their ears. Dogs with floppy ears or those with hair growing in the ear canal have less air circulation, which can create a damp environment where bacteria and yeast thrive.

    Furthermore, breeds that are prone to allergies, like Retrievers, are more likely to develop ear infections, as the inflammation and excess moisture caused by allergies can lead to an overgrowth of bacteria and yeast. Also, dogs who love to swim or get their ears wet frequently are more susceptible as the excess moisture can make it easier for infections to take hold.

    Knowing if your dog’s breed is more prone to ear infections can help you take preventative measures, like regular ear cleaning, to help prevent ear infections in dogs.

    preventing ear infections for my dog

    Regular Ear Cleaning: A Key Prevention Method

    One of the most effective ways to prevent ear infections in dogs is by maintaining a regular ear cleaning routine. This simple yet crucial step can significantly reduce the risk of infections, keeping your furry friend’s ears healthy and happy.

    Importance of Regular Ear Cleaning

    Many dog owners underestimate the importance of regular ear cleaning. Dogs’ ears are a perfect breeding ground for bacteria and yeast due to their warm, moist environment. Regular cleaning helps to remove the buildup of wax and debris, which can harbor these harmful organisms. It also allows you to spot any early signs of infection, such as redness, swelling, or unusual discharge.

    Moreover, certain breeds such as Basset Hounds, Cocker Spaniels, and Poodles have a higher risk of ear infections due to their long, floppy ears that restrict air flow. For these breeds, regular cleaning is not just beneficial, it’s essential.

    Safe Methods for Cleaning Your Dog’s Ears

    Cleaning your dog’s ears might seem like a daunting task, but it doesn’t have to be. Here are some simple steps to do it safely and effectively:

    • Use a vet-recommended cleaning solution: Ask your vet for a recommendation. These solutions are designed to safely clean your dog’s ears without causing irritation.
    • Apply the solution to a cotton ball or pad: This allows you to control the amount of solution and prevents any from going too deep into the ear.
    • Gently clean the outer ear: Use the soaked cotton ball or pad to gently clean the outer part of the ear. Avoid going too deep into the ear canal as this can cause harm.
    • Dry the ear: After cleaning, gently dry the ear with a clean cotton ball or towel. This helps to remove any remaining solution and moisture, preventing the growth of bacteria and yeast.

    Remember, if you notice any signs of an ear infection during cleaning, such as redness, swelling, or foul-smelling discharge, it’s important to seek veterinary help immediately. Regular ear cleaning is a preventative measure, but it’s not a substitute for professional treatment if an infection does occur.

    The Role of Diet in Preventing Ear Infections

    Food allergies are one of the most common causes of ear infections in dogs. They can lead to inflammation and increased production of wax, creating a conducive environment for bacteria and yeast to thrive. Therefore, keeping your dog’s diet balanced and free of potential allergens is crucial in the prevention of ear infections.

    Furthermore, certain nutrients can boost your dog’s immune system, making them less susceptible to infections. For instance, Omega-3 fatty acids have anti-inflammatory properties that can help prevent the swelling and irritation associated with ear infections. Foods rich in vitamin C and E can also strengthen your dog’s immune system.

    Here are some recommended dietary changes to help prevent ear infections in dogs:

    • Eliminate Potential Allergens: Common food allergens for dogs include wheat, soy, corn, and certain types of meat like beef and chicken. Try switching to a hypoallergenic diet or a novel protein diet.
    • Increase Omega-3 Intake: Foods like fish and flaxseeds are rich in Omega-3 fatty acids. You can also consider supplements if your dog’s diet is not providing enough.
    • Boost Vitamins: Incorporate foods rich in vitamins C and E, such as fruits and vegetables, into your dog’s diet. Supplements can also be used under veterinary guidance.
    • Probiotics: These can help maintain a healthy balance of bacteria in your dog’s body, preventing overgrowth of harmful bacteria in the ears.

    Remember, every dog is unique, and what works for one might not work for another. Always consult with your vet before making significant changes to your dog’s diet. They can provide personalized advice based on your dog’s breed, age, weight, and overall health condition.

    By adjusting your dog’s diet and ensuring they get the right nutrients, you can play a significant role in preventing ear infections. After all, a healthy dog is a happy dog, and nothing brings us more joy than seeing our furry friends thrive!

    ear infection prevention

    Importance of Regular Veterinary Check-ups

    As a loving dog parent, one of the critical steps in preventing ear infections in your furry friend is ensuring they have regular veterinary check-ups. Just as we humans need routine health check-ups, our canine companions need them too.

    Role of Regular Check-ups in Early Detection

    Regular veterinary visits play a pivotal role in the early detection of potential health issues, including ear infections. These check-ups allow your vet to examine your dog’s ears for any signs of infection, inflammation, or parasites. Even if your dog appears healthy, an underlying issue might be gradually building up, and early detection can prevent it from worsening.

    Keep in mind, ear infections can cause significant discomfort and even lead to hearing loss if not treated promptly. Hence, regular check-ups are not just about how to prevent ear infections in dogs, but also about ensuring their overall well-being and comfort.

    What to Expect During a Veterinary Ear Exam

    So, what can you expect during a veterinary ear exam? Here’s a simple rundown:

    • Visual Inspection: Your vet will start by visually inspecting your dog’s ear. They’ll look for redness, swelling, discharge, or any visible signs of infection.
    • Otoscope Examination: The vet may use an otoscope, a tool that allows them to view deep inside the ear canal, to check for any abnormalities or signs of infection.
    • Sample Collection: If an infection is suspected, the vet may take a sample of the ear discharge for further analysis. This helps determine the type of infection and the most effective treatment.
    • Discussion and Treatment Plan: Finally, your vet will discuss their findings with you. If an infection is detected, they’ll outline a treatment plan. If not, they may provide advice on how to prevent ear infections in dogs based on your pet’s specific needs.

    Remember, your vet is an invaluable resource when it comes to your dog’s health. Don’t hesitate to ask questions or voice any concerns about your dog’s ear health. After all, prevention is always better than cure!

    Effective Home Remedies for Preventing Ear Infections

    Many times, preventing ear infections in dogs starts right at home. Simple and safe home remedies can go a long way in keeping your furry friend’s ears healthy and infection-free.

    Safe and Effective Home Remedies

    Here are some safe and effective home remedies that you can use:

    • Apple Cider Vinegar: Apple cider vinegar has natural antiseptic properties. Dilute it with equal parts of water and use it to clean your dog’s ears. However, avoid this remedy if your dog’s ears are already inflamed or have open wounds.
    • Mullein Drops: Mullein is a plant with natural antibiotic properties. You can purchase mullein drops from a pet store or online. A few drops in your dog’s ears can help keep infections at bay.
    • Coconut Oil: Coconut oil has anti-inflammatory and antimicrobial properties. Warm a little bit of oil and gently massage it into your dog’s ears. It can help soothe irritation and prevent infections.

    When to Seek Professional Help

    While home remedies can be effective in preventing ear infections, it’s crucial to know when to seek professional help. If your dog shows signs of an ear infection, such as excessive head shaking, scratching, or an unpleasant odor from the ears, it’s time to consult a vet. Also, if the home remedies don’t seem to be working and your dog continues to have recurrent ear problems, a vet visit is in order.

    Remember, how to prevent ear infections in dogs is not a one-size-fits-all approach. What works for one dog might not work for another. Therefore, it’s essential to monitor your dog’s ear health regularly and take immediate action at the first sign of trouble. Prevention is always better than cure, and with these tips, you’ll be well-equipped to keep your dog’s ears healthy and happy!

    Frequently Asked Questions

    What are some common signs of ear infections in dogs?

    Dogs with ear infections may exhibit signs such as scratching or rubbing at their ears, head shaking, discharge or odor from the ears, redness or swelling in the ear canal, and changes in behavior such as irritability or depression.

    How can I prevent ear infections in my dog?

    Regular cleaning of your dog’s ears with a vet-approved cleaner can help prevent infections. Also, try to keep your dog’s ears dry, especially after swimming or bathing. If your dog has long hair, regular trimming around the ears can help prevent moisture buildup.

    Are certain breeds more prone to ear infections?

    Yes, certain breeds with floppy ears like Basset Hounds, Cocker Spaniels, and Golden Retrievers are more prone to ear infections because their ear structure can trap moisture. Dogs with allergies are also more prone to ear infections.

    How often should I clean my dog’s ears to prevent infections?

    The frequency of ear cleaning can depend on your dog’s breed, lifestyle, and health status. However, a general guideline is to clean your dog’s ears once a week. Always consult with your vet for the best advice for your specific dog.

    Can diet affect my dog’s susceptibility to ear infections?

    Yes, diet can play a role. Some dogs may have food allergies that can lead to ear infections. If you suspect this is the case, consult with your vet about potential dietary changes.

    A note about your dog’s health

    This article provides general education and does not replace an examination, diagnosis, or individualized advice from your veterinarian. Contact a veterinary professional if you are concerned about your dog’s symptoms.

    Lindsie Parks B.S., CRDNS Avatar

    ABOUT THE AUTHOR
  • Coconut Oil: Treating Yeast Infections in Dog Ears

    Coconut Oil: Treating Yeast Infections in Dog Ears

    As a holistic veterinarian and a dog parent myself, I understand how distressing it can be when our furry friends suffer from uncomfortable conditions like yeast infections in their ears. Coconut oil for yeast infection in dog ears has been a game-changer for many dog parents, and it could be for you too! This natural remedy is not only cost-effective but also packed with antifungal properties that can help combat the yeast overgrowth causing the infection. Let’s explore how this simple but powerful solution could bring relief to your beloved pet.

    Coconut oil yeast infection in dog ears

    The Role of Coconut Oil in Treating Yeast Infections

    As a holistic veterinarian, I’ve seen how troublesome yeast infections can be for dogs and their caring parents. Fortunately, there’s a natural, accessible solution that I often recommend: coconut oil. This tropical treasure has incredible properties that make it a potent ally against yeast infections in dog ears.

    Properties of Coconut Oil Beneficial for Yeast Infections

    Coconut oil is rich in lauric acid, a medium-chain fatty acid known for its antimicrobial properties. When applied, lauric acid transforms into monolaurin, a compound that effectively combats harmful microbes, including the yeast Candida. Furthermore, coconut oil contains capric acid and caprylic acid, both of which boast strong antifungal properties. These elements work together to combat yeast overgrowth and soothe the inflammation and discomfort that often accompanies these infections.

    How Coconut Oil Works Against Yeast Infections

    When you apply coconut oil for yeast infection in dog ears, it penetrates the skin to attack the yeast cells directly. The fatty acids in the oil disrupt the yeast cell walls, causing them to break down and die. This process not only kills off the existing yeast, but also prevents new yeast cells from developing, providing a double-pronged attack against the infection.

    Coconut oil also creates a protective layer on the skin, which acts as a barrier against further infection. Plus, its anti-inflammatory properties help to soothe irritated skin, reducing the discomfort and itchiness that dogs often experience with ear yeast infections.

    As a natural and non-toxic substance, coconut oil is a safe and effective treatment for yeast infections. It’s a gentle yet powerful remedy that can bring much-needed relief to your furry friend. Remember, though, it’s always best to consult with a vet before starting any new treatment regime for your dog. While coconut oil is generally safe, every dog is unique and may react differently to new substances.

    Steps to Use Coconut Oil for Treating Yeast Infections in Dog Ears

    As a veterinarian, I often get asked about natural remedies for various canine ailments. One of the most common questions is how to use coconut oil for yeast infection in dog ears. Not only is this remedy natural and cost-effective, but it’s also quite easy to administer. Here’s how you can do it:

    Preparing Coconut Oil for Treatment

    Firstly, it’s essential to choose a high-quality, organic, and cold-pressed coconut oil. These types of coconut oil have the highest concentration of beneficial properties. Here are some steps to prepare it:

    • Warm up a small amount of coconut oil in your hands or a microwave-safe dish. The oil should be liquid but not too hot to touch.
    • Using a dropper, draw up the appropriate amount of oil. For small dogs, start with just a few drops, whereas larger breeds may need up to a teaspoon.
    • Ensure the oil is at a comfortable temperature before applying it to your dog’s ears.

    Applying Coconut Oil to Dog’s Ears

    When it comes to applying coconut oil for yeast infection in dog ears, the process is straightforward:

    • Hold your dog’s ear flap up to expose the ear canal.
    • Slowly and gently squeeze the dropper to release the coconut oil into your dog’s ear. Try to distribute the oil evenly within the ear canal.
    • Massage the base of your dog’s ear gently to help the oil work its way down into the ear canal.
    • Let your dog shake his head. This helps to spread the oil further into the ear canal.
    • Finally, use a cotton ball or soft cloth to clean out any excess oil and debris from the ear. Always be gentle and careful not to go too deep into the ear canal.

    Remember, while using coconut oil for yeast infection in dog ears can be effective, it’s important to monitor your dog’s response to the treatment. If your dog’s condition doesn’t improve or worsens, it’s time to consult a vet.

    List of Dog Breeds Prone to Yeast Infections in Ears

    It’s important to note that yeast infections in dog ears can affect any breed, but some are more susceptible than others. Understanding your dog’s breed and their predisposition to this condition can help you take preventative measures.

    Identifying Breeds Susceptible to Yeast Infections

    While any dog can develop an ear yeast infection, certain breeds are more prone to this condition. For instance, dogs with long, floppy ears like Basset Hounds, Cocker Spaniels, and Beagles often have this issue as their ears do not allow for proper ventilation, creating a warm, moist environment where yeast can thrive.

    Dogs with allergies, such as Labrador Retrievers, Golden Retrievers, and West Highland White Terriers, are also more likely to develop yeast infections in their ears. These allergies can lead to an overgrowth of yeast.

    Understanding Why Certain Breeds are More Prone

    The reason why certain breeds are more prone to yeast infections in their ears is often due to their physical attributes and genetic predispositions. Dogs with long, floppy ears lack the airflow necessary to keep the ear canal dry, leading to a moist environment that is perfect for yeast growth.

    Similarly, dogs with allergies often have an overactive immune response, causing inflammation in the ear which can disrupt the natural balance of microorganisms, leading to an overgrowth of yeast.

    Knowing if your dog’s breed is prone to yeast ear infections can help you stay vigilant for signs of trouble. Regularly check your dog’s ears for signs of redness, swelling, or discharge. If you notice your dog scratching their ears more than usual or shaking their head, it might be time to consider treatment options like coconut oil for yeast infection in dog ears.

    Remember, prevention is always better than cure. Regular cleaning and preventative care can go a long way in keeping your dog’s ears healthy and yeast-free.

    coconut oil for dogs ears

    Benefits of Using Coconut Oil for Dog Ear Yeast Infections

    Coconut oil is not just a popular ingredient in your kitchen; it’s also a powerful ally when it comes to managing your dog’s health, specifically in treating yeast infections in their ears. Let’s explore the benefits of using coconut oil for this purpose.

    Health Benefits of Coconut Oil for Dogs

    Coconut oil is packed with numerous health benefits that can significantly improve your dog’s overall health. Here are some of them:

    • Rich in Lauric Acid: Coconut oil contains lauric acid, a medium-chain fatty acid that helps fight harmful bacteria, viruses, and fungi, including yeast.
    • Boosts Immune System: The antimicrobial properties of coconut oil can bolster your dog’s immune system, helping them fight off infections more effectively.
    • Improves Skin and Coat Health: Regular use of coconut oil can result in a shinier coat and healthier skin, reducing the chances of skin infections that can lead to yeast overgrowth.

    Specific Benefits of Coconut Oil for Ear Infections

    When it comes to treating yeast infections in your dog’s ears, coconut oil has several specific benefits:

    • Antifungal Properties: The lauric acid in coconut oil can effectively kill yeast cells, helping to eliminate the infection.
    • Soothes Irritation: Coconut oil can help soothe the inflamed and irritated skin in your dog’s ears, providing relief from the itching and discomfort caused by the yeast infection.
    • Easy to Apply: Coconut oil is easy to apply to your dog’s ears, making it a convenient home remedy for yeast infections.
    • Safe for Regular Use: Unlike some medications, coconut oil is safe for regular use, allowing you to use it as a preventative measure against future yeast infections.

    In summary, using coconut oil for yeast infection in dog ears can be a safe, effective, and convenient treatment option. However, it’s important to remember that while coconut oil can be a helpful tool in managing yeast infections, it should not replace a visit to the vet if your dog is showing signs of a severe or persistent infection.

    Potential Side Effects of Using Coconut Oil on Dogs

    As a dog parent, it’s only natural to want the best for our furry friends. However, while coconut oil for yeast infection in dog ears can be beneficial, it’s important to be aware of the potential side effects.

    Understanding Potential Risks

    The most notable potential risk is allergic reactions. Although it’s rare, some dogs might be allergic to coconut oil. Symptoms of an allergic reaction can include itching, redness, hives, or swelling. If you notice any of these symptoms after using coconut oil, stop the treatment immediately and consult your vet.

    How to Mitigate Potential Side Effects

    To help minimize any potential side effects, make sure to watch for any signs of an allergic reaction, such as itching or redness. If you notice anything unusual, stop using the coconut oil and consult your vet.

    In conclusion, while coconut oil for yeast infection in dog ears can be an effective home remedy, it’s important to use it responsibly. Always monitor your dog’s reaction to the treatment, and consult your vet if you have any concerns. After all, our furry friends rely on us to keep them healthy and happy!

    using coconut oil for yeast infections in dogs ears

    Comparing Coconut Oil with Other Yeast Infection Treatments

    Coconut Oil vs. Other Natural Remedies

    When it comes to treating yeast infections in dog ears, coconut oil stands out amongst other natural remedies. For example, while apple cider vinegar can help balance pH levels, it may sting a dog’s ears if they’re already irritated. Similarly, while probiotics can help balance the gut flora and potentially reduce yeast overgrowth, they don’t provide immediate relief for an active ear infection. On the other hand, coconut oil can soothe discomfort instantly due to its anti-inflammatory properties, while its antifungal properties work to eliminate the yeast infection.

    Coconut Oil vs. Traditional Medical Treatments

    Traditional medical treatments for yeast infections in dogs often include antifungal medications or antibiotics, which can have side effects and might not be suitable for long-term use. In contrast, coconut oil is a safe, natural alternative that can be used regularly without causing harm.

    However, it’s important to note that while coconut oil has many benefits, it may not be as potent as prescription treatments in severe cases. For example, topical medications specifically designed to kill yeast and bacteria may be more effective in severe or persistent infections. That being said, many pet owners find that coconut oil is a wonderful supplement to traditional treatments, aiding in quicker recovery and providing additional relief for their furry friends.

    Remember, it’s always important to consult with your vet before starting any new treatment regimen for your dog. While coconut oil is generally safe, it’s essential to ensure it’s the right treatment for your pet’s specific condition.

    Conclusion

    When it comes to coconut oil for yeast infection in dog ears, the choice between natural remedies, traditional treatments, or a combination of both ultimately depends on the severity of the infection, your pet’s overall health, and your personal preference. Coconut oil, with its natural antifungal and anti-inflammatory properties, can certainly be a beneficial addition to your pet’s healthcare routine.

    In rounding up this discussion on using coconut oil for yeast infection in dog ears, we note the incredible benefits that this natural remedy offers. Coconut oil, with its antifungal properties, is a powerful agent against yeast infections. It works by breaking down the cell walls of the yeast, effectively eliminating the infection.

    But let’s not forget, coconut oil isn’t just for treating infections. It can also contribute to your dog’s overall health, improving their skin condition, digestion, and even mental cognition. However, like any treatment, it’s important to use coconut oil responsibly to avoid potential side effects, such as weight gain from overconsumption.

    Compared to other treatments, both natural and medical, coconut oil stands out for its affordability, accessibility, and ease of use. It’s a remedy you can administer at home, reducing the stress of vet visits for both you and your furry friend.

    But remember, while coconut oil can be a great first line of defense, it’s crucial to seek veterinary advice if your dog’s condition doesn’t improve or worsens. Your vet can provide a definitive diagnosis and guide you on the best course of treatment for your pet. After all, the ultimate goal is to ensure our dogs lead happy, healthy lives!

    Frequently Asked Questions

    1. How does coconut oil help in treating yeast infections in dog ears?

    Coconut oil contains lauric acid which acts as an antimicrobial agent that can kill yeast. When applied to the dog’s ears, it can help in eliminating the yeast causing the infection.

    2. How often should I apply coconut oil to my dog’s ears to treat yeast infections?

    The frequency of application can vary depending on the severity of the infection. However, it is generally recommended to apply coconut oil to the infected area once or twice a day until the infection clears.

    3. Is coconut oil safe for all dogs?

    Yes, coconut oil is generally safe for all dogs. However, some dogs may have allergies or sensitivities to coconut oil. It’s always best to consult with your vet before starting any new treatment.

    4. Can I use any type of coconut oil for treating yeast infections in my dog’s ears?

    It’s recommended to use organic, virgin coconut oil as it is less likely to have been processed with potentially harmful chemicals. It also tends to have a higher concentration of lauric acid, which is beneficial for treating yeast infections.

    5. Can I use coconut oil as a preventive measure against yeast infections in my dog’s ears?

    Yes, coconut oil can be used as a preventive measure. Regularly cleaning your dog’s ears with a small amount of coconut oil can help to keep them healthy and prevent yeast infections.

    A note about your dog’s health

    This article provides general education and does not replace an examination, diagnosis, or individualized advice from your veterinarian. Contact a veterinary professional if you are concerned about your dog’s symptoms.

    Lindsie Parks B.S., CRDNS Avatar

    ABOUT THE AUTHOR
  • How to Soothe an Itchy Dog Ear Safely

    How to Soothe an Itchy Dog Ear Safely

    If your dog has an itchy ear, start with comfort and protection, not a home mixture. Keep the ear dry, stop your dog from scratching if you can, and wipe only the part of the ear you can clearly see with soft gauze or a cotton pad. Do not push a cotton swab into the canal or pour in vinegar, peroxide, oil, tea, cleaner, or medicated drops unless your veterinarian has confirmed that the product fits the cause and the eardrum is safe.

    An itchy ear can come from allergies, yeast, bacteria, mites, trapped moisture, a grass seed, or another problem. Pain, a strong odor, discharge, swelling, bleeding, a head tilt, or trouble balancing means your dog needs veterinary care rather than another home remedy. [1]

    Small dog scratches near its ear, a common sign of ear discomfort

    What You Can Do Right Now

    First, take a calm look at both ears in good light. Lift the ear flap gently. Do not force the ear open if your dog pulls away, cries, snaps, or seems painful.

    You can take these low-risk steps while arranging care:

    • Keep the ear dry. Pause swimming and avoid getting bath water in the ear.
    • Wipe loose debris from the visible ear flap with dry gauze or a soft cotton pad. Stay where you can see your fingers and the pad.
    • Prevent self-injury. If scratching is making the skin raw, an Elizabethan collar can give the ear a break.
    • Note what you see and smell. Redness, dark debris, yellow or brown discharge, blood, swelling, and odor are useful details for your veterinarian.
    • Take a photo if your dog will hold still. It can help show how the ear changed before the appointment.

    Do not keep cleaning a sore ear to make it look normal. A veterinarian may need to examine the debris or collect a sample before the ear is cleaned. Frequent cleaning can also add irritation. [2]

    Check for Signs That Need Prompt Care

    Call your veterinarian the same day if your dog has obvious pain, repeated head shaking, a strong odor, moist or pus-like discharge, bleeding, marked redness, swelling, or skin damage from scratching. A puffy ear flap can be an ear hematoma and also needs care.

    Seek urgent help for a sudden head tilt, stumbling, circling, unusual eye movement, vomiting with balance trouble, facial droop, severe pain, or significant trauma. These signs can point to a deeper ear problem.

    A sudden problem in one ear after a walk can mean a grass seed or other foreign object is trapped in the canal. Do not probe for it with tweezers or a cotton swab. Removal may require an otoscope, pain control, or sedation. [1]

    Spaniel shakes its head with ears extended, a sign of possible ear irritation

    Why Your Dog’s Ear Is Itchy

    The itch is a symptom, not a diagnosis. Several problems can look alike from the outside, and more than one can be present at the same time.

    Allergies

    Environmental or food allergies can inflame the skin lining the ear. That irritated skin then becomes more welcoming to yeast or bacteria. Dogs with allergy-related ear trouble may also lick their paws, rub their face, or have itchy skin elsewhere. Treating only the secondary infection may bring short relief, but the ear often flares again if the allergy plan is not addressed. [1]

    Yeast or Bacteria

    Yeast and bacteria are common secondary problems in inflamed ears. Odor, redness, pain, waxy buildup, and discharge can occur with either one. Color or smell alone cannot reliably tell you which organism is involved. An ear swab examined under a microscope helps a veterinarian choose the right treatment. [2]

    Ear Mites

    Ear mites can cause intense itching and dark, crumbly debris, especially in puppies or pets who have been around an affected animal. Dark debris is not proof of mites, though. Wax, yeast, and blood can look similar. Random mite treatment can delay the correct diagnosis and may further inflame a sore ear. [1]

    Moisture, Wax, or Overcleaning

    Swimming, bathing, humid weather, and ears with limited airflow can leave the canal damp. Moisture does not create every infection, but it can help yeast or bacteria grow in an already vulnerable ear. Too much cleaning can strip and irritate the ear lining, so more cleaning is not always better. [2]

    A Foreign Body or Growth

    Grass seeds, trapped hair, polyps, and other growths can cause one-sided itching that does not settle. A veterinarian may need an otoscope to see the full canal and eardrum. Some dogs need sedation for a complete, comfortable examination or safe removal. [3]

    Veterinarian examines a dog’s ear while its owner offers reassurance

    How to Clean Only When It Is Safe

    If the ear is mildly dirty but not painful, swollen, raw, foul-smelling, or draining, you may wipe the visible ear flap with a soft pad. That is different from flushing the canal.

    For canal cleaning, use only a product your veterinarian has selected for your dog and follow the label. The right cleaner depends on the ear’s condition and on whether the eardrum is intact. Some ingredients can be harmful if the eardrum is damaged, and a swollen canal may be too painful to clean safely. [3]

    Never insert a cotton swab, finger, or tool into the canal. A swab can push material deeper, scrape sore tissue, or make a frightened dog move suddenly. If your veterinarian has shown you how to use a cleaner, let your dog shake afterward and wipe away only the material that reaches the visible outer ear.

    There is no universal daily or weekly schedule. A dog with healthy ears may need little or no routine cleaning. A swimmer or a dog with recurring allergy-related ear trouble may need a veterinarian-approved plan.

    Household Remedies to Avoid in the Ear Canal

    It is understandable to reach for something already in the kitchen, but a sore ear is not a good place to experiment.

    • Apple Cider Vinegar is acidic and can sting inflamed, scratched, or ulcerated tissue. Do not pour it into an undiagnosed ear.
    • Hydrogen peroxide and rubbing alcohol can irritate tissue and should not be used as routine dog ear cleaners.
    • Coconut Oil can coat the canal and trap debris. It does not identify or reliably treat the cause of the itch.
    • Chamomile Tea is not sterile and should not be dripped into the canal. A cool compress held against the outside of a closed, uninjured ear flap is different from putting tea inside the ear, but stop if your dog resists.

    The goal is not to rule out every plant-based approach. It is to protect a painful, delicate structure until you know what is causing the problem.

    How to Think About Over-the-Counter Ear Products

    The word “ear product” covers very different jobs. A cleanser, a medicated drop, and a parasite treatment are not substitutes for one another.

    An Ear Cleanser such as Epiklean is designed to remove wax or debris. It does not replace treatment for a painful infection, foreign body, or damaged eardrum. Use a cleaner only when the ear is safe to clean and the product matches your veterinarian’s plan.

    Medicated Ear Drops such as Zymox may be useful in selected cases, but the symptoms still need a cause. Drops chosen for one problem may be ineffective or unsafe for another, especially when the eardrum cannot be seen.

    An Antiparasitic Treatment such as PetArmor should be used only for the parasites and species listed on its label. Do not assume dark debris means mites, and do not combine ear products unless your veterinarian says the combination is appropriate.

    If a product burns, your dog cries, or the ear becomes redder, stop and call your veterinarian. Improvement on a product does not prove the original cause, so recurring symptoms still deserve an examination.

    When Ear Itching Keeps Coming Back

    Repeated ear trouble is a clue that something underneath has not been controlled. Common drivers include environmental allergies, food allergy, moisture, narrow or hairy canals, a foreign object, a growth, resistant organisms, and changes caused by long-term inflammation.

    A useful recheck may include an otoscopic exam and ear cytology. In stubborn cases, a veterinarian may recommend culture, allergy workup, imaging, or a deeper examination. The aim is not simply to dry the discharge. It is to identify the primary cause, treat the secondary problem, and make a prevention plan that fits that dog. [2]

    Keep a simple flare log. Record the date, which ear is affected, swimming or bathing, new foods or treats, skin symptoms, products used, and how quickly signs returned. Patterns can be more helpful than trying a different bottle each time.

    Preventing the Next Flare

    Check your dog’s ears during normal grooming so you learn what healthy looks and smells like. After swimming or bathing, gently dry the visible ear flap. Do not pack the canal with cotton.

    Follow an individual cleaning plan if your veterinarian recommends one. More frequent cleaning is not automatically better. Use the selected product, amount, and schedule, and stop if the ear becomes painful.

    If allergies are part of the problem, follow the complete allergy plan rather than changing foods at random. A properly designed diet trial takes time and strict consistency. It is different from switching brands for a few days.

    Dogs with floppy ears or hairy, narrow canals may need closer observation, but ear shape alone does not prove an infection. Early attention to mild scratching or odor can prevent days of discomfort and self-trauma.

    Owner dries a golden retriever’s outer ear with a towel after swimming

    Frequently Asked Questions

    What Is the Fastest Safe Way to Soothe My Dog’s Itchy Ear?

    Keep the ear dry, prevent scratching, and wipe only loose material from the visible outer flap with soft gauze. Avoid putting liquid or medication into the canal until the cause and eardrum status are known. Call your veterinarian if the itch is persistent or the ear is painful, smelly, swollen, or draining.

    Can I Give Benadryl for an Itchy Ear?

    Do not use an antihistamine as a substitute for an ear examination. It will not remove a foreign body or treat a yeast or bacterial infection. Ask your veterinarian whether an antihistamine is appropriate for your dog, especially if your dog has other conditions or takes medication.

    Why Is My Dog’s Ear Itchy Without an Obvious Infection?

    Allergy, mites, moisture, excess wax, a foreign body, a growth, or irritation from cleaning can all cause itching. Infection can also be present before the odor or discharge becomes obvious. A persistent one-sided itch deserves an examination.

    How Often Should I Clean My Dog’s Ears?

    There is no one schedule for every dog. Healthy ears may need little cleaning. Dogs who swim or have recurring ear disease may need a specific product and schedule from their veterinarian. Overcleaning can irritate the canal.

    What Should I Never Put in a Dog’s Itchy Ear?

    Do not put cotton swabs, alcohol, hydrogen peroxide, vinegar mixtures, oils, tea, or unselected medication into a painful or undiagnosed ear canal. Do not use a cleaner or drops if the eardrum may be damaged unless a veterinarian has confirmed the product is safe.

    References

    1. Cornell University College of Veterinary Medicine. (n.d.). Itchy ear problems. https://www.vet.cornell.edu/departments-centers-and-institutes/riney-canine-health-center/canine-health-information/itchy-ear-problems

    2. MSD Veterinary Manual. (n.d.). Otitis externa in animals. https://www.msdvetmanual.com/ear-disorders/otitis-externa/otitis-externa-in-animals

    3. VCA Animal Hospitals. (n.d.). Ear infections in dogs (otitis externa). https://vcahospitals.com/know-your-pet/ear-infections-in-dogs-otitis-externa

    Lindsie Parks B.S., CRDNS Avatar

    ABOUT THE AUTHOR
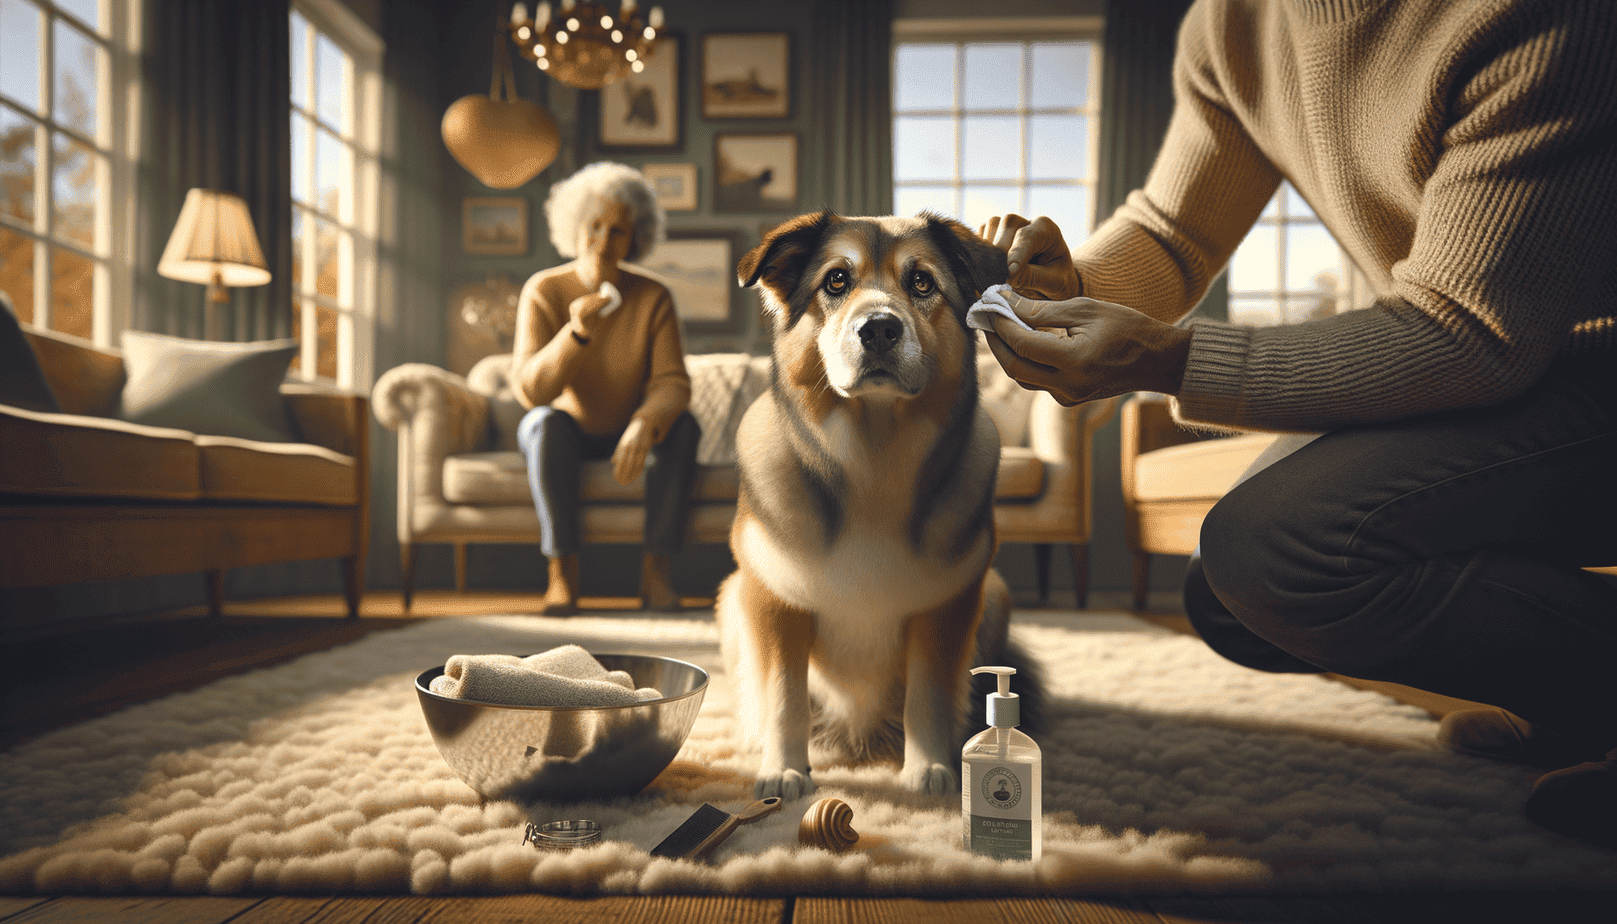
    Lindsie Parks B.S., CRDNS

    Lindsie Parks is the founder of Healthy Happy Dogs and holds a bachelor’s degree in biology. She brings more than 19 years of experience across veterinary medicine, animal welfare, practice leadership, nutrition, cold laser therapy, rescue work, and emergency animal response. Her goal is to give pet parents clear information, practical options, and greater confidence in the decisions they make for their animals.

  • Dog Ear Wax Guide: What’s Normal and What Isn’t

    Dog Ear Wax Guide: What’s Normal and What Isn’t

    A small amount of pale yellow to light brown dog ear wax is usually normal when it is soft, has little odor, and your dog’s ear looks comfortable. A sudden change in color, amount, smell, or texture deserves a closer look, especially when it comes with redness, scratching, head shaking, pain, or balance changes.

    Wax color gives you a clue, not a diagnosis. Yeast, bacteria, mites, allergies, trapped moisture, foreign material, and ordinary dirt can look surprisingly similar. The safest decision comes from looking at the whole picture and, when needed, checking the ear canal and a sample of debris.

    Quick Check: Normal Ear Wax Or A Possible Problem?

    A healthy ear has its own normal pattern. One dog may leave a faint tan mark on a cotton pad, while another may have almost no visible wax. Compare both ears and notice what has changed.

    Dog ear wax on a cotton swab held by a gloved veterinary hand

    Usually reassuring:

    • Small amount of pale yellow, tan, or light brown wax
    • Soft or slightly oily texture
    • Little to no odor
    • Pale pink skin without swelling
    • No scratching, head shaking, pain, or change in behavior

    Worth closer attention:

    • A sudden increase or one ear that looks different from the other
    • Thick, wet, crumbly, green, bloody, or very dark debris
    • Sour, musty, or foul odor
    • Redness, heat, swelling, crusts, or moisture
    • Scratching, rubbing, head shaking, tenderness, head tilt, or poor balance

    Ear inflammation has several possible causes, and secondary yeast or bacterial overgrowth can develop after the canal environment changes. That is why a symptom pattern is more useful than one color by itself. [1]

    Dog Ear Wax Color And Texture Guide

    AppearancePossible CluesWhat Else MattersSensible Next Step
    Pale yellow to light brown, soft, small amountCommon normal cerumenLittle odor and a comfortable earMonitor your dog’s usual pattern
    Dark brown or black, waxyOld wax, dirt, yeast or bacterial overgrowth, or other inflammationOdor, itch, redness, and amountArrange an exam if new, heavy, smelly, or uncomfortable
    Dark and crumbly, like coffee groundsEar mites are one possibilityStrong itch, head shaking, contact with an affected petHave debris checked instead of treating by appearance alone
    Yellow or green, wet or pus-likeInflammation or infection is possibleOdor, pain, swelling, warmthLeave the ear alone and arrange an exam
    Red, rust-colored, or bloodyIrritation, scratching, injury, or severe inflammationPain, swelling, wound, or head shakingDo not clean deeply. Seek prompt help
    Gray or dustyDirt, skin debris, old cleaner, or inflammationRecurrence, odor, itch, and rednessGently wipe only if comfortable, then reassess

    This guide is meant to help you notice patterns. Different problems can produce the same color, and the same problem can look different from one dog to another.

    Amount, Odor, And Consistency

    The amount of wax often tells you more than its shade. A little tan wax that stays consistent for months is less concerning than a large new buildup, even if both look “brown.” One-sided buildup can also point toward a local problem, such as trapped plant material, rather than a whole-body issue.

    Odor is another useful clue. Healthy ears are not perfectly scent-free, but a new musty, sour, or foul smell often travels with inflammation. Thick moisture, sticky discharge, or rapidly returning debris deserves testing rather than repeated cleaning.

    Symptoms That Matter More Than Color

    Your dog’s comfort is the best tie-breaker when the wax is hard to interpret. Make an appointment soon if you notice ongoing scratching, head shaking, redness, swelling, odor, or discharge. Pain when the ear flap is touched means the canal may be too sore for home cleaning.

    Get prompt veterinary help for active bleeding, marked swelling, a head tilt, stumbling, loss of balance, sudden hearing change, or severe pain. These signs can involve deeper structures or significant inflammation. Keep the advice calm, but do not wait several days to see whether a painful ear settles on its own.

    Why Dogs Develop Excess Ear Wax

    Ear wax is not the disease. It is part of the ear’s protective system, and extra wax often reflects a change in the canal. A useful plan asks what started the change and what is keeping it going.

    Labeled clinical illustration of a dog's ear canal showing where wax builds up

    Allergy And Skin Inflammation

    Allergy and other skin inflammation can affect the ears before the rest of the body looks obviously irritated. Recurrent wax may travel with paw licking, seasonal itch, belly redness, or digestive changes. Looking at those patterns supports a root-cause plan instead of treating each dirty ear as a separate event.

    A whole-dog approach may include reviewing food ingredients, treats, seasonal exposure, bathing products, and the timing of flare-ups. The goal is not to guess at one culprit. It is to gather a clear pattern that can guide testing and a practical care plan.

    Moisture, Ear Shape, And Airflow

    Swimming, bathing, humid weather, dense ear hair, narrow canals, and pendulous ear flaps can hold moisture or reduce airflow. These factors raise risk, but they do not mean every floppy-eared dog needs frequent cleaning. Your dog’s comfort, history, and actual debris should guide the routine.

    Dry the outer ear gently after water play. If your dog has repeated trouble after swimming, note the timing and discuss a preventive routine tailored to that ear rather than adding more cleaning on your own.

    Parasites, Foreign Material, And Chronic Change

    Ear mites, grass awns, other foreign material, masses, and long-standing inflammation can all increase debris. A foreign object often causes a sudden one-sided problem. Chronic inflammation can narrow the canal and trap more wax, which creates a frustrating cycle.

    This is where a holistic view is especially helpful. The visible wax is one piece of the story. Skin health, allergies, environment, moisture, anatomy, and past ear problems can all shape what is happening today. [1]

    Ear Mites Versus Ordinary Wax

    Ear mites can cause intense itching and dark, crumbly debris, but coffee-ground material does not prove mites. Yeast, bacteria, dried blood, and dirt can create a similar appearance. Otodectes cynotis is found in dogs, cats, foxes, and ferrets and spreads readily between animals, although it is more common in cats than dogs. [3]

    If one pet has been diagnosed with mites, the other pets in the home may need evaluation. For an individual dog, the reliable next step is to look for mites or eggs with an otoscope or microscope. Guessing from a photo can send care in the wrong direction.

    How Ear Problems Are Diagnosed

    Otoscopy

    An otoscope lets a veterinarian see the vertical and horizontal ear canal, the eardrum when visible, and problems such as swelling, narrowing, foreign material, masses, and heavy discharge. A very painful or blocked ear may need extra comfort measures before a complete view is possible.

    Veterinarian examining a dog's ear canal with an otoscope

    Cytology

    Cytology means examining a small sample of ear debris under a microscope. It can show yeast, bacteria, mites, and inflammatory cells within minutes. This simple test helps separate problems that look alike and guides treatment choices. It is also useful when an ear keeps relapsing or does not respond as expected. [1]

    How much testing is needed depends on the pattern. A first mild flare and a long-standing one-sided problem are not the same. Recurrent or severe disease may call for culture, imaging, or a closer search for an underlying cause.

    When To Clean And When To Leave The Ear Alone

    Gentle Cleaning For A Comfortable Ear

    A comfortable ear with ordinary wax can be cleaned gently when needed. Use a dog ear-cleaning solution, massage the base only if your dog accepts it comfortably, let your dog shake, and wipe the visible folds with cotton or gauze. Do not push a cotton swab or other tool down the canal. Cornell’s veterinary guidance also recommends wiping only as far as a finger can easily reach. [2]

    Dog owner gently wiping the visible outer ear with gauze

    These products are intended for routine care of comfortable ears. A cleaner that works well for ordinary wax may not be right for a painful, infected, bleeding, or injured ear. Ask your veterinarian before putting anything into an ear when the eardrum may be injured.

    EpiKlean Ear Cleanser bottle

    EpiKlean Ear Cleanser

    A general-purpose cleansing and drying solution for routine ear care in dogs and cats.

    Earth Rated Dog Ear Wipes package

    Earth Rated Dog Ear Wipes

    Pre-moistened wipes for dirt and wax on the visible ear flap and outer folds. Never push a wipe down into the ear canal.

    Not every dog needs a weekly cleaning. Some healthy ears rarely need help, while dogs with a known history may have a personalized schedule. Stop if the ear becomes red, sore, or more irritated. Over-cleaning can disrupt the canal and add to the problem.

    Do Not Clean Before An Exam When

    Leave the ear alone and arrange an examination when there is:

    • Significant pain or your dog pulls away sharply
    • Active bleeding, marked swelling, or pus-like discharge
    • A head tilt, stumbling, or balance change
    • A suspected grass awn or other foreign object
    • Sudden hearing change
    • A request from the clinic to preserve debris for sampling

    Do not pour cleaner into an ear if you suspect an injured eardrum or cannot tell why the ear is severely painful. A photograph of the visible debris and notes about odor, timing, swimming, grooming, and other skin signs can be more useful than a freshly scrubbed ear.

    A Root-Cause Plan For Recurrent Wax

    When wax keeps returning, track the pattern for a few weeks. Note which ear is affected, what the debris looks and smells like, whether your dog has been swimming, and whether paw licking or skin itch flares at the same time. This turns “dirty ears again” into usable information.

    A good plan may combine testing, gentle ear care, moisture control, and attention to allergy or skin health. Nutrition can be part of that larger picture, especially when ear flares travel with other signs, but repeated painful discharge should not be managed by diet changes or cleaning alone.

    Final Thoughts

    Your dog does not need perfectly wax-free ears. A small, stable amount of light wax can be normal and useful. Pay attention to change, comfort, odor, and the skin around the canal. If something feels off, compare both ears, take a clear photo, and arrange an ear exam before cleaning away the evidence.

    Frequently Asked Questions

    How Much Dog Ear Wax Is Normal?

    Normal varies by dog, but it is usually a small amount that stays close to your dog’s usual pattern. Pale yellow to light brown, soft wax with little odor and no redness or itch is generally reassuring.

    Is Dark Brown Ear Wax Always An Infection?

    No. Dark brown material can be old wax or dirt, but it can also accompany yeast, bacteria, mites, inflammation, or dried blood. Odor, quantity, texture, redness, pain, and microscopic testing provide a clearer answer.

    How Often Should I Clean My Dog’s Ears?

    Clean only when your dog needs it or when a clinician has given you a specific routine. Many healthy ears do not need weekly cleaning. Dogs with recurring problems may need an individualized plan.

    Can Excess Ear Wax Affect Hearing?

    A heavy plug of wax or swelling can muffle sound, but sudden hearing change can have other causes. Do not probe a blocked ear. Have the canal examined so the wax can be removed safely and the deeper ear can be checked.

    Should I Clean My Dog’s Ears Before A Veterinary Appointment?

    Not if the ear is painful, bleeding, very swollen, producing pus-like discharge, or showing neurologic signs. Leaving debris in place can help with cytology and diagnosis. Ask the clinic if you are unsure.

    References

    1. Bajwa, J. (2019). Canine otitis externa: Treatment and complications. The Canadian Veterinary Journal, 60(1), 97-99.
    2. Cornell University College of Veterinary Medicine. (2025). How to clean your dog’s ears.
    3. Companion Animal Parasite Council. (2019). Otodectic mite.

    A note about your dog’s health

    This article provides general education and does not replace an examination, diagnosis, or individualized advice from your veterinarian. Contact a veterinary professional if you are concerned about your dog’s symptoms.

    Lindsie Parks B.S., CRDNS Avatar

    ABOUT THE AUTHOR
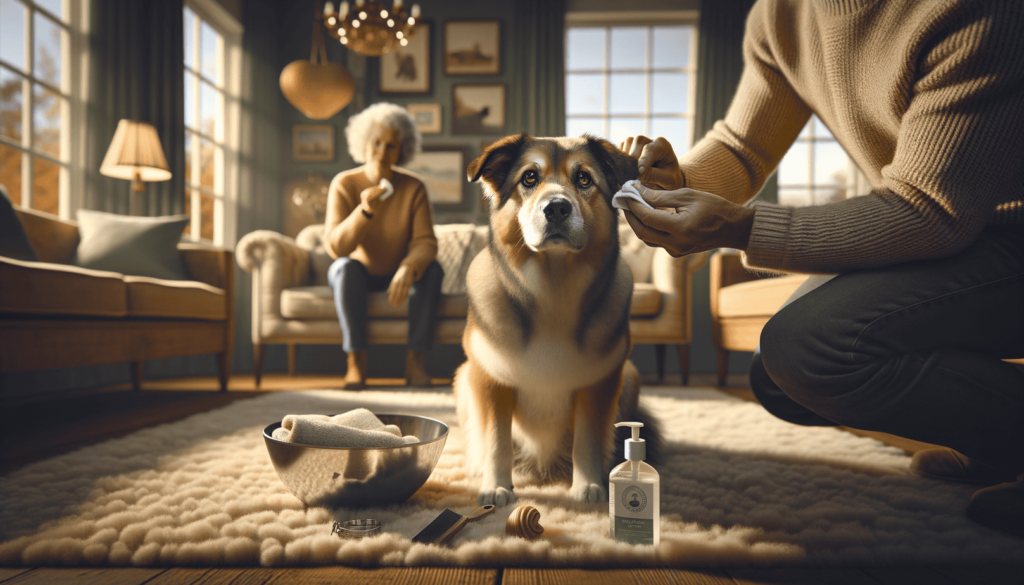
  • Symptoms of Dog Diarrhea – A Detailed Explanation from a Vet

    Symptoms of Dog Diarrhea – A Detailed Explanation from a Vet

    Hello, dear readers. I’m Dr. Candy Akers, and as a seasoned veterinarian with years of experience under my belt, I’ve encountered and treated a plethora of health issues in our beloved canine companions. One of the most common, yet distressing, concerns I often come across is dog diarrhea. While it’s a topic that might make some squirm, it’s crucial for dog owners to be informed about. Our furry friends can’t articulate their discomfort, but understanding the nuances of their symptoms can pave the way for prompt and effective intervention. In this blog, I’ve provided a detailed breakdown of the symptoms of dog diarrhea, underpinned by both my clinical experiences and the latest in veterinary research. It’s my hope that this guide will arm you with the knowledge you need to ensure the health and well-being of your pet.

    causes of diarrhea in dogs

    Watery Dog Diarrhea: Causes and Treatment

    Before digging into the causes, it’s essential to differentiate between regular loose stools and genuinely watery diarrhea. Watery diarrhea is more fluid and can often be expelled with more force, indicating a rapid transit through the intestines. Such a consistency usually implies that the intestines haven’t had enough time to absorb the fluids.

    Understanding Watery Diarrhea in Dogs

    Every dog parent has encountered those unexpected bouts of diarrhea, but not all diarrhea is created equal. Distinguishing the nature and consistency of your dog’s stool can provide valuable insights into potential underlying causes, with watery diarrhea often indicating a swift passage through the intestines. Let’s take a closer look at what this entails.

    Common Causes of Watery Dog Diarrhea

    Dogs, with their curious nature, often end up ingesting things that might not sit well with their digestive system. While some causes of watery diarrhea are innocent enough, others can be indicative of more severe health concerns. From dietary choices to infections, let’s explore the various reasons your dog might be experiencing this condition.

    1. Dietary Indiscretions: The most common reason dogs experience watery diarrhea is due to eating something they shouldn’t have. This can include garbage, spoiled food, or non-food items.
    2. Sudden Change in Diet: Rapidly switching a dog’s food can disrupt their digestive system. It’s always recommended to make dietary changes gradually over a week or so.
    3. Intestinal Parasites: Parasites such as giardia, roundworms, and whipworms can lead to watery stools.
    4. Viral Infections: Viruses like Parvovirus and Coronavirus can cause severe watery diarrhea in dogs.
    5. Toxins: Ingesting toxic substances, such as certain plants, chemicals, or contaminated foods, can lead to rapid-onset diarrhea.
    6. Underlying Health Conditions: Diseases like inflammatory bowel disease, liver disease, or certain cancers can manifest with watery diarrhea as a symptom.

    Treatment Options and Recommendations

    Seeing your furry friend in distress is never easy, and watery diarrhea can certainly cause its share of discomfort. Thankfully, with a combination of home care and veterinary guidance, you can alleviate symptoms and address the root cause. Here’s a comprehensive guide on treatment avenues and recommendations to consider.

    1. Dietary Management: Feed a bland diet like boiled chicken and rice for a few days. Gradually reintroduce their regular food.
    2. Hydration: Ensure your dog has access to plenty of clean water. Dehydration is a significant concern with watery diarrhea.
    3. Probiotics and Prebiotics: These can help restore the natural balance of the gut flora. Consult your vet for suitable options.
    4. Anti-diarrheal Medications: Over-the-counter meds can be helpful, but always consult with a vet before administering any medication to your dog.
    5. Vet Consultation: If the diarrhea is persistent, accompanied by other symptoms (like vomiting, lethargy, or blood in the stool), or if you suspect your dog ingested something toxic, seek veterinary care immediately.

    Prevention and Long-term Care

    An ounce of prevention is worth a pound of cure, especially when it comes to the health of our four-legged family members. By taking proactive steps and understanding potential triggers, you can drastically reduce the chances of recurrent watery diarrhea episodes. Dive into these preventive measures and care tips to keep your dog in tip-top shape.

    1. Maintain a Consistent Diet: Avoid giving table scraps or making sudden dietary changes.
    2. Regular Deworming: Ensure your dog is on a regular deworming schedule as recommended by your vet.
    3. Vaccination: Keep up with your dog’s vaccinations to prevent viral infections.
    4. Safe Environment: Ensure that your living space is free from toxic plants, chemicals, and other substances harmful to dogs.

    Understanding and being vigilant about the potential causes of watery diarrhea in dogs is the key to ensuring their optimal health and well-being. Always be in tune with your dog’s habits and symptoms and seek veterinary guidance when in doubt.

    diarrhea in dogs

    Blood in Dog Diarrhea: Causes and Cures

    Discovering blood in your dog’s stool can be a particularly distressing sight for any pet owner. While it’s essential not to jump to worst-case scenarios, understanding why this occurs and how to address it is crucial. This segment sheds light on the causes behind bloody diarrhea in dogs and offers guidance on treatments and cures.

    Identifying Blood in Dog Diarrhea

    Blood in a dog’s stool can manifest in various ways, ranging from bright red streaks to a darker, tarry appearance. Being able to correctly identify the type of blood present can provide clues to its origin and the potential underlying issue. Let’s explore the nuances of spotting and distinguishing blood in dog diarrhea.

    1. Fresh Blood (Hematochezia): Bright red blood that is often streaked on the outside of the stool. It indicates bleeding from the lower intestines or rectum.
    2. Digested Blood (Melena): Dark, tarry, and often foul-smelling stools. This signifies bleeding from the upper gastrointestinal tract.

    Potential Causes of Bloody Stools in Dogs

    From simple gastrointestinal irritation to more concerning health issues, a myriad of factors can lead to the presence of blood in your dog’s stool. Recognizing these potential causes is the first step in ensuring prompt and appropriate care. Here’s a detailed exploration of the reasons your dog might be passing bloody stools.

    1. Gastrointestinal Ulcers: Caused by medications, toxins, or underlying diseases.
    2. Parasitic Infections: Worms like hookworms can cause bleeding in the intestines.
    3. Trauma or Injury: Ingesting sharp objects or severe worm infestations can lead to internal injuries.
    4. Colitis: Inflammation of the colon can result in bloody diarrhea.
    5. Anal Gland Issues: Infected or abscessed anal glands can cause blood in the stool.
    6. Cancer: Tumors in the gastrointestinal tract can result in bloody stools.
    7. Infectious Diseases: Conditions like parvovirus can cause severe bloody diarrhea.

    Effective Cures and Treatments

    Once you’ve identified blood in your dog’s stool and potentially pinpointed a cause, the next step is treatment. Depending on the severity and underlying issue, the approach can range from home care to more intensive medical interventions. Here are some guidelines on addressing and treating bloody diarrhea in dogs.

    1. Dietary Adjustments: Feeding a bland diet can help soothe the digestive tract.
    2. Anti-inflammatory Medications: For conditions like colitis, certain medications can help reduce inflammation.
    3. Deworming: If parasitic infections are the cause, deworming medications will be required.
    4. Antibiotics or Antivirals: For bacterial or viral infections.
    5. Surgery: In the case of tumors, obstructions, or severe injuries, surgical intervention might be necessary.
    6. Hydration and Supportive Care: Fluid therapy might be needed, especially if the dog is dehydrated.

    When to Seek Veterinary Care

    While some mild cases of bloody diarrhea can resolve on their own, it’s always better to err on the side of caution. Persistent symptoms, accompanying signs of distress, or if your dog appears lethargic and unwell, it’s essential to consult a veterinarian promptly. Remember, early detection and treatment can make all the difference in your pet’s recovery.

    symptoms of diarrhea in dogs

    Mucus in Dog Diarrhea: What it Means

    The sight of mucus in your dog’s stool might initially be alarming. While it’s not as commonly discussed as other symptoms, it’s something many dog owners encounter at some point. Mucus plays a specific role in your dog’s gastrointestinal system, and its presence in the stool can convey vital information about your pet’s health. Let’s delve into the significance of mucus in dog diarrhea and decode what it means.


    What is Mucus and Why is it in the Stool?

    Mucus is a slippery secretion produced by the intestines to help lubricate and protect the inner lining of the digestive tract. While a small amount can be a normal occurrence, a notable increase in its presence in the stool can be indicative of certain health issues. Understanding the function of mucus helps in interpreting what excessive amounts might signify.


    Common Reasons for Mucus in Dog Diarrhea

    Several factors can lead to the presence of mucus in a dog’s stool. Whether it’s due to dietary choices, infections, or underlying health concerns, recognizing these causes is pivotal for ensuring the well-being of your canine companion. Here’s a comprehensive breakdown of the potential reasons behind mucus-laden stools.

    1. Dietary Indiscretion: Consuming spoiled food or unfamiliar items can irritate the intestines, leading to mucus production.
    2. Intestinal Infections: Bacterial or viral infections can cause inflammation in the intestines, leading to increased mucus secretion.
    3. Parasitic Infestations: Worms or protozoan parasites can irritate the intestinal lining.
    4. Colitis: Inflammation of the colon or large intestine can cause an overproduction of mucus.
    5. Irritable Bowel Syndrome (IBS): A chronic condition affecting the large intestine, often resulting in mucus in the stool.
    6. Food Allergies or Sensitivities: Some dogs may produce mucus in response to certain foods that don’t agree with them.

    Addressing Mucus in Dog Diarrhea

    If you’ve identified mucus in your dog’s stool, the next step is understanding how to approach the situation. Depending on the underlying cause, the solution can range from simple dietary adjustments to more involved medical treatments. Here’s a guide to tackling mucus in dog diarrhea.

    1. Dietary Changes: Switching to a bland diet or a hypoallergenic diet can help if food is the irritant.
    2. Probiotics: These can aid in restoring gut health and balance.
    3. Deworming: If parasites are suspected, a vet-prescribed dewormer can help.
    4. Medications: Anti-inflammatory drugs or antibiotics may be prescribed based on the cause.
    5. Monitor and Consult: If the presence of mucus is persistent or if it’s accompanied by other symptoms like blood or vomiting, it’s crucial to consult with a veterinarian.

    Keeping a Vigilant Eye

    Mucus in a dog’s stool can often be a transient issue, resolving on its own. However, as responsible pet owners, it’s crucial to observe any recurring or accompanying symptoms. Consistent vigilance and a proactive approach to any changes in your dog’s health can ensure they remain happy and thriving.

    Dehydration in Dogs with Diarrhea

    The repercussions of diarrhea in dogs extend beyond the immediate discomfort and distress; one significant consequence is dehydration. As dogs lose vital fluids and electrolytes through frequent bowel movements, their risk of becoming dehydrated increases considerably. Understanding the signs, causes, and treatment of dehydration in dogs battling diarrhea is essential for every pet owner. Let’s explore this critical aspect of canine health in depth.


    Understanding Dehydration in Dogs

    At its core, dehydration is the result of the body losing more fluids than it’s taking in, disrupting the balance of essential minerals. Especially in dogs, even mild dehydration can lead to serious complications if not addressed promptly. Being aware of the science behind dehydration allows us to recognize its onset and implications more effectively.


    Why Diarrhea Causes Dehydration

    While it might seem evident that diarrhea can result in fluid loss, the connection between the two runs deeper. When a dog experiences diarrhea, it’s not just the obvious fluid that’s being expelled. Vital electrolytes and minerals are also lost, intensifying the dehydrating effect. Here are the primary ways diarrhea accelerates dehydration in dogs:

    1. Rapid Fluid Loss: Frequent, watery stools cause dogs to lose fluids at an accelerated rate.
    2. Loss of Electrolytes: Essential minerals like sodium, potassium, and chloride, crucial for many bodily functions, are expelled with the stools.
    3. Reduced Water Intake: Some dogs may drink less when they’re feeling unwell due to diarrhea, further exacerbating dehydration.

    Signs of Dehydration in Dogs

    Spotting dehydration early can be the key to preventing more severe complications. Familiarizing yourself with these telltale signs ensures that you can take swift action when needed:

    1. Sunken Eyes: Eyes might appear deep-set and lack their usual brightness.
    2. Dry Nose and Gums: A moist nose and gums are signs of a hydrated dog; dryness can indicate dehydration.
    3. Loss of Skin Elasticity: When pinched, the skin of a dehydrated dog might not return to its place quickly.
    4. Increased Heart Rate: A rapid heartbeat can be a sign of dehydration.
    5. Lethargy: Dehydrated dogs may appear more tired and less active than usual.

    Treating and Preventing Dehydration

    If you suspect your dog is dehydrated, especially in the context of diarrhea, it’s essential to act promptly. Here are steps and precautions to ensure your dog remains hydrated:

    1. Access to Clean Water: Ensure your dog always has access to fresh, clean water. Encourage them to drink, but don’t force them.
    2. Oral Rehydration Solutions: These can help replenish lost electrolytes. Consult with a vet for recommendations.
    3. Fluid Therapy: In severe cases, intravenous or subcutaneous fluid administration at a vet clinic might be required.
    4. Monitor Water Intake: Be observant of how much your dog is drinking daily.
    5. Dietary Management: Feeding a bland diet can help in reducing diarrhea and, in turn, potential dehydration.

    The Importance of Proactive Care

    While diarrhea is an unpleasant experience for your canine friend, its side effects, like dehydration, can be even more detrimental. By understanding the close link between the two and being proactive in your care, you can safeguard your dog’s health and well-being.

    Coping with Frequent Dog Diarrhea

    Dealing with an occasional bout of diarrhea in your dog can be a trying experience, but when such episodes become recurrent, it can be both alarming and overwhelming. Frequent dog diarrhea is more than just a messy inconvenience; it could be indicative of underlying health concerns. This guide aims to assist pet owners in understanding, managing, and coping with regular occurrences of dog diarrhea.


    Why is My Dog Having Diarrhea So Often?

    Recurrent diarrhea can stem from a variety of reasons, ranging from simple dietary triggers to more complex health issues. Before delving into treatments, it’s imperative to identify potential causes behind the frequent bouts.

    1. Dietary Indiscretions: Dogs might frequently ingest unsuitable food or foreign objects, leading to recurring episodes.
    2. Chronic Conditions: Conditions such as Inflammatory Bowel Disease (IBD) can result in constant bouts of diarrhea.
    3. Food Allergies or Intolerances: Regular consumption of allergenic foods can cause continuous digestive issues.
    4. Intestinal Parasites: Persistent infestations can be a culprit behind the repeated diarrhea.
    5. Stress or Anxiety: Emotional disturbances can manifest as gastrointestinal symptoms in some dogs.

    Management Strategies for Frequent Diarrhea

    If your dog is regularly experiencing diarrhea, implementing specific management strategies can mitigate the effects and offer some relief. Here are some key approaches:

    1. Dietary Adjustments: Opt for a consistent, bland diet or a hypoallergenic food recommended by a vet.
    2. Regular Deworming: Ensure that your dog is dewormed routinely to prevent parasitic issues.
    3. Probiotics and Digestive Aids: These can help maintain gut health and potentially reduce the frequency of diarrhea episodes.
    4. Stress Reduction: If anxiety is a contributing factor, consider calming aids or behavioral therapy.
    5. Hydration Monitoring: Given the risk of dehydration, ensure your dog has constant access to fresh water.

    Consultation and Diagnostics

    For dogs with chronic diarrhea, veterinary consultation is essential. Here are steps to expect:

    1. Detailed History: Your vet will want a comprehensive history, including diet, frequency of episodes, and any other symptoms.
    2. Diagnostic Tests: This might include fecal tests, blood work, X-rays, or ultrasounds.
    3. Dietary Trials: A vet might recommend specific diets to rule out food allergies or intolerances.

    The Emotional Toll and Support

    Beyond the physical health of your pet, recurrent dog diarrhea can be emotionally taxing for pet owners. Finding support in online forums, local pet groups, or from your veterinarian can offer solace. Remember, you’re not alone, and many have navigated similar challenges with their furry friends.


    The Way Forward

    While coping with frequent dog diarrhea can be daunting, armed with knowledge and a proactive approach, you can improve the quality of life for your canine companion. Consistent care, vet consultations, and being attuned to your dog’s needs are pivotal in this journey.

    Loss of Appetite with Dog Diarrhea

    It’s disheartening to watch our beloved pets turn away from their food, especially when we are trying to nourish them back to health. Loss of appetite in conjunction with diarrhea not only signifies a potential underlying problem but also poses the risk of malnourishment and further complications. Let’s dive into this concerning symptom, understanding its causes, implications, and solutions.


    Linking Loss of Appetite and Diarrhea

    While these two symptoms might seem unrelated at first glance, they frequently present together, especially when a dog is feeling unwell. Understanding how and why a loss of appetite might accompany diarrhea can provide clarity on the issue.

    1. Gastrointestinal Discomfort: Discomfort in the digestive tract can make a dog hesitant to eat, fearing further pain or discomfort.
    2. Systemic Illness: Some illnesses that cause diarrhea also affect a dog’s overall well-being, leading to reduced appetite.
    3. Medications: Some medications prescribed for diarrhea or related conditions might decrease appetite as a side effect.

    Potential Causes of Appetite Loss with Diarrhea

    Several factors can lead to decreased appetite in dogs experiencing diarrhea. Identifying the root cause is crucial for effective treatment.

    1. Intestinal Infections: Bacterial or viral infections can cause both diarrhea and a decreased desire to eat.
    2. Parasitic Infestations: Worms or protozoan parasites can disturb the intestinal environment and affect appetite.
    3. Pancreatitis: Inflammation of the pancreas can lead to diarrhea and significantly reduce appetite.
    4. Food Intolerances or Allergies: If certain foods irritate a dog’s system, they might become wary of eating.
    5. Stress or Behavioral Issues: Emotional factors can manifest as physical symptoms, including diarrhea and reduced appetite.

    Managing and Stimulating Appetite

    When a dog is experiencing a loss of appetite coupled with diarrhea, there are several strategies to encourage eating and ensure they receive adequate nutrition.

    1. Bland Diet: Offering a simple, bland diet can be less intimidating and more palatable for ailing dogs.
    2. Warming Food: Slightly warming the food can make it more aromatic and appealing.
    3. Homemade Broths: These can entice dogs with their aroma and can be nutritionally beneficial.
    4. Appetite Stimulants: In some cases, vets might prescribe medication to stimulate a dog’s appetite.
    5. Hydration: Always ensure that your dog has access to fresh water, as dehydration can further suppress appetite.

    When to Seek Veterinary Care

    A brief period of decreased appetite might not be alarming, especially if your dog is otherwise behaving normally. However, if this loss of appetite persists for more than 24 hours, is accompanied by other serious symptoms, or if your dog appears lethargic, it’s imperative to seek veterinary advice.

    Abdominal Pain in Dogs with Diarrhea

    When our canine companions suffer from diarrhea, it’s evident that they’re in distress. However, a less visible yet significantly concerning symptom that can accompany diarrhea is abdominal pain. Recognizing and addressing this pain is paramount to ensuring the comfort and swift recovery of our pets. In this section, we will explore the intricacies of abdominal pain in dogs with diarrhea, its causes, signs, and the means to alleviate it.


    Understanding the Connection: Diarrhea and Abdominal Pain

    While diarrhea is a clear manifestation of gastrointestinal upset, abdominal pain often lurks in the shadows, presenting as an internal discomfort that your dog might not outwardly show. Here’s how the two are intertwined:

    1. Inflammation: Inflammatory conditions in the gut can lead to both diarrhea and pain.
    2. Gastrointestinal Spasms: Muscle spasms in the intestines can cause painful cramps along with diarrhea.
    3. Obstructions: Any blockages can lead to diarrhea and cause significant discomfort.

    Signs Your Dog Might be Experiencing Abdominal Pain

    Dogs, being non-verbal, communicate their pain through behavior. Observing certain signs can give you insights into their discomfort:

    1. Restlessness: Constantly changing positions or being unable to settle.
    2. Whining or Groaning: Vocal indications of pain or discomfort.
    3. Swollen Abdomen: A bloated or tight belly can indicate pain or other issues.
    4. Avoidance of Touch: Being hesitant or aggressive when their belly area is touched.
    5. Hunched Back: A curved or hunched posture can be a defensive stance against pain.

    Common Causes of Abdominal Pain with Diarrhea

    Several factors can lead to abdominal pain in dogs, especially when accompanied by diarrhea. Identifying the root cause can aid in effective treatment:

    1. Gastroenteritis: Inflammation of the stomach and intestines can cause pain and diarrhea.
    2. Foreign Bodies: Ingestion of non-food items can irritate the gut, leading to pain and loose stools.
    3. Intestinal Parasites: Worms or other parasites can disturb the intestinal lining and cause pain.
    4. Pancreatitis: As previously mentioned, inflammation of the pancreas can result in both symptoms.
    5. Gastric Ulcers: Open sores in the stomach lining can be painful and disrupt normal bowel movements.

    Alleviating Abdominal Pain in Dogs

    Once you suspect your dog is in pain, there are measures to help ease their discomfort:

    1. Seek Veterinary Care: A proper diagnosis is crucial for effective treatment.
    2. Pain Relievers: Administer only those prescribed by a vet specifically for your dog.
    3. Dietary Adjustments: A temporary bland diet can reduce strain on the digestive system.
    4. Warm Compress: Applying a warm cloth to the belly can provide some relief (ensure it’s not too hot).
    5. Hydration: Dehydration can exacerbate pain, so ensure your dog is well-hydrated.

    Prioritizing Comfort and Well-being

    While diarrhea is an overt sign of discomfort, abdominal pain might go unnoticed until it becomes severe. Being attuned to your dog’s behaviors and prioritizing their comfort will foster a trusting bond and ensure they receive the care they need during such challenging times.

    Weight Loss Due to Dog Diarrhea


    Witnessing our pets shed pounds unintentionally can be deeply concerning. When diarrhea is persistent, one of the unfortunate consequences can be unintentional weight loss. This not only impacts a dog’s physical health but also its energy levels, mood, and overall well-being. In this segment, we’ll delve into the association between diarrhea and weight loss, the potential risks, and ways to combat and reverse these effects.


    Diarrhea’s Role in Weight Loss

    While weight loss can stem from various causes, chronic diarrhea is a significant contributor. Here’s how diarrhea can lead to such drastic reductions in weight:

    1. Nutrient Malabsorption: Diarrhea can prevent the intestines from effectively absorbing essential nutrients.
    2. Increased Caloric Loss: Rapid transit of food through the digestive system leads to caloric wastage.
    3. Loss of Appetite: As discussed earlier, diarrhea can cause a diminished desire to eat.

    Signs of Unintentional Weight Loss in Dogs

    Identifying weight loss in its early stages can be crucial to addressing any underlying issues promptly. Watch out for these signs:

    1. Visible Ribcage: An increasingly prominent ribcage might be an indication of weight loss.
    2. Lethargy: A decrease in energy levels or reluctance to play can signify caloric deficiency.
    3. Changes in Eating Habits: Refusing food or eating less than usual.
    4. Loose Skin: Skin that seems less elastic or hangs more loosely than before.

    Potential Health Impacts of Weight Loss

    Sustained weight loss due to diarrhea can have several repercussions on a dog’s health:

    1. Muscle Atrophy: Reduced protein absorption can lead to muscle wastage.
    2. Weakened Immune System: Nutrient deficiencies can compromise the immune system, making dogs more susceptible to infections.
    3. Reduced Stamina: Weight loss can lead to diminished energy reserves, affecting overall stamina.
    4. Bone Health: Persistent weight loss can affect bone density, making them more prone to fractures.

    Combatting Weight Loss from Diarrhea

    Once you’ve recognized the weight loss in your pet, there are actionable steps to help them regain their health:

    1. Veterinary Consultation: Always begin with professional advice to address the root cause of diarrhea.
    2. Nutritional Supplements: Under a vet’s guidance, introduce supplements to fill nutritional gaps.
    3. High-Calorie Diet: Opt for high-quality, calorie-dense foods to help your dog regain weight.
    4. Regular Monitoring: Keep a consistent check on your dog’s weight and adjust the dietary plan as needed.
    5. Hydration: Alongside nutrient loss, diarrhea can lead to dehydration, which further exacerbates weight loss. Ensure your dog stays hydrated.

    Restoring Health and Vigor

    Tackling weight loss due to diarrhea can be challenging, but with the right approach, determination, and guidance, your dog can return to its healthy, vivacious self. Through vigilant care, nutritional adjustments, and love, you can help your canine companion bounce back from the adverse effects of persistent diarrhea.

    Conclusion

    Navigating the complexities of our canine companions’ health is a journey every pet owner undertakes with love and dedication. Diarrhea, though common, can manifest with a myriad of symptoms, from the overt to the subtle. As we’ve delved into the nuances of these signs, from abdominal pain to unintended weight loss, it’s evident that our role goes beyond just observation. We must be proactive, understanding, and always ready to seek expert advice. Remember, while the internet offers valuable insights, always consult with your veterinarian when in doubt. Your dog’s health and well-being is a shared responsibility between you and your trusted vet. By working together, armed with knowledge and compassion, we can ensure our furry friends lead happy, healthy lives. Here’s to the many joyful moments and memories ahead with your beloved pet!

    Frequently Asked Questions

    1. How long should I wait before consulting a vet if my dog has diarrhea?

    While occasional, mild diarrhea might resolve on its own, it’s crucial to consult with your veterinarian if the diarrhea persists for more than 24 hours, if there are other alarming symptoms (like blood or mucus in the stool), or if your dog seems particularly unwell or lethargic.


    2. Can I give my dog human medications for diarrhea or abdominal pain?

    Never administer human medications to your dog without consulting a veterinarian. Some human medicines can be toxic to dogs and might exacerbate the condition or lead to other serious health issues.


    3. How can I prevent my dog from getting diarrhea in the future?

    Ensuring a consistent, balanced diet, regular deworming, timely vaccinations, and avoiding abrupt dietary changes can help reduce the risk of diarrhea. Also, try to prevent your dog from scavenging or ingesting foreign items during walks.


    4. Is it normal for my dog to lose appetite along with diarrhea?

    It’s not uncommon for dogs with diarrhea to experience a temporary loss of appetite. However, if this persists or is accompanied by other severe symptoms, it’s essential to seek veterinary care to address any underlying issues.


    5. My dog has had multiple episodes of diarrhea in the past few months. Should I be concerned?

    Frequent bouts of diarrhea could indicate an underlying health condition, food allergies, or sensitivities. It’s essential to consult with your veterinarian to pinpoint the cause and devise a suitable treatment or management plan.

    A note about your dog’s health

    This article provides general education and does not replace an examination, diagnosis, or individualized advice from your veterinarian. Contact a veterinary professional if you are concerned about your dog’s symptoms.

    Dr. Candy Akers, DVM Avatar

    ABOUT THE AUTHOR

  • Complete Guide to IVDD in Dogs: Diagnosis & Care

    Complete Guide to IVDD in Dogs: Diagnosis & Care

    Welcome to your Complete Guide to IVDD in Dogs: Diagnosis & Care. Imagine your furry best friend unable to jump, play, or even walk without pain. That’s the reality for many dogs suffering from Intervertebral Disk Disease (IVDD), a condition that can strike fear in the heart of any dog owner. As a holistic veterinarian, I’ve seen the impact of IVDD on both pooches and their parents, and it’s my mission to arm you with the knowledge to navigate this challenging condition.

    IVDD doesn’t have to be a life sentence of discomfort for your dog. With the right diagnosis and care, many dogs can continue to lead happy, active lives. In this guide, we’ll explore everything from the nuts and bolts of IVDD’s anatomy to the latest in treatment options, ensuring you’re equipped to provide the best possible support for your canine companion.

    IVDD dog diagnosis care guide

    Understanding IVDD: Anatomy and Mechanisms

    As a passionate pet parent, understanding the intricacies of your dog’s health can be empowering. One disease that many dog owners encounter is Intervertebral Disk Disease (IVDD). Let’s dive into the anatomy and mechanisms behind this condition.

    IVDD is a condition in which the cushioning disks between the vertebrae of the spinal column either bulge or burst (herniate) into the spinal cord space. These disks then press on the nerves running through the spinal cord causing pain, nerve damage, and even paralysis.

    Imagine your dog’s spine as a string of pearls; each pearl represents a vertebra, and the threads connecting them are the intervertebral disks. These disks play a vital role in the dog’s body, acting as shock absorbers for the spine. When IVDD occurs, it’s as if these threads are frayed, causing the pearls (vertebrae) to rub against each other, leading to discomfort, pain and in severe cases, paralysis.

    The onset of IVDD can be sudden or gradual, often depending on the type of IVDD your dog may be experiencing. There are two types: Hansen Type I and Hansen Type II. Hansen Type I occurs typically in smaller breeds and is usually a sudden onset, often caused by a minor trauma. On the other hand, Hansen Type II is a chronic condition that often affects larger breeds and occurs over a longer period.

    As a holistic veterinarian, it’s essential for me to emphasize that IVDD is not a death sentence. With proper care and treatment, many dogs with IVDD continue to live happy, fulfilling lives. Knowledge is power, so understanding the anatomy and mechanisms of IVDD is the first step towards ensuring your furry friend gets the best possible care.

    Remember, early detection is key. The sooner we can diagnose and treat IVDD, the better the prognosis for your dog. So, if you notice any changes in your dog’s mobility or behavior, don’t hesitate to reach out to your vet. Together, we can ensure your dog gets the care they need and deserve.

    Diagnosing IVDD: Methods and Techniques

    As a veterinarian, diagnosing Intervertebral Disk Disease (IVDD) in dogs is a process that requires a combination of clinical examination and advanced imaging techniques. As part of this ivdd dogs diagnosis care guide, I’ll explain how we go about this crucial process.

    Conventional Diagnostic Methods: Clinical Examination

    When your dog comes into the clinic showing signs of IVDD, such as reluctance to jump, pain and discomfort, or even difficulty walking, the first step we take is a thorough clinical examination. This involves:

    • Neurological assessment: This checks for any abnormalities in your dog’s gait or reflexes that could indicate nerve damage.
    • Pain response: We gently palpate your dog’s spine to identify areas of tenderness or discomfort.
    • General health check: This helps us rule out other conditions that could be causing your dog’s symptoms.

    Imaging Techniques: X-rays, MRI, CT scans

    While a clinical examination can give us a good idea of whether IVDD might be the issue, we need imaging to confirm the diagnosis and pinpoint the exact location of the problem. Here’s how we use different imaging techniques:

    • X-rays: These provide a basic image of the spine and can show changes in the space between vertebrae. However, they can’t show the discs themselves.
    • MRI scans: An MRI gives us a detailed image of both the spinal cord and the discs. It’s the gold standard for IVDD diagnosis, but isn’t always available due to cost and equipment.
    • CT scans: These are often used when an MRI isn’t available. They provide a good image of the vertebrae and can sometimes show disc material in the spinal canal.

    Remember, diagnosing IVDD is the first step towards getting your dog the right treatment. If you notice any symptoms, don’t hesitate to seek veterinary help. As part of our ivdd dogs diagnosis care guide, we’re here to provide the best possible care for your furry friend.

    Managing IVDD: Treatment Strategies

    When it comes to managing IVDD in dogs, there are a number of treatment strategies you can consider, each depending on the severity of your dog’s condition and overall health.

    Anti-Inflammatory Drugs

    One of the first lines of treatment for IVDD is the use of anti-inflammatory drugs. These medications work by reducing inflammation and swelling around the affected disks, relieving pain and potentially improving your dog’s mobility. Some commonly used drugs include non-steroidal anti-inflammatory drugs (NSAIDs) and corticosteroids. However, it’s important to note that these medications should only be used under the direct supervision of a veterinarian, as they can have side effects.

    Exercise and Movement

    Another crucial aspect of managing IVDD is controlling your dog’s exercise and movement. Dogs with IVDD often need to have their physical activities restricted, especially during the initial stages of treatment. This is to prevent further damage to the spinal cord and allow the inflamed disks to heal.

    You should avoid activities that put strain on your dog’s back, such as jumping or running. Instead, opt for gentle exercises like slow walks or swimming, which can help maintain muscle tone without causing stress on the spine. Always consult with your vet to determine the right type and amount of exercise for your dog.

    Significance of Early Intervention

    Remember, the earlier IVDD is diagnosed and treated, the better your dog’s chances of recovery. So, if you notice any signs of back pain, difficulty moving, or changes in behavior, don’t hesitate to seek veterinary care. With the right treatment plan, your furry friend can still lead a happy and active life, despite their diagnosis.

    As a dog parent, your role in the care and management of IVDD is crucial. Stay informed, work closely with your vet, and always prioritize your dog’s comfort and well-being.

    ivdd basset hound

    When it comes to treating Intervertebral Disk Disease (IVDD) in dogs, the options can be broadly categorized into two: surgical and non-surgical interventions. The choice between these two largely depends on the severity of the condition, the overall health of the dog, and the potential risks associated with each method.

    Surgical and Non-Surgical Interventions

    Non-surgical treatments are usually the first line of defense against IVDD. These methods are typically recommended for dogs with mild to moderate symptoms and include:

    • Medications: Anti-inflammatory drugs, pain relievers, and muscle relaxants can help manage the symptoms of IVDD.
    • Physical Therapy: Exercises and movements designed to strengthen the dog’s back and improve mobility can be beneficial.
    • Rest: Limiting a dog’s physical activity, especially jumping and running, can help prevent further damage to the spine.

    However, in severe cases or when non-surgical treatments fail to improve the condition, surgical interventions may be necessary. The most common surgical procedure for IVDD is decompressive surgery, which involves removing the material that’s pressing on the spinal cord. This can significantly improve a dog’s quality of life, but it’s important to note that surgery comes with its own risks.

    Potential Complications of IVDD Surgery

    While surgery can be a life-saving intervention for dogs with severe IVDD, it’s not without potential complications. These can include:

    • Infection: Like any surgical procedure, there’s a risk of infection. This can usually be managed with antibiotics.
    • Recurring Symptoms: In some cases, the symptoms of IVDD may return after surgery, requiring additional treatment.
    • Post-Surgical Pain: Dogs may experience discomfort or pain after surgery, which can usually be managed with medication.

    Despite these potential complications, many dogs recover well from IVDD surgery with proper post-operative care and management. This includes regular follow-ups with the vet, a tailored physical therapy program, and a controlled diet and exercise regimen.

    Ultimately, the decision between surgical and non-surgical treatments for IVDD should be made in consultation with a trusted vet, who can guide you through the process and help you make the best decision for your furry friend. Remember, every dog is unique, and what works for one may not work for another. The goal is to ensure the highest possible quality of life for your dog, regardless of the treatment path chosen.

    Holistic Approaches and Weight Management

    When it comes to managing Intervertebral Disk Disease (IVDD) in dogs, a holistic approach can be incredibly beneficial. This means looking beyond the conventional treatments and considering alternative therapies that can aid in your dog’s recovery.

    Holistic and Alternative Treatment Modalities

    One such treatment is Cold Laser Therapy. This non-invasive procedure uses light to stimulate cell regeneration and increase blood circulation. It can help reduce inflammation and pain, promoting healing and improving your dog’s mobility. It’s important to note that while this therapy can complement conventional treatments, it should not replace them. Always consult with your vet before starting any new treatments.

    Other holistic modalities that may provide relief include acupuncture, chiropractic care, and hydrotherapy. These therapies can aid in pain relief, improve mobility, and enhance overall well-being. They should be administered by trained professionals and under the guidance of your vet.

    The Weight Factor

    Managing your dog’s weight is another crucial aspect of IVDD care. Overweight dogs have a higher risk of developing IVDD and can experience more severe symptoms. Excess weight puts additional strain on the spine, exacerbating the condition.

    Here are some tips for weight management during your dog’s recovery:

    • Consult with your vet: They can provide a personalized diet plan considering your dog’s breed, age, and health condition.
    • Control portion sizes: Overfeeding can lead to weight gain. Ensure you’re providing the right amount of food for your dog’s size and activity level.
    • Healthy treats: Opt for low-calorie, nutritious treats. Remember, treats should make up no more than 10% of your dog’s daily caloric intake.
    • Regular weigh-ins: Regularly monitor your dog’s weight to ensure they are maintaining a healthy weight range.

    Remember, a holistic approach to IVDD involves a combination of medical treatments, alternative therapies, and lifestyle changes like weight management. It’s all about providing the best care for your furry friend and improving their quality of life.

    cream dachshund

    Breed-Specific Risks and the IVDD Spectrum

    Identifying Breeds More Susceptible to IVDD and Underlying Reasons: Genetic vs. Environmental Factors

    While any dog can suffer from Intervertebral Disk Disease (IVDD), certain breeds are more predisposed to it due to genetic factors. These include Dachshunds, Beagles, Basset Hounds, and other breeds with long spines and short legs, often referred to as chondrodystrophic breeds. These dogs have a higher risk because of the way their spine is formed, which puts extra pressure on their intervertebral discs.

    Other breeds that are often affected include Cocker Spaniels, Poodles, and German Shepherds. However, this doesn’t mean that other breeds or mixed breeds are immune. Any dog can develop IVDD, especially with age or if they are overweight, leading to additional stress on their spine.

    Environmental factors also play a significant role. Dogs that are overweight or obese have a higher risk of developing IVDD, as the excess weight puts more strain on their spine. Similarly, dogs that are not regularly exercised or that engage in high-impact activities can also be at greater risk.

    Differentiating Between Chronic and Acute IVDD and Understanding Varying Degrees and Symptoms

    IVDD can present itself in two forms: acute and chronic. Acute IVDD occurs suddenly, often due to a traumatic event such as a fall or jump. The dog may yelp in pain and show immediate signs of discomfort or difficulty moving.

    Chronic IVDD, on the other hand, develops gradually over time due to the slow degeneration of the intervertebral discs. Symptoms might include a slow onset of back pain, stiffness, decreased activity levels, or difficulty jumping or climbing stairs.

    Regardless of whether IVDD is acute or chronic, the severity and symptoms can vary greatly from one dog to another. Some dogs might experience mild pain and discomfort, while others might suffer from severe pain and even paralysis. The most common symptoms include back pain, weakness in the hind legs, and changes in gait or posture. But remember, every dog is unique, and the symptoms can vary widely.

    Understanding the IVDD spectrum and how it affects different breeds, as well as the difference between acute and chronic forms, can help you better monitor your dog’s health and seek timely veterinary attention if needed. Early diagnosis and treatment are key to managing this condition and ensuring the best possible quality of life for your furry friend.

    Proactive and Comprehensive Care for Dogs with IVDD

    As we wrap up our discussion on IVDD in dogs, it’s crucial to remember that timely intervention plays a significant role in your pet’s recovery and quality of life. When you notice any signs of discomfort or changes in your dog’s movement, don’t hesitate to seek veterinary care. Early diagnosis and treatment can greatly influence outcomes, reducing the risk of severe complications like paralysis.

    Proactive care also means being mindful of your dog’s lifestyle. Regular exercise, maintaining a healthy weight, and providing a balanced diet can help manage and even prevent IVDD, especially in susceptible breeds. If your dog has been diagnosed with IVDD, follow the prescribed treatment plan diligently, whether it includes medication, surgery, or alternative therapies like cold laser therapy.

    Remember, managing IVDD isn’t just about treating the symptoms; it’s about providing comprehensive care. This includes physical care, like exercise and weight management, but also emotional care. Your dog may experience stress or anxiety due to their condition, so provide plenty of love, comfort, and reassurance.

    To summarize, here are the key points we’ve covered in this IVDD dogs diagnosis care guide:

    • IVDD is a potentially serious condition that can lead to paralysis if not treated promptly.
    • Diagnosis involves clinical examination and imaging techniques such as X-rays, MRI, or CT scans.
    • Treatment strategies range from medication and exercise restriction to surgery and alternative therapies.
    • Proactive and comprehensive care, including weight management and emotional support, is essential for managing IVDD.

    In the face of IVDD, the best thing you can do as a pet parent is to stay informed, be proactive, and provide comprehensive care for your furry friend. With the right approach, you can help your dog live a happy, comfortable life despite their condition.

    Frequently Asked Questions

    1. What is IVDD in dogs?

    Intervertebral Disc Disease (IVDD) is a condition in dogs where the cushioning discs between the vertebrae of the spinal column either bulge or burst into the spinal cord space. This can cause nerve damage, pain, and even paralysis.

    2. How is IVDD in dogs diagnosed?

    IVDD in dogs is typically diagnosed through a combination of a physical examination, medical history, and diagnostic imaging such as X-rays, CT scans, or MRI.

    3. What are the treatment options for IVDD in dogs?

    Treatment options for IVDD in dogs can range from conservative management with rest and medications to surgical intervention, depending on the severity of the condition.

    4. Can a dog recover from IVDD?

    Yes, many dogs can recover from IVDD with appropriate treatment and care. However, the prognosis can vary depending on the severity of the disease and the dog’s overall health.

    5. How can I prevent IVDD in my dog?

    While you can’t completely prevent IVDD, you can reduce your dog’s risk by maintaining a healthy weight, providing regular exercise, and avoiding activities that put excessive strain on the spine, such as jumping off high surfaces.

    A note about your dog’s health

    This article provides general education and does not replace an examination, diagnosis, or individualized advice from your veterinarian. Contact a veterinary professional if you are concerned about your dog’s symptoms.

    Lindsie Parks B.S., CRDNS Avatar

    ABOUT THE AUTHOR
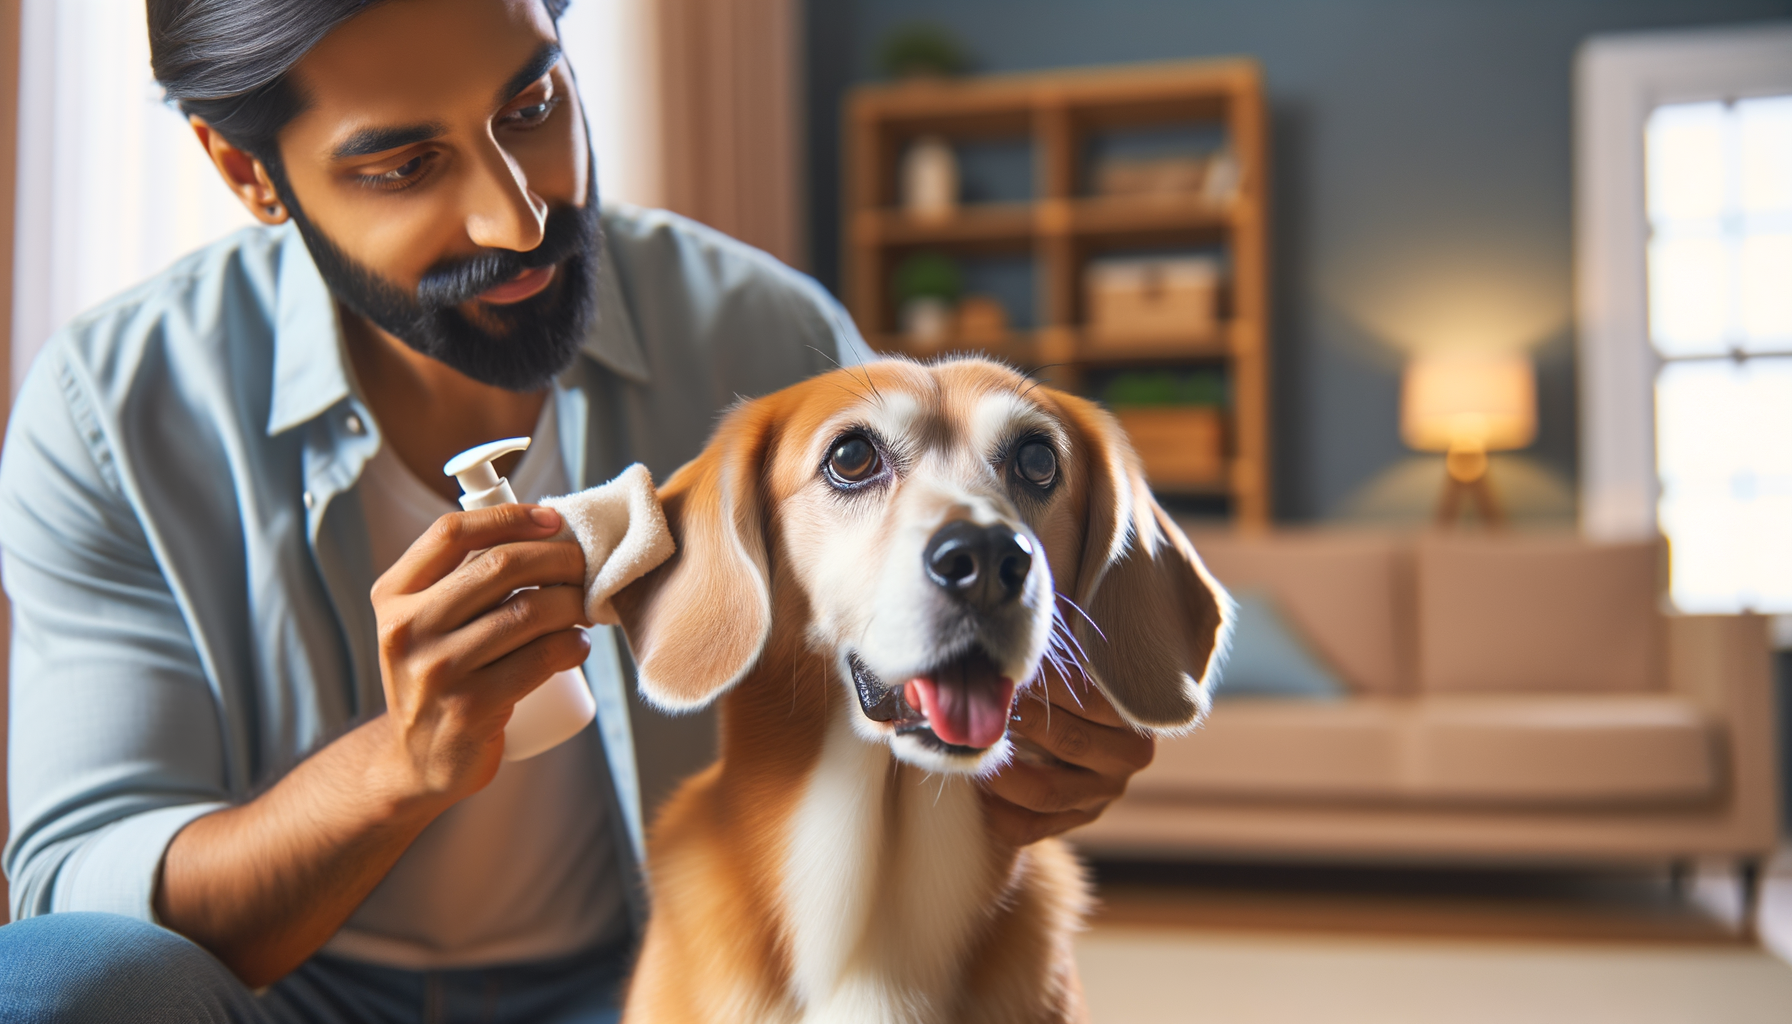
  • Alternatives To Animax: The 5 Best Natural Products For Your Dog’s Minor Cuts, Scrapes & Abrasions

    Alternatives To Animax: The 5 Best Natural Products For Your Dog’s Minor Cuts, Scrapes & Abrasions

    *This page may include affiliate links, which means that if you make a purchase through one of the product links, we may receive a small commission. For full affiliate disclosure please see our disclaimer page.

    Brand name medications, like Animax, are brought up frequently in client questions. Particularly, I hear about it in questions about skin issues. Animax is an ointment commonly used by veterinarians that needs a prescription. Additionally, I get a lot of questions akin to “Are there over-the-counter alternatives to Animax?”. 

    The simple answer is… no. Unfortunately, there is not an identical medication available over the counter. Luckily, there are other skin products for dogs that you can get over the counter. Products that are safer, cost less, and are more effective than Animax. Natural alternatives to Animax provide a great solution to dry skin, scratches, infections, and more.

    Ok, so here we go! Coming up, I will give you the scoop so that you can pick the best remedy for your dog. I always have these products around. Emphatically, I suggest that you toss one of these products into your pet’s first aid kit. Below, check out the important information about Animax and switch to a product that can help your dog live healthier.

    animax alternatives

    What is Animax?

    According to its manufacturer Dechra, Animax is:

    “Animax is a combination antimicrobial and corticosteroid for the management of dermatological disorders characterized by inflammation or dry exudative dermatitis, particularly those caused by bacterial or candidal infections, in cats and dogs.”

    Label ingredients – Animax Ointment: 

    ANIMAX Ointment combines nystatin, neomycin sulfate, thiostrepton, and triamcinolone acetonide in a non-irritating polyethylene and mineral oil base.

    Each mL contains:

    • nystatin. . . . . . . . . . . . . . . . . . . . . . . . . . . . . . . . . 100,000 units
    • neomycin sulfate equivalent to neomycin base. . . 2.5 mg
    • thiostrepton. . . . . . . . . . . . . . . . . . . . . . . . . . . . . . 2,500 units
    • triamcinolone acetonide. . . . . . . . . . . . . . . . . . . . 1.0 mg


    What is Animax Ointment Used For?

    • Chronic Ear Infections
    • Cysts Between Toes
    • Anal Gland Infections
    • Acute Ear Infections
    • Superficial Skin Infections
    • Rashes
    • Dry Skin
    • Allergic Hot Spots
    • Itchy Skin
    • Post-op Incision Protection
    • Fungal Infections
    • Eczematous Dermatitis
    • Contact/Allergy Dermatitis
    • Seborrhea
    • Minor Skin Sores
    • Cuts and Scratches
    • Scrapes and Abrasions
    Over the counter alternatives to animax

    What are the disadvantages of Animax?

    First, the biggest disadvantage of Animax ointment is that it is only available by prescription. Your vet may require an exam or other services for you to get the medication. Due to this, you will have to physically travel to the vet clinic. Additionally, Animax is only available from a veterinary licensed pharmacy. This fact makes it less available, as pet specific pharmacies are few and far between.

    Animax is a combination of medicines. The pharmaceutical industry plays a big role in it’s availability. In the past 3 years, in both the veterinary and medical communities, I have seen a rapid growth in medication shortages. Due to unknown (and probably shady) reasons, medications can often be out of stock or backordered. Consequently, this drives the cost of the drug through the roof. Medications that typically cost $10.00 can be seen at prices over $100.00. 

    Moreover, another disadvantage of Animax is the chemical nature of the product. Animax contains an antifungal, two antibiotics, and a corticosteroid. The product delivers a specific medication to a specific area of skin. However, that doesn’t really address the need for healing and soothing. Also, it is not nourishing and replenishing the skin. The ointment doesn’t provide necessary vitamins and fats for skin cells to regenerate in a stronger, healthier way.

    Know Your Ingredients

    Also of equal importance is the delivery agents listed in the inactive ingredients of Animax. These include polyethylene and mineral oil. Polyethylene is mainly obtained from petroleum and natural gas. Both petroleum and natural gas are non-renewable fossil fuels. Additionally, mineral oil is also made from heavily refined and processed petroleum.

    animax alternative

    Fossil fuels are one of the leading causes of global warming and climate change.

    Cautions When Using Animax

    Unfortunately, there has been mention of dogs going deaf after using Animax ointment in their ears. Due to numerous reports, the drug company has added deafness as a known side effect to all of their inserts and safety materials.

    “CAUTION: Federal law restricts this drug to use by or on the order of a licensed veterinarian. As with all drugs, side effects may occur. Hearing loss, with varying degrees of recovery, has been reported with the use of ANIMAX Ointment.”

    side effects of animax

    I don’t know about you, but that is a risky side effect that far outweighs any benefits. We have so many natural products that are alternatives to Animax, and subsequently do a much better job. Below, I have listed some of my favorite alternatives to Animax.

    What are the best alternatives to Animax? 

    ointment for rashes and abrasions

    Dermapaw Dog Skin and Paw Treatment

    • Best for rashes or self-scratches
    • Great for abrasions and other injuries where most of the hair is still present

    natural ointment for dogs

    RESQ Organics Skin Care with Manuka Honey

    • All Natural, organic product for superficial wounds

    pet wound gel

    Forticept Blue Butter Pet Wound Filler Antimicrobial Gel

    • Best for deeper wounds like dog bites or barbed wire

    pet wound spray

    Davis Chlorhexidine Dog and Cat Spray

    • Best for really nasty infections that may have gone unnoticed for a day or two

    silver wound spray for dogs

    Colloidal Silver Wound and Skin Care for Dogs & Cats  

    • Best for wider wounds with skin layer damage and no hair left
    • Great for wounds under bandages for a few days at a time

    As always, monitor your dog’s skin carefully. I recommend checking it at least twice a day. Watch for signs of healing or signs of a worsening condition. Additionally, if your pet has a sore that is large, deep, or dirty, please contact your veterinarian for recommendations. If the wound gets worse, looks infected, or creates yellow, green, or white discharge, or starts to smell, call your veterinarian immediately.

    References:

    A note about your dog’s health

    This article provides general education and does not replace an examination, diagnosis, or individualized advice from your veterinarian. Contact a veterinary professional if you are concerned about your dog’s symptoms.

    Dr. Candy Akers, DVM Avatar

    ABOUT THE AUTHOR
  • Dried Dead Tick on Your Dog? What to Do Right Away

    Dried Dead Tick on Your Dog? What to Do Right Away

    By Lindsie Parks, B.S., CRDNS

    Finding a dried dead tick on your dog is unsettling, but you can usually handle it calmly at home. Remove the tick with fine-tipped tweezers or a tick-removal tool, clean the spot, note the date, and watch your dog. A dead tick cannot keep feeding, but it may have fed before it died, so “dead” does not mean the bite is irrelevant.

    Do not squeeze, twist, burn, or coat the tick with petroleum jelly or nail polish. Those methods can make removal harder and irritate your dog’s skin. The CDC recommends gripping an attached tick as close to the skin as possible and pulling upward with steady, even pressure. [1]

    What a Dried Dead Tick Means

    A dried tick often looks flat, shriveled, brittle, or gray-brown. Its legs may curl close to its body. It can still be firmly attached because tick mouthparts are designed to hold on during feeding.

    A tick may die while attached for several reasons. It may have finished feeding, dried out, or been killed by a flea-and-tick product. Some preventives kill ticks after they attach rather than stopping every attachment. This is why finding a dead tick does not automatically mean a product failed.

    The important question is not only whether the tick is dead. It is also how long it may have been attached, what species it is, where you live or traveled, and how your dog feels. Different tick-borne germs have different transmission patterns. There is no single safe cutoff that applies to every tick and every disease.

    Owner parts a golden retriever's fur to inspect a small attached tick
    Part the fur in bright light so you can see the tick’s body, legs, and attachment point.

    How to Tell a Dead Tick From a Scab or Skin Tag

    Part your dog’s fur and use bright light. A tick usually has a distinct oval or rounded body. Adult and nymph ticks have eight legs, though the legs can be tiny and tucked under a dried body.

    A scab is usually flatter and blends into the skin. A skin tag grows from the skin and may match your dog’s skin color. If the spot bleeds as soon as you touch it, seems to be living tissue, or has no visible tick body or legs, stop. Do not pull until you are confident it is a tick.

    When in doubt, take a clear close-up photo and ask your veterinary clinic. A short pause is safer than accidentally pulling on a nipple, skin tag, wart, or inflamed scab.

    Common Ticks Found on Dogs

    Several tick species may attach to dogs in the United States. Adult female American dog ticks have ornate cream markings on a brown shield. Brown dog ticks are more uniformly reddish brown and can infest homes and kennels. Adult female blacklegged ticks have a dark shield and legs with a reddish-orange abdomen. Adult female lone star ticks have one distinct white dot on the back.

    Markings can change with life stage, sex, and feeding. Save a clear photo or the tick for your veterinarian if identification matters. The comparison below shows typical adult female markings for four common species.

    American dog tick, brown dog tick, blacklegged tick, and lone star tick with common and scientific names
    From left: American dog tick (Dermacentor variabilis), brown dog tick (Rhipicephalus sanguineus), blacklegged tick (Ixodes scapularis), and lone star tick (Amblyomma americanum).

    How to Remove a Dead Tick From Your Dog

    Gather good lighting, gloves if you have them, and fine-tipped tweezers or a tick-removal tool. The current article’s exact recommended supply link is preserved here: tick-removal supplies.

    Gloved hand uses fine-tipped tweezers to remove a tick from a dog's skin
    Grip the tick close to the skin and pull upward with slow, steady pressure.
    1. Keep your dog still. Ask another person to offer treats or gently steady your dog. If your dog is painful, frightened, or likely to bite, let a veterinary team help.
    2. Part the fur. Make sure you can see where the tick enters the skin.
    3. Grip close to the skin. With fine-tipped tweezers, grasp the tick at the mouthparts or head end, not across the swollen body.
    4. Pull straight up. Use slow, steady pressure. Do not jerk or twist.
    5. Check the area. Confirm that the body is gone. Do not squeeze the removed tick with bare fingers.
    6. Clean up. Wash the bite and your hands with soap and water. A veterinarian-approved pet-safe cleanser is also reasonable.

    Do not use a hot match, flame, essential oil, rubbing alcohol, petroleum jelly, or nail polish to force an attached tick to release. These methods can burn or irritate the skin and delay clean removal. [1]

    What If the Tick’s Mouthparts Stay Behind?

    Sometimes a small dark speck remains after the body comes away. Do not dig at your dog’s skin with a needle or keep pinching the area. That can turn a tiny bite into a painful wound.

    If a fragment is clearly visible and comes away easily with clean fine-tipped tweezers, you can remove it. If it does not lift easily, leave it alone, clean the area, and monitor it. The skin often pushes a small fragment out as it heals. CDC guidance for attached ticks similarly advises leaving mouthparts alone when they cannot be removed easily. [1]

    Call your veterinarian if the spot becomes increasingly red, hot, swollen, painful, or starts draining. The same applies if the bite is near an eye, deep in an ear canal, or in another hard-to-reach area.

    How to Care for the Bite Site

    After removal, wash the area gently. You do not need to scrub, repeatedly soak it in alcohol or peroxide, or routinely apply a human antibiotic ointment. Strong products can irritate the skin, and dogs may lick ointments off.

    Owner checks a small tick-bite site on a relaxed dog after removal
    Photograph the bite site after removal so you can compare any change over the next several days.

    A tiny pink bump or small scab can remain for several days. Take a photo on the day you remove the tick so you can compare the site later. You can also place the tick in a sealed container or bag with the date and location written down. That may help your veterinarian identify it if your dog develops signs.

    Avoid picking at the scab. If your dog keeps licking or scratching, use a cone or recovery collar and ask your veterinary clinic what is safe for the location.

    What Symptoms Should You Watch For?

    Most dogs do not become ill after every tick bite. Still, check the site daily and pay attention to your dog’s energy, appetite, movement, and comfort.

    Call your veterinarian if you notice:

    • Redness, swelling, heat, pain, or discharge that is getting worse
    • A bump that continues growing instead of settling
    • Fever, unusual tiredness, poor appetite, or vomiting
    • Limping, stiff movement, joint pain, or reluctance to walk
    • Pale gums, unusual bruising, nosebleeds, or other bleeding
    • Weakness, wobbliness, trouble breathing, or collapse

    Signs of tick-borne illness may not appear immediately. CDC pet guidance notes that signs can take seven to 21 days or longer to show, and CDC’s ehrlichiosis guidance lists fever, lethargy, poor appetite, lameness, joint pain, and bleeding among possible signs in dogs. [2] [3]

    Weakness, breathing trouble, collapse, or rapidly worsening illness deserves urgent veterinary care. For a dog who feels normal, record the bite and monitor instead of assuming disease is present.

    Why a Dead Tick Can Still Be Attached

    A dead tick can remain anchored by its mouthparts after it stops moving. It may also stay in place after a systemic preventive kills it. Many oral products work after a tick bites and takes in the medication through the blood meal.

    That does not make prevention pointless. Preventives can shorten feeding time and reduce future infestations, but no method replaces hands-on tick checks. Tick risk also changes with region, season, travel, wildlife, and your dog’s health history.

    If you use a preventive and keep finding attached ticks, ask your veterinarian whether the product, dose, application, and schedule fit your dog’s risk. Do not combine products or add essential oils without professional guidance.

    How to Prevent the Next Tick

    Make a quick tick check part of your routine after walks, yard time, camping, or travel. Run your fingertips over the coat and inspect:

    • In and around the ears
    • Around the eyelids and muzzle
    • Under the collar
    • Under the front legs
    • Between the back legs
    • Between the toes
    • Around the tail

    CDC guidance recommends checking pets daily and removing ticks promptly. [2] Keep grass trimmed, reduce leaf litter near play areas, and discourage wildlife from feeding close to your dog’s space.

    Choose prevention with your veterinarian. CAPC recommends consistent tick control and notes that risk can extend through much of the year, depending on tick species and local conditions. [4] Your dog’s age, weight, medical history, lifestyle, travel, and local tick species all matter.

    Final Thoughts

    A dried dead tick is usually a practical removal problem, not a reason to panic. Take it off carefully, clean the bite, save a photo or the tick if useful, and watch both the skin and your dog.

    The calm plan is simple: remove, clean, note, and watch. If the spot worsens or your dog acts sick, call your veterinarian.

    ~Lindsie

    Frequently Asked Questions

    Will a dead tick fall off on its own?

    It may, but you should not wait for that. Prompt removal reduces skin irritation and ends uncertainty about whether the tick is truly dead.

    Can a tick be dead but still attached?

    Yes. Mouthparts can keep the body anchored after the tick dies. Some preventives also kill ticks after attachment.

    What does a dried dead tick look like?

    It often looks flat, shriveled, brittle, or gray-brown, with tiny legs curled near the body. Use bright light and magnification if needed.

    Should I worry if my dog seems normal?

    Do not panic, but keep a note of the bite and monitor your dog over the next few weeks. Call your veterinarian for worsening skin changes or whole-body signs such as fever, lethargy, poor appetite, limping, weakness, or unusual bleeding.

    Can I use Vaseline, heat, alcohol, or nail polish to remove it?

    No. These methods can irritate or burn the skin and delay clean removal. Use fine-tipped tweezers or a proper tick tool instead. [1]

    References

    1. Centers for Disease Control and Prevention. (2026). What to do after a tick bite.
    2. Centers for Disease Control and Prevention. (2024). Preventing ticks on pets.
    3. Centers for Disease Control and Prevention. (2022). Ehrlichiosis in dogs: Fast facts for veterinarians.
    4. Companion Animal Parasite Council. (2026). Ixodes scapularis and Ixodes pacificus.

    A note about your dog’s health

    This article provides general education and does not replace an examination, diagnosis, or individualized advice from your veterinarian. Contact a veterinary professional if you are concerned about your dog’s symptoms.

    Lindsie Parks B.S., CRDNS Avatar

    ABOUT THE AUTHOR
  • Can Dogs Eat Pecans? Demystifying the Dangers For Canines

    Can Dogs Eat Pecans? Demystifying the Dangers For Canines

    Pecans are a popular snack and ingredient in many different dishes. They’re commonly found in desserts, such as pecan pie and pralines, or used as a coating for chicken or fish. Some people even prefer to eat them raw, using them as an on-the-go snack. It’s no surprise that pecans are loved by so many – they have a rich, buttery flavor that pairs well with sweet and savory dishes alike. Have you ever wondered “Can dogs eat pecans?”. Let’s find out.

    can dogs eat pecans

    The Common Question: Can Dogs Eat Pecans?

    With their popularity among humans, it’s natural to wonder if our furry friends can enjoy pecans too. Unfortunately, the answer is no – dogs should not eat pecans.

    While they may look harmless enough, nuts like pecans can pose serious health risks to our pups. The reason why some nuts are toxic to dogs has to do with their high-fat content.

    Nuts also tend to be difficult for dogs to digest properly, which can cause gastrointestinal upset or even blockages in the digestive system. It’s important for pet owners to be aware of what foods are safe and healthy for their animals – this extends beyond just dog food and treats.

    While sharing snacks with your pup may seem harmless (and often adorable), it can lead to serious health consequences if you’re not careful. In the next section, we’ll take a closer look at the potential dangers of feeding pecans to dogs – including symptoms they may experience after consuming them.

    Overview of Pecans

    Definition and Characteristics of Pecans

    If you’re like most people, you probably don’t give much thought to what a pecan actually is. It’s just a nut, right?

    Well, yes and no. Pecans are a type of tree nut that is native to North America.

    The trees themselves can grow up to 100 feet tall and have a lifespan of over 300 years! Pecans have a distinctive taste and texture that sets them apart from other nuts.

    They’re crunchy, buttery, and slightly sweet, with a rich flavor that makes them popular in sweet dishes like pies and candies. In their raw form, pecans are light brown with a smooth shell that’s easy to crack open.

    bowl full of pecans. are they safe for dogs?

    Nutritional Value and Health Benefits for Humans

    Pecans may be delicious, but they’re also packed with nutrition. Just one ounce of pecans (about 19 halves) contains:

    • 196 calories
    • 20 grams of fat (mostly healthy monounsaturated fat)
    • 3 grams of protein
    • 4 grams of carbs
    • 3 grams of fiber

    In addition to being high in healthy fats and protein, pecans are also rich in vitamins and minerals like:

    • Vitamin E: an antioxidant that protects the body from damage caused by free radicals
    • Magnesium: important for maintaining healthy bones and muscles – Copper: needed for the production of red blood cells
    • Zinc: helps boost the immune system

    Studies have also shown that eating pecans can provide numerous health benefits for humans. For example:

    • Lowered cholesterol levels: The monounsaturated fat in pecans can help lower LDL (bad) cholesterol levels in the blood.
    • Reduced inflammation: Pecans contain anti-inflammatory compounds that may help reduce inflammation throughout the body.
    • Improved gut health: The fiber in pecans can help promote healthy digestion and prevent constipation.

    So, as you can see, pecans are not only delicious but also quite nutritious. But what about dogs?

    Can they eat pecans too? Let’s find out in the next section.

    are pecans safe for my dog

    Can Dogs Eat Pecans?

    As much as we love our furry friends, it’s important to remember that not all human foods are safe for dogs to consume. This includes certain nuts, such as pecans. While pecans may be a delicious and nutritious snack for us humans, they can actually be quite dangerous for dogs.

    Explanation of why some nuts are toxic to dogs, including pecans

    Pecans contain a toxin known as juglone, which can be harmful to dogs if ingested in large amounts. Juglone is found in the leaves, bark, and nut husks of the pecan tree. When dogs eat pecans or any other part of the tree that contains juglone, it can cause a range of health issues.

    The Potential Dangers of Feeding Pecans To Dogs

    If your dog consumes pecans or any other food containing juglone, it can lead to a variety of symptoms and health problems. These include vomiting and diarrhea, lethargy and weakness, fever or increased body temperature, loss of appetite or refusal to eat altogether. In addition to these symptoms, consuming too many nuts can lead to more serious complications such as pancreatitis – an inflammation of the pancreas – which may require hospitalization or even surgery in severe cases.

    can my dog eat pecans

    Symptoms And Signs That A Dog May Have Eaten Pecans

    If you suspect your dog has eaten pecans or anything else containing juglone it’s important to contact your veterinarian right away. The symptoms may not show up right away but could start within hours after ingestion. Some signs that your dog may have eaten something toxic include vomiting and diarrhea; lethargy; fever; loss of appetite; abdominal pain; dehydration from excessive vomiting and diarrhea (which could lead to collapse), so be aware of these symptoms.

    Health Risks Associated With Consuming Pecans For Dogs

    If your dog has consumed pecans or anything containing juglone, the best thing to do is to seek immediate medical attention from your veterinarian. Depending on the severity of the symptoms, your dog may need to be hospitalized and treated with IV fluids, medications, or other treatments.

    In severe cases, surgery may be necessary to remove any remaining pecan pieces from your dog’s digestive tract. The best way to avoid these health risks altogether is by keeping pecans and other dangerous foods out of reach of your pet.

    While pecans are a tasty treat for us humans, they can be harmful to our precious dogs. Be aware of what foods are safe for dogs and keep all dangerous food items out of reach.

    If you notice any signs that your pet may have eaten something they shouldn’t have, contact your veterinarian immediately. Your furry friend will thank you in the end!

    giving a beagle a treat.  don't feed your dog pecans

    Effects of Pecan Consumption in Dogs

    Symptoms and Signs That a Dog May Have Eaten Pecans

    Pecans are not safe for dogs to eat. If your dog has eaten pecans, they may show symptoms such as vomiting, diarrhea, abdominal pain, loss of appetite, lethargy or even collapse.

    These symptoms can be caused by the high-fat content of pecans, which can lead to digestive problems in dogs. In severe cases of pecan poisoning, a dog may develop pancreatitis which is an inflammation of the pancreas that can cause severe abdominal pain and even death if left untreated.

    Other signs that your dog may have eaten pecans include difficulty breathing or an allergic reaction such as swelling around the face or difficulty swallowing. If you suspect that your dog has eaten pecans and is showing any of these symptoms or signs, it is important to seek veterinary care immediately.

    Health Risks Associated with Consuming Pecans for Dogs

    Pecan poisoning in dogs can also lead to liver damage due to its high levels of toxicity. The nut contains juglone which is toxic to dogs and can cause damage to red blood cells leading anemia in dogs.

    Furthermore, if a dog eats too many pecans at once it can lead to intestinal blockage which requires immediate surgical intervention. As previously mentioned pancreatitis is one of the most severe conditions associated with ingestion of pecan by dogs.

    It is caused when the body tries to digest too much fat at once causing an inflammatory response from the pancreas. If you notice any adverse effects on your dog after giving them human food containing nuts like pecan or any other nut for that matter, make sure you take them promptly for medical attention before it’s too late.

    can dogs eat pecans

    Alternatives To Pecans For Dogs

    There are many safe and healthy alternatives to pecans that dogs can enjoy. Some of the best options include:

    • Carrots
    • Apples (without seeds)
    • Sweet potatoes
    • Broccoli
    • Cauliflower

    Not only are these foods safe for dogs, but they also provide a variety of health benefits such as vitamins and minerals. These alternatives can be given as a snack or added to your dog’s diet in moderation.

    It is important to remember that while some human foods may seem harmless they may have adverse effects on our furry friends. Providing your dog with a balanced diet consisting of food specifically formulated for them is always the best option.

    Alternatives to Pecans for Dogs

    A Healthy Snack List for Dogs

    As much as we love our furry friends, it can be hard to resist their big eyes and pleading faces when we’re snacking on something they’d love to have. Fortunately, there are plenty of healthy treats that dogs can enjoy without risking their health. Here are some of the best options:

    • Carrots: These crunchy veggies are a great source of fiber and vitamins, making them a super healthy snack for your pup.
    • Apples: Apples are another great source of fiber and vitamins, but make sure to remove the seeds first – apple seeds contain small amounts of cyanide that can be toxic in large quantities.
    • Blueberries: These little berries pack a big punch when it comes to antioxidants, making them a great choice for keeping your dog’s immune system strong.
    • Peanut butter (in moderation): Peanut butter is high in protein and healthy fats, but it’s also high in calories – so make sure you only give it to your dog in small amounts.
    are pecans safe for dog as treats

    Incorporating Alternatives into Your Dog’s Diet

    When incorporating new snacks into your dog’s diet, it’s important to do so gradually. Introduce small amounts at first and monitor your dog’s reaction – if they experience any digestive upset or other issues, don’t continue feeding them that particular snack. One way to incorporate these alternative snacks is by using them as training treats or rewards.

    For example, you could use small pieces of carrot or apple when teaching your dog new commands or tricks. Just be careful not to overdo it with the treats – too many can lead to weight gain and other health problems.

    You can also mix some of these healthier snacks into your dog’s regular meals. For example, you could chop up some blueberries or carrots and mix them in with your dog’s kibble.

    This adds some variety to their diet and provides them with extra nutrients. While pecans may be off-limits for dogs, there are plenty of other healthy snacks that they can enjoy.

    From crunchy carrots to sweet blueberries, there are a variety of options that can be incorporated into your dog’s diet in a safe and healthy way. Remember to introduce new snacks gradually and monitor your dog’s reaction – and as always, consult with your veterinarian if you have any concerns about what you’re feeding your pup.

    Conclusion: Keeping Our Furry Friends Safe

    Recap on the Dangers of Feeding Pecans to Dogs

    While pecans are a delicious and beloved snack for humans, they can be quite dangerous for our furry friends. Not only do pecans present a choking hazard due to their size and shape, but they can also contain toxins that can cause serious health problems in dogs.

    These toxins include juglone, which can cause gastrointestinal distress and even death in extreme cases. Additionally, the high-fat content of pecans can lead to pancreatitis in dogs.

    If you suspect that your dog has consumed pecans, it’s important to watch out for symptoms such as vomiting, diarrhea, lethargy, loss of appetite, and dehydration. If your dog is displaying any of these symptoms or if you know that they have ingested pecans or any other toxic substance, it’s critical that you seek veterinary care immediately.

    can dog eat pecans

    The Importance of Being Aware of What Foods Are Safe for Our Furry Friends

    As pet owners and animal lovers, it’s our responsibility to ensure the safety and well-being of our furry friends. This means being knowledgeable about what foods are safe and healthy for them to eat – as well as which foods are not.

    While some human foods may seem harmless or even healthy at first glance (like blueberries or chicken), they may actually be quite dangerous for dogs. It’s important to do your research before feeding your dog any new food item – especially if it’s something that you regularly eat yourself.

    Some common human foods that are toxic to dogs include chocolate (which contains theobromine), grapes/raisins (which can cause kidney failure), onions/garlic (which can damage red blood cells), and macadamia nuts (which can cause lethargy/vomiting). By staying informed on what foods are safe and dangerous for dogs, you can help prevent serious illness or even death in your furry friend.

    In addition to avoiding toxic foods, it’s also important to ensure that your dog’s diet is nutritionally balanced and appropriate for their age/breed/health status. This means consulting with your veterinarian to determine the best type of food to feed your dog, as well as monitoring their portion sizes and ensuring that they are getting enough exercise.

    pecans are harmful to dogs

    Final Thoughts

    While the question of whether or not dogs can eat pecans may seem trivial at first glance, it highlights a larger issue of pet safety and responsible ownership. By taking the time to research and understand what foods are safe for our furry friends – as well as being cautious about feeding them new items – we can help ensure their health and happiness for years to come. As pet owners, it’s our duty to prioritize our dog’s safety above everything else.

    This means keeping a watchful eye on what they eat, seeking veterinary care when needed, and making informed decisions about their nutrition. By doing so, we can help ensure that our furry friends live long, happy lives by our side.

    ~Lindsie

    A note about your dog’s health

    This article provides general education and does not replace an examination, diagnosis, or individualized advice from your veterinarian. Contact a veterinary professional if you are concerned about your dog’s symptoms.

    Lindsie Parks B.S., CRDNS Avatar

    ABOUT THE AUTHOR
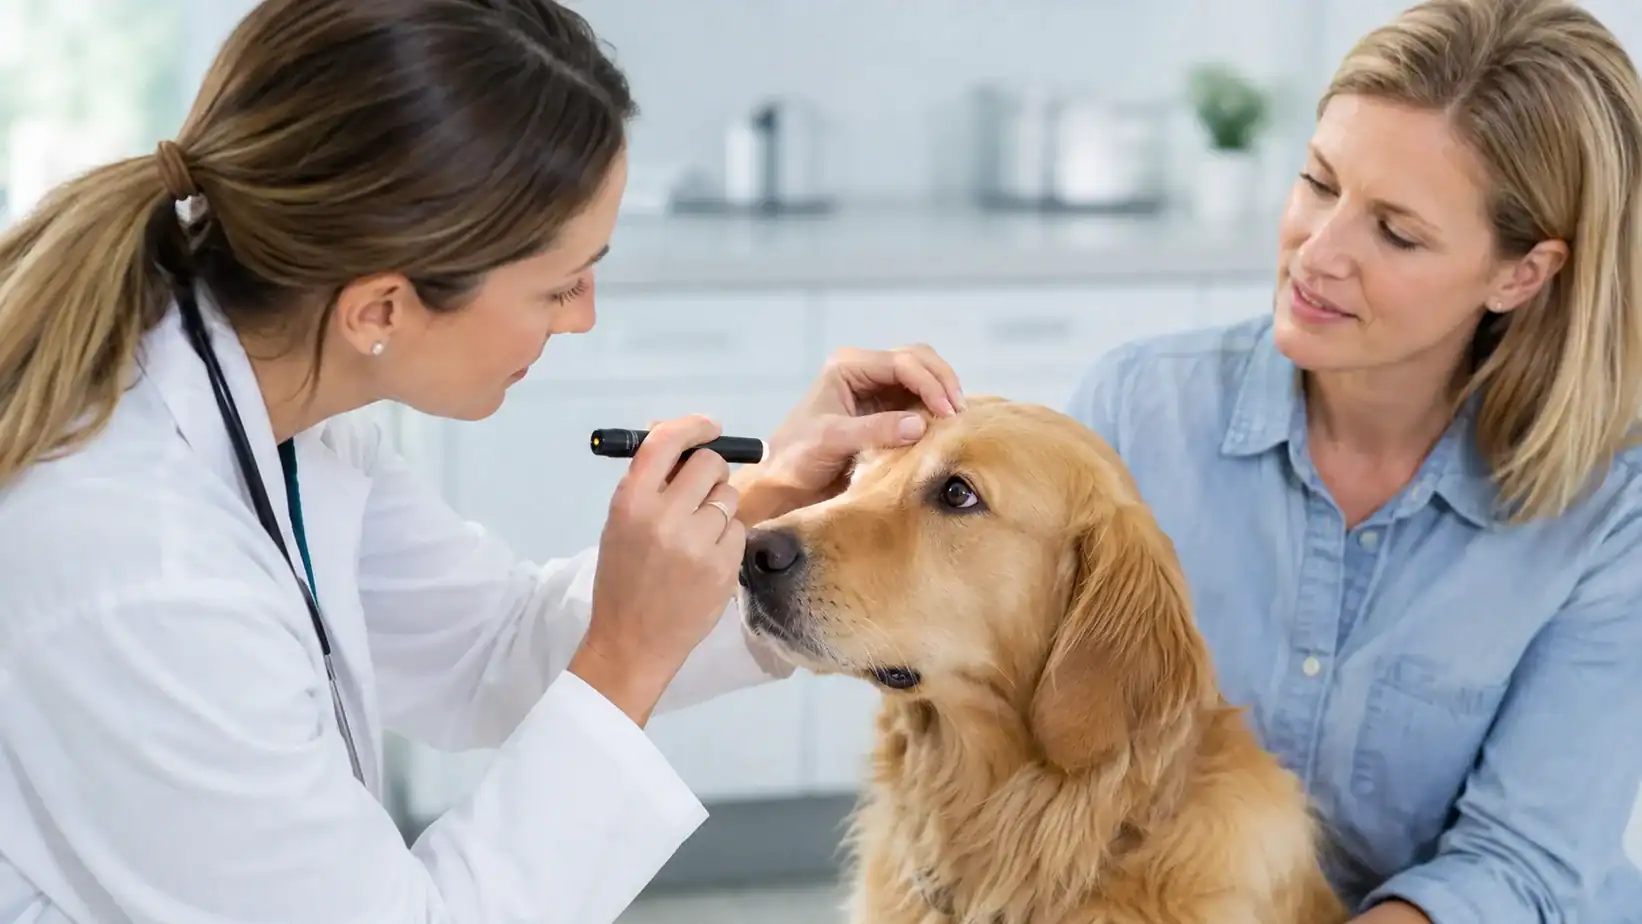
  • Do I Have To Rinse Coconut Oil Off My Dog? Healthy Grooming

    Do I Have To Rinse Coconut Oil Off My Dog? Healthy Grooming

    The Coconut Oil Doggy Dilemma: Do I Have to Rinse My Pup?

    If you’re a pet parent, you’ve probably heard about the wonders of coconut oil. It’s been touted as a cure-all for everything from dry skin to bad breath in dogs.

    But with all the buzz surrounding this natural remedy, there’s one question that keeps popping up: do I have to rinse my dog after applying coconut oil? Before we can answer that question, let’s take a closer look at why coconut oil is so popular among dog owners in the first place.

    rinse coconut oil off

    The Benefits of Using Coconut Oil on Dogs

    Coconut oil is packed with medium-chain fatty acids, which have been shown to provide various health benefits for dogs. Some of the most notable benefits include:

    • Promoting Healthy Skin and Coat: The fatty acids in coconut oil can help moisturize dry skin and reduce itchiness. It can also improve coat texture and shine.
    • Aiding Digestion: Coconut oil has antibacterial properties that can help combat digestive issues like constipation or diarrhea. It may also improve nutrient absorption.
    • Boosting Immunity: Coconut oil’s lauric acid has immune-boosting qualities that can aid dogs with its antifungal, antimicrobial, and antiviral properties.

    The Proper Way to Apply Coconut Oil to Your Dog

    Firstly, it’s important not to apply too much coconut oil. A little goes a long way.

    Apply only enough so that your pup doesn’t look greasy or wet afterward. When using unrefined virgin coconut oil, warm it up slightly in your hands before applying it onto their coat/skin.

    Then gently massage it into their skin, starting from the neck and working your way down their body. You can also apply a small amount to their paw pads.

    Try not to apply directly to their face, especially near their eyes or mouth. Instead, use a soft cloth or cotton ball to spread it onto the areas that need attention.

    Do You Need to Rinse Off Coconut Oil from Your Dog?

    No, you do not have to rinse off coconut oil from your dog. The vast majority of dogs will not experience any negative side effects from leaving coconut oil on their skin and coat.

    In fact, the longer it stays on, the more time it has to absorb into their skin and provide benefits. Some dog owners choose to rinse off coconut oil after application. They’re usually worried about attracting dirt or creating a mess around the house.

    But unless your pup is prone to rolling in mud or dust immediately after application, there’s really no need for concern. If your dog has sensitive skin or allergies, consult with your vet before using any new products.

    Potential Risks of Leaving Coconut Oil on Your Dog

    While leaving coconut oil on your pup is generally safe, there are some potential risks you should be aware of:

    • Attracting Dirt: Coconut oil is oily in nature and can attract dirt if too much is applied.
    • Skin Irritation: While rare, some dogs may develop skin irritation as a result of using coconut oil. If you notice redness or itching after applying coconut oil to your pup’s coat/skin then discontinue use immediately.

    Listen To Your Pup

    The decision of whether you want to rinse coconut oil off your dog or not ultimately comes down to personal preference. If you’re concerned about attracting dirt or creating a mess, then it’s fine to rinse it off. But if you want your pup to get the full benefits of coconut oil, then leaving it on is perfectly fine.

    Just be sure to monitor how your dog responds after use. Always start with a small amount and gradually increase the quantity as needed.

    And if you notice any adverse reactions, stop using immediately and consult with your vet. So go ahead and pamper your pooch with some lovely coconut oil – they’ll thank you for it!

    The Benefits of Using Coconut Oil on Dogs

    Coconut oil has become increasingly popular over the years, and not just for human consumption. Many pet owners have started using coconut oil on their furry friends as well. There are a variety of benefits that come with using coconut oil on your dog. These include promoting healthy skin and coat, aiding in digestion, and boosting immunity.

    Promoting Healthy Skin and Coat

    One of the benefits of using coconut oil on dogs is that it can promote healthy skin and coat. Coconut oil contains medium-chain fatty acids that act as a natural moisturizer for your dog’s skin. It can also help soothe dry or irritated skin by reducing inflammation.

    Coconut oil also contains lauric acid. This compound has antimicrobial properties that can help prevent infections such as hot spots or flea bites. Additionally, applying coconut oil to your dog’s fur can make it shinier and softer to the touch.

    Aiding in Digestion

    Coconut oil can also aid in digestion for dogs. The medium-chain fatty acids found in coconut oil are easily digestible. They can provide energy quickly without being stored as fat.

    This means that it can be particularly helpful for dogs with sensitive stomachs or digestive issues. Furthermore, coconut oil has been shown to improve nutrient absorption in dogs by assisting with the breakdown of fat-soluble vitamins like A, D, E, and K. By improving nutrient absorption and aiding in digestion, coconut oil may help boost your dog’s overall health.

    Boosting Immunity

    Another benefit of using coconut oil on dogs is its ability to boost their immune system. Lauric acid found in coconut oil has been shown to have antiviral properties. Coconut oil may help fight off viruses such as canine influenza or parvovirus.

    Additionally, taking regular doses of coconut oil has been linked to improving cognitive function. As well as reducing the risk of neurodegenerative diseases like Alzheimer’s in humans. Research on this topic is limited when it comes to dogs. It may be worth considering the potential benefits for your furry friend.

    Other Potential Benefits

    Aside from the benefits mentioned above, there are several other potential benefits of using coconut oil on dogs. For example, it can serve as a natural remedy for fleas or ticks by repelling them with its scent. It may also help reduce bad breath in dogs by killing harmful bacteria in their mouth.

    Coconut oil has also been known to act as a natural sunscreen for dogs. This is due to its high vitamin E content. This can be particularly helpful for breeds with short hair or no hair.

    Using coconut oil on your dog can provide a variety of benefits ranging from promoting healthy skin and coat to boosting immunity and aiding digestion. Further research may be needed to fully understand all of coconut oil’s potential benefits. However, incorporating coconut oil into your dog’s routine may be worth considering for improved overall health and well-being.

    The Proper Way to Apply Coconut Oil to Your Dog’s Skin and Coat

    When applying coconut oil to your dog’s skin and coat, it’s important to do it correctly. First, start off with a small amount of coconut oil and work it into your hands until it becomes liquid. This can be done by simply rubbing your hands together or by placing the container in a warm water bath.

    Once the coconut oil is melted, gently massage it onto your dog’s skin and coat. Make sure you get all the way down to their skin, working in a circular motion.

    Pay special attention to areas that tend to get dry or where they may have hot spots. Avoid excessive use of coconut oil on your dog to prevent oily residue.

    A general rule of thumb is 1 teaspoon per 10 pounds of body weight. For example, if your dog weighs 30 pounds, use no more than 3 teaspoons of coconut oil at once.

    In terms of frequency, applying coconut oil once or twice a week is typically sufficient for most dogs. However, if your dog has chronic dry skin or other skin issues, you may need to apply it more frequently.

    Benefits of Using Coconut Oil on Your Dog’s Skin and Coat

    Coconut oil provides several benefits when applied topically on dogs’ skin and coat. First and foremost, its moisturizing properties can help soothe dry or irritated skin. This makes it particularly useful for dogs with allergies or other conditions that may cause itching or rashes.

    Additionally, applying coconut oil can help improve the overall appearance of your dog’s coat by making it shiny and healthy-looking. It also has antimicrobial properties that can help prevent infections caused by bacteria or fungi.

    Using coconut oil on your dog’s skin and coat can help repel fleas and ticks. This is because the lauric acid found in coconut oil acts as a natural insect repellent.

    Why You Should Consider Using Coconut Oil on Your Dog

    If you’re looking for a natural way to improve your dog’s skin and coat health, look no further. Unlike other topical treatments that may contain harsh chemicals or irritants, coconut oil is gentle enough for even the most sensitive skin.

    In addition to its moisturizing and antimicrobial properties, coconut oil is also incredibly versatile. It can be used as a standalone treatment. Or it can be mixed with other ingredients to create DIY grooming products like shampoos or conditioners.

    Using coconut oil on your dog can be an affordable alternative to expensive vet treatments or grooming products. With just a few teaspoons per application, a small jar of coconut oil can last for weeks. Making it both effective and economical.

    The Bottom Line

    When it comes down to it, there’s no harm in leaving the coconut oil on your dog after applying it to their skin and coat. In fact, doing so may provide additional benefits by allowing the moisture from the coconut oil to continue working its magic over time.

    Of course, if you’re concerned about potential risks like attracting dirt or causing irritation, rinsing off your dog after applying coconut oil is certainly an option. However, this step is not necessary for most dogs and may actually reduce the effectiveness of the treatment by washing away some of the beneficial oils.

    Ultimately, whether you decide to rinse off your dog after applying coconut oil or leave it on is up to personal preference. Just remember that when used correctly, this natural remedy can be an effective way to promote healthy skin and coat in dogs of all ages and breeds.

    Do You Need to Rinse off Coconut Oil From Your Dog?

    Coconut oil is a popular natural remedy for dogs, and it has several benefits such as promoting healthy skin, reducing inflammation, and boosting immunity. Applying coconut oil on your dog can also help keep their coat shiny and healthy.

    However, many pet owners wonder if they need to rinse off the coconut oil after applying it. The answer is that it’s not necessary but optional.

    Why Rinsing off Coconut Oil is Not Necessary

    Coconut oil is a natural product that is easily absorbed into the skin of both humans and pets. It doesn’t contain any harmful chemicals or toxins, so there’s no need to worry about leaving it on your dog’s skin or coat. In fact, leaving the coconut oil on your dog can provide added benefits as it will continue to moisturize their skin and fur over time.

    Why Some People Choose to Rinse off Their Dogs After Applying Coconut Oil

    Despite the fact that rinsing off coconut oil isn’t necessary, some pet owners prefer to do so for various reasons. One of the reasons may be that they feel like leaving the oil on their dog causes dirt and dust to stick to its fur more easily. They believe that rinsing off the excess helps prevent dirt accumulation on their dogs’ coats.

    Another reason may be due to concerns about possible adverse effects of leaving too much of the product on their pets’ coats. While there are no known serious side effects resulting from using too much coconut oil topically in dogs, some pet owners prefer removing all excesses just in case.

    How Often Should You Apply Coconut Oil?

    The frequency with which you apply coconut oil depends entirely on your preferences or what your veterinarian recommends because every pet is unique with different needs similar to human hair care routines. If your dog has dry or itchy skin, you can apply coconut oil once or twice a week. However, if your dog’s coat is healthy and shiny, you can apply coconut oil every two weeks.

    How to Apply Coconut Oil to Your Dog’s Coat

    Applying coconut oil to your dog is simple. First, make sure that the coconut oil is in a liquid state.

    If it’s solidified, you can melt it by placing the container in hot water for a few minutes. Next, using your fingers or a brush, gently rub the coconut oil into your dog’s skin and coat.

    Make sure to massage it well so that it penetrates deep into their skin. You should also use enough amount of coconut oil to adequately treat all areas of concern.

    Potential Risks of Leaving Coconut Oil on Your Dog

    While leaving excess amounts of coconut oil on dogs’ coats may not be harmful per se, there are some potential risks associated with doing so that pet owners should be aware of. For instance:

    • Leaving too much excess oils may attract dirt and dust which may cause mats and tangles making grooming more difficult.
    • If too much of the product is applied on certain pets or in certain areas with sensitive skin or allergies, it could cause irritation or rashes.
    • In some cases where dogs consume a large quantity all at once could lead to gastrointestinal issues such as diarrhea or vomiting.

    When used properly with care and consideration for potential risks involved especially if it’s their first time trying this natural remedy out on their pets then pet owners can ensure the benefits outweigh the risks for their furry friends.

    Potential Risks of Leaving Coconut Oil on Your Dog

    The Downside of Leaving Too Much Coconut Oil on Your Dog

    While there are many benefits to using coconut oil on your dog, there are also some potential risks to keep in mind. One such risk is attracting dirt, which can be a problem if you apply too much coconut oil to your dog.

    This is because the excess oil can make dirt and debris stick to your dog’s fur, which can cause mats and tangles. Another potential risk of using too much coconut oil is that it can cause skin irritation.

    This is especially true if your dog has sensitive skin or if the oil is left on for an extended period of time. If you notice any redness or itching after applying coconut oil, it may be best to wash it off and try a different product.

    How Often Should You Use Coconut Oil?

    When it comes to using coconut oil on your dog, less is often more. While it may be tempting to slather on a lot of the stuff in hopes of achieving maximum benefits, doing so can actually do more harm than good.

    Ideally, you should only apply coconut oil once a week or as needed. This will help prevent any potential buildup or issues with attracting dirt while still allowing you to enjoy all the benefits that this natural remedy has to offer.

    How Much Should You Use?

    In addition to limiting how often you use coconut oil on your dog, it’s also important to carefully measure out how much you apply each time. As a general rule of thumb, one teaspoon per 10 pounds of body weight is a good starting point.

    However, keep in mind that some dogs may require less (or more) depending on their individual needs and coat type. If in doubt, start with a small amount and gradually increase as needed until you find the right balance for your furry friend.

    How to Avoid Potential Risks

    To avoid any potential risks associated with using coconut oil on your dog, it’s important to follow some basic guidelines. First and foremost, always start with a small amount and work your way up as needed.

    Additionally, be sure to choose a high-quality, unrefined coconut oil that is safe for use on dogs. Consider rinsing your dog off after applying coconut oil to help prevent any issues with attracting dirt or causing skin irritation.

    The Bottom Line

    Overall, there are both benefits and potential risks to using coconut oil on your dog. While it can promote healthy skin and coat and aid in digestion, it can also attract dirt and cause skin irritation if too much is used.

    To use coconut oil safely and effectively on your furry friend, be sure to limit how often you apply it, carefully measure out how much you use each time, choose a high-quality product that is safe for dogs, and consider rinsing off after application. With these tips in mind, you can enjoy all the benefits of this natural remedy without putting your dog at risk.

    Conclusion: To Rinse or Not To Rinse – That Is the Question

    After weighing the benefits and risks of using coconut oil on your dog and leaving it on versus rinsing it off, the decision ultimately comes down to personal preference and observation of your dog’s reaction. It is clear that coconut oil can provide numerous benefits for dogs, including promoting healthy skin and coat, aiding in digestion, and boosting immunity. It can also serve as a natural alternative to chemical-laden products found in stores. However, it is important to use coconut oil in moderation as excess amounts may attract dirt or cause skin irritation.

    When it comes to whether or not to rinse off coconut oil from your dog after application, there is no right or wrong answer. Some pet owners choose to rinse their dogs off after applying coconut oil due to personal preference or concern for potential risks. Others leave the oil on without any issues. Observation of your dog’s behavior and reaction is key in making this decision.

    Whether or not to rinse off the oil after application ultimately depends on personal preference and observation of your dog’s behavior and reaction. By using moderation when applying coconut oil and observing how your furry friend responds, you can make an informed decision that best suits your pet’s needs.

    ~Sheena

    A note about your dog’s health

    This article provides general education and does not replace an examination, diagnosis, or individualized advice from your veterinarian. Contact a veterinary professional if you are concerned about your dog’s symptoms.

    Lindsie Parks B.S., CRDNS Avatar

    ABOUT THE AUTHOR