Category: Dog Health

  • Natural Puppy Warts Treatment- Mouth & Skin- From Holistic Vet

    Natural Puppy Warts Treatment- Mouth & Skin- From Holistic Vet

    Hello, I’m Dr. Candy Akers, a dedicated holistic veterinarian with years of experience in natural pet care. Throughout my career, I’ve encountered numerous cases of puppy warts, a common concern for many pet owners. These small growths, while often benign, can cause distress for both the puppy and its owner. I firmly believe in the power of natural treatments, not just for their efficacy but also for their gentle approach, especially when it comes to our young furry friends. In this blog, I’ll be sharing my insights on natural remedies for treating puppy warts, both in the mouth and on the skin. Drawing from my holistic veterinary background, I aim to provide you with a comprehensive guide that’s both informative and actionable. Let’s embark on this journey towards natural healing together.
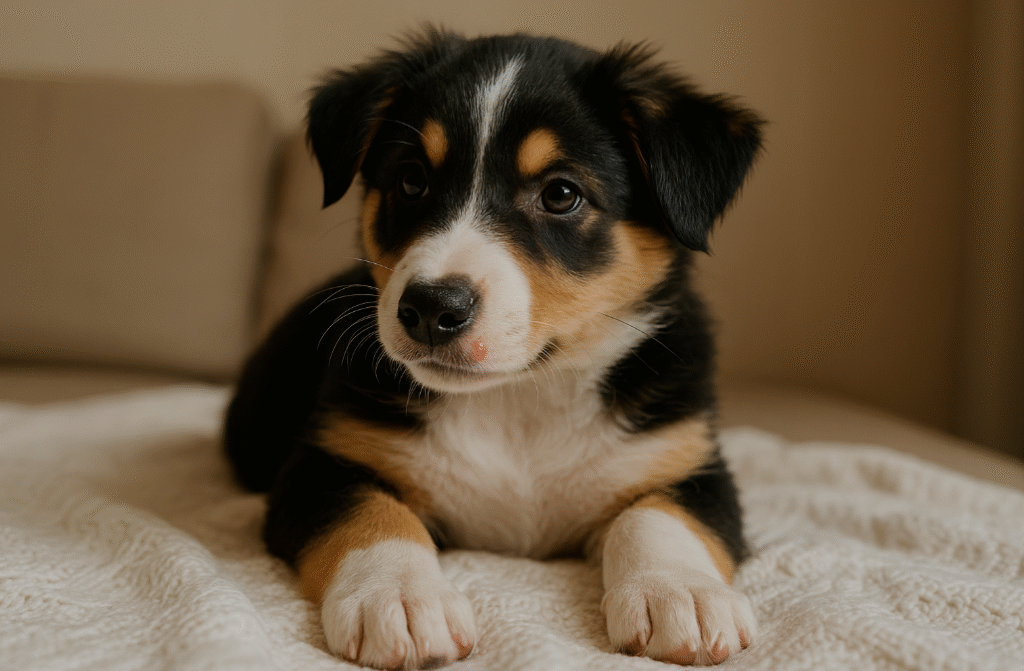
    puppy warts

    Understanding Puppy Warts

    Puppy warts, scientifically known as Canine Papillomas, are small, benign tumors that commonly appear on puppies and younger dogs. They are caused by the Canine Papilloma Virus (CPV) and, while they might look concerning, are typically harmless. However, understanding them is crucial for any pet owner, as it helps in early detection, proper care, and prevention.

    1. Types of Puppy Warts

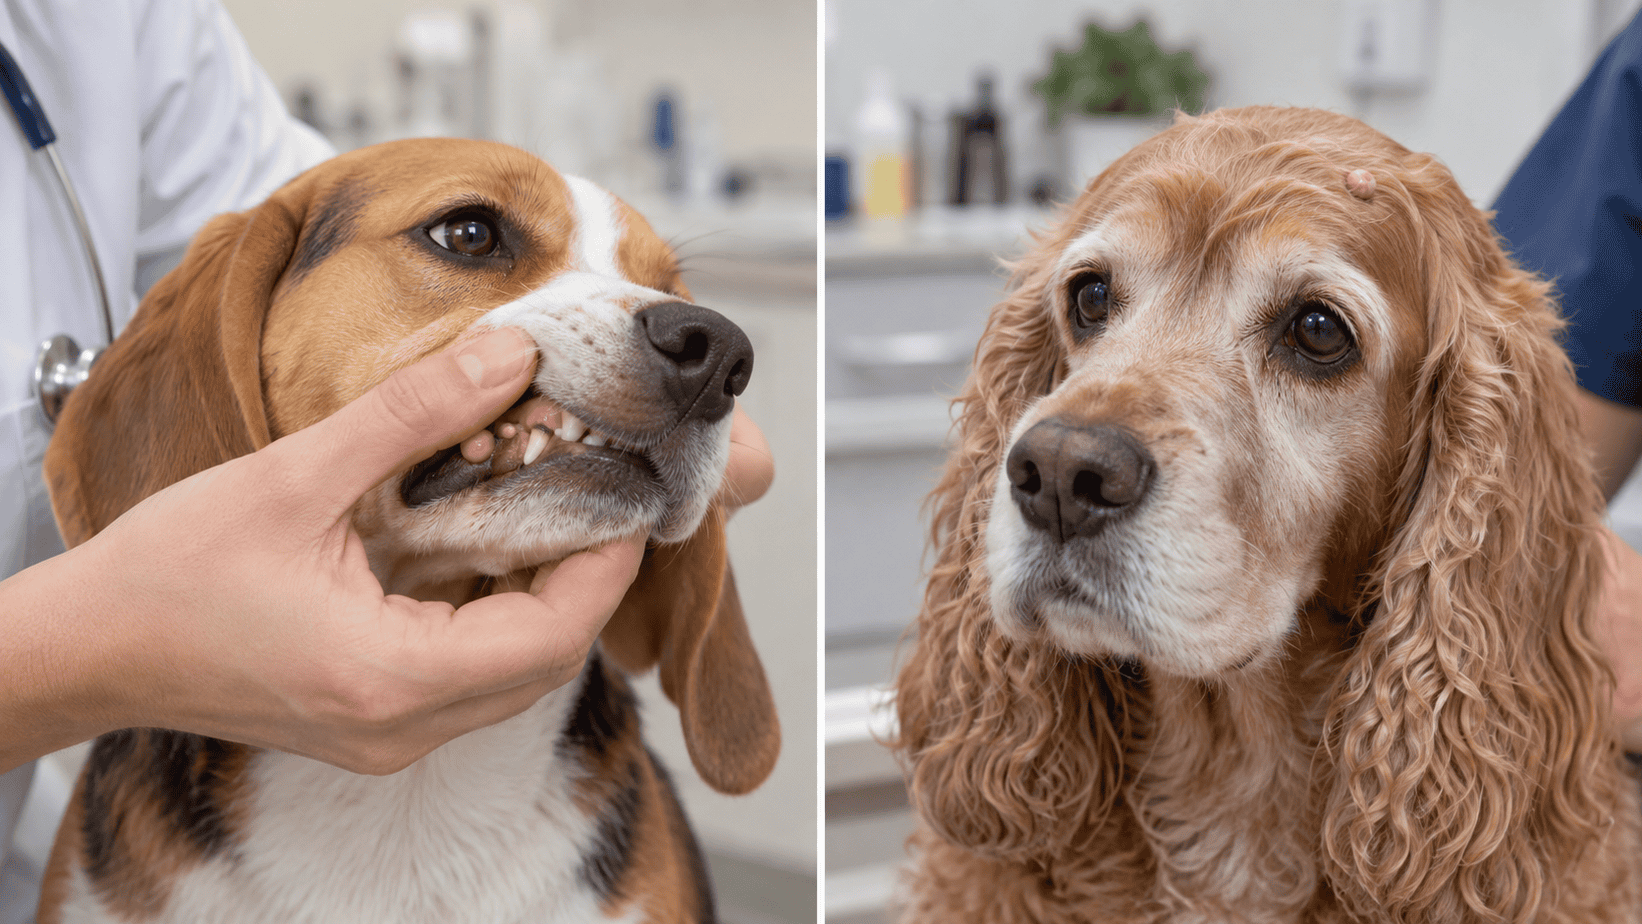
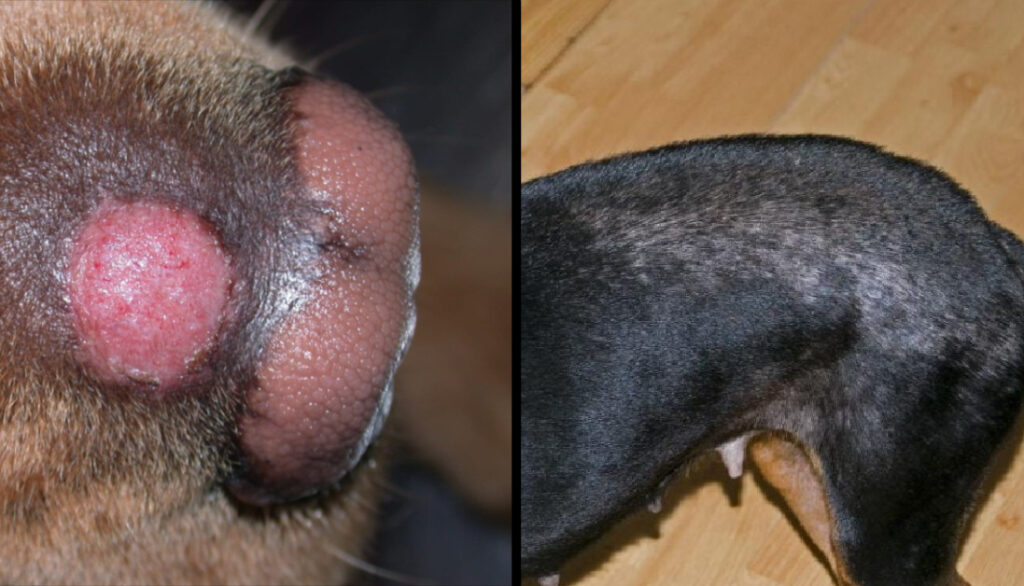
    • Mouth Warts: These are the most common type of warts in puppies. They appear inside the mouth, especially on the gums, tongue, and roof of the mouth. They can resemble a cauliflower in appearance and might make it uncomfortable for the puppy to eat or drink.
    • Skin Warts: These warts appear on the external skin and can be found anywhere on the body. They are often flesh-colored and have a rough texture.

    2. Causes and Transmission

    The primary cause of puppy warts is the Canine Papilloma Virus. This virus is contagious among dogs, especially in those with weaker immune systems like puppies. The transmission can occur through:

    • Direct contact with an infected dog.
    • Sharing toys, bowls, or bedding with an infected dog.
    • Being in an environment where an infected dog has been, like dog parks or kennels.

    3. Symptoms and Identification

    While the warts themselves are the most obvious symptom, there can be other signs to watch out for:

    • Excessive drooling, especially if the warts are inside the mouth.
    • Bleeding from the warts if they get injured.
    • A sudden increase in the number or size of the warts.
    • Signs of discomfort or pain in the affected area.

    4. Are Puppy Warts Dangerous?

    In most cases, puppy warts are benign and pose no serious health risk. However, they can become problematic if:

    • They grow large enough to obstruct breathing or eating.
    • They become infected or ulcerated.
    • There’s a sudden and rapid increase in their number.

    It’s essential to monitor the warts and consult a veterinarian if any of the above issues arise.

    Puppy warts, while common, are typically not a cause for alarm. However, understanding them is crucial for early detection and care. If you ever notice any unusual growths on your puppy, it’s always a good idea to consult with a veterinarian to ensure your pet’s health and well-being.
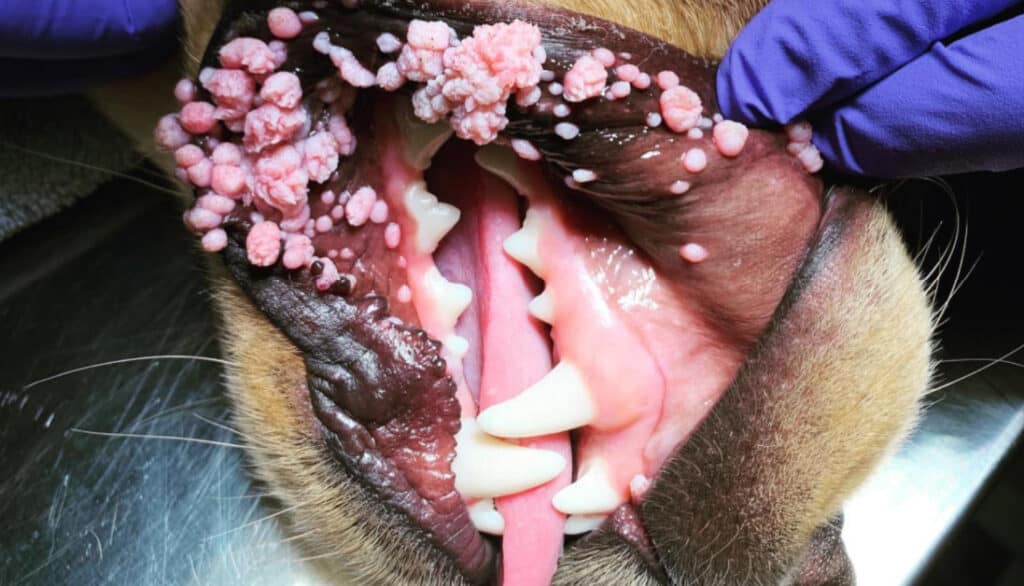
    close up of puppy warts in a dogs mouth

    Holistic Vet’s Approach to Treating Warts

    As a holistic veterinarian, my approach to treating any ailment, including puppy warts, is rooted in understanding the body as a whole and addressing the underlying causes rather than just the symptoms. When it comes to puppy warts, the presence of these growths often indicates more about the puppy’s overall health than just the presence of the Canine Papilloma Virus.

    1. The Nature of Puppy Warts

    First and foremost, it’s essential to understand that most puppy warts are benign and self-limiting. This means that, in many cases, they will resolve on their own without any intervention. The body’s natural defense mechanisms, when functioning optimally, can combat the virus and lead to the eventual disappearance of the warts.

    2. When to Intervene

    While the body often takes care of puppy warts on its own, there are instances where intervention becomes necessary:

    • If the warts grow large enough to obstruct the puppy’s ability to eat or breathe.
    • If there’s a rapid increase in the number or size of the warts.
    • If the warts become infected, ulcerated, or bleed frequently.

    In such cases, a more direct approach to treatment might be required to ensure the puppy’s well-being.

    3. Boosting the Immune System: The Holistic Approach

    The appearance of puppy warts can be a telltale sign that your dog’s immune system needs bolstering. A robust immune system is the body’s primary defense against various pathogens, including the Canine Papilloma Virus. Here’s how a holistic vet might approach this:

    • Dietary Adjustments: Ensuring that your puppy is on a balanced, nutritious diet is paramount. Foods rich in antioxidants, vitamins, and minerals can naturally enhance the immune system.
    • Natural Supplements: Herbs like Echinacea and Astragalus can be beneficial in boosting immunity. Always consult with a holistic vet before introducing any new supplements to your puppy’s regimen.
    • Stress Reduction: Just like in humans, stress can weaken a dog’s immune system. Ensuring a calm environment, regular playtime, and proper rest can help in reducing stress levels.
    • Regular Exercise: Physical activity can aid in improving circulation, enhancing mood, and overall well-being, all of which contribute to a stronger immune system.

    While puppy warts themselves might not always require direct treatment, their presence can be an indicator of a compromised immune system. As a holistic veterinarian, I believe in addressing the root cause and ensuring that our furry friends are not just free of symptoms, but truly healthy from the inside out.

    echinacea, calendula, and coconut oil

    Natural Remedies for Puppy Mouth Warts

    Puppy mouth warts, while typically benign, can be a source of discomfort for our furry friends. As a holistic veterinarian, I often lean towards natural remedies that not only address the warts themselves but also bolster the puppy’s overall health. Here are some tried-and-true natural treatments for puppy mouth warts:

    1. Echinacea:

    • Why it works: Echinacea is a well-known immune booster. By enhancing the immune system, it helps the body naturally combat the Canine Papilloma Virus, leading to the resolution of warts.
    • How to use: Echinacea can be given as a supplement, either in tincture form or as capsules. Always consult with a holistic vet for the correct dosage.

    2. Calendula:

    • Why it works: Calendula has natural antiseptic properties, making it excellent for any oral issues. It can help soothe the mouth and reduce any inflammation associated with the warts.
    • How to use: Calendula mouthwash or gel can be applied directly to the warts. Ensure that any product used is safe for ingestion, as puppies might swallow some of it.

    3. Coconut Oil:

    • Why it works: Coconut oil has antiviral and anti-inflammatory properties. It can help soothe the affected area and may reduce the size and number of warts.
    • How to use: Apply a small amount of virgin coconut oil directly to the warts. Most dogs love the taste, so it’s usually well-accepted.

    apples and apple cider vinegar

    4. Apple Cider Vinegar:

    • Why it works: Apple cider vinegar (ACV) can create an acidic environment that might be unfavorable for the virus, potentially reducing the warts.
    • How to use: Dilute ACV with water (1 part ACV to 2 parts water) and apply it to the warts using a cotton ball. Be cautious, as some dogs might find this irritating. Always monitor for any adverse reactions.

    5. Probiotics:

    • Why it works: A healthy gut often translates to a robust immune system. Probiotics can help maintain a balanced gut flora, indirectly aiding in the resolution of warts.
    • How to use: Probiotic supplements designed for dogs can be added to their food. Ensure you choose a high-quality product and consult with a vet for the correct dosage.

    6. Thuja:

    • Why it works: Thuja is a homeopathic remedy often recommended for growths and warts.
    • How to use: Thuja pellets can be given orally. It’s essential to consult with a holistic or homeopathic vet for the appropriate potency and dosage.

    Natural remedies offer a gentle yet effective approach to treating puppy mouth warts. While these treatments can be beneficial, it’s always crucial to monitor your puppy’s condition and consult with a holistic veterinarian to ensure the best care. Remember, every dog is unique, and what works for one might not work for another.
    natural treatments for puppy warts

    Natural Remedies for Puppy Skin Warts

    Puppy skin warts, though typically not harmful, can sometimes be a cosmetic concern or cause discomfort if located in areas where they might be rubbed or scratched. As a holistic veterinarian, I advocate for natural remedies that are gentle on the puppy’s skin while addressing the root cause. Here are some effective natural treatments for puppy skin warts:

    1. Castor Oil:

    • Why it works: Castor oil has been traditionally used for various skin ailments due to its anti-inflammatory and immune-boosting properties. It can help soften and reduce the size of the warts.
    • How to use: Apply a small amount of castor oil directly to the wart using a cotton ball. Secure with a bandage if necessary to prevent the puppy from licking it off.

    2. Lemon Juice:

    • Why it works: The acidic nature of lemon juice can help in reducing the size and appearance of warts.
    • How to use: Apply fresh lemon juice directly to the wart using a cotton ball. Monitor for any skin irritation.

    3. Vitamin E:

    • Why it works: Vitamin E is an antioxidant that promotes skin health and healing.
    • How to use: Break open a vitamin E capsule and apply the oil directly to the wart. This can help in softening and healing the affected area.

    turmeric

    4. Turmeric:

    • Why it works: Turmeric is known for its anti-inflammatory and antiseptic properties. It can help reduce inflammation and promote healing.
    • How to use: Make a paste using turmeric powder and a little water. Apply this paste to the wart and let it dry. Wash off after a few hours.

    5. Immune-Boosting Foods:

    • Why it works: Boosting the puppy’s immune system can help in naturally combating the virus causing the warts.
    • How to use: Incorporate immune-boosting foods like blueberries, spinach, and sweet potatoes into the puppy’s diet. Always introduce new foods gradually and in moderation.

    Natural remedies for puppy skin warts offer a gentle approach to treatment, focusing on both the external symptoms and the overall well-being of the puppy. While these methods can be beneficial, it’s essential to observe your puppy for any adverse reactions and consult with a holistic veterinarian for tailored advice.
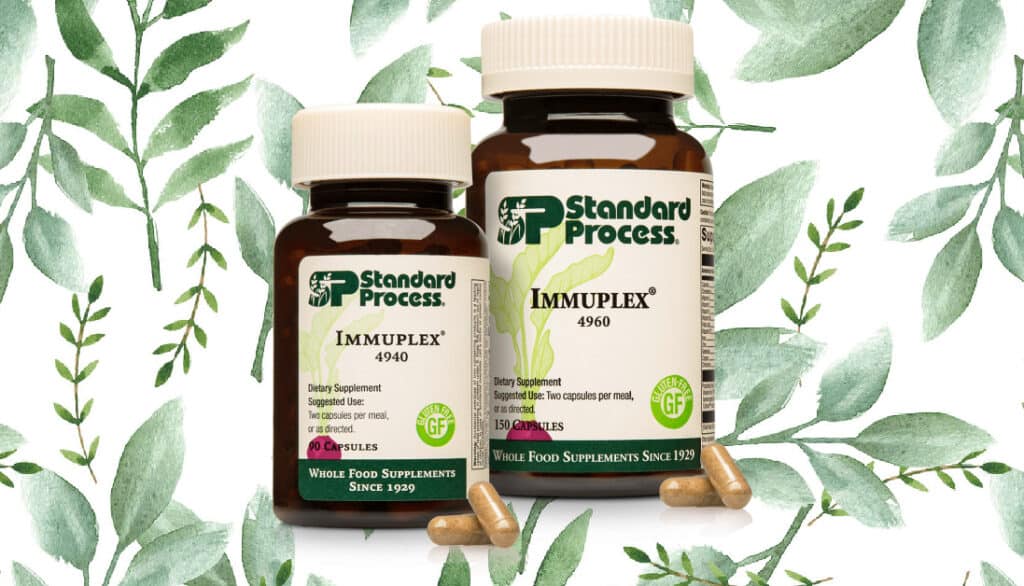
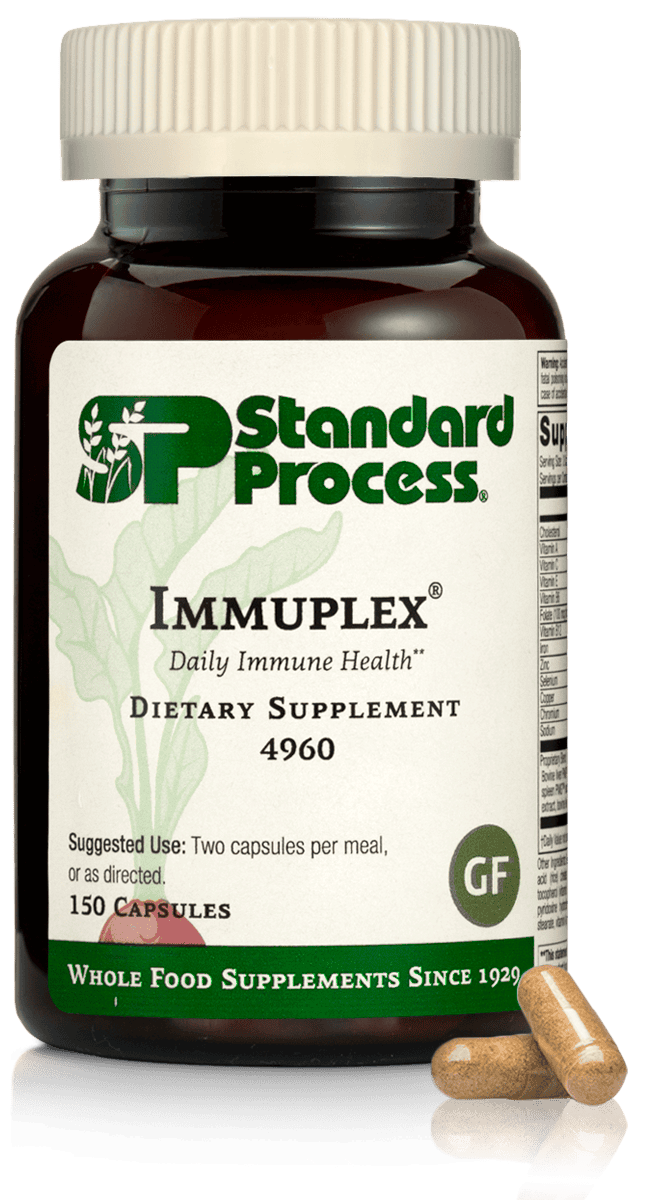
    standard process immuplex

    Standard Process Immuplex for Treating and Preventing Puppy Warts

    In the realm of holistic veterinary medicine, we often look to whole food supplements to support the body’s natural healing processes. One such supplement that has garnered attention for its potential benefits in treating and preventing puppy warts is the Standard Process Immuplex.

    1. What is Standard Process Immuplex?

    Standard Process Immuplex is a whole food supplement designed to support the body’s immune system. It blends essential nutrients from various sources, such as spleen, thymus, and liver extracts, along with vitamins and minerals, to provide comprehensive immune support.

    2. How Can It Help with Puppy Warts?

    • Immune System Boost: The primary cause of puppy warts is the Canine Papilloma Virus (CPV). A robust immune system can combat this virus more effectively, reducing the appearance and duration of warts. Immuplex is designed to bolster the immune system, making it a potential ally in the fight against CPV.
    • Nutrient-Rich Composition: The blend of vitamins, minerals, and glandular extracts in Immuplex provides a holistic approach to health, ensuring that the body has the necessary nutrients to function optimally.
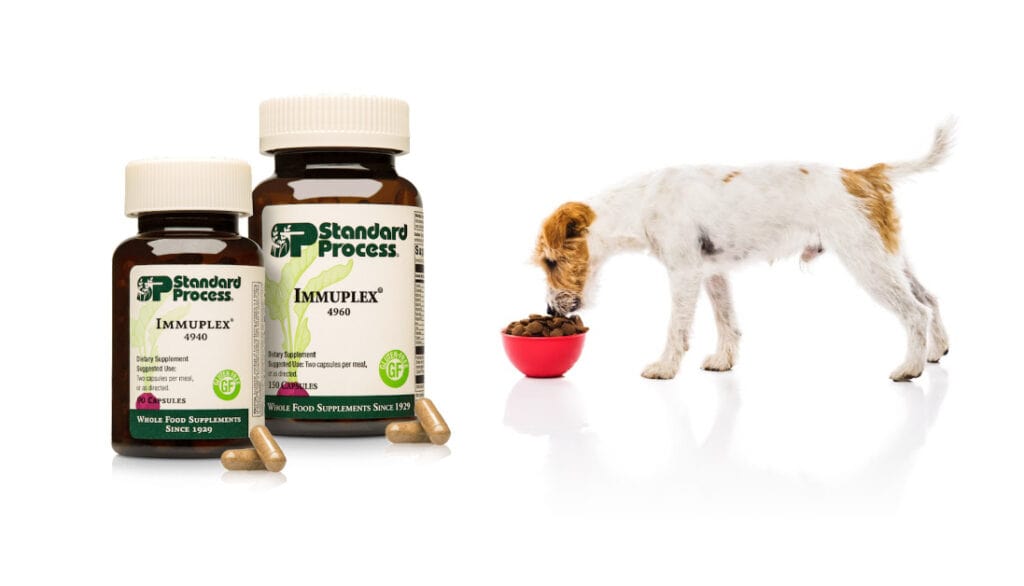
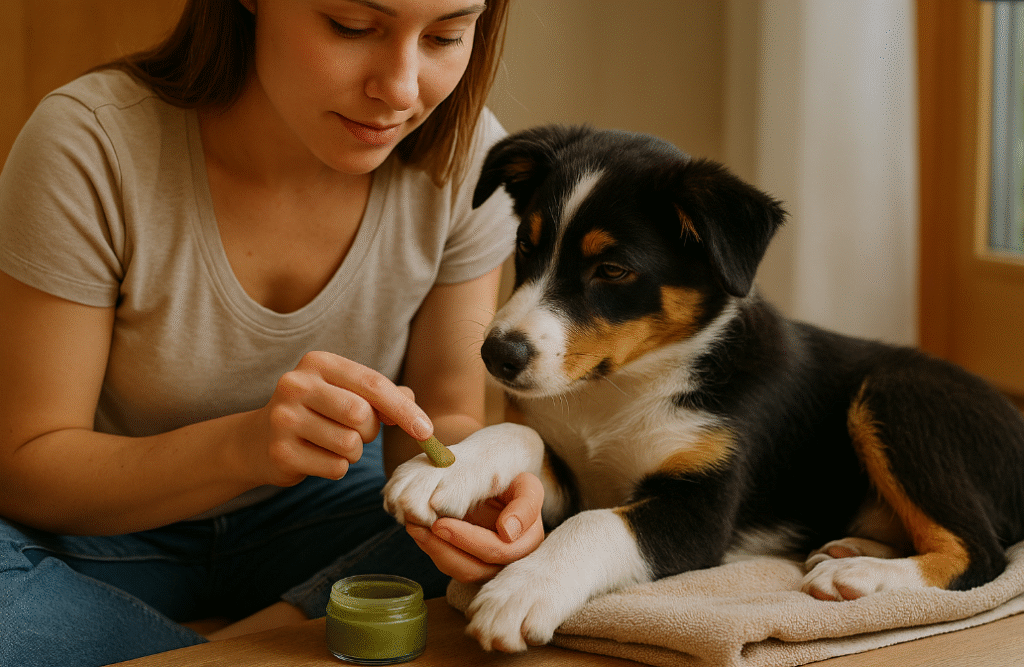
    puppy eating with standard process immuplex

    3. How to Use Standard Process Immuplex for Puppies?

    • Dosage: The dosage will vary based on the puppy’s weight and overall health. It’s crucial to consult with a holistic veterinarian to determine the appropriate dosage for your puppy.
    • Duration: For preventive measures, a short course might be recommended. However, for treating existing warts or other immune-related issues, a longer course might be necessary.
    • Administration: Immuplex usually comes in capsule form. The capsule can be opened, and the contents mixed with the puppy’s food for easier administration.

    4. Precautions and Considerations

    • Consultation: Always consult with a holistic veterinarian before introducing any new supplement to your puppy’s regimen.
    • Monitor for Reactions: While adverse reactions are rare, it’s essential to observe your puppy for any changes in behavior, digestion, or overall health after starting the supplement.
    • Quality Matters: Ensure that you’re purchasing the genuine Standard Process Immuplex from a reputable source to guarantee its quality and efficacy.

    Standard Process Immuplex offers a natural approach to bolstering the immune system, making it a potential tool in treating and preventing puppy warts. As with any supplement or treatment, individual results may vary, and it’s essential to approach its use with knowledge and guidance from a trusted holistic veterinarian.
    herbal remedies for puppy warts

    Prevention Tips from Holistic Vet

    As the saying goes, “Prevention is better than cure.” This adage holds especially true in the world of holistic veterinary medicine, where we focus on maintaining overall health to prevent ailments rather than just treating symptoms. When it comes to puppy warts and other common canine concerns, here are some prevention tips from my holistic veterinary perspective:

    1. Strengthen the Immune System:

    • Balanced Diet: Ensure your puppy receives a nutritious, balanced diet. Fresh, whole foods that are free from additives and fillers can provide essential nutrients.
    • Supplements: Consider adding immune-boosting supplements like Echinacea, Vitamin C, or probiotics, but always consult with a holistic vet first.

    2. Maintain Good Hygiene:

    • Regular Baths: Use a gentle, natural shampoo to keep your puppy’s skin clean and healthy.
    • Clean Environment: Ensure your puppy’s living space, including bedding and toys, is cleaned regularly to prevent the spread of viruses.

    3. Limit Exposure to Infected Dogs:

    • Socialization: While socializing puppies is crucial, be cautious about exposing your young dog to others that might have visible warts.
    • Shared Items: Avoid sharing toys, bowls, or bedding with dogs that have warts.

    4. Manage Stress:

    • Routine: Dogs, like humans, thrive on routine. Regular feeding times, walks, and play sessions can help reduce stress.
    • Safe Spaces: Ensure your puppy has a quiet, comfortable space to retreat to if they feel overwhelmed.

    5. Regular Check-ups:

    • Holistic Vet Visits: Regular visits to a holistic vet can help catch potential issues early and provide guidance on preventive care.
    • Vaccinations: While holistic vets often take a more conservative approach to vaccinations, it’s essential to discuss the best vaccination schedule for your puppy.

    6. Natural Preventive Remedies:

    • Topical Oils: Applying oils like coconut oil can keep the skin moisturized and act as a barrier against potential irritants.
    • Herbal Teas: Herbs like chamomile can be used to make a mild tea that, when cooled, can be used as a rinse to soothe and protect the skin.

    7. Educate Yourself:

    • Stay Informed: The world of holistic veterinary medicine is vast. Regularly reading up on natural pet care can provide insights into new preventive measures.
    • Workshops & Seminars: Consider attending workshops or seminars on holistic pet care to deepen your understanding.

    Prevention, from a holistic perspective, is about maintaining a state of overall well-being. By focusing on the whole health of our puppies, from diet to environment, we can reduce the risk of ailments like warts and ensure our furry friends lead happy, healthy lives.
    how to treat puppy warts

    Conclusion

    Navigating the world of puppy warts can be a daunting task for any pet owner. However, with the right knowledge and a holistic approach, we can address not just the symptoms but the overall well-being of our beloved furry companions. From understanding the nature of warts to exploring natural remedies and preventive measures, this guide aims to provide a comprehensive overview for those seeking gentle and effective solutions. As a holistic veterinarian, I believe in the power of nature, combined with informed care, to bring about the best outcomes for our pets. Remember, every dog is unique, and while these guidelines offer a general approach, always consult with a trusted veterinarian for tailored advice. Here’s to the health, happiness, and long, wagging tails of our cherished four-legged friends!

    Frequently Asked Questions

    What causes puppy warts?

    Puppy warts, or Canine Papillomas, are caused by the Canine Papilloma Virus (CPV). They are contagious among dogs, especially those with weaker immune systems, like puppies.

    Are puppy warts harmful or painful for my dog?

    Most puppy warts are benign and don’t cause any pain. However, if they grow in clusters or in areas where they might be rubbed (like near the collar), they can cause discomfort. Warts inside the mouth might make eating or drinking uncomfortable if they become too large.

    How long do puppy warts typically last?

    In many cases, puppy warts will resolve on their own within a few weeks to months as the puppy’s immune system matures and combats the virus. However, the duration can vary based on the dog’s overall health and immune response.

    Can I use over-the-counter wart treatments for humans on my puppy?

    It’s essential not to use human wart treatments on puppies without consulting a veterinarian. Many human products contain ingredients that might be harmful or toxic to dogs.

    If my puppy has warts, should I avoid taking them to dog parks or socializing with other dogs?

    It’s a good idea to limit your puppy’s interaction with other dogs while they have visible warts, as the condition is contagious among dogs. Once the warts have cleared, and with a vet’s approval, you can resume regular social activities.

    A note about your dog’s health

    This article provides general education and does not replace an examination, diagnosis, or individualized advice from your veterinarian. Contact a veterinary professional if you are concerned about your dog’s symptoms.

    Dr. Candy Akers, DVM Avatar

    ABOUT THE AUTHOR
  • How To Treat Dog Eye Infection Without Vet: Expert Home Remedy

    How To Treat Dog Eye Infection Without Vet: Expert Home Remedy

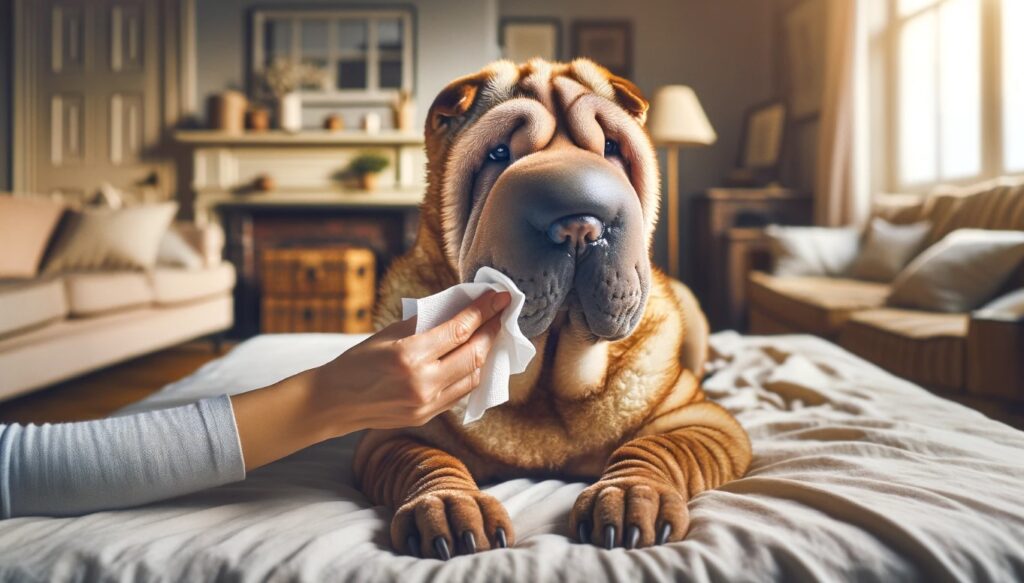
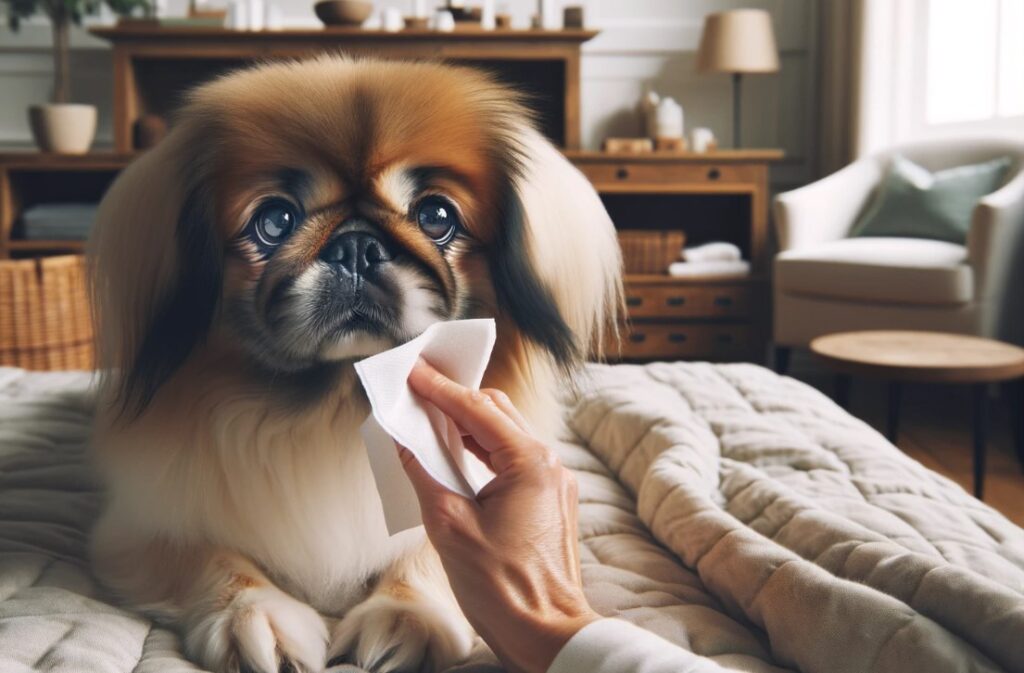
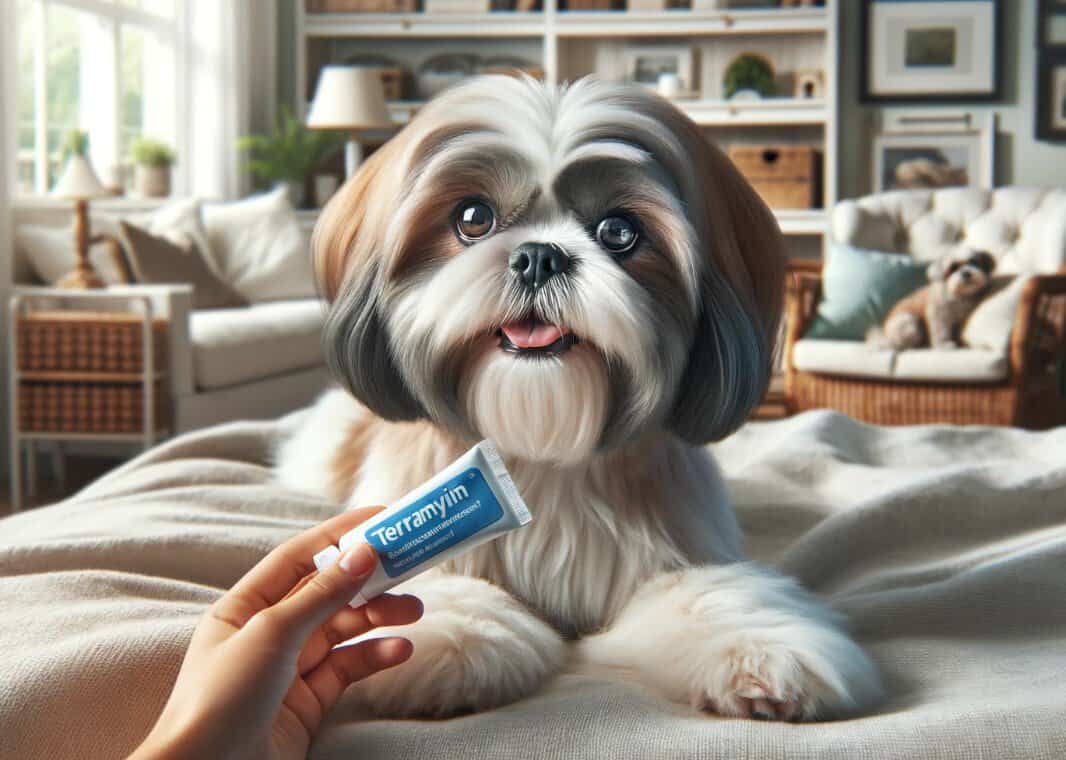
    Over the years in my practice, I’ve come to appreciate the value of integrating conventional medicine with natural remedies to ensure our furry companions receive the best of both worlds. Our pets, much like us, can sometimes encounter minor health issues that can be managed with a touch of Mother Nature’s wisdom, coupled with our informed care. One such common issue I encounter in many of our four-legged friends is eye infections. It’s heart-wrenching to see our pups with teary, irritated eyes, and while I always advocate for professional veterinary guidance in health matters, I understand the appeal of seeking gentle, natural remedies for initial care or minor cases. This blog aims to offer a guide on how to treat dog eye infections at home with expert-recommended home remedies.

    However, it’s imperative to note: while these remedies can be beneficial, they’re not a substitute for professional veterinary care, especially in more severe or persistent cases. Always observe your pet closely and consult with your vet when in doubt. Let’s journey together in ensuring our dogs get the best, most compassionate care they deserve.

    eye infections in dogs

    Recognizing Signs of a Dog Eye Infection

    Our dogs can’t verbally communicate when something is amiss, which makes it crucial for us as pet owners to be keen observers, particularly when it comes to their eyes, which are expressive yet delicate organs. Here are some of the most common symptoms and what they might indicate:

    1. Redness or Swelling: The whites of a dog’s eyes, also known as the sclera, should ideally be clear. If you notice any redness or swelling, it’s a sign of inflammation. This is often one of the first indications of an infection or another type of eye problem.
    2. Discharge: A clear, watery discharge is usually a dog’s way of clearing out debris from the eye. However, if the discharge becomes thick, yellow, green, or even white, it could be pus or mucus, indicative of an infection.
    3. Tearing or Cloudiness: Excessive tearing can be a dog’s response to eye irritation. On the other hand, a cloudy or opaque appearance in the eye might indicate more serious issues like cataracts, corneal problems, or even an internal eye infection.
    4. Frequent Blinking or Squinting: If your dog is blinking more than usual or seems to be squinting, it could be due to discomfort or pain in the eye. It’s a clear sign that something isn’t right, and their eye or eyes are irritated.
    5. Scratching or Pawing at the Eye: A dog might scratch or paw at its eyes due to itching or pain. This action can exacerbate the issue and even lead to injuries, so it’s crucial to address the root cause promptly.

    By understanding and recognizing these signs early on, we can take steps to ensure they get the care they need, whether through home remedies or a visit to the vet.

    Common Causes of Eye Infections in Dogs

    Eye infections in dogs are not uncommon, and understanding their root causes can be key to both prevention and effective treatment. Like humans, dogs can develop eye infections from a variety of factors. While some causes might be relatively benign, others can be indicative of more significant underlying issues. Let’s delve into the common culprits:

    1. Foreign Bodies: One of the most frequent causes of eye infections is the intrusion of foreign objects like dirt, sand, grass, or even an eyelash. These can irritate the eye and introduce bacteria, leading to an infection.
    2. Bacteria and Viruses: Just as with human eye infections, bacteria (like Staphylococcus or Streptococcus) and viruses can be primary causes. These microbes can enter the eye through various means, including contact with contaminated surfaces, interaction with infected animals, or even via respiratory infections.
    3. Allergies: Dogs, like humans, can suffer from allergies. Pollen, mold, dust, and certain chemicals can irritate a dog’s eyes, leading to symptoms similar to infections. Over time, chronic allergies can predispose the eye to actual infections.
    4. Trauma: Injuries to the eye, whether from rough play, encounters with other animals, or accidents, can introduce bacteria into the eye, leading to infections.
    5. Underlying Health Conditions: Some systemic health problems, like immune disorders or diseases like Canine Distemper, can manifest with eye infection symptoms.
    6. Tear Duct Issues: Tear ducts play a crucial role in keeping the eyes clean and moist. If they become blocked or don’t function properly, it can lead to dry eyes, which are more susceptible to infections.

    It’s worth noting that while any dog can develop an eye infection, some breeds with prominent eyes like Pugs, Shih Tzus, and Bulldogs, or breeds with skin folds, are more prone to certain eye issues.

    treating eye infections in dogs

    Expert Home Remedies for Dog Eye Infections

    Treating minor eye irritations with natural remedies can be both gentle and effective. However, always remember that these remedies are best suited for mild conditions. If symptoms persist or if you’re unsure about the severity, it’s vital to consult a veterinarian. Here are some expert-recommended home remedies for dog eye infections:

    Saline Solution

    A saline solution can help cleanse the eye and reduce irritation.

    • How to prepare: Mix a teaspoon of salt in a cup of warm, distilled water until dissolved. Allow it to cool to room temperature.
    • How to apply: Using a clean cotton ball, gently dab or wipe the dog’s eye, ensuring no direct contact.

    Herbal Teas

    Herbal teas possess anti-inflammatory and antimicrobial properties, making them a beneficial rinse for irritated eyes.

    • Chamomile Tea:
      • Benefits: It’s known for its anti-inflammatory and calming properties.
      • Preparation and Application: Brew a chamomile tea bag in warm water, let it cool, then use a cotton ball to apply it on the affected eye.
    • Green Tea:
      • Benefits: Contains antioxidants that can help reduce inflammation.
      • Preparation and Application: Similarly, brew, cool, and apply using a clean cotton ball.

    Warm Compress

    Applying warmth can soothe the eye and alleviate pain.

    • How to use: Dip a clean cloth in warm water, wring out excess, and gently place it over the dog’s closed eye for a few minutes.
    • Frequency: 2-3 times a day.

    Remember, while these remedies can be beneficial for minor irritations, it’s paramount to ensure that the situation doesn’t call for more immediate professional attention. Always prioritize your dog’s well-being, and be cautious when applying any substance near their eyes.

    dog eye infections

    Preventative Measures for Eye Health in Dogs

    Maintaining good eye health is not just about addressing infections when they arise but also implementing proactive steps to prevent potential problems. After all, prevention is often the best medicine. Here’s how you can ensure your dog’s eyes stay bright, clear, and healthy:

    1. Regular Cleaning

    • Why it’s Important: Over time, dust, debris, and discharge can accumulate around your dog’s eyes. This can not only lead to discomfort but also become a breeding ground for bacteria.
    • How to Do It: Use a soft, damp cloth or cotton ball to gently wipe away any dirt or discharge from around the eyes. Ensure you use a separate cloth or cotton ball for each eye to prevent cross-contamination.

    2. Check Eyes Frequently

    • Why it’s Important: Regular checks can help you spot and address any signs of irritation, inflammation, or infection early on.
    • What to Look For: Clearness of the eye, any discoloration, swelling, or unusual discharge.

    3. Trim Hair Around the Eyes

    • Why it’s Important: For breeds with long hair, strands can fall into the eyes causing irritation and potentially leading to infections.
    • How to Do It: Using blunt-nosed scissors, carefully trim the hair that falls over the eyes, ensuring not to accidentally poke or hurt your dog. Alternatively, consider taking your dog to a professional groomer.

    4. Protect Against External Factors

    • Why it’s Important: Various external factors can irritate your dog’s eyes, leading to infections.
    • Preventative Steps:
      • Outdoor Activities: If your dog enjoys sticking their head out of the car window, consider dog goggles to prevent foreign particles from entering the eyes.
      • Environment: Ensure your living environment is free from irritants such as excessive dust or harmful chemicals.

    5. Offer a Balanced Diet

    • Why it’s Important: Just like humans, certain nutrients can help promote eye health in dogs.
    • What to Feed: Foods rich in antioxidants, vitamins, especially Vitamin A, and omega-3 fatty acids can be beneficial. Always consult with a vet for specific dietary recommendations.

    6. Be Cautious with Toys

    • Why it’s Important: Some toys, if thrown directly towards the face, can accidentally injure the eyes.
    • Safety Measures: Opt for size-appropriate toys and be gentle during playtime. Avoid laser pointers, as directly shining them into a dog’s eyes can cause damage.

    7. Regular Vet Check-ups

    • Why it’s Important: Annual or bi-annual vet visits ensure that any potential eye issues or underlying conditions are spotted and addressed early.
    • What to Expect: A comprehensive eye exam will often be part of a regular check-up.

    Your dog’s eyes are windows to their soul, and they rely on you for their care. By taking these preventive measures, you can ensure those eyes remain bright and healthy throughout their life.

    When to Seek Professional Help

    While home remedies and preventative measures are invaluable tools in the arsenal of a responsible pet owner, there are moments when professional intervention is not just beneficial but essential. Our dogs depend on us to discern when their condition warrants more than home care. Here’s how to know when it’s time to see a veterinarian:

    1. Persistence of Symptoms

    • Concern: If after trying home remedies for a couple of days you notice no improvement, or if the symptoms worsen, it’s a clear signal to seek professional guidance.
    • Why: Persistent symptoms can indicate a more severe underlying condition or an infection resistant to simple treatments.

    2. Change in Eye Color or Appearance

    • Concern: Any cloudiness, discoloration, or opacity in the eye can be indicative of serious issues such as cataracts, glaucoma, or even an internal infection.
    • Why: These conditions can compromise your dog’s vision or lead to more complex health challenges if not addressed promptly.

    3. Behavioral Changes

    • Concern: If your dog becomes more withdrawn, avoids light, becomes aggressive when you approach their face, or seems to bump into objects more frequently, it could be a sign of diminished vision or eye pain.
    • Why: Behavioral changes often indicate discomfort or potential loss of vision, necessitating immediate attention.

    4. Excessive Discharge or Pus

    • Concern: Thick, yellow, green, or bloody discharge is typically a sign of a bacterial or viral infection.
    • Why: Such infections can escalate quickly, causing further complications or damage to the eye.
    treating dog eye infections

    5. Swelling or Bulging Eyes

    • Concern: If one or both eyes appear swollen or seem to bulge, it can be a sign of glaucoma, tumors, or other significant issues.
    • Why: Conditions like glaucoma can escalate rapidly and lead to blindness if not treated in time.

    6. Visible Injuries

    • Concern: Any scratches, cuts, or puncture wounds around or on the eye require immediate attention.
    • Why: Injuries can introduce bacteria, risking infection, or cause direct trauma to the eye which might impact vision.

    7. Frequent Scratching or Pawing

    • Concern: If your dog continuously scratches or paws at its eyes, even after initial cleaning or home treatment, it’s a sign of ongoing discomfort.
    • Why: Continued scratching can exacerbate the issue, potentially leading to injuries or aggravating the infection.

    8. Recurrence of Issues

    • Concern: If your dog seems to suffer from repeated eye infections or irritations, it’s essential to consult with a veterinarian to understand the root cause.
    • Why: Recurrent issues can signify an underlying health condition, allergy, or environmental irritant that needs addressing.

    In essence, while home remedies are an excellent first line of defense and care, they are not a replacement for professional veterinary expertise. Always err on the side of caution, prioritizing your dog’s wellbeing above all else. When in doubt, pick up the phone and consult your vet. They’re there to help ensure your furry companion leads a healthy, happy life.

    dog eye infection

    Conclusion

    Our furry companions rely on us to navigate the world of their health and well-being. Their eyes, shimmering windows to their boundless souls, are not just essential for sight but are indicators of their overall health. While understanding the nuances of common eye infections, recognizing symptoms, and trying expert-approved home remedies can offer solace in times of minor ailments, it’s paramount to recognize the limits of home care. The bond between you and your canine friend is priceless, and as guardians of their health, it’s our duty to strike the right balance between holistic home treatments and timely professional interventions. Remember, a proactive approach, combined with a keen observance of their behavior, will ensure those loving eyes continue to gaze at you with clarity and affection for years to come. After all, in the journey of companionship, our ultimate goal is their happiness and well-being.

    Frequently Asked Questions

    Can I use over-the-counter eye drops meant for humans on my dog?

    While some human products might be safe for dogs, many aren’t. Always consult with a veterinarian before applying any human medication to your dog’s eyes to ensure safety and appropriateness.

    How can I tell the difference between a simple eye irritation and a more severe eye infection in my dog?

    Simple irritations often present as temporary redness or minor discharge and might resolve on their own or with gentle cleaning. However, persistent redness, cloudiness, excessive discharge, swelling, or behavioral changes indicate a more severe infection or issue.

    Is it safe to use multiple home remedies at once for my dog’s eye infection?

    It’s advisable to try one remedy at a time. This way, you can monitor your dog’s reaction and ensure they don’t have an adverse response. Combining remedies can also make it challenging to identify which one is effective or causing potential irritation.

    How often should I clean my dog’s eyes as a preventive measure?

    Regular cleaning can be beneficial, especially for breeds prone to eye issues. Gently cleaning the area around the eyes once a week, or whenever you notice dirt or discharge, can help prevent infections.

    My dog had an eye infection recently. Is there a higher chance of recurrence?

    Recurrence depends on the cause. If it was due to an external factor like a foreign object, chances might be lower. However, if it’s because of underlying health issues or environmental factors, there could be a higher risk. Ensure you follow all preventive measures and consult with a vet about any concerns.

    A note about your dog’s health

    This article provides general education and does not replace an examination, diagnosis, or individualized advice from your veterinarian. Contact a veterinary professional if you are concerned about your dog’s symptoms.

    Dr. Candy Akers, DVM Avatar

    ABOUT THE AUTHOR
  • Is Roundup Safe For Dogs? Glyphosate Weed Killer Toxicity Facts

    Is Roundup Safe For Dogs? Glyphosate Weed Killer Toxicity Facts

    Hello, I’m Dr. Candy Akers. As a dedicated veterinarian and passionate advocate for pet safety, I’ve spent years researching the potential hazards that lurk in our homes and gardens. One of the most common questions I encounter from concerned pet owners is about the safety of various household products, especially when it comes to our furry friends. RoundUp, a popular weed killer, is one such product that has garnered significant attention. With its widespread use in gardens and lawns across the country, it’s crucial for us to understand its impact on our beloved pets. You may find yourself asking “Is RoundUp safe for dogs?” The short answer is no.

    In this blog, I aim to shed light on the facts surrounding RoundUp, its active ingredient Glyphosate, and its safety implications for dogs. My goal is to provide you with evidence-based insights, so you can make informed decisions that prioritize the well-being of your canine companions.

    is roundup safe for dogs

    What is RoundUp? Understanding Glyphosate Weed Killer

    RoundUp is one of the most widely recognized and used herbicides globally. Its primary purpose is to control and eliminate unwanted weeds and grasses in gardens, lawns, and agricultural lands. But what exactly is RoundUp, and why has it become such a staple in both residential and commercial landscaping?

    Composition and Main Ingredient

    At the heart of RoundUp is its active ingredient: Glyphosate. Glyphosate is a systemic herbicide, which means it is absorbed by plants and then transported throughout their systems, effectively killing them from the inside out. It works by inhibiting a specific enzyme pathway essential for plant growth, causing the plant to wither and die.

    How RoundUp Works

    When applied, RoundUp is absorbed primarily through the foliage of plants, rather than their roots. Once inside the plant, Glyphosate disrupts the shikimic acid pathway – a vital process that plants use to produce certain amino acids. Without these amino acids, the plant cannot produce proteins essential for growth, leading to its eventual death.

    The Rise of RoundUp

    Introduced in the 1970s by the Monsanto Company, RoundUp quickly gained popularity due to its effectiveness and broad-spectrum weed control capabilities. Over the years, its use has expanded from agricultural fields to home gardens, making it a go-to solution for many seeking a weed-free environment.

    Safety and Environmental Concerns

    While RoundUp has proven to be a powerful tool against unwanted vegetation, its widespread use has raised concerns about its environmental impact and potential health risks to humans and animals. Glyphosate’s role in the ecosystem, its persistence in the soil, and its potential runoff into water systems have been topics of extensive research and debate.

    herbicides with dogs

    Is RoundUp Weed Killer Safe for Dogs? Unveiling the Truth

    As a veterinarian, one of the most pressing concerns I often hear from pet owners revolves around the safety of various products they use in their homes and gardens. RoundUp, given its ubiquity, naturally becomes a focal point of such inquiries. So, is RoundUp safe for our four-legged friends? Let’s delve into the evidence and separate fact from fiction.

    Glyphosate Toxicity in Animals

    Glyphosate, the primary ingredient in RoundUp, has been the subject of numerous studies to determine its safety profile in animals, including dogs. While it’s classified as having low toxicity to dogs when ingested in small amounts, there are still potential risks. Large doses or prolonged exposure can lead to digestive issues, lethargy, and in severe cases, more significant health complications.

    Reported Cases and Symptoms

    Over the years, there have been isolated reports of dogs experiencing adverse reactions after coming into contact with freshly sprayed areas treated with RoundUp. Symptoms can range from mild, such as drooling and skin irritations, to more severe manifestations like vomiting, diarrhea, and respiratory distress.

    It’s essential to note that while these cases exist, they are relatively rare when compared to the vast number of households that use RoundUp without any reported incidents. However, caution is always advised.

    Factors Influencing Safety

    Several factors can influence the safety of RoundUp concerning dogs:

    1. Concentration: Commercially available RoundUp products come in various concentrations. Those with higher glyphosate concentrations pose a greater risk.
    2. Exposure: Direct ingestion of the product or licking treated areas while still wet can increase the risk of adverse reactions.
    3. Dog’s Size and Health: Smaller dogs or those with pre-existing health conditions might be more susceptible to glyphosate’s effects.

    While RoundUp, when used as directed and with precautions, poses a low risk to dogs, it’s always best to err on the side of caution. If you choose to use RoundUp or any herbicide, ensure that your pets are kept away from treated areas until the product has dried completely. And always monitor your dog for any unusual behavior or symptoms after potential exposure.

    herbicide in the dictionary

    Immediate Steps: What To Do If You Suspect Your Dog Has Come Into Contact with RoundUp

    Our pets are curious by nature, and despite our best efforts, they can sometimes find their way into areas we’d rather they didn’t. If you suspect your dog has come into contact with RoundUp or any herbicide, acting swiftly and calmly can make all the difference. Here’s a step-by-step guide on what to do.

    1. Assess the Situation: First and foremost, determine the extent of the exposure. Did your dog merely walk over a treated area, or did they ingest some of the product? The type and amount of exposure can dictate the necessary response.

    2. Remove Your Dog from the Area: Ensure your dog is no longer in the vicinity of the RoundUp or any treated areas. This will prevent further exposure and reduce the risk of complications.

    3. Clean the Affected Area

    • Skin/Fur Contact: If RoundUp has come into contact with your dog’s skin or fur, wash the area thoroughly with mild soap and water. Make sure to rinse well to remove all residues.
    • Ingestion: If you believe your dog has ingested RoundUp, do not induce vomiting unless instructed by a veterinarian. Some chemicals can cause more harm if vomited, especially if inhaled.

    4. Monitor for Symptoms: Keep a close eye on your dog for any signs of distress or unusual behavior. Symptoms to watch for include:

    • Excessive drooling or salivation
    • Vomiting or diarrhea
    • Lethargy or weakness
    • Difficulty breathing
    • Skin irritation or redness

    5. Contact Your Veterinarian: Even if your dog appears fine, it’s always a good idea to consult with your veterinarian after any potential exposure to herbicides. They can provide guidance tailored to your dog’s specific situation and may recommend further monitoring or treatment.

    6. Prevent Future Incidents: Once the immediate situation is under control, consider ways to prevent future exposures. This might include:

    • Storing herbicides out of reach
    • Using barriers to keep pets away from treated areas
    • Considering alternative, pet-safe weed control methods

    While RoundUp poses a low risk to dogs when used as directed, accidents can happen. Being prepared and knowing how to respond can ensure your dog’s safety and well-being. Always prioritize your pet’s health and consult with professionals when in doubt.

    sprayer spraying herbicide on weeds

    Ensuring Safety: How to Safely Use RoundUp Around Dogs

    For many, RoundUp is an essential tool in the battle against unwanted weeds. However, when pets are part of the household, using such products requires an added layer of caution. Let’s discuss how to safely use RoundUp in a home shared with our canine companions.

    1. Keeping Your Dog Away from Treated Areas:

    • After applying RoundUp, ensure that your dog is kept away from the treated area for at least 24-48 hours or until the product has completely dried. This reduces the risk of direct contact or ingestion.

    2. Using a Barrier:

    • Physical barriers, such as fencing or temporary enclosures, can be effective in preventing dogs from accessing freshly treated areas. This is especially useful in larger gardens or yards.

    3. Wearing Protective Clothing:

    • When applying RoundUp, wear gloves and other protective clothing. After application, change and wash your clothes to prevent any transfer of residues that your dog might come into contact with.

    4. Following the Label Instructions:

    • Always read and adhere to the label instructions. This ensures you’re using the product correctly and in the right amounts, minimizing risks.

    5. Considering Alternative Weed Control Methods:

    • If you’re concerned about using chemical herbicides, consider natural or pet-safe alternatives. There are several eco-friendly and dog-friendly products available that can be effective in controlling weeds.

    6. Store RoundUp Safely:

    • Always store RoundUp and similar products in a secure location, out of reach of pets. This prevents any accidental ingestion or exposure.

    7. Monitor After Application:

    • Even with all precautions in place, always monitor your dog after you’ve used RoundUp in your garden. Look out for any signs of discomfort or unusual behavior, which could indicate exposure.

    Using RoundUp in a household with dogs doesn’t have to be a daunting task. With the right precautions and a proactive approach, you can maintain a weed-free garden while ensuring the safety and well-being of your furry friend. Always prioritize your pet’s health and consult with experts when in doubt.

    dog safety with roundup

    Post-Application Concerns: Is Roundup Safe for Dogs After It Dries?

    One of the most frequently asked questions I encounter regarding herbicides, especially RoundUp, is about its safety after application. Many pet owners wonder: Once RoundUp dries, is it safe for their dogs to roam the treated areas? Let’s address this concern by examining the science and facts behind glyphosate’s behavior post-application.

    How Glyphosate Reacts When Dried

    Upon application, RoundUp’s active ingredient, glyphosate, begins its work on the plants. As it dries, the majority of the glyphosate is absorbed into the plants, targeting the enzymes responsible for their growth. The drying process significantly reduces the amount of glyphosate residues left on the surface.

    Residual Risks and Considerations

    While the risk of glyphosate exposure decreases as RoundUp dries, it doesn’t mean the risk is entirely eliminated. Here are some factors to consider:

    • Weather Conditions: Humidity, temperature, and rainfall can influence how quickly RoundUp dries and how long any residues might remain. For instance, if it rains shortly after application, there’s a possibility of glyphosate runoff, which can pose a risk to pets.
    • Type of Surface: RoundUp applied to hard surfaces like patios or driveways might not be absorbed as quickly as when applied to soil or plants. This can lead to longer drying times and potential residues.
    • Product Formulation: Different RoundUp formulations have varying drying times and residual effects. Always refer to the product label for specific guidance.

    Safe Practices for Pet Owners

    To ensure your dog’s safety:

    • Wait Before Allowing Access: It’s a good rule of thumb to wait at least 24 hours before allowing your dog to access areas treated with RoundUp. This gives the herbicide ample time to dry and minimizes any potential exposure.
    • Monitor Your Dog: Even after waiting, keep an eye on your dog when they first access the treated area. Watch for any signs of discomfort or unusual behavior.
    • Consider the Environment: If the weather has been particularly wet or humid, you might want to wait a bit longer before letting your dog roam the treated areas.

    While the risks associated with dried RoundUp are considerably lower, it’s always best to exercise caution. By understanding the product’s behavior and taking preventive measures, you can ensure a safe environment for your furry friend.

    Timeframe Safety: How Long After Using Roundup Is It Safe for Pets?

    When it comes to the safety of our beloved pets, every precaution matters. One of the primary concerns many pet owners have after using RoundUp or any herbicide is the safe timeframe for reintroducing their pets to the treated areas. Let’s delve into this topic to provide clarity and peace of mind.

    Understanding the Degradation Process of Glyphosate

    Glyphosate, the active ingredient in RoundUp, doesn’t remain active indefinitely. Once applied, it begins to break down and degrade in the environment. Several factors influence this degradation:

    • Soil Composition: In most soils, glyphosate binds tightly to soil particles, which reduces its mobility and availability. Over time, soil microbes break down glyphosate into carbon dioxide and other natural compounds.
    • Weather Conditions: Sunlight, temperature, and rainfall can all impact how quickly glyphosate degrades. Warm, moist conditions tend to accelerate the degradation process.
    • Product Formulation: Different formulations of RoundUp may have varying persistence in the environment. Always refer to the product label for specific details.

    General Recommendations

    While it’s challenging to provide a one-size-fits-all answer due to the variables mentioned above, here are some general guidelines:

    • 24 to 48 Hours: For most RoundUp products, waiting 24 to 48 hours after application before allowing pets to roam is a common recommendation. This timeframe ensures that the product has dried thoroughly and reduces the risk of direct contact.
    • Check the Treated Area: Before reintroducing your pet, inspect the treated area. Ensure it’s dry and free from any puddles or noticeable residues.
    • Consider the Weather: If it has rained shortly after application, it might be wise to wait an additional day or two. Rain can wash glyphosate residues into puddles or areas where pets might drink or play.

    The safety of our pets is paramount. By understanding the behavior of products like RoundUp in the environment and following recommended guidelines, we can strike a balance between effective weed control and ensuring a safe space for our four-legged friends. Always prioritize your pet’s well-being and consult product labels or experts when in doubt.

    weed killers safe for dogs

    Pet Owners’ Dilemma: Can I Use Roundup If I Have a Dog?

    For many pet owners, the garden is not just a personal sanctuary but also a playground for their furry companions. The desire for a weed-free garden often clashes with concerns about pet safety, especially when considering products like RoundUp. So, the pressing question arises: Can you use RoundUp and still ensure the safety of your dog? Let’s explore this dilemma.

    Weighing the Pros and Cons

    Pros:

    1. Effectiveness: RoundUp is a powerful herbicide that can effectively control and eliminate a wide range of weeds.
    2. Ease of Use: Ready-to-use formulations make it convenient for homeowners to tackle weed problems without professional help.
    3. Cost-Effective: For large areas, using RoundUp can be more economical than manual weeding or other methods.

    Cons:

    1. Potential Risks: While glyphosate has low toxicity when used as directed, there’s always a risk of accidental ingestion or exposure for pets.
    2. Environmental Concerns: Overuse can lead to runoff, potentially affecting local water sources and ecosystems.
    3. Residual Presence: Even after drying, traces of glyphosate might remain, posing a risk if pets ingest or come into contact with treated plants.

    Best Practices for Dog Owners

    If you decide to use RoundUp, here are some guidelines to ensure your dog’s safety:

    1. Follow Label Instructions: Always use the product as directed. This includes using the recommended amounts and not over-applying.
    2. Keep Pets Away: After application, ensure your dog (and other pets) stay away from the treated area for at least 24-48 hours or until the product has dried completely.
    3. Store Safely: Keep RoundUp and other herbicides in a secure location where pets cannot access them.
    4. Consider Alternatives: If you’re still concerned, look into pet-safe weed control methods or natural alternatives to glyphosate-based products.

    The decision to use RoundUp when you have a dog is a personal one. By being informed and taking necessary precautions, it’s possible to use the product without compromising your pet’s safety. However, always prioritize your dog’s well-being and consider all options before making a decision. Your garden’s beauty should never come at the expense of your pet’s health.

    Conclusion

    Navigating the world of gardening and landscaping while ensuring the safety of our beloved pets can often feel like a tightrope walk. With products like RoundUp being so prevalent, it’s essential for pet owners to arm themselves with knowledge and make informed decisions. As we’ve explored in this blog, while RoundUp offers undeniable benefits in weed control, it also comes with considerations and precautions, especially for households with pets.

    The key takeaway is balance. With careful application, adherence to guidelines, and a vigilant eye on our pets, it’s possible to maintain a beautiful garden without compromising the safety of our four-legged companions. However, always remember that products and practices evolve, so staying updated on research and recommendations is crucial.

    Thank you for joining me on this exploration of RoundUp and pet safety. I hope this information empowers you to make the best choices for both your garden and your furry family members. After all, a safe pet is a happy pet, and a well-informed owner is a confident one.

    Frequently Asked Questions

    Is RoundUp’s active ingredient, glyphosate, toxic to dogs?

    Glyphosate is classified as having low toxicity to dogs when ingested in small amounts. However, large doses or prolonged exposure can lead to health complications. It’s always best to prevent any exposure and consult a veterinarian if you suspect your dog has come into contact with RoundUp.

    How long should I wait before letting my dog into an area treated with RoundUp?

    As a general guideline, it’s recommended to wait at least 24 to 48 hours after application before allowing pets to roam the treated areas. This ensures the product has dried thoroughly and minimizes potential exposure.

    What should I do if my dog accidentally ingests RoundUp?

    If you believe your dog has ingested RoundUp, do not induce vomiting unless instructed by a veterinarian. Immediately remove your dog from the area, monitor for any signs of distress or unusual behavior, and consult with your veterinarian as soon as possible.

    Are there pet-safe alternatives to RoundUp for weed control?

    Yes, there are several natural and pet-safe alternatives to glyphosate-based products. Some options include vinegar-based solutions, corn gluten meal, and manual weeding. Always research and test any alternative method to ensure its effectiveness and safety for your specific garden and pet.

    Does rain after applying RoundUp increase the risk to my pets?

    Rain shortly after RoundUp application can lead to runoff, potentially spreading the glyphosate to areas where pets might play or drink. If it rains soon after you’ve applied RoundUp, it’s wise to wait an additional day or two before allowing your dog to access the treated areas.

    A note about your dog’s health

    This article provides general education and does not replace an examination, diagnosis, or individualized advice from your veterinarian. Contact a veterinary professional if you are concerned about your dog’s symptoms.

    Dr. Candy Akers, DVM Avatar

    ABOUT THE AUTHOR
  • Dental Wipes for Dogs: What They Can and Cannot Do

    Dental Wipes for Dogs: What They Can and Cannot Do

    By Dr. Candy Akers, DVM

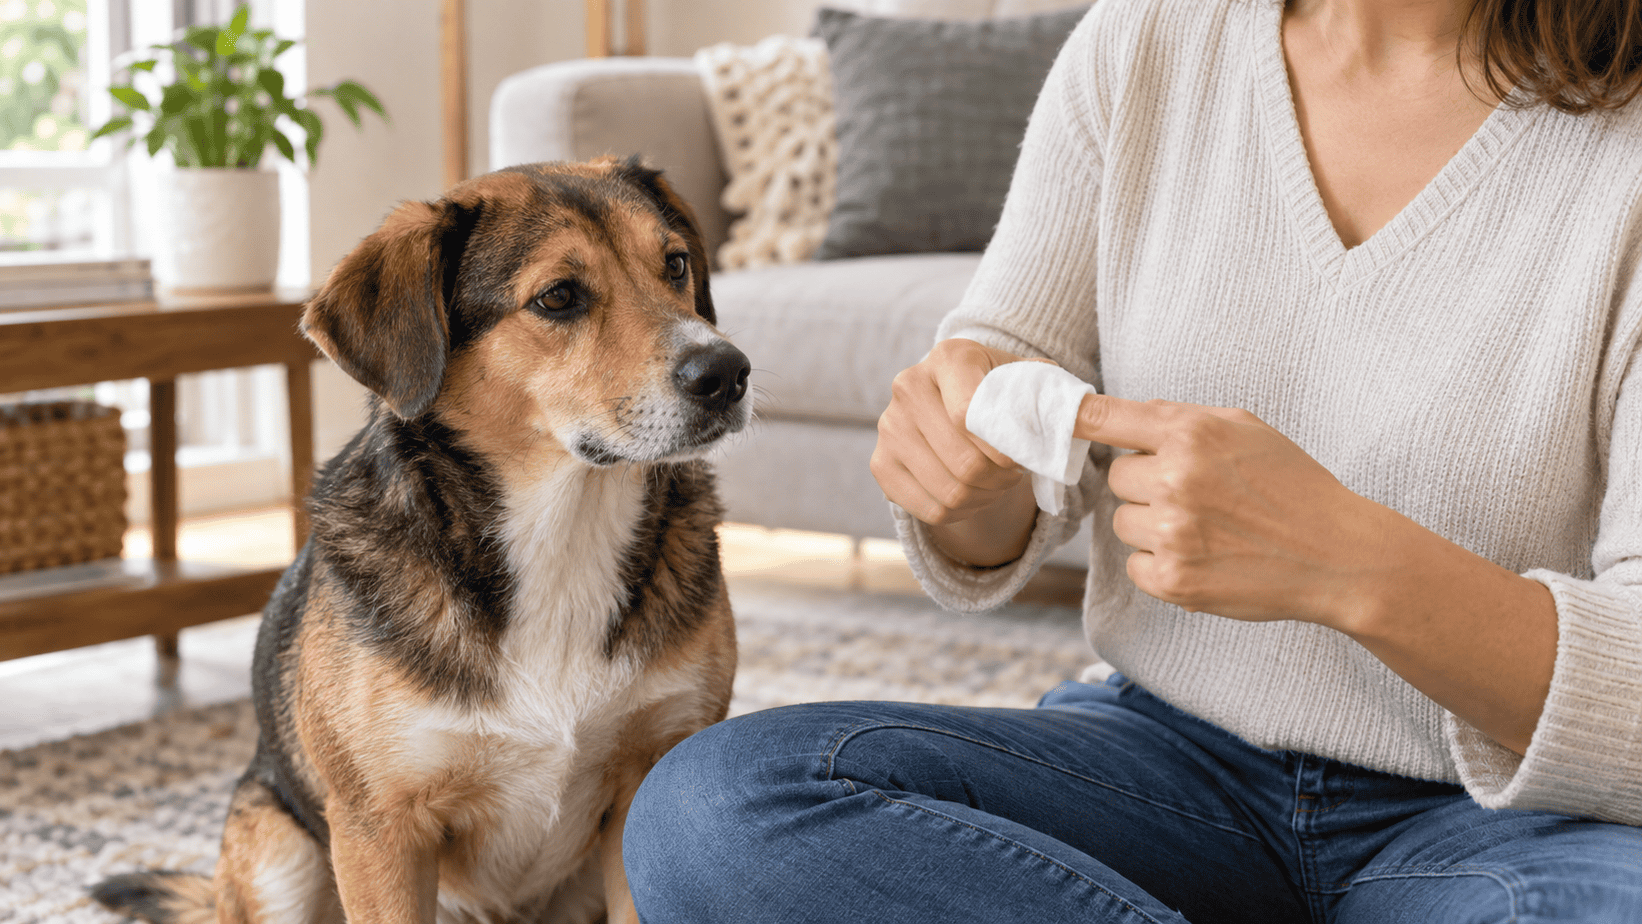
    Yes, dental wipes for dogs can help remove soft plaque and food debris from the tooth surfaces you can reach. They may also freshen your dog’s breath for a while. I think of them as a practical bridge for dogs who will not yet accept a toothbrush, or as a simple way to keep a daily mouth-care habit going.

    They do have limits. A wipe does not clean between teeth or below the gumline as thoroughly as a toothbrush. It cannot remove hardened tartar, diagnose dental disease, or replace a professional dental cleaning when one is needed. If your dog has painful gums, loose teeth, facial swelling, or heavy brown buildup, start with a veterinary exam instead of trying to scrub the problem away.

    Do Dental Wipes for Dogs Work?

    Dental wipes work mainly through gentle friction. When you rub a textured pad over the outer tooth surfaces, it can lift some of the soft, bacteria-rich film called plaque. Tartar, also called calculus, is mineralized buildup that is hard and resistant to removal with ordinary home care. That distinction matters because marketing language often treats plaque and tartar as if they were the same thing. They are not.[1]

    A wipe may be worthwhile when your dog tolerates a finger near the mouth but becomes worried by a brush. It can also help you practice lip lifting and brief mouth handling. Those small, calm repetitions may make better dental care possible later.

    I would not judge a wipe only by how minty your dog’s breath smells afterward. Fragrance can mask odor without solving its cause. Persistent bad breath may come with plaque, inflamed gums, a damaged tooth, or disease below the gumline that you cannot see at home.

    Benefits and Limits of Dog Dental Wipes

    Wipes Compared With Brushing

    Brushing remains the better mechanical option because bristles can follow the gumline and reach small spaces more effectively. In a randomized canine study, daily or every-other-day brushing controlled plaque, calculus accumulation, and gingivitis better than weekly or every-other-week brushing. The researchers recommended daily brushing.[2]

    That does not make a wipe useless. A gentle routine your dog accepts can be more helpful than a toothbrush that never leaves the cabinet. If wiping is the only comfortable option today, use it consistently and keep working toward brushing a few teeth at a time.

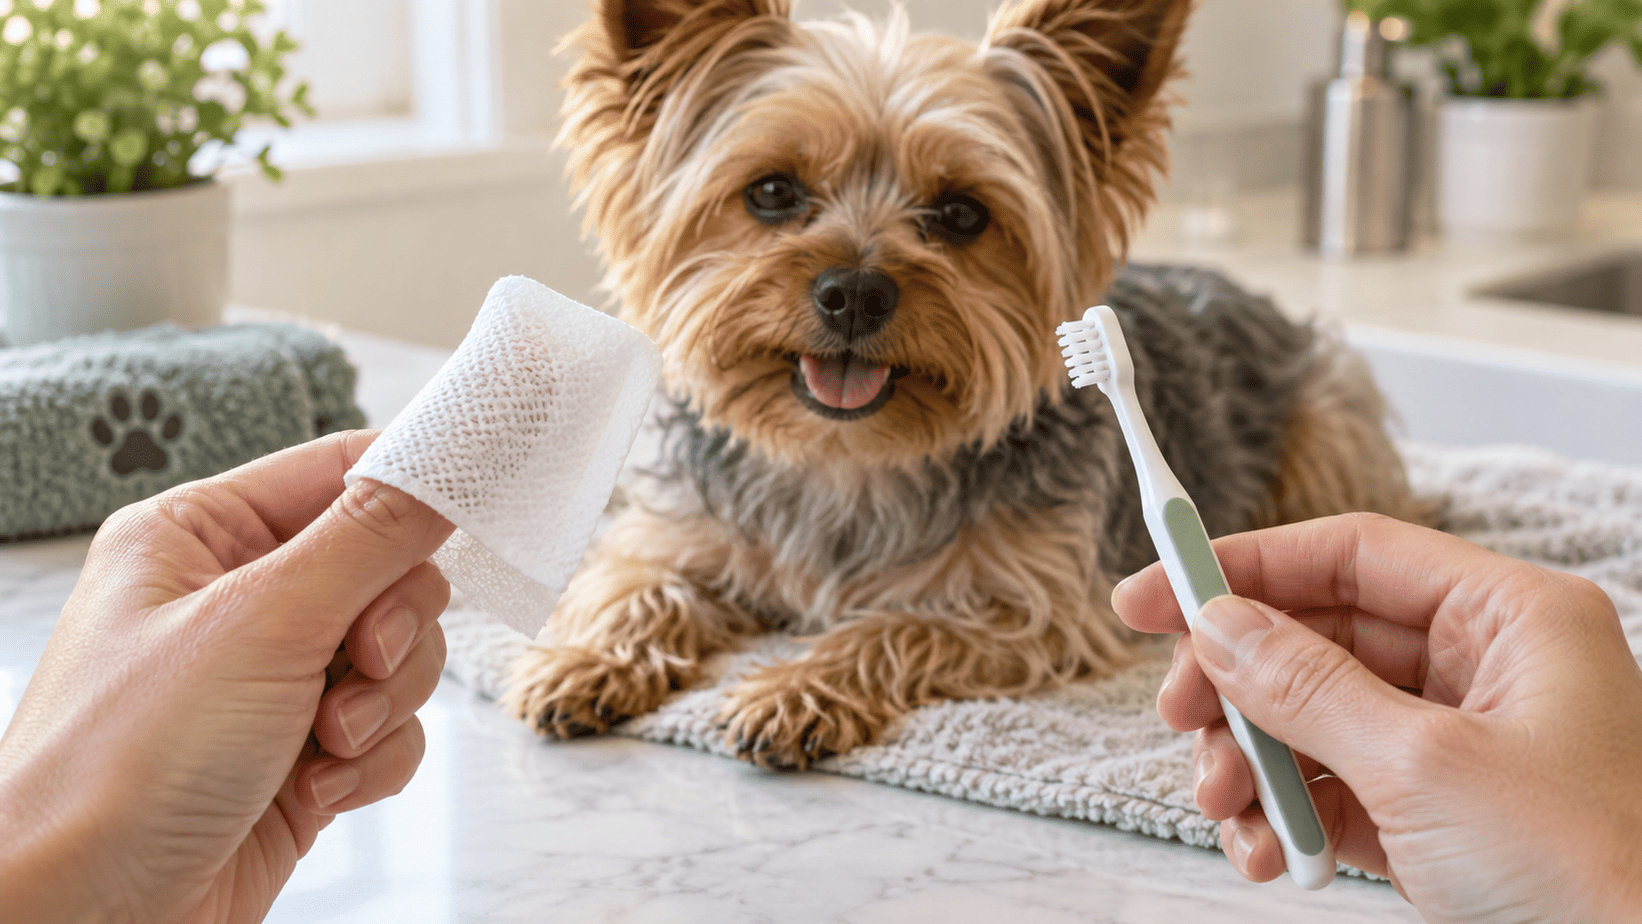
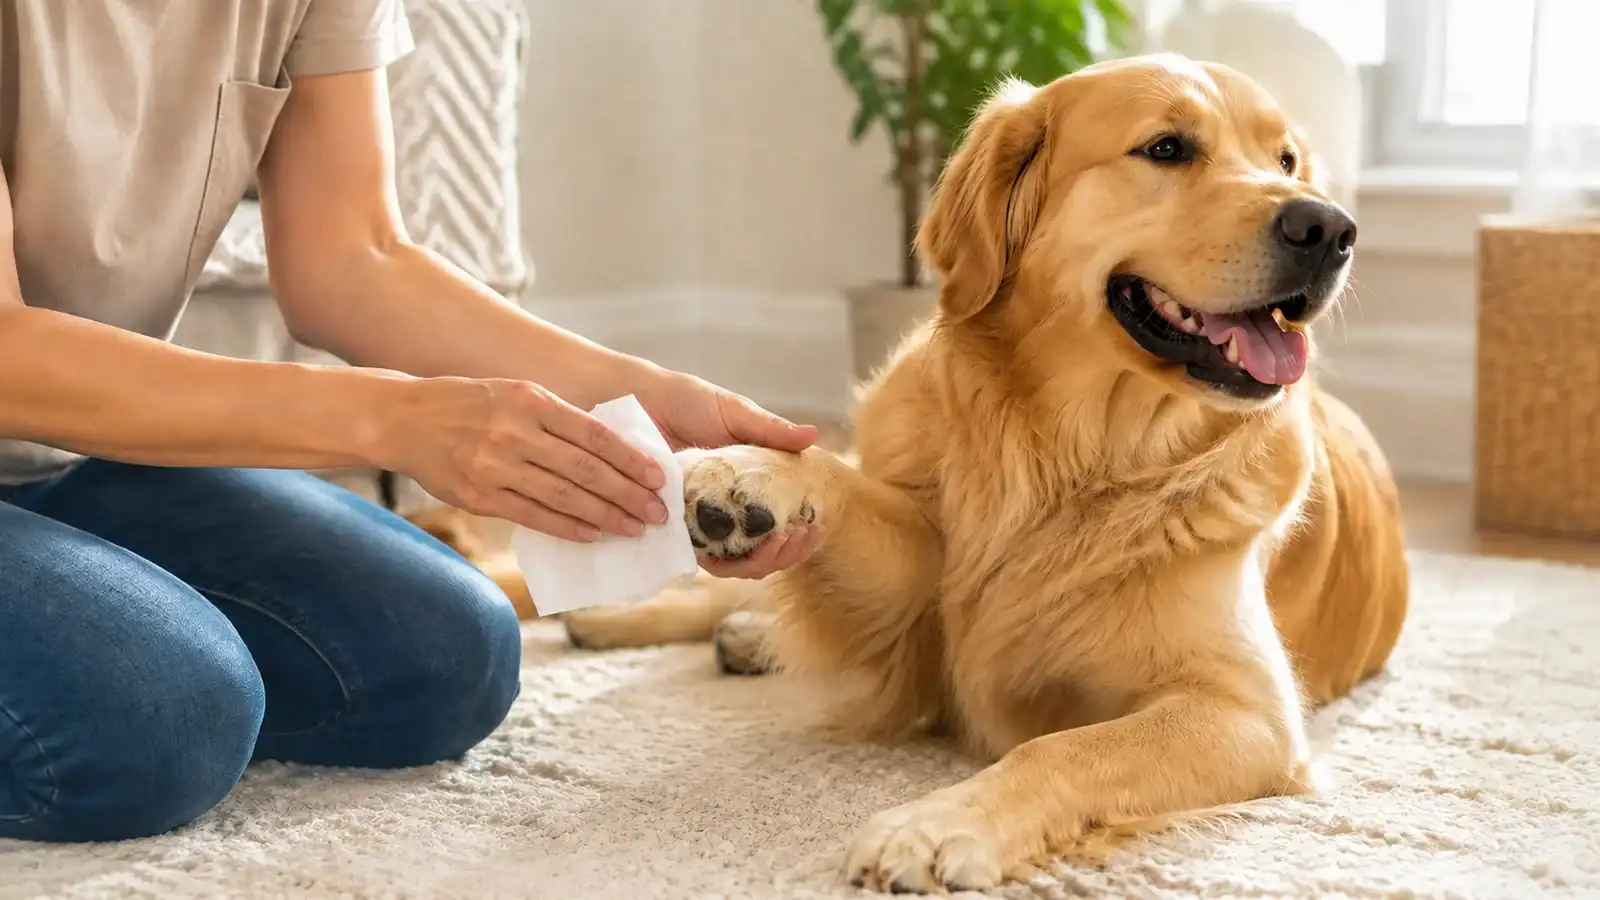
    Dog dental wipe and soft toothbrush shown as two home dental-care options

    Wipes Compared With Professional Dental Care

    Home care is preventive maintenance. It cannot provide a complete oral examination, dental X-rays, cleaning below the gumline, or treatment for a loose, fractured, or infected tooth.

    Once tartar is firmly attached, do not try to chip or scrape it off at home. That can injure the gums or tooth surface, and it leaves disease below the gumline unaddressed. A veterinarian can examine the whole mouth and recommend professional care based on what your dog actually needs.

    How to Choose Dental Wipes for Your Dog

    Start with the label, not the front-of-package promises. I look for a product made specifically for dogs or for dogs and cats, with a complete ingredient list and clear directions. Formulas can change, so check the package you are holding even if you have bought the product before.

    Consider these practical details:

    • Fit and grip. A finger sleeve may stay in place better for some hands. A flat wipe may be easier to fold to a comfortable size for a small mouth.
    • Texture. A lightly textured surface can add friction, but it should not feel rough enough to irritate healthy gums.
    • Flavor and scent. Strong mint or fragrance may make some dogs back away. Acceptance matters more than a fresh smell.
    • Directions and age guidance. Follow the manufacturer’s species, age, frequency, and storage instructions. Do not assume that an adult formula is appropriate for a puppy.
    • Individual sensitivities. If your dog has food allergies, oral irritation, or a history of reacting to grooming products, review the full ingredient list with your veterinarian.
    • Evidence for the exact product. The Veterinary Oral Health Council, or VOHC, reviews submitted product data and awards a seal for a specific plaque claim, tartar claim, or both. The seal applies only to the product and claim named. It is not a blanket endorsement of every item made by that company.[3]

    Use only oral-care products labeled for pets, and follow the directions because dogs will swallow some residue. Human dental wipes and human toothpaste may contain ingredients or concentrations that are not appropriate for dogs.[4]

    How to Use Dental Wipes Safely

    The goal is not to force a perfect cleaning. It is to build a calm routine while removing soft buildup from the surfaces you can safely reach. WSAVA dental guidance emphasizes starting slowly, keeping the experience positive, and avoiding force because struggling can increase resistance and bite risk.[4]

    1. Choose a quiet time. Try after a walk or another calm part of the day.
    2. Let your dog investigate. Offer the closed package or a fresh wipe to sniff without putting it in the mouth.
    3. Position yourself to the side. Avoid leaning over your dog or forcing the jaws open.
    4. Secure the wipe. Wrap a flat wipe firmly around your index finger, or fit a finger-style wipe according to the label. It should not be loose enough to slip into the mouth.
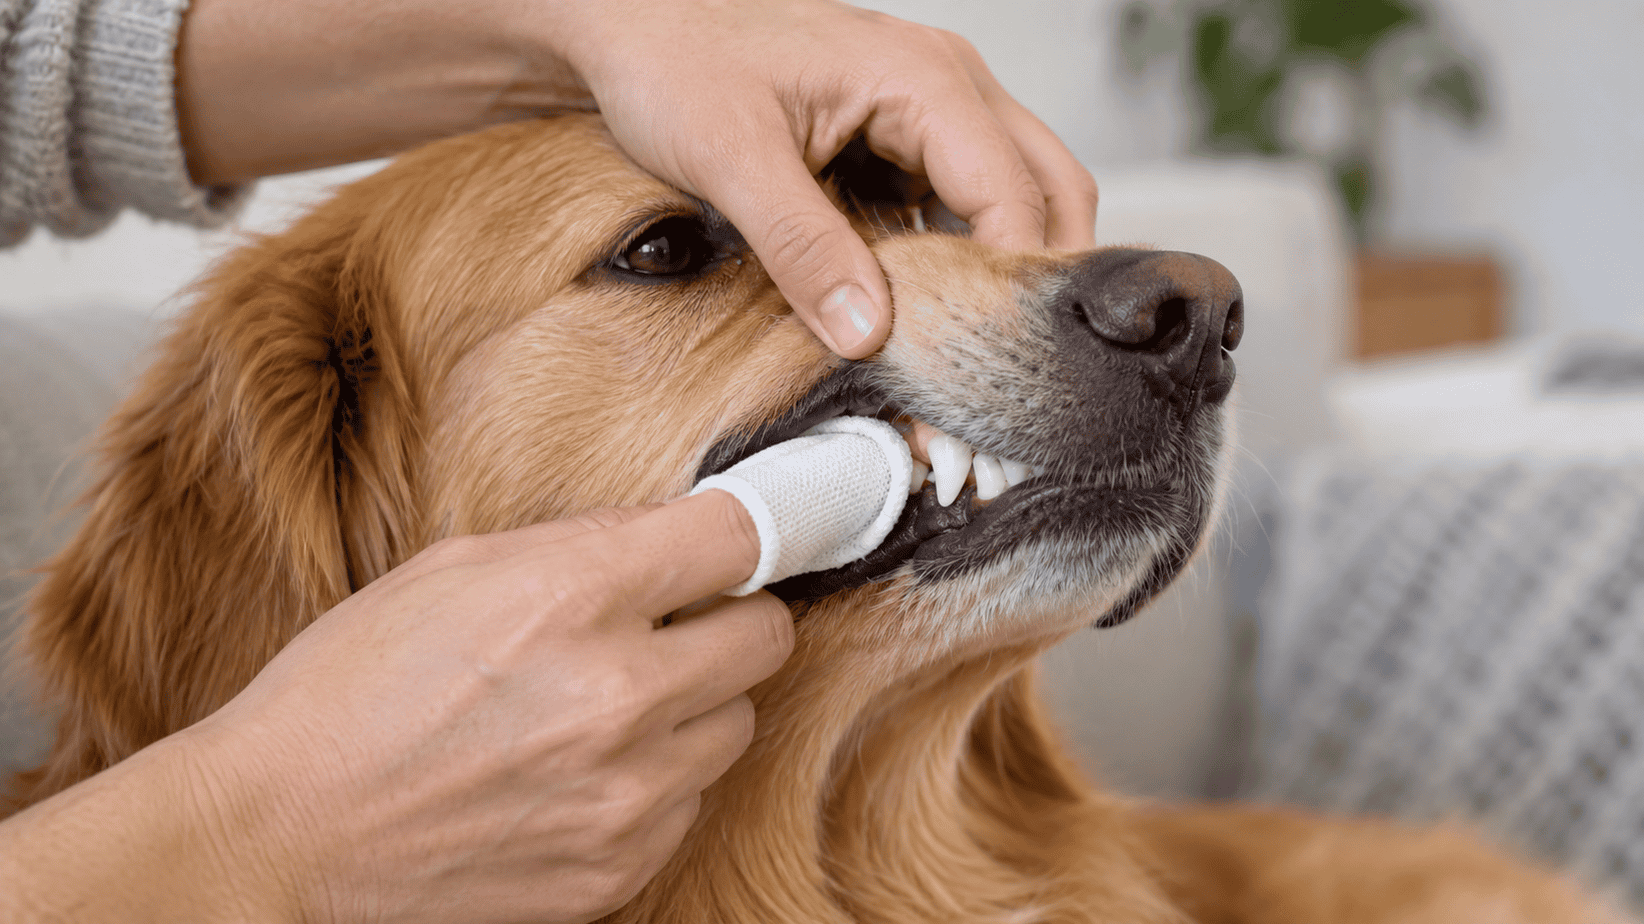
    5. Lift the lip gently. Keep the mouth closed and expose only the outer surfaces of the teeth.
    6. Wipe a few teeth. Use light circular or side-to-side strokes along the outer tooth surfaces and gumline. Start with the canine teeth or an easy section, then work toward the back teeth as your dog becomes comfortable.
    7. Keep the first sessions short. Ten calm seconds can be a successful beginning. Stop before your dog feels trapped.
    8. Reward cooperation. Praise, play, or a small appropriate treat can help the routine feel predictable and safe.
    9. Reseal the container. A dry wipe provides less useful contact and may drag against the gums.

    Stop if your dog shows pain, sudden resistance, growling, snapping, bleeding, swelling, repeated pawing at the mouth, or excessive drooling. Do not wipe over a broken tooth, loose tooth, mouth ulcer, or visibly inflamed area. If you are worried about being bitten, do not put your finger in the mouth.

    Owner gently lifts a dog's lip while using a secure finger dental wipe on the outer teeth

    How Often Should You Use Dental Wipes?

    Follow the product label first. For mechanical plaque control, daily care is the useful goal when your dog tolerates it. Plaque begins returning quickly after a tooth surface is cleaned, which is why consistency matters more than an occasional long session.[1]

    If a full-mouth wipe is too much, clean a small section and rotate areas over several days. Keep each session easy. Continue brushing wherever your dog accepts it, since the evidence for daily brushing is stronger and the brush reaches more effectively along the gumline.[2]

    Five Dental Wipe Options to Compare

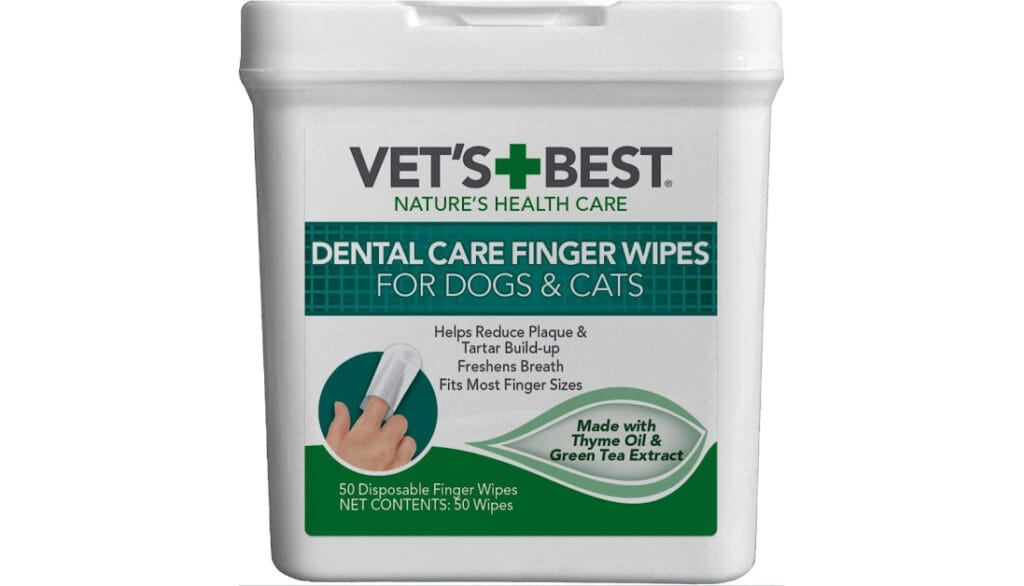
    Vet’s Best Dental Care Finger Wipes

    Vet’s Best Dental Care Finger Wipes use a fitted finger-sleeve design. That format may feel more secure than a loose pad and can make it easier to control pressure. The current product information includes scent and botanical ingredients, so read the complete label if your dog has a sensitive mouth or dislikes flavored products.

    Best fit: Someone who prefers a sleeve that stays on one finger.

    Keep in mind: A finger wipe still cannot reach tight spaces as well as a soft toothbrush, and it will not remove established tartar.

    Vet's Best Dental Care Finger Wipes

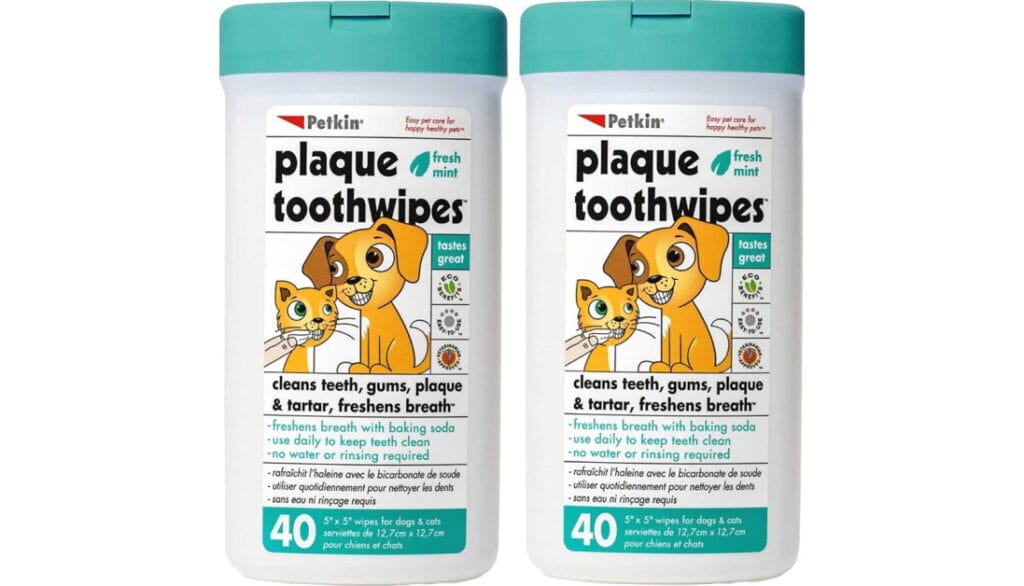
    Petkin Plaque Dental Toothwipes

    Petkin Dog and Cat Dental Wipes are flat, premoistened tooth wipes with a mint scent. A flat pad can be folded to suit your hand and your dog’s mouth, which may be helpful for a small dog.

    Best fit: Someone who wants a simple fold-around-the-finger format.

    Keep in mind: A noticeable mint scent may reduce acceptance for a scent-sensitive dog. Check the current count and directions because packaging can change.

    Petkin Plaque Dental Toothwipes (80ct)

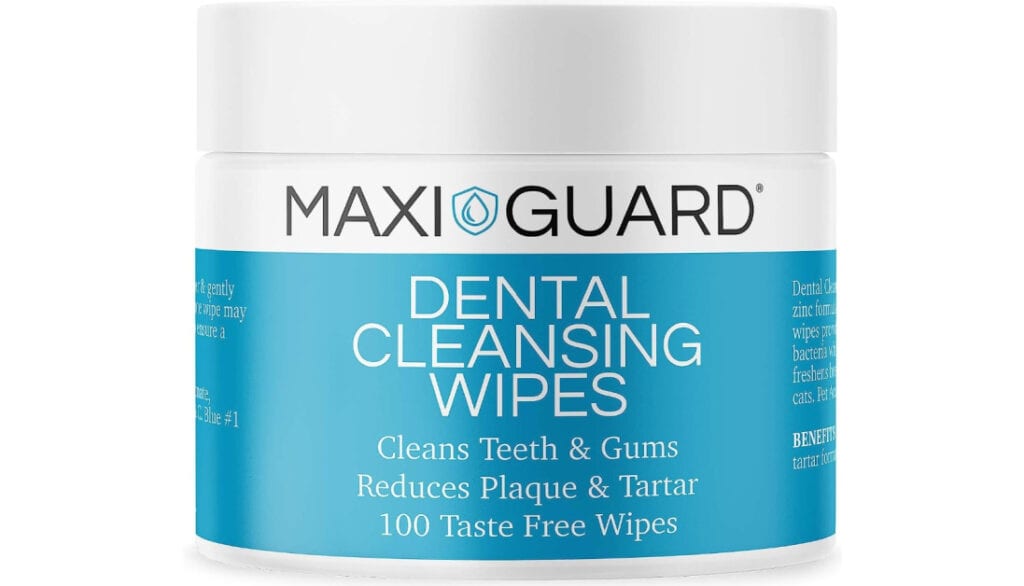
    Maxi-Guard Dental Cleansing Wipes

    Maxi-Guard Dental Cleansing Wipes for Dogs are small pads with a zinc-based formula. The compact format may be convenient for short sessions and small areas of the mouth.

    Best fit: Someone looking for a small wipe and a short, targeted routine.

    Keep in mind: Check the dimensions and full ingredient list before buying. Small pads can be harder to grip securely on a larger finger.

    Maxi-Guard Dental Cleansing Wipes for Dogs (100ct)

    Pet MD Dental Wipes

    Pet MD dental wipes are textured flat pads sold in an apple-and-mint scented formula. Texture may add surface friction. The scent is mainly a question of acceptance, not proof of dental benefit.

    Best fit: Someone who wants a larger flat pad that can be folded around a finger.

    Keep in mind: Scent is not evidence of dental benefit. If your dog turns away from fragrance, choose a milder option.

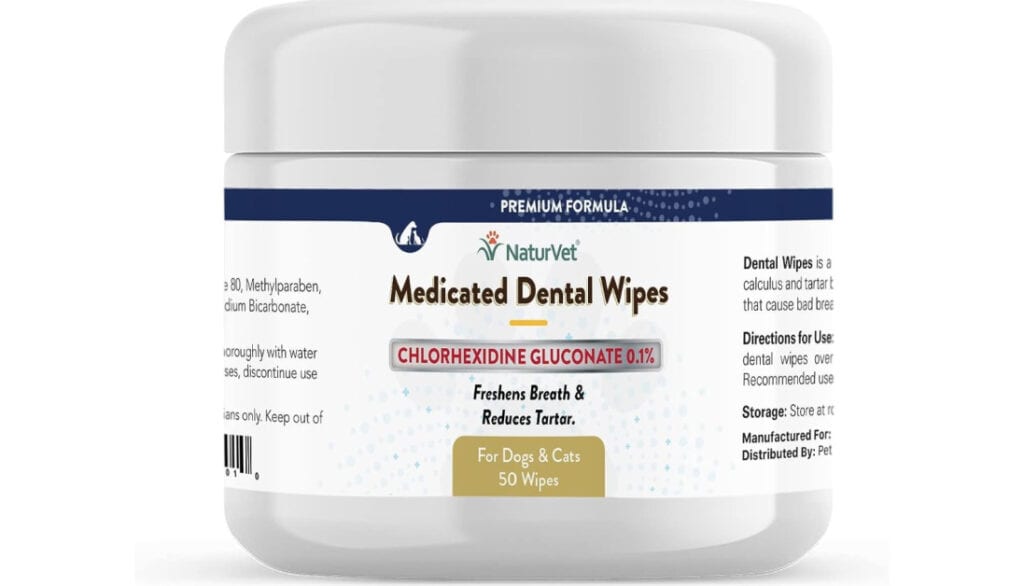
    NaturVet Medicated Dental Wipes

    NaturVet Medicated Dental Wipes for Dogs are another premoistened option intended for pet oral care. The word “medicated” in a product name does not tell you which dental outcome has been demonstrated, so the ingredient panel and exact label claims deserve a careful read. This wipe contains a low concentration of chlorhexidine which can help destroy odor causing bacteria in the mouth.

    Best fit: When a dog has recurring bad breath or dental disease. Could also be helpful for dogs who eat poop.

    Keep in mind: Do not use a product claim as a reason to delay an examination for painful gums, heavy tartar, or persistent odor.

    NaturVet Medicated Dental Wipes for Dogs & Cats 50 Count

    A Whole-Dog Dental Care Plan

    I see dental care as part of the whole dog, not a cosmetic project focused on white teeth or minty breath. A useful plan considers comfort, behavior, nutrition, chewing habits, the shape and crowding of the mouth, and what the family can repeat without creating fear.

    Wipes may be one part of that plan. Brushing, when tolerated, offers better plaque control. Appropriate diet, chews, or other products with evidence for the exact claim may add support. Choose chewing items carefully for your dog’s size, chewing style, calorie needs, and tooth condition. Very hard objects can fracture teeth in puppies or senior dogs.[4]

    Regular oral examinations still matter. VOHC describes brushing as the gold standard, recommends frequent home hygiene, and notes that many dogs need periodic professional scaling in addition to ongoing plaque control.[3]

    When Your Dog Needs Veterinary Dental Care

    Arrange a dental examination if you notice:

    • persistent or suddenly worse bad breath
    • red, swollen, or bleeding gums
    • yellow or brown hardened buildup
    • a loose, broken, discolored, or missing tooth
    • drooling, mouth rubbing, or pawing at the face
    • dropping food, chewing on one side, or refusing hard food
    • facial swelling or swelling below an eye
    • a new reluctance to let you touch the muzzle

    These signs can reflect pain or disease that a wipe cannot correct. Seek prompt care for facial swelling, active bleeding, significant pain, trauma, or trouble eating or drinking.

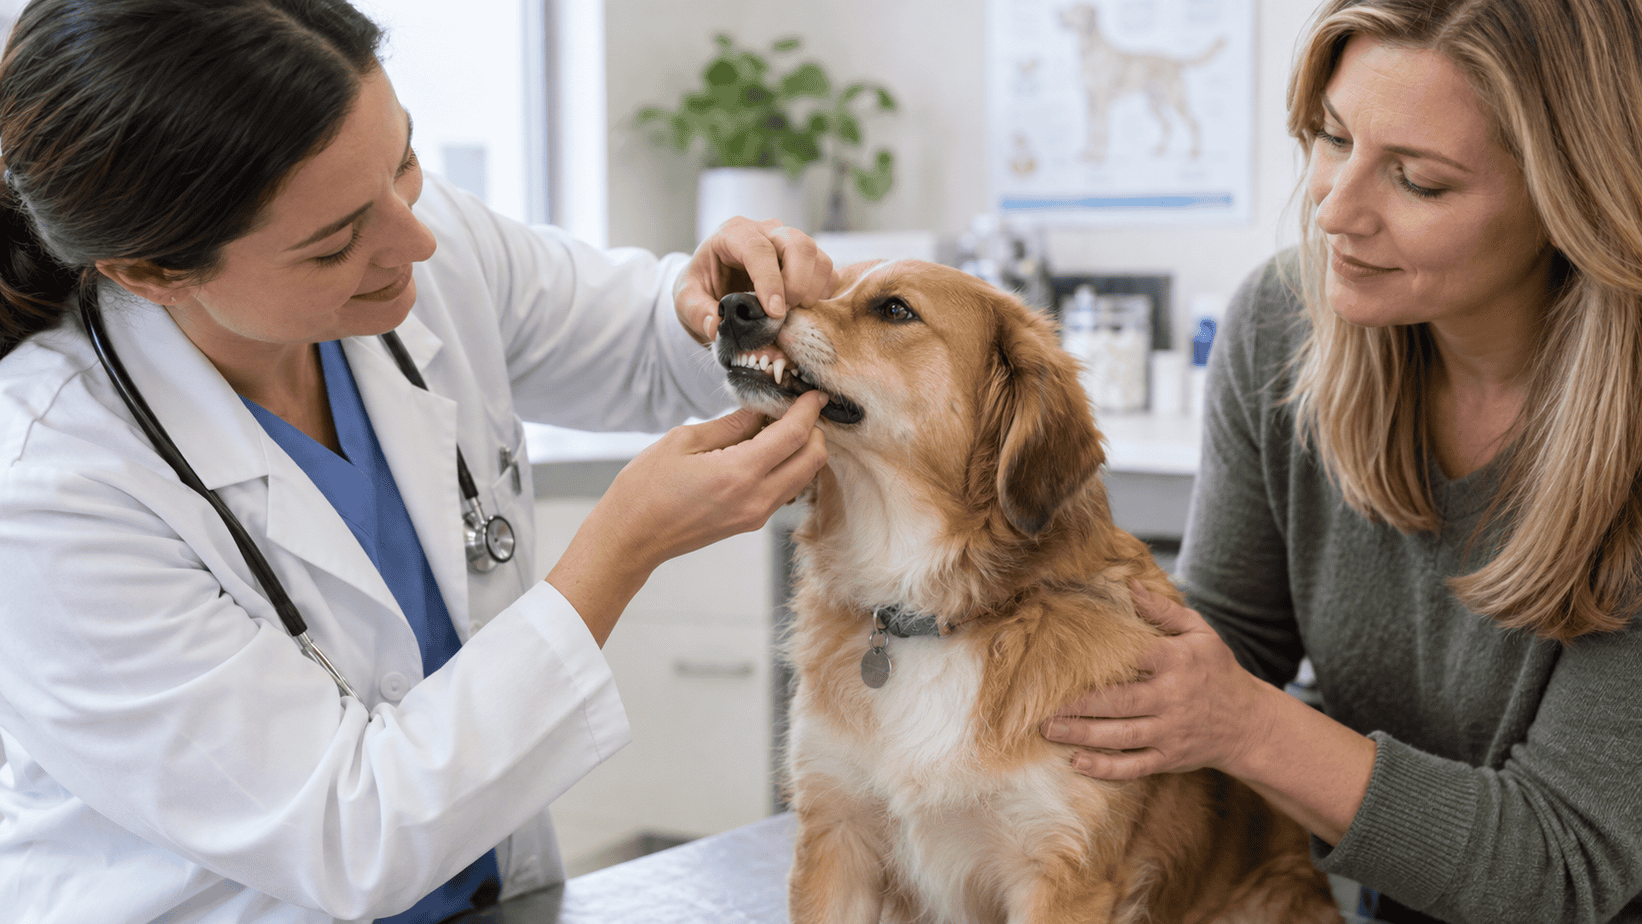
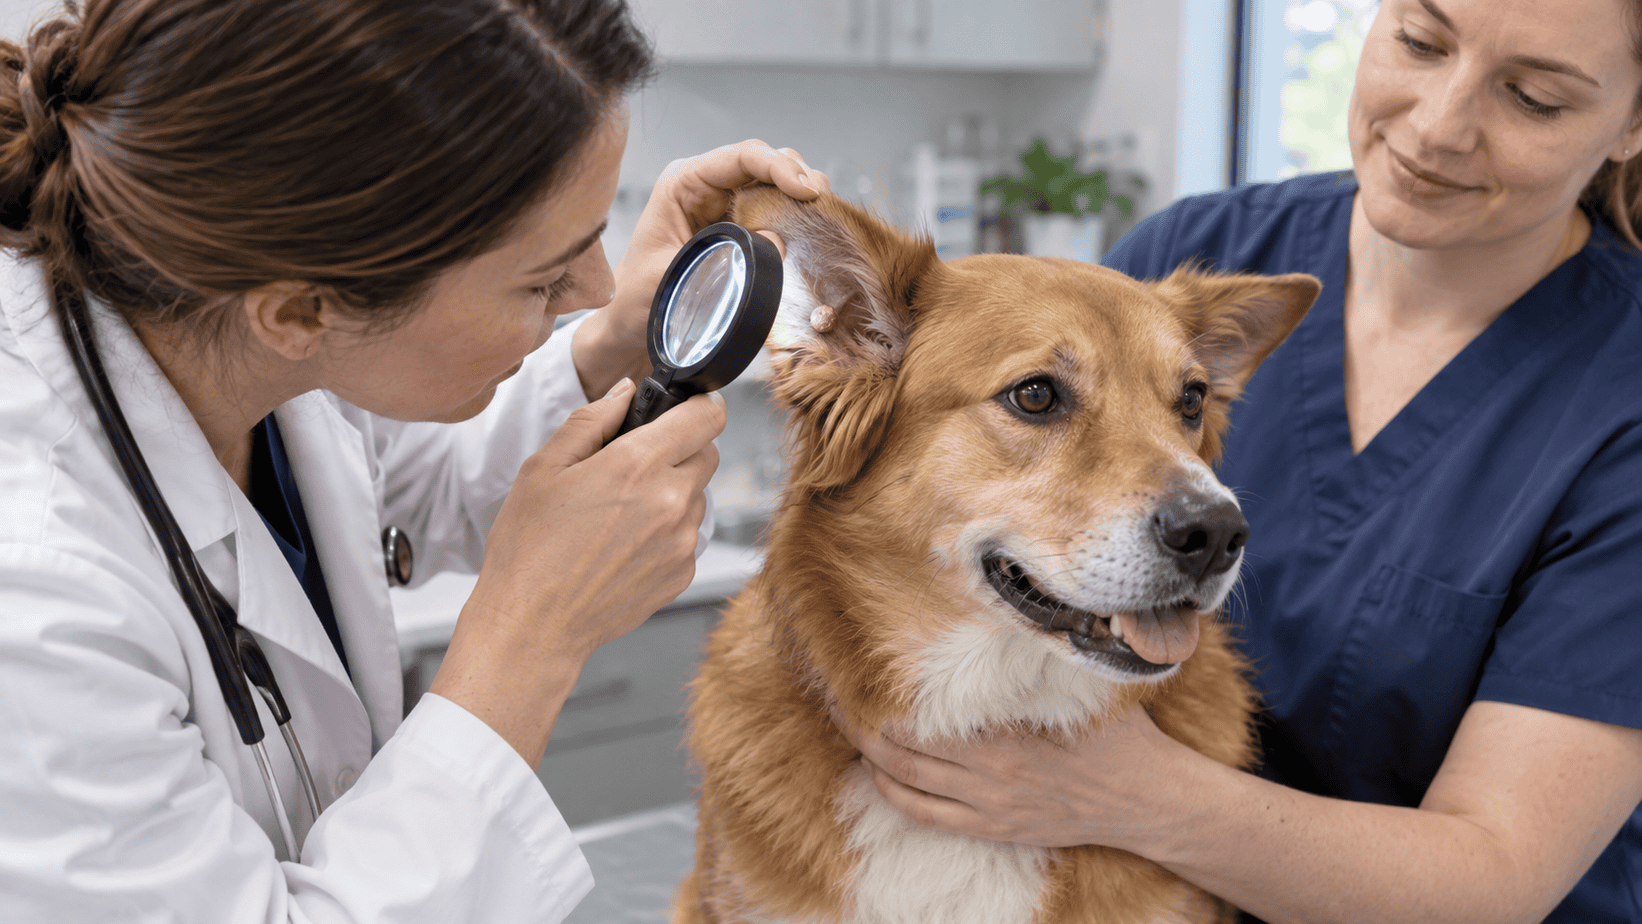
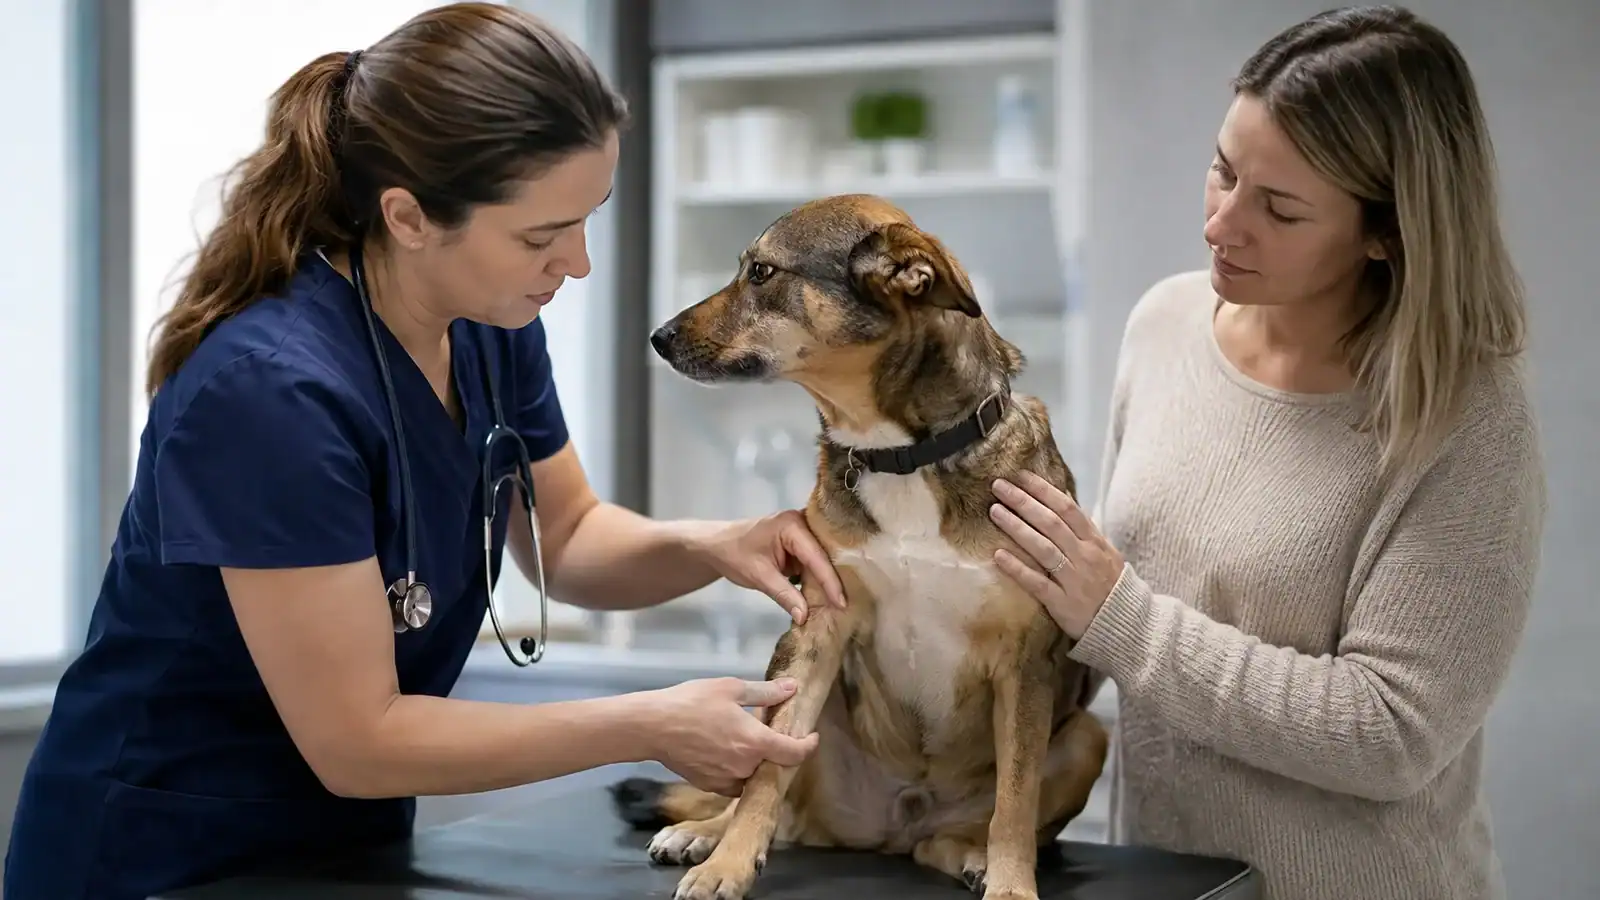
    Veterinarian gently examines a calm dog's teeth while the owner provides reassurance

    Final Thoughts

    Dental wipes can be a sensible tool when you use them for the job they can actually do: gently removing some soft plaque and debris from reachable tooth surfaces. They are convenient, often easier to introduce than a brush, and may help turn mouth care into a steady habit.

    Keep your expectations grounded. Wipes do not remove hardened tartar or replace a thorough oral examination, brushing, dental X-rays, or professional treatment. A calm ten-second session that you can repeat is a good place to begin. From there, build the safest and most complete routine your dog will comfortably accept.

    Do Dental Wipes for Dogs Really Work?

    They can help remove some soft plaque and food debris from the outer tooth surfaces through friction. Their reach is limited, so they are less thorough than brushing and cannot treat disease below the gumline.

    Can Dental Wipes Remove Tartar?

    No. Tartar is hardened, mineralized buildup that resists ordinary home removal. Do not scrape it yourself. Ask your veterinarian whether your dog needs a professional dental cleaning.[1]

    Can Dental Wipes Replace Brushing?

    Not completely. A toothbrush reaches the gumline and small spaces more effectively, and daily brushing has stronger evidence for plaque control. A wipe can be a practical supplement or a bridge for a dog who is still learning to accept brushing.[2]

    How Often Should I Use Dental Wipes?

    Use them as often as the product label directs. Daily care is a reasonable goal when the mouth is healthy and your dog is comfortable, but do not force a session. Short, positive cleaning is safer than a struggle.

    Are Dental Wipes Safe for Puppies and Small Dogs?

    They may be appropriate if the label includes your puppy’s age and species and the wipe can be held securely. Start with gentle lip handling and a very short session. For a small mouth, fold the wipe so it does not bunch up. Ask your veterinarian before use if your puppy has mouth pain, ulcers, retained baby teeth, or another dental concern.

    References

    1. Veterinary Oral Health Council. (n.d.). Protocols and submissions. https://vohc.org/protocols-and-submissions/
    2. Harvey, C., Serfilippi, L., & Barnvos, D. (2015). Effect of frequency of brushing teeth on plaque and calculus accumulation, and gingivitis in dogs. Journal of Veterinary Dentistry, 32(1), 16-21. https://doi.org/10.1177/089875641503200102
    3. Veterinary Oral Health Council. (n.d.). Finding the most effective route to good oral health for your dog or cat. https://vohc.org/
    4. World Small Animal Veterinary Association. (2020). WSAVA global dental guidelines. https://wsava.org/wp-content/uploads/2020/01/Dental-Guidleines-for-endorsement_0.pdf

    A note about your dog’s health

    This article provides general education and does not replace an examination, diagnosis, or individualized advice from your veterinarian. Contact a veterinary professional if you are concerned about your dog’s symptoms.

    Dr. Candy Akers, DVM Avatar

    ABOUT THE AUTHOR
  • Best Dog Ear Cleaners – OTC Cleaners Ranked by a Vet

    Best Dog Ear Cleaners – OTC Cleaners Ranked by a Vet

    Over the years, I’ve encountered countless cases of ear infections and complications in our furry friends. Many of these issues could have been prevented with proper ear hygiene and the right cleaning solutions. It’s crucial for dog owners to understand the importance of ear health and the role it plays in the overall well-being of their pets. In this blog, I’ll be sharing my expert insights on the best over-the-counter ear cleaners for dogs, ranked based on their efficacy and safety. My aim is to guide you in making informed choices that ensure the health and comfort of your beloved canine companions. Let’s dive in and explore the world of dog ear care together.

    best ear cleaners for dogs

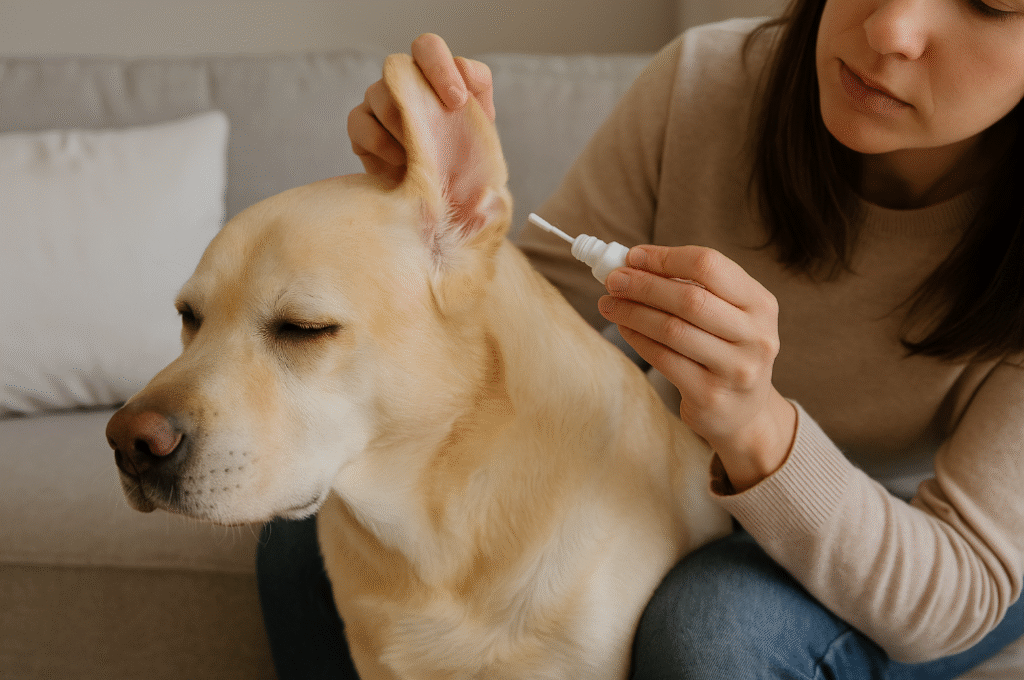
    Why is Regular Ear Cleaning Important for Dogs?

    Dogs, much like humans, can be susceptible to a variety of ear-related issues. Their ears, especially in breeds with floppy or dense ear structures, provide an ideal environment for the growth of bacteria and yeast. Regular ear cleaning is not just a grooming routine; it’s a preventive health measure. Here’s why it’s paramount:

    1. Prevention of Infections: The warm, moist environment inside a dog’s ear can be a breeding ground for bacteria and yeast. Regular cleaning helps remove the debris and wax that these microorganisms thrive on, reducing the risk of infections.
    2. Early Detection of Issues: Regularly checking and cleaning your dog’s ears allows you to spot potential problems early on, such as mites, ticks, or foreign objects. Early detection can prevent complications and make treatments more effective.
    3. Avoidance of Painful Conditions: Ear infections can be extremely painful for dogs. They might shake their heads, scratch incessantly, or even whine. Regular cleaning can prevent such discomfort and pain.
    4. Improved Hearing: Just like in humans, excessive wax or debris can impair a dog’s hearing. By maintaining clean ears, you ensure that your dog’s hearing is at its best.
    5. Strengthening the Bond: The act of cleaning your dog’s ears can also serve as a bonding activity. It’s a time for you to reassure your pet, making them feel safe and cared for.
    6. Prevention of Odors: Unclean ears can produce a foul smell, which is often the first sign pet owners notice when an infection is present. Regular cleaning keeps your dog smelling fresh.

    Regular ear cleaning is not just about aesthetics or hygiene; it’s about ensuring the health, comfort, and happiness of your canine companion. As a veterinarian, I cannot stress enough the importance of this simple yet crucial routine. By incorporating it into your pet care regimen, you’re taking a proactive step towards a happier and healthier pet.

    Factors to Consider When Choosing an Ear Cleaner

    Selecting the right ear cleaner for your dog is crucial. With a myriad of products available in the market, it can be overwhelming for pet owners to make an informed choice. As a veterinarian, I’ve seen the good, the bad, and the ugly when it comes to ear cleaning solutions. Here are some essential factors you should consider:

    Ingredients:

    • Natural vs. Chemical: Some cleaners boast all-natural ingredients, which can be gentler on your dog’s ears. However, some conditions might require stronger, medicated solutions. Always check the ingredient list and be wary of harsh chemicals that might irritate your dog’s ears.
    • Active Agents: Look for ingredients known to combat common ear issues, such as salicylic acid for yeast or hydrocortisone for inflammation.

    Consistency:

    • Liquid vs. Gel: While liquid solutions can penetrate deeper and are easier to apply, gels might stay in the ear longer, providing prolonged relief. The choice often depends on your dog’s specific needs and your comfort in applying the product.

    Application Method:

    • Drops, Wipes, or Sprays: Drops are the most common and can be effective for deeper cleaning. Wipes are great for surface cleaning and quick touch-ups, while sprays can be easier for some pet owners to apply without stressing the dog.
    • pH Balance: A balanced pH ensures that the cleaner is neither too acidic nor too alkaline, both of which could irritate the ear canal. Ideally, an ear cleaner should mimic the natural pH of a dog’s ear.
    • Price and Brand Reputation: While it’s tempting to go for cheaper options, it’s essential to ensure you’re getting a quality product. Research brands, read reviews, and if in doubt, consult with your veterinarian.
    • Alcohol vs. Alcohol-Free: Alcohol can be effective in drying out the ear, which can be beneficial in some cases. However, it can also cause stinging, especially if the ear is inflamed or has open sores. Alcohol-free solutions might be gentler for regular cleaning.
    • Fragrance: While a pleasant scent might be appealing to pet owners, some fragrances can irritate a dog’s sensitive ears. It’s often best to opt for fragrance-free or cleaners with natural, mild scents.

    In essence, choosing the right ear cleaner for your dog is a balance between efficacy and gentleness. It’s always a good idea to start with a milder solution and consult with your veterinarian, especially if your dog has a history of ear issues or shows signs of discomfort after cleaning.

    labrador retriever playing in a creek

    Top 5 OTC Dog Ear Cleaners Ranked by Dr. Candy

    Navigating the vast array of over-the-counter dog ear cleaners can be daunting. As a veterinarian, I’ve had the opportunity to test, review, and recommend various products to my clients. Based on my experience and observations, here are my top 5 picks for OTC dog ear cleaners:

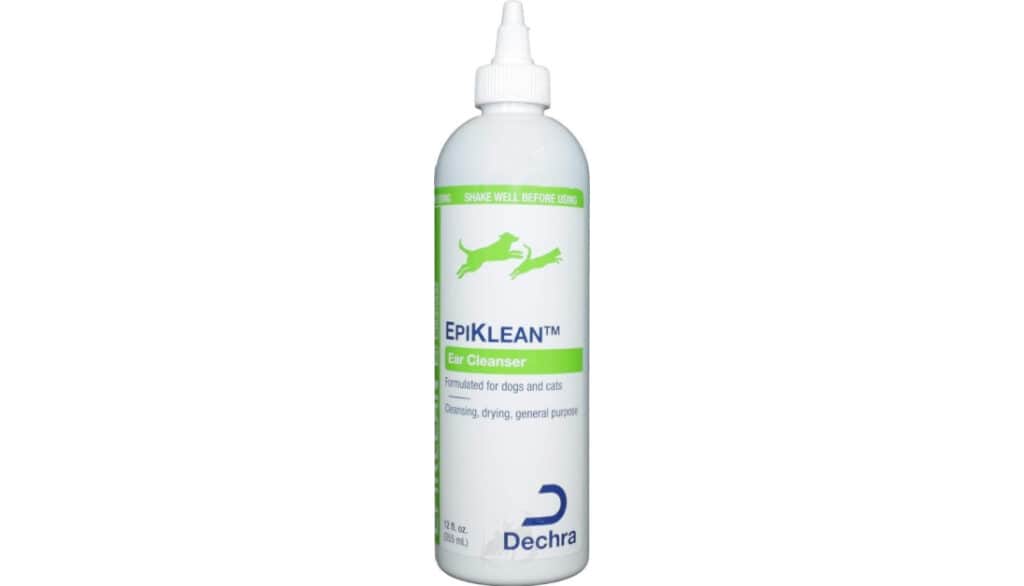
    Dechra EpiKlean Ear Cleanser for Cats and Dogs

    Dechra EpiKlean Ear Cleanser is an all-purpose cleaner specifically designed for cats and dogs that are free from ear infections but require routine cleaning. The cleanser is proudly made in the USA, ensuring high-quality production and safety standards. The product is formulated to cleanse and dry the ears of pets, preventing potential irritants and obstructions, including moisture that can lead to fungal growth.

    PROs:

    • The cleanser is versatile, suitable for both cats and dogs.
    • It is manufactured in the USA, ensuring adherence to American safety standards.
    • The product effectively removes potential irritants and moisture, reducing the risk of fungal infections.

    CONs:

    • Regular maintenance is required as it’s designed for pets that are ear infection-free.
    • The cleanser is not antifungal or antibacterial, so it may not be suitable for treating existing infections.

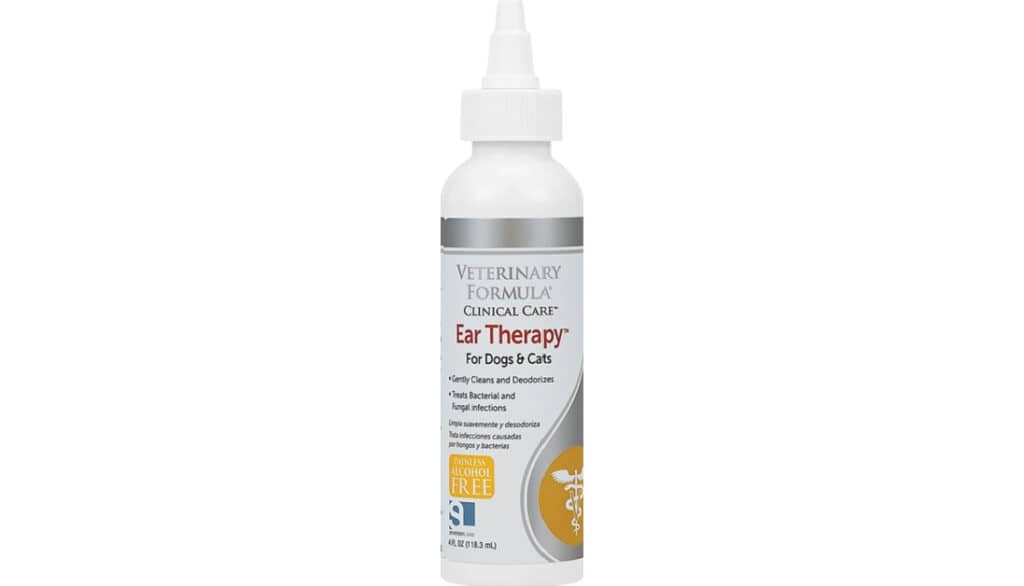
    Veterinary Formula Clinical Care Ear Therapy

    Veterinary Formula Clinical Care Ear Therapy is a medicated treatment formulated to alleviate infections, inflammation, and wax build-up. It is suitable for both dogs and cats, ensuring a broad spectrum of use. The formula is pH balanced, alcohol-free, and contains aloe vera to soothe the ear canal.

    PROs:

    • Alleviates infections, inflammation, and wax build-up effectively.
    • Suitable for both dogs and cats, offering versatility.
    • Contains aloe vera, providing a soothing effect on the ear canal.

    CONs:

    • May require consistent application for optimal results.
    • Some animals might be sensitive to its ingredients.
    Veterinary Formula Clinical Care Ear Therapy

    Virbac Epi-Otic Advanced Ear Cleanser for Dogs

    Virbac Epi-Otic Advanced Ear Cleanser is a non-irritating ear cleanser formulated with anti-adhesive properties to prevent microbial attachment. It is specifically designed for dogs with chronic otitis externa, a condition of the outer ear. The cleanser’s patented anti-odor technology eliminates ear canal odor, making it a suitable solution for maintaining ear hygiene.

    PROs:

    • Formulated with anti-adhesive properties that deter microbial growth.
    • Designed to address chronic otitis externa in dogs, targeting a specific health concern.
    • Features patented anti-odor technology to combat ear canal odor.

    CONs:

    • The product might be more specialized and not suitable for general ear cleaning.
    • Some dogs might be sensitive to the ingredients, leading to potential irritation.
    Virbac Epi-Otic Advanced Ear Cleanser for Dogs

    Zymox Otic Enzymatic Solution for Dogs

    Zymox Otic Enzymatic Solution is a non-invasive solution designed to treat acute and chronic otitis externa caused by bacterial, fungal, and yeast infections. The solution contains hydrocortisone, which aids in reducing inflammation and itchiness. It is a no-pre-cleaning treatment, meaning it can be directly applied to the ears without the need for prior cleaning.

    PROs:

    • Effectively treats acute and chronic otitis externa caused by various infections.
    • Contains hydrocortisone to alleviate inflammation and itching.
    • Simplifies the treatment process with its no-pre-cleaning feature.

    CONs:

    • The solution may not be suitable for all dogs, especially those with known allergies to ingredients.
    • Consistent usage is required for optimal results, which might be cumbersome for some pet owners.
    Zymox Otic Enzymatic Solution for Dogs

    Vet’s Best Ear Relief Wash Cleaner for Dogs

    Vet’s Best Ear Relief Wash Cleaner for Dogs is a veterinarian-formulated ear cleaner designed to cleanse and soothe raw, irritated, itchy, and smelly dog ears. The formula is alcohol-free and contains a unique blend of natural ingredients such as yucca, clove oil, and echinacea. It’s suitable for all dogs and puppies over 12 weeks old and is designed to prevent ear odor, itching, and the accumulation of wax.

    PROs:

    • Veterinarian-formulated, ensuring a professional and effective approach to ear care.
    • Contains natural ingredients, reducing the risk of side effects and allergic reactions.
    • Alcohol-free formula, ensuring it’s gentle on the dog’s ears and doesn’t cause dryness.

    CONs:

    • May require regular application for optimal results.
    • Some dogs might be sensitive to certain natural ingredients, necessitating patch testing before full use.
    Vet's Best Ear Relief Wash Cleaner for Dogs

    While these are my top picks, it’s essential to choose a product that aligns with your dog’s specific needs. Always monitor your dog’s reaction after using a new product and consult with your veterinarian if you notice any adverse reactions or if the ear issues persist.

    How to Properly Clean Your Dog’s Ears

    Cleaning your dog’s ears might seem like a daunting task, especially if your furry friend is a bit skittish. However, with the right technique and a calm approach, it can be a stress-free experience for both of you. I’ve guided countless pet owners through this process. Here’s a step-by-step guide to ensure you’re cleaning your dog’s ears safely and effectively:

    Preparation:

    • Gather Supplies: Ensure you have your chosen ear cleaner, cotton balls or pads, and treats for rewarding your dog afterward.
    • Choose a Calm Environment: Find a quiet spot where your dog feels comfortable, away from distractions.

    Positioning Your Dog:

    • If possible, have someone assist you by gently holding the dog or providing comfort. For smaller dogs, placing them on a table or elevated surface might make the process easier.

    Inspect the Ear:

    • Before cleaning, take a moment to inspect the ear. Look for signs of redness, swelling, discharge, or any foreign objects. If you notice severe issues, it might be best to consult with a vet before proceeding.

    Application of the Cleaner:

    • Gently hold the ear flap (pinna) upright to expose the ear canal.
    • Carefully pour or squeeze the recommended amount of ear cleaner into the ear canal. Ensure you don’t insert the applicator tip too deep.
    • Gently massage the base of the ear for about 20-30 seconds. You should hear a squishing sound, which helps in breaking up debris inside.
    ear cleaners for dogs

    Allow Your Dog to Shake:

    • After massaging, let go of the ear. Your dog will likely shake its head, which helps in bringing the loosened debris and excess cleaner to the surface.

    Wipe Away Debris:

    • Using a cotton ball or pad, gently wipe the inside of the ear flap and the entrance of the ear canal. Do not insert anything deep into the ear canal.
    • Continue wiping until no more debris comes out on the cotton.

    Reward and Comfort:

    • Once done, reward your dog with a treat and some affection. This positive reinforcement will make future cleanings easier.

    Repeat for the Other Ear:

    • If both ears need cleaning, repeat the process for the other ear.

    Post-Cleaning Inspection:

    • After cleaning, inspect the ears again to ensure they look clean and free from redness or irritation.

    Tips:

    • Never use Q-tips or pointed objects in your dog’s ear, as they can push debris further in or damage the eardrum.
    • If your dog shows signs of discomfort or pain during cleaning, stop immediately and consult with a veterinarian.
    • Regularly inspecting and cleaning your dog’s ears can prevent many common ear issues.

    Cleaning your dog’s ears is an essential aspect of their overall health and well-being. With patience, consistency, and the right technique, it can become a routine both you and your dog get accustomed to.

    Signs Your Dog Might Need a Professional Ear Cleaning or Check-Up

    While regular at-home ear cleaning is beneficial for maintaining your dog’s ear health, there are instances when professional intervention is necessary. Here are some signs that indicate your dog might need a professional ear cleaning or a check-up:

    1. Persistent Scratching: If your dog is constantly scratching its ears or shaking its head, even after regular cleanings, it could be a sign of an underlying issue.
    2. Unpleasant Odor: A foul smell emanating from the ears is often a clear indication of an infection.
    3. Visible Discharge: Yellow, brown, or bloody discharge is a cause for concern. It can be indicative of bacterial or yeast infections, or even a ruptured eardrum.
    4. Redness and Swelling: If the inner ear appears red, swollen, or feels warm to the touch, it could be a sign of inflammation or infection.
    5. Whining or Pain: If your dog yelps when its ears are touched or seems in pain, it’s crucial to seek professional help immediately.
    6. Hearing Loss: If you notice your dog isn’t responding to sounds or commands as usual, or seems disoriented, it could be experiencing hearing issues.
    7. Unusual Behavior: Changes in behavior, like loss of balance, walking in circles, or tilting the head to one side, can be indicative of inner ear problems or more severe conditions.
    8. Foreign Objects: Dogs are curious creatures. If you suspect they’ve gotten something stuck in their ear, like grass seeds, twigs, or even insects, it’s best to let a professional remove it to avoid injury.
    9. Chronic Issues: Some dogs, especially certain breeds, are prone to recurrent ear issues. If you find yourself treating the same problem repeatedly, a vet might offer a more long-term solution or identify an underlying cause.

    While regular home maintenance is essential, there are times when professional care is non-negotiable. Always trust your instincts as a pet owner. If something seems off, it’s better to be safe and consult with your veterinarian.

    labrador retriever sleeping

    Conclusion

    Ear health is an integral aspect of your dog’s overall well-being. As we’ve explored in this guide, regular ear cleaning can prevent a myriad of issues, from minor irritations to severe infections. But it’s not just about cleaning; it’s about being observant, understanding the signs of potential problems, and seeking professional help when needed.

    As a veterinarian, I’ve witnessed the difference proactive ear care can make in a dog’s life. It’s not just about preventing discomfort or health issues; it’s about ensuring your furry friend can enjoy the world around them without the hindrance of ear problems. Whether you’re choosing an ear cleaner or learning the proper cleaning technique, always prioritize your dog’s comfort and safety.

    Thank you for joining me on this journey into the world of canine ear care. I hope this guide empowers you to make informed decisions for your pet’s health. Remember, a little attention to detail and regular care can lead to a happier, healthier life for your beloved companion.

    Frequently Asked Questions

    How often should I clean my dog’s ears?

    Answer: The frequency of ear cleaning varies depending on the breed, age, and health of your dog. Dogs with floppy ears or those prone to ear infections might require more frequent cleanings, perhaps once a week. On the other hand, dogs with upright ears and no history of ear issues might only need cleaning once a month. Always monitor your dog’s ears and adjust the cleaning routine based on their needs.

    What should I do if my dog seems to be in pain after an ear cleaning?

    Answer: If your dog shows signs of discomfort, pain, or unusual behavior after an ear cleaning, it’s crucial to stop using the product and consult with your veterinarian immediately. They can provide guidance on the next steps and recommend alternative products or treatments if needed.

    Are there any breeds that are more prone to ear issues?

    Answer: Yes, some breeds are more susceptible to ear problems due to their ear structure, hair growth inside the ear, or genetic predispositions. Breeds with floppy ears, like Basset Hounds, Cocker Spaniels, and Golden Retrievers, often require more diligent ear care. Regular inspections and cleanings can help prevent issues in these breeds.

    Can I use human ear cleaners or home remedies for my dog?

    Answer: It’s essential to use products formulated specifically for dogs. Human ear cleaners or home remedies might not be pH balanced for dogs and could cause irritation or adverse reactions. If you’re considering a home remedy, always consult with your veterinarian first.

    Is it safe to clean my dog’s ears if I suspect an infection?

    Answer: If you suspect an infection, it’s best to consult with a veterinarian before attempting to clean your dog’s ears. Cleaning an infected ear without proper guidance can exacerbate the issue or cause pain to your dog. Your vet can provide appropriate treatments and guide you on cleaning protocols during the healing process.

    A note about your dog’s health

    This article provides general education and does not replace an examination, diagnosis, or individualized advice from your veterinarian. Contact a veterinary professional if you are concerned about your dog’s symptoms.

    Dr. Candy Akers, DVM Avatar

    ABOUT THE AUTHOR
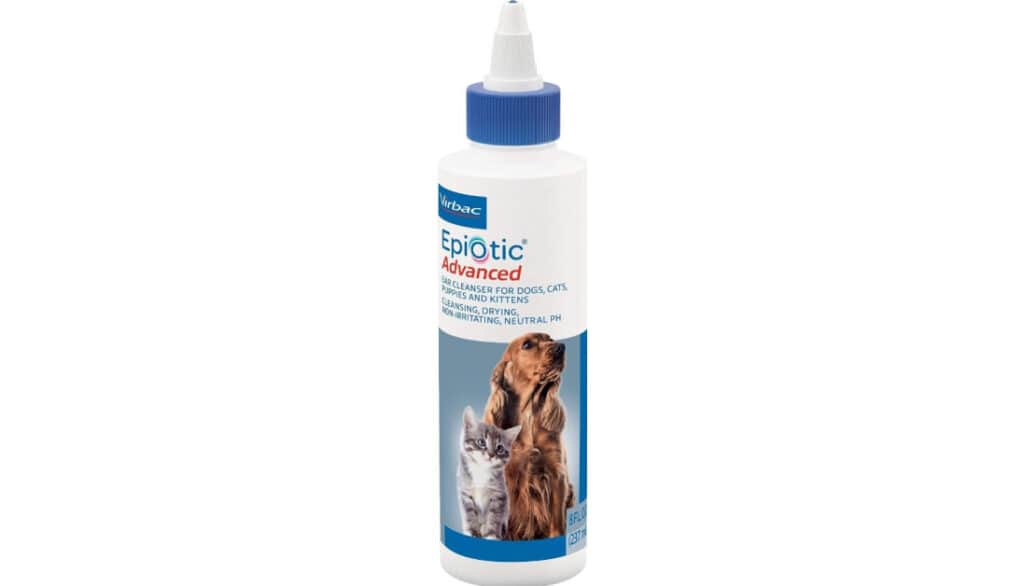
  • Dog Wart or Skin Growth? When to Watch and Call Your Vet

    Dog Wart or Skin Growth? When to Watch and Call Your Vet

    By Dr. Candy Akers, DVM

    If you find a bump that looks like a dog wart, take a breath before you reach for a remedy. A true canine papilloma is usually a benign viral growth. It often looks rough or cauliflower-like, especially around the mouth of a young dog. But many bumps that people call warts, particularly on older dogs, are not viral papillomas at all.

    A photo can help you track a growth, but appearance alone cannot confirm what it is. New, changing, bleeding, painful, or ulcerated growths deserve a veterinary exam. The same is true for a bump that affects your dog’s eating, vision, breathing, or walking.

    I have spent a significant part of my veterinary career understanding and treating skin conditions. Seeing the same skin problems return is one reason I began looking more deeply at whole-body and holistic support. That perspective still starts with a careful diagnosis. We cannot support a dog well if we are guessing about the bump in front of us.

    What Is a Dog Wart?

    Veterinarians use the word papilloma for a growth made by an overgrowth of surface cells. Some papillomas are caused by canine papillomaviruses. Researchers have identified many canine papillomavirus types, and different types are linked with different patterns of disease.[1]

    The classic picture is a young dog with several small, rough growths in or around the mouth. They may have a feathered or cauliflower-like surface. Oral papillomas are usually benign, and many regress as the dog’s immune response develops.[1][2]

    That is not the only kind of bump a dog can have. Owners often use “wart” for almost any raised, hairless, crusty, or bumpy skin growth. In an older dog, a wart-like bump may be a sebaceous gland growth, cyst, skin tag, or another type of mass. Some tumors can also look surprisingly ordinary.

    The practical rule is simple: call it a wart-like growth until your veterinarian has examined it.

    Dog Wart or Something Else?

    A bump’s texture, color, and location provide clues, but none of them provide a diagnosis by themselves.

    True viral papilloma

    Often rough, frond-like, or cauliflower-shaped. Common around the lips and mouth of young dogs. More than one may appear.

    Sebaceous growth

    Often seen in middle-aged or older dogs. It may be pink, tan, gray, or dark and can look lobulated or crusty. These growths are often benign, but appearance is not enough to confirm that.

    Cyst

    May feel smooth or firm. Some cysts develop a central pore or release thick material. Squeezing one can cause pain, inflammation, or infection.

    Skin tag

    Usually soft and attached by a narrow stalk. Friction can make it irritated or dark.

    Tick

    A newly attached tick can be mistaken for a smooth gray or brown bump. Look for legs close to the skin, but do not keep picking at an uncertain mass.

    Tumor

    A mast cell tumor, melanoma, squamous cell carcinoma, or another tumor can resemble a wart, tag, or harmless nodule. That is why rapid change, bleeding, ulceration, and a new lump in an older dog matter.

    Even experienced eyes can be fooled. If a bump does not fit the classic pattern, sampling it is often more useful than debating what it resembles.

    What Do True Viral Papillomas Look Like?

    Classic canine oral papillomas are usually small, raised growths with an uneven surface. They may be pale pink, white, gray, or darker if the surface is irritated or pigmented. They can occur alone, but clusters are common.

    Close-up of a canine oral papilloma attached to the inner lower lip

    Papillomas may appear in these areas:

    • Lips, gums, tongue, and inside the mouth
    • Muzzle and facial skin
    • Eyelid margins
    • Ear tissue
    • Between the toes or on the paws
    • Other haired or lightly haired skin

    Location changes the level of concern. A small growth on the body may not bother a dog. A similar growth on an eyelid can rub the eye. One between the toes can split or become painful. Several oral growths can make chewing and swallowing difficult.

    A black surface does not automatically mean cancer, and a pink surface does not guarantee a harmless growth. Color is only one part of the picture.

    Are Dog Warts Contagious?

    True canine viral papillomas can spread from dog to dog. Canine papillomaviruses are host adapted, and no canine papillomavirus type is known to have zoonotic potential. In plain language, these viruses are not considered contagious to people.[1]

    If your veterinarian suspects active viral papillomas, avoid close contact with other dogs and shared dog-play settings until you receive individual guidance. This matters most for puppies, young dogs, and dogs with weakened immune defenses.

    Removing one papilloma does not automatically answer whether a dog is still contagious. Other tiny lesions may be present, and the diagnosis may not have been confirmed before removal. Ask your veterinarian when it is reasonable to return to daycare, boarding, grooming, or group play.

    When a Wart-Like Growth Needs a Vet Exam

    A calm, routine appointment is appropriate for many new skin growths. Some changes should move the visit higher on your list.

    Schedule an exam promptly if the growth:

    • Enlarges quickly
    • Changes color, shape, or surface
    • Bleeds without an obvious scrape
    • Becomes raw, crusted, weepy, or foul-smelling
    • Looks infected or has discharge
    • Seems painful or very itchy
    • Is repeatedly licked, chewed, or scratched
    • Interferes with eating, drinking, vision, breathing, walking, or toileting
    • Appears inside the mouth or near the eye
    • Keeps returning after removal
    • Appears on an older dog and is new or changing
    • Comes with weight loss, low energy, reduced appetite, or other illness signs

    A wart that bleeds once after being snagged is different from one that bleeds repeatedly or breaks down on its own. Apply gentle pressure with clean gauze if your dog allows it. If bleeding does not stop, the area is painful, or the lesion has opened deeply, seek veterinary care.

    How to Track a Dog’s Skin Growth at Home

    Good monitoring can make a veterinary visit more useful. It should never be used to postpone an exam when a red flag is present.

    Use this five-step method:

    1. Take a clear photo in good light. Use the same angle each time.
    2. Place a ruler beside the growth. Do not press the ruler into sore tissue.
    3. Record the date and exact location. “Left ear, outer edge” is more useful than “on head.”
    4. Note the diameter, height, color, surface, discharge, and whether it is firm or soft.
    5. Record what your dog is doing. Licking, pawing, limping, head shaking, or trouble chewing can be as important as size.
    Owner photographing and measuring a small skin growth on a dog with a ruler

    If your veterinarian recommends monitoring, compare the growth at a consistent interval such as once a week. Daily checking can make small lighting differences look like dramatic change. It can also irritate the area if you keep touching it.

    Do not squeeze, scrape, or poke the growth to test it. If you see what might be a tick but cannot identify it confidently, have a veterinary professional check it.

    How Veterinarians Diagnose Wart-Like Growths

    Your veterinarian will consider your dog’s age, health history, medications, the number of growths, their location, and how they have changed. A classic cluster of oral papillomas in a young dog may be strongly suspected from the examination.

    Veterinarian examining a dog's ear with a handheld otoscope

    When the diagnosis is uncertain, the next step may involve collecting cells or tissue.

    Cytology uses a small sample of cells. It is often quick and may not require sedation. Some skin masses release helpful cells readily, while others do not. An inconclusive cytology result does not mean the growth is harmless.

    Biopsy removes a small piece or the whole growth for a pathologist to examine. Histopathology looks at the tissue architecture, which can provide a more definite diagnosis. A biopsy may be the best choice when a lesion is changing, ulcerated, unusually pigmented, persistent, or located where treatment planning matters.

    Sometimes complete removal is both diagnostic and therapeutic. The best method depends on the suspected diagnosis, size, depth, location, and your dog’s health.

    Dog Wart Treatment: When Waiting Is Reasonable

    If the lesion is a confirmed or strongly suspected viral papilloma and it is not causing trouble, watchful waiting may be reasonable. Many viral papillomas regress without treatment as the immune system responds.[1][2]

    Waiting does not mean ignoring the lesion. Keep it clean, prevent licking or chewing, follow contact restrictions, and report meaningful changes.

    Veterinary treatment may be considered when papillomas:

    • Interfere with eating, vision, or movement
    • Bleed or become infected
    • Cause pain
    • Are numerous or widespread
    • Persist while new lesions keep appearing
    • Occur in a dog with immune suppression
    • Cannot be confidently distinguished from another mass

    Surgical excision, cryosurgery, laser treatment, or another procedure may be discussed for selected lesions. These are veterinary procedures, not home techniques. The goal is not simply to make a bump disappear. The goal is to choose a method that fits the diagnosis and protects healthy tissue.

    The 2024 veterinary review notes that evidence for many proposed drug and immune treatments is limited or inconsistent. It also explains that persistent papillomatosis is uncommon and requires a more careful investigation than a routine self-resolving wart.[1]

    A Holistic Note About Nutritional Support

    A whole-dog approach is central to my veterinary philosophy. Rest, balanced nutrition, comfortable movement, stress reduction, and treatment of underlying health concerns help create the foundation for a strong, balanced immune response. When a dog is dealing with papillomas, I look at the complete health picture and incorporate targeted nutritional support when appropriate.

    Standard Process Immuplex is one of the nutritional tools I may recommend. This whole-food-based multivitamin and mineral complex is formulated to support immune cells and normal immune responses. Its blend of nutrients and animal-derived ingredients is designed to nourish the body’s natural defenses and can fit well into an individualized holistic care plan.[3]

    For the right dog, Immuplex can be a valuable addition to a broader immune-support plan. I recommend selecting the dose and duration with guidance from a veterinarian who understands your dog’s diet, medications, and health history. At the same time, any growth that is changing, bleeding, painful, or unusual should be examined so we understand exactly what we are supporting.

    Holistic veterinary care brings these pieces together: identify the growth, support the whole dog, and provide the nutritional foundation the body needs. Immuplex is not an afterthought in this approach. It can be a purposeful part of a thoughtful, individualized plan for immune health.

    Standard Process Immuplex supplement bottle

    Standard Process Immuplex

    A whole-food-based multivitamin and mineral complex formulated to support immune cells and normal immune responses. It can be a purposeful part of an individualized holistic plan for immune health.

    Can You Use Compound-W on a Dog?

    Do not apply Compound-W to a dog unless your veterinarian specifically directs you to. Compound-W is a human wart-removal product. It is not designed to solve the diagnostic problem of a lump on a dog.

    A chemical wart remover can injure normal skin, especially on the face, eyelid, ear, paw, genitals, or inside the mouth. Dogs also lick treated areas. Most importantly, treating an unidentified lump at home can delay the diagnosis of a tumor or another condition that needs different care.

    The same warning applies to other home-removal methods. Do not:

    • Tie off a growth with thread, floss, or a rubber band
    • Cut it with scissors or nail clippers
    • Burn or freeze it
    • Apply acids, essential oils, vinegar, or caustic pastes
    • Repeatedly pick at the surface

    These methods can cause pain, bleeding, infection, tissue damage, and incomplete removal. They also destroy features your veterinarian or pathologist may need to identify the lesion.

    Final Thoughts

    Most confirmed viral papillomas are not an emergency, and many resolve on their own. The tricky part is knowing whether the bump is truly a papilloma.

    Start with a clear photo, a measurement, and a note about when you first saw it. Prevent licking and trauma. Arrange an exam if the growth is new, changing, bleeding, painful, ulcerated, or affecting normal function. I would also lean toward an exam for a new wart-like growth on an older dog.

    A thoughtful diagnosis gives you more options, not fewer. It can spare your dog an unnecessary home treatment, identify a harmless growth that only needs monitoring, or catch a problem while it is still small.

    Frequently Asked Questions

    Do dog warts fall off on their own?

    Many confirmed viral papillomas regress as the dog’s immune response develops. They may shrink, dry, or disappear over weeks to a few months. A persistent, changing, or newly appearing growth should be rechecked rather than assumed to be following a normal timeline.[1][2]

    Are dog warts contagious to people?

    Canine papillomaviruses are host adapted, and no canine type is known to have zoonotic potential. True canine papillomas can spread to other dogs, but they are not considered contagious to people.[1]

    What are “old dog warts”?

    “Old dog warts” is an informal name for wart-like growths on senior dogs. Many are not viral papillomas. Sebaceous gland growths, cysts, tags, and tumors can all enter the conversation. A new or changing growth on an older dog deserves an exam.

    Why is my dog’s wart bleeding?

    A raised growth may bleed after rubbing, scratching, or chewing. Repeated bleeding, spontaneous bleeding, ulceration, or discharge needs veterinary attention. Keep your dog from licking it and use gentle pressure with clean gauze if the surface is bleeding.

    Can I tie off, freeze, or cut off a dog wart?

    No. Home removal can cause pain, infection, and serious bleeding, and it may delay the diagnosis of a tumor. Your veterinarian can decide whether monitoring, sampling, or removal is appropriate.

    How long do dog papillomas last?

    Many viral papillomas resolve within weeks to a few months, but the timing varies. Rare cases persist or continue producing new lesions. If lesions are not improving, are spreading, or have lasted for months, schedule a recheck.[1]

    References

    [1] Munday, J. S., & Knight, C. G. (2024). Papillomaviruses and papillomaviral disease in dogs and cats: A comprehensive review. Pathogens, 13(12), 1057. https://doi.org/10.3390/pathogens13121057

    [2] Merck Veterinary Manual. (n.d.). Oral papillomas in dogs. https://www.merckvetmanual.com/digestive-system/diseases-of-the-mouth-in-small-animals/oral-papillomas-in-dogs

    [3] Journeys Holistic Life. (n.d.). Immuplex®, 150 capsules. https://journeysholisticlife.com/products/standardprocess-immuplex-4960

    A note about your dog’s health

    This article provides general education and does not replace an examination, diagnosis, or individualized advice from your veterinarian. Contact a veterinary professional if you are concerned about your dog’s symptoms.

    Dr. Candy Akers, DVM Avatar

    ABOUT THE AUTHOR
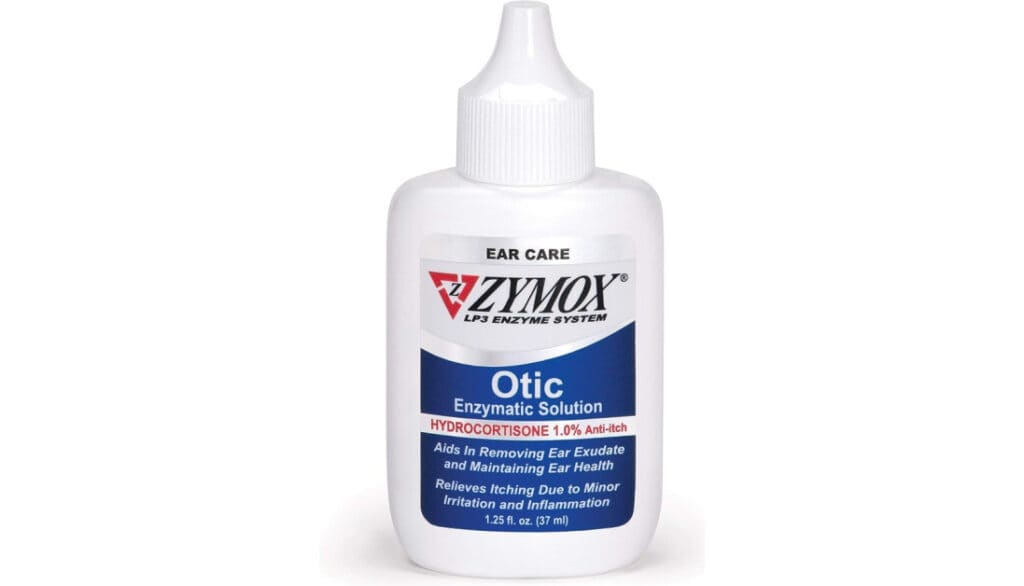
  • Eye Wipes for Dogs: Safe Cleaning and Vet-Ranked Picks

    Eye Wipes for Dogs: Safe Cleaning and Vet-Ranked Picks

    Eye wipes can help remove dried tears, light crust, and debris from the fur and skin around a dog's eyes. They cannot treat an eye infection, ulcer, dry eye, blocked tear duct, or other medical problem. Choose a fragrance-free product made specifically for the eye area, use a fresh wipe for each eye, and keep the wipe on the eyelids and surrounding fur rather than the eyeball.

    If your dog is squinting, pawing at an eye, acting painful, or has redness, swelling, cloudiness, trauma, or yellow-green discharge, skip the grooming routine and call your veterinarian. Eye problems can worsen quickly, and cleaning away discharge does not fix the cause.

    I have seen how much easier eye care becomes when dogs learn that the routine is gentle and predictable. The right wipe can make everyday cleanup simple, but the technique and your dog's symptoms matter more than the brand.

    What Eye Wipes Can and Cannot Do

    Dog eye wipes are grooming products. Their main job is to soften and lift debris from the eyelids, facial folds, and hair below the eyes. That can help keep the area dry and comfortable, especially in dogs that have shallow eye sockets, facial folds, long facial hair, or mild tear overflow.

    Wipes do not prevent every infection. They also do not diagnose why an eye is watering. Excess tears, also called epiphora, are a symptom rather than a disease. Tears may overflow because the eye is irritated, tear production has increased, eyelid or eyelash anatomy directs tears onto the face, or the normal drainage pathway is narrowed or blocked (VCA Animal Hospitals, n.d.).

    That distinction matters. If the skin is simply damp or the fur has a little dried material, gentle cleaning may be useful. If the eye itself looks abnormal or your dog is uncomfortable, your veterinarian needs to examine it.

    When Eye Discharge Needs a Veterinary Exam

    A small amount of clear or pale crust after sleep can be normal for some dogs. A new change in amount, color, odor, or comfort deserves attention.

    Contact your veterinarian promptly if you notice:

    • Squinting, holding an eye closed, or avoiding light
    • Pawing or rubbing at the face
    • Redness or swelling
    • A cloudy, blue, or dull-looking eye surface
    • Thick yellow, green, or bloody discharge
    • Sudden heavy tearing, especially from one eye
    • A visible scratch, foreign object, or recent trauma
    • A change in vision or bumping into objects

    Redness, irritation, and thick green discharge can occur with dry eye, a condition that can lead to painful corneal ulcers and vision damage when untreated (Cornell University College of Veterinary Medicine, 2025). Do not assume that wiping away thick discharge makes the problem safe to watch.

    If a chemical gets in the eye, flush as directed by a veterinarian or poison-control professional and seek urgent care. Do not try to neutralize it with another household product.

    Dog owner checking eye discharge and preparing to contact a veterinarian.

    How to Choose a Safe Eye Wipe

    The front of the package is not enough. Read the intended-use statement and ingredient list before using any product near the eyes.

    Look for a wipe that is:

    • Made for dogs and labeled for the eye area or eyelids
    • Fragrance-free or very lightly formulated
    • Soft, low-lint, and large enough to control with your fingers
    • Packaged to stay moist and clean
    • Clear about whether rinsing is required

    Avoid products with alcohol, hydrogen peroxide, essential oils, strong fragrance, or harsh disinfectants. Human baby wipes and general household wipes are not designed for a dog's eye area. A product marketed as natural can still sting or irritate sensitive tissue.

    Most eye wipes are meant for the skin, eyelids, and fur around the eye. Unless the label specifically says the product is an ophthalmic solution, do not put the liquid directly into the eye.

    For dogs with allergies or sensitive skin, test a small area below the eye first. Stop if you see redness, itching, swelling, or increased tearing.

    How to Clean Around Your Dog's Eyes

    Set up before you bring your dog over. You will need the wipes, a clean towel, and a few treats. Good light helps you see the eye without pulling on the eyelids.

    • Wash and dry your hands.
    • Let your dog sniff the closed package, then reward calm behavior.
    • Support the head gently without squeezing the muzzle.
    • If debris is dry, hold a warm, damp cloth against the fur for several seconds to soften it. Do not press on the eye.
    • Wipe the eyelid and surrounding fur with a gentle motion that moves debris away from the eye.
    • Use a fresh wipe or clean section for the other eye. Never carry material from one eye to the other.
    • Pat the fur dry, then reward your dog and end the session.

    Never scrape hard crust with a fingernail or comb. If material is stuck to the eyelid margin, or your dog resists because the area hurts, stop and call your veterinarian.

    For a nervous dog, practice in five-second steps. Touch the cheek, reward. Lift the wipe near the face, reward. Wipe once, reward. Short, calm sessions build trust better than forcing a full cleaning.

    Safe wiping on a dog's eyelid and fur while avoiding the eyeball.

    Top 5 Eye Wipes for Dogs Ranked by a Vet

    These five products were featured in the original article and remain in the same order. Labels and formulas can change, so confirm the current directions and ingredients before use. I rank them by their practical fit for the eye area, ease of use, and how clearly they should be handled around sensitive tissue.

    Five dog eye wipe products arranged for comparison.
    Wet Ones for Pets Extra Gentle Hypoallergenic Dog Wipes with Witch Hazel

    1. Wet Ones for Pets Extra Gentle Hypoallergenic Dog Wipes With Witch Hazel

    These are general pet wipes rather than a dedicated ophthalmic product. Their larger size can be handy for cleaning facial fur, but I would keep them well below the eyelid and away from the eye itself. Witch hazel can sting sensitive tissue, so this is not my choice for wiping the eyelid margin.

    Best for: Light cleanup on facial fur below the eye.

    Use caution if: Your dog has sensitive skin, active redness, or wet discharge close to the eye.

    Miracle Care Eye Wash Pads for Dogs

    2. Miracle Care Eye Wash Pads for Dogs

    The premoistened pads are sized for controlled cleaning around the eyelids and inner corner. They are convenient when you need to soften and lift small amounts of dried debris without handling a large sheet.

    Best for: Routine eyelid and eye-corner cleanup.

    Use caution if: The eye is painful, cloudy, or producing thick discharge. Those signs need an exam, not repeated wiping.

    Project Watson Dog Eyelid Wipes

    3. Project Watson Dog Eyelid Wipes

    This product is designed for the eyelid area, which makes the intended use clearer than with an all-purpose pet wipe. The individual pad format also makes it easier to use one clean pad per eye.

    Best for: Dogs that need regular eyelid or facial-fold cleaning.

    Use caution if: Your dog develops more tearing or redness after use. Stop and contact your veterinarian.

    Earthbath All Natural Specialty Eye Wipes

    4. Earthbath All Natural Specialty Eye Wipes

    These wipes are made for the fur around the eyes and can help with everyday debris and tear-stained hair. Remember that natural ingredients are not automatically irritation-free. Keep the pad on the fur and eyelid skin, not the corneal surface.

    Best for: Routine grooming and light tear-stain cleanup.

    Use caution if: Your dog has known plant sensitivities or inflamed skin.

    Vet's Best Eye Cleansing Wipes for Dogs

    5. Vet’s Best Eye Cleansing Wipes for Dogs

    These small wipes are easy to control around the eye area and may be useful for daily grooming in dogs that collect light debris. Follow the label and avoid letting liquid run into the eye.

    Best for: Quick cleanup of small amounts of dried material.

    Use caution if: The eyelids are swollen, sore, or crusted. Those changes can need veterinary treatment.

    What About Tear Stains?

    Tear stains are the reddish-brown marks that develop when tears repeatedly wet light-colored fur. Pigments in tears contribute to the color, but staining is not simply a hygiene problem.

    Some dogs stain because of facial anatomy or hair that channels tears onto the face. Other possible contributors include eyelid or eyelash problems, irritation, allergies, excessive tear production, and poor tear drainage. VCA notes that tear overflow can be linked to many different conditions and may require an eye exam to find the cause (VCA Animal Hospitals, n.d.).

    Daily gentle cleaning may reduce buildup on the hair, but it will not correct a blocked duct, painful corneal problem, or abnormal eyelid. Ask your veterinarian about persistent staining, especially when it starts suddenly, affects one eye more than the other, smells bad, or comes with discomfort.

    Keep long hair trimmed by a groomer or veterinary professional so it does not rub the eye. Do not use bleach, peroxide, stain-removing powders, or human cosmetic products near the eyes.

    Safer Alternatives to Eye Wipes

    You do not always need a packaged wipe. For light debris on the outer fur, a soft cloth or cotton pad dampened with warm water may be enough. Use a separate clean area for each eye and dry the fur afterward.

    If your veterinarian wants you to rinse the eye, use a sterile saline eye wash or another ophthalmic product they recommend. Contact-lens disinfecting solution is not the same thing as sterile eye wash.

    Skip homemade saline, chamomile tea, coconut oil, aloe gel, apple cider vinegar, and witch hazel near the eye. Homemade mixtures can have the wrong salt concentration, may be contaminated, and can irritate the cornea. Oils and plant extracts can blur the surface or trigger more inflammation.

    A warm, wet washcloth can help loosen external crust, and VCA includes gentle warm-cloth cleaning as supportive care for dogs with medically managed dry eye (VCA Animal Hospitals, 2023). That does not replace prescribed medication or an exam.

    How Often Should You Use Eye Wipes?

    Use them only as often as your dog needs and the label allows. Some dogs need a quick daily wipe because of facial anatomy. Others need cleaning only after sleep or outdoor play.

    More is not always better. Frequent rubbing can make delicate skin sore. If you are wiping several times a day because discharge keeps returning, the next step is a veterinary exam.

    Final Thoughts

    Eye wipes can be useful grooming tools when the eye itself is comfortable and clear. Choose a product made for the eye area, keep it on the eyelids and fur, use a fresh wipe for each eye, and stop if your dog shows pain or irritation.

    The biggest safety rule is simple: do not clean away a warning sign and assume the problem is solved. Sudden tearing, squinting, redness, cloudiness, swelling, trauma, or colored discharge deserves veterinary attention.

    Frequently Asked Questions

    Can I Use Baby Wipes Around My Dog’s Eyes?

    No. Baby wipes are made for human skin and may contain fragrance, preservatives, or cleansers that irritate a dog’s eyes. Use a dog eye-area wipe or a soft cloth dampened with warm water on the outer fur.

    Can Eye Wipes Go Directly in My Dog’s Eye?

    Usually not. Most wipes are intended for eyelids and surrounding fur. Only use a liquid in the eye if it is clearly labeled as an ophthalmic product and your veterinarian or the product directions support that use.

    How Often Can I Wipe My Dog’s Eyes?

    Once daily or as needed may be reasonable for mild external buildup, depending on the label and your dog’s skin. If discharge returns quickly, becomes colored, or requires frequent cleaning, schedule an exam.

    What Is Best for Dog Tear Stains?

    Gentle daily cleaning and keeping the fur dry can help manage staining. Persistent or one-sided staining needs a veterinary exam because tear overflow can come from irritation, anatomy, or a drainage problem.

    When Is Eye Discharge an Emergency?

    Seek urgent veterinary care for squinting, obvious pain, a cloudy or blue eye, trauma, sudden vision change, a protruding eye, or chemical exposure. Thick yellow-green discharge with redness also needs prompt evaluation.

    References

    VCA Animal Hospitals. (n.d.). Eye discharge (epiphora) in dogs. https://vcahospitals.com/know-your-pet/eye-discharge-or-epiphora-in-dogs

    Cornell University College of Veterinary Medicine. (2025, December 2). Keratoconjunctivitis sicca (KCS) in dogs. https://www.vet.cornell.edu/departments-centers-and-institutes/riney-canine-health-center/canine-health-topics/keratoconjunctivitis-sicca-kcs-dogs

    VCA Animal Hospitals. (2023, January 18). Keratoconjunctivitis sicca (KCS) or dry eye in dogs. https://vcahospitals.com/know-your-pet/keratoconjunctivitis-sicca-kcs-or-dry-eye-in-dogs

    A note about your dog’s health

    This article provides general education and does not replace an examination, diagnosis, or individualized advice from your veterinarian. Contact a veterinary professional if you are concerned about your dog’s symptoms.

    Dr. Candy Akers, DVM Avatar

    ABOUT THE AUTHOR
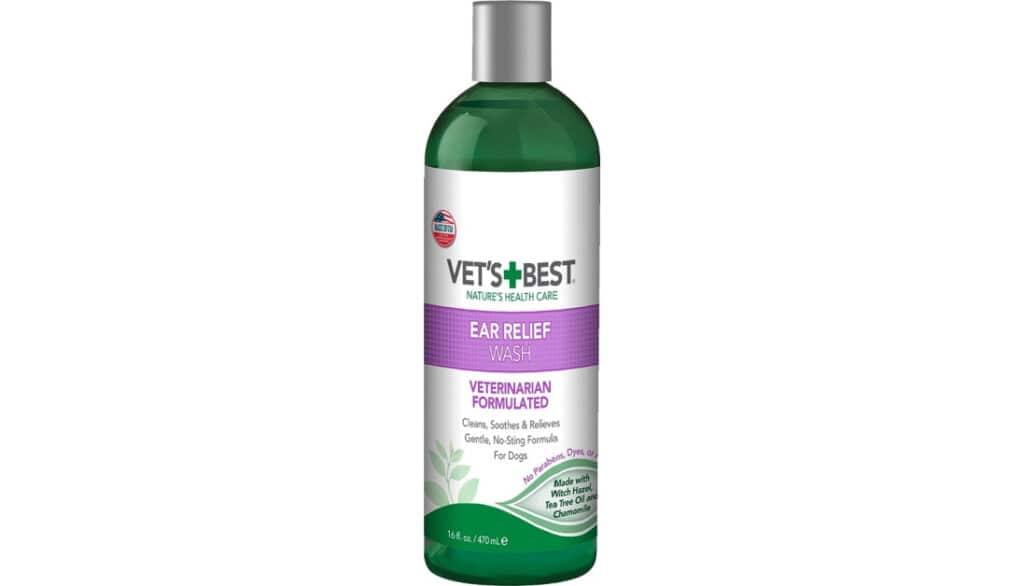
  • How To Clean A Dog Wound With Salt Water- Home Steps & Recipe

    How To Clean A Dog Wound With Salt Water- Home Steps & Recipe

    Hello, I’m Dr. Candy Akers, and I’ve dedicated my life to understanding and promoting the well-being of our beloved pets. Over the years, I’ve encountered countless pet owners who are deeply committed to the health and happiness of their furry companions. One common concern that many face is how to effectively treat and care for wounds that our adventurous pets might sustain. While there are numerous treatments available, there’s a natural remedy that has stood the test of time: salt water. In this blog, I’ll delve into the science and practicality of using salt water as a wound-cleaning agent for dogs.

    Drawing from research, personal experiences, and age-old wisdom, I aim to provide a comprehensive guide on this topic. Let’s explore together the benefits, preparation methods, and best practices for using salt water to aid in your dog’s healing process.

    clean dogs wound with saline

    Why Salt Water for Dog Wounds?

    Salt water, often referred to as saline solution, has been used for centuries as a natural remedy for wound care, not just for humans but also for animals, including dogs. Let’s delve into the reasons why salt water is considered beneficial for treating dog wounds:

    1. Natural Antiseptic Properties: Salt water acts as a disinfectant, helping to clean out wounds and prevent the growth of harmful bacteria. When applied to wounds, the saline solution can draw out moisture, creating an environment that’s less conducive for bacteria to thrive.
    2. Promotes Healing: The osmotic effect of salt helps to reduce the moisture in the wound, which can speed up the healing process. By removing excess fluids and debris, salt water can help tissues regenerate more effectively.
    3. Reduces Inflammation: Salt water can help reduce swelling and inflammation around the wound. This not only aids in the healing process but also provides relief to the dog, making them more comfortable.
    4. Safe and Cost-effective: Unlike some commercial antiseptics that might contain chemicals or additives that could be harmful or cause allergic reactions in pets, salt water is a natural and safe alternative. Additionally, making a salt water solution at home is cost-effective, requiring just salt and water.
    5. Gentle on Skin: For dogs with sensitive skin, salt water can be a gentler option than some commercial products. It doesn’t contain alcohol or other potentially irritating substances.
    6. Prevents Infection: One of the primary concerns with any wound is the potential for infection. Regular cleaning with salt water can help reduce this risk, ensuring the wound remains clean and free from harmful pathogens.

    While there are various methods and products available for wound care, salt water remains a trusted and effective option. Its natural properties make it a go-to choice for many veterinarians and pet owners alike.

    Preparing the Salt Water Solution: Recipe & Ratios

    Preparing a salt water solution for wound care is straightforward, but it’s essential to get the ratios right to ensure its effectiveness and safety. Here’s a step-by-step guide on how to prepare the salt water solution for dog wounds:

    Ingredients Needed:

    1. Salt: Ideally, you should use non-iodized sea salt or table salt. Avoid using salts with added anti-caking agents or flavorings.
    2. Water: It’s best to use distilled water or boiled and cooled tap water to ensure it’s free from impurities and contaminants.

    Step-by-Step Recipe:

    1. Boil the Water: Start by boiling the water for about 10 minutes to kill any bacteria or pathogens. This step ensures that the solution is as clean as possible. After boiling, allow the water to cool to room temperature.
    2. Measure the Salt: For a standard saline solution, the ratio is typically 1 teaspoon of salt to 1 pint (or 2 cups) of water. This ratio creates a solution that’s isotonic, meaning it closely mimics the natural salinity of the body, ensuring it’s gentle on wounds.
    3. Mixing: Once the water has cooled, add the measured salt to the water. Stir thoroughly until the salt has completely dissolved. It’s crucial to ensure that no salt grains remain at the bottom, as undissolved salt can be abrasive on wounds.
    4. Storage: Transfer the salt water solution to a clean, airtight container. If you’ve made more than you need for a single application, you can store the remaining solution in the refrigerator for up to 24 hours. For longer storage, it’s best to prepare a fresh batch to ensure its sterility.
    5. Application: When you’re ready to use the solution, you can pour a small amount onto a clean cloth or gauze pad and gently dab it onto the wound. Alternatively, for deeper wounds, you can use a syringe (without a needle) to flush the wound with the solution.

    Tips:

    • Always ensure your hands are clean before preparing or applying the solution.
    • If your dog shows any signs of discomfort or irritation after using the salt water solution, discontinue its use and consult a veterinarian.
    • While salt water is beneficial for cleaning wounds, it’s not a substitute for professional veterinary care for deep, large, or infected wounds.

    A salt water solution is a simple yet effective remedy for cleaning minor dog wounds. By following the correct recipe and ratios, you can ensure that the solution is both safe and beneficial for your furry friend.

    how to clean a dog wound with salt water

    How to Clean a Dog’s Wound with Salt Water: Detailed Steps

    Cleaning a dog’s wound properly is crucial to prevent infections and promote faster healing. Here’s a detailed guide on how to clean a dog’s wound using the salt water solution:

    Before You Begin: Safety First

    1. Assess the Wound: Before attempting any cleaning, take a moment to assess the wound’s severity. If it’s deep, bleeding excessively, or showing signs of infection, it’s best to consult a veterinarian immediately.
    2. Prepare Your Supplies: Gather everything you’ll need, including the salt water solution, clean cloths or gauze pads, a syringe (without a needle) for deeper wounds, and a towel.
    3. Calm Your Dog: Ensure your dog is calm and comfortable. You might need someone to help hold your dog still, especially if the wound is in a sensitive area.

    Cleaning the Wound: Step-by-Step Guide

    1. Wash Your Hands: Always start by washing your hands thoroughly to prevent introducing any bacteria to the wound.
    2. Gently Restrain Your Dog: If your dog is anxious or in pain, it’s essential to ensure they’re securely held to prevent sudden movements. Using a leash or having someone hold the dog can be helpful.
    3. Apply the Salt Water Solution:
      • For Surface Wounds: Moisten a clean cloth or gauze pad with the salt water solution. Gently dab or wipe the wound, moving from the center of the wound outward. This method ensures that you’re not pushing any debris or bacteria into the wound.
      • For Deeper Wounds: Fill a syringe (without a needle) with the salt water solution. Gently flush the wound, ensuring the solution reaches the entire wound area. This helps to remove any debris or contaminants.
    4. Drying the Wound: After cleaning, gently pat the wound dry with a clean cloth or gauze. Avoid rubbing, as this can cause irritation.
    5. Dressing the Wound (If Necessary): For some wounds, especially those in areas where they might get dirty easily, you might want to apply a light dressing. Ensure the dressing allows the wound to breathe, promoting faster healing.

    Post-Cleaning Care

    1. Monitor for Signs of Infection: After cleaning, keep an eye on the wound for any signs of infection, such as increased redness, swelling, pus, or if the dog is excessively licking or biting the area.
    2. Repeat as Needed: Depending on the wound’s severity, you might need to clean it once or twice a day. Always use a fresh batch of salt water solution for each cleaning.
    3. Avoid Over-Cleaning: While it’s essential to keep the wound clean, over-cleaning can delay the healing process. Follow your veterinarian’s advice on how often to clean the wound.

    Cleaning a dog’s wound with salt water is a gentle and effective method to promote healing and prevent infections. However, always prioritize your dog’s comfort and safety, and consult a veterinarian if you’re unsure about the wound’s severity or the cleaning process.

    how to clean a dog wound with saline

    Post-Cleaning Care & Monitoring

    After cleaning a dog’s wound, the care doesn’t stop there. Proper post-cleaning care and monitoring are essential to ensure the wound heals correctly and to catch any potential complications early on. Here’s a guide on what to do and what to watch out for after cleaning your dog’s wound with salt water:

    Post-Cleaning Care

    1. Protect the Wound: Depending on the wound’s location and your dog’s behavior, you might consider placing a protective barrier like a bandage or a wound dressing. This can help keep out dirt and debris, especially if the wound is on a paw or another area that comes into frequent contact with the ground.
    2. Limit Activity: If the wound is significant or in a location that could be aggravated by movement, consider limiting your dog’s activity for a few days. This might mean shorter walks or avoiding rough play.
    3. Prevent Licking and Scratching: Dogs instinctively want to lick or scratch their wounds, but this can introduce bacteria and delay healing. Consider using an inflatable surgery collar to prevent your dog from reaching the wound but allows them to still eat, drink, and stay comfortable.
    4. Maintain a Clean Environment: Ensure that the area where your dog rests and plays is clean. This is especially important for dogs with wounds on their paws or belly, as these areas come into direct contact with the ground.

    Monitoring

    1. Check the Wound Daily: Take a moment each day to inspect the wound. Look for signs of healing, such as the edges coming together or the formation of new skin.
    2. Watch for Signs of Infection: Be vigilant for increased redness, swelling, warmth, pus, or a foul odor coming from the wound. These can be signs of an infection and require immediate veterinary attention.
    3. Monitor Your Dog’s Behavior: Changes in behavior can be a sign that the wound is bothering your dog or that they’re not feeling well. If your dog becomes lethargic, loses appetite, or seems more irritable than usual, it’s a good idea to consult with a veterinarian.
    4. Note Any Discharge: While some clear fluid or a small amount of blood can be normal, especially in the initial stages of healing, any yellowish or greenish discharge can be a sign of pus and, therefore, an infection.
    5. Duration of Healing: While minor wounds might heal within a week, more significant wounds can take longer. If you don’t see any improvement after several days, or if the wound seems to be getting worse, seek veterinary care.

    Post-cleaning care and monitoring are as crucial as the initial wound cleaning. By taking the time to care for and observe the wound, you can ensure your dog’s swift recovery and reduce the risk of complications. Always trust your instincts as a pet owner, and when in doubt, consult with a professional.

    Conclusion

    Caring for our furry companions involves a blend of love, attention, and knowledge. Wounds, whether minor scrapes or more significant injuries, are almost inevitable in a dog’s life. However, with the right approach, we can ensure they heal properly and swiftly. Salt water, a time-tested and natural remedy, offers a gentle yet effective means of cleaning wounds, promoting faster healing, and preventing infections. By understanding its benefits, preparing the solution correctly, and following the recommended cleaning and post-care steps, we can provide our dogs with the best care possible.

    Always remember, while home remedies like salt water are invaluable, it’s essential to consult with a veterinarian for severe injuries or if you’re ever in doubt. After all, our dogs rely on us for their well-being, and it’s our responsibility to ensure they lead healthy, happy lives. Thank you for joining me on this journey to better pet care, and I hope this guide serves you and your canine companion well.

    Frequently Asked Questions

    1. Can I use any type of salt for the salt water solution?

    Answer: It’s best to use non-iodized sea salt or table salt for the solution. Avoid using salts with added anti-caking agents, flavorings, or those that are iodized. These additional components might irritate the wound or not provide the desired antiseptic properties.

    2. How often should I clean my dog’s wound with the salt water solution?

    Answer: For minor wounds, cleaning once or twice a day is usually sufficient. However, it’s essential to monitor the wound and adjust the cleaning frequency based on its condition. If you’re unsure, consult with your veterinarian for specific guidance.

    3. My dog seems irritated after applying the salt water solution. What should I do?

    Answer: While salt water is generally gentle, some dogs might have more sensitive skin than others. If your dog shows signs of discomfort or irritation after the application, rinse the area with plain water and discontinue the salt water treatment. It’s always a good idea to consult with a veterinarian in such cases.

    4. Can I store the salt water solution for future use?

    Answer: If you’ve made more salt water solution than needed, you can store the remaining amount in the refrigerator for up to 24 hours. However, for longer storage or repeated use, it’s recommended to prepare a fresh batch to ensure its sterility and effectiveness.

    5. The wound on my dog looks infected. Can I still use the salt water solution?

    Answer: While salt water can help clean wounds and has antiseptic properties, it’s not a substitute for professional veterinary care for infected wounds. If the wound shows signs of infection, such as increased redness, swelling, pus, or a foul odor, it’s crucial to seek immediate veterinary attention.

    A note about your dog’s health

    This article provides general education and does not replace an examination, diagnosis, or individualized advice from your veterinarian. Contact a veterinary professional if you are concerned about your dog’s symptoms.

    Dr. Candy Akers, DVM Avatar

    ABOUT THE AUTHOR
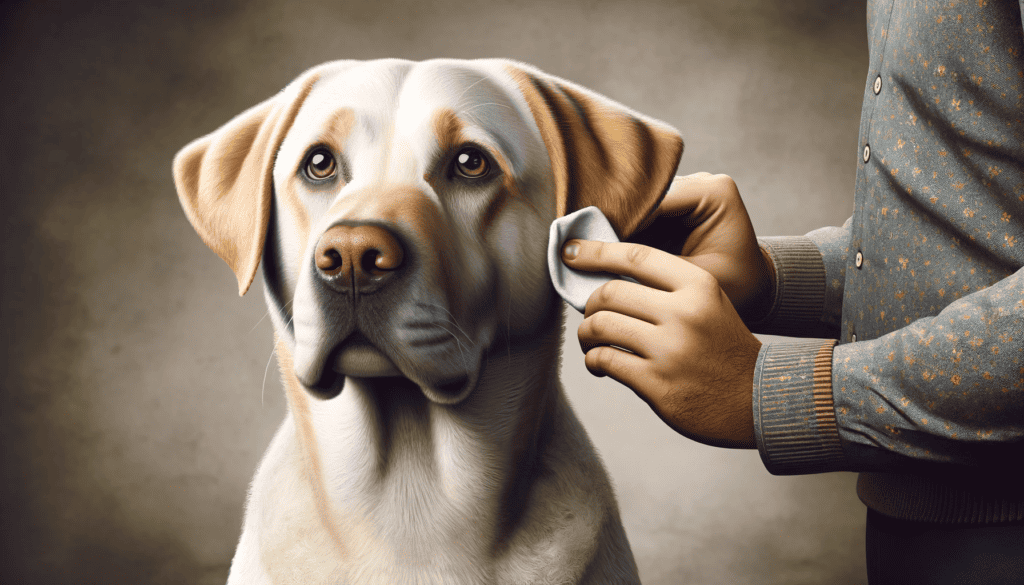
  • Chlorhexidine Wipes for Dogs: Safe Use and Vet Picks

    Chlorhexidine Wipes for Dogs: Safe Use and Vet Picks

    Hello, I’m Dr. Candy Akers. Chlorhexidine wipes for dogs can be useful for targeted, external skin care when you choose a pet-specific product and follow its label or your veterinarian’s instructions. They help cleanse paws, skin folds, underarms, and other small areas, but they do not diagnose the cause of itching, odor, redness, or infection.

    The formula matters. Some wipes contain chlorhexidine alone. Others pair it with an antifungal ingredient such as ketoconazole or miconazole. Directions, concentrations, and safe body areas can differ, so I do not treat every chlorhexidine wipe as interchangeable.

    Are Chlorhexidine Wipes Safe for Dogs?

    For many dogs, pet-specific chlorhexidine wipes are well tolerated when used as directed. Safety depends on the complete formula, the condition of the skin, the body area, and how often the product is used.

    Quick Safety Checklist

    • Use a wipe made for animals, not a human disinfecting wipe.
    • Read the active and inactive ingredients before the first use.
    • Follow the label or your veterinarian’s directions for frequency.
    • Keep the product out of the eyes, nose, mouth, and other mucous membranes.
    • Do not put a skin wipe into the ear canal unless it is specifically labeled for ear use.
    • Do not use it on an open wound, cut, or raw area unless your veterinarian directs you to.
    • Prevent licking until the area is dry.
    • Stop if redness, swelling, pain, or itching appears or gets worse.

    The Pet MD chlorhexidine wipe label, for example, says the product is for topical use, warns against eye and mucous-membrane contact, advises preventing licking until dry, and says to avoid open wounds, cuts, and raw areas [1].

    What Chlorhexidine Wipes Can and Cannot Do

    Chlorhexidine is an antiseptic. In a pet wipe, it helps reduce microbes on the skin surface and make it easier to care for small, hard-to-reach areas. Combination wipes may include an azole antifungal ingredient for problems that are responsive to that ingredient.

    Research supports cautious use. A small pilot study found that wipes containing chlorhexidine, climbazole, and Tris-EDTA reduced Malassezia yeast on canine skin [2]. Another study found that a 2% chlorhexidine surgical scrub improved signs in some dogs with superficial pyoderma [3]. These studies involved specific formulas and small groups. They do not prove that every wipe will work for every itchy or infected dog.

    A wipe cannot tell you whether your dog has bacteria, yeast, mites, allergy, a foreign body, ringworm, an endocrine problem, or simple irritation. Those conditions can look similar. When a problem is persistent or recurrent, cytology and a veterinary exam can guide the right treatment.

    In my clinical experience, many skin problems that benefit from chlorhexidine care also involve yeast. That is one reason some veterinary products combine chlorhexidine with ketoconazole, miconazole, or another antifungal ingredient. Still, the right choice depends on what is actually happening on your dog’s skin.

    How to Choose the Right Wipe

    Check the Active Ingredients

    Start with the label. Note the chlorhexidine concentration and whether the formula includes ketoconazole, miconazole, climbazole, Tris-EDTA, a steroid, alcohol, fragrance, or soothing ingredients. Watch out for high concentrations of alcohol as using this can be painful and might create an unwanted “treatment experience” which could make future treatments more difficult.

    Beagle beside two clearly labeled pet chlorhexidine wipe formulas in a veterinary clinic.

    A higher chlorhexidine percentage is not automatically better. A 0.2% hygiene wipe and a 2% medicated wipe may be designed for different jobs. Choose the product that matches the body area and the plan for your dog.

    Match the Wipe to the Area

    Small pads can fit between toes and into narrow skin folds. Larger wipes are easier for a belly, groin, or several folds. For the face, use only a product whose label supports facial use, and stay well away from the eyes, nose, and mouth.

    Ear skin is not the same as the ear canal. A wipe may be appropriate for the outer ear flap, but the canal needs an ear-specific product and a clear plan. Chlorhexidine can harm the eye, and some chlorhexidine products should not be used in an ear when the eardrum’s condition is unknown.

    Consider the Whole Formula

    Dogs can react to active or inactive ingredients. Fragrance, preservatives, and added medications can matter as much as the main antiseptic. If your dog has very sensitive skin or a history of reactions, try to use products with only a few ingredients, and make sure they are not too concentrated.

    How to Use Chlorhexidine Wipes Safely

    Before You Start

    Look closely at the area. If the skin is open, bleeding, very painful, deeply cracked, or producing pus, skip home treatment and contact your veterinarian. If the problem is mild and the product is appropriate, check the label for the target area, frequency, and any age limits.

    Step-by-Step Use

    1. Wash and dry your hands, or wear gloves if the label recommends them.
    2. Remove loose dirt or debris gently if the label directs you to. Do not scrub inflamed skin.
    3. Take out one wipe. Close the container so the remaining wipes do not dry out.
    4. Wipe the targeted skin gently. For paws, separate the toes and reach the skin without forcing or rubbing.
    5. Use a fresh wipe for a different infected or irritated area when cross-contamination is a concern.
    6. Let the area air-dry unless the label says otherwise.
    7. Keep your dog from licking or chewing the area until it is dry. Some veterinary guidance recommends a longer no-lick period, or other practitioners might recommend covering the area with a shirt, so follow the appropriate instructions for your product.
    8. Discard the wipe after one use and wash your hands.

    Frequency and Contact Time

    Most of the time I recommend my clients use these chlorhexidine wipes once a day unless you are treating a very aggressive fungal or bacterial infection. There is no single schedule that fits every wipe. Some labels direct use one to three times daily. A veterinarian may recommend a different schedule based on the diagnosis and formula. Do not increase the frequency because the skin still looks red after one or two applications. More frequent use can worsen dryness or irritation.

    Where You Can Use Chlorhexidine Wipes

    Paws and Between the Toes

    Wipes are convenient for the webbing between toes, nail folds, and small areas of the paw. While you are there check for splinters, grass awns, cuts, swelling, or a broken nail first. Recurrent paw licking often needs a deeper look for allergy, infection, pain, or a foreign object.

    Veterinarian gently cleaning intact skin between a Labrador’s toes with a pet wipe.

    Skin Folds, Underarms, and Groin

    These warm, moist areas are common targets for pet-specific wipes. Gently open the fold, wipe the skin, and let it dry. If the fold smells strong, oozes, hurts, or quickly becomes irritated again, your dog may need cytology and a treatment plan.

    Face and Muzzle

    Never use a chlorhexidine wipe for your dog’s eyes. Use only a product labeled for facial skin. Keep a good distance from the eyes, nostrils, and lips. Do not wipe inside the mouth. If chlorhexidine reaches the eye, rinse with water and seek veterinary advice if irritation continues.

    Veterinarian safely wiping the external facial fold of a calm French bulldog.

    Ears

    Do not push a skin wipe into the ear canal. You may be able to wipe the outer ear flap with an appropriate product, but a newly painful, smelly, red, or draining ear needs an exam. The eardrum cannot be evaluated from home.

    Wounds and Surgical Sites

    Many medicated wipe labels say not to use the product on open wounds, cuts, or raw areas. Do not use a chlorhexidine wipe on an incision or post-surgical site unless the veterinarian who performed the procedure gives you specific instructions.

    My Vet-Selected Chlorhexidine Wipes for Dogs

    These are the five products that I recommend the most. Formulas and labels can change, so confirm the current package before buying or applying any product. My comments reflect practical product differences, not a promise that one wipe will treat every condition.

    Nootie Medicated Dog Wipes

    https://amzn.to/46hb5Cs

    This formula has traditionally paired 2% chlorhexidine with 2% miconazole. I consider it when you need both antibacterial and antifungal topical support. The larger wipe can be useful on the belly or several folds. The scent and residue may be too much for some households, and a strong combination formula is not necessary for routine dirt.

    Pet MD XL Topical Wipes With Aloe

    https://amzn.to/3ZqgzbW

    The XL size is convenient for wider areas. Some Pet MD formulas combine chlorhexidine with ketoconazole, so check the exact listing and label. Aloe and humectants may feel soothing, but inactive ingredients can still irritate a sensitive dog. Close the container firmly because large wipes can dry out.

    Dechra MiconaHex+Triz Wipes

    https://amzn.to/3Lt3w3I

    This type of product combines chlorhexidine, miconazole, and Tris-EDTA. It can be a practical fit when you want a combination product for a small localized area. The jar size and cost may be less convenient for long treatment courses.

    Vetnique Dermabliss Medicated Wipes

    https://amzn.to/3PIZUgp

    Dermabliss products come in more than one strength and formula. Confirm whether you are buying a lower-strength hygiene wipe or a stronger chlorhexidine plus antifungal product. I like the convenience for folds and small areas, but fragrance, residue, and ingredient sensitivity still deserve attention.

    Smiling Paws Medicated Wipes

    https://amzn.to/3rihNcw

    The small wipe size can fit between toes and into narrow folds. Combination versions have included chlorhexidine and ketoconazole. Small pads are less efficient for large areas, and the scent may bother some people or dogs.

    Side Effects and When to Call Your Vet

    Stop Using the Wipes If

    Stop and contact your veterinarian if the skin becomes redder, more swollen, more painful, or itchier after application. Also stop if you see hives, facial swelling, breathing trouble, or a rapidly spreading reaction. Breathing difficulty or significant facial swelling is an emergency.

    Dryness and flaking can occur with repeated use. A reaction may also come from fragrance, preservatives, alcohol, or an added antifungal ingredient rather than chlorhexidine alone.

    Schedule Veterinary Care If

    • The area is open, raw, bleeding, or draining.
    • There is pus, a strong odor, spreading hair loss, crusting, or marked pain.
    • Your dog keeps licking or chewing the same place.
    • The problem returns soon after treatment.
    • The ear is newly painful, smelly, or producing discharge.
    • You are unsure whether the cause is bacterial, fungal, allergic, parasitic, or traumatic.
    • Your dog swallowed a wipe or shows vomiting, drooling, weakness, or other unusual signs.

    A Holistic Look at Recurrent Skin Problems

    Topical care works best when it is part of a bigger plan. Recurrent paw, fold, or skin problems may be driven by allergies, fleas or mites, trapped moisture, anatomy, hormonal disease, or an infection that needs targeted treatment.

    I look at comfort, skin-barrier support, grooming, drying after swimming or bathing, parasite prevention, diet history, and the pattern of flare-ups. The goal is not just to quiet the surface for a day. It is to understand why the problem keeps returning.

    Final Thoughts

    Chlorhexidine wipes can be a useful tool for targeted external skin care. The safest approach is simple: choose a pet-specific formula, follow the exact label, protect the eyes and mucous membranes, prevent licking until dry, and stop if the skin worsens.

    If your dog’s skin problem is persistent or recurrent, you may have to look a little deeper. I’ve observed skin issues that look like a typical infection, but are driven by food sensitivities. Food goes in the mouth, but reactions can appear through the skin. Yes, even the ear canal, between the toes, and the anal glands near the rectum. It's all skin related.

    If you are facing a complicated or confusing issue with your dog and conventional veterinary medicine has failed to clear it, you may want a full holistic veterinary consultation which includes sensitivity testing, nutrition, supplements, and guidance. I offer a limited number of online consults to help pet parents develop a full plan to get your pup feeling better. If I’m all booked up I can point you to a trusted consultant.

    Frequently Asked Questions

    Are chlorhexidine wipes safe for all dogs?

    No product is safe for every dog. Many dogs tolerate pet-specific chlorhexidine wipes when they are used on the right body area and according to the label. Dogs can still react to chlorhexidine or another ingredient.

    Can I use chlorhexidine wipes on a puppy?

    Yes, unless a product label says a specific dog age. Most over the counter wipes sold in stores are safe. Watch closer for reaction or irritation since many young puppies have sensitive skin. Puppies also have smaller bodies and may lick treated areas quickly, so supervision matters.

    How often can I use chlorhexidine wipes?

    I usually recommend using these wipes once a day. Follow the exact product label or your veterinarian’s plan. Depending on the formula and condition, directions may range from occasional use to one or more applications per day. Do not assume more is better.

    What if my dog licks the treated area?

    Prevent licking until the area is fully dry. If your dog swallowed part of a wipe or develops drooling, vomiting, coughing, weakness, or unusual behavior, call your veterinarian or an animal poison service promptly.

    Can I use chlorhexidine wipes in my dog’s ears?

    Do not put a general skin wipe into the ear canal. Wipes can be used in the outer folds of the ear, but if you have an active ear infection use an ear-specific product. In ears, new pain, odor, head shaking, or discharge deserves an examination.

    References

    1. DailyMed. (2023). Pet MD chlorhexidine wipes: Chlorhexidine gluconate and ketoconazole cloth. https://dailymed.nlm.nih.gov/dailymed/drugInfo.cfm?setid=b5e7b5b4-da71-4f32-ac33-0c11e919c54e
    2. Cavana, P., Peano, A., Petit, J.-Y., Tizzani, P., Perrot, S., Bensignor, E., & Guillot, J. (2015). A pilot study of the efficacy of wipes containing chlorhexidine 0.3%, climbazole 0.5% and Tris-EDTA to reduce Malassezia pachydermatis populations on canine skin. Veterinary Dermatology, 26(4), 278-e61. https://doi.org/10.1111/vde.12220
    3. Murayama, N., Nagata, M., Terada, Y., Shibata, S., & Fukata, T. (2010). Efficacy of a surgical scrub including 2% chlorhexidine acetate for canine superficial pyoderma. Veterinary Dermatology, 21(6), 586-592. https://doi.org/10.1111/j.1365-3164.2010.00898.x

    A note about your dog’s health

    This article provides general education and does not replace an examination, diagnosis, or individualized advice from your veterinarian. Contact a veterinary professional if you are concerned about your dog’s symptoms.

    Dr. Candy Akers, DVM Avatar

    ABOUT THE AUTHOR
  • Wart on Your Dog’s Head? Natural Care and Next Steps

    Wart on Your Dog’s Head? Natural Care and Next Steps

    A wart-like bump on your dog’s head may be a viral papilloma, but not every bump is a wart. Young dogs are more likely to develop contagious oral papillomas. Older dogs commonly develop nonviral sebaceous growths that can look like warts. Cysts and several types of tumors can look similar, too.

    That is why my first step is identification, not removal. Take a clear photo, measure the bump, and note whether it is changing. Do not cut, squeeze, freeze, burn, or tie it off. Never put human wart remover on a dog.

    If the growth is new, changing, bleeding, painful, or close to the eye, mouth, nose, or ear canal, arrange a veterinary exam. If your veterinarian confirms a harmless papilloma or sebaceous growth, you can discuss gentle natural support and whether simple monitoring is the best plan.

    First, Make Sure It Is Really a Wart

    A true papilloma is a growth caused by a canine papillomavirus. It may be pale, pink, gray, or dark. Some are smooth, while others have a rough, frond-like, or cauliflower-like surface. They may appear alone or in clusters.

    The dog’s age and the growth’s location offer useful clues, but they do not provide a diagnosis.

    Puppies and young dogs often develop multiple viral papillomas around the lips, inside the mouth, or on the muzzle. These may show up after close contact with other dogs. Less common papillomavirus-related growths can occur on the skin, feet, or other areas. Researchers have identified several canine papillomaviruses associated with oral papillomas, skin papillomas, and pigmented plaques.[1]

    In a middle-aged or older dog, a solitary “wart” is often something else. Sebaceous hyperplasia and sebaceous adenomas are common wart-like growths in older dogs, especially on the head, ears, and back.[3] Most sebaceous growths are benign, but other skin tumors can have a similar appearance.[4]

    A veterinarian may recognize a typical benign growth during an exam. If the appearance is uncertain, a needle sample or biopsy may be recommended. This is especially important before applying anything that could inflame the tissue and make the lesion harder to evaluate.

    Young dog with oral papillomas compared with an older dog with a solitary head growth

    Quick Decision Guide: Watch or Call the Vet?

    You may be able to monitor a growth briefly when all of these are true:

    • It is small and has not changed.
    • The surface is intact, with no bleeding or discharge.
    • Your dog is not scratching, rubbing, or reacting to touch.
    • It is not on an eyelid, at the eye’s edge, inside the mouth, in the ear canal, or beside a nostril.
    • Your veterinarian has seen it before or has advised you that short-term monitoring is reasonable.

    Schedule an exam promptly if the growth:

    • Enlarges or changes color, shape, or texture
    • Bleeds, crusts, opens, or produces discharge
    • Feels firmly attached beneath the skin
    • Becomes painful, itchy, or repeatedly traumatized
    • Appears with facial swelling or enlarged lymph nodes
    • Interferes with blinking, seeing, eating, drinking, breathing, or hearing
    • Persists when a suspected viral papilloma should be improving
    • Develops in a dog taking immune-suppressing medication or living with a condition that affects immunity

    Seek same-day care for uncontrolled bleeding, trouble breathing, a painful eye, rapid facial swelling, or a dog who cannot eat or drink comfortably.

    What Causes True Dog Warts?

    Canine papillomaviruses infect surface cells of the skin or mucous membranes. As those cells multiply, they create the raised, sometimes cauliflower-like growth owners recognize as a wart. Different canine papillomaviruses are linked to different lesion patterns.[1]

    Oral papillomas can spread between dogs through close contact and through shared items such as chew toys, bowls, and water dishes. A daycare outbreak affected 13 of 52 dogs, and investigators considered unnoticed viral shedding a possible part of the spread.[2]

    These are canine viruses, not the human papillomaviruses that cause warts in people. Dog papillomas are not considered a human contagion risk. Still, a dog with active oral papillomas should avoid close-contact group play and shared chew items until a veterinarian says it is reasonable to return.

    Young dogs are affected most often because their immune response is still maturing. Dogs with weakened immunity can also have more persistent disease. A papilloma is not a sign that a dog is dirty, and a caring owner cannot always prevent exposure.

    How Long Do Dog Warts Last?

    Many true viral papillomas shrink once the dog’s immune system recognizes the infection. In a typical young dog, improvement may occur over several weeks, with full regression taking a few weeks to a few months.

    That timeline is not a guarantee. A growth that stays the same may still be benign, especially when it is a nonviral sebaceous growth. A bump that enlarges, changes, bleeds, or fails to follow the expected course should be reassessed.

    Do not keep treating a presumed wart for months without knowing what it is. A photo log is useful, but it does not replace an exam when the lesion changes.

    Safe Natural Care at Home

    I take holistic options seriously, but “natural” does not automatically mean gentle or appropriate for every location. Head growths deserve extra caution because the eyes, ears, mouth, and nose are close by.

    Start with monitoring

    Take a photo in good light with a ruler beside the bump. Repeat the photo from the same angle once a week. Record the date, size, color, surface, and whether your dog rubs or scratches it. This gives your veterinarian a more useful history than memory alone.

    Owner photographing and measuring a small wart-like growth on a dog's head

    Prevent trauma

    Try to stop scratching and rubbing. Keep collars, harness straps, and grooming tools from catching the growth. If it is in a spot your dog can scratch, ask your veterinarian whether a soft recovery collar is appropriate. Do not cover a head growth with a tight adhesive bandage.

    Keep the area simple

    If the surrounding skin gets dirty, ask your veterinarian what cleanser is appropriate for that location. Avoid scrubbing the growth. Do not apply products to an open, bleeding, or infected-looking surface.

    Holistic immune and nutrition support

    In my holistic practice, I use nutrition, rest, and targeted whole-food support to help the immune system respond as effectively as possible. Dogs with healthy immune function are often better able to resolve viral papillomas, so immune support is a practical part of my treatment plan once I have confirmed what the growth is.

    Thuja is one of the homeopathic remedies I consider for classic wart-like growths. I choose it based on the dog’s age, health history, lesion pattern, and the rest of the treatment plan. I do not use it blindly for every lump, because sebaceous growths, cysts, and tumors can look like warts. Once the growth has been appropriately identified, Thuja can be a useful part of a veterinarian-guided holistic plan.

    Topical products need strict limits

    Castor oil, vitamin E, and aloe vera gel are sometimes chosen to moisturize or soothe intact skin. They are not proven wart removers. On a veterinarian-identified benign growth, your veterinarian may approve a pet-safe product for the surrounding intact skin. Keep it away from the eyes, mouth, ear canal, and any raw surface, and prevent licking.

    Apple cider vinegar is often promoted online for dog warts, but I do not recommend applying it to a head growth. It is acidic and can sting or irritate the skin, especially near an eye, on thin facial skin, or on ulcerated tissue. Irritation is not evidence that a wart is “dying.”

    Stop any topical product if you see redness, swelling, pain, discharge, or increased rubbing. When in doubt, leave the bump alone until it has been examined.

    What Not to Do to a Dog Wart

    Home removal can turn a minor problem into bleeding, infection, pain, or a delayed diagnosis. Avoid all of the following:

    • Cutting or clipping the growth
    • Squeezing, puncturing, or picking at it
    • Tying floss or thread around its base
    • Freezing or burning it
    • Applying salicylic acid or another human wart remover
    • Using essential oils or caustic plant extracts
    • Repeatedly soaking it in apple cider vinegar
    • Covering it with a tight or adhesive bandage
    • Giving a supplement in a human dose without veterinary guidance

    Even a benign-looking growth can have a strong blood supply. A dark, rough, or stalked lesion is not automatically safe to remove at home.

    How a Veterinarian May Diagnose and Treat It

    Your veterinarian will consider your dog’s age, medical history, medications, growth rate, and the exact location of the bump. They may check the mouth, lips, eyelids, ears, skin, and nearby lymph nodes for other lesions.

    Veterinarian examining a wart-like growth near a dog's outer ear

    Some masses release enough cells for a fine-needle sample to be helpful. Others require a biopsy or complete removal for a tissue diagnosis. A biopsy recommendation does not mean your veterinarian has decided the growth is cancer. It means appearance alone is not giving a reliable answer.

    A typical viral papilloma that is not causing trouble may simply be observed while the immune system responds. Treatment or removal may be appropriate when a growth:

    • Bleeds or becomes infected
    • Is repeatedly scratched or rubbed
    • Interferes with vision, eating, or breathing
    • Persists or continues to grow
    • Has an uncertain diagnosis
    • Occurs in a dog with impaired immunity
    • Causes pain or a meaningful quality-of-life problem

    The right plan depends on the diagnosis and location. A small eyelid mass, for example, may need attention sooner than a larger bump on the top of the head because it can rub the cornea.

    Can Dog Warts Be Prevented?

    There is no way to prevent every canine papilloma. During an active oral papilloma outbreak, reduce close muzzle-to-muzzle contact and do not share bowls, water dishes, chew toys, or grooming tools. Clean communal items and follow your veterinarian’s guidance about daycare, boarding, and dog-park visits.

    Balanced nutrition, appropriate exercise, rest, parasite control, and management of underlying disease support general health. They do not create a guarantee against warts.

    For older dogs, routine skin checks matter. Run your hands over the head, ears, neck, and body once a month. Photograph new lumps and mention them at the next veterinary visit, or sooner if they change.

    Final Takeaway

    Most wart-like bumps on a dog’s head are not an emergency, and many are benign. The safest natural approach begins with knowing what you are treating. Photograph and measure the growth, prevent rubbing, and skip caustic or destructive remedies.

    Once your veterinarian identifies the bump, you can decide together whether observation, gentle supportive care, sampling, or removal makes sense. If the growth is new, changing, bleeding, painful, or close to the eye, mouth, nose, or ear canal, contact your veterinarian and book a skin-lump examination.

    Frequently Asked Questions

    What is the fastest way to get rid of dog warts?

    There is no safe instant home method. A true viral papilloma often regresses as the immune system responds. A growth that is traumatized, persistent, or uncertain may need veterinary removal or sampling. Cutting, freezing, tying off, or applying human wart remover can cause injury and delay the correct diagnosis.

    What does a papilloma look like on a dog?

    A papilloma may be smooth or rough, pale or pigmented, and single or clustered. Many oral papillomas have a frond-like or cauliflower-like surface around the lips, mouth, or muzzle. Sebaceous growths and several tumors can look similar, so a photo cannot confirm the diagnosis.

    Are dog warts contagious to humans or other pets?

    Canine papillomaviruses are host-adapted and are not considered contagious to people. Oral papillomas can spread between dogs through close contact and shared items. They are not expected to infect cats, but an affected dog should avoid communal toys and bowls until a veterinarian advises otherwise.

    Will a dog wart go away on its own?

    Many viral papillomas in young dogs improve over several weeks and disappear within a few months. Nonviral wart-like growths may remain. If a bump grows, bleeds, changes, causes discomfort, or does not follow the expected course, have it checked.

    How can I tell a wart from a cancerous growth?

    You cannot always tell by looking. Rapid growth, ulceration, bleeding, pain, irregular pigment, fixation, or nearby swelling raise concern, but some important tumors look harmless and some benign growths look alarming. A veterinary exam, cytology, or biopsy provides a more reliable answer.

    References

    1. Medeiros-Fonseca, B., Faustino-Rocha, A. I., Medeiros, R., Oliveira, P. A., & Gil da Costa, R. M. (2023). Canine and feline papillomaviruses: An update. Frontiers in Veterinary Science, 10, 1174673. https://doi.org/10.3389/fvets.2023.1174673

    2. Lane, H. E., Weese, J. S., & Stull, J. W. (2017). Canine oral papillomavirus outbreak at a dog daycare facility. Canadian Veterinary Journal, 58(7), 747–749. https://pmc.ncbi.nlm.nih.gov/articles/PMC5479657/

    3. Yasuno, K., et al. (2016). Immunohistochemical characterization of sebaceous epithelioma in dogs. Journal of Veterinary Medical Science, 78(6), 899–902. https://pmc.ncbi.nlm.nih.gov/articles/PMC5090144/

    4. MSD Veterinary Manual. (n.d.). Tumors of the skin in dogs. https://www.msdvetmanual.com/dog-owners/skin-disorders-of-dogs/tumors-of-the-skin-in-dogs

    5. Standard Process. (n.d.). Immuplex. https://www.standardprocess.com/products/immuplex

    Dr. Candy Akers, DVM Avatar

    ABOUT THE AUTHOR
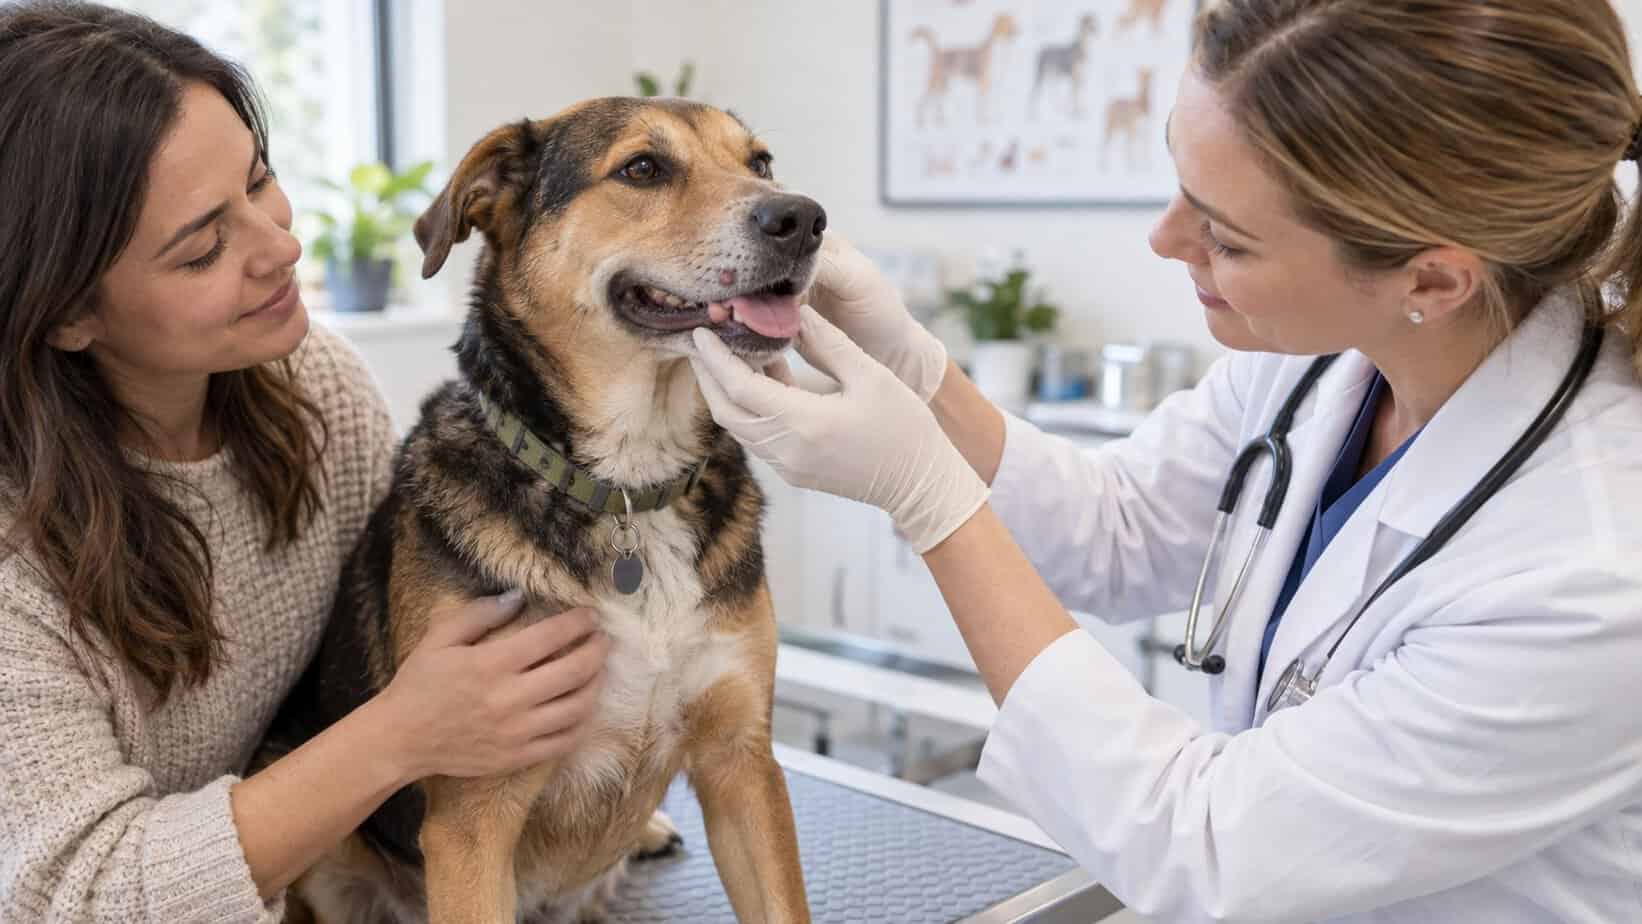
  • Best Antifungal Wipes for Dogs: 5 OTC Picks From a Vet

    Best Antifungal Wipes for Dogs: 5 OTC Picks From a Vet

    Medicated antifungal wipes can be a good choice when your dog has a small, localized problem on a paw, ear, between skin folds, under an arm, or around the groin. I usually look for a clearly labeled veterinary product with chlorhexidine plus an azole antifungal such as ketoconazole or miconazole. The right formula depends on the body area and what is actually causing the skin irritation.

    Best Antifungal Wipes for Dogs: Quick Pick

    My best overall recommendation is Vetnique Dermabliss Medicated Wipes because the chlorhexidine-and-ketoconazole formula fits the most common skin need: convenient care for a small patch of skin or a hard-to-reach fold.

    Smiling Paws is useful for very small areas, Dechra MiconaHex + Triz offers a familiar veterinary-style formula, Nootie gives you a larger pad, and Curaseb is the ear-specific option. Do not put a skin wipe in the ear, and do not apply any medicated wipe to open or ulcerated skin unless the label or your veterinarian specifically directs it.

    Dog wipes have become more popular in the past few years. The wipe products have been found to be very effective, while also being super convenient. A small study in dogs found that wipes containing chlorhexidine, climbazole, and Tris-EDTA substantially reduced Malassezia yeast populations on treated skin. [1]

    Antifungal Wipes for Dogs at a Glance

    ProductFormula FocusBest ForPotential Drawback
    Vetnique DermablissChlorhexidine plus ketoconazoleBest overall for small skin areas and foldsSmall pad; confirm the latest label
    Smiling PawsChlorhexidine plus ketoconazoleToes, facial folds, and other tight spacesToo small for broad areas
    Dechra MiconaHex + TrizChlorhexidine, miconazole, and TrizEDTATargeted veterinary-style maintenanceMay leave a noticeable residue
    Nootie Medicated Wipes2% chlorhexidine plus 2% miconazoleLarger localized areasA shampoo or spray may be easier for widespread trouble
    Curaseb Ear Treatment WipesEar-focused medicated formulaAccessible outer-ear foldsNot a substitute for a skin wipe or treatment deep in the ear canal

    Understanding Canine Fungal Infections


    Fungal infections are common in dogs, but they do not all look or behave the same way. Some affect the skin, while others show up in the paws, skin folds, ears, or nose. Knowing the basic differences helps you choose sensible home care and recognize when a problem needs a closer look.

    What Are Canine Fungal Infections?


    Fungi are microorganisms that thrive in warm, moist places. Some live naturally on a dog’s skin without causing trouble. When the normal balance changes, however, those organisms can multiply and irritate the skin.

    Common Types of Fungal Infections in Dogs

    • Ringworm (dermatophytosis): Despite the name, ringworm is not a worm. It is a fungal infection that can cause circular, red, scaly patches and may spread to other animals or people.
    • Yeast infections (Malassezia dermatitis): Yeast commonly causes trouble in the ears, paws, and skin folds. Watch for itching, redness, greasy skin, or a distinctive odor.
    • Aspergillosis: This fungal infection usually affects the nasal cavity. Signs can include nasal discharge, nosebleeds, or swelling around the nose.

    Symptoms to Watch For

    – More itching or scratching than usual
    – Red, inflamed, or scaly skin
    – Patches of hair loss
    – An unpleasant odor from the skin or ears
    – Discharge from the ears or nose
    – Swelling or warmth in an affected area

    Causes and Risk Factors

    Warmth and moisture give fungi an easy place to grow. A dog may also be more vulnerable when allergies, hormone imbalances, immune problems, or prolonged antibiotic or steroid use disturb the skin’s normal defenses.

    Why Early Care Matters

    An irritated patch is much easier to manage before a dog has scratched it raw or spread the problem to a larger area. Some fungal infections can also pass to other pets or people. If the area keeps spreading, becomes painful, or returns soon after treatment, it is time to find out what is driving it rather than continuing to wipe the surface.

    Why Use Antifungal Wipes for Dogs?

    Pet parents often ask me for a practical option between full baths. Antifungal wipes fill that role nicely when the affected area is small and the product matches the problem.

    • They are convenient. The wipes come pre-moistened, so there is nothing to mix and very little mess. They are easy to keep on hand at home or while traveling.
    • They provide targeted care. A wipe lets you reach a paw, skin fold, outer ear flap, or other specific spot without treating the whole dog.
    • They can limit surface spread. Regularly cleaning areas that tend to stay damp can help keep yeast and other microbes from getting comfortable.
    • They are often less stressful than a bath. Some dogs will accept a quick, gentle wipe much more readily than a shampoo or spray treatment.
    • They can complement other treatment. When a dog is also receiving oral medication or another topical treatment, a wipe can support local skin care and help the area recover.

    Antifungal wipes are not the right answer for every rash or itchy spot, but they are a useful tool when you know what you are treating and choose a formula made for that part of the body.

    How I Chose These Medicated Wipes

    I ranked these products by the clarity of their formula, the body area they are meant for, pad size, ease of use, and how practical they are for a real dog-care routine. A good wipe should put the medication where you need it without turning a small paw or fold problem into a full bath.

    I also separate product specifications from proof of effectiveness. An ingredient list tells us what is in the jar. It does not tell us what organism is on your dog, whether the concentration is right for that problem, or whether a fungal infection is driving the cycle. The Merck Veterinary Manual notes that a topical wipe or cream can be appropriate for focal lesions, while also stressing that the underlying condition predisposing the skin to infection must be managed. [2]

    Formulas can change. Before you buy or apply any wipe, read the latest package label and make sure it matches the body area you plan to treat.

    The 5 Best OTC Antifungal Wipes for Dogs

    1. Vetnique Dermabliss Medicated Pet Wipes: Best Overall

    Vetnique Dermabliss is my best all-around choice for a small, localized patch because it combines chlorhexidine with ketoconazole in a convenient pad. This pairing gives owners a practical way to address a spot where both bacterial and yeast overgrowth may be part of the picture.

    Pros
    Veterinary-strength formula: These wipes contain 2% chlorhexidine, which helps reduce bacteria on the skin, and 1% ketoconazole, an antifungal ingredient. The combination is useful for skin problems such as ringworm and seborrhea.
    Easy and convenient: The small wipes are made for quick, targeted cleaning at home or on the go.
    Soothing aloe: Aloe vera leaf juice can calm itching and irritated skin, which is especially welcome for dogs with allergies or skin sensitivities.
    Cons
    Some customers report that the product leaves a residue that they or their pets find unpleasant.
    Great for: Irritated skin and mild infections

    Keep in mind: Do not use near the eyes or inside the ear unless the exact label says that use is safe.

    2. Smiling Paws Medicated Wipes: Best for Small, Hard-to-Reach Areas

    The Smiling Paws Pets Medicated Antibacterial & Antifungal Wipes are a handy size for tight spaces. They are easiest to use between toes, around nail folds, and in small facial or body folds where a large pad feels clumsy.

    Pros
    Broad topical support: Ketoconazole and chlorhexidine help address yeast, fungus, and bacteria on the skin. The formula is marketed for concerns that include mange, ringworm, hot spots, and pyoderma.
    A useful size for tight spaces: At about 2.5 by 2.5 inches, the thin wipes can reach paws and small creases without feeling bulky.
    Soothing ingredients: Aloe and essential fatty acids help calm irritated areas while the active ingredients do their work.
    Cons
    The container may not last long when a dog needs repeated treatment or when several pets are being treated.
    Some customers dislike the scent, especially those who prefer fragrance-free products.
    Great for: Hot spots, superficial infections, and crusty hair loss along the edge of the ear

    Keep in mind: Be sure to avoid the eyes and mucous membranes and to stop and consult a veterinarian if irritation develops or increases. [3] Always compare the jar in your hand with the label because brand ownership, packaging, and formulas can change.

    3. Dechra MiconaHex + Triz Wipes: Best Veterinary-Style Formula

    The Dechra MiconaHex + Triz Wipes combine a familiar topical approach: chlorhexidine, miconazole, and TrizEDTA. I like this type of formula for targeted maintenance when you have already identified the problem and want an easy way to reach paws, folds, or other small skin areas.

    Pros
    These versatile wipes can be used for dogs, cats, and horses, which is convenient in a multi-pet household.
    Customer reviews describe improvement in yeast-related skin trouble, itching, and redness.
    They are simple to use and less messy than many shampoos or sprays.
    Cons
    The small wipe size can be frustrating on a large dog or when you need to cover a broad area.
    The 50-count package can become expensive when a skin problem needs ongoing care.
    Great for: Small spots or areas with crusty hair loss, or focused maintenance in a diagnosis-guided skin plan.

    Keep in mind: The strong antiseptic formula can sometimes cause pain or irritation if the skin is affected deeply, cracked, or bleeding.

    4. Nootie Medicated Wipes: Best Larger Pad

    The Nootie Medicated Dog Wipes use 2% chlorhexidine and 2% miconazole in a larger pad. That extra surface area is useful when you are treating more than one toe, a broad fold, or a patch on the belly and do not want to reach for several tiny wipes.

    Pros
    The combination of 2% chlorhexidine and 2% miconazole is intended for problems that include ringworm, hot spots, allergy dermatitis, and ear or skin infections.
    The 2-inch wipes fit into hard-to-reach areas, and the 70-count package gives you a useful supply.
    Pet parents describe them as easy to use for irritated, itchy skin.
    Cons
    The scent is fairly strong. It is not necessarily unpleasant, but some people may find the added fragrance bothersome.
    The formula can leave a sticky residue on your hands.
    Great for: Stubborn fungal infections and ringworm, or larger but still localized areas.

    Keep in mind: Widespread or deep skin disease deserves a veterinarian’s examination rather than a larger stack of wipes.

    5. Curaseb Ear Treatment Wipes: Best Ear-Specific Option

    Curaseb Cat & Dog Ear Infection Treatment Wipes belong in a separate category. They are designed for the accessible parts of the outer ear, not for general body skin and not for pushing down into the ear canal.

    Ear odor and debris may accompany yeast, bacteria, allergy, a foreign body, or ear mites. A wipe can clean what you can safely see, but it cannot tell you why the ear is inflamed. Pain, marked swelling, a head tilt, loss of balance, pus, blood, or repeated trouble calls for a prompt veterinary visit.

    Pros
    These wipes are made to soothe itchy, inflamed ears while removing wax, dirt, and discharge from the areas you can safely see and reach.
    Curaseb makes its pet health products in the United States with an emphasis on quality and safety. I’ve been using this brand for decades, and I always have good results.
    The wipes are quick to use and have a cucumber-melon scent that many pet parents find pleasant.
    Cons
    A 100-count container can still run out quickly when a dog with chronic ear trouble needs daily cleaning.
    No ear product works the same way for every dog. Some dogs take several days to improve, while others need a different approach.
    Great for: Puppies and breeds with shorter hair. Quick maintenance cleaning of accessible outer-ear folds.

    Keep in mind: Never insert a wipe deeply into the canal or use a skin product in the ear just because the ingredients look similar.

    How to Choose the Right Wipe

    Choose by Body Area

    Start with location. Paws, groin, underarms, and skin folds need a product labeled for skin. The outer ear needs an ear-specific product. The eyes, lips, genital mucosa, open wounds, and deep ear canal deserve extra caution because a product that is comfortable on intact skin may be painful or unsafe there.

    If the label does not name the body area you intend to treat, choose another product or ask your vet. Pad size matters more than it seems. Small rounds are precise between toes. Larger squares cover a belly patch faster. When you need to wipe the same broad area repeatedly, consider whether a spray, mousse, or shampoo would make the routine gentler and more even.

    Ingredients to Look for in Antifungal Wipes

    The active ingredients tell you far more than the front of the package. Some formulas focus on fungus or yeast, some also address bacteria, and others add soothing ingredients to make repeated use more comfortable.

    Ketoconazole

    Ketoconazole is an antifungal medication. It disrupts the fungal cell membrane, which makes it useful against a broad range of fungi and explains why it appears in many medicated pet wipes.

    Chlorhexidine

    Chlorhexidine is an antiseptic and disinfectant with antibacterial and antifungal activity. It helps reduce yeast and bacteria on the skin surface, supporting a healthier environment while irritated skin settles down.

    Aloe Vera

    Aloe vera is not an antifungal ingredient, but it can soothe itching and inflammation. It also supports skin comfort and hydration while the medicated ingredients address the infection.

    Witch Hazel

    Witch hazel is a natural astringent that can calm irritated skin and help dry weepy areas where fungi tend to thrive. Multiple applications in a row can dry out the skin or cause irritation.

    Boric Acid

    Boric acid has antiseptic properties and can slow the growth of fungi and bacteria. It is often used for yeast-related problems and can help restore a healthier skin environment.

    Salicylic Acid

    Salicylic acid helps loosen and remove dead skin cells. That gentle exfoliating action reduces buildup where fungi or skin mites can flourish and can also ease redness and inflammation.


    When comparing antifungal wipes, look for a formula that pairs an appropriate antifungal or antiseptic with soothing ingredients. If the label does not make it clear where the product can be used, choose a different one rather than guessing.

    Consider Sensitive Skin, Scent, Pad Size, and Packaging

    For a dog with reactive skin, test a small area first. Always watch for increased redness, heat, swelling, discomfort, or frantic licking.

    Dr. Candy’s Pro-Tip: One additional tip that I can offer is to look at the container the wipes come in and choose a package that seals well. I personally get frustrated when I go to get a wipe but the sticker-type lid came open while in the cabinet. A medically sensible formula is not useful if the pads dry out before you finish the container. I also favor a pad you can handle without scrubbing. More friction is not more treatment.

    When Antifungal Wipes Can Help

    Medicated wipes make the most sense for a small area with a known or strongly suspected superficial overgrowth, especially when your veterinarian has already seen a similar episode. Common places include skin folds, between the toes, around nail beds, under the arms, and the groin.

    Malassezia pachydermatis is a yeast that normally lives on canine skin. Changes in the skin environment or the dog’s defenses can allow it to multiply. In the pilot wipe study, the treated areas included the axillae, groin, perianal area, and umbilical region, which helps explain why wipes are so often discussed for folds and localized sites. [1]

    Owner gently cleaning the outer facial fold of a calm French bulldog with a wipe

    A wipe is a poor fit for widespread hair loss, open or oozing sores, deep swelling, severe pain, rapidly spreading redness, or a dog who feels ill. Ringworm, parasites, bacterial infection, allergy, and immune or hormonal disease can overlap in appearance. If you keep treating the surface without understanding the pattern, the skin may improve briefly and then flare again.

    How to Use Antifungal Wipes Safely

    Medicated wipes are simple to use, but they still contain active ingredients. A few sensible habits make the treatment more comfortable for your dog and help prevent avoidable irritation.

    1. Read the label first. Products differ in how often they should be used, where they can be applied, and how they should be stored.
    2. Stay away from the eyes and mouth. A skin wipe can sting or irritate these sensitive tissues. Use an ear wipe only where the label directs, and never push it deep into the canal.
    3. Watch the first application closely. Check for new redness, swelling, itching, or unusual behavior. Stop using the product if the area becomes more irritated.
    4. Store the container out of reach. A curious dog may chew the package or swallow a wipe.
    5. Wash your hands afterward. This keeps medication from accidentally reaching your own eyes, mouth, or other sensitive areas.

    A medicated wipe should make home care easier, not turn it into a wrestling match or leave the skin looking angrier. Gentle application and a formula that suits the location usually make all the difference.

    Owner gently applying a medicated wipe between a calm Labrador retriever's toes

    What to Do About Licking or Irritation

    If your dog licks a freshly treated area, prevent more access and check the product label. If they ate the packaging or whole wipes call your veterinarian or an animal poison resource. Check if a meaningful amount may have been swallowed or if drooling, vomiting, weakness, coughing, or other symptoms appear.

    Offer a distraction to your dog when you apply an antifungal wipe. A toy or small treat can keep your dog busy for a few minutes while the area dries.

    Stop using the product and seek guidance if redness, swelling, pain, or itching increases. [3]

    A Holistic Plan for Recurring Skin Trouble

    Moisture, Friction, and the Home Environment

    Yeast and bacterial overgrowth are often the visible end of a longer story. Damp paws, deep folds, swimming, humid weather, tight collars or harnesses, repeated licking, and friction can keep the skin barrier under stress.

    Dry paws and folds well after bathing or wet walks. Wash bedding and grooming tools regularly. Keep hair mats from trapping moisture. If one season, room, cleaning product, or outdoor route seems to trigger a flare, write it down. A simple log can reveal patterns that are easy to miss from day to day.

    Nutrition, Allergy Patterns, and Skin-Barrier Support

    I look at skin from the inside and the outside. Nutrition, digestion, allergy patterns, grooming, stress, sleep, medications, movement, and the home environment all matter. A wipe may reduce surface organisms, but it cannot correct an allergy or rebuild a chronically damaged skin barrier on its own.

    Herbal or botanical options deserve thoughtful attention, not casual mixing. A systematic review found promising antibacterial, antifungal, anti-inflammatory, and wound-supporting signals for several medicinal plants. [4] But I don’t recommend making up a homemade antifungal wipe recipe or applying concentrated essential oils.

    You can find safe recipes and directions in holistic pet care books. My newest go-to is ‘The Forever Dog Life’ written by Dr. Karen Becker and Rodney Habib. I’m always reaching for Chapter 6 which covers recipes for the body.

    Wipes vs. Shampoo, Spray, or Prescription Treatment

    Choose a wipe when the area is small, easy to reach, and appropriate for the label. Choose a shampoo when several body regions need even coverage and your dog can tolerate bathing and contact time. A spray or mousse may be easier for a medium-sized area or a dog who dislikes rubbing.

    Prescription or systemic treatment may be needed when infection is confirmed, lesions are deep or widespread, topical care has failed, or an underlying immune disorder is driving repeated flares.

    When Your Dog Needs a Veterinarian

    Arrange veterinary care promptly for open sores, pus, bleeding, severe pain, rapidly spreading redness, marked swelling, strong discharge, fever, lethargy, facial swelling, or breathing trouble. Ear pain, a head tilt, loss of balance, or a swollen ear flap also deserves prompt attention.

    Veterinarian examining the skin on a calm dog's front leg while the owner provides reassurance

    Book a recheck when the problem returns as soon as you stop wiping, spreads to new places, or fails to improve during the label-directed period. Your veterinarian may use skin cytology, fungal testing, culture, or other diagnostics to distinguish yeast, bacteria, dermatophytes, parasites, and inflammatory disease. That clarity can save your dog from weeks of trial and error.

    If you have tried conventional treatment patterns such as systemic antibiotics or steroids, you may need more personal guidance from a holistic or integrative veterinarian. I do a limited number of online consults that will go over a full plan to get your pup back on track. It includes food sensitivity testing, nutrition, supplements, topical care and more.

    Final Thoughts

    Fungal skin problems can make a dog miserable, even when the affected area looks small. Antifungal wipes give you a practical way to care for paws, folds, the outer ear flap, and other targeted areas without putting your dog through a full bath every time.
    Choose the product by its active ingredients and intended body area, then pay attention to how the skin responds. If the irritation is severe, persistent, or keeps coming back, the next useful step is figuring out why. The goal is not simply a cleaner patch of skin. It is a dog who feels comfortable again.

    Frequently Asked Questions

    How Often Should I Use Antifungal Wipes on My Dog?

    Follow the exact product label or your veterinarian’s plan. Frequency varies with the active ingredients, body area, diagnosis, and skin sensitivity. Using a wipe more often is not automatically more effective and can increase irritation.

    Can I Use Human Antifungal Wipes on My Dog?

    I do not recommend using a human antifungal wipe unless your veterinarian has reviewed the exact product and body area. Human products may have different active ingredients, concentrations, fragrances, solvents, and warnings, and dogs are likely to lick treated skin.

    What Should I Do if My Dog Licks the Treated Area?

    Prevent more licking, read the label, and watch your dog closely. Contact your veterinarian or an animal poison resource if a meaningful amount may have been swallowed or if your dog develops drooling, vomiting, coughing, weakness, or unusual behavior.

    How Long Should It Take to See Improvement?

    There is no honest one-size-fits-all promise. A localized superficial problem may begin to look calmer during the first week if the product matches the cause. If the skin worsens, remains painful, spreads, or does not improve as the label predicts, stop guessing and arrange a veterinary examination.

    Can Antifungal Wipes Cause Side Effects?

    Most dogs tolerate pet-specific antifungal wipes well. Possible problems include dryness, redness, stinging, increased itching, or contact sensitivity. Stop the product and get advice if irritation increases. Seek urgent care for facial swelling, hives, breathing difficulty, collapse, or another severe reaction.

    References

    1. Cavana, P., Peano, A., Petit, J.-Y., Tizzani, P., Perrot, S., Bensignor, E., & Guillot, J. (2015). A pilot study of the efficacy of wipes containing chlorhexidine 0.3%, climbazole 0.5% and Tris-EDTA to reduce Malassezia pachydermatis populations on canine skin. Veterinary Dermatology, 26(4), 278-e61. https://pmc.ncbi.nlm.nih.gov/articles/PMC4660877/
    2. Merck Veterinary Manual. (n.d.). Pyoderma in dogs and cats. https://www.merckvetmanual.com/integumentary-system/pyoderma/pyoderma-in-dogs-and-cats
    3. U.S. National Library of Medicine. (n.d.). Antibacterial & antifungal medicated wipes. DailyMed. https://dailymed.nlm.nih.gov/dailymed/fda/fdaDrugXsl.cfm?setid=0346ba3c-5e6b-45e2-bd06-653f267f4e2e&type=display
    4. Tresch, M., Mevissen, M., Ayrle, H., Melzig, M. F., Roosje, P., & Walkenhorst, M. (2019). Medicinal plants as therapeutic options for topical treatment in canine dermatology? A systematic review. BMC Veterinary Research, 15, 174. https://bmcvetres.biomedcentral.com/articles/10.1186/s12917-019-1854-4

    A note about your dog’s health

    This article provides general education and does not replace an examination, diagnosis, or individualized advice from your veterinarian. Contact a veterinary professional if you are concerned about your dog’s symptoms.

    Dr. Candy Akers, DVM Avatar

    ABOUT THE AUTHOR
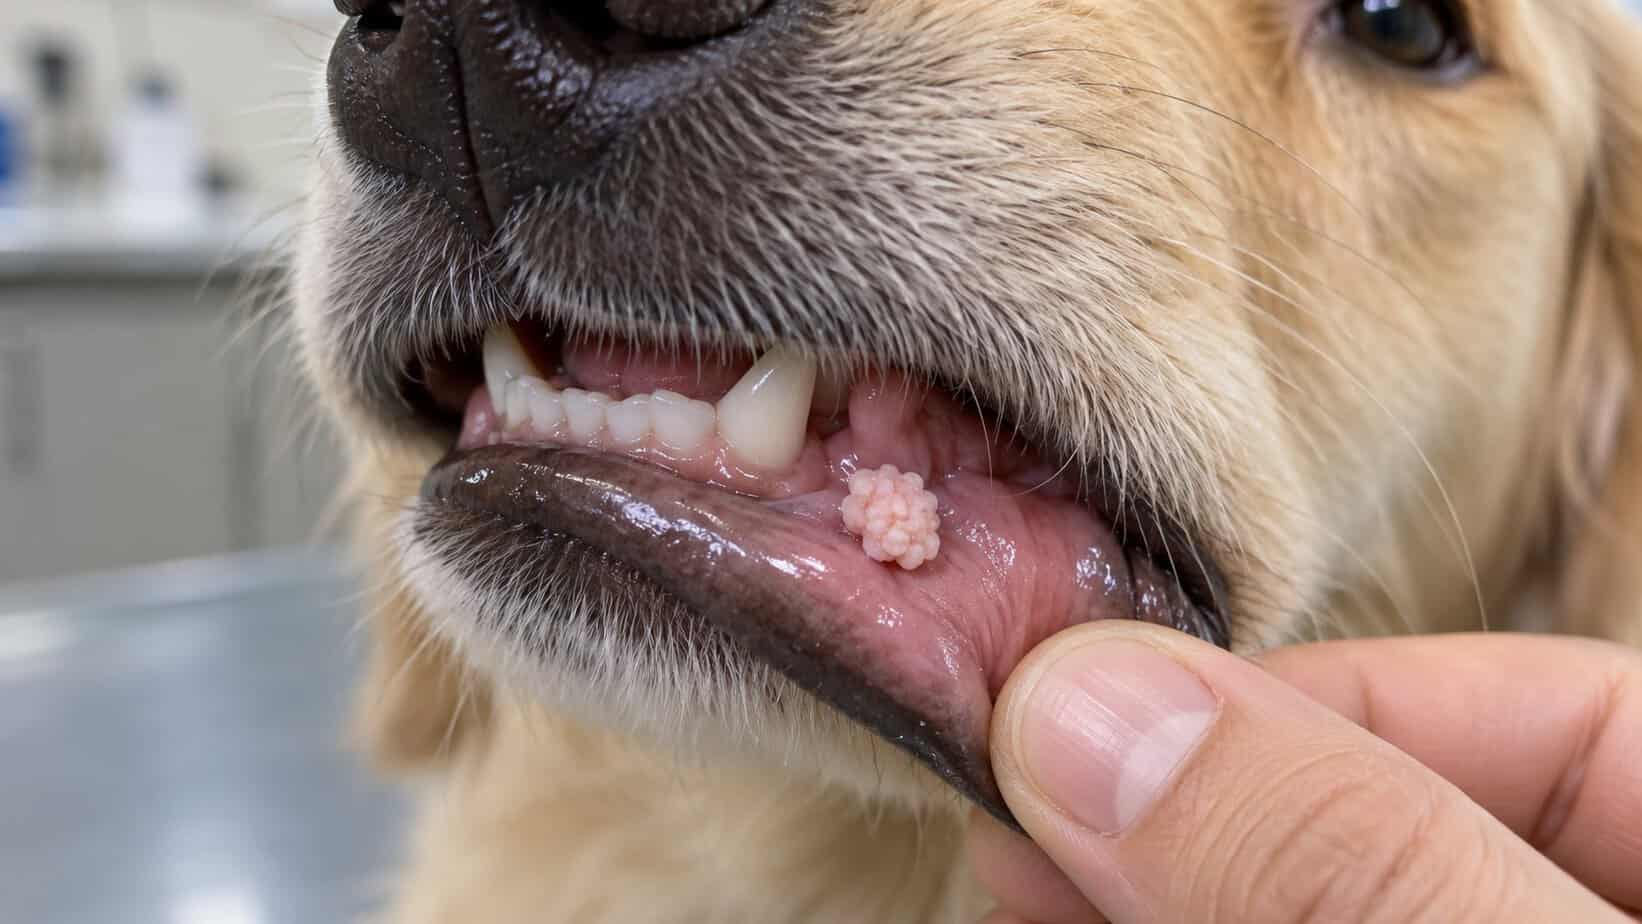
  • Wrinkle Wipes For Dogs – Cleaning Tips & Best Ones Ranked By A Vet

    Wrinkle Wipes For Dogs – Cleaning Tips & Best Ones Ranked By A Vet

    I’m Dr. Candy Akers, a seasoned veterinarian with over a decade of experience in animal care and wellness. Throughout my career, I’ve encountered countless pet owners who are deeply committed to the health and happiness of their furry companions. One of the most common concerns I’ve come across, especially among owners of certain dog breeds, is the proper care of wrinkles. These adorable folds, while endearing, can harbor dirt and moisture, leading to various skin issues if not cleaned regularly. I’ve seen the consequences of neglect firsthand, and I’ve also witnessed the transformative power of proper wrinkle care. In this blog, I’ll be sharing my insights on the importance of cleaning dog wrinkles, along with a vet-approved ranking of the best wrinkle wipes available in the market. My aim is to equip you with the knowledge and tools to ensure your pet remains healthy, happy, and wrinkle-worry-free.

    wrinkle wipes for dogs

    Why Do Some Dogs Have Wrinkles?

    Dogs, with their diverse breeds and unique characteristics, have always been a subject of intrigue. Among these captivating features, wrinkles stand out, especially in breeds like the Shar-Pei or the Pug. But have you ever wondered why only certain breeds have these distinctive folds? Let’s explore.

    1. Genetic Heritage: The primary reason some dogs have wrinkles is genetics. Specific genes dictate the skin’s elasticity and the amount of hyaluronic acid produced, which affects skin texture. Breeds like the Shar-Pei have been selectively bred over generations to emphasize these skin folds, leading to their characteristic appearance.
    2. Historical Purpose: For some breeds, wrinkles had a functional purpose. The Shar-Pei, for instance, was originally bred for hunting and guarding. Their loose, wrinkled skin made it harder for predators to get a firm grip on them during confrontations. Similarly, the Bloodhound’s saggy, wrinkled skin helps trap scent particles, enhancing their tracking abilities.
    3. Protection and Insulation: The thick folds can also act as a protective barrier, preventing minor injuries or scratches from reaching the underlying skin. Additionally, for some breeds living in colder regions, these wrinkles provided an extra layer of insulation against the cold.
    4. Health Conditions: While genetics play a significant role, certain health conditions can also lead to the development of wrinkles or skin folds. Hypothyroidism, for example, can cause changes in skin texture and elasticity, leading to a wrinkled appearance.
    5. Evolutionary Residue: Some scientists believe that these skin folds are evolutionary residues from when dogs were aquatic animals. The wrinkles, in this theory, helped increase surface area, aiding in swimming and maneuvering underwater.

    While wrinkles add to the charm and uniqueness of certain dog breeds, they also come with their set of responsibilities. Proper care and regular cleaning are essential to ensure these folds don’t become breeding grounds for infections.

    The Importance of Proper Wrinkle Care

    Wrinkles and skin folds, while undeniably charming, come with their own set of challenges. As a veterinarian, I’ve often emphasized the importance of proper wrinkle care to pet owners. Here’s why it’s so crucial:

    • 1. Prevention of Infections: The crevices of wrinkles can trap moisture, dirt, and debris. This creates a perfect environment for bacteria and yeast to thrive, leading to infections. Regular cleaning ensures these folds remain dry and free from harmful microorganisms.
    • 2. Avoidance of Skin Irritation: Without proper care, the trapped moisture and debris can cause skin irritation, leading to redness, itching, and discomfort for your pet. Over time, this can develop into painful sores or hot spots.
    • 3. Reduction of Odor: The moist environment in the wrinkles can produce an unpleasant odor over time. Regular cleaning not only ensures your dog’s comfort but also keeps them smelling fresh.
    • 4. Early Detection of Issues: Routine wrinkle care allows pet owners to spot potential problems early on. Whether it’s an unusual lump, a rash, or an unexpected change in the skin’s texture, early detection can lead to timely interventions and better outcomes.
    • 5. Enhancing Comfort: Imagine having a constant itch or discomfort that you couldn’t address. That’s how dogs with unattended wrinkles might feel. Proper care ensures they remain comfortable and free from any skin-related distress.
    • 6. Maintaining Aesthetic Appeal: While health and comfort are paramount, let’s not forget the aesthetic aspect. Clean, well-maintained wrinkles enhance the natural beauty of breeds like Pugs, Bulldogs, and Shar-Peis.

    While wrinkles add a distinctive charm to certain breeds, they also demand dedicated care. As pet owners, understanding the importance of wrinkle care is paramount to ensure our furry friends lead a healthy, comfortable, and happy life.

    wrinkle wipes for pugs

    Choosing the Right Wrinkle Wipe for Your Dog

    Ingredients Matter

    • Natural and Organic: Opt for wipes that contain natural ingredients. Ingredients like aloe vera, chamomile, and witch hazel can soothe the skin while cleaning.
    • Avoid Harsh Chemicals: Steer clear of wipes containing parabens, alcohol, or artificial fragrances. These can irritate the skin and exacerbate existing issues.

    Hypoallergenic

    Dogs with wrinkles often have sensitive skin. Choosing hypoallergenic wipes reduces the risk of allergic reactions and skin irritations.

    Texture and Thickness

    • Softness: The wipe should be gentle on the skin to prevent abrasions.
    • Durability: A thicker wipe ensures it won’t tear during use, providing a thorough cleaning without leaving residues.

    Moisture Level

    The wipe should be moist enough to clean effectively but not overly wet, as excessive moisture can exacerbate bacterial growth in the wrinkles.

    Size of the Wipe

    Consider the size of the wipe in relation to your dog’s size. For larger breeds with deeper folds, a bigger wipe might be more effective, while smaller breeds might benefit from a more compact size.

    Vet-Approved

    Always look for products that come with a vet’s endorsement or approval. This ensures the product has been tested and deemed safe for pets.

    Resealable Packaging

    To maintain the moisture and efficacy of the wipes, ensure they come in resealable packaging. This prevents them from drying out and ensures longevity.

    Price vs. Quality

    While it’s essential to stay within a budget, don’t compromise on quality. Sometimes, cheaper products can end up costing more in the long run if they lead to skin issues or don’t clean effectively.

    Reviews and Recommendations

    Before making a purchase, read reviews from other pet owners. Personal experiences can provide valuable insights. Additionally, consulting with your vet or fellow dog owners can lead to trusted recommendations.

    wrinkle wipes for frenchie

    Top 5 Wrinkle Wipes Ranked by a Vet – Dr. Candy’s Recommendations

    Pogi’s Dog Grooming Wipes – 100 Dog Wipes for Cleaning and Deodorizing

    Pogi’s Dog Grooming Wipes are plant-based, hypoallergenic wipes designed for cleaning and deodorizing your pet. Enriched with conditioning ingredients like Aloe Vera, Vitamin E, and Hawaiian Awapuhi, these wipes not only help in freshening up but also give the coat a healthy shine. Perfect for removing dirt, odor, and dander from paws, bodies, and bums, they offer a quick and gentle cleaning solution, especially when a full bath isn’t feasible.

    Pogi's Dog Grooming Wipes - 100 Dog Wipes for Cleaning and Deodorizing

    PROs:

    • Great For Ultra-Sensitive Dogs: Pogi’s Dog Grooming Wipes are plant-based and hypoallergenic, indicating they are safe and gentle to use on sensitive skin and are less likely to cause an allergic reaction.
    • Multi-Use Cleaning Solution: These wipes can effectively serve multiple purposes from cleaning paws, eradicating odors, to refreshing the dog’s body in between bath times. This positions them as a versatile cleaning solution that caters to all the grooming needs of dogs.
    • Built for Durability: The wipes are designed to be durable and robust, preventing them from ripping or disintegrating while in use. This ensures effective cleaning without any inadvertent messes or inconvenience.

    CONs:

    • Unscented Nature: While being fragrance-free is beneficial for pets with allergies or sensitivity to scents, it may not appeal to everyone. Those who enjoy a fresh scent during or after cleaning their pets might not find this feature as desirable.
    • Effect on Persistent Dirt: While these wipes are suitable for regular cleanups, they may not always be sufficient to tackle stubborn or heavy dirty areas. 
    • Unmedicated: This gentle formula doesn’t pack the punch needed for yeast and bacterial infections. If your dog’s folds are smelly and crusty, you may need a medicated wipe for those wrinkles.

    Natural Dog Company Wrinkle Wipes for Dogs

    Natural Dog Company Wrinkle Wipes are specially designed to treat, heal, and protect your dog’s wrinkles. Made with organic and natural ingredients like Shea butter, Rosemary Extract, and Calendula, these hypoallergenic wipes are perfect for cleaning and deodorizing your dog’s face, paws, and butts, ensuring a barrier on the skin to retain moisture and keep bacteria out. Safe for all dog breeds and sizes, they are a must-have for on-the-go grooming adventures.

    Natural Dog Company Wrinkle Wipes for Dogs

    PROs:

    • Organic and Safe Ingredients: Natural Dog Company Wrinkle Wipes for Dogs have been curated with organic, safe ingredients that include Shea butter, Rosemary Extract, and Calendula. These ingredients not only clean but also nourish the skin, providing an all-rounder care for your pet’s skin.
    • Calendula: I love that these include Calendula. Calendula is an herb that is amazing for many types of skin conditions.
    • Multi-Purpose Use: These wipes are perfect for a host of grooming requirements including cleaning faces, paws, and butts and are even effective in deodorizing the pet, adding to their versatility.
    • Designed for Easy Application: Equipped with easy application features and stable storage conditions, the wipes come in a recyclable, screw-top jar that makes them an excellent option for on-the-go adventures with your pet.

    CONs:

    • Size of the Wipes: The wipes might seem small to provide a comprehensive cleaning for larger breeds, potentially requiring users to apply multiple wipes during each grooming session.
    • Less Effective on Severe Skin Conditions: While these wipes can help mitigate common skin concerns, they might not be enough to treat severe skin conditions such as chronic infections and wounds. 

    Nootie Medicated Dog Wipes, 2% Chlorhexidine and 2% Miconazole Formulated Pet Wipes

    Nootie offers medicated wipes for pets, specifically formulated for both dogs and cats. These wipes contain veterinary-strength active ingredients, including 2% chlorhexidine gluconate and 2% miconazole nitrate, designed to provide relief from ear infections, skin conditions, ringworm, hot spots, and allergic dermatitis.

    Nootie Medicated Dog Wipes

    PROs:

    • The Nootie Medicated Dog Wipes are formulated with 2% Chlorhexidine and 2% Miconazole, which are effective in treating various infections that may occur in skin folds and wrinkles. These topical medications are antibacterial, antifungal, and anti-yeast. 
    • These wipes are 2″ in size, ideal for use on hard-to-reach areas. They may be too small for some large breed dogs.
    • Easy to use and efficient. They have successfully helped in treating skin irritations and itchiness of dog wrinkles.

    CONs:

    • Some users believe the smell of the wipes is quite strong. While not necessarily unpleasant, it smells as if there is an added fragrance which some people might find unnecessary or even bothersome.
    • They can also leave a sticky residue on hands after use.

    Bully Wipes – Bulldog Wrinkle Wipes – All Natural Organic (50ct)

    Bully Wipes are specially designed wrinkle wipes tailored for Bulldog breeds. These wipes are infused with an all-natural organic formula that offers a refreshing botanical scent, effectively removing dirt and ensuring safety around sensitive areas like eyes, ears, paws, and wrinkles.

    Bully Wipes - Bulldog Wrinkle Wipes - All Natural Organic (50ct)

    Pros:

    • Great For Sensitive Breeds: Bully Wipes are created specifically for skin folds and wrinkles and are considered safe to use daily around various sensitive areas like the eyes, ears, paws, and skin folds. The wipes can effectively remove dirt and maintain a healthy skin barrier, addressing the unique needs of dog’s skin folds.
    • 100% Natural: The product includes high-quality, all-natural ingredients such as aloe vera, calendula, neem oil, and geranium among others, which can soothe itchiness, promote healing, treat skin conditions, and moisturize the skin. This makes the wipes beneficial for the dog’s overall skin health.

    Cons:

    • Fragrance: The scent of the Bully Wipes could potentially be overpowering for some Bulldogs, causing them to reject the application. This could make it challenging for pet owners to maintain regular grooming habits using the wipes.

    Petpost Bulldog Wrinkle Wipes for Dogs – 5″ x 7″ Extra Large

    The Petpost Bulldog Wrinkle Wipes are specially designed for dogs with wrinkles, such as Bulldogs and Pugs. These extra-large 5″x7″ cotton pads are infused with a natural coconut oil and aloe formula, ensuring a gentle yet effective cleaning of the folds and wrinkles. The wipes not only remove dirt and gunk but also provide soothing relief to irritated skin. With regular use, these wipes can help maintain a cleaner and happier face for your furry friend.

    PROs:

    • Natural and Gentle Ingredients: Petpost Bulldog Wrinkle Wipes contain aloe and high-quality coconut oil in its solution. These naturally derived ingredients not only effectively clean the wrinkles on your pet’s skin but also ensure its gentle and soothing properties prevents serious skin irritations.
    • Environmentally Friendly Approach: With all-natural ingredients and recyclable packaging, Petpost’s approach to product development signifies a responsible and conscious pet company focused on minimizing its environmental impact.
    • Naturally Anti-inflammatory: Coconut oil has natural anti-inflammatory properties, which can help calm redness and irritation in skin folds.

    CONs:

    • Potential Size Limitation: While the wipes are described as extra-large, they might still be inadequate for larger breed dogs, causing users to resort to using multiple wipes in one cleaning session.

    Squishface Wrinkle Wipes – 5”x7” Large Dog Wipes

    Squishface Wrinkle Wipes are specially designed 5″x7″ large dog wipes that not only deodorize but also act as a tear stain remover. Ideal for breeds like English Bulldogs, Pugs, French Bulldogs, and more, these wipes are perfect for cleaning wrinkles, tear stains, and even paws, ensuring your furry friend remains fresh and cuddle-ready between baths.

    Squishface wrinkle wipes

    PROs:

    • Exceptional Skin Health Ingredients: Squishface Wrinkle Wipes are fortified with phytosphingosine and Ketoconazole. The former has excellent microbial properties while the latter is known for effectively targeting yeast and other fungal organisms.
    • Non-Stinging and Mild: These wipes are crafted with a paraben-free and alcohol-free formula that is non-stinging, which makes them suitable even for dogs with sensitive skin or allergies.

    CONs:

    • Potential Container Leakages: There have been experiences where the wipes’ fluid leaks out from the top of the container, which could create a mess and also leads to the drying out of the wraps faster than expected.

    When selecting a wrinkle wipe for your dog, it’s essential to consider their specific needs, any existing skin conditions, and the purpose of the wipe (routine cleaning vs. treating an issue). Always monitor your dog’s skin after introducing a new product to ensure there are no adverse reactions. And, as always, consulting with your veterinarian will provide the most tailored advice for your furry friend.

    Step-by-Step Guide to Cleaning Dog Wrinkles

    1. Preparation

    • Gather Supplies: Before you begin, ensure you have all the necessary items at hand. This includes:
      • Wrinkle wipes or a recommended cleaning solution
      • Soft, dry cloth or towel
      • A flashlight (for deeper wrinkles or dimly lit areas)
      • Barrier cream or ointment (if recommended by your vet)
    • Choose the Right Time: It’s best to clean your dog’s wrinkles when they are calm and relaxed, perhaps after a walk or play session.

    2. Create a Calm Environment

    • Find a quiet spot in your home, free from distractions.
    • You can place your dog on a comfortable surface, like a soft mat or a grooming table.

    3. Approach Gently

    • Approach your dog calmly, using a gentle voice.
    • Reward them with treats or soothing words to create a positive association with the cleaning process.

    4. Start Cleaning

    • Gently pull apart the skin fold to expose the wrinkle.
    • Use the wrinkle wipe or damp cloth with the cleaning solution to gently clean inside the fold. Ensure you reach all areas, but avoid excessive rubbing.
    • For deeper wrinkles or those hard to see, use a flashlight to ensure thorough cleaning.

    5. Dry The Area

    • After cleaning, it’s crucial to remove any moisture to prevent bacterial growth.
    • Gently pat the cleaned wrinkle with a soft, dry cloth or towel, ensuring it’s completely dry.

    6. Apply Barrier Cream (If Needed)

    • If your vet has recommended a barrier cream or ointment, apply a thin layer to the cleaned wrinkle.
    • This can help protect the skin and prevent moisture buildup.

    7. Reward Your Dog

    • After the cleaning process, reward your dog with their favorite treat or some playtime.
    • This helps reinforce a positive association with the cleaning routine.

    8. Monitor for Reactions

    • Keep an eye on the cleaned areas for any signs of irritation, redness, or discomfort.
    • If you notice any adverse reactions, consult your vet immediately.

    9. Establish a Routine

    • Depending on your dog’s breed and specific needs, establish a regular cleaning routine.
    • This could be daily, every other day, or weekly. Consult with your vet to determine the best frequency.

    Regular and proper cleaning of your dog’s wrinkles is essential for their health and comfort. By following this step-by-step guide and ensuring you’re gentle and thorough, you can keep your furry friend’s wrinkles clean and free from complications.

    wrinkle wipes for mastiffs

    Additional Tips for Maintaining Wrinkle Health

    1. Regular Inspections:

    • Why: Regularly inspecting your dog’s wrinkles helps in early detection of issues like redness, swelling, or unusual discharge.
    • How: Gently pull apart the skin folds and look for any signs of irritation or infection.

    2. Dry After Cleaning:

    • Why: Moist environments promote bacterial growth.
    • How: After using a wipe, gently pat the area with a soft, dry cloth to remove any residual moisture.

    3. Diet and Hydration:

    • Why: A healthy diet promotes good skin health.
    • How: Ensure your dog has a balanced diet rich in omega-3 fatty acids. Also, ensure they have constant access to fresh water to stay hydrated.

    4. Avoid Tight Collars:

    • Why: Tight collars can cause friction against the neck wrinkles, leading to irritation.
    • How: Opt for adjustable, comfortable collars. Consider harnesses for breeds with prominent neck wrinkles.

    5. Use Barrier Creams:

    • Why: They can protect the skin and prevent moisture buildup.
    • How: Apply a thin layer of vet-approved barrier cream to the wrinkles, especially in humid conditions.
    wrinkle wipes shar pei

    6. Regular Vet Check-ups:

    • Why: Routine check-ups can catch potential issues before they become severe.
    • How: Schedule regular appointments with your vet and discuss any concerns related to your dog’s wrinkle health.

    7. Avoid Over-cleaning:

    • Why: Over-cleaning can strip the skin of its natural oils, leading to dryness and irritation.
    • How: Clean the wrinkles based on your dog’s needs and the vet’s recommendation, not necessarily daily.

    8. Be Gentle:

    • Why: Rough handling can cause abrasions and discomfort.
    • How: Always be gentle when cleaning or inspecting the wrinkles. Use soft cloths and avoid excessive rubbing.

    9. Monitor Allergies:

    • Why: Allergies can exacerbate skin issues in the wrinkles.
    • How: If you notice your dog scratching or if the wrinkles appear more irritated during certain seasons, consult your vet about potential allergies.

    10. Educate Yourself:

    • Why: Understanding the specific needs of your dog’s breed can help in better care.
    • How: Read up on your dog’s breed, join breed-specific forums, or attend workshops to gain more insights into wrinkle care.

    Maintaining wrinkle health is a blend of regular care, vigilance, and understanding your dog’s specific needs. With the right practices in place, you can ensure that your dog’s charming wrinkles remain a source of joy and not discomfort.

    wrinkle wipes pekingese

    Conclusion

    In the world of canine care, the nuances often make all the difference. Wrinkles, those endearing folds that grace our furry friends, are more than just a charming trait; they’re a responsibility. As we’ve journeyed through the importance of wrinkle care, the best products to use, and the techniques to employ, it’s evident that our pets rely on us for their comfort and well-being. Armed with knowledge and the right tools, we can ensure that these wrinkles remain a source of joy rather than discomfort. Remember, the love and care we invest in our pets are returned to us tenfold in loyalty, affection, and those heartwarming moments that make pet ownership so rewarding. Here’s to happy, healthy wrinkles and even happier canine companions!

    Frequently Asked Questions

    1. How often should I clean my dog’s wrinkles?

    Answer: The frequency depends on the breed and specific needs of your dog. While some dogs may require daily cleaning, others might benefit from a weekly routine. Always monitor the wrinkles for signs of dirt or irritation and consult with your vet for a tailored recommendation.

    2. Can I use human skincare products or baby wipes to clean my dog’s wrinkles?

    Answer: It’s best to avoid human skincare products as they might contain ingredients that are not safe or suitable for dogs. While some baby wipes might be gentle, they may not effectively address the specific needs of dog wrinkles. Always opt for vet-approved or specially formulated wrinkle wipes for dogs.

    3. My dog’s wrinkles have a strong odor, even after cleaning. What should I do?

    Answer: A persistent odor might indicate a bacterial or yeast infection. It’s essential to consult with your veterinarian for a proper diagnosis and treatment plan.

    4. Are there any home remedies for cleaning dog wrinkles?

    Answer: While some pet owners use diluted solutions of apple cider vinegar or coconut oil for cleaning, it’s crucial to ensure any home remedy is safe for your dog. Always do a patch test and consult with your vet before trying any home remedies.

    5. How can I make the wrinkle cleaning process more comfortable for my dog?

    Answer: Start by creating a calm environment and choosing a time when your dog is relaxed. Use gentle, soothing strokes and reward your dog with treats or positive reinforcement throughout the process. Over time, your dog will associate wrinkle cleaning with positive experiences.

    A note about your dog’s health

    This article provides general education and does not replace an examination, diagnosis, or individualized advice from your veterinarian. Contact a veterinary professional if you are concerned about your dog’s symptoms.

    Dr. Candy Akers, DVM Avatar

    ABOUT THE AUTHOR
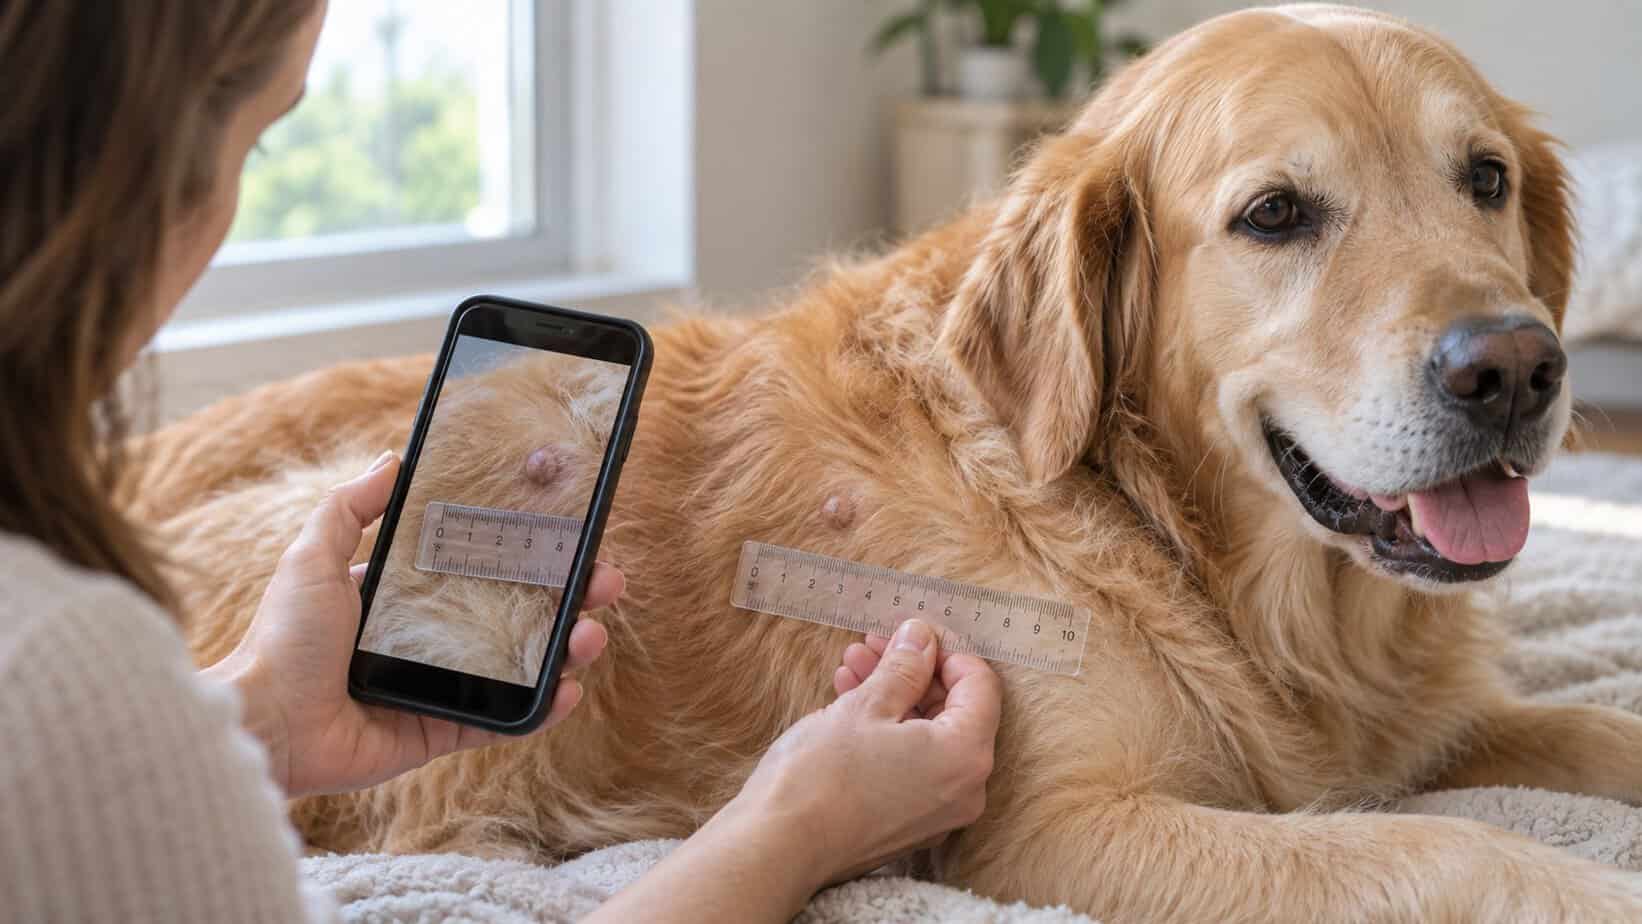
  • Vet Says Best OTC Ointment For Dog Eye Infection- Treat At Home

    Vet Says Best OTC Ointment For Dog Eye Infection- Treat At Home

    We all know that familiar pang of worry when we spot something amiss with our furry friends – be it a limp, a cough, or those watery eyes that hint at an infection. Eye infections, particularly, can sneak up on our canine companions and leave us feeling helpless, especially if we’re not sure how to treat them at home. With a myriad of information online, and numerous products claiming to be the ultimate solution, finding the right ointment for a dog eye infection can be a tad overwhelming.

    That’s where this guide comes in. After extensive consultations with vets and personal experiences with my own four-legged buddy, I’ve come to rely on one over-the-counter ointment: Terramycin. In this blog, we’ll dive deep into what makes Terramycin a trusted choice, its ingredients, and how it stands up against other home remedies. Plus, for those who lean towards more natural treatments, I’ve got you covered with some alternative homeopathic options.

    So, if you’re scrambling to find an effective solution to your dog’s eye infection, or simply prepping for potential future flare-ups, you’re in the right place. Let’s ensure our dogs get the care they deserve, right from the comfort of our homes!

    terramycin ointment for dogs

    What is Terramycin?

    Terramycin, often regarded as a wonder drug in the world of veterinary medicine, isn’t a new name for many seasoned pet owners. But if you’re unfamiliar, allow me to introduce you to this versatile ointment.

    Historical Context and Discovery:

    Terramycin, scientifically known as oxytetracycline, was first introduced to the world in the 1950s by Pfizer. It heralded a new era in antibiotic research, becoming one of the first broad-spectrum antibiotics. This meant it could combat a wide variety of bacterial infections, making it a staple in many medical and veterinary toolkits.

    Popularity and Trusted Recommendation by Vets:

    Over the decades, Terramycin has earned its reputation not just by effectively treating infections but also due to its safety profile. Veterinarians around the globe often recommend it for its efficacy against a wide range of bacterial eye infections in animals. It’s not uncommon to find Terramycin in the medicine cabinets of breeders, farmers, and everyday pet parents like you and me.

    The true magic of Terramycin lies in its mechanism of action. It inhibits protein synthesis in bacteria, preventing them from growing and multiplying. This gives the body’s immune system a chance to catch up and clear out the invaders, restoring your dog’s eyes to their clear, vibrant state.

    In essence, Terramycin is more than just an ointment; it’s peace of mind in a tube, ensuring our beloved dogs get relief from discomfort and a speedy recovery from eye infections.

    terramycin ointment

    What Does Terramycin Treat?

    When it comes to the health of our furry friends, particularly their eyes, we all yearn for a solution that’s both broad in its efficacy and specific in its action. Terramycin, with its rich history and trusted reputation, fits that bill perfectly. So, what exactly does this wonder ointment treat? Let’s dive in.

    1. Bacterial Conjunctivitis:

    Commonly known as “pink eye,” bacterial conjunctivitis can cause redness, swelling, and discharge in your dog’s eyes. It’s one of the most frequent eye ailments in canines. Terramycin helps by targeting the bacteria responsible, clearing up the infection, and reducing the associated discomfort.

    2. Keratitis:

    This is an inflammation of the cornea which can be caused by several bacteria. Left untreated, it can lead to more severe complications. Thankfully, Terramycin is effective against many of the bacterial culprits behind keratitis.

    3. Blepharitis:

    An inflammation of the eyelids, blepharitis can make your dog’s eyes appear crusty and can be quite painful. Terramycin helps soothe the inflammation and tackle the underlying bacterial cause.

    4. Corneal Ulcer:

    While corneal ulcers have several causes, when they are the result of a bacterial infection, Terramycin can be a lifesaver. It aids in healing the ulcer by eliminating harmful bacteria and preventing secondary infections.

    5. Prevention:

    Apart from treating active infections, Terramycin is also used as a preventive measure. If your dog has recently had eye surgery or an injury, Terramycin can help ward off potential bacterial infections.

    In summary, Terramycin’s broad-spectrum nature makes it a go-to for numerous bacterial eye infections in dogs. However, always remember, while it’s an excellent tool in the arsenal against bacterial infections, it won’t be effective against fungal or viral infections. If you’re ever in doubt about the nature of your dog’s eye condition or the best course of treatment, always consult with a veterinarian.

    best otc eye ointment

    Ingredients in Terramycin

    Understanding what goes into our pets’ treatments is vital. It’s not just about ensuring safety but also about appreciating how the product works. Let’s peel back the label on that tube of Terramycin and delve into its ingredients.

    1. Active Ingredient: Oxytetracycline Hydrochloride

    The star of the show, oxytetracycline hydrochloride, belongs to the tetracycline class of antibiotics. As we’ve discussed earlier, its primary role is to inhibit bacterial protein synthesis, thus stopping the bacteria from multiplying and allowing the body’s immune system to destroy them. Oxytetracycline is broad-spectrum, which means it’s effective against a variety of bacteria.

    2. Active Ingredient: Polymyxin B Sulfate

    This is another potent antibiotic compound found in Terramycin. Polymyxin B specifically targets gram-negative bacteria, complementing the action of oxytetracycline. Together, these two ensure a wide range of bacteria are addressed, making the ointment highly versatile.

    3. Inert Ingredients:

    While the specific composition might vary slightly based on the manufacturer, Terramycin typically contains ingredients to ensure the ointment remains stable, easy to apply, and safe for use in the eyes. These may include:

    • Petrolatum: Acts as a base, helping the ointment stay in place once applied and ensuring prolonged contact with the eye.
    • Lanolin: A natural moisturizer that helps soothe the eye and keep it lubricated, providing additional comfort to your pet.
    • Mineral Oil: Aids in the smooth application and can assist in keeping the eye moisturized.

    Safety and Allergens:

    While Terramycin is generally safe for most dogs, it’s essential to be aware of its ingredients in case your pet has specific allergies. Always monitor for any adverse reactions when first applying the ointment and consult your vet if you’re uncertain.

    In essence, the ingredients in Terramycin work harmoniously to combat bacterial infections. The active components tackle the bacteria, while the inert ingredients ensure the ointment is comfortable, safe, and easy to apply.

    How to Apply Terramycin on Your Dog’s Eye

    How to Apply Terramycin on Your Dog’s Eye

    Administering any medication to our pets can sometimes feel like a daunting task. The eyes, being such a sensitive area, require gentle care and precision. To help you out, here’s a step-by-step guide on applying Terramycin ointment to your dog’s eyes safely and effectively.

    1. Preparation:

    • Clean Hands: Start by washing your hands thoroughly with soap and water. Ensure they’re clean to prevent introducing any additional bacteria to your dog’s eye.
    • Clean the Eye: If your dog’s eye has discharge or crustiness, gently clean the area with a soft, damp cloth or a sterile saline solution. Remember to pat dry with a clean towel.

    2. Get Your Dog Comfortable:

    • If your dog is skittish or unfamiliar with eye treatments, it might be helpful to have a second person assist. One can hold and soothe the dog, while the other administers the ointment.
    • You can also place your dog on a table or hold smaller breeds in your lap, wrapping them gently in a towel to keep them still.

    3. Application:

    • Hold the tube of Terramycin using your thumb and forefinger.
    • Gently pull down your dog’s lower eyelid using your free hand to create a small pocket for the ointment.
    • Squeeze a small amount (typically about 1/4 inch) of the ointment directly into the pocket. Avoid touching the tube’s tip to the eye or any surface to prevent contamination.
    • Release the eyelid and let your dog blink, spreading the ointment across the eye.
    best otc eye ointment for dogs

    4. Post-Application:

    • Offer your dog a treat or some gentle praise for staying still. This positive reinforcement can make future applications easier.
    • Recap the Terramycin tube tightly and store it in a cool, dry place.
    • Wash your hands again after the application.

    5. Frequency and Duration:

    While it’s always best to follow your vet’s instructions, the general recommendation for Terramycin is to apply it 2-4 times daily. The duration will depend on the severity of the infection and how quickly your dog responds to the treatment. Typically, it’s advised to continue treatment for 48 hours after symptoms have subsided to ensure the infection is fully addressed.

    6. Tips and Precautions:

    • Always monitor your dog after application to ensure they don’t rub their eyes, which might remove the ointment.
    • If your dog shows any signs of an allergic reaction or the condition worsens, stop the treatment and consult your veterinarian immediately.
    • Avoid using the ointment past its expiration date.

    By following these steps and being gentle and patient, applying Terramycin to your dog’s eyes should be a breeze. Remember, consistency is key to a quick recovery!

    Alternative Home Remedies for Dog Eye Infections

    While Terramycin is a reliable and effective solution for many bacterial eye infections, some pet owners seek alternative or complementary treatments, especially from the natural world. Let’s explore some of these home remedies that can help soothe your dog’s eye discomfort.

    1. Homeopathic Drops:

    • Overview: Homeopathic eye drops, often made from natural herbs and minerals, aim to alleviate symptoms without introducing strong chemicals.
    • Where to Find: These drops can be sourced from specialty pharmacies or natural food stores. Always ensure that any product you choose is safe for pets.
    • Usage: Follow the instructions on the label or as prescribed by your vet. Generally, these drops can be administered 2-3 times daily.

    2. Chamomile Tea:

    • Overview: Chamomile is renowned for its soothing and anti-inflammatory properties. When used as a rinse, it can help reduce irritation and redness.
    • Preparation: Brew a cup of chamomile tea and let it cool down to room temperature. Use a tea bag for convenience, ensuring there are no added flavors or preservatives.
    • Usage: Soak a clean cloth in the cooled tea and gently wipe your dog’s eye. Alternatively, you can use a dropper to apply a few drops of the tea to the infected eye.

    3. Saline Solution:

    • Overview: A simple saline solution can help clean the eye and remove debris or discharge. It mimics the natural tears and can be soothing for inflamed eyes.
    • Preparation: Mix a teaspoon of salt in a cup of boiled, then cooled water. Stir until the salt dissolves completely.
    • Usage: Dip a clean cloth or cotton ball into the solution and gently clean your dog’s eye. You can also use a dropper to apply it directly.

    4. Goldeneye/Rod Tea Treatment:

    • Overview: Not as commonly known as chamomile, goldeneye (or goldenrod) has properties that can benefit eye health.
    • Preparation: Similar to chamomile, steep the goldeneye/rod in hot water, then allow it to cool to room temperature.
    • Usage: Use a clean cloth to apply the tea to the dog’s eye or use a dropper for direct application.

    Precautions and Recommendations:

    • Always test a small amount of any remedy to check for adverse reactions before full application.
    • While these remedies can be soothing, they might not replace the need for antibiotics in severe bacterial infections. It’s always best to consult with your vet before starting or switching treatments.
    • Ensure that any product or ingredient you’re using is safe for pets. Some natural remedies suitable for humans might not be safe for dogs.

    Whether you’re leaning towards a more natural approach or looking for complementary treatments to work alongside antibiotics, these remedies can offer some relief. However, always prioritize the advice of your veterinarian.

    otc eye ointment terrmycin

    Potential Risks and Side Effects

    Any form of medication, whether prescribed or over-the-counter, can present risks and side effects. When it comes to our furry friends, we must be informed and vigilant. Let’s delve into the potential risks and side effects associated with eye treatments like Terramycin and other remedies.

    1. Terramycin (Oxytetracycline and Polymyxin B):

    • Allergic Reactions: Some dogs might develop an allergic response to one of the ingredients in the ointment. Signs include increased redness, swelling, itchiness, or rashes around the eyes.
    • Irritation: There may be a stinging or burning sensation upon initial application. If this persists or seems severe, it’s essential to consult with your vet.
    • Secondary Infections: On rare occasions, prolonged use can lead to fungal infections in the eye.

    2. Homeopathic Drops:

    • Ineffectiveness: While they can be soothing, homeopathic treatments may not always address the root cause of the infection.
    • Allergic Reactions: As with any medication, there’s a potential for an allergic response. Always monitor closely after the first application.

    3. Herbal Teas (like Chamomile and Goldeneye/Rod):

    • Potential Irritants: Not all dogs will react the same way to herbal treatments. Some might find certain herbs irritating.
    • Contamination Risk: If the tea isn’t prepared with clean, boiled water or if the herbs aren’t sourced from reputable providers, there’s a risk of introducing contaminants.

    4. Saline Solution:

    • Salt Concentration: If the saline solution is too salty, it can cause discomfort or dryness. Always ensure a mild concentration.

    General Tips and Precautions:

    • Monitor After Application: After applying any treatment, keep an eye on your dog for the next few hours to notice any adverse reactions.
    • Avoid Mixing Treatments: Unless advised by a vet, avoid using multiple treatments simultaneously as this can lead to interactions or increased irritation.
    • Consultation: If in doubt, always reach out to your veterinarian. They can provide guidance tailored to your dog’s specific needs and conditions.
    • Consistency in Observation: Even if the initial applications don’t cause any side effects, it’s essential to be consistently observant. Side effects can manifest after several applications.
    • Storage: Ensure all treatments are stored appropriately, away from heat and direct sunlight, and out of reach of children and pets.

    In summary, while treatments like Terramycin and home remedies can offer relief and healing, being aware of the potential risks helps ensure the safety and well-being of our beloved pets. Always prioritize their comfort and health, and when in doubt, seek professional advice.

    dog eye ointment otc

    Conclusion

    Our canine companions bring boundless joy, unwavering loyalty, and heartwarming moments into our lives. In return, they rely on us to ensure their well-being and health. When it comes to issues like eye infections, the wealth of information and treatment options available can be overwhelming. However, armed with the right knowledge and guidance, addressing such concerns becomes a smoother journey.

    From the tried-and-tested effectiveness of Terramycin to the soothing touch of natural remedies, there are various paths to ensuring your dog’s eye health. As we’ve highlighted throughout this guide, the key is always to prioritize safety, be observant, and maintain open communication with your veterinarian.

    Every dog is unique, and what works for one might not necessarily be the best fit for another. But with patience, care, and the insights we’ve shared, you can navigate the realm of canine eye care with greater confidence and peace of mind.

    Thank you for joining us on this deep dive into treating dog eye infections at home. We hope you’ve found this guide informative and helpful. Always remember: the sparkle in your dog’s eyes is a reflection of the love and care they receive. Here’s to many more years of that beautiful, healthy sparkle!

    A note about your dog’s health

    This article provides general education and does not replace an examination, diagnosis, or individualized advice from your veterinarian. Contact a veterinary professional if you are concerned about your dog’s symptoms.

    Dr. Candy Akers, DVM Avatar

    ABOUT THE AUTHOR
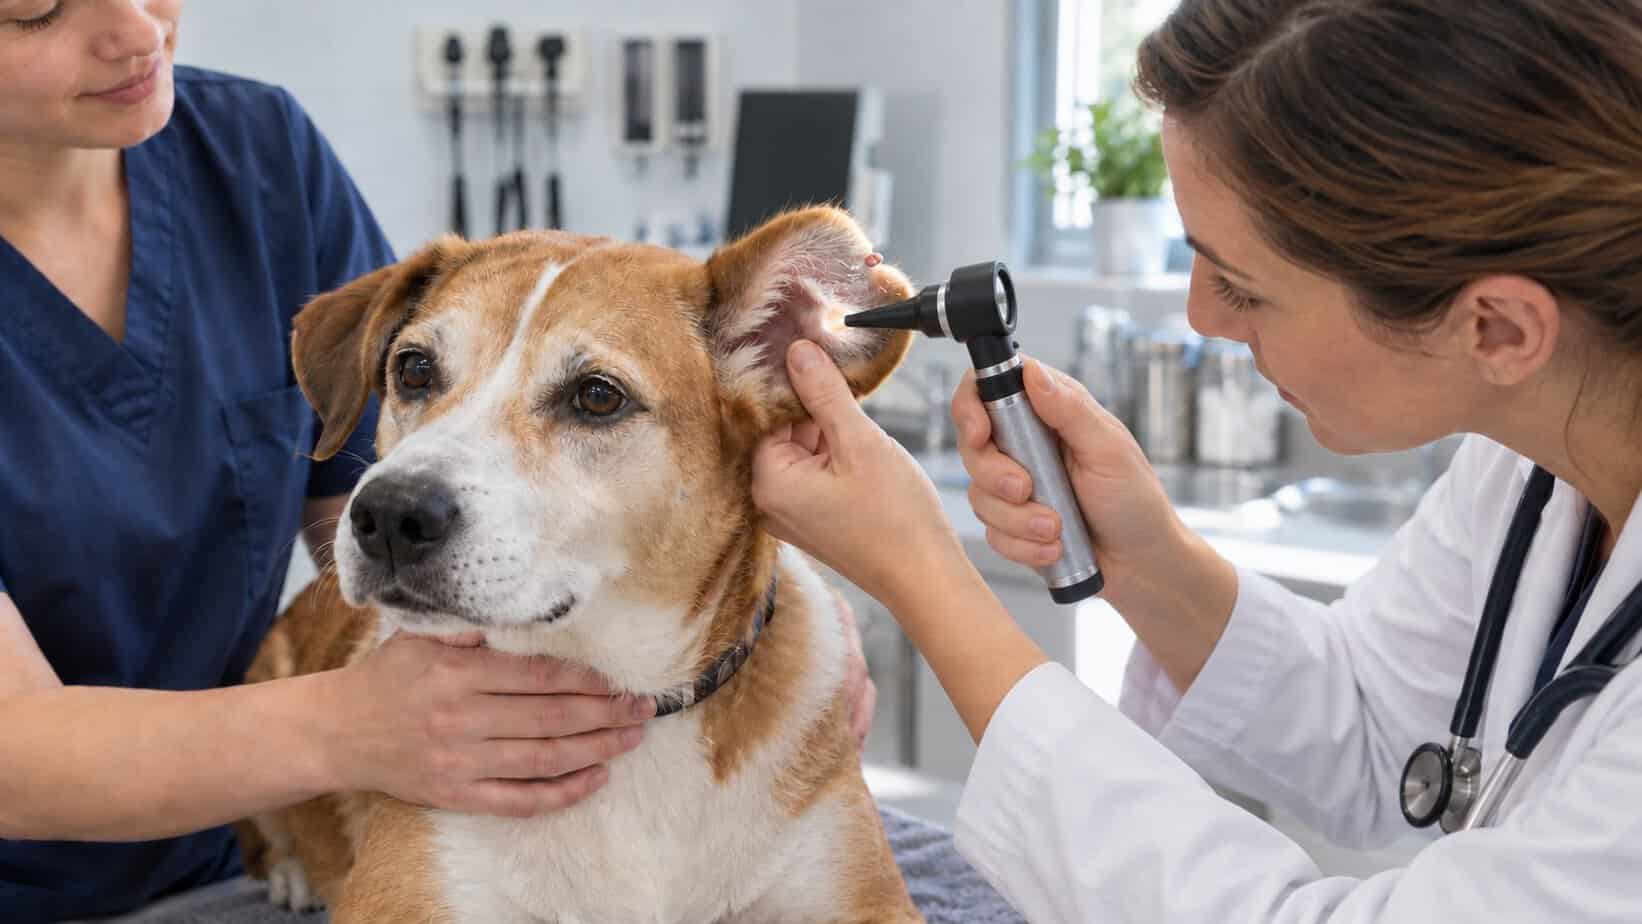
  • What Does Ringworm Look Like On A Dog? Pics & Descriptions

    What Does Ringworm Look Like On A Dog? Pics & Descriptions

    One of the most common concerns that dog owners approach me with is regarding unusual skin conditions their pets develop. Among these, ringworm stands out due to its distinct appearance and the anxiety it often causes among pet parents. Recognizing the early signs of ringworm can make a significant difference in the speed and efficacy of treatment, not to mention the comfort of your beloved canine companion. In this article, I aim to provide a comprehensive visual guide on what ringworm looks like in dogs, accompanied by addressing this condition, ensuring your furry friend’s well-being.

    ringworm in dogs

    What is Ringworm?

    Ringworm, contrary to its name, is not caused by a worm. It’s a common misconception stemming from its circular appearance, which can resemble a worm curled into a ring. In reality, ringworm is a fungal infection caused by dermatophytes, a group of fungi that thrive on the skin’s outer layer, as well as on nails and hair.

    Types of Dermatophytes:

    There are several types of dermatophytes that can affect dogs, including:

    • Microsporum canis: The most common cause of ringworm in dogs.
    • Microsporum gypseum: Found in soil and can occasionally infect dogs.
    • Trichophyton mentagrophytes: Less common, but can also be a culprit.

    How Do Dogs Contract Ringworm?

    Dogs can contract ringworm in various ways:

    1. Direct Contact: Dogs can get ringworm by coming into direct contact with another infected animal. This is the most common mode of transmission.
    2. Environment: The fungi can survive for a long time in the environment, especially in warm, humid conditions. Dogs can become infected when they touch contaminated objects such as bedding, grooming tools, or soil.
    3. Humans: While less common, dogs can also contract ringworm from infected humans and vice versa.

    Symptoms of Ringworm in Dogs:

    While we’ll delve deeper into the visual signs in the next section, common symptoms include:

    • Circular patches of hair loss
    • Reddened, scaly, or crusty skin
    • Itchiness (though not all dogs will scratch or seem bothered)
    • Brittle or distorted nails (in cases where the nails are infected)

    It’s essential to understand that while ringworm is not a life-threatening condition, it is highly contagious. It can spread between animals and even to humans. Early detection and treatment are crucial to prevent its spread and ensure the health and comfort of your pet.

    ringworm in dogs symptoms

    Early Signs of Ringworm in Dogs

    Ringworm often begins subtly, making its early detection a bit challenging. However, being observant and recognizing the initial signs can make a significant difference in managing the condition. Here are the early signs to watch out for:

    1. Circular Patches of Hair Loss: One of the most telltale signs of ringworm is the appearance of small, circular patches where the hair has thinned or fallen out. These patches may gradually expand over time.
    2. Reddened and Scaly Skin: Within these bald patches, the skin often appears red and may have a slightly raised, scaly texture. The borders of these patches are typically more pronounced and may look inflamed.
    3. Mild Itchiness: While not all dogs will exhibit signs of discomfort, some may scratch, bite, or lick the affected areas due to mild itchiness. It’s worth noting that the degree of itchiness can vary from one dog to another.
    4. Dandruff-Like Flakes: Some dogs may show dandruff-like flakes on the affected areas. These flakes are a result of the skin’s reaction to the fungal infection.
    5. Brittle or Discolored Fur: Surrounding the affected area, the fur might appear brittle or have a dull, discolored appearance, indicating the fungus’s impact on the hair shafts.
    6. Initial Nail Changes (Less Common): In cases where the fungus affects the claws, the nails might become rough, brittle, or discolored. This sign is less common in the early stages but can be a clear indicator in advanced cases.

    It’s crucial to remember that while these signs are indicative of ringworm, other skin conditions can exhibit similar symptoms. Early intervention not only aids in faster recovery but also helps in preventing the spread of the infection to other pets or even humans in the household.

    Visual Guide: Ringworm on Dogs

    Understanding what ringworm looks like can be the key to early detection and treatment. Here’s a visual breakdown of the progression and appearance of ringworm on dogs:

    Early-stage Ringworm on a Dog’s Leg

    A small, circular patch with slight hair loss. The center might appear slightly scaly with a reddish hue.

    Description: At this stage, the lesion is often mistaken for a minor skin irritation. The defined circular shape is the key indicator.

    ringworm on dog leg

    Ringworm on a Dog’s Ear

    Pronounced patchy hair loss, with the skin appearing redder and more inflamed. The hair loss is evident, and the border of the patch is distinct.

    Description: The face, especially around the eyes and ears, is a common area for ringworm to appear. The skin might look dry and scaly.

    ringworm on dogs ear

    Advanced Ringworm on a Dog’s Back

    A larger patch with significant hair loss. The skin might appear crusty with a mix of red and grayish tones.

    Description: At this advanced stage, the lesion is more noticeable, and there might be multiple patches close to each other, sometimes merging.

    ringworm on dogs back

    Ringworm on a Dog’s Paw

    The skin between the toes showing redness and scaliness. There might be slight swelling.

    Description: The paws can also be affected, especially if the dog has been walking on contaminated surfaces. The skin might appear cracked, and there could be discomfort when walking.

    Ringworm Affecting the Nails

    A close-up of a dog’s nail showing discoloration, roughness, and brittleness.

    Description: Though less common, the nails can be affected, leading to discomfort and potential lameness if not addressed.

    ringworm on dog paw

    It’s essential to note that while these pictures and descriptions provide a clear guide, individual cases can vary. Factors like the dog’s skin color, fur type, and overall health can influence the appearance of ringworm. Always consult with a veterinarian if you suspect your dog has ringworm, as they can provide a definitive diagnosis and recommend the best course of treatment.

    Comparing Ringworm to Other Skin Conditions

    While ringworm has distinct characteristics, it’s not uncommon for it to be mistaken for other skin conditions that dogs might develop. Here’s a comparison to help differentiate ringworm from other common skin issues:

    Ringworm vs. Flea Bites

    Side-by-side images of a dog’s skin showing ringworm and flea bites.

    Description:

    • Ringworm: Circular, defined patches with hair loss, reddened and scaly skin.
    • Flea Bites: Small, red, raised bumps often accompanied by intense itching. They might be scattered randomly and not have the defined circular shape of ringworm.
    ringworm vs flea allergy dermatitis in dogs

    Ringworm vs. Demodex (Mange)

    Side-by-side images of a dog’s skin showing ringworm and demodex.

    Description:

    • Ringworm: Circular patches with a clear border, hair loss, and possibly a scaly center.
    • Demodex: Caused by the Demodex mite, this condition leads to hair loss, but without the defined circular pattern. The skin might appear thickened, red, and sometimes oily. In severe cases, pustules or crusts can form.
    ringworm vs demodex in dogs

    Ringworm vs. Allergic Reactions

    Pic 8: Side-by-side images of a dog’s skin showing ringworm and allergic reactions.

    Description:

    • Ringworm: Defined circular patches with hair loss and a scaly or crusty appearance.
    • Allergic Reactions: These can manifest as hives, redness, and swelling. The affected areas might be spread out and not have the circular shape characteristic of ringworm. The dog might also exhibit other symptoms like sneezing or watery eyes.
    ringworm vs allergies in dogs

    Recognizing the differences between ringworm and other skin conditions is crucial for effective treatment. While some symptoms might overlap, the visual distinctions, combined with other signs and the progression of the condition, can provide clarity. However, a definitive diagnosis should always be made by a veterinarian, as they can recommend the most appropriate treatment based on the specific condition.

    Treatment and Prevention For Ringworm in Dogs

    Ringworm, while uncomfortable and unsightly, is treatable. Addressing it promptly can prevent its spread and reduce the duration of the infection. Here’s a guide on the treatment and prevention of ringworm in dogs:

    Treatment Options:

    1. Topical Antifungal Medications:
      • Description: These are creams, ointments, or shampoos specifically formulated to treat fungal infections. They are applied directly to the affected areas.
      • Examples: Miconazole, clotrimazole, and ketoconazole-based products.
    2. Oral Antifungal Medications:
      • Description: For more severe or widespread infections, oral medications might be prescribed. These help treat the infection from the inside out.
      • Examples: Griseofulvin, itraconazole, and terbinafine.
    3. Medicated Shampoos and Dips:
      • Description: These are used to treat the entire coat, reducing the fungal load and preventing the spread to other areas of the body or other animals.
      • Examples: Lime sulfur dips and ketoconazole shampoos.
    4. Environmental Cleaning:
      • Description: It’s crucial to clean and disinfect the dog’s living environment to eliminate fungal spores. This includes bedding, toys, grooming tools, and other personal items.
      • Recommendation: Use a bleach solution (1:10 ratio) or other pet-safe disinfectants.
    treatment for ringworm in dogs

    Prevention Measures:

    1. Regular Grooming: Regularly grooming your dog can help in early detection of any skin abnormalities, including ringworm.
    2. Avoid Direct Contact: If you know an animal has ringworm, prevent your dog from coming into direct contact with it.
    3. Clean Environment: Regularly clean and disinfect your dog’s living spaces, especially if they’ve been diagnosed with ringworm.
    4. Wash Hands: After handling a dog with ringworm, always wash your hands thoroughly to prevent the spread of the fungus to other pets or humans.
    5. Isolation: If your dog is diagnosed with ringworm, it’s advisable to keep them isolated from other pets until the infection is fully treated.
    6. Regular Vet Check-ups: Regular visits to the veterinarian can help in early detection and treatment of various conditions, including ringworm.

    While ringworm is a common condition in dogs, with timely intervention and the right care, it can be effectively treated. Always consult with your veterinarian for a definitive diagnosis and the best treatment plan tailored to your dog’s specific needs.

    Conclusion

    Ringworm in dogs, while a common concern, is a condition that can be effectively managed with timely detection and appropriate care. As pet owners, our furry companions rely on us to ensure their well-being. By educating ourselves about conditions like ringworm, we not only empower ourselves to act swiftly but also create a safer environment for our pets and those around them. Remember, while the visual guides and descriptions provided here are comprehensive, there’s no substitute for professional veterinary advice. Always consult with your veterinarian if you suspect any health issues in your dog. Together, we can ensure our pets lead healthy, happy lives, free from the discomfort of conditions like ringworm. Thank you for joining me on this informative journey, and I hope this guide serves you well in your pet parenting journey.

    Frequently Asked Questions

    Can humans get ringworm from dogs?

    A: Yes, ringworm is a zoonotic condition, meaning it can spread between animals and humans. If your dog has ringworm, it’s essential to follow preventive measures, such as washing hands after handling the dog and cleaning the environment, to reduce the risk of transmission.

    How long does it take for ringworm to heal in dogs?

    A: With appropriate treatment, most cases of ringworm in dogs start to show improvement within 1-2 weeks. However, the entire course of treatment, which can last several weeks, should be completed to ensure the fungus is entirely eradicated.

    Are certain dog breeds more susceptible to ringworm?

    A: While any dog can contract ringworm, puppies, elderly dogs, and those with compromised immune systems are more susceptible. Some breeds with specific genetic predispositions or skin conditions might also be more prone, but overall, all dogs are at risk.

    Can my dog still interact with other pets while being treated for ringworm?

    A: It’s advisable to isolate a dog with ringworm from other pets during the initial stages of treatment to prevent the spread of the infection. Once the treatment is well underway and the veterinarian gives a go-ahead, interactions can gradually resume.

    How can I prevent my dog from getting ringworm again in the future?

    A: Regular grooming, keeping your dog’s environment clean, and avoiding contact with infected animals are key preventive measures. Additionally, regular vet check-ups can help in early detection and management of any potential infections.

    A note about your dog’s health

    This article provides general education and does not replace an examination, diagnosis, or individualized advice from your veterinarian. Contact a veterinary professional if you are concerned about your dog’s symptoms.

    Dr. Candy Akers, DVM Avatar

    ABOUT THE AUTHOR
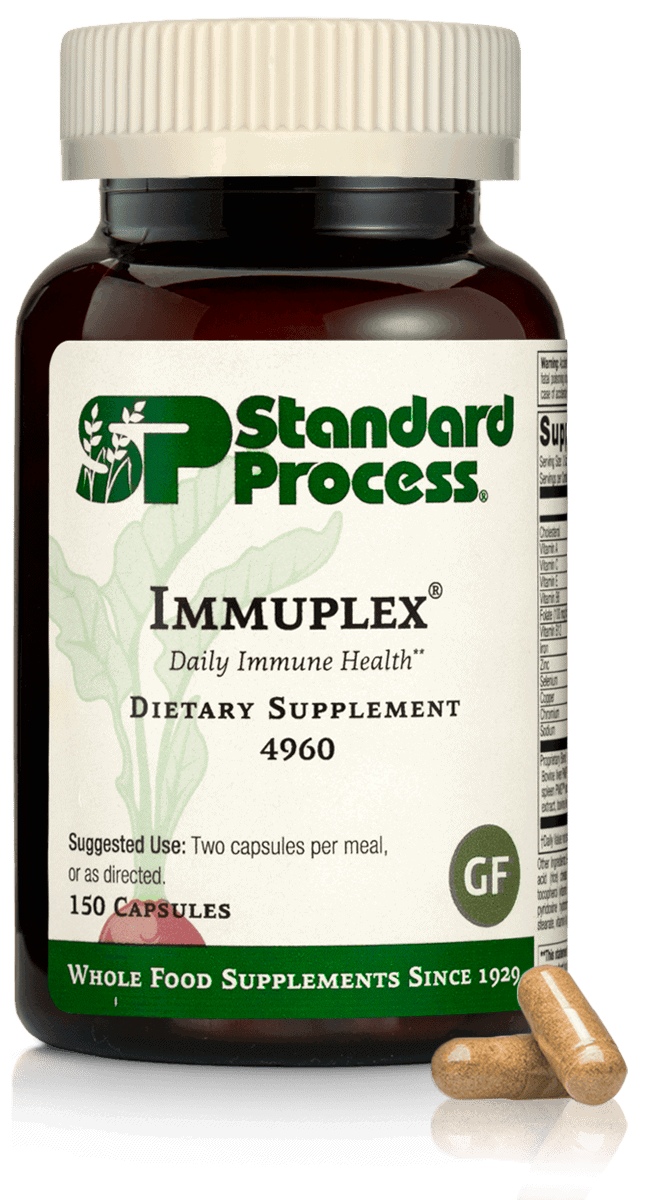
  • Hydrocortisone Cream for Dogs: Best OTC Options

    Hydrocortisone Cream for Dogs: Best OTC Options

    Written By: Dr. Candy Akers, DVM

    For a healthy dog with one small, mildly itchy patch of intact skin, a plain 1% hydrocortisone product can be a reasonable short-term option. Of the three human products reviewed here, my pick for a dry, localized spot is Aquaphor Itch Relief Ointment because the ointment base stays where you put it. Amazon Basic Care is lighter and easier to spread. PROcure adds calendula and moisturizers, but its longer ingredient list deserves extra scrutiny.

    Do not put hydrocortisone in your dog’s eyes, ear canal, nose, mouth, or genital area. Skip it on open, oozing, crusted, painful, or infected skin, and prevent licking. If the itch is widespread, keeps returning, or comes with odor, discharge, swelling, or hair loss, the cream is not the real solution.

    This article contains affiliate links. If you buy through one of these links, Healthy Happy Dogs may earn a commission at no extra cost to you.

    Quick Answer: Which OTC Hydrocortisone Cream Is Best?

    If I am choosing among the three products already reviewed on this page, I prefer Aquaphor Itch Relief Ointment for a small, dry patch. An ointment is thicker than a lotion, so it tends to stay on the skin and adds a protective, moisturizing layer. That same thickness makes it a poor choice for a wet, greasy, or oozing area.

    Amazon Basic Care Maximum Strength Anti-Itch Intensive Healing Lotion is the easier option when you want a thin layer that spreads without leaving much residue. PROcure Hydrocortisone Cream with Calendula may appeal to families who prefer a botanical-leaning formula, but botanicals do not automatically make a product safer or more effective for a dog.

    There is also a good argument for choosing a pet-labeled 1% hydrocortisone product. The strength may be familiar, but the directions and vehicle were designed with pets in mind. That can remove some of the guesswork. Cornell’s canine hot-spot guidance notes that generic 1% hydrocortisone can be used as part of care for an otherwise healthy dog, which is why I do not treat every human formula as automatically off-limits [1]. I do, however, check the entire label.

    Owner gently examining a small dry patch of intact skin on a relaxed dog

    Can You Use Human Hydrocortisone Cream on a Dog?

    Sometimes, yes. The safest version of that answer has five parts:

    1. The active ingredient is plain hydrocortisone at 1%.
    2. The dog is generally healthy.
    3. The irritated area is small, superficial, and intact.
    4. The product has no concerning added medication.
    5. The dog cannot lick the treated area.

    The words “hydrocortisone 1%” on the front do not tell you everything. Human creams may also contain numbing agents, pain relievers, antibiotics, antifungals, fragrances, or other active ingredients. Some human topical medicines are dangerous when pets lick them. A peer-reviewed review of household pet exposures describes how accidental contact with human dermatology products can cause serious harm, depending on the ingredient and amount [2]. That is why I want pet parents to read the Drug Facts panel, not just the brand name.

    If your dog has diabetes, Cushing’s disease, a weakened immune system, a history of steroid reactions, or is pregnant or nursing, do not improvise with an OTC steroid. The same is true for a very young puppy or a dog already taking a steroid medication. Those situations deserve individualized advice.

    What Hydrocortisone Does, and What It Cannot Fix

    Hydrocortisone is a low-potency corticosteroid medicine. Applied to the skin, it can calm inflammation, redness, and itching [3]. That can make a dog more comfortable and may help interrupt the itch-scratch cycle for a short time.

    What it cannot do is identify why the skin is itchy. Hydrocortisone does not kill fleas or mites. It does not treat a bacterial or yeast infection. It does not remove a grass awn, change a food allergy, or fix repeated contact with an irritating shampoo. By quieting redness, it can even make an infection or other underlying problem look less obvious for a while.

    I think of hydrocortisone as a small fire extinguisher, not a renovation crew. It can settle a minor flare while you remove the trigger and watch the skin. If you keep reaching for it, that pattern is useful information. Something underneath the itch needs attention.

    How to Choose a Safer OTC Product

    Start with the complete ingredient list. For simple short-term use, I look for one active medication: hydrocortisone 1%. I avoid combination formulas unless I have a specific reason to use every active ingredient. Products with lidocaine, benzocaine, pramoxine, zinc oxide, antibiotic drugs, antifungal drugs, essential oils, or strong fragrance should not be treated as interchangeable with plain hydrocortisone.

    Next, match the vehicle to the skin:

    • Ointment is thick and useful for a dry, small patch. It can trap moisture, so avoid it on wet or oozing skin.
    • Cream is less greasy and works well on a small, dry-to-normal patch.
    • Lotion spreads easily but is easier for a dog to lick and may contain more inactive ingredients.
    • Spray can be convenient on hairy areas, but overspray near the face is a concern.

    Check the package every time you replace a product. Formulas can change. If the label is missing, hard to read, expired, or different from what you expected, do not use it on your dog.

    Three OTC Hydrocortisone Products Compared

    ProductFormatBest FitMain Caution
    Aquaphor Itch Relief Ointment1% ointmentSmall, dry patchAvoid wet or oozing skin
    Amazon Basic Care Lotion1% lotionSmall, intact areaEasy to lick, more inactive ingredients
    PROcure With Calendula1% creamBotanical-leaning optionMore ingredients can irritate
    Aquaphor Itch Relief Ointment product package

    Best Overall for Dry, Localized Itch: Aquaphor Itch Relief Ointment

    Aquaphor Itch Relief Ointment is my first choice of these three when the irritated spot is small, dry, and not infected. The ointment base helps the medication stay in contact with the skin. Use only a very thin film. A heavy layer does not work better, and it gives your dog more to lick.

    Do not use an ointment to seal in moisture over a hot, weeping, or smelly lesion. That kind of skin needs a closer look.

    Amazon Basic Care 1% hydrocortisone lotion product package

    Best Lighter Lotion: Amazon Basic Care 1% Hydrocortisone

    Amazon Basic Care Maximum Strength Anti-Itch Intensive Healing Lotion is easier to spread and feels lighter on the skin. That may be useful for a small area where an ointment would mat the coat or collect dirt.

    The tradeoff is that lotion can travel. Keep it away from the eyes and mouth, and supervise your dog until the layer has dried. Recheck the current ingredient panel before every new purchase because a familiar product name does not guarantee an unchanged formula.

    PROcure Hydrocortisone Cream with Calendula product package

    Best Botanical-Leaning Option: PROcure Hydrocortisone With Calendula

    PROcure Hydrocortisone Cream with Calendula combines 1% hydrocortisone with calendula, aloe, coconut oil, olive oil, and other inactive ingredients listed by the manufacturer [4]. It may suit an owner who prefers a cream with botanical and moisturizing ingredients.

    I would not call it stronger, safer, or more healing because it contains calendula. A longer ingredient list can be a benefit for one dog and an irritation risk for another. Use a tiny test area first, and stop if redness or itching increases.

    How to Apply Hydrocortisone Cream Safely

    1. Look before you treat. The area should be small, intact, and only mildly red or itchy. Do not cover a puncture, bite, burn, lump, surgical site, or raw hot spot with OTC cream.
    2. Clean gently. If needed, wipe away surface dirt with lukewarm water or a pet-safe cleanser, then pat the area completely dry. Do not scrub irritated skin.
    3. Test a tiny spot. Apply a rice-grain amount to a small portion of the area and watch for more redness, swelling, or discomfort.
    4. Use a thin film. More is not better. Follow the current product label and any instructions your veterinarian has given for your dog.
    5. Prevent licking. Offer a supervised walk, food puzzle, or calm activity while the product dries. A well-fitted recovery collar may be needed for a dog who will not leave the area alone.

    Wash your hands after application. Do not bandage or tightly cover the area unless your veterinarian specifically recommends it. Covering can increase moisture and medication absorption.

    Owner gently patting a dog’s foreleg dry with a clean towel

    When Not to Use Hydrocortisone

    Skip home treatment and arrange veterinary care when the skin is open, bleeding, ulcerated, wet, crusted, swollen, hot, painful, or foul-smelling. Pus, dark discharge, rapid spread, hair loss, or a dog who seems ill also points away from a simple itch.

    Location matters. Do not put OTC hydrocortisone:

    • In or directly around the eyes
    • Inside the ear canal
    • On the nose, lips, or inside the mouth
    • On the genitals or anus
    • On an open wound or surgical incision
    • Across a large part of the body

    For paws, a tiny amount on intact skin may be reasonable, but paws are easy to lick and problems between the toes often involve infection, allergy, a foreign object, or moisture. For ears, cream on the outer flap is very different from cream inside the canal. Head shaking, odor, discharge, or pain needs an ear exam.

    Calm golden retriever wearing a recovery collar while an owner offers a food puzzle

    A Holistic Look at Recurring Itchy Skin

    My holistic approach addresses the whole dog and the factors behind the itch. I start by looking for patterns: Where did the irritation begin? Is it seasonal? Are the paws, ears, belly, or base of the tail affected? Did symptoms appear after a new shampoo, lawn treatment, food, medication, boarding stay, or flea exposure? These details guide a focused plan that supports skin health while addressing what may be triggering the irritation.

    Healthy skin begins with consistent daily care. I prioritize gentle grooming, a complete and balanced diet, reliable flea prevention, clean bedding, and a bathing routine that protects the skin and coat. I also encourage pet parents to record flare dates, affected areas, products used, and their dog’s response. Photos taken in consistent lighting help us track progress and make informed adjustments.

    Thoughtful use of natural therapies is part of holistic veterinary care. Each treatment should have a clear purpose and be appropriate for the individual dog. When hydrocortisone is part of the plan, I keep topical care focused rather than layering essential oils, vinegar, peroxide, alcohol, or multiple herbal products onto the same area. Inflamed skin needs carefully chosen care, especially where a dog can lick. A targeted approach lets us assess each treatment’s benefit and build a plan around what helps your dog.

    When Your Dog Needs Veterinary Care

    Get prompt care if your dog has facial swelling, trouble breathing, collapse, widespread hives, severe pain, a rapidly spreading rash, or repeated vomiting after licking a product. Those are not wait-and-see signs.

    Arrange an exam soon when itching lasts more than a few days, keeps returning, disrupts sleep, causes self-trauma, or involves the ears or feet. The same applies to odor, discharge, thickened skin, scabs, hair loss, or more than one body area.

    Bring the product package or a clear photo of the label. The complete ingredient list is more useful than saying “itch cream.” If your dog swallowed more than a quick lick, has symptoms, or the formula contains another active drug, contact your veterinarian or a pet poison service right away.

    Final Thoughts

    For a small, dry, mildly itchy patch on intact skin, plain 1% hydrocortisone can have a narrow, useful role. Of the three preserved human products, Aquaphor Itch Relief Ointment is my top choice for a dry localized spot. A pet-labeled 1% product is often the simpler option when you want dog-specific directions.

    Keep the job small: verify the ingredients, apply the thinnest film, prevent licking, and watch the skin. If you find yourself treating the same place again, stop chasing the itch and look for the cause.

    Frequently Asked Questions

    Can I Use Human 1% Hydrocortisone on My Dog?

    Sometimes. A plain 1% product may be used briefly on a healthy dog’s small area of intact, mildly irritated skin. Check every active and inactive ingredient, avoid sensitive locations, and prevent licking. A pet-labeled product is a good choice when you want directions designed for dogs.

    What if My Dog Licks Hydrocortisone Cream?

    One quick lick of a small amount of plain 1% hydrocortisone may only cause drooling or stomach upset, but the full formula matters. Wipe away the remaining product, check the label, and call your veterinarian or a pet poison service if your dog swallowed more, develops symptoms, or the cream contains other active drugs.

    Can I Put Hydrocortisone Cream on My Dog’s Paws?

    A tiny amount may be reasonable on intact skin where your dog cannot lick it. Do not use it on cracked pads, between-toe swelling, discharge, odor, or a possible foreign object. Repeated paw licking commonly needs a cause-based exam.

    Can Hydrocortisone Go in or Near My Dog’s Ear?

    Do not put an OTC skin cream inside the ear canal. A small amount on intact outer-ear skin is a different situation, but head shaking, pain, odor, or discharge can signal an ear infection and needs veterinary care.

    How Long Can I Use Hydrocortisone Cream on My Dog?

    Use it for the shortest practical time and follow the current label or your veterinarian’s instructions. If the area is not clearly improving within a few days, worsens at any time, or returns after treatment stops, discontinue it and have the skin evaluated.

    References

    1. Cornell University College of Veterinary Medicine. (n.d.). Hot spots. https://www.vet.cornell.edu/departments-centers-and-institutes/riney-canine-health-center/canine-health-topics/hot-spots

    2. Asad, U., Boothe, D., & Tarbox, M. (2020). Effect of topical dermatologic medications in humans on household pets. Baylor University Medical Center Proceedings, 33(1), 131-132. https://doi.org/10.1080/08998280.2019.1679003

    3. National Library of Medicine. (2018). Hydrocortisone topical. MedlinePlus. https://medlineplus.gov/druginfo/meds/a682793.html

    4. PROcure. (n.d.). Hydrocortisone cream with calendula. https://www.procureheals.com/products/hydrocortisone/

    Dr. Candy Akers, DVM Avatar

    ABOUT THE AUTHOR
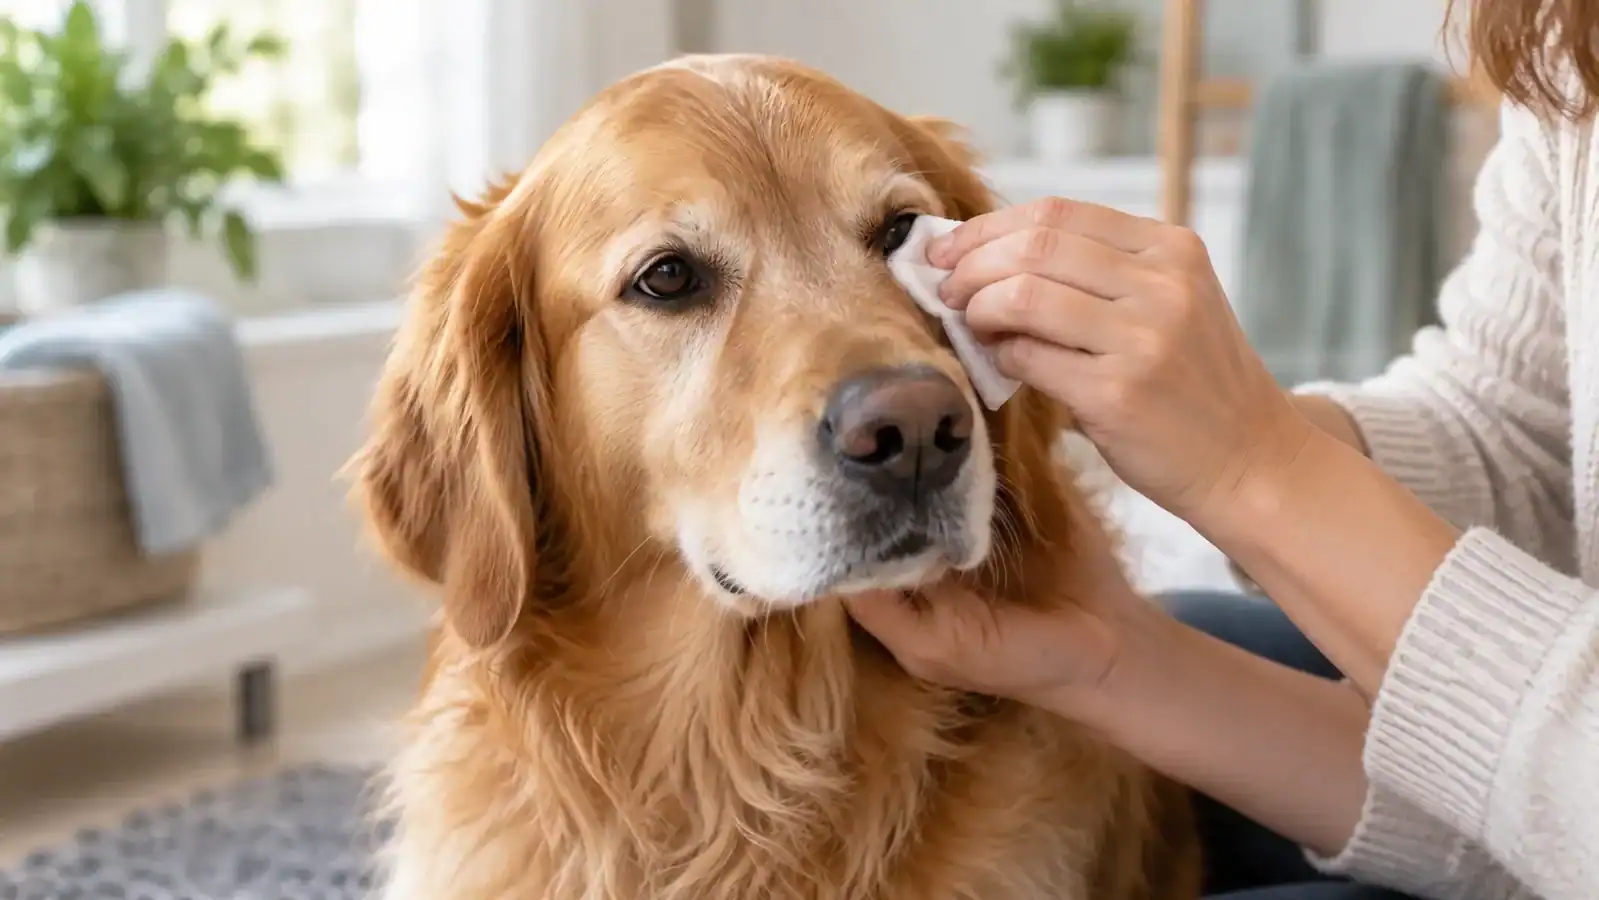
  • Can I Give My Dog Aspirin For A Limp? Is It Safe?

    Can I Give My Dog Aspirin For A Limp? Is It Safe?

    Hello, dear pet parents! As a veterinary professional, I completely understand the worry and concern that arise when you see your beloved four-legged friend limping. Your first instinct? To alleviate their pain as swiftly and effectively as possible. Many of us have found ourselves wondering, “Can I give my dog aspirin for a limp?” The short answer is, no.

    It’s commendable that you’ve taken the time to research and understand the implications of this seemingly simple question. In this article, we’ll delve deep into the world of canine health, discussing the potential benefits and risks of administering aspirin to your dog. It’s essential to approach your pet’s health with knowledge and caution, and I’m here to guide you through. Remember, our ultimate goal is to ensure the safety and well-being of your furry companion.

    can i give my dog aspirin

    Understanding the Cause of Your Dog’s Limp

    Observing your dog limping can be a heart-wrenching experience. As they look up at you with those trustful eyes, it’s only natural to feel an urge to help them immediately. But before jumping to conclusions or remedies, it’s pivotal to comprehend the root cause of the limp. Every limp tells a story.

    1. Acute Injuries:

    Just like us, dogs can have their off days. They might step wrongly on a rocky path, play a bit too rough with a fellow pup, or perhaps jump from a height that’s just a tad too much. Sprains, strains, and minor injuries can cause sudden limping.

    2. Chronic Issues:

    Conditions like arthritis, hip dysplasia, or degenerative joint diseases might lead to a more gradual onset of limping. These often are age-related, but genetics and breed predispositions can play a role too.

    3. Infections and Diseases:

    Ticks carrying Lyme disease or fungal infections can infiltrate the paw or joint areas, causing discomfort and limping. It’s always a good idea to check between their toes and around the paw pads for any signs of infections, injuries, or foreign objects.

    4. Nail and Paw Problems:

    A broken nail, a small cut on the paw, or even an embedded thorn can be the culprit. It might seem minor to us, but for a dog, even the smallest foot issue can be immensely painful.

    5. Bone Issues:

    Fractures or bone cancers can also lead to limping. These are more serious concerns and require immediate veterinary attention.

    It’s crucial to approach your dog’s limping with a blend of empathy and detective work. While it might be tempting to simply administer pain relief, understanding the cause is essential. After all, treating the symptom without addressing the underlying problem can lead to more complications down the road. Always consult with your veterinarian for a proper diagnosis. Remember, our dogs communicate with us in many ways, and a limp is a clear sign that they need our attention and care.

    What is Aspirin?

    Ah, aspirin! A common household name that many of us reach for when that annoying headache strikes or when our joints seem to be voicing their protest after a long day. But what really is this little pill that has stood the test of time, and why has it been a trusted companion in many medicine cabinets?

    1. A Historical Glimpse:

    Aspirin, or acetylsalicylic acid as the scientists would call it, has roots tracing back thousands of years. Ancient civilizations, including the Greeks and Egyptians, used willow bark – a natural source of salicylates – to alleviate aches and pains. It wasn’t until the late 1800s that aspirin was synthesized and patented, forever changing the landscape of over-the-counter pain relief.

    2. The Science Behind the Magic:

    Without getting too technical (and trust me, the chemistry can get dizzying!), aspirin works by inhibiting certain enzymes in our body. This results in reduced production of substances that cause inflammation and pain. It’s like telling those pain-causing agents, “Hey, take a break!”

    3. More Than Just Pain Relief:

    Over the years, researchers have found aspirin to be quite the overachiever. Apart from pain relief, it’s often prescribed in low doses to reduce the risk of heart attacks or strokes. Its ability to thin the blood makes it a valuable tool in certain medical scenarios.

    4. A Word of Caution:

    While aspirin might seem like a wonder drug, it’s not without its side effects. For humans, prolonged use can lead to issues like stomach ulcers. This brings us to an essential question: If it has side effects for us, what about our canine companions? (But more on that later!)

    To wrap up our aspirin 101: it’s a versatile drug with a rich history and a wide array of applications. However, like with anything, knowledge and caution are paramount. Before popping that pill—or thinking of giving it to your furry friend—it’s always wise to understand what it is and how it works.

    can dogs have aspirin for a limp

    Can Dogs Safely Take Aspirin?

    The age-old saying “what’s good for the goose is good for the gander” doesn’t always hold true, especially when it comes to our dogs. The debate around giving our furry companions human medications, like aspirin, is one that has pet parents buzzing with questions. So, can you share your headache remedy with a limping Lassie or a pained Pooch?

    1. A Different Metabolism:

    First things first, dogs are not just furry humans. Their metabolism—how they process and break down substances—is quite different from ours. While we might metabolize certain drugs safely, the same isn’t always true for our pets. This difference can alter the effects of aspirin on their system.

    2. Possible Benefits:

    In some cases, vets might prescribe aspirin for short-term relief from pain and inflammation. Yes, it can act as a temporary solution for conditions like arthritis or minor injuries. But emphasis on the ‘temporary’!

    3. Dosage Matters:

    If you ever find yourself in a situation where aspirin seems like the only option, dosage is crucial. A small slip in the amount can result in adverse effects. Generally, it’s essential to consult with a veterinarian to get the dosage right. And please, resist the urge to guesstimate!

    4. Beware of Side Effects:

    Dogs can exhibit side effects from aspirin, just like humans. Stomach upset, ulcers, or even kidney issues are some of the risks involved. Monitoring for signs like vomiting, diarrhea, or behavioral changes is crucial after administering aspirin.

    5. Regular vs. Occasional Use:

    It’s one thing to give aspirin occasionally under a vet’s guidance and quite another to use it regularly. Continuous usage can heighten the risk of side effects and potentially lead to more severe health concerns.

    In a nutshell, while aspirin can sometimes be given to dogs under specific circumstances, it’s not a decision to take lightly. Always, and I mean always, consult with a veterinarian before heading to the medicine cabinet. Our pets trust us to make the best decisions for them, and armed with the right knowledge, we can ensure they lead happy, pain-free lives.

    Risks of Giving Aspirin to Dogs

    I know, I know. As pet parents, it feels like we’re always navigating a minefield of “dos” and “don’ts.” And when it comes to aspirin, the terrain gets a tad tricky. While it’s tempting to think, “It helps me; why not Fido?” we need to tread with care. Let’s delve into the potential pitfalls of sharing your aspirin stash with your four-legged friend.

    1. Stomach and Digestive Issues:

    Just like in humans, aspirin can irritate a dog’s stomach lining. This can lead to gastritis, ulcers, or even perforations. Signs to look out for include vomiting (sometimes with blood), diarrhea, or a lack of appetite. And trust me, seeing your pet lose their zest for their favorite treat is not a sight you’d enjoy.

    2. Bleeding Complications:

    Aspirin has an anti-clotting effect. While this is beneficial in certain human conditions, for dogs, it can pose a risk. Even minor injuries could lead to prolonged bleeding, and surgeries or procedures can become riskier.

    3. Kidney and Liver Concerns:

    These vital organs bear the brunt of processing and eliminating many drugs, aspirin included. Over time, or with an overdose, they can be adversely affected, leading to reduced function or even failure.

    4. Aspirin Toxicity:

    Overdosing is a real concern. Symptoms of aspirin toxicity include rapid breathing, tremors, seizures, and even coma. If you ever suspect an overdose, it’s a race against time; seek veterinary attention immediately.

    5. Drug Interactions:

    If your dog is on other medications, aspirin can interfere or react with them, leading to a myriad of potential complications. This is yet another reason why consulting with your vet is non-negotiable.

    6. Hypersensitivity Reactions:

    Though rare, some dogs might have an allergic or hypersensitive reaction to aspirin. This can manifest as swelling, hives, difficulty breathing, or other concerning symptoms.

    To wrap up this cautionary chapter: using aspirin for dogs is a bit like navigating stormy seas. Sure, you might reach calm waters, but there are many risks along the way. Before casting off into the aspirin sea, anchor yourself with sound advice from a veterinarian. Our canine companions look to us for guidance and protection, and with knowledge on our side, we can steer clear of troubled waters.

    Alternatives to Aspirin for Dogs

    Seeing our furry buddies in discomfort nudges us into problem-solving mode. While aspirin is a tempting quick-fix, it’s not the only arrow in our quiver. Thankfully, the world of veterinary medicine has evolved and presented us with alternatives that might be safer and more tailored to our canine companions. Let’s explore some of these alternatives, shall we?

    1. Veterinary-Approved NSAIDs:

    Not all NSAIDs (Non-Steroidal Anti-Inflammatory Drugs) are created equal. Some are specifically formulated for dogs, taking their unique physiology into account. Examples include Carprofen, Meloxicam, and Deracoxib. They tend to have fewer side effects than aspirin, but always monitor for any changes in your dog’s behavior or health.

    2. Natural Supplements and Remedies:

    Mother Nature has bestowed us with a treasure trove of natural pain-relieving and anti-inflammatory agents. Glucosamine, chondroitin, and fish oil are often hailed for their joint-supporting benefits. Turmeric, with its active ingredient curcumin, has also gained popularity for its anti-inflammatory properties. But remember, natural doesn’t always mean safe. Dosage and potential allergies are things to keep in mind.

    3. Physical Therapy:

    You’d be surprised at how much a structured physical therapy regimen can help. Whether it’s post-surgery or for chronic pain management, regular exercises, massages, or even hydrotherapy can bring about significant relief.

    4. Acupuncture:

    Ancient practices to the rescue! Acupuncture for dogs is gaining traction. By targeting specific points on the body, it’s believed to enhance circulation and release pain-reducing chemicals. Skeptical? Many pet parents swear by its effectiveness.

    5. Comfort Measures:

    Sometimes, simple changes can bring about big relief. Orthopedic beds, warm compresses, or even ramps to avoid stairs can make your dog’s life much more comfortable.

    6. Prescription Pain Medications:

    In some cases, your veterinarian might prescribe stronger pain medications like Tramadol or Gabapentin. These are for more severe pain scenarios and should be used strictly as prescribed.

    In essence, while aspirin might be the age-old go-to, it’s not the only tool at our disposal. Exploring alternatives, especially under the guidance of a veterinarian, can lead to safer, more effective solutions for our pets’ pain and discomfort. After all, they rely on us to provide the best, and with the plethora of options available, we can certainly rise to the occasion.

    can i give my dog aspirin for a limp

    Safe Administration Tips if You Decide to Give Aspirin

    I get it. Sometimes, despite knowing all the potential risks, you might find yourself in a situation where aspirin seems like the only viable option. Maybe it’s a weekend, or you’re miles away from the nearest vet. If you absolutely must go down this route, it’s essential to do so safely. Here are some guidelines and a handy dosing chart to help ensure you administer aspirin to your dog in the safest way possible.

    1. Consultation First: Always, always consult your veterinarian before giving aspirin to your dog, even if it’s just a phone call.

    2. Opt for Buffered Aspirin: Buffered aspirin is less acidic, making it a tad gentler on your dog’s stomach. It’s designed specifically for canine consumption.

    3. Always with Food: Giving aspirin on an empty stomach can increase the risk of ulcers. Ensure your dog has eaten something before administering the tablet.

    4. No Human Coatings: Some human aspirins have coatings (like enteric) that can be difficult for dogs to digest. It might stay longer in their system, leading to potential overdosing.

    5. Monitor for Side Effects: Keep a close eye on your dog after giving them aspirin. Any signs of distress, bleeding, or unusual behavior warrants immediate veterinary attention.

    6. Start Small: If you’re unsure about the dose, it’s always safer to start with a smaller amount and observe your dog’s reaction.

    Dosing Chart:

    (Please note: This chart is a general guideline. Individual dog needs can vary, so always consult with your veterinarian for precise dosing)

    Dog’s WeightRecommended Dose
    Under 10 lbsConsult your vet
    10-30 lbs81 mg (baby aspirin) every 12-24 hours
    30-50 lbs162 mg (two baby aspirins) every 12-24 hours
    50-100 lbs325 mg (one regular strength tablet) every 12-24 hours
    Over 100 lbsConsult your vet

    To wrap up, while aspirin might sometimes be a necessary route, it’s essential to approach it with caution and care. Think of it as a temporary band-aid, not a long-term solution. Our dogs rely on our wisdom and love to navigate their health hurdles, and with meticulous attention, we can ensure they remain happy, healthy, and wagging their tails.

    Signs It’s Time to See a Veterinarian

    As pet parents, we often pride ourselves on understanding our furry companions. From that mischievous glint in their eyes when they’ve gotten into the trash to the contented sigh they let out during cuddles, we’re usually in tune with their moods and quirks. But sometimes, amidst the tail wags and belly rubs, there are signs that things might be amiss. Knowing when it’s time to swap your detective hat for a trip to the vet’s office can make all the difference. Here’s what to keep an eye out for:

    • Persistent Limping: If a limp lasts or seems painful, seek expert advice.
    • Appetite Changes: Skipping meals or overeating could be warning signs.
    • Abnormal Thirst & Urination: Increased intake or more frequent urination might indicate health concerns.
    • Weight Changes: Sudden fluctuations should be noted.
    • Breathing Issues: Excessive panting or coughing are serious.
    • Digestive Issues: Consistent upsets, vomiting, or constipation are red flags.
    • Behavioral Shifts: Sudden mood changes could be pain-related.
    • Unusual Odors: Bad breath or odd smells can hint at infections or dental issues.
    • Visible Distress Signs: Lumps, wounds, or swelling need attention.
    • Excessive Scratching/Shaking: This could suggest allergies or infections.

    The takeaway? Trust your gut and your knowledge of your dog. If something feels off, it probably is. While our dogs might not speak our language, they have a myriad of ways to communicate with us. It’s our responsibility to listen, observe, and act. Remember, when in doubt, it’s always better to err on the side of caution. A trip to the vet, even if just for peace of mind, is worth its weight in gold.

    Conclusion

    Navigating the world of canine health can often feel like a balancing act on a tightrope. On one hand, we have our undying love for our furry friends and an innate desire to see them pain-free and frolicking. On the other, there’s a maze of information, medication, and decisions to weave through. Aspirin, while a household name for us, throws up its own set of challenges when we consider it for our four-legged companions.

    The essence of this journey through the aspirin quandary is not about painting aspirin as a villain. Instead, it’s about understanding its place, its risks, and its alternatives. Knowledge is our strongest ally, and when paired with the advice of veterinary professionals, we’re armed to make the best choices for our pets.

    So, the next time your dog limps into the room or seems under the weather, remember: you’ve got tools in your arsenal. Sometimes it’s a simple remedy, and other times it’s the reassuring voice of your vet on the phone. But always, at the heart of it, is a bond between you and your dog — a bond that calls for care, understanding, and above all, love.

    Stay informed, trust your instincts, and here’s to countless more days of wagging tails, wet noses, and joyful barks!

    Frequently Asked Questions (FAQs)

    Can I give my dog the same aspirin I take for headaches or pain?

    While it’s technically possible for dogs to consume human aspirin in some scenarios, it’s crucial to get the dosage right and be aware of the risks. Always consult with your veterinarian before administering any human medication to your pet.

    How long can I give my dog aspirin if needed?

    Aspirin is best used as a short-term solution for pain and inflammation in dogs. If your dog’s symptoms persist or if you find the need to administer aspirin regularly, it’s essential to consult your veterinarian for a more sustainable and safe treatment plan.

    My dog accidentally ingested a large amount of aspirin. What should I do?

    If you suspect your dog has consumed a large amount or overdose of aspirin, it’s vital to seek emergency veterinary care immediately. Symptoms of aspirin toxicity can escalate quickly, so timely intervention is crucial.

    Are there any specific signs to look for after giving my dog aspirin?

    Monitor your dog for any unusual behavior, digestive upsets (like vomiting or diarrhea), excessive panting, changes in appetite, or signs of distress. If any of these symptoms appear, contact your vet promptly.

    Can I combine aspirin with other pain relief medications for my dog?

    Combining medications can lead to adverse reactions or increase the risk of overdose. Always consult with your veterinarian before administering any combination of medications to ensure the safety and well-being of your pet.

    A note about your dog’s health

    This article provides general education and does not replace an examination, diagnosis, or individualized advice from your veterinarian. Contact a veterinary professional if you are concerned about your dog’s symptoms.

    Dr. Candy Akers, DVM Avatar

    ABOUT THE AUTHOR
  • Symptoms of Dog Diarrhea – A Detailed Explanation from a Vet

    Symptoms of Dog Diarrhea – A Detailed Explanation from a Vet

    Hello, dear readers. I’m Dr. Candy Akers, and as a seasoned veterinarian with years of experience under my belt, I’ve encountered and treated a plethora of health issues in our beloved canine companions. One of the most common, yet distressing, concerns I often come across is dog diarrhea. While it’s a topic that might make some squirm, it’s crucial for dog owners to be informed about. Our furry friends can’t articulate their discomfort, but understanding the nuances of their symptoms can pave the way for prompt and effective intervention. In this blog, I’ve provided a detailed breakdown of the symptoms of dog diarrhea, underpinned by both my clinical experiences and the latest in veterinary research. It’s my hope that this guide will arm you with the knowledge you need to ensure the health and well-being of your pet.

    causes of diarrhea in dogs

    Watery Dog Diarrhea: Causes and Treatment

    Before digging into the causes, it’s essential to differentiate between regular loose stools and genuinely watery diarrhea. Watery diarrhea is more fluid and can often be expelled with more force, indicating a rapid transit through the intestines. Such a consistency usually implies that the intestines haven’t had enough time to absorb the fluids.

    Understanding Watery Diarrhea in Dogs

    Every dog parent has encountered those unexpected bouts of diarrhea, but not all diarrhea is created equal. Distinguishing the nature and consistency of your dog’s stool can provide valuable insights into potential underlying causes, with watery diarrhea often indicating a swift passage through the intestines. Let’s take a closer look at what this entails.

    Common Causes of Watery Dog Diarrhea

    Dogs, with their curious nature, often end up ingesting things that might not sit well with their digestive system. While some causes of watery diarrhea are innocent enough, others can be indicative of more severe health concerns. From dietary choices to infections, let’s explore the various reasons your dog might be experiencing this condition.

    1. Dietary Indiscretions: The most common reason dogs experience watery diarrhea is due to eating something they shouldn’t have. This can include garbage, spoiled food, or non-food items.
    2. Sudden Change in Diet: Rapidly switching a dog’s food can disrupt their digestive system. It’s always recommended to make dietary changes gradually over a week or so.
    3. Intestinal Parasites: Parasites such as giardia, roundworms, and whipworms can lead to watery stools.
    4. Viral Infections: Viruses like Parvovirus and Coronavirus can cause severe watery diarrhea in dogs.
    5. Toxins: Ingesting toxic substances, such as certain plants, chemicals, or contaminated foods, can lead to rapid-onset diarrhea.
    6. Underlying Health Conditions: Diseases like inflammatory bowel disease, liver disease, or certain cancers can manifest with watery diarrhea as a symptom.

    Treatment Options and Recommendations

    Seeing your furry friend in distress is never easy, and watery diarrhea can certainly cause its share of discomfort. Thankfully, with a combination of home care and veterinary guidance, you can alleviate symptoms and address the root cause. Here’s a comprehensive guide on treatment avenues and recommendations to consider.

    1. Dietary Management: Feed a bland diet like boiled chicken and rice for a few days. Gradually reintroduce their regular food.
    2. Hydration: Ensure your dog has access to plenty of clean water. Dehydration is a significant concern with watery diarrhea.
    3. Probiotics and Prebiotics: These can help restore the natural balance of the gut flora. Consult your vet for suitable options.
    4. Anti-diarrheal Medications: Over-the-counter meds can be helpful, but always consult with a vet before administering any medication to your dog.
    5. Vet Consultation: If the diarrhea is persistent, accompanied by other symptoms (like vomiting, lethargy, or blood in the stool), or if you suspect your dog ingested something toxic, seek veterinary care immediately.

    Prevention and Long-term Care

    An ounce of prevention is worth a pound of cure, especially when it comes to the health of our four-legged family members. By taking proactive steps and understanding potential triggers, you can drastically reduce the chances of recurrent watery diarrhea episodes. Dive into these preventive measures and care tips to keep your dog in tip-top shape.

    1. Maintain a Consistent Diet: Avoid giving table scraps or making sudden dietary changes.
    2. Regular Deworming: Ensure your dog is on a regular deworming schedule as recommended by your vet.
    3. Vaccination: Keep up with your dog’s vaccinations to prevent viral infections.
    4. Safe Environment: Ensure that your living space is free from toxic plants, chemicals, and other substances harmful to dogs.

    Understanding and being vigilant about the potential causes of watery diarrhea in dogs is the key to ensuring their optimal health and well-being. Always be in tune with your dog’s habits and symptoms and seek veterinary guidance when in doubt.

    diarrhea in dogs

    Blood in Dog Diarrhea: Causes and Cures

    Discovering blood in your dog’s stool can be a particularly distressing sight for any pet owner. While it’s essential not to jump to worst-case scenarios, understanding why this occurs and how to address it is crucial. This segment sheds light on the causes behind bloody diarrhea in dogs and offers guidance on treatments and cures.

    Identifying Blood in Dog Diarrhea

    Blood in a dog’s stool can manifest in various ways, ranging from bright red streaks to a darker, tarry appearance. Being able to correctly identify the type of blood present can provide clues to its origin and the potential underlying issue. Let’s explore the nuances of spotting and distinguishing blood in dog diarrhea.

    1. Fresh Blood (Hematochezia): Bright red blood that is often streaked on the outside of the stool. It indicates bleeding from the lower intestines or rectum.
    2. Digested Blood (Melena): Dark, tarry, and often foul-smelling stools. This signifies bleeding from the upper gastrointestinal tract.

    Potential Causes of Bloody Stools in Dogs

    From simple gastrointestinal irritation to more concerning health issues, a myriad of factors can lead to the presence of blood in your dog’s stool. Recognizing these potential causes is the first step in ensuring prompt and appropriate care. Here’s a detailed exploration of the reasons your dog might be passing bloody stools.

    1. Gastrointestinal Ulcers: Caused by medications, toxins, or underlying diseases.
    2. Parasitic Infections: Worms like hookworms can cause bleeding in the intestines.
    3. Trauma or Injury: Ingesting sharp objects or severe worm infestations can lead to internal injuries.
    4. Colitis: Inflammation of the colon can result in bloody diarrhea.
    5. Anal Gland Issues: Infected or abscessed anal glands can cause blood in the stool.
    6. Cancer: Tumors in the gastrointestinal tract can result in bloody stools.
    7. Infectious Diseases: Conditions like parvovirus can cause severe bloody diarrhea.

    Effective Cures and Treatments

    Once you’ve identified blood in your dog’s stool and potentially pinpointed a cause, the next step is treatment. Depending on the severity and underlying issue, the approach can range from home care to more intensive medical interventions. Here are some guidelines on addressing and treating bloody diarrhea in dogs.

    1. Dietary Adjustments: Feeding a bland diet can help soothe the digestive tract.
    2. Anti-inflammatory Medications: For conditions like colitis, certain medications can help reduce inflammation.
    3. Deworming: If parasitic infections are the cause, deworming medications will be required.
    4. Antibiotics or Antivirals: For bacterial or viral infections.
    5. Surgery: In the case of tumors, obstructions, or severe injuries, surgical intervention might be necessary.
    6. Hydration and Supportive Care: Fluid therapy might be needed, especially if the dog is dehydrated.

    When to Seek Veterinary Care

    While some mild cases of bloody diarrhea can resolve on their own, it’s always better to err on the side of caution. Persistent symptoms, accompanying signs of distress, or if your dog appears lethargic and unwell, it’s essential to consult a veterinarian promptly. Remember, early detection and treatment can make all the difference in your pet’s recovery.

    symptoms of diarrhea in dogs

    Mucus in Dog Diarrhea: What it Means

    The sight of mucus in your dog’s stool might initially be alarming. While it’s not as commonly discussed as other symptoms, it’s something many dog owners encounter at some point. Mucus plays a specific role in your dog’s gastrointestinal system, and its presence in the stool can convey vital information about your pet’s health. Let’s delve into the significance of mucus in dog diarrhea and decode what it means.


    What is Mucus and Why is it in the Stool?

    Mucus is a slippery secretion produced by the intestines to help lubricate and protect the inner lining of the digestive tract. While a small amount can be a normal occurrence, a notable increase in its presence in the stool can be indicative of certain health issues. Understanding the function of mucus helps in interpreting what excessive amounts might signify.


    Common Reasons for Mucus in Dog Diarrhea

    Several factors can lead to the presence of mucus in a dog’s stool. Whether it’s due to dietary choices, infections, or underlying health concerns, recognizing these causes is pivotal for ensuring the well-being of your canine companion. Here’s a comprehensive breakdown of the potential reasons behind mucus-laden stools.

    1. Dietary Indiscretion: Consuming spoiled food or unfamiliar items can irritate the intestines, leading to mucus production.
    2. Intestinal Infections: Bacterial or viral infections can cause inflammation in the intestines, leading to increased mucus secretion.
    3. Parasitic Infestations: Worms or protozoan parasites can irritate the intestinal lining.
    4. Colitis: Inflammation of the colon or large intestine can cause an overproduction of mucus.
    5. Irritable Bowel Syndrome (IBS): A chronic condition affecting the large intestine, often resulting in mucus in the stool.
    6. Food Allergies or Sensitivities: Some dogs may produce mucus in response to certain foods that don’t agree with them.

    Addressing Mucus in Dog Diarrhea

    If you’ve identified mucus in your dog’s stool, the next step is understanding how to approach the situation. Depending on the underlying cause, the solution can range from simple dietary adjustments to more involved medical treatments. Here’s a guide to tackling mucus in dog diarrhea.

    1. Dietary Changes: Switching to a bland diet or a hypoallergenic diet can help if food is the irritant.
    2. Probiotics: These can aid in restoring gut health and balance.
    3. Deworming: If parasites are suspected, a vet-prescribed dewormer can help.
    4. Medications: Anti-inflammatory drugs or antibiotics may be prescribed based on the cause.
    5. Monitor and Consult: If the presence of mucus is persistent or if it’s accompanied by other symptoms like blood or vomiting, it’s crucial to consult with a veterinarian.

    Keeping a Vigilant Eye

    Mucus in a dog’s stool can often be a transient issue, resolving on its own. However, as responsible pet owners, it’s crucial to observe any recurring or accompanying symptoms. Consistent vigilance and a proactive approach to any changes in your dog’s health can ensure they remain happy and thriving.

    Dehydration in Dogs with Diarrhea

    The repercussions of diarrhea in dogs extend beyond the immediate discomfort and distress; one significant consequence is dehydration. As dogs lose vital fluids and electrolytes through frequent bowel movements, their risk of becoming dehydrated increases considerably. Understanding the signs, causes, and treatment of dehydration in dogs battling diarrhea is essential for every pet owner. Let’s explore this critical aspect of canine health in depth.


    Understanding Dehydration in Dogs

    At its core, dehydration is the result of the body losing more fluids than it’s taking in, disrupting the balance of essential minerals. Especially in dogs, even mild dehydration can lead to serious complications if not addressed promptly. Being aware of the science behind dehydration allows us to recognize its onset and implications more effectively.


    Why Diarrhea Causes Dehydration

    While it might seem evident that diarrhea can result in fluid loss, the connection between the two runs deeper. When a dog experiences diarrhea, it’s not just the obvious fluid that’s being expelled. Vital electrolytes and minerals are also lost, intensifying the dehydrating effect. Here are the primary ways diarrhea accelerates dehydration in dogs:

    1. Rapid Fluid Loss: Frequent, watery stools cause dogs to lose fluids at an accelerated rate.
    2. Loss of Electrolytes: Essential minerals like sodium, potassium, and chloride, crucial for many bodily functions, are expelled with the stools.
    3. Reduced Water Intake: Some dogs may drink less when they’re feeling unwell due to diarrhea, further exacerbating dehydration.

    Signs of Dehydration in Dogs

    Spotting dehydration early can be the key to preventing more severe complications. Familiarizing yourself with these telltale signs ensures that you can take swift action when needed:

    1. Sunken Eyes: Eyes might appear deep-set and lack their usual brightness.
    2. Dry Nose and Gums: A moist nose and gums are signs of a hydrated dog; dryness can indicate dehydration.
    3. Loss of Skin Elasticity: When pinched, the skin of a dehydrated dog might not return to its place quickly.
    4. Increased Heart Rate: A rapid heartbeat can be a sign of dehydration.
    5. Lethargy: Dehydrated dogs may appear more tired and less active than usual.

    Treating and Preventing Dehydration

    If you suspect your dog is dehydrated, especially in the context of diarrhea, it’s essential to act promptly. Here are steps and precautions to ensure your dog remains hydrated:

    1. Access to Clean Water: Ensure your dog always has access to fresh, clean water. Encourage them to drink, but don’t force them.
    2. Oral Rehydration Solutions: These can help replenish lost electrolytes. Consult with a vet for recommendations.
    3. Fluid Therapy: In severe cases, intravenous or subcutaneous fluid administration at a vet clinic might be required.
    4. Monitor Water Intake: Be observant of how much your dog is drinking daily.
    5. Dietary Management: Feeding a bland diet can help in reducing diarrhea and, in turn, potential dehydration.

    The Importance of Proactive Care

    While diarrhea is an unpleasant experience for your canine friend, its side effects, like dehydration, can be even more detrimental. By understanding the close link between the two and being proactive in your care, you can safeguard your dog’s health and well-being.

    Coping with Frequent Dog Diarrhea

    Dealing with an occasional bout of diarrhea in your dog can be a trying experience, but when such episodes become recurrent, it can be both alarming and overwhelming. Frequent dog diarrhea is more than just a messy inconvenience; it could be indicative of underlying health concerns. This guide aims to assist pet owners in understanding, managing, and coping with regular occurrences of dog diarrhea.


    Why is My Dog Having Diarrhea So Often?

    Recurrent diarrhea can stem from a variety of reasons, ranging from simple dietary triggers to more complex health issues. Before delving into treatments, it’s imperative to identify potential causes behind the frequent bouts.

    1. Dietary Indiscretions: Dogs might frequently ingest unsuitable food or foreign objects, leading to recurring episodes.
    2. Chronic Conditions: Conditions such as Inflammatory Bowel Disease (IBD) can result in constant bouts of diarrhea.
    3. Food Allergies or Intolerances: Regular consumption of allergenic foods can cause continuous digestive issues.
    4. Intestinal Parasites: Persistent infestations can be a culprit behind the repeated diarrhea.
    5. Stress or Anxiety: Emotional disturbances can manifest as gastrointestinal symptoms in some dogs.

    Management Strategies for Frequent Diarrhea

    If your dog is regularly experiencing diarrhea, implementing specific management strategies can mitigate the effects and offer some relief. Here are some key approaches:

    1. Dietary Adjustments: Opt for a consistent, bland diet or a hypoallergenic food recommended by a vet.
    2. Regular Deworming: Ensure that your dog is dewormed routinely to prevent parasitic issues.
    3. Probiotics and Digestive Aids: These can help maintain gut health and potentially reduce the frequency of diarrhea episodes.
    4. Stress Reduction: If anxiety is a contributing factor, consider calming aids or behavioral therapy.
    5. Hydration Monitoring: Given the risk of dehydration, ensure your dog has constant access to fresh water.

    Consultation and Diagnostics

    For dogs with chronic diarrhea, veterinary consultation is essential. Here are steps to expect:

    1. Detailed History: Your vet will want a comprehensive history, including diet, frequency of episodes, and any other symptoms.
    2. Diagnostic Tests: This might include fecal tests, blood work, X-rays, or ultrasounds.
    3. Dietary Trials: A vet might recommend specific diets to rule out food allergies or intolerances.

    The Emotional Toll and Support

    Beyond the physical health of your pet, recurrent dog diarrhea can be emotionally taxing for pet owners. Finding support in online forums, local pet groups, or from your veterinarian can offer solace. Remember, you’re not alone, and many have navigated similar challenges with their furry friends.


    The Way Forward

    While coping with frequent dog diarrhea can be daunting, armed with knowledge and a proactive approach, you can improve the quality of life for your canine companion. Consistent care, vet consultations, and being attuned to your dog’s needs are pivotal in this journey.

    Loss of Appetite with Dog Diarrhea

    It’s disheartening to watch our beloved pets turn away from their food, especially when we are trying to nourish them back to health. Loss of appetite in conjunction with diarrhea not only signifies a potential underlying problem but also poses the risk of malnourishment and further complications. Let’s dive into this concerning symptom, understanding its causes, implications, and solutions.


    Linking Loss of Appetite and Diarrhea

    While these two symptoms might seem unrelated at first glance, they frequently present together, especially when a dog is feeling unwell. Understanding how and why a loss of appetite might accompany diarrhea can provide clarity on the issue.

    1. Gastrointestinal Discomfort: Discomfort in the digestive tract can make a dog hesitant to eat, fearing further pain or discomfort.
    2. Systemic Illness: Some illnesses that cause diarrhea also affect a dog’s overall well-being, leading to reduced appetite.
    3. Medications: Some medications prescribed for diarrhea or related conditions might decrease appetite as a side effect.

    Potential Causes of Appetite Loss with Diarrhea

    Several factors can lead to decreased appetite in dogs experiencing diarrhea. Identifying the root cause is crucial for effective treatment.

    1. Intestinal Infections: Bacterial or viral infections can cause both diarrhea and a decreased desire to eat.
    2. Parasitic Infestations: Worms or protozoan parasites can disturb the intestinal environment and affect appetite.
    3. Pancreatitis: Inflammation of the pancreas can lead to diarrhea and significantly reduce appetite.
    4. Food Intolerances or Allergies: If certain foods irritate a dog’s system, they might become wary of eating.
    5. Stress or Behavioral Issues: Emotional factors can manifest as physical symptoms, including diarrhea and reduced appetite.

    Managing and Stimulating Appetite

    When a dog is experiencing a loss of appetite coupled with diarrhea, there are several strategies to encourage eating and ensure they receive adequate nutrition.

    1. Bland Diet: Offering a simple, bland diet can be less intimidating and more palatable for ailing dogs.
    2. Warming Food: Slightly warming the food can make it more aromatic and appealing.
    3. Homemade Broths: These can entice dogs with their aroma and can be nutritionally beneficial.
    4. Appetite Stimulants: In some cases, vets might prescribe medication to stimulate a dog’s appetite.
    5. Hydration: Always ensure that your dog has access to fresh water, as dehydration can further suppress appetite.

    When to Seek Veterinary Care

    A brief period of decreased appetite might not be alarming, especially if your dog is otherwise behaving normally. However, if this loss of appetite persists for more than 24 hours, is accompanied by other serious symptoms, or if your dog appears lethargic, it’s imperative to seek veterinary advice.

    Abdominal Pain in Dogs with Diarrhea

    When our canine companions suffer from diarrhea, it’s evident that they’re in distress. However, a less visible yet significantly concerning symptom that can accompany diarrhea is abdominal pain. Recognizing and addressing this pain is paramount to ensuring the comfort and swift recovery of our pets. In this section, we will explore the intricacies of abdominal pain in dogs with diarrhea, its causes, signs, and the means to alleviate it.


    Understanding the Connection: Diarrhea and Abdominal Pain

    While diarrhea is a clear manifestation of gastrointestinal upset, abdominal pain often lurks in the shadows, presenting as an internal discomfort that your dog might not outwardly show. Here’s how the two are intertwined:

    1. Inflammation: Inflammatory conditions in the gut can lead to both diarrhea and pain.
    2. Gastrointestinal Spasms: Muscle spasms in the intestines can cause painful cramps along with diarrhea.
    3. Obstructions: Any blockages can lead to diarrhea and cause significant discomfort.

    Signs Your Dog Might be Experiencing Abdominal Pain

    Dogs, being non-verbal, communicate their pain through behavior. Observing certain signs can give you insights into their discomfort:

    1. Restlessness: Constantly changing positions or being unable to settle.
    2. Whining or Groaning: Vocal indications of pain or discomfort.
    3. Swollen Abdomen: A bloated or tight belly can indicate pain or other issues.
    4. Avoidance of Touch: Being hesitant or aggressive when their belly area is touched.
    5. Hunched Back: A curved or hunched posture can be a defensive stance against pain.

    Common Causes of Abdominal Pain with Diarrhea

    Several factors can lead to abdominal pain in dogs, especially when accompanied by diarrhea. Identifying the root cause can aid in effective treatment:

    1. Gastroenteritis: Inflammation of the stomach and intestines can cause pain and diarrhea.
    2. Foreign Bodies: Ingestion of non-food items can irritate the gut, leading to pain and loose stools.
    3. Intestinal Parasites: Worms or other parasites can disturb the intestinal lining and cause pain.
    4. Pancreatitis: As previously mentioned, inflammation of the pancreas can result in both symptoms.
    5. Gastric Ulcers: Open sores in the stomach lining can be painful and disrupt normal bowel movements.

    Alleviating Abdominal Pain in Dogs

    Once you suspect your dog is in pain, there are measures to help ease their discomfort:

    1. Seek Veterinary Care: A proper diagnosis is crucial for effective treatment.
    2. Pain Relievers: Administer only those prescribed by a vet specifically for your dog.
    3. Dietary Adjustments: A temporary bland diet can reduce strain on the digestive system.
    4. Warm Compress: Applying a warm cloth to the belly can provide some relief (ensure it’s not too hot).
    5. Hydration: Dehydration can exacerbate pain, so ensure your dog is well-hydrated.

    Prioritizing Comfort and Well-being

    While diarrhea is an overt sign of discomfort, abdominal pain might go unnoticed until it becomes severe. Being attuned to your dog’s behaviors and prioritizing their comfort will foster a trusting bond and ensure they receive the care they need during such challenging times.

    Weight Loss Due to Dog Diarrhea


    Witnessing our pets shed pounds unintentionally can be deeply concerning. When diarrhea is persistent, one of the unfortunate consequences can be unintentional weight loss. This not only impacts a dog’s physical health but also its energy levels, mood, and overall well-being. In this segment, we’ll delve into the association between diarrhea and weight loss, the potential risks, and ways to combat and reverse these effects.


    Diarrhea’s Role in Weight Loss

    While weight loss can stem from various causes, chronic diarrhea is a significant contributor. Here’s how diarrhea can lead to such drastic reductions in weight:

    1. Nutrient Malabsorption: Diarrhea can prevent the intestines from effectively absorbing essential nutrients.
    2. Increased Caloric Loss: Rapid transit of food through the digestive system leads to caloric wastage.
    3. Loss of Appetite: As discussed earlier, diarrhea can cause a diminished desire to eat.

    Signs of Unintentional Weight Loss in Dogs

    Identifying weight loss in its early stages can be crucial to addressing any underlying issues promptly. Watch out for these signs:

    1. Visible Ribcage: An increasingly prominent ribcage might be an indication of weight loss.
    2. Lethargy: A decrease in energy levels or reluctance to play can signify caloric deficiency.
    3. Changes in Eating Habits: Refusing food or eating less than usual.
    4. Loose Skin: Skin that seems less elastic or hangs more loosely than before.

    Potential Health Impacts of Weight Loss

    Sustained weight loss due to diarrhea can have several repercussions on a dog’s health:

    1. Muscle Atrophy: Reduced protein absorption can lead to muscle wastage.
    2. Weakened Immune System: Nutrient deficiencies can compromise the immune system, making dogs more susceptible to infections.
    3. Reduced Stamina: Weight loss can lead to diminished energy reserves, affecting overall stamina.
    4. Bone Health: Persistent weight loss can affect bone density, making them more prone to fractures.

    Combatting Weight Loss from Diarrhea

    Once you’ve recognized the weight loss in your pet, there are actionable steps to help them regain their health:

    1. Veterinary Consultation: Always begin with professional advice to address the root cause of diarrhea.
    2. Nutritional Supplements: Under a vet’s guidance, introduce supplements to fill nutritional gaps.
    3. High-Calorie Diet: Opt for high-quality, calorie-dense foods to help your dog regain weight.
    4. Regular Monitoring: Keep a consistent check on your dog’s weight and adjust the dietary plan as needed.
    5. Hydration: Alongside nutrient loss, diarrhea can lead to dehydration, which further exacerbates weight loss. Ensure your dog stays hydrated.

    Restoring Health and Vigor

    Tackling weight loss due to diarrhea can be challenging, but with the right approach, determination, and guidance, your dog can return to its healthy, vivacious self. Through vigilant care, nutritional adjustments, and love, you can help your canine companion bounce back from the adverse effects of persistent diarrhea.

    Conclusion

    Navigating the complexities of our canine companions’ health is a journey every pet owner undertakes with love and dedication. Diarrhea, though common, can manifest with a myriad of symptoms, from the overt to the subtle. As we’ve delved into the nuances of these signs, from abdominal pain to unintended weight loss, it’s evident that our role goes beyond just observation. We must be proactive, understanding, and always ready to seek expert advice. Remember, while the internet offers valuable insights, always consult with your veterinarian when in doubt. Your dog’s health and well-being is a shared responsibility between you and your trusted vet. By working together, armed with knowledge and compassion, we can ensure our furry friends lead happy, healthy lives. Here’s to the many joyful moments and memories ahead with your beloved pet!

    Frequently Asked Questions

    1. How long should I wait before consulting a vet if my dog has diarrhea?

    While occasional, mild diarrhea might resolve on its own, it’s crucial to consult with your veterinarian if the diarrhea persists for more than 24 hours, if there are other alarming symptoms (like blood or mucus in the stool), or if your dog seems particularly unwell or lethargic.


    2. Can I give my dog human medications for diarrhea or abdominal pain?

    Never administer human medications to your dog without consulting a veterinarian. Some human medicines can be toxic to dogs and might exacerbate the condition or lead to other serious health issues.


    3. How can I prevent my dog from getting diarrhea in the future?

    Ensuring a consistent, balanced diet, regular deworming, timely vaccinations, and avoiding abrupt dietary changes can help reduce the risk of diarrhea. Also, try to prevent your dog from scavenging or ingesting foreign items during walks.


    4. Is it normal for my dog to lose appetite along with diarrhea?

    It’s not uncommon for dogs with diarrhea to experience a temporary loss of appetite. However, if this persists or is accompanied by other severe symptoms, it’s essential to seek veterinary care to address any underlying issues.


    5. My dog has had multiple episodes of diarrhea in the past few months. Should I be concerned?

    Frequent bouts of diarrhea could indicate an underlying health condition, food allergies, or sensitivities. It’s essential to consult with your veterinarian to pinpoint the cause and devise a suitable treatment or management plan.

    A note about your dog’s health

    This article provides general education and does not replace an examination, diagnosis, or individualized advice from your veterinarian. Contact a veterinary professional if you are concerned about your dog’s symptoms.

    Dr. Candy Akers, DVM Avatar

    ABOUT THE AUTHOR
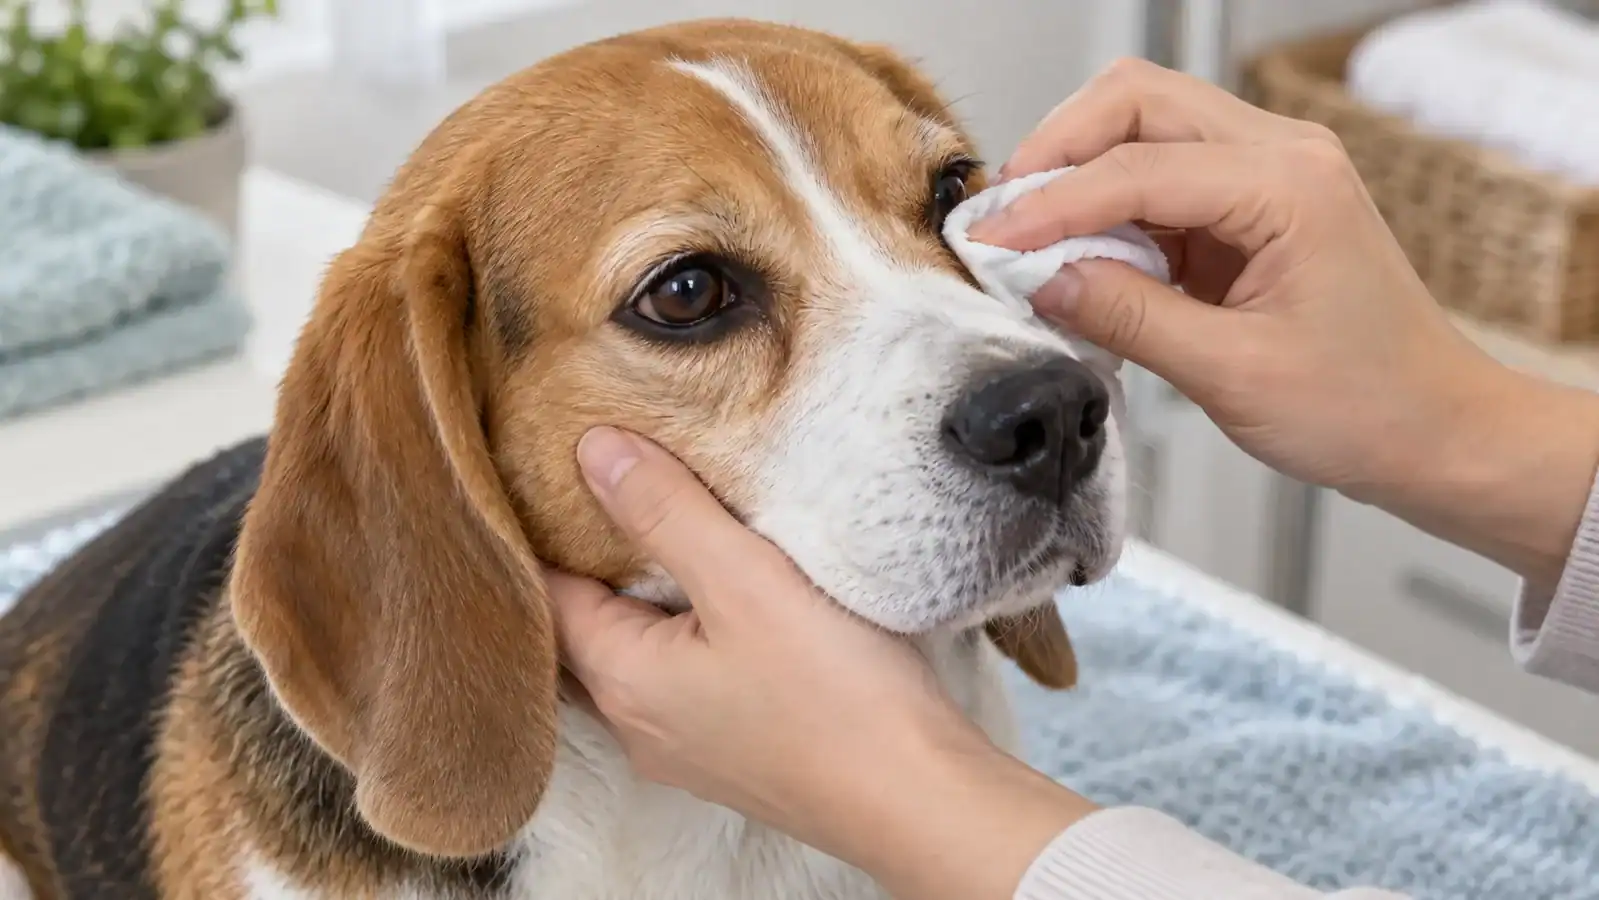
  • Dog Eye Ointment – Vet Tells You How To Apply & Where To Buy OTC

    Dog Eye Ointment – Vet Tells You How To Apply & Where To Buy OTC

    Over the years, I’ve come across numerous dogs with a variety of eye issues – from simple irritations to more serious infections. Often, the solution lies in the timely application of the right dog eye ointment, but I’ve observed that many owners are either unaware of these products or unsure about how to use them effectively.

    That’s why I’ve put together this comprehensive guide. My aim is to demystify the world of dog eye ointments, helping you understand their purpose, recognize symptoms of eye infections, and apply treatments correctly. And, for those wondering where to purchase over-the-counter solutions, I’ve got that covered too.

    eye ointment for dog

    What Dog Eye Ointments Are For

    Maintaining the health of your dogs eyes is crucial for the overall well-being and happiness of our pets. But why exactly might your dog need eye ointment, and what role does it play in their eye care?

    1. Protection and Healing: Dog eye ointments serve as a protective barrier, often shielding the sensitive eye tissues from further irritants while providing a conducive environment for healing. Whether it’s a minor scratch or an external particle, a suitable ointment can offer immediate relief and faster recovery.
    2. Treatment of Infections: Just as we might use antibiotic ointment for our infections, certain dog eye ointments contain antibiotics to treat bacterial infections in a dog’s eye. These infections can be caused by a range of factors, including injury, foreign bodies, or underlying health conditions.
    3. Lubrication: Some dogs, especially certain breeds or older dogs, may suffer from dry eyes (keratoconjunctivitis sicca). In such cases, lubricating ointments can help keep their eyes moist and reduce discomfort.
    4. Reduction of Inflammation and Pain: Certain ointments are formulated with anti-inflammatory agents that can decrease swelling and pain. This is particularly helpful in cases of eye injuries or post-surgical recovery.
    5. Treatment of Specific Conditions: There are specialized ointments designed to tackle specific issues, such as corneal ulcers, conjunctivitis, or certain fungal infections. Using the correct ointment for the diagnosed condition is vital to ensure effective treatment and recovery.

    Dog eye ointments play a multi-faceted role in the realm of canine eye care and are indispensable tools in a pet parent’s arsenal. However, always consult your veterinarian before applying any ointment. Each dog is unique, and what works for one might not necessarily be the best choice for another.

    When it comes to treating eye conditions in dogs, several ointments have proven both safe and effective over the years. While the best course of action is always to consult with your veterinarian for specific recommendations, here are some commonly recommended dog eye ointments that you might come across:

    1. Terramycin (Oxytetracycline and Polymyxin B)

    • Description: Terramycin is a broad-spectrum antibiotic ointment often prescribed for bacterial infections of the eye.
    • Main Use: Treats conditions like conjunctivitis, corneal ulcers, and certain inflammatory eye disorders.

    2. Neopolydex (Neomycin, Polymyxin B, and Dexamethasone)

    • Description: A combination antibiotic and steroid ointment, Neopolydex is useful for both treating infections and reducing inflammation.
    • Main Use: Beneficial for eye injuries with associated swelling or infections complicated by inflammation.

    3. Optimmune (Cyclosporine)

    • Description: This ointment is specifically designed for dogs with dry eyes (keratoconjunctivitis sicca). It helps increase tear production while also reducing inflammation.
    • Main Use: Chronic dry eye conditions, where it helps restore moisture and comfort.

    4. Tetravet (Tetracycline)

    • Description: Another antibiotic ointment, Tetravet is effective against a range of bacteria that might cause eye infections.
    • Main Use: Used to treat bacterial eye infections, including conjunctivitis and certain corneal conditions.

    5. Gentak (Gentamicin)

    • Description: Gentak is a potent antibiotic ointment effective against several types of bacteria.
    • Main Use: Primarily used for bacterial conjunctivitis and other bacterial-caused eye infections.

    The world of dog eye ointments is vast, and the above examples are just the tip of the iceberg. It’s essential to understand that while OTC (Over The Counter) ointments can be beneficial, it’s paramount to seek a veterinarian’s guidance. Your pet’s specific symptoms, the underlying cause, breed, age, and other factors can all influence the best choice of treatment. Proper diagnosis and tailored treatment ensure not only quick relief but also the long-term well-being of your furry friend’s eyes.

    eye ointment for dogs

    Symptoms That May Indicate Your Dog Has An Eye Infection

    A dog’s eyes are expressive and can convey a multitude of emotions, but they’re also sensitive and can be prone to infections. As a vigilant pet parent, it’s essential to recognize the signs that might indicate an eye problem in your canine companion. While some symptoms can be subtle, others might be glaringly evident. Here’s a guide to help you understand and identify symptoms that may suggest your dog has an eye infection:

    1. Redness or Swelling

    • Description: The white part of the eye (sclera) may appear redder than usual, or the eyelids might be swollen.
    • Possible Causes: Conjunctivitis, foreign body irritation, or other inflammatory conditions.

    2. Discharge

    • Description: You might notice a clear, mucus-like, or even pus-filled discharge coming from one or both eyes.
    • Possible Causes: Bacterial or viral infections, tear duct issues, or irritants.

    3. Excessive Tearing or Watery Eyes

    • Description: Continuous watering of the eyes or damp fur around the eyes.
    • Possible Causes: Foreign body irritation, allergies, or infections.

    4. Cloudiness or Change in Eye Color

    • Description: A cloudy appearance or any color changes to the eye’s natural look.
    • Possible Causes: Cataracts, glaucoma, corneal injuries, or infections.

    5. Frequent Blinking or Squinting

    • Description: Your dog might blink more than usual or appear to be squinting.
    • Possible Causes: Discomfort due to foreign bodies, dry eyes, or infections.

    6. Rubbing or Scratching at the Eye

    • Description: Your dog may use its paw to rub the eye or scratch around it.
    • Possible Causes: Irritation, foreign body presence, or infections.

    7. Sensitivity to Light

    • Description: Your dog might seem to avoid bright light or prefer staying in dimly lit areas.
    • Possible Causes: Uveitis, glaucoma, or other internal eye problems.

    8. Behavioral Changes

    • Description: In response to discomfort or pain, your dog might become more reclusive, aggressive, or show a lack of interest in activities they usually enjoy.
    • Possible Causes: Severe eye conditions or infections causing pain.

    It’s vital to understand that while some of these symptoms might indicate a simple, easily treatable problem, others could be signs of more severe conditions. Always consult with your veterinarian if you notice any of these symptoms or any other unusual behavior related to your dog’s eyes. Timely intervention can make a significant difference in outcomes and ensure your dog’s eyes remain healthy and bright.

    eye ointment for my dog

    How To Apply Dog Eye Ointment Step By Step

    Administering eye ointment to your furry friend can sometimes feel like a daunting task, especially if it’s your first time. However, with a little preparation and patience, it can become a smooth process for both you and your pet. Here’s a step-by-step guide to help you apply dog eye ointment effectively and safely:

    Wash Your Hands

    • Why It’s Important: Keeping your hands clean ensures that no additional contaminants or bacteria are introduced to your dog’s eye.
    • Tips: Use mild soap and warm water. Ensure your hands are dry before handling the ointment tube.

    Gather Supplies

    • Items You’ll Need:
      • The prescribed eye ointment
      • A clean cloth or tissue
      • Treats (optional, but useful for rewarding your dog post-application)
    • Tips: Keep everything close by to ensure the process is as quick and hassle-free as possible.

    Create a Calm Environment

    • Why It’s Important: A relaxed dog will be more cooperative, making the application process smoother.
    • Tips: Choose a quiet room with soft lighting. Talk to your dog in a gentle, reassuring voice. You can also have a favorite toy or treat nearby as a distraction.

    Hold Your Dog Comfortably

    • Positioning: If you have a smaller dog, it might be easier to place them on a table or your lap. For larger dogs, sitting beside them or having them lie down can work.
    • Tips: It’s essential that both you and your dog are comfortable. If your dog is anxious, consider asking someone they trust to help hold them gently but firmly.

    Open the Eye Ointment Tube

    • Tips: Ensure the tube’s tip doesn’t touch any surface, including your hands or the dog’s eye, to prevent contamination.

    Gently Pull Down the Lower Eyelid

    • Why It’s Important: Creating a small pouch in the lower eyelid ensures the ointment gets applied to the whole eye.
    • Tips: Use your thumb or a finger to pull down the eyelid gently.

    Apply the Ointment

    • Instructions: Gently squeeze the ointment tube, applying a thin strip or the recommended amount into the pouch you’ve created with the lower eyelid.
    • Tips: Avoid touching the eye with the tube. If you’re unsure about the amount, consult with your vet.

    Let Your Dog Blink

    • Why It’s Important: Blinking will help spread the ointment across the eye.
    • Tips: If your dog doesn’t blink, you can gently close their eyelid and massage softly to spread the ointment.

    Reward and Positive Reinforcement

    • Why It’s Important: Making the experience positive ensures future applications will be easier.
    • Tips: Give your dog a treat or play a short game. This will help them associate the process with positive outcomes.

    Remember, consistency and patience are key. The more routinely you do this, the more accustomed your dog will become, making the process smoother over time. If you face any challenges or notice any adverse reactions, don’t hesitate to consult your veterinarian for advice or alternative methods.

    Dr. Candy’s Recommendation

    When it comes to eye ointments for our canine companions, the choices are numerous. However, over my years in veterinary practice, one product consistently stands out for its effectiveness and safety: Terramycin. I’d like to shed some light on why Terramycin is often my go-to recommendation for many common eye conditions in dogs.

    What is Terramycin Eye Ointment?

    Terramycin is an antibiotic ointment that contains two potent ingredients: Oxytetracycline and Polymyxin B. Together, these antibiotics provide a broad spectrum of activity against the bacteria commonly responsible for eye infections in dogs.

    Why Choose Terramycin?

    1. Broad-Spectrum Antibiotic: Its dual-action formula tackles a wide variety of bacterial infections, making it a versatile treatment option.
    2. Safety: Terramycin has been used for decades and has a well-established safety profile when used as directed.
    3. Ease of Application: The ointment is smooth and easy to apply, causing minimal discomfort to your pet.
    4. Fast-Acting: Many pet parents report seeing improvements in their dog’s symptoms in just a few days of starting the treatment.

    Terramycin Product Information

    • Ingredients: Oxytetracycline and Polymyxin B
    • Dosage: The amount and frequency of application should be based on your veterinarian’s recommendation, typically applied 2-4 times daily.
    • Storage: Store at room temperature, away from direct sunlight.

    Terramycin Cautions & Considerations

    1. Consultation: While Terramycin is available over-the-counter, always consult with your veterinarian before starting any treatment to ensure it’s the right choice for your dog’s specific condition.
    2. Allergies: As with any medication, there’s a potential for allergic reactions. Monitor your dog for any adverse reactions and consult your vet if you notice anything unusual.
    3. Concurrent Medications: If your dog is on other eye medications, ensure there’s an interval of at least 5-10 minutes between applying different products.
    4. Avoid Contamination: Ensure the tip of the ointment tube doesn’t touch any surfaces, including the eye, to prevent any potential contamination.

    In conclusion, while there are many effective eye ointments on the market, Terramycin often tops my list due to its proven track record and versatility. However, it’s crucial to remember that every dog is unique. Always prioritize professional guidance and ensure that any treatment aligns with your dog’s specific needs and condition.

    over the counter eye ointment for dogs

    Where to Buy OTC Dog Eye Ointment

    The health and well-being of our furry companions are always a top priority for pet owners. Thankfully, for less severe eye conditions or for preventive care, several over-the-counter (OTC) eye ointments are available. Knowing where to buy these products can save time, reduce stress, and ensure you’re getting quality products. Here are some reliable places and tips for purchasing OTC dog eye ointments:

    1. Pet Supply Stores

    • Overview: Most large pet supply chains and even local pet stores carry a selection of OTC dog eye ointments.
    • Pros: The convenience of in-store shopping allows you to ask staff for recommendations and see the product firsthand.
    • Cons: The variety might be limited depending on the store’s size and stock.

    2. Online Retailers

    • Popular Options: Websites like Amazon, Chewy, Petco, and Petsmart offer a vast range of OTC eye ointments.
    • Pros: Online platforms often provide customer reviews, which can be helpful when deciding on a product. Plus, the convenience of home delivery can’t be beaten.
    • Cons: Always ensure you’re buying from a reputable seller to avoid counterfeit or expired products.

    3. Veterinary Clinics

    • Overview: Many veterinary clinics stock popular OTC eye ointments, even if a prescription isn’t required.
    • Pros: Buying from your vet’s office ensures you’re getting a quality product, and you can get professional advice on the spot.
    • Cons: Prices might be slightly higher than other sources.

    4. Pharmacies

    • Overview: Some human pharmacies also carry pet products, including OTC dog eye ointments.
    • Pros: Convenient, especially if you’re already there for other purchases.
    • Cons: Their pet product range might be limited.

    Tips for Buying OTC Dog Eye Ointment:

    1. Read Labels Carefully: Ensure the product is specifically meant for dogs and check for any active ingredients.
    2. Check Expiry Dates: Like all medications, eye ointments have a shelf life. Always check the expiry date before purchasing.
    3. Seek Recommendations: If unsure about which product to buy, don’t hesitate to ask your veterinarian or fellow dog owners for their preferences.
    4. Beware of Extremely Low Prices: If a deal seems too good to be true, be cautious. Counterfeit pet products do exist, and they can be harmful.
    5. Storage: Once purchased, store your dog’s eye ointment as instructed, usually in a cool, dry place away from direct sunlight.

    While there are several places to buy OTC dog eye ointments, always prioritize quality and your pet’s safety. Ensure you’re informed, and when in doubt, consult with a professional to make the best choice for your canine companion.

    Conclusion

    Our canine companions bring so much joy, affection, and unforgettable moments into our lives. In return, it’s our responsibility to ensure they lead healthy, happy lives. One crucial area of this care is their eye health, a small area that can sometimes be overlooked until a problem draws our attention.

    From understanding the signs of eye infections to knowing the best ointments to use and where to purchase them, being equipped with the right knowledge is paramount. Terramycin, as I’ve highlighted, stands out as a trusted recommendation, but always remember that individual needs may vary. Your veterinarian remains the best source of advice tailored to your pet’s unique situation.

    The world is a vast playground filled with wonders for our dogs to see, from chasing after a squirrel to watching a butterfly flutter by. By taking proactive steps in maintaining their eye health, we can ensure they continue to see and enjoy the beauty around them.

    Thank you for joining me on this journey to better understand and care for our dog’s eyes. Together, let’s make every wag, bark, and blink count.

    Frequently Asked Questions

    How often should I check my dog’s eyes for signs of infection?

    Answer: Ideally, it’s good to inspect your dog’s eyes at least once a week. However, if your dog has been exposed to areas with a lot of dirt, dust, or potential allergens, you might want to check more frequently. Always be on the lookout for symptoms like redness, excessive tearing, or discharge.

    Can I use human eye ointment for my dog?

    Answer: While some ingredients in human eye ointments might be similar to those in dog-specific products, it’s crucial not to use human medication on your dog without consulting a veterinarian. Some ingredients safe for humans might be harmful to dogs.

    My dog doesn’t like having ointment applied. Do you have any tips to make it easier?

    Applying ointment can be challenging for some dogs. Start by creating a calm environment, use positive reinforcement with treats, and consider having someone your dog trusts help hold and comfort them. Over time, with consistency and patience, many dogs become more accustomed to the process.

    How long does it typically take to see improvements after starting an eye ointment like Terramycin?

    Many pet owners notice improvements within a few days of starting treatment with Terramycin. However, the response can vary depending on the severity of the infection and the dog’s overall health. Always complete the recommended duration of treatment, even if the symptoms seem to have subsided.

    Are there any side effects associated with OTC dog eye ointments?

    Like all medications, there’s a potential for side effects, though they’re generally rare with OTC eye ointments. Potential reactions could include increased redness, swelling, or itching. If you observe any unusual symptoms or behaviors in your dog after starting an ointment, stop its use and consult your veterinarian immediately.

    A note about your dog’s health

    This article provides general education and does not replace an examination, diagnosis, or individualized advice from your veterinarian. Contact a veterinary professional if you are concerned about your dog’s symptoms.

    Dr. Candy Akers, DVM Avatar

    ABOUT THE AUTHOR
  • Best OTC Antifungal Spray for Dogs and How to Use It

    Best OTC Antifungal Spray for Dogs and How to Use It

    By Dr. Candy Akers, DVM

    The best OTC antifungal spray for dogs is a dog-labeled formula that matches the skin problem and the body area. For a small, reachable patch of yeast-prone skin, I look for an azole antifungal, often paired with chlorhexidine. My longstanding OTC pick is GNC Ultra Medicated Antifungal Spray. Its current label lists 1% chlorhexidine gluconate and 0.25% ketoconazole. [1]

    A spray is not the answer for every itchy dog. Fleas, allergies, bacterial infections, mites, ringworm, and contact irritation can look similar at home. Before you reach for a bottle, check whether the problem is localized, whether the skin is intact, and whether the label fits your dog’s age and treatment area.

    What Makes an OTC Antifungal Spray a Good Choice?

    Look for a Dog-Labeled Antifungal Active

    I choose by the active-ingredient panel, not by the loudest promise on the front of the bottle. Ketoconazole and miconazole are azole antifungals. Chlorhexidine is an antiseptic that can add activity against bacteria and yeast. A combination formula can make sense when a dog’s surface-skin problem may involve more than one organism.

    A systematic review found strong evidence for a topical regimen combining 2% miconazole with 2% chlorhexidine for canine Malassezia dermatitis. [2] A broader veterinary review also supports topical therapy as an important tool for superficial bacterial and yeast skin infections. [3] That evidence supports the ingredient classes and the topical approach. It does not prove that every spray works equally well, and it does not create one universal treatment schedule.

    An itch-relief spray without an antifungal active may soothe skin, but it is not the same kind of product. Turn the bottle around and read the active ingredients, species, age limit, treatment area, warnings, and directions.

    Choose a Formula and Format That Fit the Area

    Sprays are most practical for small, accessible areas where you can part the coat and reach the skin. Paws, the lower legs, and some skin folds may fit that description. A thick coat, widespread rash, painful skin, or a problem inside the ear canal calls for a different plan.

    I use a simple three-part fit check:

    1. Does the dog have a surface-skin problem that reasonably fits yeast or fungus?
    2. Can the product reach the affected skin without getting into the eyes, mouth, nose, ear canal, or genitals?
    3. Does the label permit use on a dog of this age and on skin in this condition?

    If any answer is no or uncertain, pause before spraying.

    First Decide What Kind of Skin Problem You Are Treating

    Signs That Fit Localized Yeast Overgrowth

    Malassezia yeast normally lives on canine skin. It can overgrow when the skin environment changes. Common clues include redness, greasy or scaly skin, a noticeable odor, darkening over time, and repeated licking or chewing. Paws, lip folds, neck folds, armpits, and the groin are frequent trouble spots. [4]

    Those signs are useful clues, not a diagnosis. A dog with only one itchy foot may have a splinter, contact irritation, an allergy flare, or a bacterial infection. If the same patch keeps returning, testing can save you from cycling through products that never address the cause.

    Owner parts a dog's fur to inspect a small patch of irritated skin on the lower leg

    Problems That Need a Different Plan

    Ringworm is a fungal infection, but it can spread to other animals and people. A visible spray may be only one part of the treatment and environmental-control plan. Circular hair loss also has other causes, so guessing from appearance is risky.

    Do not spray into the eyes, mouth, nose, or ear canals. The GNC label says not to use its product on broken or inflamed skin. [1] Raw, draining, painful, or rapidly spreading areas deserve an examination. Nasal discharge, coughing, breathing changes, fever, marked tiredness, or appetite loss do not fit a simple surface-skin spray problem.

    My OTC Pick: GNC Ultra Medicated Antifungal Spray

    Over the years, I have evaluated many antifungal sprays for dogs. GNC Ultra Medicated Antifungal Spray remains my practical OTC pick for a small, reachable skin area when the label fits the dog and the problem.

    Here are the current label facts I want dog parents to know:

    • Active ingredients: chlorhexidine gluconate 1.00% and ketoconazole 0.25%.
    • Species and age: for dogs at least 8 weeks old.
    • Application distance: hold the bottle 8 to 10 inches from the affected area.
    • Skin condition: do not use on broken or inflamed skin.
    • Ingestion: do not allow the dog to ingest the product.
    • Follow-up: if the problem persists for more than 7 days or gets worse, consult a veterinarian. [1]

    Product labels can change. Compare the bottle in your hand with the current label before you use it. I also would not assume that ingredients mentioned on an old product page, such as tea tree oil or aloe, are present unless they appear on the current package.

    The product recommendation is one piece of a whole-dog plan. I want to calm the surface flare while also looking at moisture, allergy triggers, nutrition, grooming, and skin-barrier health.

    How to Use Antifungal Spray on a Dog

    Prepare the Skin

    Start in good light. Part the coat and look closely. If the skin is open, very inflamed, wet with discharge, or painful, stop and choose veterinary care instead of this product.

    For intact skin, gently remove loose surface debris if needed. Do not scrub an irritated patch. Take a clear baseline photo from a consistent distance so you can compare the same area later.

    Apply the Spray

    Read the bottle before every new course because directions differ between products. For GNC Ultra Medicated Antifungal Spray, hold the bottle 8 to 10 inches away and spray the affected area as directed on the label. [1] Keep the mist away from the face, ear canals, and other sensitive areas.

    Use only the amount and frequency stated on the current label or provided by your veterinarian. More product is not automatically better. Mixing several medicated topicals can irritate the skin and make it harder to tell what is helping.

    Prevent Licking and Track the Response

    Supervise your dog until the area is dry. A calm food puzzle, short leash walk, or quiet cuddle can keep the tongue away without rubbing off the product. If your dog cannot stop licking, ask your veterinarian about a temporary protective option.

    Each day, note four things: odor, redness, licking, and spread. Use your photos to compare the patch under similar lighting. The GNC label directs dog parents to seek veterinary advice if the problem lasts more than 7 days or worsens. [1] You do not need to keep switching bottles when the pattern tells you the diagnosis may be wrong or incomplete.

    Owner photographs a dog's lower leg to track skin changes while the dog uses a food puzzle

    Treat the Root Cause of Recurring Yeast

    Moisture and Skin Folds

    Warm, moist skin gives yeast a comfortable place to multiply. Dry paws after wet walks. Check between the toes after swimming. Keep deep folds clean and dry, and make sure grooming products rinse out fully.

    Owner dries a dog's paws with a towel after a wet walk

    Routine antifungal spraying on healthy skin is not my goal. I would rather reduce the conditions that allow repeated overgrowth. If a fold stays damp, the coat mats close to the skin, or a dog licks the same paw every evening, those details can point us toward the next useful change.

    Allergies, Nutrition, and Skin-Barrier Health

    Recurring Malassezia dermatitis often accompanies another problem, especially allergy or altered skin-barrier function. [4] The yeast may be the visible flare while the underlying trigger keeps resetting the cycle.

    From a holistic perspective, I review the whole pattern. That includes food quality, seasonal changes, indoor and outdoor exposures, flea control, grooming habits, medications, and any health condition that may change the skin. A species-appropriate, minimally processed diet may support overall skin health, but there is no single menu that fixes every itchy dog. Food changes should be purposeful, nutritionally complete, and matched to the individual.

    A topical spray can help reduce a surface flare. Recurrence is useful feedback that the skin environment still needs attention.

    Natural Support for Fungal and Irritated Skin

    Botanical care deserves the same careful standard as conventional care. A systematic review of medicinal plants in canine dermatology found potentially useful antibacterial, antifungal, anti-inflammatory, and skin-supportive activity for plants including calendula, St. John’s wort, chamomile, and sage. The authors also highlighted limits in the clinical evidence. [5]

    That is why I prefer properly formulated dog skin products over a homemade essential-oil spray. Concentration, purity, the carrier, licking risk, and the condition of the skin all matter. Natural support can complement a sensible antifungal plan, but it should not cover up pain, a spreading lesion, or a repeatedly missed diagnosis.

    When a Spray Is Not Enough

    Stop home treatment and arrange veterinary care when the area spreads quickly, becomes raw or draining, smells markedly worse, swells, or seems painful. Eye, face, or ear-canal involvement also needs a more precise approach.

    Book an examination for circular hair loss that could be contagious, repeated relapses, several affected body regions, or a dog who seems unwell. Seek prompt care for nasal discharge, coughing, breathing changes, marked tiredness, or poor appetite. These signs fall outside the role of an OTC skin spray.

    If an appropriate product has not helped within the label’s time frame, the next step is not a stronger guess. Skin cytology, fungal testing, or another focused test may reveal yeast, bacteria, dermatophytes, mites, allergy, or a mixed problem.

    Final Thoughts

    Choose an OTC antifungal spray by the dog-specific label, active ingredients, treatment area, and skin condition. For a small, accessible patch that fits the label, an azole plus chlorhexidine is a practical ingredient combination. My longstanding product pick is GNC Ultra Medicated Antifungal Spray, with the safeguards described above.

    Save the label, take a baseline photo, and track the area for 7 days. If the skin worsens, the problem spreads, or the same flare returns, let the pattern guide you toward the root cause rather than another round of trial and error.

    Frequently Asked Questions

    What Spray for Dogs Has Antifungal Ingredients?

    Look for a dog-labeled spray with an azole antifungal such as ketoconazole or miconazole. Some formulas pair the antifungal with chlorhexidine. The active-ingredient panel, age limit, warnings, and treatment area matter more than a broad itch-relief claim.

    Can I Use Human Antifungal Spray on My Dog?

    I do not recommend substituting a human spray without veterinary guidance. Human products can have different strengths, inactive ingredients, directions, and ingestion risks. Choose a dog-labeled product that fits the body area and follow its current label.

    How Often Can I Use Antifungal Spray on My Dog?

    Follow the exact frequency on that product’s current label or the schedule your veterinarian gives you. There is no safe universal frequency for every spray. Using more often can irritate skin or expose a dog to extra product without treating the real cause.

    Does Antifungal Spray Work for Ringworm in Dogs?

    A topical antifungal may be part of a ringworm plan, but ringworm can be contagious and may require diagnostic testing, broader treatment, and environmental cleaning. Do not assume every circular patch is ringworm or that one spray is a complete solution.

    What If My Dog Licks Antifungal Spray?

    Prevent licking and follow the label’s first-aid directions. If your dog ingests the product, develops drooling, vomiting, weakness, or another concerning sign, contact your veterinarian or a pet poison service promptly. Keep the bottle available so the exact ingredients can be reviewed.

    References

    1. DailyMed. (2018). GNC Medicated Spray: Chlorhexidine gluconate and ketoconazole spray. U.S. National Library of Medicine. DailyMed product label
    2. Negre, A., Bensignor, E., & Guillot, J. (2009). Evidence-based veterinary dermatology: A systematic review of interventions for Malassezia dermatitis in dogs. Veterinary Dermatology, 20(1), 1-12. https://doi.org/10.1111/j.1365-3164.2008.00721.x
    3. Mueller, R. S., Bergvall, K., Bensignor, E., & Bond, R. (2012). A review of topical therapy for skin infections with bacteria and yeast. Veterinary Dermatology, 23(4), 330-341, e62. https://doi.org/10.1111/j.1365-3164.2012.01057.x
    4. Bajwa, J. (2017). Canine Malassezia dermatitis. The Canadian Veterinary Journal, 58(10), 1119-1121. https://pmc.ncbi.nlm.nih.gov/articles/PMC5603939/
    5. Tresch, M., Mevissen, M., Ayrle, H., Melzig, M., Roosje, P., & Walkenhorst, M. (2019). Medicinal plants as therapeutic options for topical treatment in canine dermatology? A systematic review. BMC Veterinary Research, 15, 174. https://doi.org/10.1186/s12917-019-1854-4

    A note about your dog’s health

    This article provides general education and does not replace an examination, diagnosis, or individualized advice from your veterinarian. Contact a veterinary professional if you are concerned about your dog’s symptoms.

    Dr. Candy Akers, DVM Avatar

    ABOUT THE AUTHOR
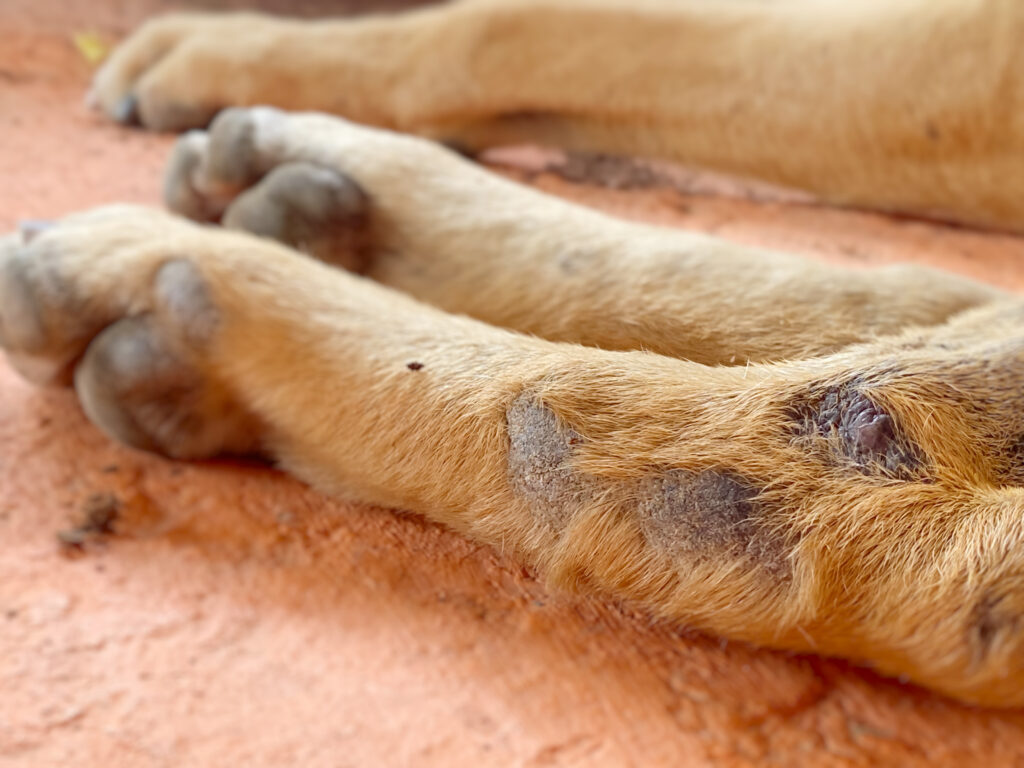
  • Best OTC Antifungal Shampoos for Dogs: What I Recommend

    Best OTC Antifungal Shampoos for Dogs: What I Recommend

    If you are looking for the best OTC antifungal shampoo for dogs, my top overall pick is Dechra MiconaHex + Triz Shampoo. It combines 2% miconazole with 2% chlorhexidine, plus TrizEDTA and ingredients intended to support the skin barrier [1]. That combination makes it a practical choice when a dog has a diagnosed or strongly suspected superficial yeast problem with possible bacterial overgrowth.

    The best bottle for your dog still depends on what is causing the redness, odor, scaling, or itching. Yeast, ringworm, bacteria, allergies, and mites can look frustratingly similar. A medicated shampoo treats the skin surface. It cannot tell you why the problem started or why it keeps returning. When symptoms are severe, spreading, painful, or recurrent, I want the diagnosis checked before you work through a shelf of products.

    Quick Answer: My Best Overall Pick

    For many dogs with superficial yeast and possible bacterial overgrowth, I prefer a formula that pairs an azole antifungal, such as miconazole or ketoconazole, with an antiseptic ingredient. That is why MiconaHex + Triz is my first choice in this group.

    Here is the quick way I sort the options:

    • Best overall combination: Dechra MiconaHex + Triz Shampoo
    • Straightforward miconazole option: Davis Miconazole Pet Shampoo
    • Widely available budget option: Veterinary Formula Clinical Care Antiseptic and Antifungal Medicated Shampoo
    • Degreasing combination for oily skin: Dechra Mal-A-Ket Shampoo
    • Retail alternative to evaluate by its bottle label: GNC Ultra Medicated Shampoo

    Formulas and directions can change. Always read the active-ingredient panel, age restrictions, warnings, contact time, and frequency on the bottle you actually buy.

    What Antifungal Shampoo Can and Cannot Treat

    Yeast Dermatitis

    Malassezia yeast normally lives on canine skin. It becomes a problem when the skin environment allows too much growth or when a dog reacts to it. Greasy scale, a musty odor, redness, darkened skin, and itching can fit the pattern, especially around paws, folds, the groin, or ears. Those signs are clues, not a diagnosis.

    Veterinary dermatology guidelines emphasize identifying and correcting predisposing factors along with topical or systemic treatment [2]. In practice, that often means looking for allergy, trapped moisture, skin-fold friction, an endocrine disorder, immune suppression, or another reason the skin barrier is struggling. Cytology, a quick look at cells and organisms collected from the skin, can help confirm yeast and bacteria.

    Ringworm

    Ringworm is not a worm. It is a contagious fungal infection of hair and skin caused by dermatophytes. Circular hair loss and scaling may raise suspicion, but many lesions do not look like a neat ring. Other skin diseases can mimic it.

    A shampoo may be part of a ringworm plan, but I would not rely on an OTC bath as the only step. Veterinary consensus guidance supports confirming the diagnosis and using a coordinated plan that may include whole-body topical therapy, oral medication, and environmental cleaning [3]. Ringworm can spread to other animals and people, so early identification matters.

    Mixed Bacterial and Yeast Problems

    Yeast and bacterial overgrowth can occur together. Scratching, moisture, damaged skin, and underlying allergy can create an environment that favors both. Combination shampoos are useful in this setting because the antifungal and antiseptic ingredients have different jobs.

    Still, a combination label does not prove that your dog has both problems. If the skin is painful, oozing, crusted, or rapidly worsening, a veterinarian should examine it.

    Problems That Can Look Fungal

    Allergies, fleas, mites, bacterial infections, contact irritation, and hormonal disease can all produce itching, odor, scale, or hair loss. A strong smell does not automatically mean yeast. If a shampoo repeatedly helps for a few days and the problem returns, that pattern is telling us to look deeper.

    Veterinarian gently examining a beagle's paw and skin in a clinic

    How to Choose the Right Active Ingredients

    Miconazole and Ketoconazole

    Miconazole and ketoconazole are azole antifungals. They are commonly used in medicated shampoos aimed at superficial yeast and fungal organisms. The important question is not which ingredient sounds strongest. It is whether the ingredient fits the diagnosed problem and whether the concentration and directions match the product evidence.

    Davis Miconazole Shampoo, for example, is labeled with 2% miconazole nitrate. Its DailyMed directions specify a 10-minute contact time and a twice-weekly schedule until symptoms subside, followed by weekly use or veterinary direction [4]. That is a label-specific regimen, not a universal schedule for every medicated shampoo.

    Chlorhexidine and Benzethonium Chloride

    Chlorhexidine and benzethonium chloride are antiseptic ingredients with antibacterial activity. They may be paired with an azole when mixed surface overgrowth is a concern. Chlorhexidine should not be treated as interchangeable with miconazole or ketoconazole. Read the complete active-ingredient list rather than assuming the word “medicated” means antifungal.

    Skin-Barrier and Supporting Ingredients

    Ceramides, oatmeal, aloe, and other conditioning ingredients may help reduce dryness or support comfort. TrizEDTA is included in some Dechra combinations as a supporting ingredient. Acetic acid can add a degreasing or acidifying effect.

    These features matter because a product that is too drying can make an already fragile skin barrier feel worse. A dog with greasy, oily skin may need something different from a dog with dry, cracked, highly sensitive skin.

    Best OTC Antifungal Shampoos for Dogs

    Dechra MiconaHex + Triz Shampoo bottle
    Dechra MiconaHex + Triz Shampoo: Best OverallThis is my top pick among the options preserved here. Dechra lists 2% miconazole nitrate, 2% chlorhexidine gluconate, and TrizEDTA in the product line [1]. I like the combination when yeast and bacterial surface overgrowth may be occurring together. The barrier-support positioning is also helpful for dogs who need repeated bathing.View Dechra MiconaHex + Triz Shampoo
    GNC Ultra Medicated Antifungal Shampoo for Dogs bottle
    GNC Ultra Medicated Shampoo: Retail AlternativeThis product remains included because it is part of the established product set and affiliate content. I could not verify a current official veterinary product page for it. If you consider it, turn the bottle around and confirm the active ingredients, concentrations, age limits, contact time, frequency, and manufacturer warnings before use.View GNC Ultra Medicated Shampoo
    Veterinary Formula Clinical Care Antiseptic and Antifungal Medicated Shampoo for Dogs bottle
    Veterinary Formula Clinical Care Antiseptic and Antifungal Medicated Shampoo: Budget-Friendly OptionVeterinary Formula lists ketoconazole and benzethonium chloride and directs owners to leave the shampoo on for 5 to 10 minutes before rinsing. The manufacturer recommends twice-weekly use until irritation subsides, with label-specific maintenance directions [5].View Veterinary Formula Antiseptic and Antifungal Shampoo
    Davis Miconazole Pet Shampoo bottle
    Davis Miconazole Pet Shampoo: Straightforward Miconazole OptionDavis is a clear option when you want a miconazole-focused product. The DailyMed label lists 2% miconazole nitrate and directs a 10-minute soak, prevention of licking, thorough rinsing, and twice-weekly use until symptoms subside, followed by weekly use or veterinary direction [4].View Davis Miconazole Pet Shampoo
    Dechra Mal-A-Ket Shampoo bottle for cats and dogs
    Dechra Mal-A-Ket Shampoo: Degreasing CombinationDechra lists 1% ketoconazole, 2% chlorhexidine, and 2% acetic acid in Mal-A-Ket Shampoo and describes it as antifungal, antibacterial, and degreasing [6]. That profile may make sense for oily, smelly skin when the diagnosis fits.View Dechra Mal-A-Ket Shampoo

    How to Use Medicated Dog Shampoo Safely

    Before the Bath

    Read the entire label before your dog is wet and impatient. Set out towels, a timer, and a nonslip mat. Brush out loose hair and tangles if brushing is comfortable. If the skin has open sores, active bleeding, or severe pain, pause and get veterinary guidance.

    Keep medicated shampoo away from the eyes, nose, mouth, and ear canals. A damp cloth is often easier for cleaning around the face. Do not plan to use leftover human antifungal shampoo unless your veterinarian has specifically approved that product for your dog.

    During the Bath

    1. Wet the coat thoroughly with comfortably warm water. Water must reach the skin, not only the top of the fur.
    2. Apply the amount directed on the label. Work the lather gently into affected areas without aggressive scrubbing.
    3. Start a timer for the label’s contact time. Many products use 5 to 10 minutes, but the bottle in your hand is the authority.
    4. Prevent licking while the shampoo is on the skin.
    5. Rinse until the water is clear and the coat no longer feels slippery.

    Longer is not necessarily better. Extending contact time beyond the label can increase dryness or irritation without adding a proven benefit.

    Caregiver gently lathering medicated shampoo into a calm dog's back during a bath

    After the Bath

    Towel dry gently and keep your dog warm. Dry paws, skin folds, and the area under a collar or harness. Wash towels after use. If ringworm is suspected or confirmed, follow the veterinarian’s environmental-cleaning plan rather than relying on routine laundry alone.

    Watch for increased redness, swelling, hives, agitation, vomiting, breathing trouble, or worsening itch. Rinse again and seek veterinary advice if a reaction occurs. Breathing trouble or facial swelling requires urgent care.

    Track the Response

    Take a photo before the first bath and note odor, itch level, redness, scale, and lesion size. Recheck the same features under similar lighting. You are looking for steady improvement, not just a temporary change in smell.

    If the label’s treatment period passes without clear progress, stop guessing. The organism may be different, the dog may need oral medication, or an underlying disease may be keeping the skin inflamed.

    A Holistic Plan for Recurrent Yeast and Skin Problems

    Look for the Predisposing Factor

    I think of medicated shampoo as one tool, not the whole plan. When yeast keeps returning, I want to know what is creating the opportunity. Allergies are common. Moisture between toes or in skin folds can contribute. So can chronic inflammation, endocrine disease, immune suppression, or repeated damage to the skin barrier [2].

    This is where a whole-dog approach earns its place. Treat what is on the skin, then ask why the skin could not hold its balance.

    Support the Skin from the Inside Out

    Start with a complete, balanced diet that your dog tolerates well. Review treats, flavored medications, and frequent diet changes if allergy is being investigated. Keep body condition healthy. Ask your veterinarian whether an appropriate essential fatty acid supplement makes sense for your dog rather than adding several oils at random.

    Gentle grooming matters too. Avoid heavily fragranced products when skin is reactive. Use conditioning or barrier-support products only when they are compatible with the medicated plan. More ingredients do not automatically mean more healing.

    Reduce Moisture and Reinfection

    Dry the coat well after swimming and bathing. Pay special attention to paws, armpits, groin, wrinkles, and heavy skin folds. Keep bedding and grooming tools clean and dry. If your dog wears boots, a harness, or protective clothing, make sure damp fabric is not sitting against the skin.

    For ringworm, ordinary moisture control is not enough. Follow a specific household and environmental plan because infected hairs can spread fungal material [3].

    Caregiver gently towel-drying a Labrador's paw after a bath

    Use Natural Adjuncts Carefully

    I understand the appeal of coconut oil, herbs, and essential oils. Some plant-based ingredients show antifungal or anti-inflammatory activity in laboratory research, but a systematic review found that direct canine clinical evidence remains limited for many topical botanicals [7]. Laboratory research on coconut-oil formulations also does not prove that kitchen coconut oil will treat a dog’s infection.

    Dogs lick their skin, and concentrated essential oils can irritate or be unsafe. I would rather use natural measures to support comfort and the skin barrier when they are appropriate, while keeping diagnosed antifungal treatment evidence-based.

    When Shampoo Is Not Enough

    Arrange a veterinary examination if you see:

    • Rapidly spreading hair loss, redness, or scale
    • Pain, pus, bleeding, open sores, or a strong worsening odor
    • Facial, eye, or ear involvement
    • Fever, lethargy, poor appetite, vomiting, or other whole-body signs
    • Severe itching that prevents sleep
    • A possible ringworm exposure in a home with children, older adults, or immunocompromised people
    • Repeated flare-ups after treatment stops
    • No clear improvement within the product label’s expected period

    Your veterinarian may use cytology, a fungal culture or PCR test, a skin scraping, or other tests. Some dogs need oral antifungal or antibacterial medication. Others improve only when the allergy, hormonal disorder, parasite, or environmental trigger is addressed.

    Final Thoughts

    The best OTC antifungal shampoo for dogs is the one that matches the diagnosed skin problem, uses well-documented active ingredients, and is applied exactly as directed. For many superficial yeast cases with possible bacterial overgrowth, MiconaHex + Triz remains my best overall pick.

    Give the shampoo enough contact time, rinse completely, and track what changes. If the problem returns again and again, do not just rotate bottles. Recurrent skin trouble is the body asking us to look for the reason underneath.

    Frequently Asked Questions

    What Dog Shampoos Contain Antifungal Ingredients?

    Look for dog shampoos that clearly list an azole antifungal such as miconazole or ketoconazole. MiconaHex + Triz, Davis Miconazole, Veterinary Formula Clinical Care Antiseptic and Antifungal, and Mal-A-Ket are examples in this guide. Confirm the current bottle label because formulas can change.

    Is Antifungal Shampoo Good for Dogs?

    It can be very helpful when the organism and product match. Medicated shampoo acts directly on the skin and may reduce surface yeast, scale, grease, and odor. It is less useful when the real problem is allergy, mites, or another condition. Stop and seek advice if irritation worsens.

    How Often Can I Bathe My Dog With Antifungal Shampoo?

    Follow the product label or your veterinarian’s instructions. Some labels direct twice-weekly bathing during an active problem and less frequent maintenance, but schedules vary by formula and diagnosis [4][5]. More frequent bathing is not automatically better and can dry or irritate the skin.

    Does Antifungal Shampoo Work for Ringworm in Dogs?

    Antifungal shampoo can be one part of ringworm treatment, but it should not be the only home remedy. Ringworm is contagious, and veterinary guidelines support diagnosis plus a coordinated treatment and environmental plan [3]. Other pets and people in the home may also need guidance.

    Where Can I Buy Antifungal Dog Shampoo?

    Many products are sold through veterinary clinics, pet retailers, pharmacies, and online stores. Buy from a reliable seller, inspect the seal and expiration date, and compare the bottle with the manufacturer’s official information. The product links above preserve the established shopping options for this page.

    References

    [1] Dechra. (n.d.). MiconaHex+Triz. https://www.dechra-us.com/our-products/us/companion-animal/dog/non-prescription/miconahex-triz

    [2] Bond, R., Morris, D. O., Guillot, J., Bensignor, E. J., Robson, D., Mason, K. V., Kano, R., & Hill, P. B. (2020). Biology, diagnosis and treatment of Malassezia dermatitis in dogs and cats: Clinical consensus guidelines of the World Association for Veterinary Dermatology. Veterinary Dermatology, 31(1), 28-74. https://pubmed.ncbi.nlm.nih.gov/31957204/

    [3] Moriello, K. A., Coyner, K., Paterson, S., & Mignon, B. (2017). Diagnosis and treatment of dermatophytosis in dogs and cats: Clinical consensus guidelines of the World Association for Veterinary Dermatology. Veterinary Dermatology, 28(3), 266-e68. https://pubmed.ncbi.nlm.nih.gov/28516493/

    [4] U.S. National Library of Medicine. (n.d.). Miconazole shampoo label. DailyMed. https://dailymed.nlm.nih.gov/dailymed/fda/fdaDrugXsl.cfm?setid=26715826-7c09-450a-831e-a028e91b79e7

    [5] Veterinary Formula Clinical Care. (n.d.). Antiseptic & antifungal medicated shampoo. https://www.veterinaryformula.com/products/antiseptic-antifungal-medicated-shampoo

    [6] Dechra. (n.d.). Mal-A-Ket shampoo. https://www.dechra-us.com/our-products/us/equine/horse/non-prescription/mal-a-ket

    [7] Tresch, M., Mevissen, M., Ayrle, H., Melzig, M., Roosje, P., & Walkenhorst, M. (2019). Medicinal plants as therapeutic options for topical treatment in canine dermatology? A systematic review. BMC Veterinary Research, 15, 174. https://doi.org/10.1186/s12917-019-1854-4

    A note about your dog’s health

    This article provides general education and does not replace an examination, diagnosis, or individualized advice from your veterinarian. Contact a veterinary professional if you are concerned about your dog’s symptoms.

    Dr. Candy Akers, DVM Avatar

    ABOUT THE AUTHOR